![- 1 cup cream cheese, softened - 1/2 cup powdered sugar - 1 teaspoon pure vanilla extract - 1/2 cup heavy whipped cream - 1 cup graham cracker crumbs - 1/4 cup unsalted butter, melted - Fresh seasonal fruit (strawberries, blueberries, raspberries) - Optional chocolate chips or caramel sauce To make these tasty no-bake cheesecake bites, you need simple and fresh ingredients. Start with cream cheese. It should be softened, so it blends easily. The powdered sugar adds sweetness. The vanilla extract gives a lovely flavor. Heavy whipped cream makes the filling light and fluffy. For the crust, graham cracker crumbs are a must. They give a nice crunch. The melted butter helps hold the crumbs together. Lastly, add toppings. Fresh fruit like strawberries or blueberries adds color and taste. You can also drizzle chocolate or caramel sauce for extra fun. These ingredients come together for an easy and delicious treat. For the full recipe, check out the details on how to mix and chill these bites! - Step 1: Beat the softened cream cheese in a bowl. Use an electric mixer to make it smooth. - Step 2: Gradually add the powdered sugar and vanilla. Mix until it's creamy and lump-free. - Step 3: In a clean bowl, fold in the heavy whipped cream. Use a spatula to keep it fluffy. - Step 4: Mix the graham cracker crumbs with melted butter. Stir until it looks like damp sand. - Step 5: Press the crust mixture into a mini muffin tin. Use about one tablespoon for each cup. - Step 6: Fill each crust with the cream cheese mixture. Smooth the top with a spatula. - Step 7: Refrigerate the bites for at least two hours. This helps them firm up well. Enjoy the ease of making these no-bake cheesecake bites! For the full recipe, check out the Full Recipe. - Make sure your cream cheese is at room temperature. This helps it blend easily. - Gently fold in the whipped cream. This keeps the mixture light and fluffy. To get the best texture, always use softened cream cheese. Cold cream cheese can cause lumps. When you fold in the whipped cream, do it slowly. This keeps air in the mixture, making each bite creamy. - Arrange the cheesecake bites on a decorative platter. It adds a nice touch. - Garnish each bite with a sprig of mint. This adds color and freshness. A beautiful presentation makes your treats even more appealing. Use a bright platter to show off the bites. The mint adds a pop of green that looks great. - Think about adding flavors like citrus zest or chocolate. This can change the taste of your bites. Adding a dash of lemon or orange zest can elevate the flavor. If you love chocolate, try mixing in chocolate chips. This small change can make a big difference in taste. For the full recipe, check out the details above. {{image_4}} You can easily change the flavors of your no-bake cheesecake bites. One fun option is chocolate. To make chocolate no-bake cheesecake bites, add 1/2 cup of melted chocolate to the cream cheese mixture. This gives a rich, sweet treat that chocolate lovers will adore. Another great choice is fruit-infused cheesecake bites. You can use lemon or raspberry for a fresh twist. For lemon, add the zest of one lemon and a tablespoon of lemon juice to the cream cheese. For raspberry, mix in raspberry puree to the filling for a fruity punch. You can make these bites fit many diets. For gluten-free options, use gluten-free graham crackers in your crust. This keeps the taste and texture while being safe for those with gluten allergies. If you want vegan adaptations, substitute regular cream cheese with plant-based cream cheese. Use coconut whipped cream instead of heavy whipped cream. These swaps keep the bites creamy and delicious without dairy. Hosting a party? Create a DIY customize-your-bite station. Set out different toppings like crushed nuts, fresh fruit, and chocolate chips. Let your guests build their own cheesecake bites. This makes for a fun and interactive dessert experience, where everyone can create their perfect treat. For the full recipe, check the section above to get started today! To keep your no-bake cheesecake bites fresh, store them in an airtight container. Place the container in the fridge. They will stay good for up to five days. Be sure not to stack them, as this can ruin their shape. If you want to enjoy them later, chill them right after making. If you have leftovers, freezing is a great option. First, let the cheesecake bites cool completely in the fridge. Then, place them in a single layer on a baking sheet. Freeze them for about two hours. Once they're firm, transfer them to a freezer bag or container. They can last up to three months in the freezer. For the best taste, eat your cheesecake bites within five days if stored in the fridge. If frozen, try to eat them within three months for the best flavor and texture. Always check for any signs of freezer burn or spoilage before enjoying. Feel free to explore the [Full Recipe] for more details on making these tasty treats! No-bake cheesecake bites can last up to five days in the refrigerator. Store them in an airtight container. If you want them to last longer, you can freeze them. They will stay fresh in the freezer for about two months. Just make sure to wrap them well to avoid freezer burn. Yes, you can use different types of crusts. Some great options include: - Oreos for a chocolatey flavor - Nuts, like almonds or pecans, for a crunchy base - Gluten-free cookie crumbs for a gluten-free option Feel free to experiment with what you like best! You can get creative with toppings! Some ideas include: - Drizzling melted chocolate or caramel sauce - Adding crushed cookies for extra crunch - Sprinkling shredded coconut for a tropical twist - Using different fruits, like kiwi or mango, for a fresh taste Mix and match to find your favorite combination! Absolutely! You can prepare no-bake cheesecake bites ahead of time. Make them up to two days in advance. Just store them in the fridge until you’re ready to serve. For longer storage, freeze them and let them thaw in the fridge overnight before serving. This makes it easy to enjoy a sweet treat anytime! For the full recipe, check here. You learned how to make no-bake cheesecake bites, starting with key ingredients like cream cheese and graham crackers. Following simple steps, you can create a tasty dessert. With tips on texture, presentation, and ways to customize your treats, you have the tools to impress. Remember, these bites are easy to adapt for various diets and occasions. Whether served at a party or a family dinner, enjoy your delicious creations!](https://lazychefmagic.com/wp-content/uploads/2025/05/def8c3ec-d310-4fdc-ba35-94d0c1fab19b-768x768.webp)
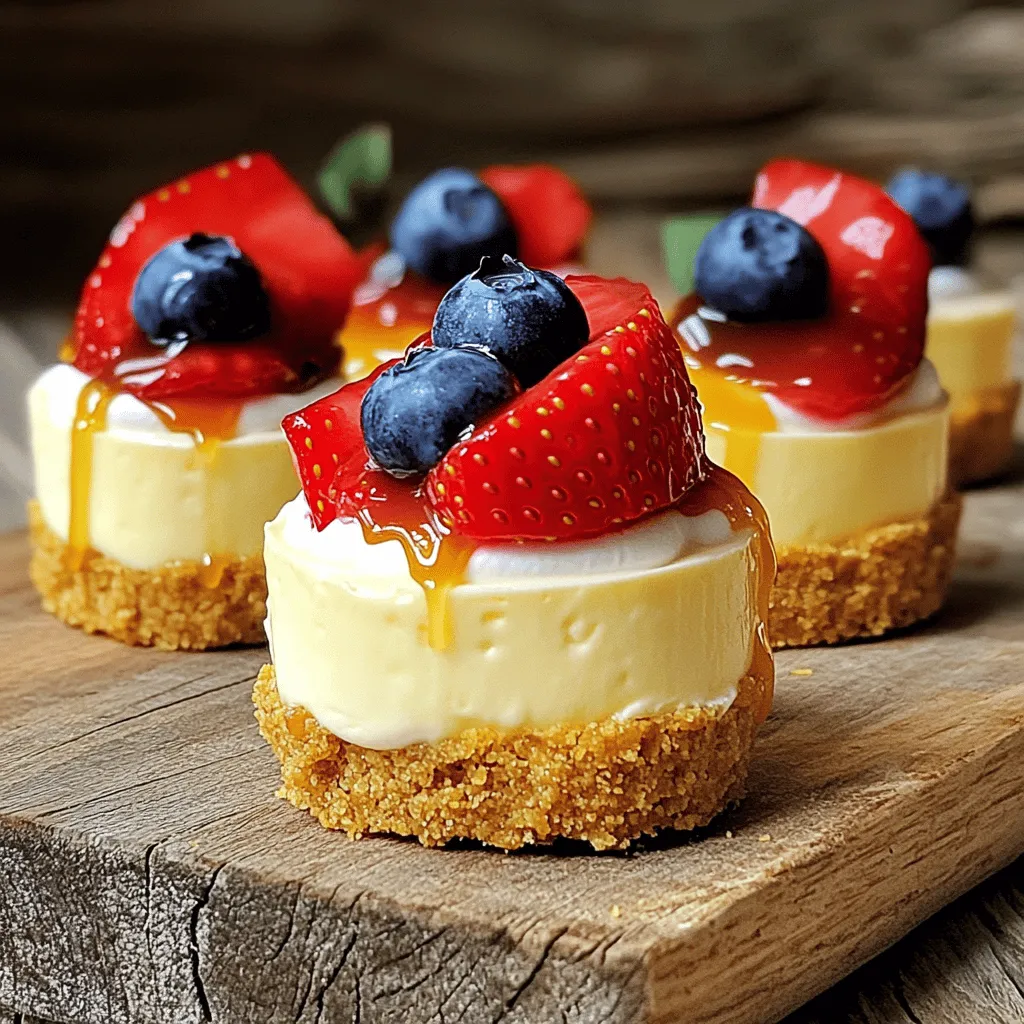
If you crave a sweet treat that’s quick and easy, these No-Bake Cheesecake Bites are perfect! With just a few simple ingredients, you’ll create a delicious dessert that everyone will love. I’ll walk you through each step, from the creamy filling to the buttery crust. Plus, I’ll share tips for customizing and storing these bites for later. Get ready for a delightful experience without turning on the oven!
Ingredients
Main Ingredients
– 1 cup cream cheese, softened
– 1/2 cup powdered sugar
– 1 teaspoon pure vanilla extract
– 1/2 cup heavy whipped cream
Crust Ingredients
– 1 cup graham cracker crumbs
– 1/4 cup unsalted butter, melted
Toppings
– Fresh seasonal fruit (strawberries, blueberries, raspberries)
– Optional chocolate chips or caramel sauce
To make these tasty no-bake cheesecake bites, you need simple and fresh ingredients. Start with cream cheese. It should be softened, so it blends easily. The powdered sugar adds sweetness. The vanilla extract gives a lovely flavor. Heavy whipped cream makes the filling light and fluffy.
For the crust, graham cracker crumbs are a must. They give a nice crunch. The melted butter helps hold the crumbs together.
Lastly, add toppings. Fresh fruit like strawberries or blueberries adds color and taste. You can also drizzle chocolate or caramel sauce for extra fun.
These ingredients come together for an easy and delicious treat.
Step-by-Step Instructions
Preparing the Cream Cheese Mixture
– Step 1: Beat the softened cream cheese in a bowl. Use an electric mixer to make it smooth.
– Step 2: Gradually add the powdered sugar and vanilla. Mix until it’s creamy and lump-free.
Combining the Whipped Cream
– Step 3: In a clean bowl, fold in the heavy whipped cream. Use a spatula to keep it fluffy.
Making the Graham Cracker Crust
– Step 4: Mix the graham cracker crumbs with melted butter. Stir until it looks like damp sand.
– Step 5: Press the crust mixture into a mini muffin tin. Use about one tablespoon for each cup.
Assembling the Cheesecake Bites
– Step 6: Fill each crust with the cream cheese mixture. Smooth the top with a spatula.
– Step 7: Refrigerate the bites for at least two hours. This helps them firm up well.
Enjoy the ease of making these no-bake cheesecake bites!
Tips & Tricks
Perfecting the Texture
– Make sure your cream cheese is at room temperature. This helps it blend easily.
– Gently fold in the whipped cream. This keeps the mixture light and fluffy.
To get the best texture, always use softened cream cheese. Cold cream cheese can cause lumps. When you fold in the whipped cream, do it slowly. This keeps air in the mixture, making each bite creamy.
Presentation Tips
– Arrange the cheesecake bites on a decorative platter. It adds a nice touch.
– Garnish each bite with a sprig of mint. This adds color and freshness.
A beautiful presentation makes your treats even more appealing. Use a bright platter to show off the bites. The mint adds a pop of green that looks great.
Flavor Enhancements
– Think about adding flavors like citrus zest or chocolate. This can change the taste of your bites.
Adding a dash of lemon or orange zest can elevate the flavor. If you love chocolate, try mixing in chocolate chips. This small change can make a big difference in taste.
Variations
Flavor Variations
You can easily change the flavors of your no-bake cheesecake bites. One fun option is chocolate. To make chocolate no-bake cheesecake bites, add 1/2 cup of melted chocolate to the cream cheese mixture. This gives a rich, sweet treat that chocolate lovers will adore.
Another great choice is fruit-infused cheesecake bites. You can use lemon or raspberry for a fresh twist. For lemon, add the zest of one lemon and a tablespoon of lemon juice to the cream cheese. For raspberry, mix in raspberry puree to the filling for a fruity punch.
Dietary Modifications
You can make these bites fit many diets. For gluten-free options, use gluten-free graham crackers in your crust. This keeps the taste and texture while being safe for those with gluten allergies.
If you want vegan adaptations, substitute regular cream cheese with plant-based cream cheese. Use coconut whipped cream instead of heavy whipped cream. These swaps keep the bites creamy and delicious without dairy.
Interactive Options
Hosting a party? Create a DIY customize-your-bite station. Set out different toppings like crushed nuts, fresh fruit, and chocolate chips. Let your guests build their own cheesecake bites. This makes for a fun and interactive dessert experience, where everyone can create their perfect treat.
Storage Info
Refrigeration Guidelines
To keep your no-bake cheesecake bites fresh, store them in an airtight container. Place the container in the fridge. They will stay good for up to five days. Be sure not to stack them, as this can ruin their shape. If you want to enjoy them later, chill them right after making.
Freezing Instructions
If you have leftovers, freezing is a great option. First, let the cheesecake bites cool completely in the fridge. Then, place them in a single layer on a baking sheet. Freeze them for about two hours. Once they’re firm, transfer them to a freezer bag or container. They can last up to three months in the freezer.
Shelf Life
For the best taste, eat your cheesecake bites within five days if stored in the fridge. If frozen, try to eat them within three months for the best flavor and texture. Always check for any signs of freezer burn or spoilage before enjoying.
FAQs
How long do No-Bake Cheesecake Bites last?
No-bake cheesecake bites can last up to five days in the refrigerator. Store them in an airtight container. If you want them to last longer, you can freeze them. They will stay fresh in the freezer for about two months. Just make sure to wrap them well to avoid freezer burn.
Can I use a different crust?
Yes, you can use different types of crusts. Some great options include:
– Oreos for a chocolatey flavor
– Nuts, like almonds or pecans, for a crunchy base
– Gluten-free cookie crumbs for a gluten-free option
Feel free to experiment with what you like best!
What are some other topping ideas?
You can get creative with toppings! Some ideas include:
– Drizzling melted chocolate or caramel sauce
– Adding crushed cookies for extra crunch
– Sprinkling shredded coconut for a tropical twist
– Using different fruits, like kiwi or mango, for a fresh taste
Mix and match to find your favorite combination!
Can I make these in advance?
Absolutely! You can prepare no-bake cheesecake bites ahead of time. Make them up to two days in advance. Just store them in the fridge until you’re ready to serve. For longer storage, freeze them and let them thaw in the fridge overnight before serving. This makes it easy to enjoy a sweet treat anytime!
You learned how to make no-bake cheesecake bites, starting with key ingredients like cream cheese and graham crackers. Following simple steps, you can create a tasty dessert. With tips on texture, presentation, and ways to customize your treats, you have the tools to impress.
Remember, these bites are easy to adapt for various diets and occasions. Whether served at a party or a family dinner, enjoy your delicious creations!
![- 1 cup cream cheese, softened - 1/2 cup powdered sugar - 1 teaspoon pure vanilla extract - 1/2 cup heavy whipped cream - 1 cup graham cracker crumbs - 1/4 cup unsalted butter, melted - Fresh seasonal fruit (strawberries, blueberries, raspberries) - Optional chocolate chips or caramel sauce To make these tasty no-bake cheesecake bites, you need simple and fresh ingredients. Start with cream cheese. It should be softened, so it blends easily. The powdered sugar adds sweetness. The vanilla extract gives a lovely flavor. Heavy whipped cream makes the filling light and fluffy. For the crust, graham cracker crumbs are a must. They give a nice crunch. The melted butter helps hold the crumbs together. Lastly, add toppings. Fresh fruit like strawberries or blueberries adds color and taste. You can also drizzle chocolate or caramel sauce for extra fun. These ingredients come together for an easy and delicious treat. For the full recipe, check out the details on how to mix and chill these bites! - Step 1: Beat the softened cream cheese in a bowl. Use an electric mixer to make it smooth. - Step 2: Gradually add the powdered sugar and vanilla. Mix until it's creamy and lump-free. - Step 3: In a clean bowl, fold in the heavy whipped cream. Use a spatula to keep it fluffy. - Step 4: Mix the graham cracker crumbs with melted butter. Stir until it looks like damp sand. - Step 5: Press the crust mixture into a mini muffin tin. Use about one tablespoon for each cup. - Step 6: Fill each crust with the cream cheese mixture. Smooth the top with a spatula. - Step 7: Refrigerate the bites for at least two hours. This helps them firm up well. Enjoy the ease of making these no-bake cheesecake bites! For the full recipe, check out the Full Recipe. - Make sure your cream cheese is at room temperature. This helps it blend easily. - Gently fold in the whipped cream. This keeps the mixture light and fluffy. To get the best texture, always use softened cream cheese. Cold cream cheese can cause lumps. When you fold in the whipped cream, do it slowly. This keeps air in the mixture, making each bite creamy. - Arrange the cheesecake bites on a decorative platter. It adds a nice touch. - Garnish each bite with a sprig of mint. This adds color and freshness. A beautiful presentation makes your treats even more appealing. Use a bright platter to show off the bites. The mint adds a pop of green that looks great. - Think about adding flavors like citrus zest or chocolate. This can change the taste of your bites. Adding a dash of lemon or orange zest can elevate the flavor. If you love chocolate, try mixing in chocolate chips. This small change can make a big difference in taste. For the full recipe, check out the details above. {{image_4}} You can easily change the flavors of your no-bake cheesecake bites. One fun option is chocolate. To make chocolate no-bake cheesecake bites, add 1/2 cup of melted chocolate to the cream cheese mixture. This gives a rich, sweet treat that chocolate lovers will adore. Another great choice is fruit-infused cheesecake bites. You can use lemon or raspberry for a fresh twist. For lemon, add the zest of one lemon and a tablespoon of lemon juice to the cream cheese. For raspberry, mix in raspberry puree to the filling for a fruity punch. You can make these bites fit many diets. For gluten-free options, use gluten-free graham crackers in your crust. This keeps the taste and texture while being safe for those with gluten allergies. If you want vegan adaptations, substitute regular cream cheese with plant-based cream cheese. Use coconut whipped cream instead of heavy whipped cream. These swaps keep the bites creamy and delicious without dairy. Hosting a party? Create a DIY customize-your-bite station. Set out different toppings like crushed nuts, fresh fruit, and chocolate chips. Let your guests build their own cheesecake bites. This makes for a fun and interactive dessert experience, where everyone can create their perfect treat. For the full recipe, check the section above to get started today! To keep your no-bake cheesecake bites fresh, store them in an airtight container. Place the container in the fridge. They will stay good for up to five days. Be sure not to stack them, as this can ruin their shape. If you want to enjoy them later, chill them right after making. If you have leftovers, freezing is a great option. First, let the cheesecake bites cool completely in the fridge. Then, place them in a single layer on a baking sheet. Freeze them for about two hours. Once they're firm, transfer them to a freezer bag or container. They can last up to three months in the freezer. For the best taste, eat your cheesecake bites within five days if stored in the fridge. If frozen, try to eat them within three months for the best flavor and texture. Always check for any signs of freezer burn or spoilage before enjoying. Feel free to explore the [Full Recipe] for more details on making these tasty treats! No-bake cheesecake bites can last up to five days in the refrigerator. Store them in an airtight container. If you want them to last longer, you can freeze them. They will stay fresh in the freezer for about two months. Just make sure to wrap them well to avoid freezer burn. Yes, you can use different types of crusts. Some great options include: - Oreos for a chocolatey flavor - Nuts, like almonds or pecans, for a crunchy base - Gluten-free cookie crumbs for a gluten-free option Feel free to experiment with what you like best! You can get creative with toppings! Some ideas include: - Drizzling melted chocolate or caramel sauce - Adding crushed cookies for extra crunch - Sprinkling shredded coconut for a tropical twist - Using different fruits, like kiwi or mango, for a fresh taste Mix and match to find your favorite combination! Absolutely! You can prepare no-bake cheesecake bites ahead of time. Make them up to two days in advance. Just store them in the fridge until you’re ready to serve. For longer storage, freeze them and let them thaw in the fridge overnight before serving. This makes it easy to enjoy a sweet treat anytime! For the full recipe, check here. You learned how to make no-bake cheesecake bites, starting with key ingredients like cream cheese and graham crackers. Following simple steps, you can create a tasty dessert. With tips on texture, presentation, and ways to customize your treats, you have the tools to impress. Remember, these bites are easy to adapt for various diets and occasions. Whether served at a party or a family dinner, enjoy your delicious creations!](https://lazychefmagic.com/wp-content/uploads/2025/05/def8c3ec-d310-4fdc-ba35-94d0c1fab19b-250x250.webp)
