Starbucks Copycat Birthday Cake Pops Simple Delight

WANT TO SAVE THIS RECIPE?

Craving Starbucks’ famous birthday cake pops? I’ve got you covered! In this simple guide, I’ll show you how to recreate these sweet treats at home. You don’t need a lot of fancy tools or a chef’s hat. Just a few basic ingredients and my easy steps will bring joy to your kitchen. Get ready to impress your friends and enjoy delightful bites in no time! Let’s dive into the sweet world of cake pops!

Ingredients

Necessary Ingredients for Starbucks Copycat Birthday Cake Pops

To make these fun cake pops, you will need:

– 1 box vanilla cake mix (plus required ingredients per the package)

– 1 cup creamy vanilla frosting

– 1 cup white chocolate chips

– 1 tablespoon coconut oil

– Lollipop sticks or sturdy skewers

These ingredients give you a sweet base and a smooth coating. The cake mix acts as the main part, while the frosting helps bind it all together. The white chocolate adds a nice touch on the outside.

Optional Ingredients to Enhance Flavor or Decor

You can add some flair to your cake pops with these options:

– Flavor extracts (like almond or lemon) to enhance the cake

– Food coloring to match your theme

– Different types of sprinkles for varied looks

– Mini chocolate chips or nuts for added texture

These optional additions let you customize your cake pops. You can match them to any party or holiday theme.

Key Equipment Needed for Preparation

To prepare these delightful treats, gather these tools:

– Large mixing bowl

– Parchment paper for easy cleanup

– Baking sheet

– Microwave-safe bowl for melting chocolate

– Mixing spatula or your hands for mixing

– Refrigerator to chill the cake balls

Having the right tools makes the process smooth. It allows you to focus on creating tasty cake pops without any hassle.

Step-by-Step Instructions

Detailed Baking Instructions for the Cake

To start, preheat your oven. Follow the temperature on the cake mix box. Grab a box of vanilla cake mix. Prepare it as the package says. Pour the batter into a greased 9×13 inch baking pan. Bake until golden. Stick a toothpick in the center. If it comes out clean, your cake is done. Let it cool completely on a wire rack.

Crumbling and Mixing the Cake with Frosting

Once the cake is cool, move it to a large bowl. Use your hands to crumble the cake into small pieces. Aim for a texture like coarse crumbs. Next, add one cup of creamy vanilla frosting to the crumbs. Mix it well with your hands or a spatula. You want it to hold together, making it easy to shape into balls.

Shaping and Cooling the Cake Balls

Now, take small portions of the cake mix. Each piece should be about one inch in diameter. Roll them into smooth balls between your palms. Place the balls on a parchment-lined baking sheet. Make sure they do not touch each other. Put the tray in the refrigerator for about 30 minutes. Chilling helps the cake pops firm up, making coating easier.

Tips & Tricks

Best Practices for Melting Chocolate Smoothly

To melt chocolate smoothly, use a microwave-safe bowl. Start with white chocolate chips and add a tablespoon of coconut oil. The oil helps achieve a nice, glossy finish. Microwave in 30-second bursts. Stir after each burst to avoid burning. This method keeps the chocolate from seizing.

Achieving the Perfect Cake Pop Consistency

The right cake pop texture is key. After mixing the cake crumbs with frosting, the mixture should hold its shape. If it’s too dry, add a bit more frosting. If it’s too wet, mix in more cake crumbs. Roll the mixture into balls about one inch wide. Chill them for 30 minutes before coating. This step helps them stay firm.

Creative Decoration Ideas for Cake Pops

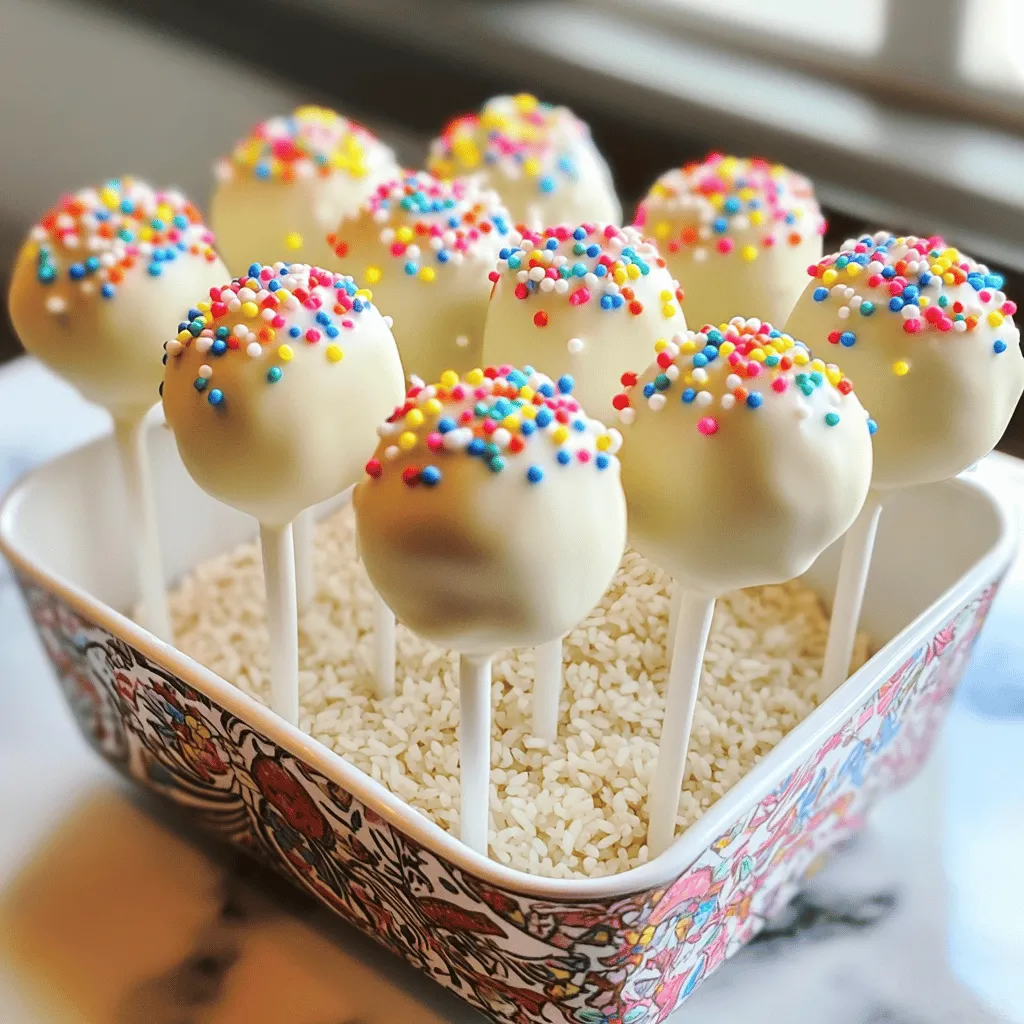
Get creative with your cake pops! Use colorful sprinkles for a festive look. You can also drizzle melted chocolate on top for added flair. For a fun twist, try crushed nuts or mini chocolate chips. Use themed decorations for holidays or birthdays. Let your imagination shine through!
Variations

Alternative Cake Flavors for Birthday Cake Pops

You can switch up the cake flavor for fun. Instead of vanilla, try chocolate, red velvet, or lemon. Each flavor gives a new spin to your cake pops. Chocolate cake pops are rich and delicious. Red velvet adds a touch of color and flavor. Lemon gives a fresh twist, perfect for summer.

Different Frosting Options to Use

While vanilla frosting is a classic, feel free to experiment. Cream cheese frosting pairs well with red velvet. Chocolate frosting adds a rich flavor to chocolate cake pops. If you want a fun twist, use strawberry or cookie dough frosting. These choices bring extra taste and excitement to your treats.

Seasonal Decorations for Holiday-Themed Cake Pops

Decorations can change with the seasons. For Christmas, use red and green sprinkles. In the fall, orange and yellow colors bring a harvest feel. For Halloween, add spooky designs like candy eyes. You can also use pastel colors for Easter. Seasonal decorations make your cake pops festive and fun for any occasion.

Storage Info

How to Store Uncoated Cake Balls

To store uncoated cake balls, first, let them cool completely. Place them in a single layer in an airtight container. If you stack them, use parchment paper between layers. Keep the container in the fridge. This helps them stay fresh. They can last up to a week when stored this way.

Best Practices for Storing Coated Cake Pops

For coated cake pops, allow them to set first. Once the chocolate hardens, place them in an airtight container. You can store them at room temperature for a few days. If you want them to last longer, keep them in the fridge. Just make sure they are not touching each other. This prevents any damage to the decorations.

Shelf Life and Freezing Instructions

Cake pops have a good shelf life. When properly stored, they last about one week in the fridge. You can also freeze them for up to three months. To freeze, place the cake pops on a baking sheet. Freeze them until solid, then transfer them to a freezer-safe bag. When you’re ready to eat them, let them thaw in the fridge.

FAQs

Can I use a different type of cake mix?

Yes, you can use any flavor of cake mix. Think chocolate, red velvet, or lemon. Each will give your cake pops a unique taste. Just make sure to follow the instructions on the cake mix box. This way, you get the right texture and flavor. Experimenting with different mixes can lead to fun results.

How can I make cake pops without crumbling?

To prevent crumbling, ensure the cake is completely cooled before mixing. When you crumble the cake, aim for a fine texture. Mix in enough frosting, so the batter holds together. If it feels too dry, add a bit more frosting. Chilling the cake balls helps them firm up, making them easier to coat.

What can I do if my chocolate coating is not smooth?

If your chocolate isn’t smooth, try these tips. First, use a microwave-safe bowl and melt in short bursts, stirring often. If it’s too thick, add a little coconut oil. This will help it glide better. If it seizes up, you might have overheated it. Starting fresh with lower heat is best.

You now know how to make Starbucks copycat birthday cake pops at home. We covered key ingredients, step-by-step instructions, and helpful tips. You can choose optional flavors and decorations to make them unique. Storage and shelf-life details ensure your pops stay fresh. Dive into making cake pops that impress everyone. Enjoy the process, and share your creations!
To make these fun cake pops, you will need: - 1 box vanilla cake mix (plus required ingredients per the package) - 1 cup creamy vanilla frosting - 1 cup white chocolate chips - 1 tablespoon coconut oil - Lollipop sticks or sturdy skewers These ingredients give you a sweet base and a smooth coating. The cake mix acts as the main part, while the frosting helps bind it all together. The white chocolate adds a nice touch on the outside. You can add some flair to your cake pops with these options: - Flavor extracts (like almond or lemon) to enhance the cake - Food coloring to match your theme - Different types of sprinkles for varied looks - Mini chocolate chips or nuts for added texture These optional additions let you customize your cake pops. You can match them to any party or holiday theme. To prepare these delightful treats, gather these tools: - Large mixing bowl - Parchment paper for easy cleanup - Baking sheet - Microwave-safe bowl for melting chocolate - Mixing spatula or your hands for mixing - Refrigerator to chill the cake balls Having the right tools makes the process smooth. It allows you to focus on creating tasty cake pops without any hassle. For the full recipe, check out the details above! To start, preheat your oven. Follow the temperature on the cake mix box. Grab a box of vanilla cake mix. Prepare it as the package says. Pour the batter into a greased 9x13 inch baking pan. Bake until golden. Stick a toothpick in the center. If it comes out clean, your cake is done. Let it cool completely on a wire rack. Once the cake is cool, move it to a large bowl. Use your hands to crumble the cake into small pieces. Aim for a texture like coarse crumbs. Next, add one cup of creamy vanilla frosting to the crumbs. Mix it well with your hands or a spatula. You want it to hold together, making it easy to shape into balls. Now, take small portions of the cake mix. Each piece should be about one inch in diameter. Roll them into smooth balls between your palms. Place the balls on a parchment-lined baking sheet. Make sure they do not touch each other. Put the tray in the refrigerator for about 30 minutes. Chilling helps the cake pops firm up, making coating easier. For the full recipe and more details, check the recipe section above. To melt chocolate smoothly, use a microwave-safe bowl. Start with white chocolate chips and add a tablespoon of coconut oil. The oil helps achieve a nice, glossy finish. Microwave in 30-second bursts. Stir after each burst to avoid burning. This method keeps the chocolate from seizing. The right cake pop texture is key. After mixing the cake crumbs with frosting, the mixture should hold its shape. If it's too dry, add a bit more frosting. If it’s too wet, mix in more cake crumbs. Roll the mixture into balls about one inch wide. Chill them for 30 minutes before coating. This step helps them stay firm. Get creative with your cake pops! Use colorful sprinkles for a festive look. You can also drizzle melted chocolate on top for added flair. For a fun twist, try crushed nuts or mini chocolate chips. Use themed decorations for holidays or birthdays. Let your imagination shine through! {{image_4}} You can switch up the cake flavor for fun. Instead of vanilla, try chocolate, red velvet, or lemon. Each flavor gives a new spin to your cake pops. Chocolate cake pops are rich and delicious. Red velvet adds a touch of color and flavor. Lemon gives a fresh twist, perfect for summer. While vanilla frosting is a classic, feel free to experiment. Cream cheese frosting pairs well with red velvet. Chocolate frosting adds a rich flavor to chocolate cake pops. If you want a fun twist, use strawberry or cookie dough frosting. These choices bring extra taste and excitement to your treats. Decorations can change with the seasons. For Christmas, use red and green sprinkles. In the fall, orange and yellow colors bring a harvest feel. For Halloween, add spooky designs like candy eyes. You can also use pastel colors for Easter. Seasonal decorations make your cake pops festive and fun for any occasion. To store uncoated cake balls, first, let them cool completely. Place them in a single layer in an airtight container. If you stack them, use parchment paper between layers. Keep the container in the fridge. This helps them stay fresh. They can last up to a week when stored this way. For coated cake pops, allow them to set first. Once the chocolate hardens, place them in an airtight container. You can store them at room temperature for a few days. If you want them to last longer, keep them in the fridge. Just make sure they are not touching each other. This prevents any damage to the decorations. Cake pops have a good shelf life. When properly stored, they last about one week in the fridge. You can also freeze them for up to three months. To freeze, place the cake pops on a baking sheet. Freeze them until solid, then transfer them to a freezer-safe bag. When you're ready to eat them, let them thaw in the fridge. For the full recipe, check out the main section of this article. Yes, you can use any flavor of cake mix. Think chocolate, red velvet, or lemon. Each will give your cake pops a unique taste. Just make sure to follow the instructions on the cake mix box. This way, you get the right texture and flavor. Experimenting with different mixes can lead to fun results. To prevent crumbling, ensure the cake is completely cooled before mixing. When you crumble the cake, aim for a fine texture. Mix in enough frosting, so the batter holds together. If it feels too dry, add a bit more frosting. Chilling the cake balls helps them firm up, making them easier to coat. If your chocolate isn’t smooth, try these tips. First, use a microwave-safe bowl and melt in short bursts, stirring often. If it’s too thick, add a little coconut oil. This will help it glide better. If it seizes up, you might have overheated it. Starting fresh with lower heat is best. You now know how to make Starbucks copycat birthday cake pops at home. We covered key ingredients, step-by-step instructions, and helpful tips. You can choose optional flavors and decorations to make them unique. Storage and shelf-life details ensure your pops stay fresh. Dive into making cake pops that impress everyone. Enjoy the process, and share your creations!

Starbucks Copycat Birthday Cake Pops

Celebrate in style with these festive birthday cake pops that are sure to delight! Made with simple ingredients like vanilla cake mix, creamy frosting, and coated in delicious white chocolate, these colorful treats are perfect for any celebration. Discover the step-by-step guide to create these fun and tasty cake pops that everyone will love.

Ingredients
  

1 box vanilla cake mix (plus required ingredients per the package)

1 cup creamy vanilla frosting

1 cup white chocolate chips

1 tablespoon coconut oil

Colorful sprinkles (for decoration)

Lollipop sticks or sturdy skewers

Instructions
 

Bake the Cake: Preheat your oven according to the temperature specified on the cake mix box. Prepare the cake mix as directed and pour the batter into a greased 9x13 inch baking pan. Bake until golden and a toothpick inserted in the center comes out clean. Once baked, allow the cake to cool completely in the pan on a wire rack.

    Crumble the Cake: After the cake has cooled, transfer it to a large mixing bowl. Using your hands, crumble the cake into fine pieces, achieving a texture similar to coarse crumbs.

      Incorporate the Frosting: Add the cup of vanilla frosting to the cake crumbs in the mixing bowl. Mix thoroughly with your hands or a spatula until the mixture is uniform and holds together well enough to be shaped into balls.

        Shape the Cake Balls: Take small portions of the mixture (approximately 1 inch in diameter) and roll them into smooth balls using your palms. Place each ball on a parchment-lined baking sheet, ensuring they are not touching.

          Chill the Cake Balls: Refrigerate the formed cake balls for about 30 minutes. This chilling step helps them firm up and makes the coating process easier.

            Melt the Chocolate: In a microwave-safe bowl, combine the white chocolate chips with the coconut oil. Microwave the mixture in 30-second intervals, stirring in between, until the chocolate is fully melted and smooth.

              Prepare the Lollipop Sticks: Dip the tip of each lollipop stick into the melted chocolate before inserting it into the center of each cake ball. This step ensures that the stick adheres nicely to the cake pop.

                Coat the Cake Pops: Carefully dip each cake ball into the melted chocolate, making sure it is completely coated. Gently roll it around in the chocolate, allowing any excess to drip back into the bowl, then place the coated cake pops back onto the parchment-lined baking sheet.

                  Decorate with Sprinkles: While the chocolate coating is still wet, generously sprinkle colorful decorations on top of each cake pop to add a festive touch.

                    Set the Cake Pops: Allow the coated cake pops to cool completely at room temperature or for a quicker set, place them in the refrigerator until the chocolate is firm.

                      Prep Time: 20 minutes | Total Time: 1 hour 20 minutes | Servings: 12-15 cake pops

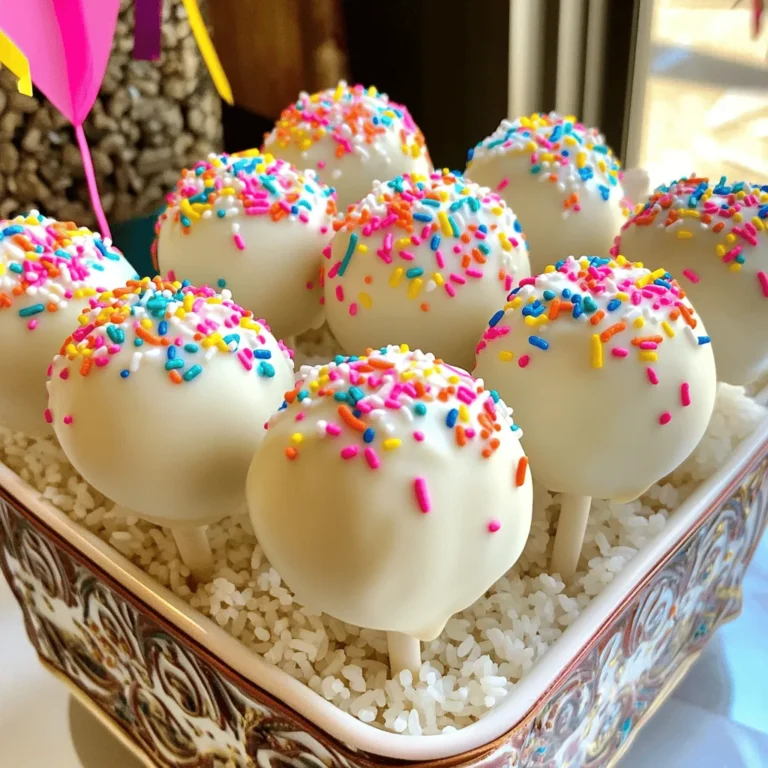
                        - Presentation Tips: For a delightful display, stand the cake pops upright in a decorative container filled with rice, beans, or floral foam to stabilize them. Alternatively, arrange them on a cake stand for an eye-catching centerpiece at your celebration!

                          WANT TO SAVE THIS RECIPE?

                          Leave a Comment

                          Recipe Rating