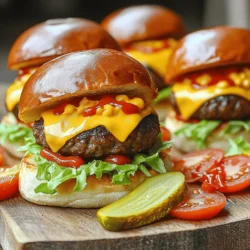
If you’re looking for a crowd-pleaser at your next gathering, cheeseburger sliders are the answer! These mini delights are easy to make and can be customized for everyone’s taste. Whether you want traditional cheeseburgers or some fun variations, I’ve got you covered. Let’s dive into the simple ingredients and steps that will make your sliders a hit! Get ready to impress your guests with these tasty bites!
Ingredients
Required Ingredients
– 1 lb ground beef (80/20)
– 12 slider buns
– 6 slices of cheddar cheese, halved
– Condiments and toppings
To make these sliders, you need to gather some essential items. Start with one pound of ground beef. I prefer using the 80/20 blend. This gives the beef a good mix of flavor and juiciness. Next, grab twelve slider buns. Soft, fresh buns work best. You will also need cheese. I suggest six slices of cheddar cheese, cut in half.
Don’t forget the condiments! Ketchup, mustard, and your favorite toppings help create the perfect bite.
Optional Ingredients
– Bacon strips for bacon cheeseburger sliders
– Avocado or guacamole for an extra twist
Want to take your sliders up a notch? Consider adding bacon. A few crispy strips can turn regular sliders into delicious bacon cheeseburger sliders. You can also add creamy avocado or guacamole for an extra twist. They add great taste and creaminess.
Nutritional Information
– Overview of calories, fat content, protein, and carbohydrates
Cheeseburger sliders are tasty, but it’s good to know what you eat. Each slider has about 200 calories. They also contain around 12 grams of fat and 10 grams of protein. Carbohydrates come in at about 18 grams per slider. If you’re mindful of your diet, these numbers can help you enjoy your meal while keeping track of what you eat.
Step-by-Step Instructions
Preparation Steps
– First, I mix 1 pound of ground beef with seasonings. I use 1 teaspoon of garlic powder, 1 teaspoon of onion powder, and 1 teaspoon of smoked paprika. I add salt and pepper to taste. This mix gives great flavor to the beef.
– Next, I divide the beef into 12 equal portions. I shape each portion into a small patty. I make sure the patties are a bit larger than the slider buns. This helps them fit nicely after cooking.
Cooking Instructions
– I heat my grill or skillet over medium-high heat until it is hot. I place the patties on it and cook for 3 to 4 minutes on one side. Then, I flip them and cook for another 2 minutes. I cook them until they reach my preferred doneness.
– As the patties near the end of cooking, I add a half-slice of cheddar cheese on each one. I cover the grill or skillet with a lid. This helps the cheese melt quickly, usually in about a minute.
Assembling the Sliders
– While the cheese melts, I toast the slider buns lightly. I can do this on the grill or in a toaster until they are golden brown.
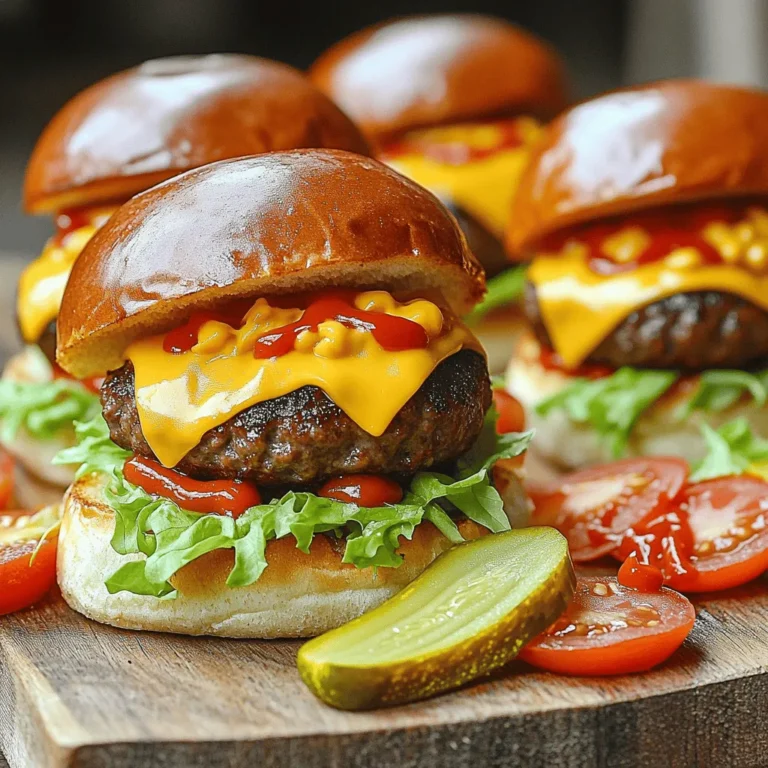
– To put the sliders together, I start with a cheesy patty on the bottom half of each toasted bun. Then, I add a handful of shredded lettuce, a spoonful of diced tomatoes, and a few slices of dill pickles on top.
– Finally, I drizzle ketchup and mustard over everything. I place the top half of the bun on each slider, pressing down gently.
– I serve the sliders warm. I keep extra toppings and condiments on the side for guests to customize their burgers as they like.
Tips & Tricks
Best Practices for Tender Sliders
To make tender sliders, avoid over-mixing the meat. When you mix the ground beef with seasonings, do it gently. This keeps the meat tender and juicy. If you mix too much, the sliders can become tough.
For even browning, heat your grill or skillet well before adding the patties. Medium-high heat works best. Cook the patties for about 3-4 minutes on one side. Then flip them and cook for another 2 minutes. This method helps achieve that perfect golden crust.
Enhancing Flavor
To boost flavor, use seasonings like garlic powder, onion powder, and smoked paprika. These add a great taste to your patties. You can also marinate the meat in your favorite sauce for extra zing.
For cheese, cheddar is a classic choice. But you can try others like pepper jack or Swiss for variety. Each cheese brings its own flavor, adding fun to the sliders.
Serving Suggestions
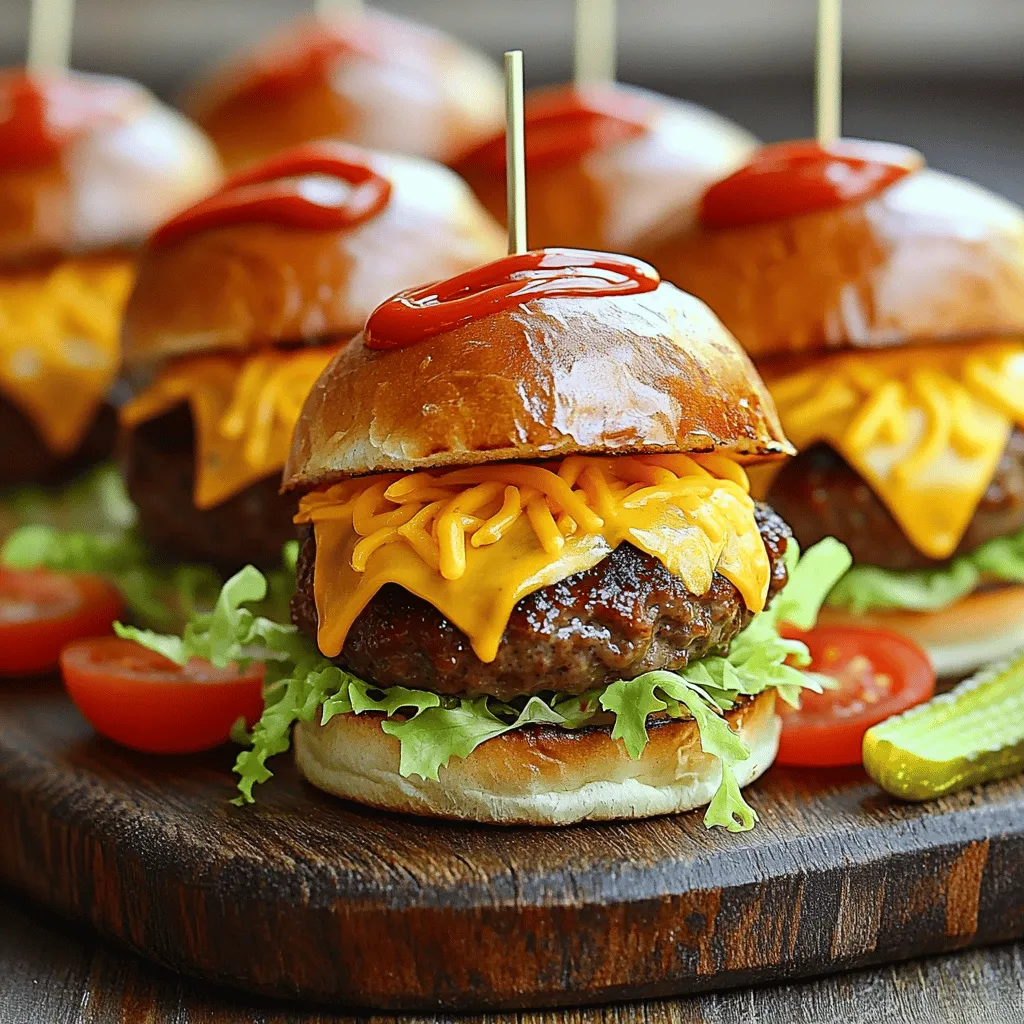
At gatherings, you can serve sliders on a large platter. Stack them up for a fun look. Offer a variety of toppings, like shredded lettuce, diced tomatoes, and sliced pickles. This lets guests build their own sliders.
Pair your sliders with sides like crispy fries or a fresh salad. For drinks, serve soda, beer, or lemonade. These pair nicely with the savory flavors of the sliders.
Variations
Bacon Cheeseburger Sliders
For bacon cheeseburger sliders, you’ll need some extra ingredients. Here’s what to add:
– 1 lb ground beef (80/20)
– 6 slices of bacon, cooked and crumbled
– 12 slider buns
– 6 slices of cheddar cheese, halved
– Condiments and toppings
To make these sliders, mix the bacon with the beef before you shape the patties. This adds a nice crunch and flavor. Cook the patties as usual and top each with cheese. The cheese melts into the bacon, giving a rich taste.
Vegetarian or Vegan Sliders
If you want vegetarian or vegan sliders, you can swap the beef. Use these options:
– 1 lb plant-based burger patties
– 12 slider buns
– Vegan cheese slices
– Condiments and toppings
You can also use cooked black beans or chickpeas to make patties. Just mash them and mix with breadcrumbs and spices. This keeps the sliders hearty and satisfying.
Breakfast Sliders
Breakfast sliders are a fun twist. Here’s how to make them:
– 1 lb ground beef or breakfast sausage
– 12 slider buns
– 6 scrambled eggs
– 6 slices of cooked bacon
– Cheese slices (optional)
– Condiments like hot sauce
For breakfast sliders, cook the sausage or beef first. Then, scramble the eggs. Layer the sausage, eggs, and bacon on each slider bun. This combo is perfect for brunch or a morning gathering.
Storage Info
Best Practices for Storing
To keep your cooked sliders fresh, use an airtight container. Place wax paper between layers to prevent sticking. Store them in the fridge for up to three days. If you have leftovers, assemble the sliders just before serving. This keeps the buns from getting soggy.
Reheating Instructions
For best results, reheat sliders in the oven. Preheat your oven to 350°F (175°C). Place the sliders on a baking sheet and cover with foil. Heat for about 10-15 minutes, or until warm. You can also use a microwave, but this may make the buns chewy. Heat them for about 30 seconds, then check.
Freezing Sliders
If you want to freeze sliders, do so before cooking. Wrap each patty tightly in plastic wrap. Then, place them in a freezer bag. Store them for up to three months. When ready to eat, thaw them in the fridge overnight. Cook them as normal, then assemble with buns and toppings.
FAQs
How long do cheeseburger sliders last in the fridge?
Cheeseburger sliders can last in the fridge for about 3 to 4 days. Make sure to store them in an airtight container. This keeps them fresh and safe to eat. If you want to enjoy them later, I recommend eating them within this time frame.
Can I make cheeseburger sliders ahead of time?
Yes, you can make cheeseburger sliders ahead of time. You can cook the patties and store them in the fridge. Assemble the sliders just before serving to keep the buns fresh. You can also prep all the toppings ahead. This helps save time on busy days.
What are some popular restaurants to find cheeseburger sliders?
Many local eateries and chains serve great cheeseburger sliders. Some popular places include:
– Shake Shack
– White Castle
– Red Robin
These spots often have unique spins on sliders, making your dining experience fun. You can also check out local diners that might have homemade-style sliders.
You learned how to make delicious cheeseburger sliders. We covered the needed ingredients, preparation steps, and cooking tips. I shared ways to customize your sliders with optional toppings and variations. You now have great ideas for serving and storing your sliders.
Try these steps at your next gathering, and impress your friends. Enjoy creating tasty sliders that everyone will love!