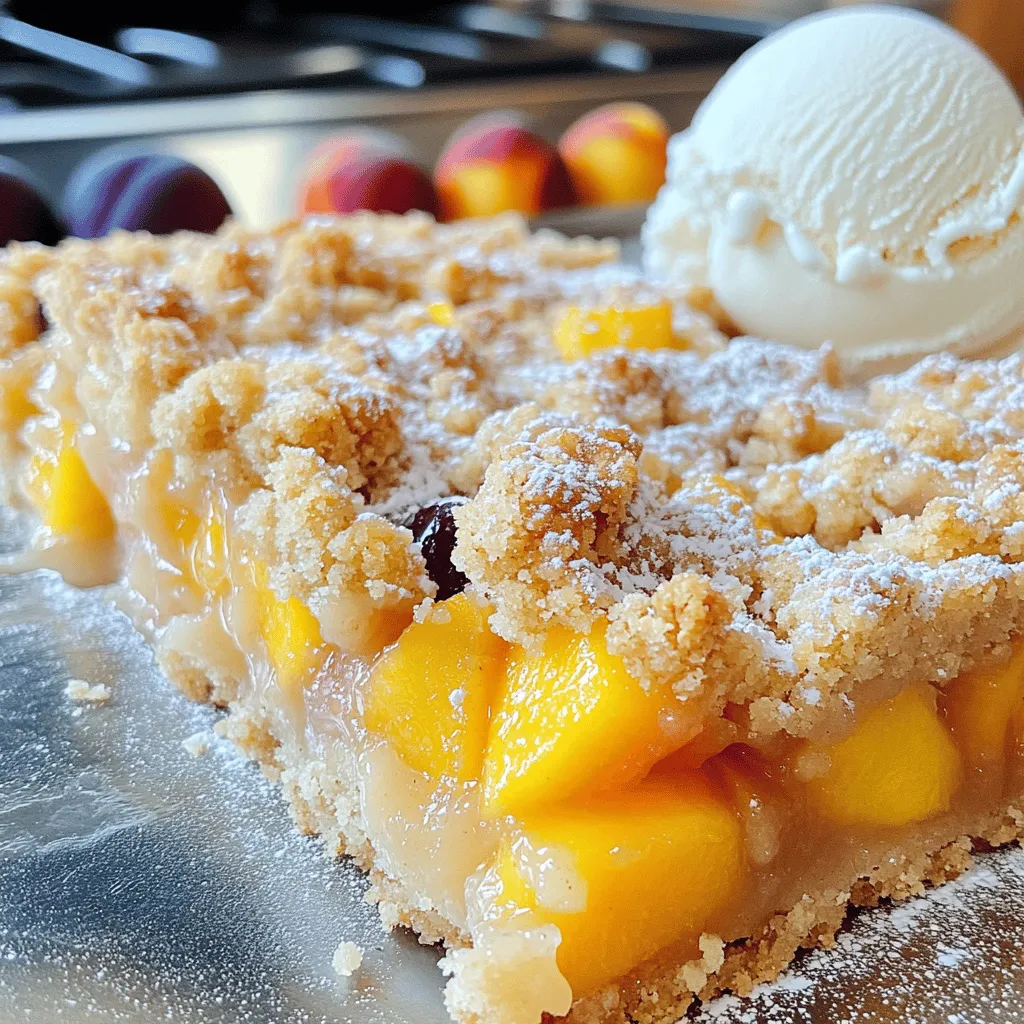
Peach Plum Crumble Bars Fresh and Flavorful Treat
Looking for a delicious way to enjoy summer fruit? You’ll love these Peach Plum Crumble Bars! They pack a sweet
Looking for a delicious way to enjoy summer fruit? You’ll love these Peach Plum Crumble Bars! They pack a sweet
![To make the creamy base of our Avocado Dill Hummus, you will need: - 1 ripe avocado - 1 cup canned chickpeas, thoroughly drained and rinsed - 2 tablespoons tahini - 2 tablespoons fresh dill, finely chopped - 2 tablespoons freshly squeezed lemon juice - 2 cloves garlic, finely minced - 2 tablespoons extra virgin olive oil (plus extra for drizzling) - Salt and freshly ground black pepper, to taste - 1 teaspoon ground cumin These ingredients blend together to create a rich and smooth hummus. The avocado adds creaminess, while the dill brings a fresh flavor. For a more vibrant hummus board, consider adding: - Assorted crudités, such as carrot sticks, cucumber slices, and bell pepper strips - Pita bread, cut into triangles These options not only add color but also provide a delightful crunch. They serve as perfect dippers for our hummus. To elevate your hummus board, try these garnishes: - Whole dill sprigs for a touch of green - A drizzle of extra virgin olive oil for shine These garnishes make your dish look more inviting and appetizing. You can follow the full recipe to see how to best arrange everything for a stunning display. First, grab a ripe avocado and cut it in half. Remove the pit and scoop the flesh into your food processor. Next, add one cup of drained and rinsed chickpeas, two tablespoons of tahini, and two tablespoons of fresh lemon juice. Don't forget the two cloves of minced garlic and two tablespoons of extra virgin olive oil. For flavor, add one teaspoon of ground cumin. Now, secure the lid and blend until the mixture is smooth and creamy. If needed, pause to scrape down the sides. This helps mix everything evenly. Once it’s nice and smooth, add the finely chopped dill. Season with salt and freshly ground black pepper to taste. Pulse a few times to mix in the dill without over-blending it. To get that dreamy texture, make sure your chickpeas are well-drained. If the hummus feels too thick, add a little water or olive oil, one teaspoon at a time, while blending. This helps you control the creaminess. If you prefer a chunkier hummus, blend less. Just pulse a few times before serving. Once your hummus is ready, use a spatula to transfer it into a decorative serving bowl. Create a swirl on top with the back of a spoon for a nice look. Drizzle extra olive oil over the hummus and garnish with whole dill sprigs. Now, let’s arrange the board! Use a large wooden board or rustic platter. Place the hummus bowl in the center. Artfully arrange assorted crudités like carrot sticks, cucumber slices, and bell pepper strips around the bowl. Add pita bread triangles for a tasty dipper. This colorful display makes for a fun and inviting treat. For the full recipe, check out the details provided above. Enjoy your fresh and flavorful Avocado Dill Hummus Board! When serving your Avocado Dill Hummus Board, think bright and fresh. Use colorful veggies like carrots, cucumbers, and bell peppers. These add a fun crunch. Pita bread triangles are perfect for dipping. They give a nice chewy texture. You can even add some olives or cherry tomatoes for extra flair. Aim for a mix of colors and shapes to make it pop. Presentation makes your hummus board look inviting. Use a large wooden board or a rustic platter. Place the hummus in the center. Create a small swirl on top for style. Drizzle some olive oil around the edges. Add whole dill sprigs for color. Arrange the veggie sticks and pita around the bowl in a circular pattern. This setup is perfect for sharing and looks great on the table. To boost the flavor, think about what spices you can add. A sprinkle of smoked paprika can add warmth. You might try a pinch of cayenne for a kick. Fresh herbs like parsley or chives can also brighten the taste. Experiment to find what you love. Adding zest from lemon can lift the flavors too. Each small change can make your hummus board truly special. Don't forget to check the [Full Recipe] for more tips and ingredient ideas! {{image_4}} You can change up the avocado dill hummus by swapping some ingredients. Instead of chickpeas, try white beans for a creamier texture. You can also use sunflower seeds instead of tahini. They add a nutty flavor and are great for nut-free diets. For a spicy kick, mix in some diced jalapeños or cayenne pepper. This adds a fun twist to your classic hummus. Hummus can take on flavors from many global cuisines. For a Mediterranean vibe, add olives, feta, and roasted red peppers. An Italian touch can come from basil, sun-dried tomatoes, and a drizzle of balsamic glaze. You can create a Mexican-themed board with corn chips, salsa, and avocado slices. Each culture brings a unique taste that enhances the hummus experience. Seasonal ingredients can elevate your avocado dill hummus board. In spring, consider adding fresh peas or asparagus for crunch. Summer is perfect for ripe tomatoes and cucumbers, which bring brightness. In fall, roasted butternut squash or sweet potatoes add warmth and color. Winter calls for hearty veggies like carrots and kale for a vibrant touch. This keeps your board fresh and exciting throughout the year. For the full recipe, check out the Avocado Dill Hummus Board 🥑. After you enjoy your hummus board, you may have some leftovers. To store leftover hummus, use an airtight container. This keeps air out and helps it stay fresh. Make sure to press plastic wrap against the hummus if you don't have a container. This extra step keeps it from drying out. To keep your ingredients fresh, store them properly. For the avocado, wrap it tightly in plastic wrap to prevent browning. Store chopped veggies in a sealed container with a damp paper towel. This helps maintain their crunch. Keep pita bread in a sealed bag at room temperature. This way, it stays soft and tasty. Hummus can last about 3 to 5 days in the fridge. Always check for off smells or changes in texture. If it looks or smells strange, it’s best to throw it away. Enjoy your hummus within this time frame for the best taste. To serve Avocado Dill Hummus, place it in a bowl at the center of your board. Surround it with colorful dippers. Use fresh veggies like carrot sticks, cucumber slices, and bell pepper strips. Pita bread cut into triangles makes a great addition too. This setup invites everyone to dig in and enjoy. A splash of olive oil on top adds shine and flavor. Yes, you can make Avocado Dill Hummus ahead of time. Prepare the hummus a day or two before your event. Store it in an airtight container in the fridge. To keep it fresh, add a thin layer of olive oil on top. This helps prevent browning. When ready to serve, give it a quick stir. Absolutely! Healthy dippers are key to a tasty hummus board. Here are some great options: - Fresh carrot sticks - Cucumber slices - Bell pepper strips - Cherry tomatoes - Radishes - Celery sticks - Whole grain crackers These choices add crunch and color. They pair well with the creamy hummus. This recipe is already vegan-friendly. It uses plant-based ingredients like chickpeas and avocado. To ensure it stays vegan, use tahini and check the pita bread. Some pita brands may use dairy. By sticking to plant-based items, you enjoy a creamy, flavorful dish without any animal products. Avocado Dill Hummus is easy to make and fun to serve. You learned about key ingredients, preparation steps, and tips for the perfect board. Try different flavors and fresh ingredients to make it your own. Remember to store leftovers correctly for later enjoyment. This hummus will impress your guests and become a favorite. Get creative, and enjoy every bite!](https://lazychefmagic.com/wp-content/uploads/2025/07/780d2f42-cbec-4599-8a08-453d4b2400b5.webp)
If you’re looking for a fresh and tasty snack, you need to try my Avocado Dill Hummus Board. This fun
![Fresh blueberries are the star of this drink. They add a sweet and tangy flavor. When you buy them, look for plump, firm berries. They should be deep blue with a slight bloom. You need one cup for this recipe. If you want more flavor, consider using a mix of berries. You can use different types of lemonade. Homemade lemonade is the best choice, as it’s fresh and bright. If you’re short on time, buy a light, tart store-bought option. Aim for two cups in total. This balance helps your float stay refreshing and not too sweet. The creamy vanilla ice cream adds a rich touch. You need one cup for the perfect float. If you want less sweetness, skip the honey. If you prefer it sweeter, use one tablespoon of honey. For a fun twist, you can try lemon sorbet for a lighter version. To start, take 1 cup of fresh blueberries. Place them in a small saucepan over medium heat. Add 1 tablespoon of honey if you want extra sweetness. Stir gently and cook for about 5-7 minutes. You will see the blueberries soften and release their juices. This forms a beautiful syrup. Once it looks good, remove it from the heat. Let the syrup cool for a bit. Now, grab your serving glasses. Carefully pour the blueberry syrup into each glass. You want a nice layer at the bottom. Next, slowly pour in 2 cups of lemonade. Fill the glasses about three-quarters full. This keeps the syrup layer intact. Finally, add a scoop of creamy vanilla ice cream on top. It should float above the lemonade, looking amazing. To make your float even prettier, add fresh mint leaves on top. A sprinkle of lemon zest adds a nice touch, too. Use clear glasses to show off those colorful layers. You can also add a lemon wheel on the rim for a fun look. Enjoy your Blueberry Lemonade Float right away. Each sip is a refreshing treat! For the best flavor, use fresh lemonade. You can make it at home. Mix fresh lemon juice with water and sugar. Aim for a tart taste to balance the sweet blueberries. If you buy lemonade, look for light and refreshing options. Avoid overly sweet brands that can overpower the float. When making the blueberry syrup, keep the heat at medium. This helps the blueberries break down without burning. Stir gently so they don’t stick to the pan. Cook them for about 5-7 minutes until they are soft. You want them to release their juices and create a nice syrup. Remove from heat once ready and let it cool slightly before using. Use clear glasses to show off the layers. The blueberry syrup, lemonade, and ice cream look stunning together. Pour the lemonade slowly to keep the layers separated. Add the ice cream on top last; it should float beautifully. Garnish with fresh mint and lemon zest. For an extra touch, add a lemon wheel on the glass rim. This makes each float look even more inviting. Enjoy creating this Blueberry Lemonade Float with these tips for a perfect summer treat! For the complete recipe, check [Full Recipe]. {{image_4}} You can switch up the fruit in your Blueberry Lemonade Float. Try strawberries for a sweet twist. Raspberries add a nice tart flavor. Peaches bring a juicy summer vibe. Each fruit gives a unique taste while keeping it refreshing. Just follow the same steps for the syrup. While creamy vanilla ice cream is the classic choice, there are fun alternatives. Use lemon sorbet for a zesty kick. Coconut ice cream adds a tropical touch. Or try yogurt for a lighter option. Each choice changes the float’s texture and flavor. Layering is key for a stunning float! Start with the syrup, then pour the lemonade slowly. This helps keep the layers separate. If you want, use a spoon to carefully add the ice cream on top. You can also create a rainbow effect with different fruits and colors. This makes the drink look fun and inviting. For the full recipe, check out the Blueberry Lemonade Float section above! After making your Blueberry Lemonade Float, you may have some leftover parts. The blueberry syrup can last for up to one week in the fridge. Store it in a jar with a tight lid. The lemonade can also stay fresh for about five days if kept in a sealed container. If you have extra vanilla ice cream, keep it in the freezer, where it will stay good for several weeks. To store your blueberry syrup, let it cool first. Then, pour it into a glass jar. Cover it tightly. For lemonade, use a pitcher or bottle. Make sure it is sealed well to keep it fresh. For ice cream, keep it in its original container if possible. This helps prevent freezer burn. You can use leftover blueberry syrup in many ways. Drizzle it on pancakes or waffles for breakfast. You can even mix it into yogurt for a tasty snack. The lemonade is great for making other drinks, like spritzers or cocktails. If you have leftover ice cream, blend it into smoothies for a creamy treat. Yes, you can prep parts ahead. Make the blueberry syrup early and chill it. Store it in the fridge for up to three days. Just mix it with lemonade and ice cream when you are ready to serve. This keeps the float fresh and tasty. Blueberry and lemonade mix well with many flavors. Try adding mint for a fresh taste. Basil also works great, giving a nice twist. You can also mix in some strawberries or raspberries for a berry blast. Each adds its own fun flavor. Yes, you can make this float dairy-free. Just swap creamy vanilla ice cream for a dairy-free version. Look for coconut or almond milk ice cream. This keeps the float creamy without dairy. Enjoy your tasty treat without any worries! This blog post shared how to make a delicious Blueberry Lemonade Float. We covered choosing fresh blueberries, different lemonade types, and sweeteners for flavor. You learned to prepare the blueberry syrup and assemble your float with garnishes. Remember the tips on heat control and serving. Don't forget to explore fruit alternatives and ice cream choices for fun variations. Lastly, I showed how to store leftovers effectively. Enjoy creating this treat, and feel free to experiment with new flavors. Your perfect summer drink awaits!](https://lazychefmagic.com/wp-content/uploads/2025/07/107e25eb-4526-430c-aaff-f01da734e8fc.webp)
Looking for a tasty way to cool off this summer? Try my Blueberry Lemonade Float! This refreshing drink combines fresh
![- Watermelon cubes - Fresh mint leaves Watermelon adds a juicy sweet burst. It balances the salty halloumi perfectly. Choose ripe watermelon for the best flavor. Fresh mint leaves offer a bright finish. They elevate each bite with a refreshing taste. - Halloumi cheese Halloumi is a semi-hard cheese from Cyprus. It has a unique ability to hold its shape when grilled. This gives you a lovely golden crust. The salty and creamy flavor complements the sweet watermelon. It's a star ingredient in these skewers. - Olive oil, balsamic glaze, salt, and pepper Olive oil enhances the grilling process. It adds a rich flavor and helps prevent sticking. Balsamic glaze brings a tangy sweetness. Use it to drizzle over the skewers for extra depth. Don’t forget salt and pepper to taste. These staples enhance all the flavors in the dish. For the full recipe, check out the details above. - Soak wooden skewers: If you use wooden skewers, soak them in water for at least 30 minutes. This step is key to stop them from burning on the grill. - Cut watermelon and halloumi: Take a medium watermelon and cut it into 1-inch cubes. Do the same with 8 ounces of halloumi cheese. Keeping the size uniform helps them cook evenly. - Threading watermelon and halloumi: Start by threading the watermelon and halloumi cubes onto your skewers. Alternate the pieces for a nice mix. - Ensuring even spacing: Leave a little space between the pieces. This helps heat circulate around each cube for better grilling. - Preheat the grill: While you prep the skewers, preheat your grill to medium-high heat. This ensures a good sear on your ingredients. - Grill times for perfect texture: Place the skewers on the grill and cook for about 3-4 minutes per side. You want the halloumi to be golden and a bit crispy, while the watermelon should show nice grill marks. Now you have the perfect grilled watermelon halloumi skewers. For a full recipe, check the [Full Recipe]. To get those perfect grill marks, you need a hot grill. Preheat your grill to medium-high heat before you start cooking. Place the skewers down gently and avoid moving them too much. Let them sit for 3-4 minutes on each side. This gives the watermelon and halloumi time to caramelize. To avoid burning, watch the skewers closely. Halloumi can burn fast due to its low moisture. If you see it turning dark too quickly, move it to a cooler part of the grill. Always check the watermelon too. It should show nice grill marks without becoming mushy. For extra flavor, try adding herbs. Fresh basil or oregano pairs well with the sweetness of watermelon. You can also sprinkle some chili flakes for a spicy kick. If you prefer a sweeter taste, use honey instead of balsamic glaze. As for sides, consider a light salad. A simple arugula salad with lemon juice complements the skewers. You can also serve it with grilled corn on the cob for a delightful summer meal. For serving, presentation matters. Lay the skewers on a wooden board or a colorful platter. Add some fresh mint leaves around them. This not only looks nice but also adds a fresh touch. Pair your skewers with drinks that refresh. I recommend a light white wine or lemonade. If you want something non-alcoholic, a mint-infused iced tea works well. These choices elevate your meal and make it feel special. Check out the Full Recipe to get all the details you need for these delicious skewers. {{image_4}} You can change up the cheese. Try feta or goat cheese for a new taste. Both will add a salty kick. For fruits, consider peaches or pineapple. They grill well and add sweetness. Switch up the marinade. A honey-soy blend brings a sweet touch. You could also try a spicy sriracha glaze for heat. Adding fresh herbs like basil or rosemary boosts flavor. These herbs pair well with both watermelon and halloumi. Mini skewers work great for appetizers. They make for easy bites at parties. For a main dish, use larger skewers. This way, you can pack more fruit and cheese on each stick. It gives a hearty serving that keeps everyone satisfied. For the full recipe, follow my instructions to make these delicious skewers. To keep your grilled watermelon halloumi skewers fresh, refrigerate any leftovers. First, let them cool down to room temperature. Then, place them in an airtight container. This helps prevent moisture loss and keeps flavors intact. You can stack them gently to save space. For reheating, the best method is to use a grill or an oven. Preheat your grill to medium heat. Place the skewers on the grill for about 2-3 minutes, turning them halfway. This helps maintain their texture and flavor. If using an oven, set it to 350°F (175°C) and heat for about 5 minutes. Avoid microwaving, as it can make the halloumi rubbery. In the fridge, these skewers last for about 3 days. Make sure they are sealed well to keep them fresh. If you want to store them longer, you can freeze them. Wrap each skewer tightly in plastic wrap and place them in a freezer bag. They can last up to 2 months in the freezer. Just remember to thaw them in the fridge before reheating. Grill the skewers for about 3-4 minutes on each side. This timing helps the halloumi turn golden and crispy. The watermelon should also get nice grill marks, adding to the flavor. Yes, you can prep the skewers ahead. Assemble them and store in the fridge for up to 4 hours. Just remember to add the balsamic glaze and mint just before serving for the best taste. If you can't find halloumi, try using feta or queso blanco. Both have a nice texture and flavor, but they might melt more. You can also use grilled tofu for a vegan option. You can use a grill pan on your stovetop. Heat it to medium-high and follow the same grilling time. Another option is to use an oven broiler. Place the skewers on a baking sheet and broil for about 5-6 minutes, turning halfway. For the full recipe, check out the details above! We discussed how to make delicious watermelon and halloumi skewers. Fresh ingredients like watermelon and mint give a refreshing taste. Grilling tips help you get those perfect marks without burning. You can even switch up ingredients for new flavors or serve them in fun ways. For leftovers, just store them in airtight containers. These skewers are easy to prep and great for any meal. Enjoy your time grilling and sharing these tasty bites!](https://lazychefmagic.com/wp-content/uploads/2025/07/3e7a07dc-d535-45c4-97a2-3972120150dd.webp)
Are you ready to impress your friends with a unique and tasty dish? Grilled Watermelon Halloumi Skewers offer a delightful

Are you ready to add a splash of color to your baking? In this guide, I’ll show you how to
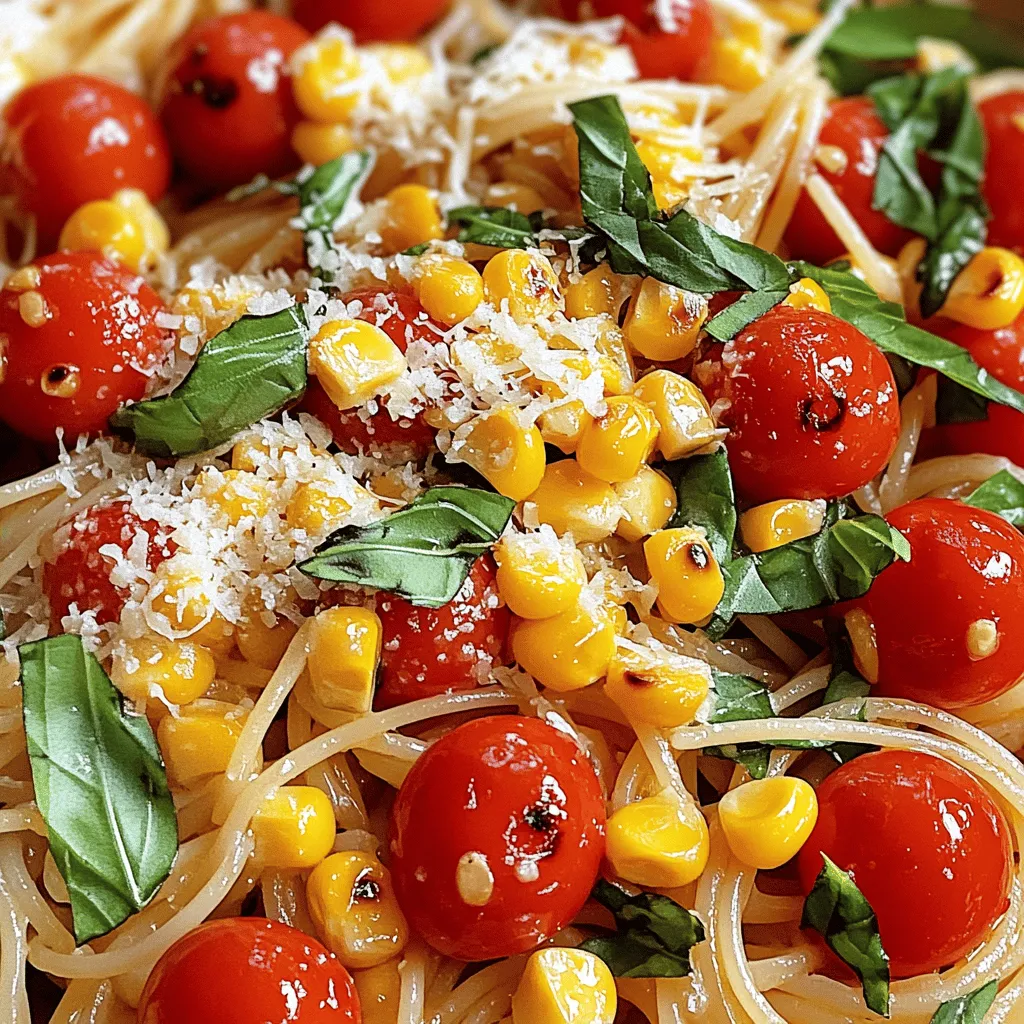
Are you ready to savor a dish that bursts with flavor and is easy to make? This Charred Corn Tomato
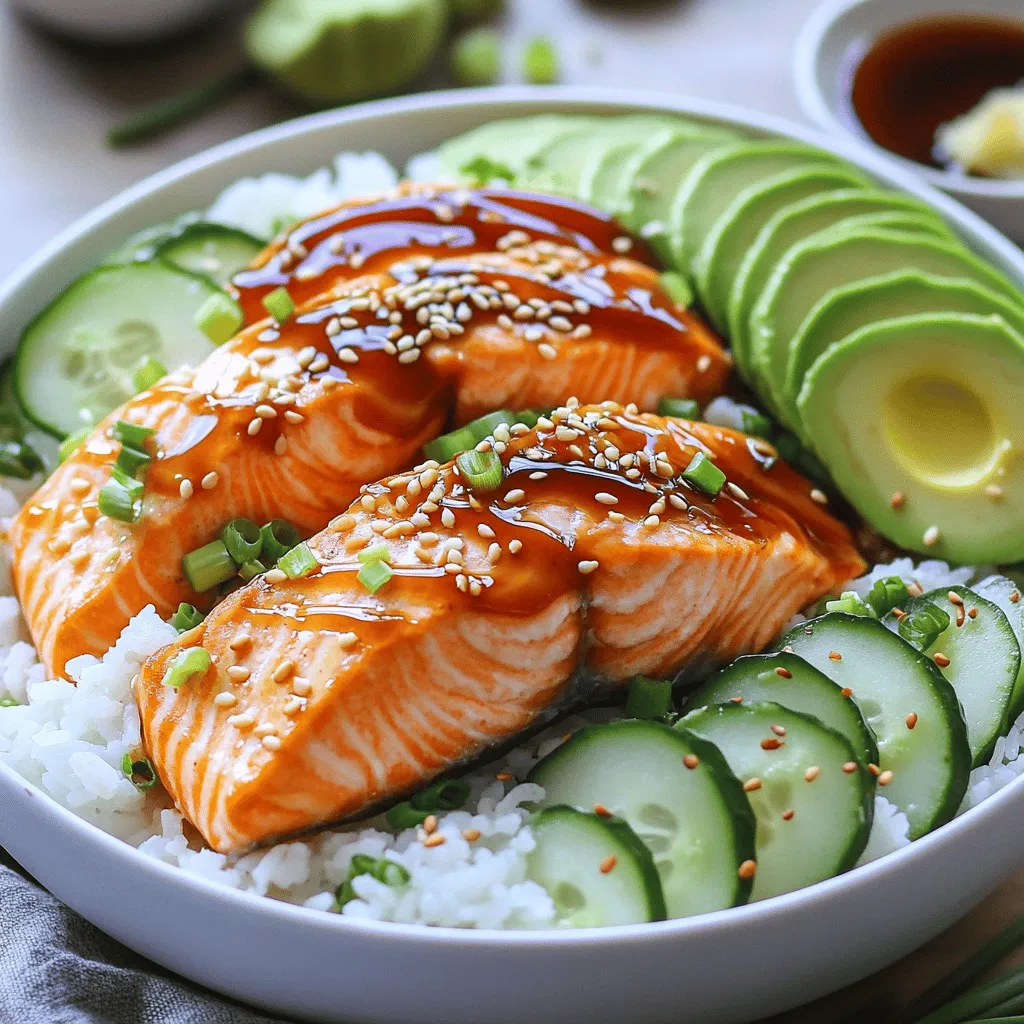
Are you ready to elevate your dinner game? The viral TikTok Salmon Rice Bowl is here to tantalize your tastebuds!
![- 1 pound chicken breast, sliced into thin strips - 3 bell peppers (red, yellow, green), sliced into strips - 1 large onion, sliced into wedges - Chili powder - Ground cumin - Smoked paprika - Garlic powder - Onion powder - 3 tablespoons olive oil - 1/2 teaspoon salt - 1/4 teaspoon black pepper - Warm tortillas - Lime wedges - Fresh cilantro for garnish When making easy sheet pan fajitas, you need fresh, vibrant ingredients. The chicken breast gives your dish a protein boost. I love using a mix of red, yellow, and green bell peppers. They add color and sweetness. The onion provides a nice flavor, too. The spice and seasoning mix is key. Chili powder and cumin bring warmth. Smoked paprika adds a fun, smoky taste. Garlic powder and onion powder round out the flavors. A drizzle of olive oil helps blend everything and keeps it moist. For serving, warm tortillas are a must. They hold the fajitas, making every bite delightful. Fresh lime wedges add a zesty kick. And don’t forget cilantro! It adds a fresh touch to the dish. For the full recipe, check out the complete guide. - Preheat the oven to 400°F (200°C). - Line a large sheet pan with parchment paper or foil. This setup makes cleanup easy. It also helps the fajitas cook evenly. A hot oven gives you great flavors. - Mix chicken and vegetables in a bowl. - Whisk together the spice-infused olive oil. In a big bowl, add sliced chicken, red, yellow, and green peppers, and onion. This mix brings color and crunch. In another small bowl, whisk olive oil with chili powder, cumin, smoked paprika, garlic powder, onion powder, salt, and black pepper. This spice blend brings out the best flavors. - Toss the mixture together and spread on the sheet pan. - Bake for 20-25 minutes, stirring halfway through for even cooking. Drizzle the spice mix over the chicken and veggies. Toss well to coat everything. Spread it out on the prepared sheet pan, making sure it's in one layer. Bake for 20-25 minutes. Stir halfway for even cooking. The chicken should reach 165°F (74°C). Enjoy the nice smell as it cooks! For the full recipe, don’t hesitate to check it out. To get the best flavor, coat your chicken and veggies well. Mix the spices with olive oil before adding to the food. This way, every bite bursts with taste. Toss the chicken and veggies until they are fully covered in the spice mix. This ensures even cooking and a great flavor. For chicken, the safe temperature is 165°F (74°C). Use a meat thermometer to check this. This helps you avoid undercooking, which can lead to food safety issues. Remove the chicken from the oven as soon as it reaches this temperature. Serve warm tortillas in a lovely stack. It makes your meal look inviting. You can use a colorful serving platter for a nice touch. Lay the tortillas next to the fajitas for easy access. Add lime wedges to the plate for a zesty finish. Guests can squeeze fresh lime over their fajitas. This adds brightness and enhances the flavors. A sprinkle of fresh cilantro adds a nice pop of color too. Cooking time can change based on how thick the chicken strips are. Thinner strips cook faster, while thicker strips take longer. Keep an eye on them to avoid overcooking. If you want to serve a larger crowd, you can double the recipe. Just make sure to use two sheet pans. If you have fewer people, you can cut the recipe in half. Adjust the cooking time as needed to ensure everything cooks evenly. For the full recipe, you can refer to the original instructions provided. {{image_4}} You can switch up the protein in your sheet pan fajitas. If you love shrimp, use one pound of peeled and deveined shrimp. Shrimp cooks fast, so check for doneness after 10 minutes. For beef lovers, thinly slice flank steak and replace the chicken. Beef adds a rich taste that pairs well with the spices. Want a vegetarian option? Use one pound of firm tofu, cut into strips. Tofu absorbs flavors well, making it a tasty choice. Feel free to get creative with veggies. You can use seasonal options like zucchini or mushrooms. Zucchini adds a nice crunch, while mushrooms create a savory depth. Try adding corn for sweetness or cherry tomatoes for a burst of flavor. If you love greens, toss in some spinach or kale during the last few minutes of baking. This keeps them fresh and vibrant. To spice things up, add sliced jalapeños for heat. They bring a kick that many enjoy. If you prefer less spice, skip them or use mild peppers. Adding fresh herbs like cilantro or parsley can brighten the dish. You can also try different spices like oregano or cayenne pepper for a unique twist. Consider using a splash of lime juice before serving for extra zest. You can find the full recipe for these easy sheet pan fajitas [Full Recipe]. After enjoying your delicious sheet pan fajitas, store the leftovers right away. Place them in an airtight container. This keeps them fresh and tasty. Make sure to cool the fajitas to room temperature before sealing. In the fridge, they stay good for about three to four days. When you’re ready to eat again, you can reheat them. The oven works best for this. Preheat to 350°F (175°C). Spread the fajitas on a baking sheet. Heat for about 10-15 minutes until warm. This keeps the flavors intact. If you're in a hurry, the microwave is a quick option. Use a microwave-safe dish and cover it. Heat in short bursts, stirring in between, until warm. If you want to save fajitas for later, freezing is a great choice. First, let them cool completely. Then, divide them into portions. Use freezer-safe bags or containers to store. Remove as much air as possible to avoid freezer burn. They will last for about two to three months in the freezer. When you’re ready to eat them, you need to thaw them. The best way is to move them to the fridge for a few hours or overnight. If you’re in a rush, you can use the microwave to defrost. Once thawed, reheat them in the oven or microwave until hot. Leftover fajitas can last in the fridge for three to four days. If you freeze them, they can stay good for two to three months. Always check for any signs of spoilage, like off smells or changes in texture. Proper storage helps keep your fajitas fresh and safe to eat. Enjoy your flavorful meal anytime you want! For the full recipe, check out the earlier section. Yes, you can use frozen chicken. It saves time and is easy to work with. Here’s how to cook it: - Preheat your oven to 400°F (200°C). - Just like fresh chicken, use the same spices and veggies. - Spread everything on the sheet pan. - Bake for 30-35 minutes, checking for an internal temperature of 165°F (74°C). Cooking from frozen may add a few more minutes. Just keep an eye on it. Sheet pan fajitas are great on their own, but sides make them even better! Here are some ideas: - Spanish rice adds a nice touch. - Black beans offer protein and fiber. - Guacamole gives a creamy flavor. - Fresh salsa adds a punch of zest. - A side salad freshens up the meal. You can mix and match to find your favorite combo! Yes, you can prep ahead! Here are some tips: - Slice the chicken and veggies the night before. - Store them in the fridge in airtight containers. - Mix the spices in a small bowl and keep it handy. - When you're ready, just toss everything together and bake. This way, dinner is quick and easy! Making vegetarian fajitas is simple. Swap the chicken for these options: - Use sliced bell peppers and zucchini. - Try portobello mushrooms for a meaty texture. - Add extra beans or tofu for protein. These swaps keep the fajitas tasty and filling! Yes, you can make it gluten-free! Here’s how: - Look for gluten-free tortillas at your store. - Check labels on condiments like salsa and guacamole. - Most spices are naturally gluten-free. You can enjoy fajitas without worry while staying on budget! This blog post covered easy and tasty sheet pan fajitas. You learned about key ingredients, cooking steps, and helpful tips. We explored variations to fit your taste and options for leftovers. My final thought is that these fajitas are versatile and fun to make. Try them with your favorite veggies or proteins. You can enjoy a delicious meal with family or friends any night. Get creative and enjoy every bite!](https://lazychefmagic.com/wp-content/uploads/2025/07/fdf20835-9eb2-4b7b-b4e7-f88772f70eee.webp)
Are you looking for a quick and tasty meal? Easy Sheet Pan Fajitas are perfect for busy days. With just
![- 2 tablespoons extra virgin olive oil - 2 boneless, skinless chicken breasts, cut into bite-sized cubes - Sea salt and freshly cracked black pepper, to taste - 3 cloves garlic, finely minced - 1 cup low-sodium chicken broth - 1 cup rich heavy cream - 8 ounces fettuccine pasta - 1 cup freshly grated Parmesan cheese - 1 teaspoon Italian seasoning blend - 1 cup frozen peas (optional, for a pop of color and sweetness) - Fresh parsley, finely chopped (for garnish) Gathering the right ingredients makes cooking easier. Start with extra virgin olive oil. It adds great flavor and helps cook the chicken. Next, use boneless, skinless chicken breasts. They cook quickly and stay tender. Season the chicken with sea salt and black pepper. This simple step boosts taste. You’ll need garlic, too. Mince three cloves to add a nice aroma. Chicken broth is next, and it gives depth to the sauce. Heavy cream makes the dish rich and creamy. For the pasta, I love using fettuccine. It holds the sauce well. Next, grab freshly grated Parmesan cheese. It melts easily and adds a savory touch. Italian seasoning brings warmth to the dish. If you want, add frozen peas for color and sweetness. Lastly, fresh parsley makes a lovely garnish. This simple list makes a creamy one-pot meal you will love! For the full recipe, check out the detailed instructions. Cooking the chicken Start by heating 2 tablespoons of extra virgin olive oil in a large pot over medium heat. Season the chicken breasts, cut into cubes, with sea salt and black pepper. Cook the chicken for about 6-7 minutes. Stir occasionally until it turns golden brown and cooks through. Once done, take the chicken out and set it aside. Sautéing garlic In the same pot, add 3 cloves of minced garlic without cleaning it. Sauté the garlic for about 1 minute. Stir constantly until it gives off a nice smell but does not burn. This adds great flavor to your dish. Adding broth and cream Next, carefully pour in 1 cup of low-sodium chicken broth and 1 cup of rich heavy cream. Use a wooden spoon to scrape up any bits stuck at the bottom of the pot. Stir everything together well. Increase the heat slightly until it simmers gently. Cooking the pasta Now, add 8 ounces of fettuccine pasta to the pot. Press it down gently so it is fully submerged in the liquid. Stir it a couple of times to stop it from sticking together. Cook the pasta according to the package, about 10-12 minutes, until it's al dente. Incorporating cheese and seasoning When the pasta is cooked, lower the heat. Add 1 cup of freshly grated Parmesan cheese and 1 teaspoon of Italian seasoning. Stir continuously until the cheese melts and the sauce becomes creamy. If you want, mix in 1 cup of frozen peas now, letting them warm for about 2 minutes. Mixing in chicken and peas Finally, return the cooked chicken to the pot. Gently mix it in until everything combines well. Taste and adjust seasoning with more salt and pepper if needed. Let it sit for a couple of minutes before serving. This helps the sauce thicken for that perfect creamy finish. For the complete guide, be sure to check the Full Recipe. - How to achieve perfect chicken Start with fresh, high-quality chicken. Cut it into small cubes to ensure even cooking. Season well with sea salt and black pepper. Cook it on medium heat until golden brown. This should take about 6 to 7 minutes. Remove it once fully cooked to keep it juicy. - Best pasta cooking methods Use fettuccine for a classic taste. Add it to the pot with the broth and cream. Press it down to submerge fully. Stir gently to prevent sticking. Cook according to package instructions. Aim for al dente for the best texture. - Ensuring a creamy sauce Use heavy cream and freshly grated Parmesan cheese. This combination gives a rich, smooth sauce. Stir continuously as you mix in the cheese. This prevents clumps and ensures creaminess. - How to prevent sticking Stir the pasta a few times while cooking. This helps keep it separate. Adding enough liquid is key; the pasta should be submerged. If needed, add a splash of broth or water during cooking. - Types of cheese to use Parmesan is the classic choice for Alfredo. For extra flavor, mix in some Pecorino Romano. Both melt well and add a nice touch to the dish. - Fresh herbs for flavor Chopped parsley brightens the dish. Other options include basil or chives for a fresh pop. Sprinkle them on top just before serving for the best taste. - Presentation tips for serving Serve in shallow bowls for a beautiful look. Top with extra cheese and herbs for color. You can also add a slice of garlic bread on the side for a complete meal. For the full recipe, check the details above. {{image_4}} You can easily switch things up with your One-Pot Chicken Alfredo. Here are some tasty options: - Substituting chicken with shrimp or vegetables: If you want a lighter meal, try shrimp. Cook them until pink and tender. For a veggie twist, use broccoli, zucchini, or bell peppers. They add great color and taste. - Using different pasta types: Fettuccine is classic, but you can use penne or spaghetti. Just adjust the cooking time based on the pasta type. - Dairy-free alternatives: You can swap heavy cream for coconut milk or cashew cream. These options keep your dish creamy without dairy. Boosting flavor is easy with a few extra ingredients. Here’s how to make your dish pop: - Adding spices or herbs: A pinch of red pepper flakes adds heat. Fresh basil or thyme can also brighten the dish. - Incorporating sun-dried tomatoes: These add a sweet and tangy kick. Chop them finely and mix them in when you add the chicken back. - Suggesting additional vegetables: Spinach or kale can be added near the end. They wilt nicely and add nutrients without overpowering the dish. These variations and enhancements make your One-Pot Chicken Alfredo unique and fun. Don't hesitate to get creative! For the complete recipe, check out the Full Recipe section. To keep your One-Pot Chicken Alfredo fresh, follow these steps: - Refrigeration guidelines: Cool the dish to room temperature. Transfer it to an airtight container. Store it in the fridge for up to 3 days. - Freezing instructions: For longer storage, portion the Alfredo into freezer-safe containers. It stays good for about 2 months in the freezer. Label the containers so you can easily find them later. When it's time to enjoy your leftovers, reheating is key. Use these methods: - Best methods for reheating pasta dishes: The best way to reheat is on the stove. Place the Alfredo in a pot and add a splash of chicken broth or milk. Stir over low heat until warmed through. - Tips for maintaining creaminess: Avoid the microwave if you can. It can make the sauce grainy. Stir in a little extra cream or broth while reheating. This will help keep it creamy and smooth. For the full recipe, check [Full Recipe]. Can I make One-Pot Chicken Alfredo ahead of time? Yes, you can make One-Pot Chicken Alfredo ahead of time. Prepare it, then cool it down. Store it in an airtight container. When you are ready to eat, just reheat it on the stove or in the microwave. How to prevent the sauce from separating? To keep the sauce creamy, avoid boiling it after adding the cheese. Stir the sauce gently over low heat. Adding cheese gradually helps it melt smoothly. Using fresh ingredients also keeps the sauce from breaking. What can I substitute for heavy cream? If you want a lighter option, use half-and-half or whole milk. For a dairy-free choice, try coconut cream or cashew cream. Keep in mind that the texture may change a bit with different substitutes. Is this recipe suitable for meal prep? Yes! This recipe is great for meal prep. It holds well in the fridge and reheats nicely. Just follow the cooling and storage tips to keep it fresh. You can portion it out for the week to enjoy easy meals. For the full recipe, check the detailed instructions above. This blog post covered how to make a delicious one-pot chicken Alfredo. We discussed key ingredients, preparation steps, and helpful tips. You learned how to enjoy creamy pasta and keep it from sticking. You also discovered some great variations, like using shrimp or different pastas. Finally, we talked about storage and reheating. Cooking can be fun and easy. Enjoy your meal, and don’t be afraid to experiment!](https://lazychefmagic.com/wp-content/uploads/2025/07/c268582b-ffe4-4bf2-b696-527db0596d51.webp)
Are you ready to whip up a delicious meal with minimal cleanup? My One-Pot Chicken Alfredo recipe is your answer!
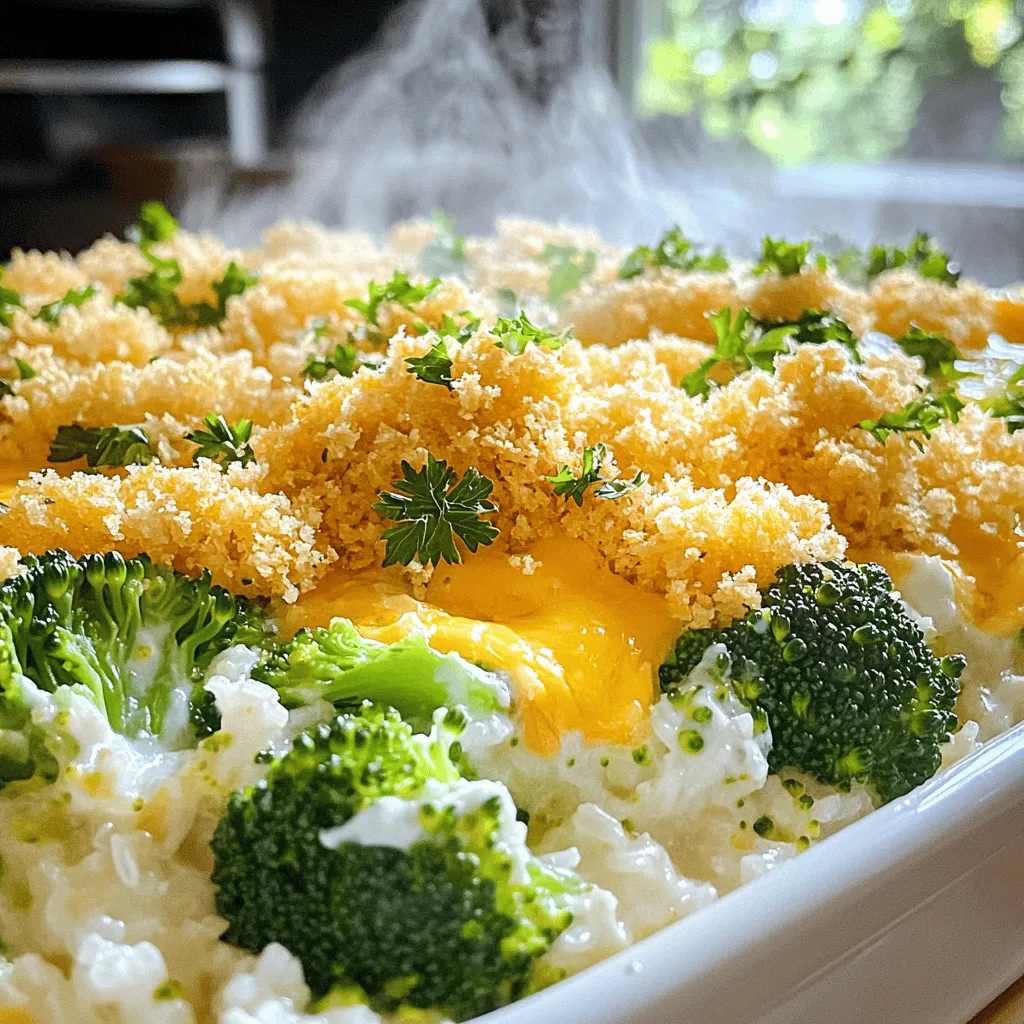
Are you ready to whip up a dish that’s cheesy, tasty, and packed with goodness? My Cheesy Broccoli Rice Casserole
