Skip to content
DisclaimerTerms Of UseGDPR PolicyCookie Policy

lazychefmagic

  • Home
  • Drinks
  • Appetizers
  • Dinner
  • Dessert
  • About
  • Contact
  • Privacy Policy
DisclaimerTerms Of UseGDPR PolicyCookie Policy

Amanda

- 4 salmon fillets (approximately 6 oz each) - 1/4 cup pure honey - 3 tablespoons soy sauce - 3 cloves garlic, finely minced - 1 tablespoon fresh ginger, freshly grated - 2 tablespoons extra-virgin olive oil - 1 teaspoon toasted sesame oil - 1 lemon, thinly sliced - Sea salt and freshly ground black pepper, to taste - 1 cup snap peas - 1 red bell pepper, cut into thin slices - Fresh cilantro or parsley for garnish - Large oven-safe skillet - Mixing bowl - Whisk - Spatula The ingredients for this One-Pan Honey Garlic Salmon come together quickly. First, you need the salmon. Four fillets work well for this dish. Each should weigh around six ounces. Next, grab some honey. You will use a quarter cup for a lovely sweet taste. Soy sauce adds depth. Three tablespoons give the dish a savory kick. Don’t forget the garlic! You will need three cloves, minced finely. Fresh ginger gives a nice zing. Use one tablespoon of freshly grated ginger. Olive oil is key for cooking. You need two tablespoons. Also, one teaspoon of toasted sesame oil adds a nutty flavor. For brightness, slice one lemon thinly. Seasoning is crucial. Use sea salt and freshly ground black pepper to taste. For color and crunch, one cup of snap peas works great. Lastly, slice one red bell pepper into thin pieces for a pop of color. You will also need fresh herbs. A sprinkle of cilantro or parsley adds freshness at the end. Gathering these ingredients will set you up for a delicious meal. Check out the Full Recipe for more details on how to prepare this dish perfectly! - Preheat the oven to 400°F (200°C). - In a bowl, mix 1/4 cup honey, 3 tablespoons soy sauce, 3 minced garlic cloves, and 1 tablespoon fresh ginger. Whisk until smooth and set aside. - In a large, oven-safe skillet, heat 2 tablespoons olive oil and 1 teaspoon sesame oil over medium-high heat. - Place the 4 salmon fillets skin-side down in the skillet. Sprinkle with sea salt and black pepper. - Cook the salmon for 3-4 minutes until the skin is crispy. Carefully flip the fillets using a spatula. - Pour the honey garlic sauce over the salmon. Place thin lemon slices on top. - Add 1 cup snap peas and sliced red bell pepper around the salmon. Ensure they soak up the sauce. - Transfer the skillet to the preheated oven. Bake for 10-12 minutes until the salmon flakes easily. - Remove the skillet from the oven and let it cool for a couple of minutes. - Before serving, sprinkle fresh cilantro or parsley on top for color. This simple process leads to a delicious one-pan meal. For the full recipe, check out the details above. Pair your One-Pan Honey Garlic Salmon with fresh sides. Here are some great options: - Rice: Jasmine or basmati rice adds a nice touch. - Quinoa: A healthy choice that soaks up the sauce well. - Green Salad: Mix greens with a light vinaigrette for crunch. For drinks, wine works well. I suggest: - Chardonnay: Its buttery notes match the salmon nicely. - Sauvignon Blanc: This wine's acidity balances the honey's sweetness. To get crispy salmon skin, follow these steps: - Start with a dry skin. Pat the fillets with a paper towel. - Heat the skillet well before adding the salmon. - Cook without moving it for a few minutes. This helps the skin crisp up. Adjusting seasoning is easy. Here’s how: - Taste the sauce before pouring it over the salmon. - Add more soy sauce for saltiness or honey for sweetness. If you don’t have salmon, try these options: - Trout: It’s similar in flavor and cooks the same way. - Chicken breasts: They work well but will need a bit longer to cook. For snap peas and bell pepper, consider these substitutes: - Green beans: They are crunchy and tasty. - Zucchini: Cut it into thin strips for a different texture. You can find the full recipe in the main section above. {{image_4}} You can change the taste of your One-Pan Honey Garlic Salmon easily. If you want a spicy kick, add red pepper flakes to the honey garlic sauce. This will bring heat and enhance the flavor. For a sweeter option, replace honey with maple syrup. Maple syrup gives a rich taste that pairs well with salmon. You can cook this dish in different ways. Grilling the salmon adds a smoky flavor. Use a grill pan or outdoor grill for this method. It gives the fish a nice char and caramelizes the sauce. If you prefer stovetop cooking, use a skillet. Cook the salmon on medium heat for a quick and easy meal. This recipe can fit different diets. For gluten-free options, use tamari instead of soy sauce. This keeps the dish safe for those with gluten allergies. If you are on a low-carb diet, skip the honey. You can add more spices or herbs instead. This keeps the dish flavorful without the extra carbs. For the full recipe, refer to the One-Pan Honey Garlic Salmon Delight . To keep your One-Pan Honey Garlic Salmon fresh, follow these tips: - Refrigerating salmon: Place leftover salmon in an airtight container. Store it in the fridge for up to 3 days. - Freezing leftovers: For longer storage, wrap the salmon tightly in plastic wrap. Then, place it in a freezer-safe bag. It can last up to 3 months in the freezer. Reheating salmon can be tricky. You don't want it to dry out. Here are some solid methods: - Oven method: Preheat your oven to 275°F (135°C). Place the salmon on a baking sheet and cover it with foil. Heat for about 15 minutes. - Microwave method: Use a microwave-safe dish with a lid. Add a splash of water to keep it moist. Heat in short bursts of 30 seconds on low power. Check often to avoid overcooking. These tips help you enjoy your salmon even after the first meal. You can find the Full Recipe above for the details on making this tasty dish. Cooking salmon takes about 10 to 12 minutes in the oven at 400°F. For thicker fillets, you may need extra time. If your fillet is about 1 inch thick, stick to the lower end of that time. For thinner fillets, check for doneness around 8 to 10 minutes. Salmon is done when it flakes easily with a fork. Yes, you can use frozen salmon. Thaw the fillets in the fridge overnight. If you're short on time, you can also run them under cold water for about an hour. Do not cook frozen salmon straight from the freezer, as it may not cook evenly. Make sure to pat them dry before cooking to avoid excess moisture. Serve this dish with simple sides like rice, quinoa, or mashed potatoes. Green salads with light dressings work well too. For a veggie boost, try roasted broccoli or steamed asparagus. These sides complement the honey garlic flavors perfectly. Absolutely! This dish is great for meal prep. You can cook the salmon and veggies in advance. Store them in airtight containers in the fridge for up to three days. Reheat gently in the microwave or oven before serving. This keeps the flavors fresh and delicious. For best results, add fresh herbs just before eating. This blog post covers a simple and tasty recipe for One-Pan Honey Garlic Salmon. You learned about the key ingredients and essential tools. I explained the steps to cook salmon perfectly with crispy skin. You'll also find tips for serving and ingredient swaps, plus ways to store leftovers. Salmon is flexible and works well with many flavors. Use what you have and have fun in the kitchen! Enjoy making this dish, and don't hesitate to experiment. Happy cooking!

One-Pan Honey Garlic Salmon Tasty and Easy Dish

Are you ready to make a delightful dish that’s both tasty and easy? This One-Pan Honey Garlic Salmon recipe takes

- 4 boneless, skinless chicken breasts - Zest of 2 medium-sized lemons - Juice of 2 medium-sized lemons - 1 tablespoon fresh rosemary, finely chopped - 1 tablespoon fresh thyme, finely chopped - 1 tablespoon fresh parsley, finely chopped - 3 cloves garlic, finely minced - 1/4 cup extra virgin olive oil - Salt and black pepper, to taste - Additional fresh herbs - Lemon wedges When I prepare Lemon Herb Grilled Chicken, I focus on fresh, bright flavors. The chicken breasts are my canvas. They soak up all the zesty goodness from the marinade. The lemon zest gives a vibrant punch. Fresh herbs like rosemary, thyme, and parsley add depth. I love using these ingredients because they make the chicken taste alive. The marinade is simple yet powerful. I mix garlic, olive oil, salt, and black pepper with the lemon zest and juice. This blend creates a rich flavor that seeps into the chicken. I find that marinating the chicken for at least one hour really boosts the taste. If I have time, I let it sit overnight. This is the secret to juicy, flavorful chicken. For the garnishes, I always keep extra herbs and lemon wedges on hand. A sprinkle of herbs adds a pop of color. Lemon wedges give a fresh tang when served. This dish looks stunning on the table and tastes even better. If you want to see the full recipe, check out the Full Recipe section. To start, gather your ingredients for the marinade. In a large mixing bowl, combine the zest and juice of two medium-sized lemons. Add in three cloves of finely minced garlic, along with one tablespoon each of fresh rosemary, thyme, and parsley. These herbs bring a burst of flavor. Next, pour in 1/4 cup of extra virgin olive oil. Sprinkle in some salt and black pepper to taste. Use a whisk to mix everything well, creating a zingy and fragrant marinade. Now, you need to marinate the chicken. Take four boneless, skinless chicken breasts and place them in a resealable plastic bag or a shallow dish. Pour the marinade over the chicken, ensuring each piece is coated. Seal the bag tightly or cover the dish with plastic wrap. It’s best to refrigerate the chicken for at least one hour. For even more flavor, let it marinate overnight. When you are ready to grill, preheat your grill to medium-high heat. If using a charcoal grill, wait until the coals turn glowing red and ashy. After marinating, take the chicken out of the fridge. Remove it from the marinade and let any extra drip off. Discard the leftover marinade to keep things safe. Place the chicken on the grill and cook for about 6-7 minutes on each side. You want the internal temperature to reach 165°F (75°C). This ensures the chicken is safe to eat and juicy. After grilling, let the chicken rest for about 5 minutes. This helps keep it moist. Enjoy your meal! You can find the Full Recipe [here]. For the best taste, marinate your chicken for at least one hour. If you can, let it sit overnight. This gives the flavors time to blend. When grilling, make sure your grill is hot before placing the chicken on it. This helps the chicken cook evenly and gives nice grill marks. After you grill the chicken, let it rest for about five minutes. This step is key. Resting allows the juices to stay inside the chicken. If you skip this, your chicken may dry out. Cover the chicken loosely with foil to keep it warm without steaming. When serving, place the chicken on a nice platter. You can drizzle a bit of olive oil on top for shine. Add some lemon wedges and fresh herbs around the chicken. This makes the dish look fresh and tasty. For a fun twist, serve with a side of colorful veggies for a vibrant meal. For the complete cooking process, check out the Full Recipe. {{image_4}} You can make lemon herb grilled chicken in different ways. - Oven-baked lemon herb chicken: Preheat your oven to 400°F (200°C). Place the marinated chicken on a baking sheet. Bake for about 25-30 minutes or until the chicken reaches 165°F (75°C). This method keeps the chicken juicy and tender. - Air fryer lemon herb chicken: Preheat the air fryer to 375°F (190°C). Place the marinated chicken in the basket. Cook for about 18-20 minutes, flipping halfway. This method gives you a crispy outside while keeping the inside moist. You can tweak the flavor easily. - Adding spices: Try adding cumin or paprika to the marinade. These spices add warmth and depth to the dish. - Using different herbs: Swap out rosemary and thyme for basil or oregano. Each herb brings a unique taste to the chicken, making it your own. Pair your chicken with tasty sides. - Complementary side dishes: Serve with grilled vegetables, rice, or a fresh green salad. These sides balance the meal and add color. - Integrating into salads or wraps: Slice the grilled chicken and add it to salads or wraps. This makes for a quick lunch or dinner, full of flavor. For more details, check out the Full Recipe. After you enjoy your lemon herb grilled chicken, store the leftovers right. Use an airtight container to keep them fresh. This helps avoid any unwanted odors in your fridge. For best taste, eat the leftovers within 3 to 4 days. Always let the chicken cool before sealing it up. You can freeze grilled chicken if you want to save it for later. Wrap each piece in plastic wrap, then place it in a freezer bag. This keeps the chicken from getting freezer burn. It’s best to eat frozen chicken within 3 months. To thaw, move it to the fridge for a night. When you are ready to eat, reheat it gently on the stove or in the oven. To avoid dryness when reheating, do not use high heat. Instead, warm it slowly over low heat. Adding a splash of broth or water helps keep it juicy. You can also use the leftovers in salads or wraps. This way, you enjoy the flavors in a new dish. I recommend marinating lemon herb grilled chicken for at least 1 hour. For the best taste, let it sit overnight. This time allows the chicken to soak up the lemon and herb flavors. The longer you marinate, the more flavorful your chicken will be. Yes, you can! This recipe works well with other meats. Try using turkey, pork, or even fish. Each meat brings its own flavor. Just adjust the cooking time as needed. For instance, fish usually cooks faster than chicken. Pair lemon herb grilled chicken with fresh sides. Great options include: - Roasted vegetables - A light salad with vinaigrette - Quinoa or rice - Grilled corn on the cob These sides enhance the vibrant flavors of the chicken and create a well-rounded meal. Enjoy your feast! In this article, we covered key ingredients for lemon herb grilled chicken, including chicken breasts, lemon, and fresh herbs. I explained how to make the marinade and shared grilling tips for the best flavor. Don’t forget to rest your chicken to keep it moist. Try variations for cooking or seasoning to suit your taste. Whether you grill, bake, or fry, this dish is sure to please. Enjoy your cooking and the great flavors that come with it!

Lemon Herb Grilled Chicken Fresh and Tasty Recipe

Looking to elevate your dinner game? This Lemon Herb Grilled Chicken recipe is fresh, tasty, and easy to make. With

Garlic Butter Shrimp Pasta is a simple yet tasty meal. It takes about 25 minutes to make. This dish serves four people. You can find the full recipe below to guide you. To make this dish, you need a few key ingredients: - 8 oz spaghetti or linguine - 1 lb large shrimp, peeled and deveined - 4 cloves garlic, finely minced - 1/2 cup unsalted butter - 1/4 teaspoon red pepper flakes (optional) - 1/2 cup chicken broth or seafood broth - 1 tablespoon fresh lemon juice - 1/4 cup fresh parsley, finely chopped - Salt and pepper, to taste - Grated Parmesan cheese, for serving These ingredients create a rich and flavorful pasta that shines. The large shrimp bring a sweet taste, while garlic adds depth. Butter forms a creamy base for the sauce. You can add a few optional ingredients to amp up the flavor: - Fresh herbs like basil or thyme - Cherry tomatoes for a juicy burst - A splash of white wine for extra richness These extras can change the taste and make your dish unique. Feel free to experiment and find what you like best! Start by bringing a large pot of salted water to a boil. Use about 4 quarts of water for 8 ounces of pasta. Add the spaghetti or linguine and cook it until it is just al dente. This usually takes about 8 to 10 minutes. Make sure to check the package for exact times. Once cooked, drain the pasta but save about 1/2 cup of the pasta water. This water will help your sauce later. In a large skillet, melt 1/2 cup of unsalted butter over medium heat. Once it's melted, add 4 cloves of finely minced garlic. If you like a little heat, toss in 1/4 teaspoon of red pepper flakes. Stir everything for about 1 minute. You want the garlic to smell great but not turn brown. Then, add 1 pound of peeled and deveined shrimp to the skillet. Season the shrimp with salt and pepper. Cook them for about 2 to 3 minutes on each side. They should turn pink and opaque. Once they are cooked, take them out of the skillet and set them aside. In the same skillet, pour in 1/2 cup of chicken broth and 1 tablespoon of fresh lemon juice. Bring this mix to a gentle simmer. Scrape any tasty bits from the skillet. Let it cook for about 2 to 3 minutes. This helps the flavors blend well. Now, add the drained pasta to the skillet. Toss it well in the garlic butter sauce. If the pasta looks dry, add some of the reserved pasta water until it’s creamy. Return the shrimp to the skillet and mix everything gently. Finally, stir in 1/4 cup of finely chopped parsley for a fresh touch. For the full recipe, check out [Full Recipe]. To make your garlic butter shrimp pasta truly shine, focus on fresh ingredients. Fresh shrimp adds a sweet taste. Fresh garlic gives a strong, bold flavor. Use high-quality pasta for the best texture. Choose spaghetti or linguine; both work well. A good rule is to cook pasta al dente. This keeps it firm and helps it hold the sauce better. Overcooked shrimp can become rubbery and tough. To avoid this, cook them just until they turn pink. This usually takes about 2-3 minutes per side. Remove them from heat as soon as they are opaque. If you’re unsure, use a timer. Timing is key for perfectly cooked shrimp. Mistakes happen in the kitchen. If your pasta seems dry, add a little reserved pasta water. This helps loosen the dish without losing flavor. If you over-salt your sauce, add a bit of sugar. This can balance the saltiness. For a lack of flavor, fresh herbs or lemon juice can brighten the dish. Don’t hesitate to adjust and taste as you go. Cooking should be fun and creative! For the full recipe, check out the [Full Recipe]. {{image_4}} To spice things up, you can add more heat. Use more red pepper flakes or fresh chili peppers. This change gives a bold kick. You can also try hot sauce for an even stronger flavor. This variation works well with the garlic butter sauce. It adds depth and excitement to your meal. If you enjoy creamy pasta, this variation is for you. Add heavy cream or cream cheese to the garlic butter sauce. This makes the dish rich and smooth. You can also use a splash of milk for a lighter option. Pair it with a sprinkle of grated cheese for extra flavor. This creamy version is comforting and filling. You can create a vegetarian version too. Replace shrimp with sautéed mushrooms or zucchini. Cook them in the same garlic butter sauce. This keeps the dish flavorful and hearty. You can add spinach or cherry tomatoes for freshness. This adaptation shows that everyone can enjoy garlic butter pasta! To store leftover garlic butter shrimp pasta, let it cool first. Place it in an airtight container. Make sure to seal the container well to keep out air. Store it in the fridge for up to three days. If you need to keep it longer, consider freezing it. When you reheat garlic butter shrimp pasta, do it slowly. Use a pan on low heat. Add a splash of chicken broth or water to keep it moist. Stir gently until heated through. You can also use the microwave. Heat in short bursts, stirring in between. This way, the pasta stays tender. If you want to freeze your garlic butter shrimp pasta, portion it first. Use freezer-safe bags or containers. Remove as much air as possible before sealing. Label the bag with the date. You can freeze it for up to three months. When you’re ready to eat, thaw it in the fridge overnight. Reheat it using the methods above for the best taste. For the full recipe, check out the detailed steps! Yes, you can use frozen shrimp. Just thaw them first. Place the shrimp in cold water for about 15 minutes. This helps them defrost safely. Once thawed, pat them dry before cooking. This prevents extra water from making the dish soggy. If you want a butter substitute, try olive oil or ghee. Both give a nice flavor. Coconut oil works too, but it adds a different taste. You can also use vegan butter for a dairy-free option. Adjust the amount based on your taste preference. To reduce saltiness, use low-sodium broth. You can also skip adding extra salt. If you find it too salty after cooking, add more pasta. This will help balance the flavors. Adding more parsley or lemon juice can also brighten the dish without more salt. Spaghetti and linguine are great choices. They catch the sauce well. You can also try fettuccine or tagliatelle for a thicker bite. Use any pasta you enjoy. The key is to cook it al dente for the best texture. Check the package for cooking times to avoid overcooking. This blog post covered all you need for Garlic Butter Shrimp Pasta. We looked at key ingredients and exciting options to enhance the flavor. I shared step-by-step instructions for cooking and tips to avoid mistakes. You can even explore tasty variations, from spicy to creamy. Plus, there’s great info on storing leftovers. Remember, this dish is easy to customize. Enjoy making it your own!

Garlic Butter Shrimp Pasta Tasty and Quick Dish

Looking for a quick and tasty meal? Garlic Butter Shrimp Pasta has you covered! This dish is not only simple

To make your No-Bake Peach Icebox Cake, gather these fresh ingredients: - 3 ripe peaches, thinly sliced - 1 cup heavy whipping cream - 1/2 cup powdered sugar - 1 teaspoon vanilla extract - 1 1/2 cups graham cracker crumbs - 1 cup cream cheese, softened - 1 tablespoon fresh lemon juice - 2 tablespoons honey - Fresh mint leaves for garnish Each ingredient plays a key role in creating the layers of flavor and texture. The peaches provide a juicy sweetness. The heavy cream adds richness, while the powdered sugar balances the flavors. Vanilla extract enhances the taste, and graham cracker crumbs give a nice crunch. Cream cheese adds a creamy base, while lemon juice brightens the mix. Honey adds natural sweetness, and mint leaves are perfect for a fresh touch. Using ripe peaches is important. They should be sweet and fragrant to enhance the overall flavor. Make sure to soften the cream cheese before mixing. This helps create a smooth filling. For the best results, measure each ingredient carefully. This ensures a perfect blend of flavors. If you want to try something different, check out the Full Recipe for additional tips and ideas. Enjoy your cooking! To start, grab a large mixing bowl. Use an electric mixer to whip the heavy cream. Set it on medium-high speed. Whip until soft peaks start to form. Slowly sprinkle in the powdered sugar. Add the vanilla extract next. Keep whipping until stiff peaks form. This makes a light and fluffy cream. In another bowl, mix the softened cream cheese. Add the fresh lemon juice and honey. Stir this mix until it is smooth. You want to avoid lumps. Next, gently fold in the whipped cream. Use a spatula, and be careful not to deflate it. This mix should be light and airy. Now, take a rectangular baking dish. Start with a thin layer of the cream mix at the bottom. Then, add a layer of graham cracker crumbs on top. Next, layer the sliced peaches evenly. Repeat this: cream mix, graham cracker crumbs, and peaches. Keep going until all ingredients are used. Make sure the top layer is the cream mix. Cover the dish tightly with plastic wrap. Place the cake in the fridge. Let it chill for at least 4 hours. For the best taste, chill it overnight. This time helps the graham crackers soak up moisture. It will make the cake soft and tasty. To make your No-Bake Peach Icebox Cake look great, use fresh mint leaves. Place them on top for color and aroma. You can also add extra peach slices around the cake for a bright touch. Serve it on a nice platter to impress your guests. This helps create a festive vibe for summer gatherings. One common mistake is overwhipping the cream. This can make it grainy and less fluffy. Watch for soft peaks, then stop. Another mistake is not letting the graham crackers soften enough. This can lead to a crunchy texture instead of the desired creamy one. Make sure to chill it long enough to let the layers blend well. The temperature of your ingredients matters. Use cold cream for better whipping. Room temperature cream cheese blends smoothly into the mixture. If you want to change the sweetness, use honey or maple syrup instead of powdered sugar. You can also add a splash of almond extract for extra flavor. This can make your cake unique and delicious. For the full recipe, check out the detailed instructions! {{image_4}} You can use many fruits in this icebox cake. Berries, like strawberries or blueberries, add a nice touch. You can also try mangoes for a tropical vibe. Seasonal fruits work great too. Think apples in fall or citrus fruits in winter. Each fruit brings its own flavor and texture. Mix and match to find your favorite combos! Adding extracts can take your cake to the next level. Almond or coconut extracts give a unique kick. Just a few drops can change the whole taste. You can also add spices like cinnamon or nutmeg for warmth. These spices blend well with peaches, creating a cozy feel. They add depth without overwhelming the dish. Want a lighter version? Swap cream cheese for yogurt. Greek yogurt works well and adds protein. You can also use alternative crackers for a gluten-free option. Look for gluten-free graham crackers or make your own. These swaps keep the cake tasty while making it healthier. Don't be afraid to experiment with what you have. For the full recipe, check out the details above! To keep your No-Bake Peach Icebox Cake fresh, cover it tightly with plastic wrap. Store it in the refrigerator. This will help prevent the cake from drying out. You can enjoy it for up to four days. The flavors will continue to meld, making each bite even better. You can freeze the assembled cake for later enjoyment. First, wrap it well in plastic wrap and then in aluminum foil. This prevents freezer burn. The cake can stay in the freezer for up to three months. When you're ready to enjoy it, move the cake to the fridge to thaw overnight. Avoid thawing it at room temperature. This will help keep the texture just right. After thawing, serve it cold for the best taste. Yes, you can use frozen peaches. However, the texture may change. Frozen peaches can be softer once thawed. This can affect the layers in your cake. Fresh peaches give a nice crunch and bright flavor. If you use frozen ones, let them thaw. Drain any excess water to keep the cake from getting soggy. You can store the icebox cake in the fridge for up to 5 days. Make sure to cover it tightly with plastic wrap. This keeps it fresh and prevents it from absorbing other smells in the fridge. If you want to keep it longer, you can freeze it. It can last in the freezer for up to 2 months. Just remember to thaw it in the fridge before serving. Yes, you can double or halve the recipe. To double it, simply double all the ingredients. Make sure to use a larger dish to fit everything. If you want to halve it, use a smaller dish and cut the amounts in half. This way, you can make the perfect size for your gathering or craving. This no-bake peach icebox cake combines fresh peaches, whipped cream, and cream cheese for a tasty treat. We covered the ingredients, step-by-step instructions, and tips to make it perfect. Remember, chilling the cake is key for the best flavor and texture. Feel free to get creative with fruit and flavor swaps. Don't hesitate to try different presentations to impress your guests. This dessert is simple to make and enjoyable to share. Enjoy every bite of your homemade peach delight!

No-Bake Peach Icebox Cake Delightful Summer Dessert

Looking for a cool dessert to beat the summer heat? Try my No-Bake Peach Icebox Cake! This easy recipe combines

- 2 medium yellow squashes, sliced into half-moons - 1 tablespoon coconut oil - 1 small onion, finely chopped - 2 cloves garlic, minced - 1 teaspoon freshly grated ginger - 1 medium tomato, diced - 1 can (400ml) creamy coconut milk - 1 teaspoon curry powder - 1/2 teaspoon ground turmeric - 1/2 teaspoon ground cumin - Sea salt, to taste - Fresh cilantro, chopped, for garnish Selecting fresh yellow squash is key for this dish. Always look for firm, unblemished squashes. Choose medium-sized squashes to get the best flavor. They should feel heavy for their size. This tells you they are full of moisture. If you want to add more to your curry, think about optional add-ins. Bell peppers or spinach can boost nutrition and color. Lentils also work well for a protein boost. They make the curry heartier and more filling. For the full recipe, see the details above. It will guide you to create a delicious and comforting meal. - Heat coconut oil in a skillet over medium heat. - Sauté onion until translucent. First, you want to heat the coconut oil in a large skillet. The oil should shimmer but not smoke. It usually takes about one minute to heat. Next, add the finely chopped onion. Sauté it for about five minutes. You want the onion to become soft and translucent. This step builds a nice base flavor. - Add garlic, ginger, and tomato, cooking until soft. - Stir in yellow squash and spices, then add coconut milk. Once the onion is ready, add minced garlic and grated ginger. Stir for about one minute until it smells amazing. Then, add the diced tomato. Cook it for about three to four minutes. You want the tomato to soften and break down. Now, it’s time to add the sliced yellow squash. Make sure to mix it well with the onion and tomato. Next, sprinkle in the curry powder, turmeric, and cumin. Stir everything for about two minutes. This helps the spices bloom. Finally, pour in the creamy coconut milk. Stir gently and bring it to a simmer. - Cover and let simmer for 10-15 minutes. - Check for tenderness of the squash. Now, lower the heat and cover the skillet. Let the curry simmer for about 10 to 15 minutes. This allows the flavors to meld beautifully. Check the squash for tenderness. You want it to be soft but still have a slight bite. If it needs more time, let it simmer a bit longer. Once perfect, season with sea salt to taste before serving. You can find the full recipe for this dish [Full Recipe]. - Overcooking the squash for mushy texture: Squash cooks quickly. Keep an eye on it. Aim for a slight bite, or "al dente," to keep it firm and tasty. - Not adjusting spices to taste: Your palate is unique. Start with the recipe, then taste. Add more spices as you like. Trust your taste buds. - Best methods for sautéing onions and garlic: Heat your coconut oil first. Add onions and let them soften. This step builds the base flavor. After that, add garlic for a quick cook. This brings out its aroma and flavor. - Importance of gentle simmering for flavor development: Simmering brings all the flavors together. Keep the heat low and let it bubble softly. This way, the spices blend well with the squash and coconut milk. - How to plate the curry beautifully: Use a wide bowl or plate. Serve the curry in the center, allowing space around it. This gives it room to breathe and look inviting. - Suggestions for garnishing with cilantro: Fresh cilantro adds color and a pop of flavor. Chop it finely and sprinkle it on top just before serving. This brightens the dish instantly. Now you are ready to make a delightful yellow squash curry with these tips and tricks in mind. For the complete process, refer to the Full Recipe. {{image_4}} You can change the flavor of your yellow squash curry by using other vegetables. Zucchini works well, adding a nice texture. Butternut squash can give a sweet twist. If you enjoy leafy greens, add spinach or kale for more nutrition. Instead of coconut milk, you can use vegetable broth. This change makes the dish lighter. The broth adds a nice savory taste without the creaminess. If you like a kick, try adding green chilies. Slice them and toss them in early while cooking. Red pepper flakes also work well. Just sprinkle them in when you add the spices. Adjust the heat to your liking. To keep the dish vegan, check that all your ingredients are plant-based. Most of the ingredients in this recipe are vegan-friendly. For gluten-free, ensure your spices and broth are certified gluten-free. This way, everyone can enjoy your yellow squash curry without worry. For the full recipe, you can refer to the [Full Recipe]. After you make Simple Yellow Squash Curry, let it cool down. Place leftovers in a clean, airtight container. This keeps the flavors fresh. Store the container in your fridge. It is best to eat the curry within three to five days. When you want to reheat, use a pot on low heat. Stir often to warm it evenly. You can also use a microwave. Heat it in short bursts, stirring in between. To freeze the curry, let it cool completely. Portion it into freezer-safe containers. Leave some space at the top for expansion. Seal the containers tightly and label them with the date. You can freeze it for up to three months. When you are ready to eat, thaw it overnight in your fridge. Reheat it on the stove or in the microwave. In the fridge, your yellow squash curry stays fresh for about three to five days. If you notice any off smells or colors, it’s best to throw it away. Always trust your senses when it comes to food safety. For the best taste, consume the curry sooner rather than later. By following these steps, you ensure your curry remains flavorful and safe to enjoy. For the full recipe, check out the delightful Yellow Squash Curry. Yes, you can use other squashes. Zucchini is a great choice. Its mild taste pairs well with the spices. Butternut squash also works well, adding sweetness. You can even mix different squashes for fun. Just remember to cut them into similar sizes for even cooking. To add more heat, try fresh chilies. You can slice green or red chilies and add them when cooking the onion. Another option is to use red pepper flakes. Start with a small amount and taste as you go. Remember, you can always add more, but it’s hard to take it out! Absolutely! This curry is ideal for meal prep. You can make it ahead and store it in the fridge for up to four days. Just let it cool before you store it. For longer storage, freeze it in airtight containers. It will keep well for about three months. This curry pairs well with rice or quinoa. You can also serve it with naan or flatbreads. A side salad with fresh greens adds a nice crunch. If you want more protein, add chickpeas or lentils. Each option complements the curry's flavors beautifully. For the full recipe, visit the link above. In this blog post, we explored a simple and tasty yellow squash curry. We covered ingredients, cooking steps, and storage tips. Fresh yellow squash adds great flavor, while coconut milk makes it creamy. Remember to avoid overcooking the squash and adjust spices to your liking. You can also customize this dish with veggies or spices. Enjoy making this recipe for an easy meal! You'll love how it warms your kitchen and your stomach.

Simple Yellow Squash Curry Flavorful and Comforting Dish

Looking for a warm, comforting dish that’s easy to make? This Simple Yellow Squash Curry delivers rich flavors and vibrant

- 4 medium yellow squashes, sliced into ¼-inch rounds - 1 tablespoon extra virgin olive oil - 2 cloves garlic, minced - 1 teaspoon fresh thyme leaves (or ½ teaspoon dried thyme) - ½ teaspoon red pepper flakes (optional, for a hint of spice) - Sea salt and freshly ground black pepper to taste - ¼ cup finely grated Parmesan cheese (optional, for serving) - Fresh parsley, chopped, for garnish - Large skillet - Cutting board - Knife - Measuring spoons - Spatula or tongs Yellow squash shines in this dish. It has a mild and sweet flavor. You can find it easily at the store or farmers' market. I love using fresh ingredients. They add to the taste and nutrition. Olive oil is key for cooking. It adds a rich flavor and helps the squash cook evenly. Garlic brings a warm aroma. Fresh thyme gives a nice herbal note. Red pepper flakes add a little kick, but you can skip them if you want less heat. If you enjoy cheese, sprinkle some Parmesan on top. It melts nicely and adds creaminess. Fresh parsley makes the dish look bright and fresh. This mix of flavors makes every bite a treat. For tools, a large skillet is best. It allows the squash to cook evenly. A good knife helps you slice the squash easily. A cutting board protects your counters. Measuring spoons ensure you get the right amount of each ingredient. A spatula or tongs helps you flip and serve the squash without a mess. For the full recipe, check out the link provided. How to slice yellow squash To start, grab your yellow squashes. Use a sharp knife to cut them into ¼-inch rounds. This size helps them cook evenly. Make sure to slice them all the same thickness. Tips for preparing garlic For garlic, take two cloves and peel them. Use a knife to mince the garlic finely. This step releases its strong flavor. If you don’t like strong garlic, use less or roast it first. Heating the olive oil In a large skillet, pour 1 tablespoon of extra virgin olive oil. Heat it over medium heat for about a minute. Wait until the oil is hot, but not smoking. This helps the squash cook just right. Sautéing garlic Now, add the minced garlic to the hot oil. Stir it quickly for about 30 seconds. You want it fragrant but not brown. If it gets brown, it will taste bitter. Adding and seasoning the squash Next, toss the sliced yellow squash into the skillet. Mix it well with the garlic oil. Then, season with 1 teaspoon of fresh thyme, a pinch of sea salt, and black pepper. If you like a little spice, add ½ teaspoon of red pepper flakes. Stir everything together. Optional Parmesan cheese Once the squash is tender, you can sprinkle ¼ cup of finely grated Parmesan cheese on top. This adds a rich flavor. Let it melt slightly from the heat. Garnishing with parsley Finally, chop some fresh parsley and sprinkle it over the dish. This adds color and freshness. It makes your Sizzling Summer Yellow Squash Delight look beautiful. Now, you can enjoy it with your favorite meal. For the full recipe, refer to the above instructions. To get the best texture in your sautéed yellow squash, follow these tips: - Cut squash evenly: Slice the squash into ¼-inch rounds. This helps them cook at the same rate. - Heat oil properly: Warm the olive oil before adding the garlic. This enhances the flavor. - Don’t overcrowd the pan: Cook in batches if needed. Too many pieces at once can steam the squash instead of sautéing it. Common mistakes to avoid: - Burning garlic: Sauté garlic for only 30 seconds. Burnt garlic can ruin the dish. - Overcooking squash: Aim for tender but crisp squash. This keeps the flavor bright and fresh. To make your sautéed yellow squash even better, try these herbs and spices: - Fresh basil: Adds a sweet, aromatic taste. - Oregano: Offers a warm, earthy flavor. - Chili powder: For a smoky kick. You can also combine yellow squash with other veggies. Consider adding: - Bell peppers: They bring color and sweetness. - Zucchini: This pairs well and cooks similarly. - Onions: They add depth and sweetness. Pair your sautéed yellow squash with a variety of main dishes. Here are some ideas: - Grilled chicken: The squash complements the smoky flavor. - Fish tacos: Adds a fresh touch to the meal. - Pasta: Toss it with pasta for a light, veggie dish. For presentation, serve in a shallow bowl. This shows off the vibrant color of the squash. Adding a lemon wedge on the side gives a nice zesty finish. You can find the Full Recipe for detailed instructions and more tips. {{image_4}} You can switch yellow squash for zucchini. This change offers a similar taste and texture. Zucchini works well with the same method. You can also add seasonal herbs like basil or dill. These herbs can enhance the flavor of the dish. Fresh herbs add brightness and a pop of color. Try adding different cheeses for a unique twist. Feta cheese adds a tangy flavor, while goat cheese gives a creamy texture. You can also explore spice variations. Cajun spices add a kick, while Italian herbs can give a more robust flavor. Experimenting with spices can make each batch special. If you want to make this dish vegan, skip the cheese. Use olive oil and herbs for flavor. You can also make it gluten-free easily. Just ensure that any added spices or sauces are gluten-free. This recipe is flexible and can fit many dietary needs. For more details and a complete guide, check out the Full Recipe. To store sautéed yellow squash, cool it first at room temperature. Place it in an airtight container. This keeps moisture out and flavor in. You can store it in the fridge for up to three days. For the best taste, use it within two days. When you reheat sautéed squash, the goal is to keep it tasty and crisp. I recommend using a skillet over medium heat. Add a little oil to help revive the flavors. Stir it gently until it's warm. Avoid the microwave if you can. It often makes the squash soggy. If you want to freeze sautéed squash, let it cool completely. Spread it out on a baking sheet in one layer. Freeze until solid, then transfer it to a freezer bag. This helps keep its shape. When you thaw it, do so in the fridge overnight. Reheat in a skillet to keep it firm and delicious. To sauté yellow squash, use a large skillet over medium heat. Start with warm olive oil. Add minced garlic to the pan first. This gives the dish a great base flavor. Then, add sliced yellow squash and toss well. Stir occasionally for even cooking. Aim for about five to seven minutes. You want the squash tender but still a bit firm. Season with salt and pepper before serving. Look for a few signs to know when yellow squash is cooked. First, the color should brighten to a vibrant yellow. Next, the squash should feel tender when pierced with a fork. It should not be mushy but still have a slight crunch. If you see a little browning on the edges, that means it’s cooked well. Yes, you can use frozen squash, but there are some best practices. Thaw the squash before cooking to avoid excess water. Drain any liquid after thawing. You may need to sauté longer since frozen squash is often softer. Adjust the seasoning as needed since frozen vegetables can lose some flavor. There are many great options to add flavor to sautéed yellow squash. Try adding fresh herbs like basil, oregano, or dill. You can also mix in a pinch of smoked paprika for a warm taste. For a kick, add some red pepper flakes. A squeeze of lemon juice at the end can brighten the dish. To get a crispy texture on sautéed yellow squash, follow these key factors. First, make sure your skillet is hot before adding the squash. Avoid overcrowding the pan to let steam escape. Stir occasionally but not too often, letting the squash sit for a bit. Finally, cook it for just the right amount of time to keep that crunch. Sautéed yellow squash is simple and tasty. We covered key ingredients, tools, and steps. Use fresh squash, garlic, and spices for great flavor. Don’t forget to garnish with parsley or cheese for fun. With the tips and variations, you can change your dish to fit any season. Proper storage keeps leftovers fresh. Experimenting will help you master this dish. Enjoy your cooking and start creating delicious meals today!

Easy Sauteed Yellow Squash Flavorful and Quick Recipe

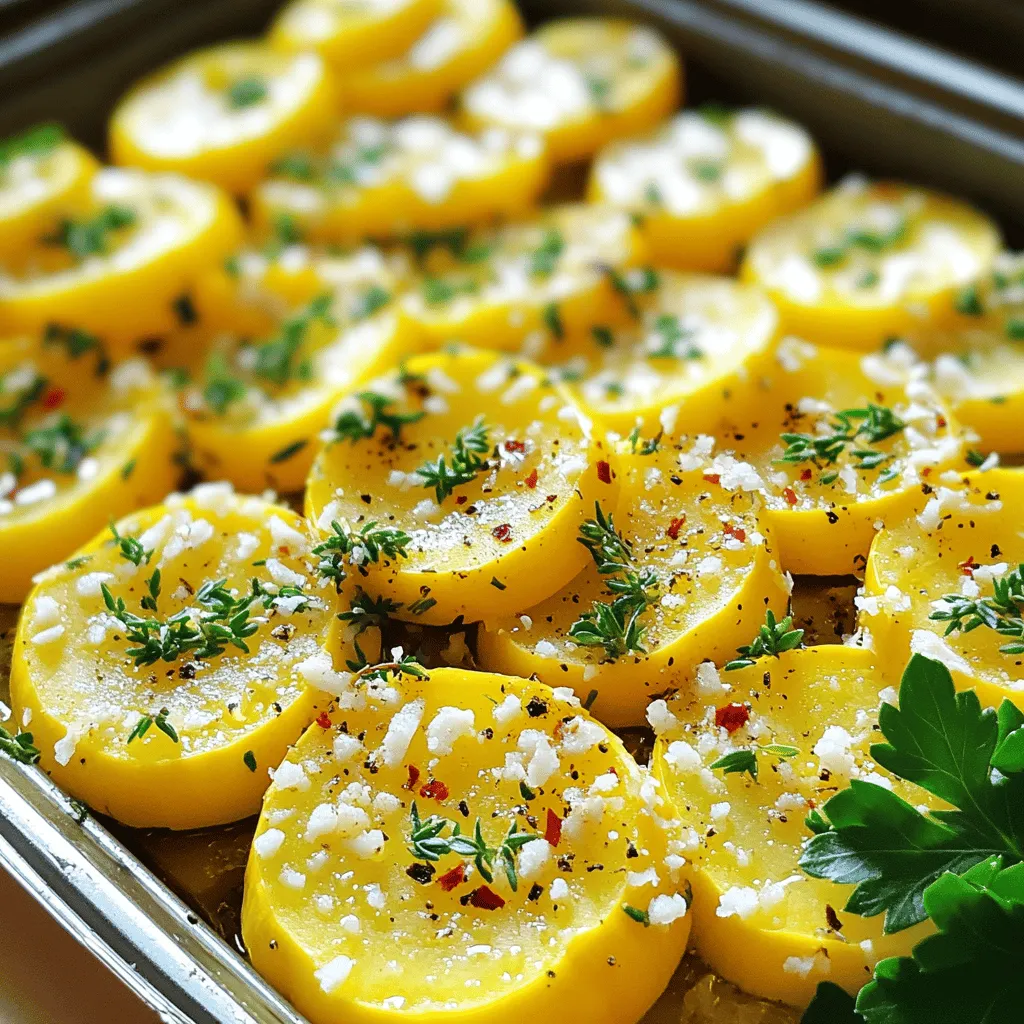
Do you want a quick, delicious side dish? Look no further than sautéed yellow squash! This easy recipe combines fresh

- 3 medium yellow summer squashes - 3 medium zucchinis - 1 medium onion - 1 cup cherry tomatoes - 1 cup corn kernels - 1 cup cheddar cheese, shredded - 1 cup whole wheat breadcrumbs - 2 cloves garlic - 1 teaspoon dried oregano - 1 teaspoon dried basil - ½ teaspoon salt - ¼ teaspoon black pepper - 2 tablespoons olive oil - 1 tablespoon balsamic vinegar In this summer squash casserole, fresh produce plays a key role. The yellow summer squashes and zucchinis bring a light, crisp flavor that shines through. I like to slice the squashes thinly to ensure even cooking. You can also use a mandoline for this task. The medium onion adds sweetness, which balances the dish. Cherry tomatoes and corn kernels bring bursts of color and sweetness. They make the casserole more inviting and flavorful. Next comes the cheese and breadcrumbs. I love using cheddar cheese for its rich taste. It melts beautifully and adds a creamy texture. Whole wheat breadcrumbs give a nice crunch on top. They soak up some of the juices from the veggies, creating a tasty topping. Finally, seasonings and oils like garlic, oregano, and basil make this dish pop. They add depth and warmth. Olive oil gives a nice richness and helps cook the veggies evenly. Balsamic vinegar adds a hint of tang that rounds out the flavors. This combination of ingredients makes the casserole not only delicious but also healthy. For the full recipe, check out the details in the main article. First, preheat your oven to 375°F (190°C). This step ensures even cooking. While the oven heats up, slice and dice your fresh ingredients. You need three medium yellow summer squashes and three medium zucchinis. Cut them into thin rounds. Next, finely dice one medium onion to add depth to the flavor. In a large skillet, heat two tablespoons of olive oil over medium heat. Once the oil is hot, add the diced onion and minced garlic. Sauté them until the onion looks clear, which should take about three to four minutes. Then, add your sliced summer squash and zucchini. Stir gently for about five to seven minutes. You want the vegetables to soften slightly but not lose their shape. Now, it's time to add the fun part! Stir in one cup of corn kernels and one cup of halved cherry tomatoes. Season this mix with one teaspoon of dried oregano, one teaspoon of dried basil, half a teaspoon of salt, and a quarter teaspoon of black pepper. Let this cook for another two to three minutes. This helps the flavors blend perfectly. Grab a baking dish and layer half of the vegetable mix at the bottom. On top of that, sprinkle half of one cup of shredded cheddar cheese evenly. Repeat this with the remaining vegetable mix and the rest of the cheese. In a small bowl, mix one cup of whole wheat breadcrumbs with one tablespoon of balsamic vinegar. Sprinkle this breadcrumb mix over the top layer of cheese. Cover the baking dish tightly with aluminum foil. Place it in the preheated oven and bake for 25 minutes. After that, carefully remove the foil and bake again for another 10 to 15 minutes. The casserole should be golden brown on top. Once done, take it out of the oven and let it cool for a few minutes before serving. Enjoy your healthy summer squash casserole! For the full recipe, check out the details above. Using fresh seasonal vegetables is key. They taste better and have more nutrients. I love selecting bright, firm squashes and ripe tomatoes. This makes a big difference in flavor. Layering techniques matter too. Start with half the vegetable mix in your baking dish. Then, add half of the cheese. Repeat this process. This way, every bite is full of goodness. For squash, the ideal sauté time is about 5-7 minutes. This softens the veggies without losing crunch. Stir gently so they cook evenly. To ensure crispy breadcrumbs, mix them well with balsamic vinegar. This helps them brown nicely in the oven. Sprinkle them on top just before baking. When serving, I like to use the baking dish. It looks rustic and inviting. You can scoop individual servings onto plates too. Garnish with fresh basil leaves for a bright touch. For side dishes, consider a light salad or some crusty bread. Both complement the casserole well. Explore options that balance flavors and add variety. {{image_4}} You can change the cheese in this dish for different tastes. Try mozzarella for creaminess or feta for a tangy kick. If you want a dairy-free option, use vegan cheese. This way, you can enjoy the casserole while sticking to your diet. Instead of regular breadcrumbs, you can use gluten-free ones. This swap makes the dish friendly for those with gluten sensitivities. You can also crush gluten-free crackers or use ground almonds for a nice crunch. For a vegan version, skip the cheese and use plant-based alternatives. You can also replace the butter with olive oil or a vegan butter. This makes the casserole just as rich and tasty. If you want a low-carb meal, try using cauliflower instead of squash. Cauliflower has a similar texture but fewer carbs. You can also skip the breadcrumbs to cut down on carbs even more. Adding spices can give your casserole a zestier flavor. Try a pinch of cayenne for heat or a sprinkle of smoked paprika for depth. These spices can really elevate the dish. You can also mix in proteins like diced chicken or canned beans. This adds heartiness and makes it more filling. Plus, it turns the dish into a complete meal. For the full recipe, check out the Wholesome Summer Squash Delight. To store leftovers, let the casserole cool first. Place it in an airtight container. This keeps the flavors fresh. You can store it in the fridge for up to 4 days. If you plan to eat it later, refrigerate as soon as possible. You can freeze the casserole for long-term storage. Cut it into portions and wrap each piece well. Use freezer-safe containers or heavy-duty foil. It lasts about 2-3 months in the freezer. When you're ready to eat, thaw it in the fridge overnight. Reheat it in the oven at 350°F (175°C) until hot. For meal prep, portion the casserole into single servings. This makes it easy to grab for lunch or dinner. Combine it with salads or proteins like grilled chicken. You can make a week’s worth of meals in one go! Yes, you can prepare this casserole ahead of time. Simply follow these steps: - Prep the ingredients: Slice the summer squash, zucchini, and onion. - Cook the mixture: Sauté the onion and garlic, then add the squash and zucchini. - Layer the casserole: Place the vegetable mix and cheese in the baking dish. - Cover and chill: Wrap it tightly with foil and store it in the fridge. When ready to bake, heat the oven to 375°F (190°C) and bake for about 30-35 minutes. Summer squash and zucchini are closely related but not the same. They share a mild flavor and soft skin. Here are their main points: - Shape: Zucchini is usually a dark green color and can be straight or curved. Summer squash is yellow and tends to be rounder. - Taste: Both have a similar mild taste that works in many dishes. - Uses: You can use them interchangeably in recipes, including this casserole. Yes, you can easily swap out cheddar cheese. Here are some options: - Mozzarella: It melts well and has a mild taste. - Parmesan: This adds a sharp flavor and nice crust. - Dairy-free cheese: Use brands like Daiya or follow your favorite recipe for homemade options. This casserole pairs well with many sides. Here are some ideas: - Grilled chicken: Adds protein and flavor. - Quinoa salad: A light and fresh option. - Steamed broccoli: Complements the casserole well. Watch for these signs to tell if your casserole is ready: - Golden brown top: The breadcrumb topping should be crispy and golden. - Bubbling edges: Look for bubbles around the sides of the dish. - Tender veggies: Check if the squash and zucchini are soft when pierced with a fork. For the full recipe, check out the details above! This blog post shared a delicious summer squash casserole recipe packed with fresh ingredients. I highlighted key steps from prepping the veggies to baking. Flavorful hints and storage tips were also provided to keep leftovers fresh. You can modify this dish with different cheeses or even make it vegan. Make this casserole your own, and enjoy healthy meals made easy. I hope you try it soon for a tasty addition to your menu!

Healthy Summer Squash Casserole Delicious and Simple

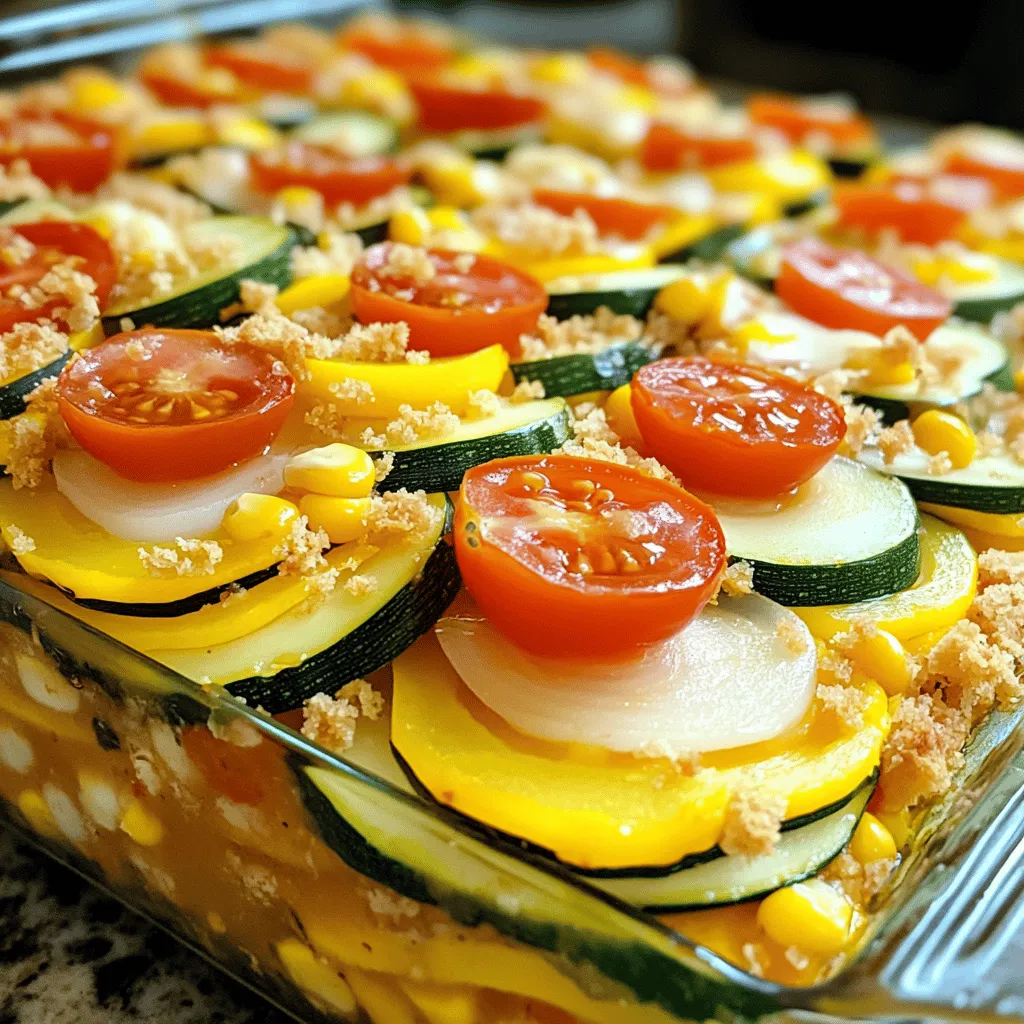
Are you ready to enjoy a dish that’s both healthy and bursting with flavor? This Healthy Summer Squash Casserole is

- 1 pound fresh okra, trimmed - 1 cup distilled white vinegar - 1 cup water - 2 tablespoons granulated sugar - 1 tablespoon kosher salt - 4 cloves garlic, peeled and smashed - 1 teaspoon mustard seeds - 1 teaspoon coriander seeds - 1 teaspoon red pepper flakes - 2 sprigs fresh dill - Prep Time: 15 minutes - Total Time: 40 minutes - Servings: 2 pint jars To make quick pickled okra, you need fresh ingredients. Start with one pound of fresh okra. Make sure the okra is trimmed but whole. This will help the flavor soak in better. You will also need a cup of distilled white vinegar and a cup of water. These liquids create the brine. Add two tablespoons of granulated sugar and one tablespoon of kosher salt to the brine. The sugar gives a slight sweetness, while the salt enhances the flavor. Don't skip the garlic! Use four cloves, peeled and smashed. The garlic adds a rich taste. You will also need mustard seeds, coriander seeds, and red pepper flakes. Each spice brings its unique flavor to the mix. Finally, grab two sprigs of fresh dill. Dill adds a fresh and earthy flavor that rounds out the pickles. You can make two pint jars with this recipe, which is perfect for sharing or enjoying over time. The prep time is just 15 minutes, and the total time is 40 minutes. You can dive into this flavorful experience with ease! For the full recipe, check out the Zesty Quick Pickled Okra 🥒. - Whisk together vinegar, water, sugar, and salt. - Heat until the mixture simmers. Start by grabbing a medium saucepan. Measure out 1 cup of distilled white vinegar, 1 cup of water, 2 tablespoons of granulated sugar, and 1 tablespoon of kosher salt. Now, whisk these ingredients together until they blend well. Put the saucepan on medium heat. Watch closely as the mixture heats. You want it to simmer, not boil. Stir continuously until the sugar and salt dissolve completely. This will take just a few minutes. Once done, take it off the heat and let it cool for about 10 minutes. - Trim tops and leave okra whole. - Radically cut down on bitterness. Next, let’s prep the okra. You’ll need 1 pound of fresh okra. Trim the tops off each pod, but keep the okra whole. Leaving them whole helps the flavor soak in better. It also cuts down on the bitterness that okra can sometimes have. This step is key for a tasty pickle! - Distribute spices in jars. - Pack okra and pour pickling liquid. - Seal and cool jars. Now, it’s time to pack everything into jars. Grab two clean pint-sized glass jars. Start by evenly dividing 4 smashed garlic cloves, 1 teaspoon of mustard seeds, 1 teaspoon of coriander seeds, and 1 teaspoon of red pepper flakes between the jars. Next, carefully pack the trimmed okra into the jars, standing them up for a nice look. Once you fill them, pour the warm pickling liquid over the okra. Make sure to cover them fully, but leave about half an inch of space at the top. Finally, seal the jars tightly with their lids and let them cool down to room temperature. This should take around 20-30 minutes. For the best flavor, let the okra sit in the fridge for at least 24 hours. But if you can wait, 3-5 days will give you even more flavor! Check out the Full Recipe for more details. To get the best flavor from your quick pickled okra, let it sit for at least 24 hours. This time allows the brine to soak into the okra. The longer you wait, the better they taste. For a deeper flavor, try to wait 3 to 5 days. This way, the spices will really shine and make each bite even more delicious. When serving pickled okra, think about how it looks. Place them in a nice dish or add them to a charcuterie board for color and flair. They can also be a fun addition to sandwiches, giving a nice crunch and tang. Toss them into salads for a zesty kick. The bright green color will make any plate pop and impress your guests. For more details, check out the Full Recipe for the perfect quick pickled okra! {{image_4}} You can spice up your pickled okra in fun ways. Adding jalapeños or other hot peppers gives a fiery kick. Slice the peppers and toss them into your jars before adding the okra. You can also adjust the red pepper flakes. Want more heat? Just add a bit more! Prefer it mild? Use less. Herbs can change the flavor of your pickled okra. Try using fresh thyme or oregano. These herbs add a nice twist. You can also swap out distilled white vinegar for apple cider vinegar. This swap adds a sweeter, tangy taste that surprises the palate. How sweet do you like your pickles? You can adjust the sugar levels to fit your taste. If you want sweeter okra, add more sugar. If you prefer savory, cut back. You can also experiment with spices like cumin or black pepper. These can bring out new flavors in your okra. For the full recipe, check out the Zesty Quick Pickled Okra. To keep your pickled okra fresh, store it in clean glass jars. Make sure to seal the jars tightly after filling them. Place the jars in the fridge right away. The pickled okra will stay good for about 2 to 3 weeks. Over time, the flavor will grow stronger, so enjoy them while fresh! You should not freeze pickled okra. Freezing can change its texture and make it mushy. The pickling brine does not freeze well either. If you want to save some, try to use it within the fridge's shelf life. If you must freeze it, pack it in airtight containers. When you're ready to eat, thaw it in the fridge overnight. Always check for spoilage before eating pickled okra. Look for any signs of mold or an off smell. If the okra feels slimy or has changed color, discard it. Safety is key! If you’re unsure, it’s best to throw it out. Remember to keep your pickles refrigerated and check them regularly for freshness. Pickling okra takes about 24 hours for basic flavor. However, for the best taste, wait 3 to 5 days. During this time, the okra absorbs the vinegar and spices. This makes it more flavorful and tangy. The longer you wait, the better the taste. You can use frozen okra, but it may change the texture. Freezing breaks down the cell walls. This can make the okra softer after pickling. If you want crunch, fresh okra is best. Frozen okra works in a pinch but may not be as crisp. Leftover pickling liquid is a treasure! Use it in salad dressings for extra flavor. You can also marinate meats or vegetables. It adds a pleasant tang to many dishes. Don't waste it; get creative with how you use it! Pickled okra has some health benefits. It is low in calories and high in fiber. The vinegar may help with digestion and blood sugar control. However, too much salt can be a concern. Enjoy it in moderation for a tasty, healthy treat! You can create delicious pickled okra at home using simple ingredients. We covered the best steps, from preparing the pickling liquid to storing your jars. Remember, letting the okra sit for a few days enhances its flavor. Feel free to experiment with spices and heat levels for a personal touch. Proper storage ensures freshness and safety. With these tips, you’ll enjoy a tasty treat that perks up any meal. Happy pickling!

Quick Pickled Okra Easy and Flavorful Recipe

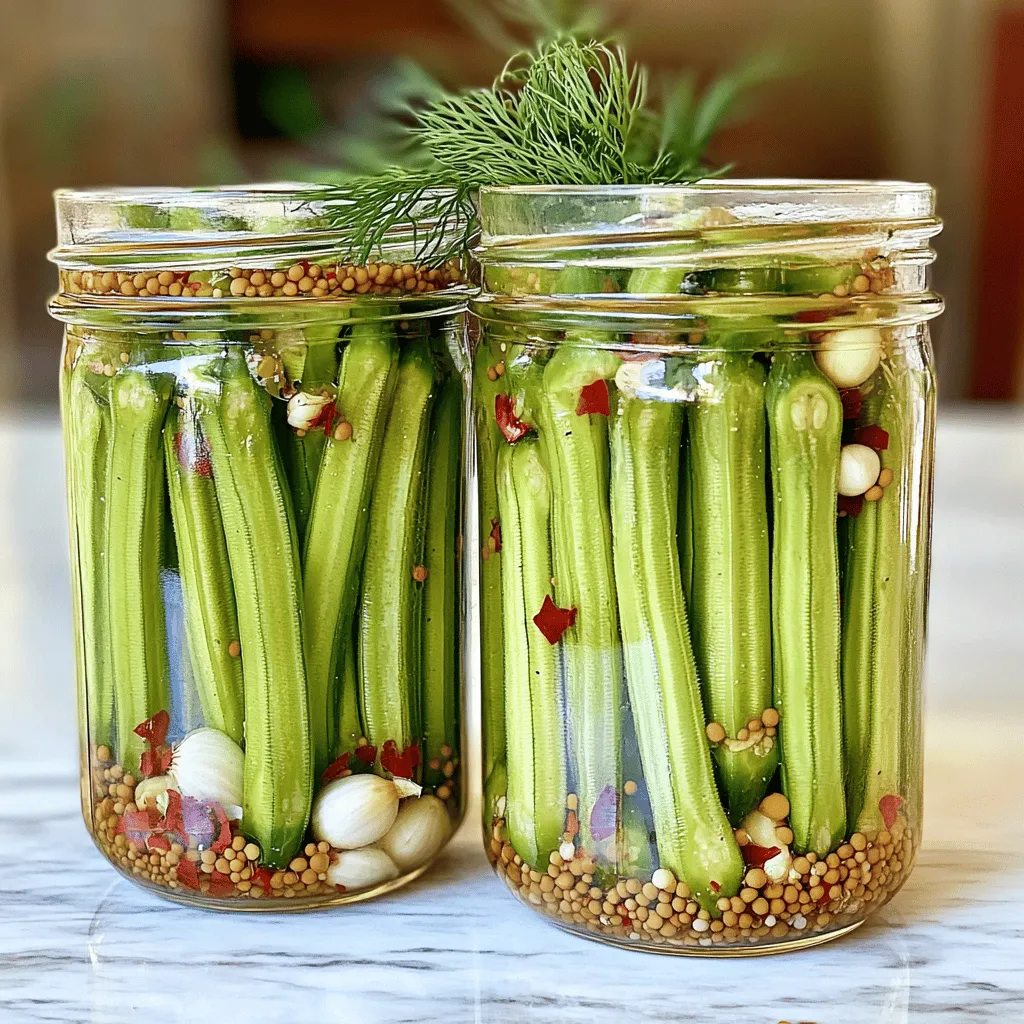
If you love bold flavors and crunchy snacks, quick pickled okra is a must-try! This easy recipe transforms fresh okra

- 2 medium zucchinis, grated - 1 cup granulated sugar - 1/2 cup packed brown sugar - 3 large eggs - 1/2 cup vegetable oil - 1 teaspoon pure vanilla extract - 2 cups all-purpose flour - 1 teaspoon baking soda - 1/2 teaspoon baking powder - 1 teaspoon ground cinnamon - 1/4 teaspoon ground nutmeg - 1/2 teaspoon salt - 1 cup chopped walnuts (optional) - 1/2 cup chocolate chips (optional) I love using fresh zucchinis for this recipe because they add moisture. Grating them makes the bread soft and tasty. The mix of granulated and brown sugar gives a rich flavor. If you want a lighter bread, use less sugar. You will need some eggs for binding. Vegetable oil keeps the bread moist and tender. Vanilla extract adds depth to the flavor. Combine the dry ingredients like flour, baking soda, and spices. Ground cinnamon and nutmeg bring warmth. Adding salt boosts all the flavors. Feel free to add walnuts or chocolate chips to make the bread even more delightful. You can adjust the amount based on your taste. - Mixing bowls - Loaf pan - Whisk - Spatula - Grater Gather your kitchen tools before starting. Mixing bowls help keep things tidy. A loaf pan is essential for shaping the bread. A whisk will blend the wet ingredients well. A spatula is perfect for mixing and pouring. Don't forget a grater for the zucchinis! Check out the Full Recipe for a detailed list and cooking tips! - Preheat the Oven: Start by preheating your oven to 350°F (175°C). This step is key for even baking. Prepare a 9x5 inch loaf pan by greasing it or lining it with parchment paper. This makes for easy removal later. - Prepare the Zucchini Mixture: In a large mixing bowl, combine 2 medium zucchinis, grated, with 1 cup of granulated sugar and 1/2 cup of packed brown sugar. Mix well. Let this sit for about 10 minutes. This helps bring out the zucchini’s moisture, making your bread moist and tasty. - Combine Eggs, Oil, and Vanilla: In a separate bowl, whisk together 3 large eggs, 1/2 cup of vegetable oil, and 1 teaspoon of pure vanilla extract. Blend until smooth. This creates a rich flavor base for your bread. - Sift and Mix Dry Ingredients: In another bowl, sift together 2 cups of all-purpose flour, 1 teaspoon of baking soda, 1/2 teaspoon of baking powder, 1 teaspoon of ground cinnamon, 1/4 teaspoon of ground nutmeg, and 1/2 teaspoon of salt. Sifting ensures even distribution of the leavening agents and spices for a fluffy texture. - Combine Wet and Dry Mixtures: Gradually add the dry ingredients to the zucchini mixture. Stir gently with a spatula or wooden spoon until just combined. Avoid overmixing; this keeps your zucchini bread light and fluffy. - Transfer to Pan and Bake: If you want, fold in 1 cup of chopped walnuts and/or 1/2 cup of chocolate chips at this stage. Pour the batter into the prepared loaf pan. Smooth the top with a spatula and sprinkle some extra walnuts or chocolate chips on top. Place the loaf pan in the preheated oven and bake for 50-60 minutes. Check with a toothpick; it should come out clean with a few moist crumbs. Proper Zucchini Preparation Start with fresh zucchinis. Wash them well and grate them using a box grater. I often leave the skin on for added texture and nutrients. After grating, place the zucchini in a clean towel. Squeeze out excess moisture gently. This step is key to avoid a soggy bread. Avoid Overmixing Mix your batter gently. Overmixing can make your bread tough. Once you combine wet and dry ingredients, stop stirring as soon as you see no dry flour. This keeps your zucchini bread light and airy. Oven Calibration Always check your oven's temperature. An oven thermometer can help ensure accuracy. If your oven runs hot or cold, adjust the baking time. This way, your bread bakes evenly. Toothpick Test Use a toothpick to check doneness. Insert it into the center of the bread. If it comes out clean or with a few moist crumbs, your bread is ready. This simple test helps guarantee perfect results. Best Serving Practices Slice your zucchini bread while it is still warm. This makes for a soft, easy cut. Serve it with a pat of butter or cream cheese on top. Ideal Pairings Pair your zucchini bread with coffee or tea for a delightful snack. You could also enjoy it with a side of fresh fruit. This adds color and flavor to your meal. For more ideas, check the Full Recipe for creative serving suggestions. {{image_4}} Substituting Sugar with Natural Sweeteners You can swap out granulated sugar for natural sweeteners. Options like honey or maple syrup work well. These sweeteners add a unique flavor. Use about 3/4 cup of honey for 1 cup of sugar. Remember, honey makes the bread more moist, so reduce the liquid slightly. Using Whole Wheat Flour Whole wheat flour is a great choice for a healthier bread. It adds fiber and nutrients. You can use half whole wheat and half all-purpose flour for a nice balance. This change gives a deeper, nuttier taste to your zucchini bread. Adding Spices like Ginger or Cloves Spices can take your zucchini bread to the next level. A teaspoon of ground ginger or cloves adds warmth and depth. You can mix and match spices to find your favorite flavor combo. Just a little can make a big difference. Incorporating Dried Fruits Dried fruits like raisins or cranberries add sweetness and texture. Fold in about 1/2 cup of your favorite dried fruit. This twist gives the bread a fun surprise in each bite. Creative Toppings and Spreads Top your warm bread with cream cheese or a sprinkle of nuts. A light spread of butter can enhance the flavor too. You might try a drizzle of honey on top for extra sweetness. These toppings make every slice special. Decorative Serving Tips Serve your zucchini bread on a colorful platter. Adding fresh herbs or thin zucchini ribbons can make it pretty. A simple touch can turn a delicious loaf into an eye-catching centerpiece. To keep your zucchini bread fresh, you can store it at room temperature or in the fridge. If you plan to eat it within a couple of days, wrap it in plastic wrap or foil. This keeps the bread moist. For longer storage, place it in the refrigerator. This helps it stay fresh up to a week. Freezing is a great way to save zucchini bread for later. Here are the best practices: - Wrap it Well: Once cooled, wrap the bread tightly in plastic wrap. Then, place it in a freezer bag. This prevents freezer burn. - Label and Date: Always label your bread with the date. It helps you know when to use it. Thawing Instructions: To thaw, remove the bread from the freezer. Keep it wrapped and let it sit in the fridge overnight. If you need it fast, you can leave it out at room temperature for about two hours. The shelf life of zucchini bread depends on storage. At room temperature, it lasts about 3-4 days. In the fridge, it stays fresh for up to a week. If frozen, you can keep it for 2-3 months. Enjoy your delicious zucchini bread for as long as possible! For the full recipe, check out the Ultimate Zucchini Delight Bread. Sogginess often comes from too much moisture. Here are common causes: - Overripe Zucchini: Use firm zucchinis for the best texture. - Not Draining Zucchini: After grating, let the zucchini sit. Squeeze out excess water. - Too Many Wet Ingredients: Follow the recipe closely. Balance is key. Yes, you can use yellow squash! It works well in this recipe. Yellow squash has a similar texture and taste. You may not notice a big difference. Experiment with both to find your favorite. Check for these signs of proper baking: - Toothpick Test: Insert a toothpick into the center. If it comes out clean or with a few crumbs, it's done. - Golden Brown Top: The top should look golden. A darker crust means it's likely ready. - Spring Back: Gently press the top. If it springs back, your bread is likely cooked. Yes, you can make this recipe vegan! Try these substitutions: - Eggs: Use flax eggs or applesauce. One flax egg equals 1 tablespoon of ground flaxseed mixed with 2.5 tablespoons of water. - Oil: Replace vegetable oil with melted coconut oil or applesauce. - Sugar: Ensure your sugar is vegan-friendly. Most granulated sugars work well. Making mini loaves is easy! Here’s how: - Use Mini Loaf Pans: Adjust the size of your pans to fit. - Baking Time: Bake for about 25-30 minutes. Check for doneness with the toothpick test. - Watch Closely: Mini loaves bake faster, so keep an eye on them. This blog post covered the recipe and tips for making perfect zucchini bread. You learned about the key ingredients, kitchen tools, and step-by-step baking instructions. We discussed how to keep it moist and some variations to try. Lastly, I shared storage tips to keep your bread fresh. Remember, with a little care, your zucchini bread can impress everyone. Enjoy your baking journey and experiment with new flavors!

The Best Zucchini Bread Tasty and Moist Recipe Guide

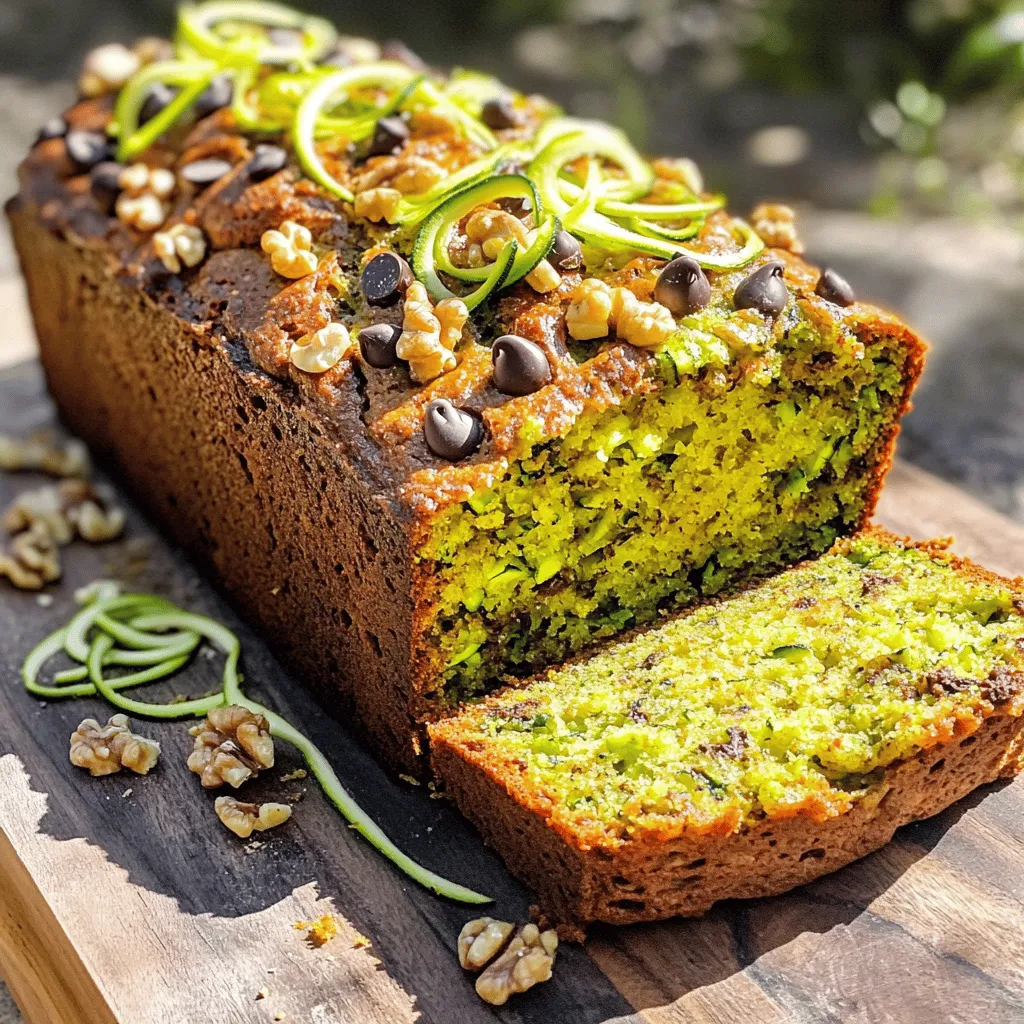
Are you ready to bake the best zucchini bread ever? This tasty and moist recipe will become your new favorite!

- 4 medium zucchinis, thinly sliced - 1 cup shredded mozzarella cheese, divided - 1 cup cottage cheese - ½ cup grated Parmesan cheese - 1 large egg - 1 teaspoon garlic powder - 1 teaspoon dried oregano - 1 teaspoon salt - ½ teaspoon black pepper - 1 cup cherry tomatoes, halved (for garnish) - Fresh basil leaves, for garnish Zucchini is the star here. It gives the dish a fresh taste and a nice texture. The cheese adds creaminess and flavor. Mozzarella melts beautifully, while Parmesan gives a rich, savory punch. Cottage cheese adds protein and moisture, making each bite filling. The egg binds everything together, ensuring a perfect bake. Seasonings like garlic powder and oregano enhance the dish’s flavor, making it more enjoyable. If you're dairy-free, try using vegan cheese. You can replace egg with flaxseed meal mixed with water. For gluten-free diets, this recipe is naturally gluten-free, so no changes are needed. If you want to add more veggies, consider bell peppers or spinach for extra nutrients. Always adjust based on your needs, so everyone can enjoy this dish. For the full recipe, check the main listing. First, preheat your oven to 375°F (190°C). This temperature helps cook the zucchini just right. Next, lightly grease a 9x13 inch baking dish. This step stops the zucchini bake from sticking. Now, grab 4 medium zucchinis. Thinly slice them and place them in a large bowl. Add 1 teaspoon of garlic powder, 1 teaspoon of dried oregano, 1 teaspoon of salt, and ½ teaspoon of black pepper. Toss the zucchini slices until they are well coated. In another bowl, mix 1 cup of cottage cheese, 1 large egg, and half of the shredded mozzarella cheese. Stir this mix until it is creamy and combined. Start layering your dish. Place half of the seasoned zucchini slices at the bottom of the greased baking dish. Spread them out evenly. Next, take half of the cheese mixture and spread it over the zucchini. Make sure it covers the slices well. Now, add the rest of the zucchini slices on top. Spread them out again to keep it even. Pour the remaining cheese mixture over this layer. Finish your layering by sprinkling ½ cup of grated Parmesan cheese and the rest of the shredded mozzarella cheese on top. This will create a nice, cheesy crust. Now, it's time to bake! Place the baking dish in your preheated oven. Bake it for 30-35 minutes. You want the top to be golden brown and bubbly. Once it looks perfect, take it out of the oven. Let the dish cool for 5-10 minutes. This cooling time helps set the layers. Before serving, garnish with fresh halved cherry tomatoes and basil leaves for a colorful touch. You can find the full recipe linked above if you need more details! To keep your zucchini bake from getting soggy, salt the zucchini first. Slice the zucchini and sprinkle it with salt. Let it sit for about 10 minutes. This draws out extra water. After that, pat the slices dry with a towel. This step helps keep your dish firm and tasty. For a cheesy flavor, you can mix mozzarella and Parmesan. Mozzarella melts well, while Parmesan adds a nice crunch. Try adding a bit of cheddar for sharpness. You can also use ricotta for a creamier texture. Experiment with your favorite cheeses to find the perfect blend. Serve the zucchini bake after it cools for 5-10 minutes. This resting time helps set the layers. Cut it into squares for easy serving. Garnish with fresh tomatoes and basil right before serving. This adds color and fresh flavor to the dish. For the full recipe, check out the details above. {{image_4}} You can switch up the veggies in this dish. Try adding bell peppers, mushrooms, or spinach. These give extra flavor and color. Just chop them small so they cook well. Mix them in with the zucchini for a tasty twist. Roasted vegetables also add a nice touch. They bring rich flavors that pair well with cheese. Want to make it heartier? Add protein! Ground turkey or chicken works great. Just cook the meat first, then layer it in. You can also add cooked sausage or bacon for a savory kick. Beans are another option for a meatless meal. They boost protein while keeping it healthy. This recipe is already gluten-free! If you want a bit more texture, use gluten-free breadcrumbs on top. This gives a nice crunch. You can also use quinoa or rice as a base. Just cook them first and layer them under the zucchini. This will make it filling and delicious. For the full recipe, check out the Cheesy Zucchini Delight Bake. After enjoying your cheesy zucchini bake, let it cool. Transfer leftovers to an airtight container. Store them in the fridge for up to three days. This will keep the dish fresh and tasty. Label the container with the date, so you know when to eat it. Remember to keep it covered to avoid drying out. To reheat your cheesy zucchini bake, preheat your oven to 350°F (175°C). Place the leftovers in an oven-safe dish. Cover with foil to keep moisture in. Heat for about 15-20 minutes, or until warmed through. You can also use a microwave. Microwave in short bursts, checking often, until hot. This will make sure your dish stays cheesy and delicious. If you want to store it longer, freezing is a great option. Allow the zucchini bake to cool completely. Cut it into portions for easy meals later. Wrap each piece in plastic wrap, then place them in a freezer bag. Label the bag with the date. It can last up to three months in the freezer. When you’re ready to eat, thaw it in the fridge overnight before reheating. You can enjoy your cheesy zucchini bake anytime! For the full recipe, check out the details above. Yes, you can use other cheeses. Cheddar, gouda, or even feta add great flavor. Each cheese brings a unique taste and texture. Just remember to keep the total amount the same. Mixing cheeses can also make the dish fun and tasty. Your zucchini bake will stay fresh for about three to four days in the fridge. Make sure to store it in an airtight container. This keeps the flavors in and the moisture out. If you want it to last longer, consider freezing it. Yes, you can prepare this dish ahead of time. Assemble it a day before and keep it in the fridge. Just remember to bake it the next day. This makes it easy for meal prep or when hosting friends. You can also freeze it before baking for up to three months. Just thaw it overnight in the fridge before baking. For the full recipe, check out the earlier sections. This blog post covered all you need for a perfect zucchini bake. We discussed key ingredients, how to layer, and baking tips. I shared ways to avoid soggy zucchini and the best cheese mixes. You can also modify the dish to fit your diet. Now, you can store leftovers easily and reheat them. Remember to have fun with variations and make this dish your own. Zucchini bake is simple, tasty, and versatile, perfect for any meal. You’ll enjoy making this dish as much as eating it!

Easy Cheesy Zucchini Bake Simple and Flavorful Dish

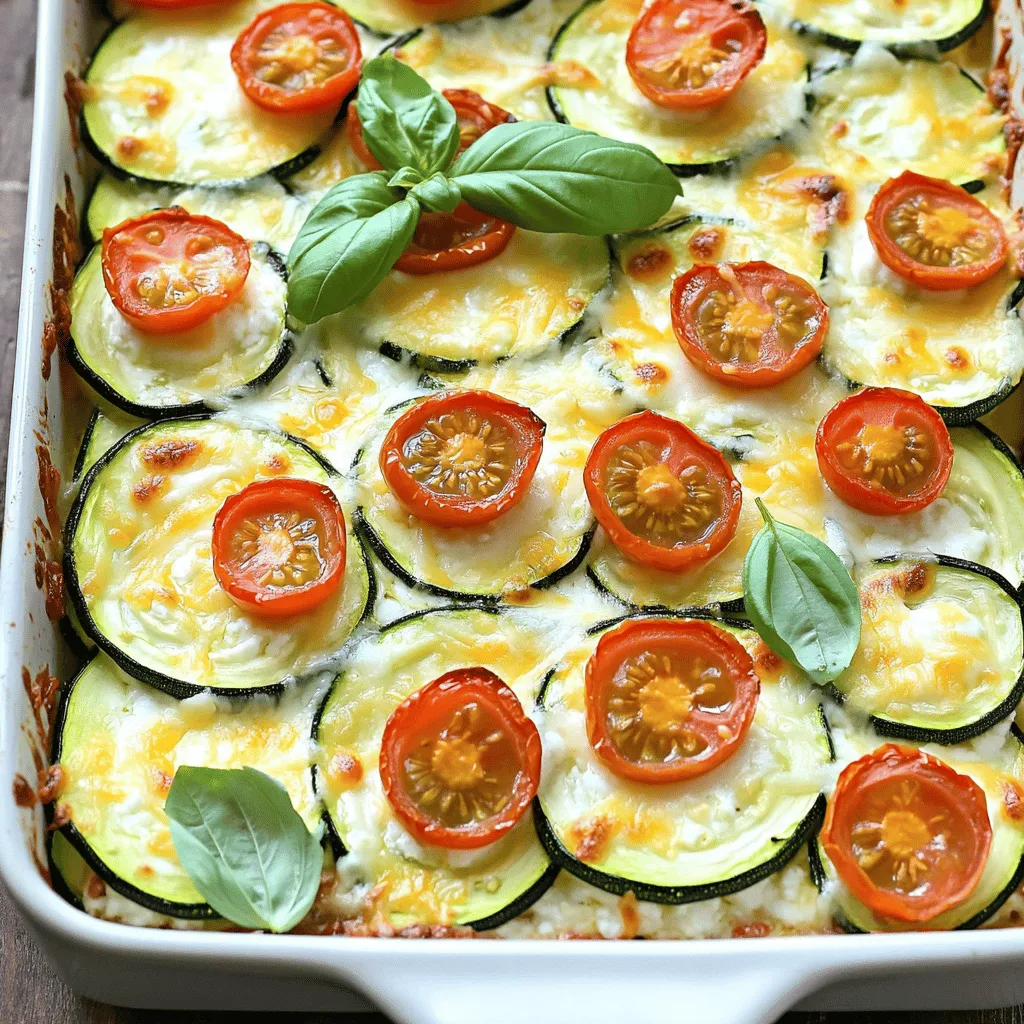
Looking for a simple and tasty dish that makes the most of summer squash? My Easy Cheesy Zucchini Bake is

Older posts
Newer posts
← Previous Page1 … Page10 Page11 Page12 … Page75 Next →

dsad

© 2025 lazychefmagic • Built with GeneratePress

Our Policies

  • Copyright Policy
  • Cookie Policy
  • GDPR Policy
  • Privacy Policy
  • Disclaimer
  • Terms Of Use

More Information

  • Home
  • About
  • Contact
  • Appetizers
  • Dessert
  • Dinner
  • Drinks
©2025, lazychefmagic About Back To Top