Skip to content
DisclaimerTerms Of UseGDPR PolicyCookie Policy

lazychefmagic

  • Home
  • Drinks
  • Appetizers
  • Dinner
  • Dessert
  • About
  • Contact
  • Privacy Policy
DisclaimerTerms Of UseGDPR PolicyCookie Policy

Amanda

- Cucumbers - 2 large, diced - Cherry tomatoes - 1 cup, halved - Red onion - 1/4, finely chopped - Feta cheese - 1 cup, crumbled - Kalamata olives - 1/2 cup, pitted and sliced - Extra virgin olive oil - 3 tablespoons - Red wine vinegar - 2 tablespoons (or apple cider vinegar as a substitute) - Fresh dill - 1 tablespoon, chopped (or 1 teaspoon dried dill) - Salt and pepper to taste When you gather fresh produce, start with cucumbers. I love using two large ones. They add crunch and freshness. Dice them into bite-sized pieces. Next, grab a cup of cherry tomatoes. Halve them for a burst of sweetness. They bring color and flavor to the salad. Red onion adds a nice kick. Use a quarter of one, finely chopped. It gives a sharp taste that balances other ingredients. Now let’s talk about cheese. Feta cheese is key here. One cup of crumbled feta will work wonders. It adds creaminess and tang. Kalamata olives are a must. Use half a cup, pitted and sliced. They bring a rich, briny flavor that pairs well with everything. For the dressing, you need three tablespoons of extra virgin olive oil. This adds healthy fat and richness. Red wine vinegar is next. Two tablespoons will add acidity. If you prefer, use apple cider vinegar for a milder taste. Chop up one tablespoon of fresh dill for a fresh herbal note. Dried dill works too; just use one teaspoon. Finally, season with salt and pepper to taste. This simple touch can elevate your salad. To get the complete recipe, check out the Full Recipe section. Enjoy putting these ingredients together! - Rinse and dice cucumbers - Chop cherry tomatoes, red onion, and olives Start by rinsing the cucumbers. Clean them well under cool water. Then, dice them into bite-sized pieces. If you want a milder taste, you can peel them first. Next, chop the cherry tomatoes in half. This adds color and sweetness. Finely chop the red onion for a sharp flavor. Finally, slice the Kalamata olives. This adds a nice briny touch. - Combine all vegetables and feta in a bowl - Gently toss to mix ingredients In a large mixing bowl, add all the chopped vegetables. Toss in the crumbled feta cheese. The feta adds a creamy texture. Gently mix everything together. Be careful not to break the feta too much. You want to see those lovely chunks of cheese in your salad. - Whisk together olive oil, vinegar, dill, salt, and pepper - Drizzle and coat the salad mixture In a separate small bowl, whisk together the olive oil and red wine vinegar. You can use apple cider vinegar for a milder taste. Add the chopped dill, salt, and pepper to the mix. Whisk until everything blends well. Drizzle this dressing over your salad mixture. Use a large spoon to toss everything gently. Make sure every piece gets a nice coating. - Chill the salad for 15 minutes before serving - Presentation tips for an appealing dish For the best flavor, chill the salad for about 15 minutes. This helps the flavors mix nicely. When serving, use a large, clear bowl. This shows off the vibrant colors. For a pretty touch, sprinkle more feta on top. A few sprigs of fresh dill add a nice finish. Enjoy your refreshing Cool Cucumber Feta Delight! For the full recipe, check the earlier sections. Chilling your salad makes the flavors pop. I suggest letting it sit in the fridge for about 15 minutes. This helps all the ingredients meld and taste better. You can also adjust the seasoning. If you want a stronger taste, add more salt or pepper. You can even try a splash of lemon juice for a fresh twist. If you don’t have red wine vinegar, try apple cider vinegar. It gives a milder taste. Fresh herbs can also change the flavor. If you can’t find fresh dill, dried dill works well too. For a dairy-free option, you can use a vegan feta. It’s creamy and adds a great taste. Meal prep can save time. You can chop the cucumbers and other veggies ahead of time. Just store them in a sealed container in the fridge. Keep the dressing separate until you are ready to serve. This keeps the salad fresh and crunchy. If you have leftover cucumbers, keep them in water. This keeps them crisp for longer. For the full recipe, check out the Cool Cucumber Feta Delight. {{image_4}} You can add protein to your Cucumber Feta Salad for a heartier meal. Try incorporating grilled chicken or shrimp. Both options add flavor and make the salad filling. Simply slice the grilled chicken or shrimp and mix them into the salad. If you want a vegetarian option, add chickpeas. They are a great source of protein and blend well with the fresh ingredients. To change the salad's flavor, consider Mediterranean inspirations. You can add chopped bell peppers or capers for a new twist. These ingredients bring a unique taste and texture. If you enjoy spice, try adding jalapeños or chili flakes. This will give your salad a nice kick and make it exciting. You can adjust the salad based on the season. In spring, add thinly sliced radishes for crunch. In summer, include diced zucchini for freshness. Each season brings new vegetables that can enhance the salad. You can also try different dressings. A lemon vinaigrette can give it a bright flavor, while a tahini dressing adds creaminess. Explore these variations to keep your Cucumber Feta Salad fresh and fun. For the full recipe, check out the Cool Cucumber Feta Delight. To keep your cucumber feta salad fresh, store leftovers in the fridge. Use an airtight container to prevent air from spoiling the salad. Glass containers work well, as they don’t retain odors. Make sure to cover it tightly. You can keep cucumber feta salad in the refrigerator for about 3 to 5 days. Always check for signs of spoilage before eating. If you notice a slimy texture or an off smell, it’s best to throw it away. Fresh ingredients are key to enjoying this salad. Can you freeze cucumber feta salad? It's not recommended. Freezing can make cucumbers mushy and change the texture of feta. Instead, consider freezing the salad components separately. For example, you can freeze the diced cucumbers and feta cheese in separate bags. When you’re ready to eat, mix fresh ingredients with the frozen ones for a crisp taste. Typically lasts 3-5 days when stored properly. To keep it fresh, use an airtight container. Ensure it is chilled right after serving. This helps maintain flavor and texture. Yes, alternatives like goat cheese or mozzarella can be used. Each cheese brings its own unique flavor. Goat cheese adds a tangy taste while mozzarella offers a milder profile. Cucumber feta salad pairs well with grilled meats, pita bread, or as a side dish for barbecues. The crispness of the salad complements rich flavors. You can also serve it with fish or roasted veggies for a balanced meal. Yes, but it's best to add dressing just before serving to keep it fresh. This way, the cucumbers stay crisp. If you prep the salad early, store the dressing separately to maximize taste. Yes, all included ingredients are gluten-free unless served with bread. This makes it a great option for people with gluten sensitivities. Enjoy it with your favorite gluten-free crackers for a tasty snack. This cucumber feta salad combines fresh produce, creamy cheese, and a zesty dressing. You saw how easy it is to prepare and customize this dish. From tweaking the flavors to adding proteins, the options are endless. Remember to chill it for the best taste. Storing leftovers correctly maximizes freshness. As you try this recipe, have fun exploring variations based on your preferences and available ingredients. Enjoy the crisp, vibrant flavors of this salad in your meals.

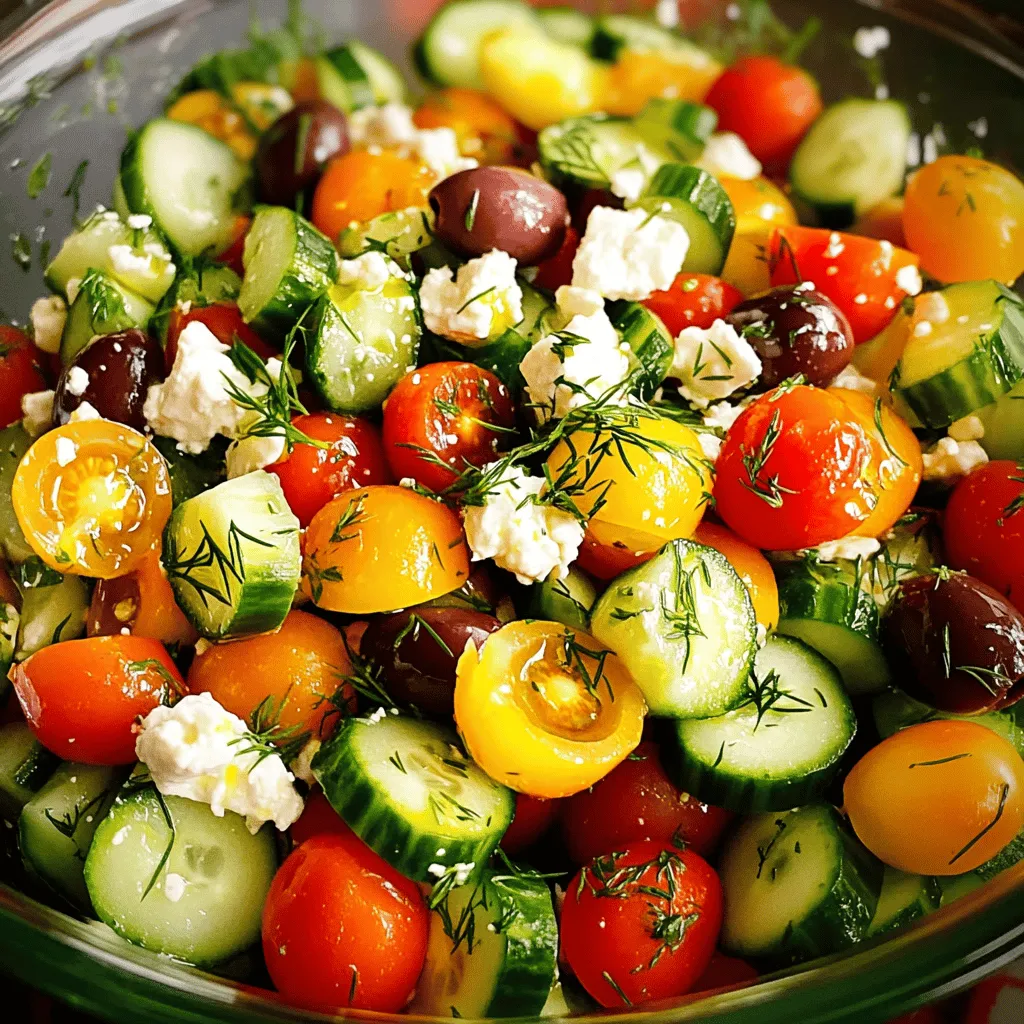
Cucumber Feta Salad Fresh and Flavorful Delight

Are you ready to brighten your meals with a fresh and flavorful delight? This Cucumber Feta Salad combines crisp cucumbers,

To make this tasty apple zucchini bread, gather these ingredients: - 1 medium zucchini, grated - 1 medium apple, peeled and grated - 1 cup all-purpose flour - 1 cup whole wheat flour - 1 teaspoon baking powder - 1 teaspoon baking soda - 1 teaspoon ground cinnamon - 1/2 teaspoon ground nutmeg - 1/2 teaspoon salt - 3/4 cup granulated sugar (adjust based on desired sweetness) - 1/2 cup packed brown sugar - 2 large eggs - 1/2 cup vegetable oil - 1 teaspoon pure vanilla extract - 1/2 cup chopped walnuts or pecans (optional) - 1/2 cup raisins or chopped dried cranberries (optional) If you need to swap some ingredients, here are good options: - For all-purpose flour, use gluten-free flour. - Applesauce can replace eggs for a moist texture. - Coconut oil works well instead of vegetable oil. - Maple syrup can substitute granulated sugar for a different flavor. - Use chia seeds mixed with water instead of eggs for a vegan option. Choose the best apples and zucchinis for your bread: - Look for zucchinis that feel firm and are smooth. Avoid those with soft spots. - Pick apples that are bright and free of blemishes. Crisp varieties like Granny Smith or Honeycrisp work best. - Smell the apple; a sweet scent means it’s fresh. - For zucchini, check that it is not too large. Smaller zucchinis are more tender and flavorful. - Always wash your fruits and veggies before using them to remove dirt and pesticides. These tips will help you find the best ingredients for your apple zucchini bread. Check out the Full Recipe for more details on how to combine these ingredients for a delicious loaf! Start by gathering all your ingredients. You need fresh zucchini and apples. Grate one medium zucchini and one medium apple. Use a box grater or food processor for this. Next, measure out your dry ingredients. In a medium bowl, mix one cup of all-purpose flour with one cup of whole wheat flour. Add one teaspoon of baking powder, one teaspoon of baking soda, one teaspoon of ground cinnamon, half a teaspoon of ground nutmeg, and half a teaspoon of salt. Whisk these together well. In a large mixing bowl, combine three-fourths cup granulated sugar and half a cup of packed brown sugar. Add two large eggs and beat them until smooth. Pour in half a cup of vegetable oil and one teaspoon of pure vanilla extract. Mix until it's all creamy. Now, gently fold in the grated zucchini and apple, making sure they blend in well. Gradually add the dry mix to the wet mix, stirring gently. Stop mixing as soon as everything is just combined. If you want to add nuts or dried fruit, this is the time. Pour the batter into a greased 9x5 inch loaf pan. Spread it evenly. Place the pan in a preheated oven at 350°F (175°C). Bake for 50 to 60 minutes. Check if it's done by inserting a toothpick into the center. It should come out clean or with a few moist crumbs. After baking, let the bread cool in the pan for about 10 minutes. Then, move it to a wire rack to cool completely. Once cool, slice and enjoy this moist and flavorful loaf! To get a moist and fluffy texture, start with fresh ingredients. Use a medium zucchini and an apple, both grated. Moisture is key, so don’t squeeze the grated zucchini. This will keep your bread soft. Mix your dry and wet ingredients separately first. Then, gently combine them. Overmixing will make your bread dense and tough. Aim for a batter that’s just combined, with some lumps remaining. Avoid using too much flour. This can make the bread dry. Always measure flour correctly by spooning it into the cup and leveling it off. Also, don’t skip the eggs. They add moisture and help bind the ingredients. If you add nuts or dried fruit, fold them in gently to avoid breaking the batter. Lastly, keep an eye on the baking time. Overbaking will lead to a dry loaf. You can boost flavor by adding spices. Try a bit of ginger or cloves along with cinnamon. You can also add vanilla extract or even almond extract for a twist. For texture, consider adding walnuts or pecans. Raisins or dried cranberries bring sweetness and chewiness. These add-ins create layers of flavor that make each bite special. For the full recipe, check out the details I provided earlier. {{image_4}} You can easily make gluten-free apple zucchini bread. Use gluten-free flour blends instead of all-purpose or whole wheat flour. Look for brands that mix different flours for the best texture. You may also want to add xanthan gum to help bind the ingredients together. This will give your bread a better rise and chew. To make this recipe vegan, swap the eggs for flax seeds or applesauce. Mix one tablespoon of ground flaxseed with three tablespoons of water. Let it sit for five minutes to thicken. For the oil, use melted coconut oil or applesauce for moisture. These swaps keep your bread moist and tasty without dairy or eggs. Add seasonal fruits or nuts to make your bread unique. In fall, try adding chopped cranberries or pecans. For a summer twist, mix in fresh blueberries or a dash of lemon zest. You can also use spices like ginger or cardamom for extra warmth. These small changes can make your apple zucchini bread a fun treat all year round! For the complete recipe, check the Full Recipe section. To keep your apple zucchini bread fresh, store it in an airtight container. This helps keep moisture in and prevents it from drying out. You can also wrap the bread in plastic wrap before placing it in the container. If you prefer, you can store it at room temperature for up to three days. If you want to keep it longer, the fridge is a good option. Just remember to seal it well to avoid absorbing other flavors. Freezing is a great way to save your apple zucchini bread for later. First, let the bread cool completely. Then, wrap it tightly in plastic wrap. You can also use aluminum foil for extra protection. Place the wrapped bread into a freezer-safe bag or container. It can last up to three months in the freezer. When you're ready to enjoy it, simply defrost it overnight in the fridge, and then bring it to room temperature. If your apple zucchini bread becomes stale, don't worry! You can quickly revive it. Wrap the bread in a damp paper towel. Then, microwave it for about 10-15 seconds. This will add moisture back into the bread. If you prefer a crispy crust, you can warm it in the oven at 350°F for about 5-10 minutes. Enjoy your fresh-tasting loaf again! You can use flaxseed meal or applesauce as an egg substitute. For flaxseed, mix 1 tablespoon of flaxseed meal with 2.5 tablespoons of water. Let it sit for about 5 minutes until it thickens. For applesauce, use 1/4 cup in place of each egg. Both options maintain moisture and bind the Ingredients well. They work great in this Apple Zucchini Bread recipe. The best way to slice zucchini is to grate it. Grating helps to integrate the zucchini into the batter. It also ensures that the moisture cooks through evenly. Use the large holes of a box grater for a good texture. Avoid chopping it into pieces as this can lead to uneven baking. Grated zucchini blends beautifully with apple in this bread. Dense bread can happen for a few reasons. Overmixing the batter can develop too much gluten. This leads to a chewy texture. To fix it, mix just until the dry and wet Ingredients are combined. Also, check that your baking powder and baking soda are fresh. Old leavening agents can fail to make the bread rise. Apple Zucchini Bread stays fresh for about 3 to 4 days at room temperature. Keep it in an airtight container to avoid drying out. For longer storage, you can freeze it. Wrap the bread tightly in plastic wrap and then in foil. It will last for up to 3 months in the freezer. When ready to eat, thaw it overnight in the fridge before slicing. This article covered everything you need to make great apple zucchini bread. We looked at ingredients, step-by-step instructions, and tips to get it just right. You learned how to pick fresh apples and zucchini, mix the batter, and bake it perfectly. I shared ways to store your bread and fix common problems. With these ideas, you can create different versions and keep your bread fresh. Now you can enjoy this tasty treat any time! Get baking, and enjoy every bite!

Delicious Apple Zucchini Bread Moist and Flavorful Loaf

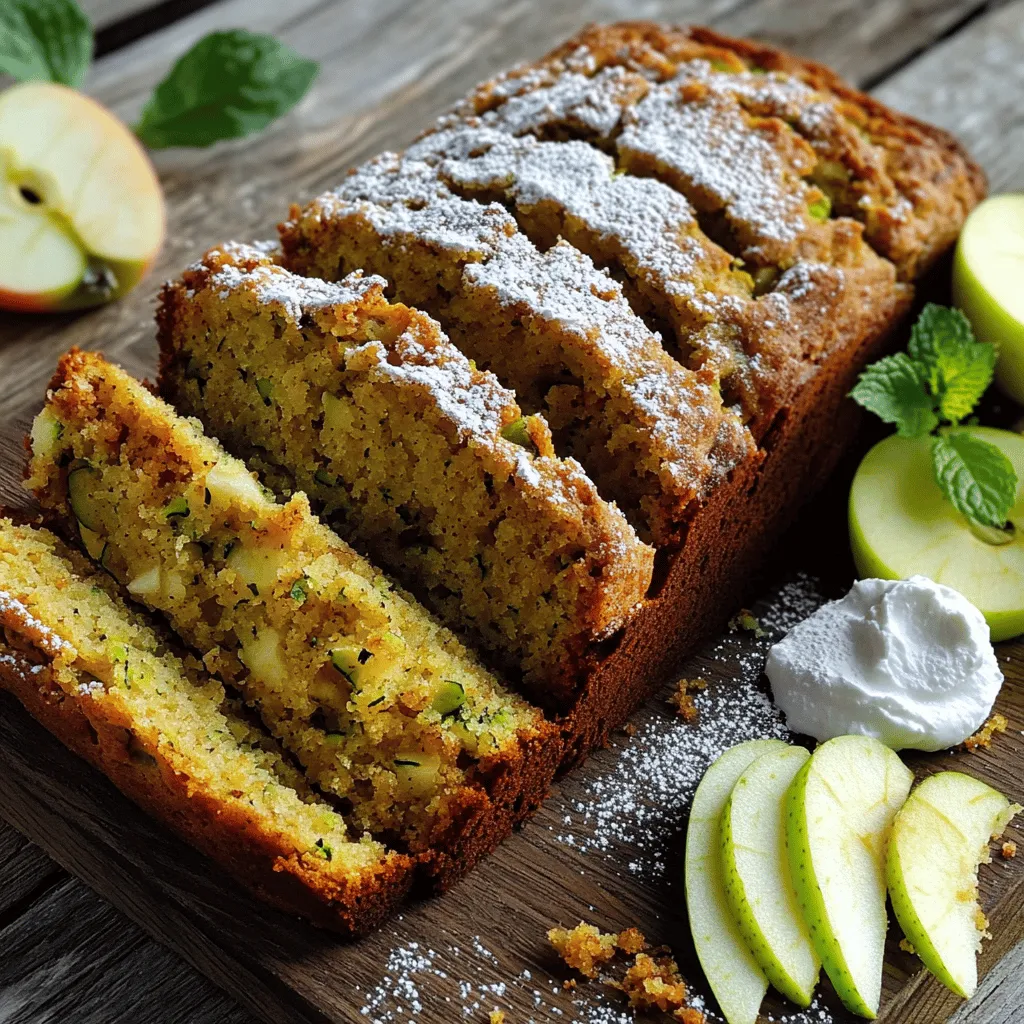
Are you ready to bake a treat that combines the best of both worlds? My Delicious Apple Zucchini Bread is

- 6 large eggs - 1/4 cup whole milk - 1 cup assorted bell peppers, diced - 1/2 cup cherry tomatoes, halved - 1/2 cup fresh spinach, roughly chopped - 1 small red onion, finely chopped - 1 cup shredded cheese - 2 tablespoons extra virgin olive oil - Sea salt and freshly cracked black pepper - Fresh basil or parsley for garnishing For the frittata, you need fresh and quality ingredients. The eggs make the base rich and fluffy. The whole milk adds creaminess. Bell peppers bring color and crunch. Cherry tomatoes add sweetness, while spinach gives a fresh touch. The red onion offers a savory flavor. Cheese binds everything together and adds a delightful melt. - Cheese options: Try sharp cheddar for a bold taste or creamy feta for a smooth flavor. - Vegetable substitutes: You can swap bell peppers for zucchini, mushrooms, or kale. Each option gives a different twist to the dish. - How to check freshness of eggs: Look for clean shells. Fresh eggs will sink in water, while old eggs float. - Choosing ripe tomatoes and bell peppers: Choose tomatoes that feel firm but yield slightly to pressure. For bell peppers, select those that are bright and have tight skin. - Preheat the oven to 375°F (190°C). This helps the frittata cook evenly. - Whisk together 6 large eggs and 1/4 cup whole milk. Make sure they blend well. - Add sea salt and freshly cracked black pepper to taste. This adds great flavor. - Heat 2 tablespoons of extra virgin olive oil in an oven-safe skillet over medium heat. - Add 1 small finely chopped red onion. Sauté for 2-3 minutes until soft. - Next, add 1 cup of diced assorted bell peppers. Cook for 3-4 minutes, stirring often. - Incorporate 1/2 cup of roughly chopped fresh spinach and 1/2 cup of halved cherry tomatoes. Cook for about 2 minutes until the spinach wilts. - Carefully pour the egg mixture over the veggies, covering them evenly. - Sprinkle 1 cup of shredded cheese on top. You can use sharp cheddar or creamy feta for this. - Let the frittata cook on the stovetop for 3-4 minutes. The edges should start to set. - Slowly transfer the skillet to the preheated oven. Bake for 15-20 minutes. - Check for doneness by touching the center. It should feel firm, and the top should be golden brown. This vibrant veggie frittata recipe is simple and delicious. For the full details, check the Full Recipe. - Overcooking eggs and vegetables: This makes the frittata dry. Cook eggs until just set. - Not preheating the oven: If the oven isn’t hot, your frittata won’t cook right. Always preheat to 375°F (190°C). - Suggested spices and herbs to add: Try oregano, thyme, or paprika for extra taste. Fresh herbs like basil or parsley brighten flavors. - Pairing options for a complete meal: Serve your frittata with a side salad or crusty bread. A light fruit salad is also refreshing. - Creative serving ideas: Cut the frittata into wedges and place on a colorful plate. You can also serve it on a wooden board for a rustic touch. - Garnishing techniques: Scatter fresh herbs on top. Add a few extra cherry tomatoes on the side for color. This makes the dish look inviting and delicious. {{image_4}} You can add cooked sausage or bacon to the frittata for a heartier meal. Both options give the dish a nice, savory flavor. If you want a vegetarian choice, consider using tofu. Crumbled tofu adds protein and has a nice texture. Seasonal ingredients can really change the taste of your frittata. In summer, fresh herbs like basil and parsley shine. They add bright flavors. In winter, root vegetables like sweet potatoes or carrots work well. They give a warm, cozy feel to the dish. Using what is in season not only tastes better, but it’s also more sustainable and often cheaper. If you want to make single servings, try using a muffin tin. Mini frittatas cook fast, and they are fun to eat. You can adjust the ingredient amounts to make just one or two. This way, you get a perfect portion every time. For the full recipe, check the vibrant veggie frittata section above. To keep your frittata fresh, place it in the fridge right away. Use an airtight container for best results. You can also wrap it in plastic wrap or aluminum foil. This helps prevent it from drying out. Aim to eat leftovers within three days for the best taste. When it's time to enjoy your frittata again, you have a few options. The oven is best for a crispy texture. Preheat it to 350°F (175°C) and place the frittata on a baking sheet. Heat for about 10-15 minutes. You can also use a microwave for quick reheating. Heat it in 30-second bursts to avoid overcooking. Cover it with a paper towel to keep moisture in. If you want to save your frittata for later, freezing is a great option. Cut it into wedges and wrap each piece in plastic wrap. Place the wrapped pieces in a freezer bag. Be sure to label it with the date. For best quality, use it within three months. To reheat, thaw it overnight in the fridge and then warm it in the oven. A frittata lasts about 3 to 4 days in the fridge. Store it in an airtight container to keep it fresh. Make sure it cools down before you put it in the fridge. If you want to eat it later, label the container with the date. This way, you know when you made it. Yes, you can make a frittata without eggs! Try using silken tofu or chickpea flour as a substitute. Silken tofu gives a creamy texture when blended. You can mix it with spices to add flavor. Chickpea flour also works well. Mix it with water to make a batter. Both options are healthy and tasty. Frittatas pair well with many sides. Here are some ideas: - Fresh salad: A light green salad adds crunch and freshness. - Toast: Crisp bread or a hearty roll is great for dipping. - Fruit: Slices of melon or berries add a sweet touch. - Yogurt: A scoop of yogurt can add creaminess and balance. Each of these sides will complement your frittata nicely. Try mixing and matching to find your favorite combo. For the full recipe, check out the Vibrant Veggie Frittata section above! You learned about the key ingredients for a delicious frittata. We covered essential steps, tips, and clever variations. Remember to choose fresh veggies for the best flavor. You can avoid overcooking for perfect texture. Try different herbs and meats to make it your own. Storing leftovers properly ensures you enjoy every bite later. A frittata is versatile and perfect for any meal. Now, it's time to get cooking and impress everyone with your creation!

Easy Frittata Simple Recipe for a Flavorful Meal

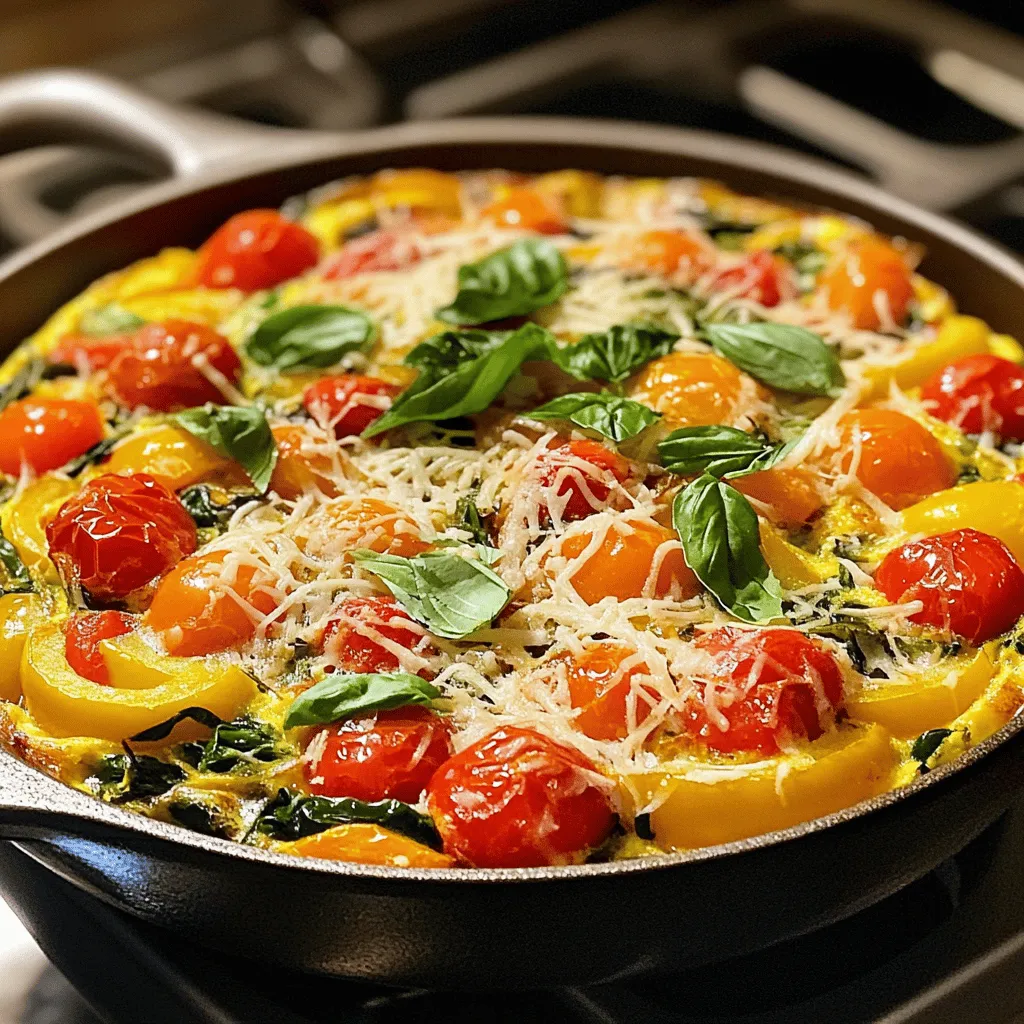
Looking for a quick, tasty meal? This Easy Frittata recipe is your answer! Packed with vibrant veggies, fluffy eggs, and

- 4 large eggs - 1 medium zucchini, grated - 1 cup feta cheese, crumbled - 1 small onion, finely chopped - 2 cloves garlic, minced - 1/4 cup milk - 2 tablespoons olive oil - Salt and black pepper to taste - Fresh parsley, chopped (for garnish) This recipe serves four people. Each serving has a good balance of protein and veggies. If you want to make more, just double or triple the ingredients. For six servings, use six eggs and 1 1/2 cups of feta cheese. Adjust the zucchini and other items as needed. When choosing zucchini, pick firm ones with smooth skin. They should feel heavy for their size. If you can't find feta cheese, try goat cheese or cottage cheese. Both options work well and add a unique taste. For a dairy-free version, use almond milk and a dairy-free cheese. These substitutes keep the dish delicious and creamy. - Preheat the oven to 375°F (190°C). - Prepare an oven-safe skillet. - Heat olive oil in the skillet over medium heat. - Add finely chopped onion and sauté for 3-4 minutes. - When the onion is soft, add minced garlic. - Stir in grated zucchini and cook for 3-5 minutes. - Season with salt and black pepper to taste. - In a bowl, whisk together eggs, milk, and crumbled feta. - Mix until the feta is evenly combined. - Pour the egg mixture into the skillet over the veggies. - Cook on the stovetop for 2-3 minutes. - Wait until the edges begin to set but the center is still runny. - Transfer the skillet to the preheated oven. - Bake for 15-20 minutes until puffy and set. - Check with a toothpick; it should come out clean. After baking, let it cool for a minute. Slice into wedges and garnish with fresh parsley. Enjoy your delicious frittata! For the full recipe, check the section above. To avoid a rubbery texture in your frittata, cook the eggs gently. Overcooking can make them tough. Use medium heat when cooking. This way, you get tender, fluffy eggs. For even cooking, stir the mixture gently. When you pour the egg mixture into the skillet, make sure it spreads evenly. Allow the edges to set a bit before moving it to the oven. This helps create a nice base. Pair your frittata with a fresh salad or cherry tomatoes. This adds color and crunch. You can also serve it with a side of crusty bread for a hearty meal. For gatherings, slice the frittata into wedges. Place them on a nice platter. Top with fresh parsley for a pop of green. You could drizzle some olive oil or lemon juice for extra flavor. A slice of this frittata has about 200 calories. It packs protein from the eggs and feta. It also offers healthy fats from olive oil. Zucchini is low in calories and high in fiber. It helps with digestion and keeps you full. Feta cheese adds calcium and flavor, making this dish tasty and healthy. You can find more details in the Full Recipe. {{image_4}} You can switch the feta for other cheeses. Goat cheese adds a tangy flavor. Cheddar gives a rich, creamy taste. Both work well with zucchini. Experiment and find your favorite! You can add more veggies for extra flavor. Bell peppers, spinach, or mushrooms are great choices. Seasonal veggies like asparagus or tomatoes can also shine in this dish. Pick what you love! Fresh herbs like basil or dill can enhance the taste. You might also try spices like paprika or black pepper. For added protein, mix in diced ham or fresh spinach. Each option makes the frittata more filling and flavorful. To keep your Zucchini and Feta Frittata fresh, store any leftovers right away. Let it cool down first. Place the frittata in an airtight container. This helps prevent it from drying out. You can also cover it tightly with plastic wrap. Refrigerate it within two hours of cooking. Use glass or plastic containers for best results. Glass containers are great for visible storage. They help you see the frittata without opening them. If you use plastic, make sure they are BPA-free. This ensures safety and health. Store the frittata for up to four days in the fridge. When you want to enjoy leftover frittata, reheat it gently. The best way is in the oven. Preheat the oven to 350°F (175°C). Place the frittata on a baking sheet. Cover it with foil to keep moisture in. Heat it for about 10-15 minutes until warm. You can also reheat it in the microwave. Use a microwave-safe plate and cover it with a damp paper towel. Heat it in short bursts of 30 seconds. Check it often to avoid overcooking. This keeps the frittata moist and tasty. To keep the texture just right, avoid high heat. High heat can make the frittata rubbery. Always reheat slowly, whether in the oven or microwave. This way, you enjoy a delicious meal that tastes fresh. For more details, check the Full Recipe. Yes, you can make this frittata ahead of time. Cook it fully, then cool it down. Store it in the fridge in an airtight container for up to three days. When you want to eat it, just reheat it in the oven or a skillet. This saves time on busy mornings. Yes, you can freeze the frittata. Cut it into wedges and wrap each piece tightly in plastic wrap. Place them in a freezer-safe bag or container. It can last for up to three months. To enjoy, thaw it in the fridge overnight and reheat in the oven. You can serve many things with a frittata. Here are some ideas: - Fresh salad - Sliced avocado - Roasted potatoes - Toast with butter - Cherry tomatoes These sides add color and flavor to your meal. A cooked frittata lasts about three to four days in the fridge. Store it in an airtight container. This keeps it fresh and tasty for your next meal. Yes, you can make a frittata without eggs. Try using these substitutes: - Silken tofu blended until smooth - Chickpea flour mixed with water - Flaxseed meal mixed with water These options give you a similar texture and flavor. They are great for a vegan option. For the best results, use the same amount as in the recipe. For detailed steps on making this dish, check the Full Recipe. This blog post guides you through making a delicious zucchini and feta frittata. We covered ingredients, how to prepare, and cooking steps. You learned tips for perfecting texture, serving ideas, and variations to try. Remember, you can make this dish your own with different veggies or cheese. Store leftovers properly and enjoy them later. Frittatas are easy to make ahead or freeze too. With these insights, you can cook and serve a tasty meal everyone will love. Enjoy your cooking journey!

Zucchini and Feta Frittata Tasty and Simple Dish

Looking for a quick and tasty meal? You’ll love this Zucchini and Feta Frittata! It’s simple to make and packed

- 1 ½ cups crushed graham crackers - ½ cup unsalted butter, melted - 2 cups cream cheese, softened to room temperature - 1 cup granulated sugar - 1 teaspoon pure vanilla extract - 3 large eggs, at room temperature - 2 cups fresh peaches, peeled and sliced - 1 teaspoon ground cinnamon - ½ teaspoon ground nutmeg - 1 cup sour cream, softened - ¼ cup brown sugar For this Peach Cobbler Cheesecake, the key ingredients make it shine. The crushed graham crackers give a nice base. The melted butter binds them well. Cream cheese is essential for a creamy texture. Granulated sugar sweetens the filling just right. Fresh peaches bring a fruity burst. The spices, like cinnamon and nutmeg, add warmth. Sour cream gives a smooth finish, while brown sugar adds a hint of caramel. You can get creative with toppings! Here are some great options: - Extra sliced peaches for garnish - Whipped cream for a light touch - A sprinkle of cinnamon for flavor - Chopped nuts for crunch Pair your cheesecake with these treats for a special touch: - Vanilla ice cream for a cool contrast - A dollop of whipped cream for extra fluff - Fresh mint leaves for a pop of color - A drizzle of caramel sauce for sweetness These options will enhance your Peach Cobbler Cheesecake experience. Make it your own and enjoy every bite! For the full recipe, check the section above. Preheat your oven to 325°F (160°C). In a mixing bowl, combine the crushed graham crackers and melted butter. Stir the mixture until it looks like wet sand. Next, press this mixture firmly into the bottom of a 9-inch springform pan. Make sure it is even all over. Bake the crust for 8-10 minutes, or until it turns a light golden brown. Once baked, remove it from the oven and let it cool while you prepare the cheesecake filling. In a large mixing bowl, beat the softened cream cheese with the granulated sugar. Use an electric mixer on medium speed until it becomes smooth and creamy. Add the vanilla extract and mix until well combined. Now, add the eggs one at a time. Make sure each egg is fully mixed in before adding the next one. This step is key for a smooth texture in your cheesecake. Now, gently fold in the fresh peach slices, ground cinnamon, and nutmeg into the cheesecake mixture. Use a spatula for this to keep the peaches intact. Once everything is well mixed, carefully pour the filling over the cooled crust. Spread it out evenly. Place the cheesecake in the oven and bake for 50-60 minutes. The center should be just set but still jiggle slightly. Once done, let the cheesecake cool at room temperature for about an hour. Afterward, transfer it to the refrigerator. Chill it for at least 4 hours, or overnight for the best results. You can find the Full Recipe at the beginning of this article. To get the best texture in your peach cobbler cheesecake, use room temperature ingredients. Cream cheese blends better when it’s not cold. It helps to create a smooth filling. Also, avoid overmixing your batter. Mixing too much adds air and can cause cracks. One common mistake is baking too long. Keep an eye on your cheesecake. It should have a slight jiggle in the center when done. This means it will set perfectly as it cools. Skipping the chilling step is another big no. Chilling is key for a firm cheesecake, so resist the urge to cut it too soon. For the best taste, serve your cheesecake cold. This enhances all the flavors. Ideal garnishes include fresh peach slices or a sprinkle of cinnamon. Both add a nice touch and flavor boost. You can even drizzle some caramel sauce for extra sweetness. {{image_4}} You can change the flavor of your Peach Cobbler Cheesecake in fun ways. Try adding other fruits. Fresh blueberries or raspberries give a nice twist. Sliced strawberries also add a bright flavor. Mix and match to find your favorite! You can also infuse your cheesecake with spices. Nutmeg adds warmth and depth. Ginger gives a nice zing. Just a pinch of these spices can enhance the peach flavor. Experiment a little to see what you like best! If you need a gluten-free dessert, you can make a simple change. Use gluten-free graham crackers for the crust. They work well and taste just as good. For vegan options, replace cream cheese with a plant-based version. You can also use flax eggs instead of regular eggs. This keeps the texture creamy and rich. Make sure to check the labels to ensure all ingredients are vegan! Mini cheesecakes are a great option for parties. You can use a muffin tin to make them. Just use cupcake liners for easy removal. They bake faster, so check them at 25 to 30 minutes. Adjust your baking time to make sure they set properly. You want them to jiggle slightly but not be runny. Let them cool and chill as you would the larger cheesecake! To keep your Peach Cobbler Cheesecake fresh, use an airtight container. Glass or plastic containers work well. Make sure the cheesecake cools before sealing it. This step helps prevent moisture buildup. Store it in the refrigerator. It will stay fresh and tasty for up to five days. If you want to save some for later, freezing is a great option. First, let the cheesecake cool completely. Wrap it tightly in plastic wrap. Then, cover it with aluminum foil. This method keeps flavors intact and prevents freezer burn. To thaw, place it in the fridge overnight. This slow thawing keeps the texture smooth and creamy. How long does Peach Cobbler Cheesecake last in the fridge? It lasts about five days when stored properly. Always check for signs of spoilage. Look for mold or an off smell. If the texture seems grainy or watery, it’s best to discard it. Enjoy this delicious treat while it’s fresh! For the full recipe, check the earlier section. Peach cobbler cheesecake is a sweet dessert that mixes two favorites. It has a creamy cheesecake layer topped with fresh peaches and spices. The base is crispy, made from crushed graham crackers and butter. Each bite gives you the taste of peach cobbler with the smoothness of cheesecake. It’s a perfect treat for summer or any gathering. Yes, you can use canned peaches. They are convenient and save time. However, canned peaches may be softer and have more juice. This can change the texture of the cheesecake. If you use canned peaches, drain them well to avoid a soggy filling. Fresh peaches offer a firmer texture and brighter flavor. To check if your cheesecake is done, look for a slight jiggle in the center. The edges should be set while the middle wobbles just a bit when you move the pan. It will continue to cook as it cools. Avoid overbaking, as it can crack and become dry. Remember, a well-made cheesecake should be creamy and smooth. Yes, this cheesecake is great for make-ahead desserts. You can bake it a day before your event. After cooling, chill it in the fridge for at least four hours or overnight. This allows the flavors to blend well. Just add the topping close to serving time for freshness. This way, you can enjoy your gathering without stress. For the complete recipe, check the Full Recipe link. This blog post gave you a clear guide to making Peach Cobbler Cheesecake. You learned about the key ingredients and step-by-step instructions. I shared tips to avoid common mistakes and ways to customize your dessert. Don’t forget the storage info for leftovers and answers to your frequently asked questions. Making this cheesecake can be fun and rewarding. Enjoy telling everyone about your sweet creation. Happy baking!

Peach Cobbler Cheesecake Delightful and Easy Recipe

Are you ready to indulge in a dessert that combines the best of both worlds? In this post, I’ll guide

- 2 medium zucchinis, finely grated - 1 teaspoon sea salt - 1/2 cup all-purpose flour (or almond flour for gluten-free) - 1/2 cup freshly grated Parmesan cheese - 1/2 cup shredded mozzarella cheese - 2 large eggs, lightly beaten - 2 green onions, finely sliced - 2 cloves garlic, minced - 1/2 teaspoon freshly ground black pepper - 1/4 teaspoon crushed red pepper flakes (optional) - Olive oil for frying Finding fresh ingredients is key. I love using bright, green zucchinis for this dish. They add great flavor and nutrition. The cheeses give a rich taste. Parmesan brings a sharpness, while mozzarella adds creaminess. You can choose almond flour if you need a gluten-free option. It still works well in the fritters. Fresh green onions and garlic provide a nice kick. And, if you want some heat, add crushed red pepper flakes. - Grater - Mixing bowl - Skillet - Paper towels Gather your tools before you start. A grater helps break down the zucchinis. A mixing bowl is great for combining all the ingredients. A skillet is essential for frying and getting that golden brown color. Paper towels help absorb extra oil after cooking. - Calories per serving: Approximately 150 - Breakdown of macronutrients: - Protein: 8g - Carbohydrates: 10g - Fat: 9g These fritters are not just tasty; they are nutritious too. Each serving provides a good balance of protein and healthy fats. Plus, they make a great snack or side dish. You can find the full recipe [here]. - Grate the zucchinis. Use a box grater or a food processor. - Squeeze excess moisture. Place grated zucchini in a towel, twist, and press hard. - Combine ingredients in a bowl. Add zucchini, salt, flour, cheeses, eggs, green onions, garlic, black pepper, and red pepper flakes. - Ensure even mixing. Stir until everything is well combined and looks uniform. - Preheat the skillet. Heat it on medium and add olive oil to coat the bottom. - Shape and fry fritters. Use a heaping tablespoon of the mix. Flatten it gently in the skillet. - Cook until golden brown. Fry each side for 3-4 minutes until they are crispy and brown. To get the full experience of this amazing dish, check out the Full Recipe! To get crispy fritters, start by draining the zucchinis well. Grate them and squeeze out extra moisture. Use a kitchen towel or cheesecloth for this. The drier the zucchini, the crispier your fritters will be. If you skip this step, you risk soggy fritters. Another way to achieve crispiness is to fry in hot oil. Heat your skillet properly before adding the fritters. This helps them form a nice crust quickly. Don’t overcrowd the skillet; give each fritter space to breathe. Seasoning is key for great flavor. I like to add fresh herbs like parsley or dill. You can also try spices like garlic powder or onion powder for extra taste. A pinch of salt enhances all the flavors too. Balancing flavors is important. If you add cheese, like Parmesan and mozzarella, make sure to taste the mix. You want a good blend without one flavor overpowering the others. You can choose to pan-fry or bake these fritters. Pan-frying gives a golden color and crispy texture. Heat your skillet with olive oil before adding the fritters. Cook them until they are golden brown on both sides. Baking is a healthier option but may not be as crispy. Preheat your oven to 400°F (200°C). Arrange the fritters on a baking sheet lined with parchment paper. Brush them lightly with oil for a nice finish. If you have an air fryer, use it! It cooks the fritters evenly and keeps them crisp. Preheat the air fryer and cook the fritters in batches. Check them regularly for that perfect golden brown. For the full recipe of Cheesy Zucchini Fritters, please refer to the designated section. {{image_4}} If you want to make these fritters gluten-free, you can switch the flour. Almond flour works well and gives a nice taste. You can also try coconut flour, but use less of it. About half the amount is usually enough. This change keeps the fritters crispy and tasty. You can make these fritters even better by adding more veggies. Sweet corn or diced bell peppers mix in nicely. They add color and flavor. You can also change the cheese. Feta gives a salty kick, while cheddar adds a rich taste. Each option brings out different flavors in the fritters. For dipping, tzatziki sauce is great. It adds a fresh, cool flavor. Marinara sauce also pairs well for a classic touch. You can serve these fritters with a side salad. They make a lovely appetizer too. The options are endless! For the full recipe, check the link. To store your leftover fritters, let them cool first. Place them in a container with a lid. You can use any airtight container. This keeps them fresh and tasty. I recommend using a glass or plastic container. You can stack them, but add parchment paper between layers to avoid sticking. Leftovers stay good in the fridge for about 3 days. When you want to eat your fritters again, reheating is key. The best method is to use a skillet. Heat the skillet over medium heat. Add a bit of olive oil for extra crispiness. Place the fritters in the skillet for about 2-3 minutes on each side. This way, they get warm and stay crispy. You could also use an oven. Preheat it to 350°F (175°C). Place the fritters on a baking sheet for about 10 minutes. You can freeze fritters both before and after cooking. If you freeze them raw, shape the fritters and place them on a baking sheet. Freeze them until solid, then transfer them to a zip-top bag. This way, they won’t stick together. If you freeze cooked fritters, let them cool first. Place them in a container or bag, with layers of parchment paper. They last in the freezer for up to 3 months. When you want to eat them, thaw in the fridge overnight for the best taste. Yes, you can prepare these fritters ahead of time. Here are some meal prep tips: - Prep the zucchini: Grate and drain the zucchini. Store it in a sealed container in the fridge for up to 24 hours. - Mix the batter: Combine all the ingredients and keep it in the fridge. Use it within a day for the best taste. - Cook later: Fry the fritters just before serving. This keeps them crispy and fresh. These fritters pair well with many sides and dips. Here are some great options: - Dips: Try sour cream, tzatziki, or ranch dressing for a creamy touch. - Salads: A fresh green salad with a light vinaigrette complements the rich flavors. - Vegetables: Serve with roasted or grilled veggies for a balanced meal. You can easily change this recipe to fit your taste. Here are some user-friendly substitutions: - Flour: Use almond flour for gluten-free fritters. - Cheese: Swap Parmesan for feta or cheddar for a different flavor. - Veggies: Add corn, bell peppers, or spinach for extra nutrition and taste. For the complete details, check the Full Recipe and enjoy making your Cheesy Zucchini Fritters! These Cheesy Zucchini Fritters are easy to make and fun to enjoy. Remember to squeeze out the moisture from the zucchinis for the perfect texture. Customize your fritters with different herbs or cheeses to fit your taste. Remember to store any leftovers properly to keep them fresh. With these tips and ideas, you can create an enjoyable dish every time. Get creative and make this recipe your own!

Cheesy Zucchini Fritters Savory and Simple Recipe

Are you ready to enjoy a tasty treat that’s both cheesy and healthy? My Cheesy Zucchini Fritters are simple to

- Ripe pineapple - Large cucumber - Red bell pepper - Red onion This salad starts with ripe pineapple. Choose one that feels heavy and smells sweet. The large cucumber adds a crisp bite. I prefer Persian or English cucumbers because they have fewer seeds. Next, we add red bell pepper for color and sweetness. Lastly, a bit of red onion gives a nice crunch. It balances the sweet and savory notes. - Jalapeño - Fresh cilantro For a spicy kick, you can add jalapeño. Be sure to seed it before chopping. Fresh cilantro adds a bright taste. I love how it enhances the pineapple's sweetness. Feel free to leave out either if you prefer a milder salad. - Fresh lime juice - Honey or agave syrup - Salt The dressing is simple but tasty. Start with fresh lime juice for zesty flavor. You can use honey or agave syrup to add sweetness. A pinch of salt brings all the flavors together. This dressing will make your salad pop! For the full details, check the Full Recipe. 1. In a large mixing bowl, combine the diced pineapple, cucumber, red bell pepper, and red onion. 2. If you enjoy a bit of heat, add the minced jalapeño into the mix for an extra layer of flavor. 3. In a separate small bowl, whisk together the freshly squeezed lime juice, honey, and a pinch of salt until the honey dissolves. This creates a bright and zesty dressing. 4. Drizzle the dressing over the combined salad ingredients. 5. Gently toss everything together with a spatula or wooden spoon. Make sure all components are well-coated with the dressing. 1. Toss the salad again to combine all ingredients well. 2. Stir in the freshly chopped cilantro, giving the salad another light toss to mix in the herbs evenly. 3. Allow the salad to rest at room temperature for about 10 minutes. This helps the flavors meld and enhances the overall taste. 1. To serve, present the salad in a large bowl or individual dishes. 2. Garnish with extra cilantro leaves and a wedge of lime on the side. This adds color and offers an option for extra freshness. Try this Pineapple Cucumber Salad recipe for a refreshing dish that is perfect for any occasion. For the full recipe, check out the details above. Choosing a ripe pineapple A ripe pineapple is sweet and juicy. Look for a golden color on the outside. The leaves should be green and fresh. Press gently on the skin; it should yield slightly. Smelling the base can also help. If it smells sweet, it’s ready! Selecting the best cucumber For this salad, choose a large cucumber. Persian or English cucumbers are great options. They have fewer seeds and a thinner skin. Look for firm cucumbers with a bright color. Avoid ones with soft spots or wrinkles. Adjusting sweetness and sourness The balance of sweet and sour is key. Start with two tablespoons of lime juice. Add honey for sweetness, about one tablespoon. Taste as you go. If it’s too sweet, add more lime juice. If it’s too sour, add more honey. Find your perfect mix! Substituting vegan options You can easily make this salad vegan. Instead of honey, use agave syrup. It adds sweetness without any animal products. This simple swap keeps the salad fresh and tasty for everyone. Adding more herbs Herbs can take your salad to the next level. Try adding mint or basil for a fresh twist. Just chop them finely and mix them in. This adds depth and complexity to the dish. Complementing with proteins Adding proteins can make this salad a meal. Grilled chicken or shrimp pairs well with the flavors. For a vegan option, try chickpeas or tofu. Both add texture and nutrients, making the salad more filling. {{image_4}} You can change this salad with seasonal fruits. In summer, add juicy peaches or ripe strawberries. These fruits bring sweetness and a nice color. For fall, try diced apples or pears. They add crunch and a sweet flavor. For vegetables, you can swap in colorful bell peppers. Yellow or orange peppers taste sweet and look great. You can also use radishes for a spicy bite. They add a fun twist to your salad. A bright citrus-based dressing works wonders. Mix orange juice with lime for a fresh taste. You can also add a splash of lemon juice for extra zing. If you like it spicy, try a dressing with chili oil. Just a few drops can add the heat you crave. You could mix honey with sriracha for a sweet and spicy kick. This combination adds depth to the flavors. Try different dressings to find your favorite blend. Grilled chicken is an easy way to make this salad a meal. Chop the chicken into bite-sized pieces. Toss it in with the other ingredients for a filling dish. If you prefer plant-based options, add chickpeas or black beans. They boost protein and fiber. You could also try cubed tofu, which soaks up flavors well. Mix and match until you find what you love. For the complete recipe, check out the [Full Recipe]. To keep your Pineapple Cucumber Salad fresh, store it in an airtight container. This helps seal in moisture and flavor. Place the container in the fridge right after serving. The salad lasts about 2-3 days in the fridge, but it tastes best when fresh. To maintain the bright flavors, avoid mixing the dressing with the salad until ready to eat. If you store it together, the cucumber may get soggy. When you’re ready to serve, give it a gentle toss after adding the dressing. This keeps the salad crisp and vibrant. For easy meal prep, chop your pineapple, cucumber, and other veggies ahead of time. Store each in separate containers. On the day you plan to serve, mix the ingredients and add the dressing. This keeps everything fresh and helps save time. Enjoy the bright taste of this salad without the rush! How can I make Pineapple Cucumber Salad spicier? You can add more jalapeño or include some chopped chili. For heat lovers, try a pinch of cayenne pepper. Mix it in slowly to get the right spice level for you. Can I make this salad ahead of time? Yes, you can prep the salad a few hours in advance. Just wait to add the dressing until right before serving. This keeps the salad fresh and crisp. What are some good pairings for this salad? This salad pairs well with grilled fish or chicken. You can also serve it alongside tacos or rice dishes for a bright contrast. What are the health benefits of pineapple and cucumber? Pineapple is full of vitamin C and helps with digestion. Cucumber adds hydration and is low in calories. Together, they make a light and healthy dish. Is this salad suitable for a vegan diet? Yes! This salad is vegan-friendly. Just swap out honey for agave syrup in the dressing for a sweet taste without the animal product. What can I use instead of honey? You can use agave syrup or maple syrup. Both will add sweetness without changing the salad's taste. How can I replace cilantro if I dislike it? If you don’t like cilantro, try parsley or green onions. Both add a fresh taste without being overpowering. This blog post explored how to make a refreshing Pineapple Cucumber Salad. We covered the main ingredients and optional additions that enhance flavors. I shared simple steps for preparation, mixing, and serving. You can also customize the dressing and make it your own. Remember to store leftovers properly and feel free to experiment with seasonal ingredients. Enjoy this salad on hot days or any time you want a light, tasty dish. Keep it fun and personal by adding your favorite ingredients. Happy salad-making!

Pineapple Cucumber Salad Refreshing and Vibrant Mix

Looking for a bright, refreshing dish that bursts with flavor? This Pineapple Cucumber Salad is the answer! With vibrant ingredients

- 4 medium zucchinis, thinly sliced - 1 cup cherry tomatoes, halved - 1 cup ricotta cheese - 1 cup shredded mozzarella cheese - 1/2 cup grated Parmesan cheese - 3 cloves garlic, minced - 1 tablespoon fresh basil, chopped - 1 tablespoon fresh thyme, chopped - 1 tablespoon olive oil - Salt and pepper to taste - 1/2 teaspoon red pepper flakes (optional for heat) - 1 cup breadcrumbs (for topping) When measuring, use a standard cup for dry ingredients. For liquids, a liquid measuring cup works best. Fresh herbs can be loosely packed into the tablespoon. For the zucchini, I prefer to slice them thinly for even cooking. This helps them blend well with the other flavors. You can swap out ricotta cheese for cottage cheese for a lighter option. If you want a vegan dish, use cashew cheese or tofu instead. Instead of cherry tomatoes, diced regular tomatoes work just fine. For a kick, try using jalapeños instead of red pepper flakes. If you have no breadcrumbs, crushed crackers or panko can add a nice crunch. For the Full Recipe, refer to the main article. Start by preheating your oven to 375°F (190°C). This step is key for cooking your casserole evenly. While the oven warms up, grab a large skillet and add olive oil. Heat it over medium heat. Once hot, add minced garlic. Sauté the garlic for about 1 minute until it’s fragrant but not burnt. Next, add the thinly sliced zucchini. Stir occasionally for 5-7 minutes. You want the zucchini to soften but still have some bite. Remember to season with salt, pepper, and red pepper flakes if you like heat. Once done, remove the skillet from heat and set it aside. Now, it's time to create those delicious layers. In a mixing bowl, combine ricotta cheese, half of the shredded mozzarella, half of the grated Parmesan, and chopped basil and thyme. Mix until everything is smooth and creamy. Take a greased baking dish and start layering. First, add half of the sautéed zucchini. Then, spread half of the ricotta mixture on top. Next, scatter half of the halved cherry tomatoes over this layer. Repeat this process. Add the remaining zucchini, followed by the rest of the ricotta mixture, and then the second half of the cherry tomatoes. Finish with the remaining mozzarella and Parmesan on top. For a crunchy finish, sprinkle breadcrumbs evenly over everything. Cover your baking dish tightly with aluminum foil. Place it in the preheated oven and bake for 25 minutes. After that time, carefully remove the foil. Keep baking for another 15-20 minutes. You want the top to be golden and bubbling. Once it’s done, let the casserole cool for about 5-10 minutes. This helps the flavors blend and makes it easier to cut. Enjoy your warm and tasty herb zucchini casserole! For a full recipe, check the detailed instructions above. When picking zucchini, look for firm, shiny ones. They should feel heavy for their size. Avoid zucchinis with soft spots or blemishes. Smaller zucchinis are often sweeter and more tender. Aim for ones around six to eight inches long. This size works best for a casserole. Herbs make this dish special. Fresh basil and thyme add depth. You can also try oregano or parsley for a new twist. I love using herbs from my garden. They taste fresh and vibrant. Chop them finely to release their oils. Adding herbs at different stages can boost flavor, too. Use some in the ricotta mix and sprinkle more on top before baking. One mistake is overcooking the zucchini. You want it tender, not mushy. Cook just until it’s slightly soft. Another issue is not seasoning enough. Salt and pepper enhance the taste. Don't forget to layer your ingredients properly. This ensures even cooking and flavor throughout. Lastly, let the casserole cool before serving. This helps it set and makes it easier to slice. {{image_4}} You can add more veggies to your herb zucchini casserole. Try bell peppers for sweetness. Spinach adds a nice green touch. Mushrooms give a great earthy flavor. Just chop them up and layer them with the zucchini. This adds color and boosts nutrition. Want to make your casserole heartier? Add protein! Cooked chicken or turkey works well. You can also use crumbled sausage for a richer taste. For a vegetarian option, add chickpeas or lentils. Mix them in with the cheese for a filling meal. If you need a gluten-free version, switch the breadcrumbs. Use ground almonds or gluten-free breadcrumbs instead. These will still give a nice crunch. Check the cheese labels to make sure they are gluten-free. Your herb zucchini casserole can still be tasty without gluten! For the full recipe, be sure to check the earlier section! After enjoying your Herb Zucchini Casserole, let it cool down. Place leftovers in an airtight container. Keep it in the fridge for up to three days. For best taste, store it in smaller portions. This makes it easier to reheat later. To reheat, place the casserole in a baking dish. Cover it with foil to keep it moist. Heat in the oven at 350°F (175°C) for about 20-25 minutes. You can also microwave individual portions. Just heat for one to two minutes, checking for warmth. If you want to save some for later, freezing is a good option. First, let the casserole cool completely. Cut it into slices, then wrap each slice in plastic wrap. Place the wrapped slices in a freezer-safe bag. It can last up to two months in the freezer. When you're ready to enjoy it, thaw in the fridge overnight before reheating. This keeps the flavors fresh and tasty. Yes, you can use frozen zucchini. However, it may change the texture. Frozen zucchini tends to be softer after thawing. I recommend squeezing out excess water before cooking. This helps keep your casserole from getting too watery. Your casserole can last about 3-5 days in the fridge. Make sure to store it in an airtight container. This keeps it fresh and tasty. If you see any signs of mold or off smells, it’s best to discard it. Yes, you can prepare the dish ahead of time. You can assemble the casserole a day before. Just cover it and store it in the fridge. When ready to bake, add a few extra minutes to the cooking time. This ensures it heats through well. For more detailed steps, check the Full Recipe. This guide detailed the key ingredients, steps, and tips for your casserole. You learned how to choose the best zucchini and enhance flavors. I shared common mistakes to avoid and variations to try. Proper storage will keep your leftovers fresh. With these insights, you’re ready to create a delicious dish. Enjoy experimenting with flavors and textures. Happy cooking!

Herb Zucchini Casserole Savory and Simple Recipe

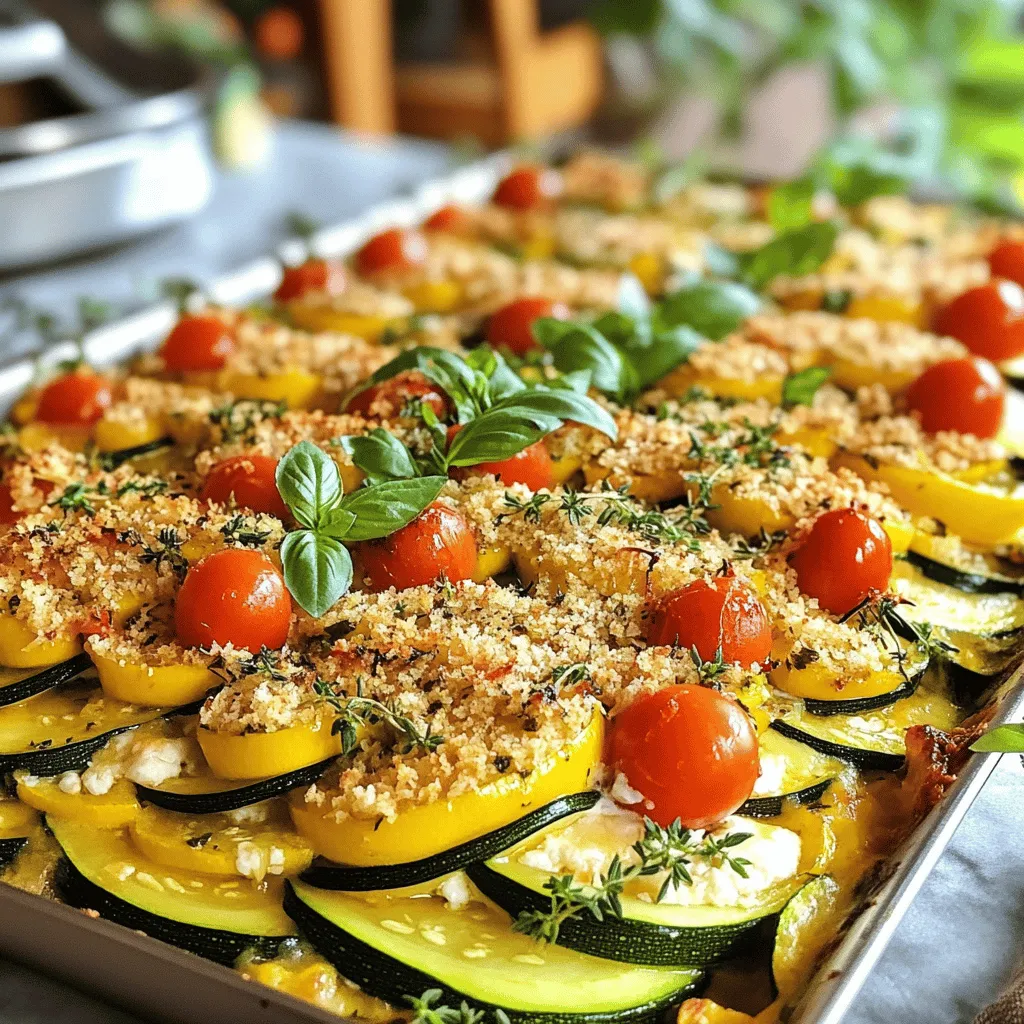
Welcome to my kitchen! If you love simple, tasty meals, you’re in for a treat. This Herb Zucchini Casserole combines

- 3 medium zucchinis, thinly sliced - 3 medium potatoes, thinly sliced - 1 medium onion, finely chopped - 2 cloves garlic, minced - 1 cup shredded cheese (cheddar or a blend) - 1 cup heavy cream - 1 teaspoon dried thyme - 1 teaspoon salt - 1/2 teaspoon black pepper - 2 tablespoons olive oil - 1/4 cup breadcrumbs (for topping) - Fresh parsley, chopped (for garnish) The zucchini in this dish adds a nice texture. It soaks up flavors and keeps the casserole moist. Potatoes provide a hearty base. They make the dish filling and comforting. Onion and garlic give it a warm, savory taste. Cheese and heavy cream create a rich, creamy layer. Seasonings like thyme, salt, and pepper bring everything together. Olive oil helps with cooking and adds flavor. Lastly, breadcrumbs on top give a nice crunch. - Variations on cheese (e.g., mozzarella, parmesan) - Alternative toppings (e.g., herbs, crispy onions) You can switch the cheese for mozzarella or parmesan if you like. These cheeses melt well and add depth. For toppings, consider fresh herbs or crispy onions for extra flavor and crunch. These small changes let you personalize the dish. - Casserole dish - Mixing bowls - Knife and chopping board - Whisk To make this dish, you need a casserole dish. It holds everything together while cooking. Mixing bowls help combine the ingredients. A knife and chopping board are essential for cutting vegetables. A whisk is great for mixing the cream and cheese smoothly. With the right tools, cooking becomes easier and more fun. For the full recipe, check out the details above! 1. Preheat your oven to 375°F (190°C). This makes sure it's hot enough to cook the casserole right. 2. Slice the zucchinis and potatoes thinly. Chop the onion finely and mince the garlic. Put all these in a big bowl. 3. Add dried thyme, salt, and black pepper to the bowl. Mix everything well so the flavors blend. 4. In another bowl, whisk the heavy cream with half of the shredded cheese until smooth. This will make the casserole creamy and rich. 1. Grease a 9x13-inch casserole dish with olive oil to avoid sticking. Start with half of the zucchini and potato mix, spreading it evenly in the dish. 2. Pour half of the cream mixture over the veggies. Let it soak in so every bite is tasty. 3. Repeat this process with the remaining veggies and the rest of the cream mix. Top it off with the leftover shredded cheese for extra flavor. 1. Cover the dish with aluminum foil to keep it moist. Bake in the preheated oven for 30 minutes. This helps the veggies soften up and the flavors mix. 2. Carefully remove the foil and bake for another 15-20 minutes. You want the top to turn golden brown. Check that the veggies are tender with a fork. 3. Once baked, let the casserole cool for a few minutes. Before serving, sprinkle some fresh parsley on top for color and taste. Enjoy this flavorful and comforting dish from the Full Recipe! To make your zucchini potato casserole taste even better, adjust the seasonings. You can add more thyme or sprinkle in some paprika for a kick. Fresh herbs like basil or oregano also work well. If you want protein, mix in some cooked chicken or sausage. This will give your dish a heartier feel and more flavor. For the perfect crispy topping, use fresh breadcrumbs mixed with a little olive oil. This helps them brown nicely in the oven. If you want a healthier option, try gluten-free breadcrumbs or crushed nuts. They add a nice crunch without using wheat. Pair this casserole with a fresh salad or steamed veggies. A light vinaigrette complements the dish well. To present your casserole nicely, serve it in the baking dish for a homely look. You can also add a sprinkle of extra cheese or fresh herbs on top for a colorful finish. For more ideas, check the Full Recipe. {{image_4}} To make this dish fit your needs, try some easy changes. You can add more vegetables to create a vegetarian version. Bell peppers, mushrooms, or spinach work well. Just chop them up and mix them in. If you want a dairy-free option, use coconut cream instead of heavy cream. You can also swap in vegan cheese for a creamy touch without dairy. Seasonal vegetables can add new flavors. In summer, toss in some fresh squash or tomatoes. In fall and winter, use root veggies like carrots or sweet potatoes. You can also switch herbs based on the season. Use fresh basil in summer and thyme or rosemary in winter for a cozy feel. Get creative with flavors! For a Mexican-inspired version, add jalapeños and spices like cumin and chili powder. This will give your casserole a nice kick. If you want a Mediterranean style, mix in olives and crumbled feta cheese. These options will change the dish while keeping it comforting and delicious. For the full recipe, check out the complete guide! To store your Zucchini Potato Casserole, let it cool first. This step helps prevent moisture that could make the dish soggy. Use an airtight container to keep it fresh. If you don’t have one, wrap it tightly with plastic wrap or foil. This keeps out air and helps maintain flavor. If you want to freeze the casserole, cut it into portions. Place the portions in freezer-safe bags or containers. Remove as much air as possible to avoid freezer burn. For long-term storage, this dish lasts up to three months in the freezer. When you are ready to eat, let it thaw overnight in the fridge. Reheat it in the oven at 350°F (175°C) until it’s hot all the way through. This helps keep the flavors and texture intact. In the fridge, the casserole can last about 3 to 5 days. If you freeze it, remember to use it within three months for the best taste. Look for signs of spoilage like a sour smell, discoloration, or mold. If you see any of these, it’s best to throw it away. Keeping track of your leftovers ensures you enjoy every bite of this comforting dish! Can I substitute other vegetables in this casserole? Yes, you can use other veggies. Carrots, bell peppers, or spinach work well. Just cut them in similar sizes. This adds flavor and nutrition. Is it necessary to peel the potatoes and zucchinis? Peeling is not needed. The skins add nutrients and texture. Just wash them well before slicing. How can I make this dish ahead of time? Prepare the casserole a day before. Store it in the fridge, covered. Bake it fresh when ready to serve. This saves time and keeps flavors strong. What can I serve with Zucchini Potato Casserole? This casserole pairs great with a salad or grilled chicken. You can also serve it with crusty bread for a hearty meal. How many calories are in Zucchini Potato Casserole? One serving has about 350-400 calories. This can vary based on cheese and cream used. Is this recipe suitable for meal prep? Yes, it’s perfect for meal prep. You can make it in batches. Just store it in containers for easy lunches or dinners. You have learned how to make a delicious Zucchini Potato Casserole. We covered all the key ingredients, tools, and steps. This dish is easy to customize with different flavors and textures. Remember, cooking is about trying new things. Don’t be afraid to tweak the recipe to suit your taste. Enjoy sharing this hearty meal with friends and family. With these tips, your casserole will be a hit every time!

Zucchini Potato Casserole Flavorful and Comforting Dish

Looking for a dish that’s both tasty and easy to make? My Zucchini Potato Casserole is just what you need.

- 4 medium zucchinis, sliced into thin rounds - 4 tablespoons unsalted butter - 4 cloves garlic, finely minced - 1 cup shredded mozzarella cheese - 1/2 cup grated Parmesan cheese I love using fresh zucchinis for this dish. They bring a lovely texture and taste. Unsalted butter is key as it lets the garlic shine. I always use fresh garlic because it makes everything pop. The blend of mozzarella and Parmesan adds creaminess and depth. - 1 teaspoon dried oregano - 1 teaspoon dried thyme - Salt and black pepper to taste Seasonings really enhance the flavors. Dried oregano and thyme work well with zucchini. A pinch of salt and some black pepper balance everything perfectly. - 1/2 cup panko breadcrumbs - Fresh parsley for garnish Panko breadcrumbs are my secret to a crunchy topping. They add a delightful texture. Fresh parsley not only looks great but also adds a fresh taste. For the full recipe, check the detailed instructions. - Step 1: Preheat the oven Preheat your oven to 375°F (190°C). This is key for the best bake. - Step 2: Sauté garlic in butter In a large skillet, melt 4 tablespoons of unsalted butter over medium heat. Once melted and bubbling, add 4 cloves of minced garlic. Stir for 1-2 minutes until fragrant. Watch closely to avoid burning the garlic. - Step 3: Add zucchini and seasonings Next, add 4 sliced zucchinis to the skillet. Season with salt, black pepper, 1 teaspoon of dried oregano, and 1 teaspoon of dried thyme. Cook for 5-7 minutes, stirring often. The zucchinis should be tender but still have some crunch. - Step 4: Cool the mixture Remove the skillet from heat and let the zucchini mix cool for 2-3 minutes. Cooling helps keep the cheese from melting too fast. - Step 5: Mix with cheeses In a big bowl, combine the zucchini mixture with 1 cup of shredded mozzarella cheese and 1/2 cup of grated Parmesan cheese. Stir well to mix everything evenly. - Step 6: Prepare the casserole Grease a 9x13-inch casserole dish with cooking spray or extra butter. Pour the zucchini mix into the dish and spread it out evenly. - Step 7: Add the topping In a small bowl, combine 1/2 cup of panko breadcrumbs with the remaining Parmesan cheese. Sprinkle this mix over the top for a crunchy finish. - Step 8: Bake and garnish Place the casserole in your preheated oven. Bake for 25-30 minutes until the top is golden and bubbly. After baking, let it rest for 5 minutes. Garnish with chopped parsley before serving. For the complete cooking steps, check the Full Recipe. Enjoy your garlic butter zucchini casserole! To make your Garlic Butter Zucchini Casserole shine, pay attention to a few key steps. First, avoid burnt garlic. When you sauté garlic, keep a close eye on it. Garlic cooks quickly. If it turns too brown, it can taste bitter. Aim for a light golden color for the best flavor. Next, ensure your zucchini retains its crunch. Cook the zucchini just enough to soften slightly. It should still have some bite. If you cook it too long, it becomes mushy. Remember, you want that nice mix of tender and crunchy in every bite. When serving your casserole, think about presentation. You can serve it warm right from the dish for a casual feel. For a fancier look, place individual portions on plates. Garnish each plate with more chopped parsley. A sprinkle of extra Parmesan cheese adds elegance too. Pair your casserole with side dishes. A fresh salad or crusty bread complements the flavors well. You might also enjoy it with grilled chicken or fish for a balanced meal. Want to boost the flavor of your casserole? Add spices or herbs. A pinch of red pepper flakes gives it a nice kick. You can also try fresh herbs like basil or chives for a burst of freshness. If you’re a cheese lover, consider alternative cheese options. Cheddar cheese adds a sharp flavor. Feta cheese can bring a nice tang. Experiment with different cheeses to find your favorite combination. You can even mix and match to create a unique twist on this classic dish. {{image_4}} You can switch the cheeses in this casserole for new tastes. Cheddar cheese adds a sharp flavor, making the dish rich and creamy. Feta cheese offers a tangy twist, giving a Mediterranean touch. If you prefer dairy-free options, vegan cheese substitutes work well. Look for vegan mozzarella or cheddar to keep the same texture. Boost the protein in your casserole by adding ground turkey or chicken. Cook the meat separately and mix it in with the zucchini. This addition makes the dish heartier. You can also use beans like black beans or chickpeas for a plant-based option. They add protein and fiber, making the meal more filling. Feel free to add other vegetables to your casserole. Bell peppers and onions can enhance the flavor and color. Just chop them up and sauté with the zucchini. You can also use summer squash for a similar texture. Mixing in different veggies makes the dish fun and colorful. You can find more ideas in the Full Recipe. To keep your Garlic Butter Zucchini Casserole fresh, store leftovers in the fridge. Place the casserole in an airtight container. This will help seal in moisture and flavor. If you do not have an airtight container, cover the dish tightly with plastic wrap. This will also work well. Consume the leftovers within three to four days for the best taste. If you want to save the casserole for later, freezing is a great option. Allow the casserole to cool completely before freezing. Transfer it to a freezer-safe container. You can also wrap the dish tightly in aluminum foil. It will keep well for up to three months. For reheating, first thaw it in the fridge overnight. Then, reheat it in the oven at 350°F (175°C) until heated through, about 20-25 minutes. In the fridge, the casserole lasts for about three to four days. After this time, it may not taste as good. Look for signs that it has gone bad, like a sour smell or mold. If you see any discoloration or an off smell, it’s best to throw it away. Enjoy your Garlic Butter Zucchini Casserole fresh for the best flavor! Yes, you can prepare this casserole ahead of time. To do this, follow these tips: - Prep the Zucchini: Slice the zucchinis and sauté them with garlic as the recipe states. - Cool the Mixture: Let the mixture cool down before mixing in the cheeses. - Assemble the Casserole: Place the mixture in your greased baking dish and cover it tightly with foil. - Refrigerate: Store it in the fridge for up to 24 hours. - Bake When Ready: When you want to bake it, remove it from the fridge, uncover, and bake as the recipe suggests. This method saves time and is perfect for busy days. Yes, it can be gluten-free! Here are some alternatives: - Use Gluten-Free Breadcrumbs: Instead of panko, choose gluten-free breadcrumbs for the topping. - Check Cheese Labels: Ensure that the cheeses you use are gluten-free, as some brands may add fillers. - Watch Seasonings: Most dried herbs and spices are gluten-free, but check for any added ingredients. These swaps make the casserole safe for gluten-free eaters. You can easily make this casserole more filling by adding: - Whole Grains: Mix in cooked quinoa or brown rice to add fiber and protein. - Proteins: Incorporate cooked chicken, turkey, or even beans for extra heartiness. - Nuts or Seeds: Sprinkle some toasted nuts or seeds for added texture and nutrition. These options will turn your dish into a more balanced meal. For the complete recipe, check out the Full Recipe. In this blog post, we explored how to make a delicious garlic butter zucchini casserole. We covered the main ingredients like zucchini, garlic, and cheese. You learned step-by-step instructions, tips for perfecting your dish, and exciting variations. This casserole is versatile, easy to store, and fun to share. You can customize it to fit your taste. Enjoy this simple yet tasty meal that everyone will love. Happy cooking!

Garlic Butter Zucchini Casserole Flavorful and Easy Dish

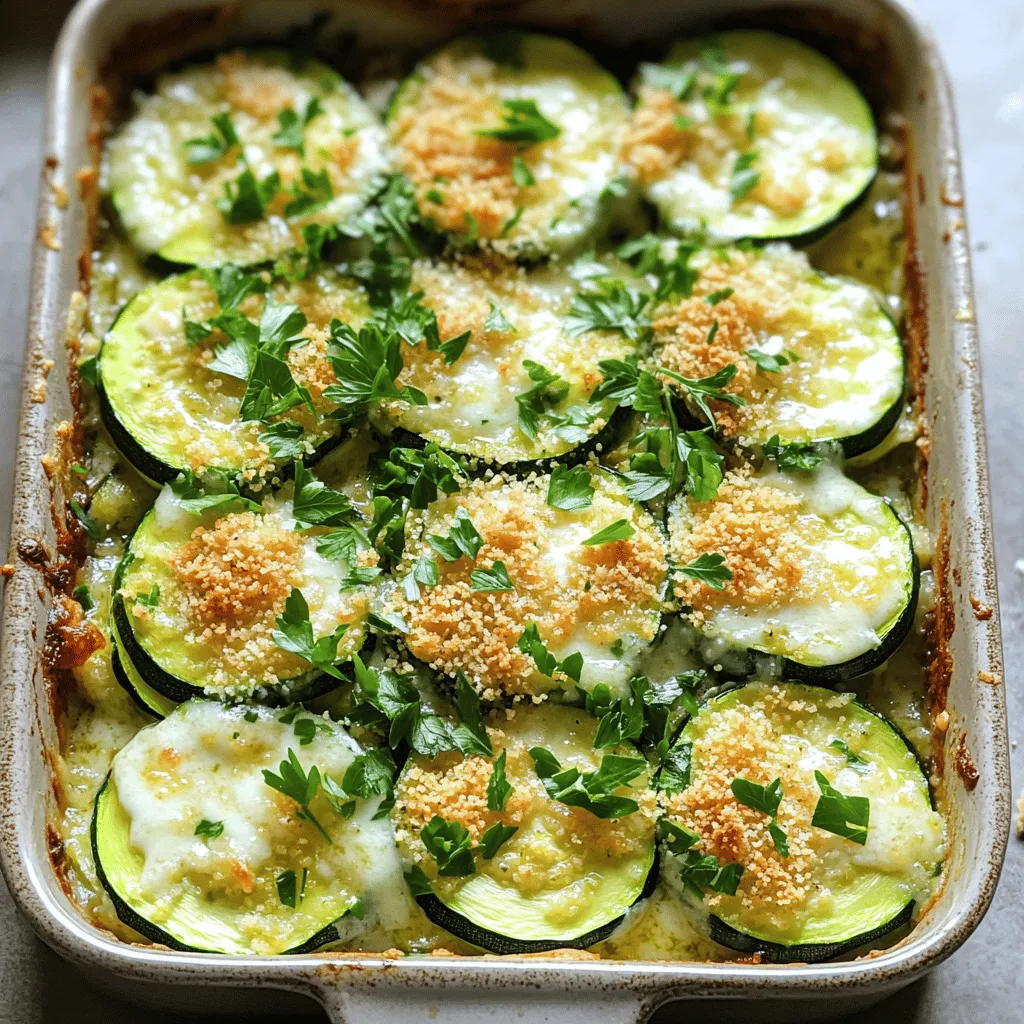
Looking for a dish that’s both tasty and simple? You’ve found it! My Garlic Butter Zucchini Casserole is a delightful

Older posts
Newer posts
← Previous Page1 … Page12 Page13 Page14 … Page75 Next →

dsad

© 2025 lazychefmagic • Built with GeneratePress

Our Policies

  • Copyright Policy
  • Cookie Policy
  • GDPR Policy
  • Privacy Policy
  • Disclaimer
  • Terms Of Use

More Information

  • Home
  • About
  • Contact
  • Appetizers
  • Dessert
  • Dinner
  • Drinks
©2025, lazychefmagic About Back To Top