Skip to content
DisclaimerTerms Of UseGDPR PolicyCookie Policy

lazychefmagic

  • Home
  • Drinks
  • Appetizers
  • Dinner
  • Dessert
  • About
  • Contact
  • Privacy Policy
DisclaimerTerms Of UseGDPR PolicyCookie Policy

Amanda

To make Sweet Mango Sticky Rice Rolls, you need the following ingredients: - 1 cup glutinous rice - 1 ½ cups coconut milk - 2 tablespoons sugar - ¼ teaspoon salt - 2 ripe mangoes, peeled and sliced into thin strips These ingredients work together to create a creamy and sweet treat. You can enhance your rolls with these optional toppings: - 2 tablespoons toasted sesame seeds - Shredded coconut These garnishes add texture and flavor to your dish. You can choose any of them based on your taste. Here are the kitchen tools you will need: - Bamboo steamer or steam-safe dish - Cheesecloth (for easy rice removal) - Mixing bowls Having the right equipment makes cooking easier and more fun! To start, rinse the glutinous rice under cold water. Do this several times until the water runs clear. This step is key to removing excess starch. It helps keep the rice from getting too gummy. After rinsing, soak the rice in fresh water. Aim for at least 4 hours, but overnight is best. When ready to cook, drain the rice well. Next, we need to steam the rice. Set up a bamboo steamer or a steam-safe dish. Line your steamer basket with cheesecloth. This makes it easy to remove the rice later. Spread the drained rice evenly in the steamer. Steam the rice for about 20 to 25 minutes. Check for doneness by looking for a translucent and tender texture. While the rice is steaming, prepare the coconut sauce. Pour 1 ½ cups of coconut milk into a saucepan. Add 2 tablespoons of sugar and ¼ teaspoon of salt. Heat this mixture over medium-low heat. Stir until the sugar dissolves completely. Avoid boiling the sauce to keep it smooth. Now for the fun part—assembling the rolls! Lay out banana leaves or parchment paper on your work surface. Take a handful of the sticky rice. Mold it into a rectangle about ½ inch thick on the leaf or paper. Leave some space around the edges. Then, add a few strips of sliced mango in the center, laying them lengthwise. Carefully fold the edges of the banana leaf or parchment over the rice and mango. Roll tightly to enclose the filling. Repeat these steps with the remaining rice and mango. Finally, arrange the rolls on a platter and drizzle with coconut sauce. Don't forget to sprinkle toasted sesame seeds on top for added flavor. To make great sticky rice, soak the rice for at least four hours. If you can, soak it overnight. This helps the rice absorb water and become tender. When you steam it, use a bamboo steamer or a heat-safe dish. Line the steamer with cheesecloth. This makes it easy to lift the rice out. Steam the rice for about 20 to 25 minutes. The rice should be translucent and soft. If it seems too dry, add a bit more coconut milk afterward. If you can't find glutinous rice, you can try using jasmine rice. It won’t be as sticky, but it still tastes good. For the coconut milk, you can use almond milk or oat milk if you need a dairy-free option. In a pinch, sugar can be replaced with honey or agave syrup. You can also switch mango for other fruits like bananas or strawberries for a fun twist. These rolls pair well with a sweet drink like coconut water or Thai iced tea. You might also try serving them with fresh fruit on the side. For a complete meal, consider adding a light salad. A mix of greens with a tangy dressing would balance the sweet rolls nicely. Feel free to drizzle extra coconut sauce over the top for added flavor. Try to arrange the rolls on a nice platter for a beautiful presentation. For the full recipe, check out the Sweet Mango Sticky Rice Rolls recipe above. {{image_4}} You can switch up the flavors in your sweet mango sticky rice rolls. Try using other fruits like bananas, strawberries, or even peaches. Each fruit brings its own taste and texture. For example, bananas add creaminess, while strawberries add a fresh bite. You can mix and match fruits to find your favorite combo. Just slice the fruit thinly and add it in the same way as mango. Making this recipe vegan or gluten-free is easy. To make it vegan, ensure your coconut milk has no added ingredients that come from animals. Most brands are already vegan. For a gluten-free option, use certified gluten-free products. Glutinous rice is naturally gluten-free, so you’re already set there. Just double-check any sauces or toppings you use. They should also be gluten-free to keep the rolls safe for all diets. How you serve the rolls can make a big difference. You can create a beautiful dessert platter. Arrange the rolls on a large plate and drizzle coconut sauce on top. Add some fresh fruit on the side for color. You could also cut the rolls into bite-sized pieces. This makes them perfect for parties or snacks. Presenting them this way allows guests to enjoy them easily. To store leftover Sweet Mango Sticky Rice Rolls, place them in an airtight container. They will stay fresh for up to three days in the fridge. Make sure the rolls are completely cool before sealing them. This keeps the moisture in and the rolls soft. If you notice any excess moisture in the container, use a paper towel to absorb it. To freeze the rolls, wrap each one tightly in plastic wrap. Then, place them in a freezer-safe bag or container. They can be frozen for up to one month. When you want to eat them, remove the rolls from the freezer and let them thaw in the fridge overnight. To reheat, steam them for a few minutes until warmed through. This helps maintain their texture and flavor. Look for signs that your rolls are no longer good to eat. If you see mold or an off smell, it's time to toss them. If the rice feels dry or hard, it may not taste good anymore. Always trust your senses. When in doubt, it's better to be safe and not eat them. Enjoy your Sweet Mango Sticky Rice Rolls while they're fresh! It takes about 30 minutes to prep and 1 hour and 15 minutes total. You will spend around 4 hours soaking the rice, so plan ahead. Cooking the rice takes about 20 to 25 minutes. After that, you mix the rice with coconut sauce and assemble the rolls. Glutinous rice is key for this recipe. It gives the rolls their sticky texture. You can try using jasmine rice, but it won't be as sticky. Other rice types will not give the same results. Stick to glutinous rice for the best flavor and texture. Yes, you can make the rolls ahead of time. Just keep them in the fridge. They taste best fresh, but you can store them for up to 2 days. Wrap them well to keep them from drying out. The texture may change a bit when stored. This dish comes from Southeast Asia, especially Thailand. It is often served as a dessert or snack. Sweet mango sticky rice is a popular street food. The dish is a symbol of Thai culture and is enjoyed during special occasions. To make these rolls gluten-free, use glutinous rice as it is naturally gluten-free. For nut-free, avoid any nut toppings. If you're vegan, ensure your coconut milk is dairy-free. You can also swap the sugar for a vegan sweetener if needed. You now know how to make delicious Sweet Mango Sticky Rice Rolls. We covered essential ingredients, from glutinous rice to ripe mangoes. I shared tips on best practices for cooking and garnishing. You can even explore variations like using different fruits. Remember, storing leftovers properly ensures you enjoy them later. This dish not only tastes great but also reflects rich cultural traditions. Enjoy your cooking journey!

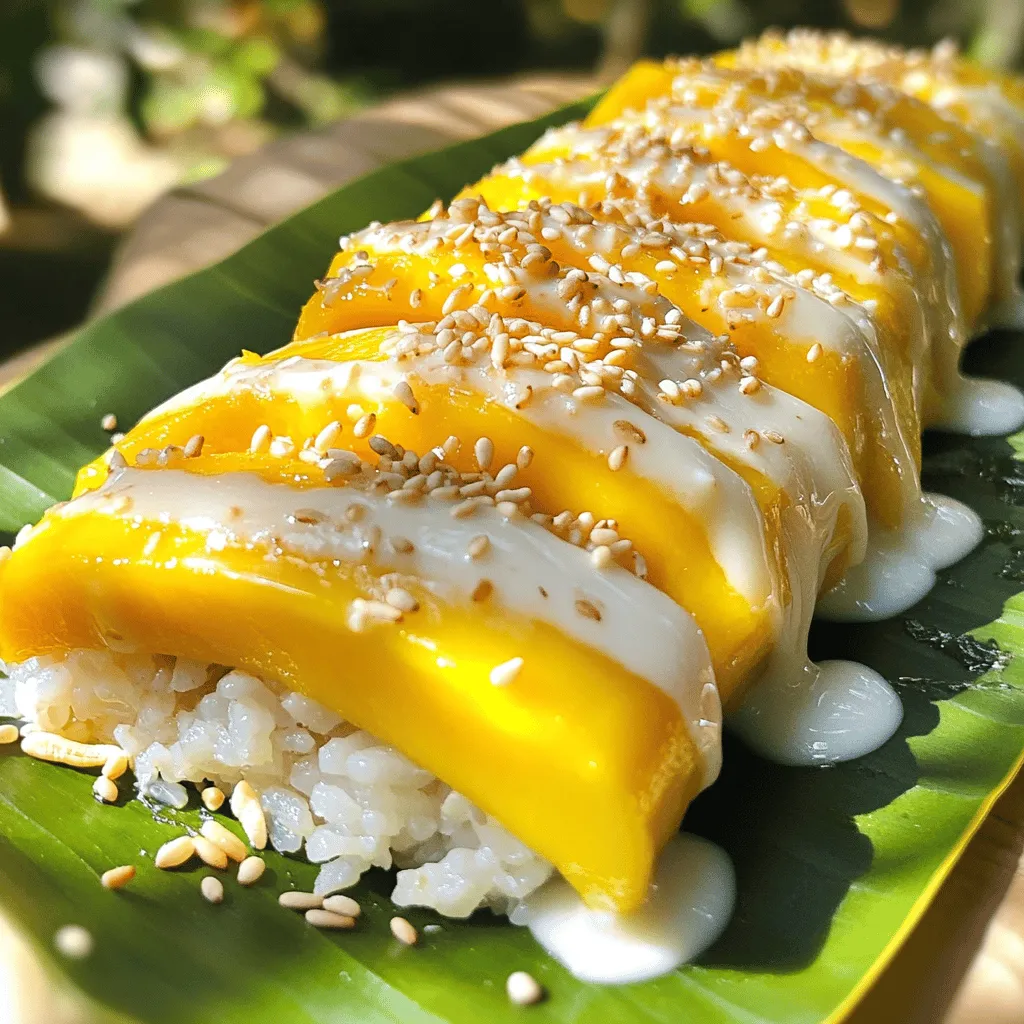
Sweet Mango Sticky Rice Rolls Delightful Snack Idea

Craving a sweet treat that’s also fun to make? Sweet mango sticky rice rolls are your answer! This delightful snack

- 1 ½ cups graham cracker crumbs - ½ cup unsalted butter, melted - 2 cups cream cheese, softened to room temperature - 1 cup granulated sugar - 2 ripe mangoes, pureed (set aside a portion diced for garnish) - 2 teaspoons pure vanilla extract - 3 large eggs - 1 tablespoon fresh lime juice - 1 cup sour cream - ¼ cup unflavored gelatin powder - ¾ cup cold water Gathering the right ingredients is key to a great mango cheesecake. Each part plays an important role. The graham cracker crumbs give a nice crunch. They form the base and add a sweet flavor. The unsalted butter helps hold the crust together. Cream cheese is the star of the filling. It gives the cheesecake its rich and creamy texture. Granulated sugar sweetens the mix. This balances the tartness of the mango and lime juice. Using ripe mangoes is a must. They add natural sweetness and a bright flavor. Be sure to puree them well. Set aside some diced mango for topping later. Pure vanilla extract enhances the overall taste. Eggs bind everything together, making it set nicely after baking. Sour cream adds a tangy twist and smoothness. The unflavored gelatin powder is important too. It helps the cheesecake hold its shape. Mixing it with cold water ensures it dissolves well. - For the graham cracker crust, you can use crushed cookies like Oreos or digestive biscuits. - If you need dairy-free options, try vegan cream cheese and coconut yogurt instead of sour cream. - For sweeteners, you can use honey, maple syrup, or a sugar substitute like stevia. These substitutions allow you to enjoy the cheesecake in different ways. Feel free to experiment, but keep the balance of flavors in mind. For the full recipe, check out the detailed instructions on how to create this delightful dessert! First, preheat your oven to 325°F (160°C). This step is key for even baking. In a medium bowl, mix the graham cracker crumbs with the melted butter. You want it to feel like wet sand. Then, take this mixture and press it into a 9-inch springform pan. Make sure it covers the bottom evenly. Bake the crust for 10 minutes. Once done, take it out and let it cool completely. Next, grab a large bowl and beat the softened cream cheese with a hand mixer. Mix until it’s smooth and creamy. Slowly add in the granulated sugar, blending it well. Now, pour in the mango puree, vanilla extract, lime juice, and sour cream. Mix until the batter is nice and smooth, free of lumps. Now it's time to add the eggs. Add one egg at a time, mixing gently after each. Avoid overmixing; just blend enough to combine. This keeps your cheesecake light and fluffy. In a small saucepan, whisk together the gelatin powder and cold water over low heat. Stir until it dissolves. Let it cool slightly, then stir it into the cheesecake batter. Carefully pour the cheesecake mixture into the cooled crust in your springform pan. Use a spatula to smooth the top. Bake the cheesecake for about 50-60 minutes. It should be set but still a bit jiggly in the center. After baking, turn off the oven and leave the door slightly open. This allows the cheesecake to cool slowly, which helps prevent cracks. Once it cools to room temperature, cover it tightly and refrigerate for at least 4 hours. For best results, chill it overnight. This helps the flavors blend and firms up the cheesecake. When you're ready to serve, top it with diced mango for a fresh look. Enjoy your Mango Cheesecake Delight! You can find the Full Recipe to explore more. To stop cracks on your cheesecake, bake it gently. Keep the oven door slightly open to let out steam. This slow cooling helps keep the surface smooth. For a creamy texture, use room temperature cream cheese. Mix it well until smooth before adding other ingredients. Avoid overmixing after adding eggs. This keeps your cheesecake light and airy. Garnish your cheesecake with fresh mango and mint. Dice some mango to add a pop of color on top. Place mint leaves for a fresh touch. This not only looks great but also adds flavor. Try pairing your cheesecake with a light dessert wine or herbal tea. These drinks enhance the sweet and tangy flavors of the mango. Use a springform pan for easy removal. This pan helps you serve the cheesecake without breaking it. A hand mixer or stand mixer is key for smooth batter. Having these tools makes mixing quick and easy. {{image_4}} For a quick treat, try a no-bake mango cheesecake. This version skips the oven and uses simple ingredients. Ingredients: - 1 ½ cups graham cracker crumbs - ½ cup unsalted butter, melted - 2 cups cream cheese, softened - 1 cup sweetened condensed milk - 2 ripe mangoes, pureed - 2 teaspoons pure vanilla extract - 1 tablespoon fresh lime juice - ¼ cup unflavored gelatin powder - ¾ cup cold water Method: 1. Mix graham cracker crumbs and melted butter in a bowl. 2. Press the mixture into a springform pan for the crust. 3. In another bowl, blend the cream cheese and sweetened condensed milk. 4. Add mango puree, vanilla, and lime juice. Mix until smooth. 5. Dissolve gelatin in cold water over low heat, then cool slightly. 6. Stir dissolved gelatin into the cream cheese mixture. 7. Pour this filling over the crust and chill for at least 4 hours. Benefits of no-bake option: - It saves time and energy. - You avoid the risk of cracks. - It stays creamy and smooth. - Perfect for hot days when you want a cool dessert. You can easily make a vegan version of mango cheesecake. Just switch a few ingredients. Plant-based substitute ingredients: - Use vegan cream cheese instead of regular cream cheese. - Replace sweetened condensed milk with coconut cream. - Use agar-agar instead of gelatin for a plant-based thickener. Adjusting the recipe for vegan diets: 1. Follow the same steps as the original recipe. 2. Blend vegan cream cheese and coconut cream to a smooth mix. 3. Use the agar-agar according to package directions to thicken. 4. Chill the vegan cheesecake until set. Mango cheesecake is versatile. You can mix in other flavors for fun twists. Adding coconut: - Mix shredded coconut into the filling before pouring it into the crust. - Top with toasted coconut for a crunchy finish. Mixing with other fruits: - Try blending mango with pineapple for a tropical taste. - You can swirl in raspberry or berry puree for a fruity twist. These variations can help you enjoy mango cheesecake in different ways! To keep your mango cheesecake fresh, store leftovers in the fridge. Use an airtight container or cover it tightly with plastic wrap. This helps maintain its creamy texture and flavor. You can refrigerate the cheesecake for up to five days. After that, it may lose its taste and texture. Always check for freshness before serving. If you want to keep your mango cheesecake for longer, freezing is a great option. To freeze it, wrap the cheesecake tightly in plastic wrap and then in aluminum foil. This prevents freezer burn. You can freeze it for up to two months. When you're ready to enjoy it again, take it out and place it in the fridge. Let it thaw slowly for several hours or overnight. Serve it cold and top it with fresh mango pieces for a tasty treat. For the full recipe, check out Mango Bliss Cheesecake. Making mango cheesecake takes about 5 hours in total. Here’s the breakdown: - Prep Time: 30 minutes - Bake Time: 50-60 minutes - Cooling Time: 1 hour in the oven - Chilling Time: At least 4 hours, but overnight is best Yes, you can make this cheesecake ahead of time. It’s best to prepare it one day in advance. This helps the flavors develop and the texture to firm up. Just store it in the fridge until you are ready to serve. Mango cheesecake pairs well with a few delightful options: - Fresh fruit: Slices of mango or berries - Whipped cream: Light and sweet topping - Mint leaves: For a pop of color and flavor - Drinks: Serve with iced tea or a light wine Yes, you can use frozen mangoes for this recipe. Here are a few adjustments: - Thaw the mangoes: Let them sit at room temp or use the microwave. - Drain excess moisture: This keeps the cheesecake creamy. - Blend them: Make sure to puree them well for a smooth texture. For the full recipe, refer to the provided details above. This blog post covers mango cheesecake from ingredients to storage and FAQs. You learned about key ingredients, alternatives, and tips for a creamy texture. We also explored variations, like no-bake and vegan options, to suit different tastes. In summary, this sweet treat is easy to make and fun to enjoy. Remember, with the right steps, your cheesecake can shine at any gathering. Now, get ready to impress your family or friends with this delicious recipe!

Mango Cheesecake Delight Simple and Creamy Recipe

If you crave a dessert that’s both simple and bursting with flavor, let’s dive into my Mango Cheesecake Delight recipe!

To make a delicious lemon posset, gather these key ingredients: - 2 cups heavy cream - 3/4 cup granulated sugar - 1/4 cup freshly squeezed lemon juice (about 2-3 lemons) - Zest of 2 lemons These ingredients create a rich and creamy base with a bright lemon flavor. The heavy cream gives it a smooth texture, while the sugar adds sweetness. Fresh lemon juice and zest bring that lovely citrus taste. For an extra touch, consider these optional garnishes: - Fresh berries (like raspberries or blueberries) - Mint leaves These garnishes not only look pretty but also add a burst of flavor. Fresh berries give a nice tartness, and mint adds a refreshing note. If you need to swap ingredients, here are some ideas: - Use coconut cream instead of heavy cream for a dairy-free version. - Try using honey or maple syrup in place of granulated sugar for a different sweetness. - If you don’t have fresh lemons, bottled lemon juice can work, but fresh gives the best taste. These substitutions can help you customize the recipe to fit your needs while still keeping the essence of lemon posset. Check out the Full Recipe for more details! Start by gathering your ingredients. You need heavy cream and sugar. In a medium-sized saucepan, mix the two. Place it on medium heat. Stir gently and watch for the sugar to dissolve. This will take a few minutes. Heat the mixture until it is warm but not boiling. Once your cream is warm, take it off the heat. Now, it's time to add the fun part! Squeeze the juice from your lemons. You need about a quarter cup. Add this juice to the warm cream. Next, add the zest from two lemons. Stir well to mix everything together. This is where the magic happens! Let the mixture cool for about five minutes. Then, strain it through a fine-mesh sieve. This step helps remove any bits of zest. Now, pour the smooth mixture into serving glasses or ramekins. Cover each one with plastic wrap. Place them in the fridge for at least four hours. If you can wait overnight, do it! This will give you the best texture. Enjoy your creamy lemon posset! For the full recipe, check out the earlier section. To get the best texture, follow these simple steps. First, heat the cream slowly. This step helps the sugar dissolve well. Make sure the cream does not boil. Boiling can ruin the smoothness. After adding lemon juice, let it cool slightly. Straining the mixture is key. It removes zest bits for a silky feel. Avoid boiling the cream. This can make your posset grainy. Also, do not skip straining. Leaving zest in can change the texture. Ensure you measure lemon juice accurately. Too much can make it too tart. Lastly, be patient when chilling. Letting it set overnight gives the best results. You can easily boost the flavor. Try adding a splash of vanilla extract. This adds warmth to the citrus. Another option is to mix in some lavender. It brings a lovely floral note. For a fun twist, add a hint of ginger. This gives a spicy kick to the sweet. Use these ideas to make your posset unique. Check out the Full Recipe for more ways to enjoy this dessert! {{image_4}} Lemon posset is great on its own, but you can mix it up! Try adding other fruits for fun flavors. For example, you can use lime juice instead of lemon juice. This gives a fresh twist. Or, add orange zest for a sweet touch. You can also blend in some pureed berries for a colorful pop. Another option is to infuse the cream with herbs like basil or thyme. These herbs add a unique taste that surprises your palate. How you serve lemon posset can change the experience. You can serve it in small glasses or ramekins. Layer it with crushed cookies or granola at the bottom for a crunch. This adds texture and makes it more filling. For a fancy touch, you can create a parfait by layering posset with fruit and whipped cream. Garnishing with fresh berries and mint leaves not only looks nice but also adds taste. You can also drizzle honey or a berry sauce on top for added sweetness. You can easily make lemon posset vegan. Just swap out the heavy cream for coconut cream. Use a plant-based sweetener in place of granulated sugar. This keeps the creamy texture while making it dairy-free. For a gluten-free version, ensure your sweetener is gluten-free, which most are. This dessert is already gluten-free as it does not use flour. Feel free to experiment with different plant-based milks if you want a lighter option. For the full recipe, check out the [Full Recipe]. Store your lemon posset in the fridge. Use airtight containers to keep it fresh. Cover each serving with plastic wrap to avoid any strong odors. This way, your posset stays creamy and zesty. Lemon posset lasts about 4 to 5 days in the fridge. After this time, it may lose its texture and flavor. Always check for any changes before enjoying. If it smells sour or looks off, it's best to toss it. You can freeze lemon posset, but it's not my first choice. The texture changes when thawed. If you still want to freeze it, place it in freezer-safe containers. It can last for about 1 month in the freezer. Thaw it overnight in the fridge before serving. For best results, enjoy it fresh using the Full Recipe. Lemon posset is a creamy dessert made from heavy cream, sugar, and lemon juice. It has a rich, tangy flavor and a smooth texture. This treat is easy to make and perfect for any occasion. You can enjoy it on its own or with fresh fruits. Yes, you can make lemon posset a day ahead. It actually tastes better when chilled overnight. Just prepare the posset, pour it into serving cups, and refrigerate. This way, you save time on the day you serve it. You can tell lemon posset is set when it feels firm to the touch. After chilling for at least four hours, gently shake the cups. If the posset jiggles slightly but holds its shape, it’s ready. For the full recipe of lemon posset, check out the detailed steps above. You'll find the ingredients and instructions to create this delightful dessert. Enjoy making it! Lemon posset is simple yet delightful. We covered essential ingredients and clever substitutions. You learned step-by-step methods for mixing and chilling. Tips helped avoid common mistakes, ensuring great texture. Variations let you play with flavors or make dietary changes. Remember to store properly so it lasts longer. Enjoy your lemon posset, and feel free to customize as you like! This treat is sure to impress your family and friends.

Lemon Posset Dessert Creamy and Citrus Delight

Are you ready to dive into a simple yet delightful dessert? Lemon Posset is creamy, refreshing, and oh-so-easy to make!

To make Summer Berry Mini Galettes, you need some simple and fresh ingredients. Here’s what you will need: - 1 ½ cups all-purpose flour - ½ teaspoon salt - 1 tablespoon granulated sugar - ½ cup cold unsalted butter, cut into small cubes - 4-5 tablespoons ice-cold water - 1 cup mixed summer berries (such as blueberries, raspberries, and diced strawberries) - 2 tablespoons granulated sugar (for the berry filling) - 1 tablespoon cornstarch - 1 teaspoon pure vanilla extract - 1 egg, beaten (for egg wash) - Turbinado sugar, for sprinkling Each ingredient plays a key role in creating the perfect balance of flavors and textures. The all-purpose flour gives the crust structure, while the cold butter makes it flaky. Ice-cold water helps keep the dough firm, ensuring a crisp base. Using mixed summer berries makes these galettes bright and juicy. You can choose your favorites, but a mix brings the best taste. The sugar and cornstarch help sweeten and thicken the berry filling. Finally, an egg wash makes the crust shine, while turbinado sugar adds a nice crunch. For the complete details on how to bring these flavors together, check out the Full Recipe. With these ingredients, you’ll create a dessert that is not only beautiful but also delicious! - Mixing dry ingredients: Start by taking a large bowl. Whisk together 1 ½ cups of all-purpose flour, ½ teaspoon of salt, and 1 tablespoon of granulated sugar. This mix gives your crust the right flavor and texture. - Incorporating butter into the mixture: Next, add ½ cup of cold unsalted butter, cut into small cubes. Use a pastry cutter or your fingertips. Mix until you see coarse crumbs with small pieces of butter. This step is key for a flaky crust. - Forming the dough: Gradually add 4-5 tablespoons of ice-cold water. Mix gently with a fork after each tablespoon. Stop when the dough starts to come together. Wrap it in plastic wrap and chill for at least 30 minutes. - Combining berries with sugars and cornstarch: In a separate bowl, take 1 cup of mixed summer berries. Add 2 tablespoons of sugar, 1 tablespoon of cornstarch, and 1 teaspoon of pure vanilla extract. - Gently mixing without crushing berries: Toss the berries carefully. You want to coat them well without smashing them. This keeps the filling fresh and juicy. - Rolling out the dough: Preheat your oven to 375°F (190°C). On a floured surface, roll out the chilled dough to about 1/8 inch thick. Use a round cutter or a plate to cut out 5-inch circles. - Filling and shaping the galettes: Place a generous tablespoon of the berry filling at the center of each dough circle. Fold the edges up towards the center, creating a rustic look while leaving the center open. Pinch the edges to hold. - Applying egg wash and sprinkling sugar: Brush each galette's surface with a beaten egg. Sprinkle turbinado sugar over the top for extra sweetness and a nice crunch. After following these steps, your Summer Berry Mini Galettes will be ready to bake! For the complete process, check the Full Recipe. - Set your oven to 375°F (190°C). This temperature gives a nice bake. - To get that golden color, watch the galettes closely. They should bake for 25-30 minutes. - Keep your butter cold. This helps make a flaky crust. Store the butter in the fridge until you are ready to use it. - If you don't have a rolling pin, use a wine bottle. Just be sure to flour it first. - Present your galettes on a rustic wooden board. Dust them with powdered sugar for a pretty look. - Pair them with whipped cream or ice cream for a special treat. You can also add fresh mint leaves for a pop of color. These tips will help you create the perfect Summer Berry Mini Galettes. For the full recipe, check the previous section! {{image_4}} You can swap berries for other fruits. Peaches and cherries work great too. Each fruit brings a new taste. Just remember to adjust the sugar based on how sweet your fruit is. For tart berries, add more sugar. For sweet fruits, you can cut back. Want to kick it up a notch? Add spices like cinnamon or nutmeg. Just a pinch can bring warm notes to your dessert. You can also infuse the crust with flavors. Try adding lemon zest or almond extract to the dough. Both will make your galettes extra special. If you need a gluten-free option, use almond flour or a gluten-free blend. Just be aware that it may change the texture a bit. For vegan galettes, replace the butter with coconut oil. Use a flax egg or applesauce instead of the regular egg wash. These adjustments make it easy for everyone to enjoy. Check out the Full Recipe for detailed steps to make your Summer Berry Mini Galettes irresistible! To keep your Summer Berry Mini Galettes fresh, store them properly. First, let them cool completely on a wire rack. Once cooled, place them in an airtight container. They will stay fresh in the fridge for about 3 days. If you want to keep them longer, you can freeze them. To freeze, wrap each galette in plastic wrap. Then place them inside a freezer-safe bag or container. This way, they can last up to 3 months. When ready to enjoy, you can thaw them overnight in the fridge. Reheating your galettes is simple and can bring back their crispy crust. The best way to reheat them is in the oven. Preheat your oven to 350°F (175°C). Place the galettes on a baking sheet and warm them for about 10-15 minutes. This method helps keep the crust crunchy and the filling warm. You can also use a microwave, but this may make the crust soft. If you choose the microwave, heat them in 30-second bursts until warm. However, for the best texture, stick to the oven method. These tips will help you enjoy your Summer Berry Mini Galettes at their best! For the complete recipe, check the Full Recipe section. Summer Berry Mini Galettes stay fresh for about 2–3 days. Store them in an airtight container at room temperature. They taste best when eaten fresh, but they can still be enjoyed later. If stored in the fridge, they may last up to a week, but the crust might lose some crispness. Yes, you can make the dough ahead of time. Wrap it tightly in plastic wrap and keep it in the fridge for up to 2 days. This helps the flavors develop and makes it easier to work with. You can also freeze the dough for up to a month. Just thaw it in the fridge before using. To thaw frozen galettes, place them in the fridge overnight. This method preserves their texture and taste. If you need them faster, you can leave them at room temperature for about 1–2 hours, but this may affect the crust's crispness. Yes, frozen berries work great in this recipe. They are often picked at peak ripeness and frozen quickly, so they taste amazing. Just make sure to drain any excess liquid before mixing them with sugar and cornstarch. This will help keep your galette from becoming too runny. To prevent sogginess, use a few simple tricks. First, sprinkle a bit of cornstarch on the dough before adding the filling. This creates a barrier that helps absorb excess juice. Second, avoid overfilling the galette. Lastly, bake them long enough to ensure the crust is golden and crisp. For more tips, check out the Full Recipe. In this post, we covered how to make delicious summer berry mini galettes. You learned about the key ingredients, step-by-step instructions, and helpful tips. Variations let you customize your galette with different fruits or dietary needs. Storing and reheating methods keep your dessert fresh for later. Remember, baking is fun and creative. Experiment with flavors and enjoy every bite of your galette!

Summer Berry Mini Galettes Irresistible Dessert Treat

When summer calls for something sweet, Summer Berry Mini Galettes are the answer! These easy, flaky treats burst with juicy

- 1 pound boneless, skinless chicken breasts - 1 cup quinoa - Fresh vegetables like cucumber and cherry tomatoes - 2 tablespoons extra virgin olive oil - 2 teaspoons dried oregano - 1 teaspoon garlic powder - Salt and pepper to taste - 1/2 cup feta cheese, crumbled - 1 cup Kalamata olives, pitted and halved - Juice of 1 fresh lemon - 1/4 cup fresh parsley, chopped Greek chicken bowls are colorful and tasty. The main ingredients create a hearty base. I love using boneless, skinless chicken breasts for their lean protein. Quinoa adds a nutty flavor and is packed with nutrients. Fresh vegetables like cucumber and tomatoes add crunch and color. For the marinade, I mix olive oil, dried oregano, garlic powder, salt, and pepper. This combination gives the chicken a lovely flavor. Marinating the chicken makes it juicy and tender, perfect for grilling. When it comes to toppings, feta cheese and Kalamata olives are a must. They bring a salty kick that pairs well with the chicken. Fresh lemon juice adds brightness. I sprinkle parsley on top for a fresh finish. You can find the full recipe in the previous section. Enjoy making this healthy meal! First, I prepare the marinade. In a medium bowl, I whisk together two tablespoons of extra virgin olive oil, two teaspoons of dried oregano, one teaspoon of garlic powder, and a good pinch of salt and pepper. This mix smells amazing! Next, I add one pound of boneless, skinless chicken breasts. I turn the chicken to coat it well with the marinade. For the best flavor, I cover it and let it marinate. I leave it at room temperature for at least 30 minutes or refrigerate it for up to two hours. Now, it’s time to cook the quinoa! In a medium saucepan, I bring two cups of vegetable broth to a boil. Using broth adds a great flavor to the quinoa. Once boiling, I add one cup of rinsed quinoa. I stir the quinoa in and reduce the heat to low. I cover the pot and let it simmer for about 15 minutes. When the liquid is absorbed, I take it off the heat and fluff the quinoa with a fork. Next, I preheat the grill to medium heat. I take the chicken out of the marinade and place it on the grill. I cook each breast for about 6 to 7 minutes on each side. I check that the internal temperature hits 165°F (75°C). Once done, I transfer the chicken to a cutting board. I let it rest for five minutes before slicing it into thin strips. It’s assembly time! In four serving bowls, I layer the cooked quinoa as the base. I then add the grilled chicken slices. Next, I top the bowls with diced cucumber, halved cherry tomatoes, sliced red onion, Kalamata olives, and crumbled feta cheese. For a lovely finish, I drizzle each bowl with fresh lemon juice. If I want, I add a splash of red wine vinegar. I love to sprinkle chopped parsley on top for a burst of color and flavor. - Presentation Tips: I serve each bowl with a lemon wedge and a sprig of fresh parsley. For a creamy touch, I sometimes add a scoop of tzatziki sauce on top or on the side. This makes the dish even better! For the complete list of ingredients and steps, check out the Full Recipe. To ensure your chicken is cooked through, use a meat thermometer. Cook until the internal temperature reaches 165°F (75°C). This step keeps your meal safe and juicy. After grilling, let the chicken rest for 5 minutes. This lets the juices settle. For perfect quinoa, rinse it thoroughly before cooking. This removes the bitter coating called saponin. When it’s done, fluff it with a fork. This makes it light and airy. Preparing ingredients in advance saves time during the week. Chop vegetables like cucumber and red onion ahead of time. Store them in airtight containers in the fridge. This keeps them fresh and crisp. To store leftovers, keep each component separate. Use glass containers for easy reheating. Properly stored, leftovers can last up to three days. Enhance your bowls with extra toppings. Try adding sliced avocado or roasted red peppers for more flavor. Fresh herbs like dill or mint can also brighten up the dish. When serving, add a wedge of lemon on the side. This gives a fresh kick. A scoop of tzatziki sauce makes a creamy addition that complements the chicken well. For a fun twist, serve with pita chips for crunch. For the full recipe, check out the Mediterranean Chicken Quinoa Bowls. {{image_4}} You can make Greek chicken bowls vegetarian by using chickpeas or tofu. Both options add protein and texture. Chickpeas have a nutty flavor, while tofu absorbs sauces well. Season them with dried oregano and garlic powder to match the chicken's taste. This way, you keep the flavor profile close to the original. You can also add a bit of smoked paprika for more depth. If you want to switch things up, try couscous or rice instead of quinoa. Couscous cooks quickly and has a light texture. Rice can add a heartier feel to your bowl. You can explore different grains like farro or bulgur for more variety. Each grain has its unique taste and can change the bowl's overall texture. Incorporate seasonal vegetables for freshness. In spring, use asparagus or peas; in summer, add bell peppers or zucchini. Adjust your dressings based on what's available, too. A light lemon vinaigrette works well with summer veggies. In winter, a richer dressing can enhance root vegetables like carrots or beets. By using seasonal ingredients, you create a bowl that's fresh and vibrant all year long. For the full recipe, check out the Mediterranean Chicken Quinoa Bowls. Store any leftovers in an airtight container. Make sure the chicken and quinoa cool down first. They will stay fresh for about three to four days. Always check for any odd smells before eating. If it smells off, throw it away. You can freeze the chicken and quinoa separately. Place them in freezer-safe bags or containers. Make sure to label them with dates. The chicken can last up to three months in the freezer. Quinoa will stay good for about two months. To thaw, move the chicken and quinoa to the fridge a day before you want to eat. For quick results, use the microwave on low power. Heat until warm, then enjoy your tasty Greek chicken bowls again. Yes, you can prepare these bowls ahead of time. Meal prep makes weeknight dinners easy. Cook the chicken and quinoa in advance. Store them in separate containers in the fridge. This way, they stay fresh for up to four days. When you are ready to eat, just reheat the chicken and quinoa. Then, assemble your bowls with fresh veggies and toppings. This keeps everything crisp and tasty. If you prefer something other than quinoa, there are great options. You can use brown rice, farro, or couscous. Each grain brings its own flavor and texture. For a low-carb option, consider cauliflower rice. It cooks quickly and soaks up flavors well. Just make sure to adjust cooking times. These alternatives can make your Greek chicken bowls unique. To make Greek chicken bowls gluten-free, choose gluten-free grains. Quinoa is already gluten-free. If you substitute, use gluten-free rice or gluten-free couscous. Double-check any packaged ingredients. Always look for gluten-free labels on items like feta cheese and olives. This ensures you enjoy a safe and tasty meal. Serve your Greek chicken bowls with refreshing sides. A simple Greek salad pairs well. You can also offer tzatziki sauce for dipping. For drinks, try sparkling water with lemon or a light white wine. These choices complement the flavors of your meal. They add a nice touch to your dining experience. This article covered how to make Greek chicken bowls with tasty ingredients. You learned about marinating chicken, cooking quinoa, and assembling your dish. I shared tips for meal prep and tasty variations too. Now, you can create your own bowls with fresh flavors and healthy options. Enjoy experimenting with the toppings, bases, and ingredients. These bowls make great meals for any day. Make them your own for a fun and delicious experience!

Greek Chicken Bowls Flavorful and Healthy Meal Idea

Are you looking for a tasty and healthy meal that’s easy to make? Greek chicken bowls are a delightful blend

For a vibrant Thai mango salad, you'll need these key ingredients: - 2 ripe mangoes, julienned - 1 medium cucumber, julienned - 1 red bell pepper, thinly sliced - 1/2 red onion, thinly sliced - 1 carrot, shredded - 1/4 cup fresh cilantro, chopped - 1/4 cup roasted peanuts, roughly chopped - 2 tablespoons fish sauce (or soy sauce for a vegetarian-friendly alternative) - 1 tablespoon fresh lime juice - 1 tablespoon honey or agave syrup - 1 red chili, minced (adjust according to your spice preference) - Salt and pepper, to taste These ingredients create a balance of sweet, sour, and crunchy flavors. The ripe mangoes give a sweet base. Fresh vegetables add crunch and color. To take your salad to the next level, consider these optional add-ins: - Fresh herbs like mint or basil for extra aroma - Protein options such as grilled shrimp or tofu for heartiness Adding protein can make this salad a full meal. The herbs will bring a fresh twist. Mangoes are not just tasty; they offer health benefits too. They are rich in vitamins A and C, which support skin and immune health. The fiber in mangoes aids digestion. Fresh vegetables and nuts are also important. They provide essential nutrients and healthy fats. The peanuts add protein and crunch, making the salad satisfying. For the full recipe, check out the detailed instructions! Start by washing all your produce well. Clean mangoes, cucumber, bell pepper, onion, and carrot. Peel the mangoes using a sharp knife. Cut them into thin julienne strips. Make sure the mangoes are ripe for the best taste. Do the same with the cucumber. For the bell pepper and onion, slice them thin. Shred the carrot to add texture. This step ensures every bite is fresh and crisp. In a large mixing bowl, combine the julienned mangoes, cucumber, red bell pepper, red onion, and shredded carrot. Use your hands or utensils to gently toss the ingredients. This helps the colors mix beautifully. Be careful not to mash the veggies. A gentle toss keeps everything fresh and crunchy. In a separate small bowl, whisk together the fish sauce (or soy sauce), fresh lime juice, honey (or agave syrup), and minced red chili. Whisk until the mixture is smooth. Taste the dressing and adjust it. If you want more sweetness, add honey. For more heat, add extra chili. This way, you make the dressing just right for your taste. Drizzle the dressing over the salad mixture. Toss everything gently to coat the ingredients well. Fold in chopped cilantro and roasted peanuts. This adds a nice crunch. Season with salt and pepper to taste. Allow the salad to sit for about ten minutes. This waiting time lets the flavors blend. You can find the full recipe if you want a more detailed guide. To choose ripe mangoes, look for these signs: - Skin should be mostly yellow or red. - Gently squeeze; it should have a little give. - Smell near the stem; a sweet aroma means it’s ready. I recommend using varieties like Haden or Alphonso. They are sweet and juicy, perfect for our salad. Adjusting sweetness and spice is key. If your salad is too sweet, add more lime juice. If it’s too spicy, add more mango or cucumber. Always taste as you go! Salt and pepper are vital for flavor. They help bring out the natural sweetness of the mangoes and the crunch of the veggies. For a stunning presentation, serve your salad in a big, colorful bowl. Top it with extra cilantro and peanuts for a nice touch. For a fun twist, use lettuce cups. Place a scoop of salad in each cup. This makes for a playful and hand-held treat! {{image_4}} For a vegetarian or vegan Thai mango salad, simply replace fish sauce with soy sauce. This swap keeps the umami flavor while making it plant-based. You can also choose alternative sweeteners. Honey works great, but agave syrup is a fine vegan choice. If you love heat, increase the number of chilies in the salad. Start with one and add more if you want a fiery kick. You can also include other spicy ingredients. Consider adding jalapeños or a dash of chili flakes for extra zest. Using seasonal fruits or vegetables can make this salad even better. In summer, add fresh berries or peaches. In the fall, try apples or pears. You can also adjust for different cultural flavors. Adding ingredients like sesame oil or rice vinegar can give it a unique twist. To keep your Thai mango salad fresh, store it in an airtight container. This helps seal in flavors and prevent browning. I recommend eating leftovers within two days for the best taste. If you notice any wilting of the veggies, it’s time to toss it. If you want to meal prep, chop all your veggies ahead of time. Store them separately, and mix them right before serving. This keeps the salad crunchy and fresh. I suggest making the dressing ahead too. Just wait to add it until you’re ready to eat. This way, your salad will taste bright and zesty. Freezing is not ideal for this salad. Mangoes and cucumbers lose their crunch when frozen. However, you can freeze the dressing. Just make sure to thaw it in the fridge before use. Avoid freezing any fresh veggies or herbs, as they won’t taste the same once thawed. To check if mangoes are ripe, look for these signs: - Skin color: A ripe mango often shows yellow or red hues. - Feel: Gently squeeze the mango. It should yield slightly under pressure. - Aroma: Ripe mangoes have a sweet, fruity smell near the stem. When buying mangoes, choose ones that feel heavy for their size. This means they are juicy. Avoid mangoes with dark spots or wrinkles, as they may be overripe. You can prepare the salad a few hours in advance. Here are some tips: - Chop the veggies and mango ahead of time. Store them in an airtight container. - Mix the dressing separately and keep it in the fridge. When you are ready to serve, combine everything. This keeps the salad fresh and crunchy. If you store the salad too long, the flavors can blend too much. The salad may lose its crispness. If you want a vegetarian option, try these substitutes: - Soy sauce works well and adds umami. - Tamari is a gluten-free alternative. These sauces provide a similar salty flavor. Adjust the amount to match your taste. Thai mango salad brings fresh flavors and vibrant colors to your table. We explored key ingredients, from ripe mangoes to fresh herbs, and optional add-ins for added taste. I shared easy steps for preparation and mixing, plus tips for selecting the best mangoes. You can create variations to suit your diet, whether vegetarian or spicy. Learning how to store leftovers helps keep the salad fresh. Enjoy making this salad and impressing others with your skills!

Thai Mango Salad Flavorful and Fresh Delight

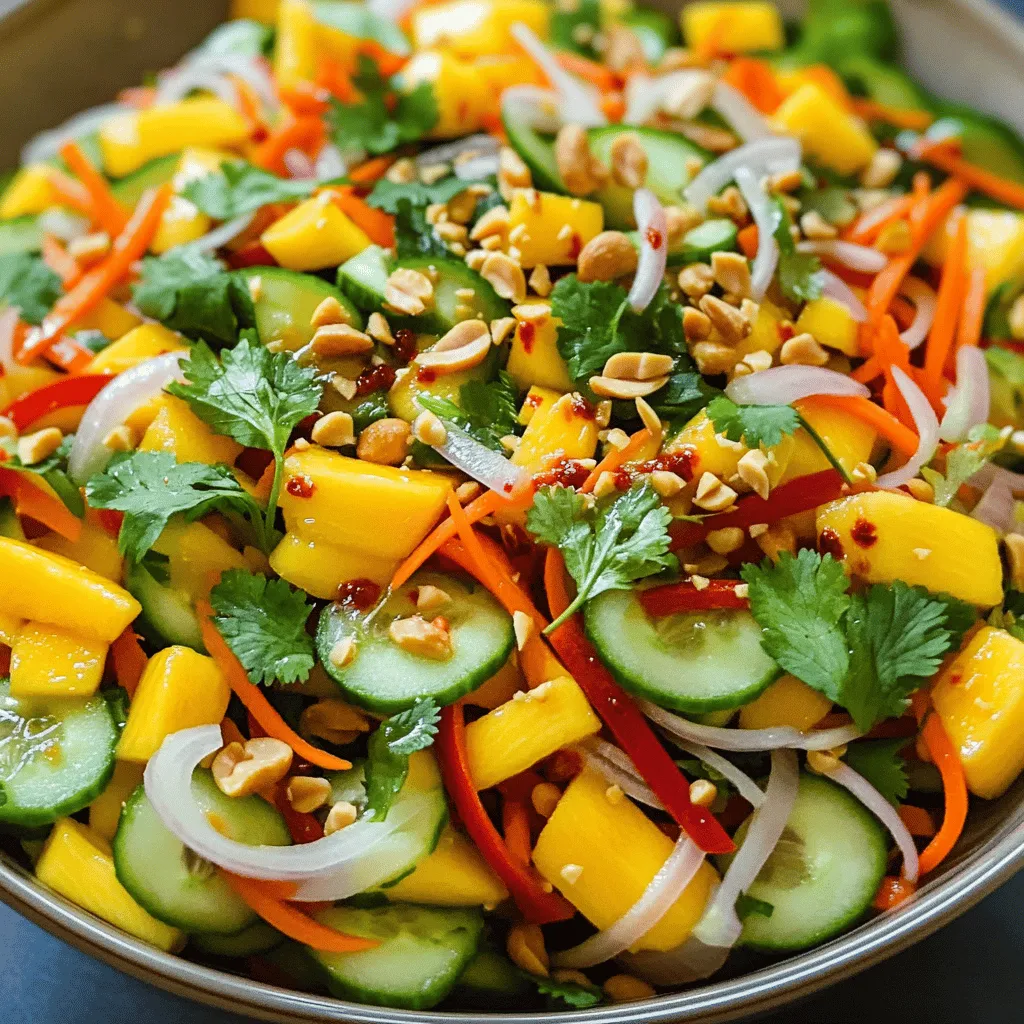
Welcome to a vibrant culinary journey where fresh meets flavorful! Thai Mango Salad is a delightful dish that marries sweet,

- 4 chicken thighs (bone-in, skin-on) - 2 tablespoons jerk seasoning - 1 tablespoon olive oil - 1 cup long-grain rice - 2 cups chicken broth - 1 can (15 oz) black beans, drained and rinsed I love using chicken thighs for this dish. They stay juicy and full of flavor. Jerk seasoning brings a wonderful mix of spices. Olive oil helps to sear the chicken well, creating a nice crust. Rice absorbs all those tasty juices and pairs perfectly with the beans. - 1 red bell pepper, diced - 1 cup corn kernels (fresh or frozen) - 1 teaspoon garlic powder - 1 teaspoon onion powder - 1 lime, juiced - Salt and pepper to taste The red bell pepper adds sweetness and color. Corn gives a nice crunch and freshness. Garlic and onion powders enhance the overall flavor. Lime juice adds a burst of brightness, while salt and pepper balance everything out. - Fresh cilantro, chopped (for garnish) - Lime wedges for serving Fresh cilantro adds a lovely touch and aroma. Lime wedges are great for squeezing over the dish before eating. They brighten the flavors even more, making each bite special. For the complete guide, check out the Full Recipe. To coat the chicken with jerk seasoning, start by placing the chicken thighs in a large mixing bowl. Sprinkle the jerk seasoning evenly over the chicken. Use your hands to rub the seasoning all over the chicken. Cover the bowl with plastic wrap. For the best flavor, let the chicken marinate for at least 30 minutes. If you have time, marinate it overnight in the fridge. To achieve crispy skin, heat olive oil in a large skillet over medium-high heat. Once the oil is hot, place the marinated chicken thighs skin-side down in the skillet. Sear them for about 5-7 minutes until the skin is golden brown. When it’s time to flip the chicken, use tongs to carefully turn each thigh. Cook for an additional 5 minutes on the other side, then remove the chicken from the skillet. Next, sauté the diced red bell pepper in the same skillet. Cook it for about 2-3 minutes until it becomes soft. This adds great flavor to your rice. After that, stir in the long-grain rice and cook it for another minute. This step helps the rice soak up the flavors of the oil and bell pepper. Slowly pour in the chicken broth, followed by the drained black beans and corn kernels. Also, add garlic powder, onion powder, lime juice, salt, and pepper. Stir well to mix everything together. Bring the mixture to a gentle boil. Now, gently layer the seared chicken thighs on top of the rice mixture. Cover the skillet with a lid, reduce the heat to low, and let it simmer for 20-25 minutes. This simmering time is crucial for making the chicken tender and ensuring the rice is cooked through. You can find the Full Recipe for Caribbean Jerk Chicken & Rice at the end of this article. Marinating is key for great flavor. I recommend at least 30 minutes. If you can, let the chicken sit overnight. This allows the spices to really soak in. Fresh lime juice is a must. It tastes brighter than bottled juice. Plus, it adds a zesty kick to the chicken. To check if the rice is done, taste it. It should be tender but not mushy. If it’s not ready, cover it and let it steam a bit longer. After cooking, fluff the rice with a fork. This helps separate the grains and keeps it light. For a nice look, serve the chicken on top of the rice. Add a sprinkle of beans and corn for color. Use fresh cilantro as a bright garnish. Lime wedges on the side add a fun touch. This dish looks great and tastes even better! For more details, check the Full Recipe. {{image_4}} You can change the heat of your jerk chicken easily. If you like it mild, choose a jerk seasoning with less spice. Look for brands that list "mild" on the label. If you want more heat, use a spicy jerk blend. You can also add fresh or pickled peppers for an extra kick. Jalapeños or Scotch bonnets work great. Just chop them finely and mix them in before cooking. If you want to switch up the protein, you have options. You can use pork instead of chicken. Pork tenderloin works well and cooks quickly. If you prefer a plant-based meal, tofu is a great choice. Just press and cube the tofu before marinating. Cooking times will vary; pork takes about 25-30 minutes while tofu cooks in about 15-20 minutes. Adjust your cooking time to ensure everything is tender and flavorful. You don’t have to stick with rice for your base. Try using quinoa for a nutty flavor. It cooks in about 15 minutes, making it a quick substitute. Cauliflower rice is another option if you want a low-carb meal. It cooks very fast, in just 5-7 minutes. Simply sauté it lightly to keep some crunch. Both alternatives add variety and nutrition to your dish. For the full recipe, check out the detailed instructions. To keep your Caribbean jerk chicken and rice fresh, first let it cool. Place the chicken and rice in separate containers. This prevents the rice from getting soggy. Use airtight containers for best results. You can also wrap the chicken in plastic wrap before placing it in a container. This adds an extra layer of protection. If you want to save leftovers for later, freezing is a great option. Make sure the chicken and rice are cool before freezing. Use freezer-safe containers or bags. Remove as much air as possible to prevent freezer burn. To reheat, take the leftovers out and thaw overnight in the fridge. Heat them in the microwave or on the stove until hot. This will keep the rice fluffy and the chicken juicy. Leftovers can last in the fridge for about 3 to 4 days. After that, they might spoil. Look for signs like a sour smell or a change in color. If the chicken or rice looks off, it’s best to toss it. Always trust your senses when it comes to food safety. You want to enjoy every bite of this tasty dish! Caribbean jerk seasoning is a spice mix that packs a punch. It blends herbs and spices to create a unique flavor. Common ingredients include: - Allspice - Thyme - Scallions - Garlic - Ginger - Scotch bonnet peppers - Cinnamon This seasoning has deep roots in Jamaican culture. It originated from the Maroons, runaway slaves who used it to preserve meat. Today, jerk seasoning symbolizes Caribbean cuisine and is enjoyed worldwide. Yes, you can prepare Caribbean jerk chicken and rice ahead of time. To do this, marinate the chicken at least 30 minutes before cooking. For better flavor, marinate overnight. Store the marinated chicken in the fridge. You can also cook the rice in advance. Just keep it in an airtight container. For safe storage, refrigerate leftovers within two hours of cooking. Reheat chicken and rice to 165°F before serving. Many sides complement Caribbean jerk chicken and rice. Here are some popular choices: - Plantains: Fried or baked for sweetness. - Coleslaw: A crunchy, fresh contrast. - Grilled vegetables: Bright and flavorful. - Corn salad: Adds color and texture. For appetizers, try tropical fruit salsa or shrimp skewers. A light salad with citrus dressing also pairs well. For the complete recipe, check out the Caribbean Jerk Chicken & Rice [Full Recipe]. This blog post covered the key ingredients and steps to make Caribbean jerk chicken and rice. You learned about the main ingredients like chicken thighs, jerk seasoning, and flavorful vegetables. I shared step-by-step instructions, tips for perfect rice, and storage info for leftovers. By following these simple guidelines, you can create a delicious dish that impresses. Experiment with variations to suit your taste. Enjoy cooking and sharing this vibrant meal with friends and family!

Savory Caribbean Jerk Chicken and Rice Delight

Get ready to spice up your dinner with my Savory Caribbean Jerk Chicken and Rice Delight! This dish combines juicy

- 2 cups cooked pasta (penne or rotini) - 1 cup marinara sauce - 1 cup pizza sauce - 1 cup mozzarella cheese, shredded - 1 cup pepperoni slices - 1/2 cup bell peppers, diced - 1/2 cup mushrooms, sliced - 1/4 cup black olives, sliced - 1 teaspoon dried oregano - 1 teaspoon garlic powder - Salt and pepper to taste - Fresh basil leaves for garnish (optional) To create a tasty pizza pasta bake, you need simple but flavorful ingredients. Start with 2 cups of cooked pasta. I like using penne or rotini. They hold sauce well and give great texture. Then, grab 1 cup each of marinara and pizza sauce. These add a rich, tangy flavor to the dish. Cheese is vital, so don't skip the 1 cup of shredded mozzarella. It melts beautifully and gives that gooey, cheesy texture we all love. For that classic pizza taste, use 1 cup of pepperoni slices. You can also add veggies like 1/2 cup of diced bell peppers and 1/2 cup of sliced mushrooms. They not only add color but also a fresh taste. Don't forget the 1/4 cup of black olives for a salty kick. Season with 1 teaspoon of dried oregano and 1 teaspoon of garlic powder. A little salt and pepper will enhance all the flavors. If you want a pop of green, add fresh basil leaves as a garnish when serving. Gather these items and get ready to make a delightful meal that your family will love. For the full recipe, check out the details above. - Preheat oven to 350°F (175°C). - Grease the baking dish. Start by preheating your oven to 350°F (175°C). This sets the stage for a warm, bubbly dish. Next, grab your baking dish and lightly grease it. This step helps the pasta bake come out easily after cooking. - Combine cooked pasta with marinara and pizza sauce. - Fold in cheese, meats, and veggies. In a large bowl, mix 2 cups of cooked pasta with 1 cup of marinara sauce and 1 cup of pizza sauce. Use a spatula to stir it well. The pasta should be coated in sauce. Now, add 1 cup of shredded mozzarella cheese, 1 cup of pepperoni slices, 1/2 cup of diced bell peppers, 1/2 cup of sliced mushrooms, and 1/4 cup of sliced black olives. Sprinkle in 1 teaspoon each of dried oregano and garlic powder. Add salt and pepper to taste. Gently fold everything together until it's evenly mixed. - Pour mixture into the baking dish and add cheese topping. - Cover with foil and bake for 25 minutes, then uncover and bake additional 10-15 minutes. Now, pour your pasta mixture into the greased baking dish. Spread it out evenly. For a cheesy topping, add a bit more mozzarella cheese on top. If you want, place some extra pepperoni slices on the surface for fun. Cover the dish with aluminum foil to keep it moist while baking. Place it in the preheated oven and bake for 25 minutes. After that, carefully remove the foil. Bake for another 10 to 15 minutes until the cheese is melted and golden. Once it’s done, let it cool for a few minutes. This makes it easier to serve and lets the flavors mix. Enjoy your Easy Pizza Pasta Bake! - Cover your dish with foil. This keeps moisture in while baking. - Watch the dish closely. You want perfect melting and browning. - Add extra herbs or spices. This gives your bake more flavor. - Feel free to swap ingredients. Use what you like best. - Pair your pasta bake with a fresh salad. Garlic bread also makes a great side. - For a nice look, add fresh basil on top. It adds color and flavor. Make sure to check out the Full Recipe for more details! {{image_4}} You can easily change up your Easy Pizza Pasta Bake. Start by using different pasta types or shapes. Spiraled fusilli or bow-tie pasta can add fun. Each shape holds sauce differently. Next, think about your toppings. Want a twist? Try BBQ sauce instead of marinara. You can also swap out meats. Use chicken or turkey instead of pepperoni for a lighter dish. If you want a vegetarian version, you have great options. Replace pepperoni with mushrooms, bell peppers, or zucchini. These veggies add flavor and color. You can also use plant-based cheese alternatives. They melt well and keep the dish creamy. This version is just as tasty and suits many diets. For a gluten-free option, you can still enjoy this dish. Use gluten-free pasta and sauces. Many brands offer great flavors that work well. Just check the labels to ensure they fit your needs. This way, everyone can enjoy a slice of comfort without worry. For the full recipe, check out the complete guide. After enjoying your pizza pasta bake, let it cool completely. This step helps keep the texture nice. Once cool, transfer it to airtight containers. These containers keep your dish fresh and tasty for later. To reheat, I suggest using the oven. This method gives the best texture and keeps the cheese melty. Preheat your oven to 350°F (175°C) and place the pasta in a baking dish. Cover it with foil to avoid drying out. Heat for about 15-20 minutes. If you need a quick fix, you can use a microwave. Just place a portion in a microwave-safe dish and heat in short bursts. Stir in between to ensure even heating. You can freeze this dish before or after baking. If freezing before baking, cover the dish tightly with foil. If you freeze after baking, let it cool first. Use freezer-safe containers and label them clearly with the date. This way, you won’t forget what’s inside! Yes, you can prep this dish ahead of time. Just prepare everything and store it in the fridge. This makes it easy to bake later. The flavors will blend nicely, making your dish even better. To add some heat, include red pepper flakes. You can also use spicy sausage. Both options will kick up the flavor. Adjust the spice level to your taste. I recommend using penne or rotini. These shapes hold sauce well and add a nice bite. They make every forkful packed with flavor. This recipe combines pasta, sauces, cheese, and toppings for a tasty dish. You learned the key ingredients, kitchen tools, and how to bake it perfectly. Remember to experiment with flavors and variations. You can even make it vegetarian or gluten-free. Store leftovers properly for later enjoyment. This is a fun meal, great for any get-together. Try it out and make it your own! Happy cooking!

Easy Pizza Pasta Bake Flavorful Family Favorite Dish

Craving a fun, easy meal the whole family will love? Look no further! This Easy Pizza Pasta Bake combines classic

- 1 pound ground turkey - 1/2 cup breadcrumbs - 1/4 cup grated Parmesan cheese - 1 small onion, finely chopped - 2 cloves garlic, minced - 1 large egg - 1/4 cup fresh parsley, finely chopped - 1 tablespoon fresh oregano, finely chopped (or 1 teaspoon dried) - 1 teaspoon dried thyme - 1/2 teaspoon salt - 1/4 teaspoon black pepper - 1 tablespoon olive oil (for cooking) - Zest of 1 lemon The key to juicy Greek turkey meatballs lies in the mix of fresh herbs and quality ingredients. Ground turkey gives a light flavor, but we boost it with: - Zest of Lemon: This adds brightness and freshness. - Fresh Oregano: It brings a classic Mediterranean taste. - Garlic and Onion: These create a savory base that deepens flavor. Using fresh herbs over dried ones can elevate your dish. The combination of these ingredients makes each bite flavorful and juicy. You can swap ingredients based on what you have. Here are some ideas: - Ground Turkey: Try ground chicken or lean beef for a different taste. - Breadcrumbs: Use crushed crackers or oats if you want a gluten-free option. - Parmesan Cheese: Feta cheese adds a nice tangy twist. - Fresh Herbs: If you lack fresh parsley or oregano, dried herbs also work. Just use less. These substitutions keep the dish fun and flexible. Check out the Full Recipe for more details on making these juicy meatballs! Start by gathering your ingredients. In a large bowl, mix together the ground turkey, breadcrumbs, and grated Parmesan cheese. Add the finely chopped onion and minced garlic for taste. The lemon zest gives a fresh pop! Next, crack the egg into the bowl. It helps bind everything together. Now, sprinkle in the chopped parsley, fresh oregano, dried thyme, salt, and black pepper. Mix gently with your hands or a spoon. Be careful not to overmix. This keeps your meatballs tender and juicy. Once your mixture is ready, it’s time to form the meatballs. With clean hands, take a scoop of the mixture. Roll it into a ball about 1 to 1.5 inches wide. This size helps them cook evenly. You should make around 20 meatballs. Place them on a plate or tray to keep them organized. Heat a large skillet over medium heat. Add olive oil when the pan is hot. You want to see it shimmer. Carefully place the meatballs in the skillet, but don’t crowd them. This helps them brown nicely. Cook each meatball for about 5-6 minutes per side. Look for a golden brown color. To be sure they are done, check the internal temperature. It should be at least 165°F. After cooking, let the meatballs rest on a plate for a few minutes. This helps the juices settle, giving you the perfect bite. For the full recipe, you can refer to the full recipe section. Enjoy your tasty Greek turkey meatballs! To keep your meatballs juicy, use fresh ground turkey. It has more fat than lean turkey. Adding breadcrumbs helps trap moisture. The egg also binds and adds richness. Mix gently, so you don’t break the meat's fibers. Overmixing will make them tough. One common mistake is overcrowding the pan. This will steam your meatballs instead of browning them. Cook in batches to get a nice crust. Also, avoid skipping the resting step. Letting them rest helps the juices settle. Lastly, don’t forget to check the internal temperature. It must reach 165°F to ensure safety. For added flavor, use fresh herbs. Parsley and oregano brighten the dish. You can also add lemon zest for a fresh punch. If you like spice, try red pepper flakes. For a twist, mix in feta cheese for a salty bite. Serve these meatballs with tzatziki sauce for a refreshing dip. For the full recipe, check out the entire article! {{image_4}} You can change the flavor of your Greek turkey meatballs by adding herbs and spices. Try fresh dill for a lighter taste. You can also add cumin for a warm, earthy flavor. If you like heat, a pinch of red pepper flakes works well too. Mix and match to find your favorite combo! Not in the mood for turkey? You can use ground chicken or lean beef instead. Both options keep the meatballs juicy and flavorful. If you want a plant-based option, try crumbled tofu or lentils. Just make sure to adjust the cooking time for different proteins. How you serve these meatballs can change the meal. You can place them on a bed of rice or quinoa for a hearty dish. Wrap them in pita bread with lettuce and tzatziki for a fun sandwich. You can also serve them as appetizers with toothpicks for easy snacking. Explore these ideas and make it your own! For the full recipe, check the detailed instructions above. After making your juicy Greek turkey meatballs, allow them to cool. Place them in an airtight container. They can last in the fridge for up to four days. Always label the container with the date. This helps you keep track of freshness. When ready to eat, just take out the meatballs. If you want to store meatballs for longer, freezing is a great idea. First, let them cool completely. Then, arrange them in a single layer on a baking sheet. Freeze them until firm, about 1-2 hours. Once frozen, transfer the meatballs to a freezer bag. Remove as much air as possible. You can keep them in the freezer for up to three months. To reheat your meatballs, you have a few options. The oven works well. Preheat it to 350°F. Place the meatballs on a baking sheet. Heat them for about 15-20 minutes, or until warm. You can also use the microwave. Heat them in a microwave-safe dish for 1-2 minutes. If you want to avoid drying out the meatballs, cover them with a damp paper towel. This keeps them juicy. For a full recipe, check the earlier sections of this article. To make turkey meatballs tender, don't overmix the meat. When mixing, combine all ingredients gently. Overmixing can lead to tough meatballs. Adding moisture helps too. Use ingredients like breadcrumbs and eggs, which retain moisture during cooking. You can also mix in some grated vegetables, like zucchini or carrots, to add more moisture. Yes, you can use ground chicken instead of turkey. Ground chicken has a similar texture and flavor. Make sure to check the fat content. Chicken may have less fat than turkey, which can affect juiciness. To keep them moist, follow the same steps in the recipe. Cook meatballs on the stove for about 5-6 minutes per side. This timing ensures they brown nicely and cook all the way through. The internal temperature should reach 165°F. If you are unsure, use a meat thermometer. This way, you’ll know your meatballs are safe to eat. For even cooking, avoid overcrowding the pan when adding meatballs. For the complete recipe, check out the Full Recipe section. We covered the key ingredients for tasty meatballs and their alternatives. I shared steps to make them juicy and highlighted tips to avoid common mistakes. You can try fun variations or store them well for later. Remember, cooking is about enjoying the process. Keep experimenting with flavors and techniques. With practice, you'll create perfect meatballs every time. Embrace your kitchen adventures!

Juicy Greek Turkey Meatballs Flavorful and Easy Dish

If you crave a dish that bursts with flavor while being easy to make, you’ve found it! Juicy Greek turkey

For the Chicken Pesto Pasta Salad, you will need these ingredients: - 2 cups cooked pasta (farfalle or rotini recommended for texture) - 1 cup cooked chicken breast, either shredded or diced into bite-sized pieces - 1 cup cherry tomatoes, halved for sweetness and color - 1 cup fresh spinach, roughly chopped to add freshness - 1/2 cup basil pesto, for a burst of flavor - 1/4 cup grated Parmesan cheese, to enhance richness - 1/4 cup pine nuts, toasted to add crunch - Salt and freshly ground pepper to taste - 1 tablespoon olive oil (optional, for an extra drizzle of flavor) Each ingredient plays a key role: - Pasta: Choose farfalle or rotini for a fun shape. They hold the pesto well. - Chicken: Use cooked chicken breast. Shredded or diced adds texture. - Cherry Tomatoes: Halve them to bring out their sweetness and vibrant color. - Spinach: Fresh spinach adds a nice green touch. Roughly chop it for easy bites. - Basil Pesto: This is the heart of the dish. It gives a rich and herby flavor. - Parmesan Cheese: Grated cheese adds a creamy, savory note to the mix. - Pine Nuts: Toast them for added crunch. They elevate the dish's texture. - Salt and Pepper: Always taste and season to enhance the flavors. - Olive Oil: Use it if you want an extra touch of richness. Feel free to swap ingredients based on your taste: - Pasta: Use gluten-free pasta if needed. Other shapes work too. - Chicken: Try chickpeas for a vegetarian twist. - Spinach: Use kale or arugula for different greens. - Pesto: Make your own or use sun-dried tomato pesto for variety. - Parmesan: Nutritional yeast can replace cheese for a vegan option. - Pine Nuts: Replace with walnuts or almonds if you have allergies. These ingredients come together to create a dish that is fresh and flavorful. Enjoy making this delightful Chicken Pesto Pasta Salad! Start with a large mixing bowl. First, cook your pasta. I recommend farfalle or rotini. Cook it until tender but firm. Drain and cool the pasta under cold water. Next, take your chicken breast. You can shred it or cut it into small pieces. Make sure it is cooked and safe to eat. Rinse the cherry tomatoes and cut them in half. Chop the fresh spinach roughly for a nice bite. Add the cooled pasta to your bowl. Follow with the chicken pieces. Toss them gently to mix. Now, add the halved cherry tomatoes and chopped spinach. Pour in the basil pesto next. Use a spatula to combine it all well. You want every piece of pasta to be covered in pesto. Sprinkle in the grated Parmesan cheese and toasted pine nuts. Toss everything again until it is blended. Taste your salad and add salt and pepper. You want it to have a nice balance. If you like, drizzle olive oil for extra flavor. Cover the bowl with plastic wrap or a lid. Place it in the fridge for at least 30 minutes. This helps the flavors mix well. When you serve, consider garnishing with extra pine nuts and fresh basil. This adds a lovely touch to the dish. For the complete method, check the Full Recipe. When cooking pasta, use a large pot. Fill it with water and add a good amount of salt. This helps the pasta gain flavor while it cooks. Bring the water to a rolling boil first. Add the pasta and stir to prevent sticking. Cook according to package directions for perfect texture. Test the pasta a minute or two before the time is up. It should be al dente, or firm to the bite. Drain the pasta and rinse it under cold water. This stops the cooking process and cools the pasta for your salad. Taste is key in any dish, especially pasta salad. After mixing your salad, always taste it. If it needs more flavor, add salt, pepper, or extra pesto. You can also squeeze some fresh lemon juice for brightness. If you want a richer flavor, try adding a bit more grated Parmesan cheese. Keep tasting until it feels just right. Remember, you can always add more, but you can’t take it out! To make your Chicken Pesto Pasta Salad stand out, think about how you present it. Use a large, colorful bowl for serving. This adds visual appeal and makes it inviting. Consider portioning the salad into individual bowls. Top each with extra pine nuts and a sprinkle of cheese. Fresh basil leaves can add a nice pop of green. This not only makes it look great but also adds freshness. For a fun twist, serve with a slice of lemon on the side. This gives guests a chance to add a zesty touch if they want. For the full recipe, check out the Chicken Pesto Pasta Salad Delight! {{image_4}} You can switch up the protein in Chicken Pesto Pasta Salad. If you want a vegetarian option, use chickpeas or tofu. Both options add protein and keep it filling. You can also try shrimp or turkey if you want a different meat. These choices keep the salad fresh and fun. If you need a gluten-free choice, use gluten-free pasta. Many brands make great options that taste delicious. Look for pasta made from rice or corn. These options cook well and still hold up in the salad. You won’t miss the regular pasta at all. Add-ins can boost the flavor and texture of the salad. Consider adding bell peppers for a sweet crunch. You can also toss in artichoke hearts or olives for a briny kick. For cheese lovers, try feta or mozzarella balls for creaminess. Fresh herbs like parsley or arugula can add brightness too. Each add-on gives you a chance to customize your dish. Make it your own! Store your Chicken Pesto Pasta Salad in an airtight container. This keeps it fresh and tasty. Place the salad in the fridge if you want to eat it later. It can last about 3 days. Make sure to seal it well. If you see any wetness or change in smell, toss it out. Freezing is a great way to keep your salad longer. However, the texture may change when thawed. To freeze, place the salad in a freezer-safe bag. Remove as much air as you can before sealing. It can last up to 2 months in the freezer. When you’re ready to eat, thaw it in the fridge overnight. Reheat your Chicken Pesto Pasta Salad gently. You can use a microwave for a quick fix. Heat it in 30-second intervals to avoid overcooking. Stir it well between intervals. You can also serve it cold for a refreshing meal. A quick drizzle of olive oil can enhance the flavor when you reheat. For detailed preparation steps, check the Full Recipe. You can make Chicken Pesto Pasta Salad a day ahead. First, follow the recipe steps. After mixing, cover the salad well. Store it in the fridge. This allows the flavors to blend. When you are ready to serve, stir it gently. You may want to add a sprinkle of fresh cheese or nuts before serving. This keeps it fresh and tasty. Yes, you can use homemade pesto. In fact, it can make the dish even better. Homemade pesto has a fresh taste that store-bought may lack. Just ensure it's well-balanced with garlic, basil, and nuts. You can adjust the flavor to fit your taste. This gives your salad a personal touch. For this salad, I recommend farfalle or rotini. These shapes hold the pesto well. They also add nice texture to each bite. You can also use penne or fusilli if you prefer. Just remember to cook the pasta al dente. This keeps it firm and perfect for mixing. This blog post helps you create a tasty Chicken Pesto Pasta Salad. We covered the key ingredients and provided tips for flavor. The step-by-step guide ensures you understand preparation and mixing. You can also explore variations, including protein swaps and gluten-free options. Proper storage methods keep leftovers fresh. In closing, this recipe is simple and fun. Enjoy trying different flavors and ingredients. It’s a meal that can impress anyone! Dive in and make it your own!

Chicken Pesto Pasta Salad Fresh and Flavorful Dish

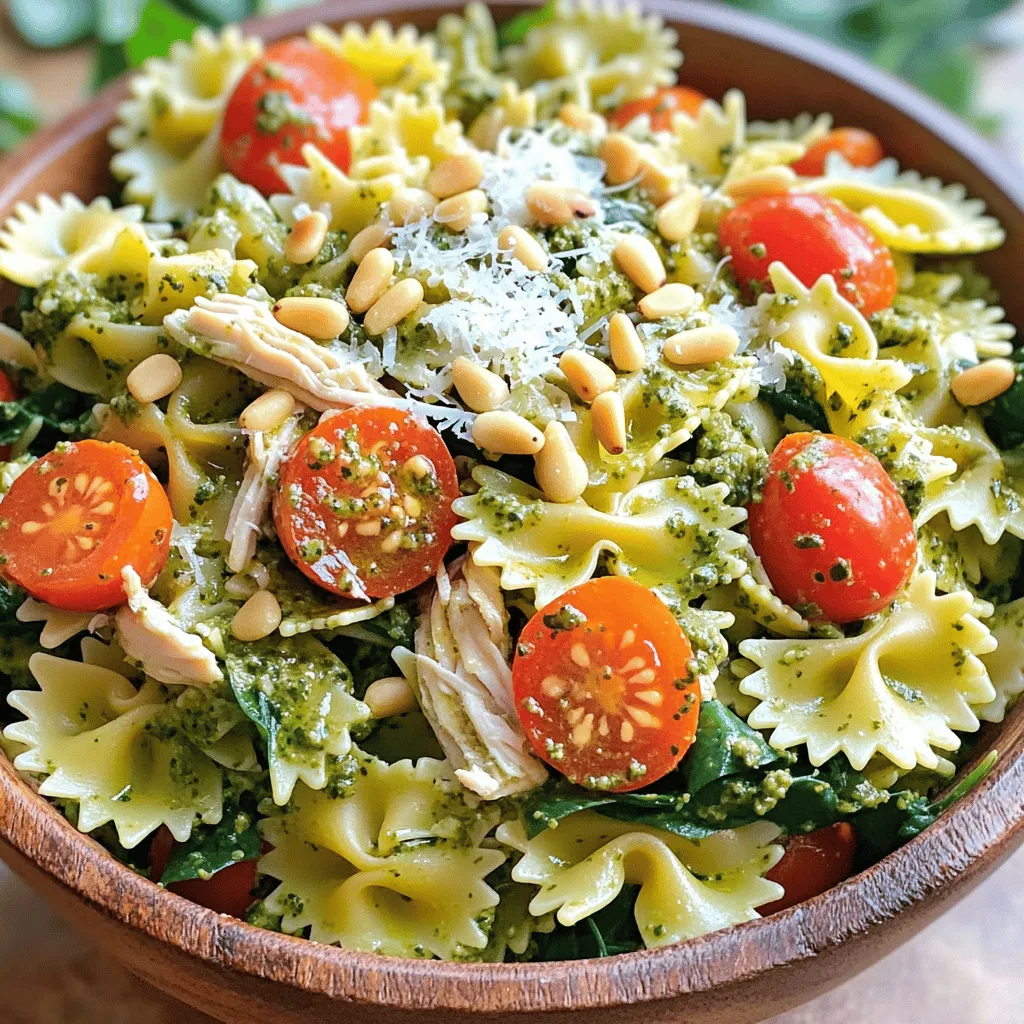
Looking for a fresh and flavorful dish that’s easy to make? You’ve found it! My Chicken Pesto Pasta Salad is

Older posts
Newer posts
← Previous Page1 … Page14 Page15 Page16 … Page75 Next →

dsad

© 2025 lazychefmagic • Built with GeneratePress

Our Policies

  • Copyright Policy
  • Cookie Policy
  • GDPR Policy
  • Privacy Policy
  • Disclaimer
  • Terms Of Use

More Information

  • Home
  • About
  • Contact
  • Appetizers
  • Dessert
  • Dinner
  • Drinks
©2025, lazychefmagic About Back To Top