Skip to content
DisclaimerTerms Of UseGDPR PolicyCookie Policy

lazychefmagic

  • Home
  • Drinks
  • Appetizers
  • Dinner
  • Dessert
  • About
  • Contact
  • Privacy Policy
DisclaimerTerms Of UseGDPR PolicyCookie Policy

Amanda

To make a great pasta primavera, you need fresh, colorful ingredients. Here’s what you will need: - 12 oz whole grain penne pasta - 1 medium zucchini, thinly sliced - 1 yellow bell pepper, diced - 1 cup cherry tomatoes, halved - 1 cup broccoli florets - 1 cup asparagus, trimmed and cut into 2-inch pieces - 3 cloves garlic, minced - 4 tablespoons olive oil - 1 teaspoon Italian seasoning - Salt and black pepper, to taste These ingredients bring a mix of flavors and textures. The whole grain penne adds a nutty taste. The vegetables provide bright colors and nutrients. Garlic enhances the dish with its warm aroma. While the main ingredients shine, you can add some optional items for extra taste: - 1 teaspoon red pepper flakes (for heat) - Fresh herbs like parsley or thyme Red pepper flakes give a nice kick. Fresh herbs add brightness and depth. These extras let you personalize the dish. Garnishes make your pasta primavera look and taste amazing. Here are some great options: - Fresh basil leaves - ½ cup grated Parmesan cheese (optional) Basil adds freshness. Parmesan brings a creamy, salty touch. These toppings make your dish even more inviting. For the full recipe, check out the links provided. To start, grab a large pot. Fill it with water and add a pinch of salt. Set it on the stove and bring it to a rolling boil. When the water is boiling, add the whole grain penne pasta. Cook it for about 10 to 12 minutes. Check the package for exact times. You want the pasta to be al dente, which means it should still have a slight bite. Before draining, save ½ cup of the pasta water. Then drain the pasta and set it aside. Next, take a large skillet or wok and heat 4 tablespoons of olive oil over medium heat. Wait until the oil shimmers. Add 3 cloves of minced garlic and sauté for about 1 minute. Stir it often; you want it to smell nice but not burn. After that, add your veggies. Toss in the sliced zucchini, diced yellow bell pepper, broccoli florets, asparagus pieces, and halved cherry tomatoes. Sauté this mix for 5 to 7 minutes. The veggies should be bright and tender but still a bit crunchy. Now, it’s time to mix everything. Sprinkle in 1 teaspoon of Italian seasoning and the optional red pepper flakes. Stir well to coat the veggies with the spices. Add salt and black pepper to taste. Next, gently add the drained pasta into the skillet. Pour in the reserved pasta water gradually. This helps create a light sauce. Toss everything together for about 2 to 3 minutes. Make sure it's heated through. Once it's all combined, transfer your pasta primavera to a serving bowl. If you like, top it with grated Parmesan cheese and fresh basil leaves. Enjoy your delightful dish! For the full recipe, check out the details above. To sauté vegetables well, start with a hot pan. Heat olive oil until it shimmers. Add garlic first to build flavor. Stir it for one minute until golden. Then, add your chopped veggies quickly. Keep stirring them to cook evenly. You want them bright and tender, not mushy. Aim for about five to seven minutes of cooking time. This keeps their color and crunch. Want more heat in your Pasta Primavera? Add red pepper flakes to the sautéed veggies. Start with a small amount, like 1/4 teaspoon, and taste as you go. This way, you can control the heat better. If you like it mild, skip the flakes altogether. You can also add black pepper for a little kick without too much heat. For a creamier sauce, mix in a splash of heavy cream or a dollop of cream cheese. Stir it in right after you add the reserved pasta water. This step makes the sauce rich and smooth. You can also use a vegan cream option if you prefer. If you want a cheesy flavor, sprinkle in some grated Parmesan cheese. This will give your dish a lovely, creamy finish. For the complete recipe, check out the Full Recipe section. {{image_4}} Pasta primavera shines as a vegetarian dish. You can add any of your favorite veggies. Think spinach, carrots, or bell peppers. They all blend well. You can also use fresh herbs. Basil and parsley will boost flavor. To make your pasta heartier, add protein. Grilled chicken or shrimp work great. You can also try chickpeas or white beans for a plant-based option. These add texture and nutrients. Just sauté them with the veggies for best results. If you need a gluten-free option, choose gluten-free pasta. Many brands offer great taste and texture. Look for options made from rice or lentils. They cook well and fit right into this dish. Always check the package for cooking times. After enjoying your pasta primavera, let it cool to room temperature. Then, place it in an airtight container. You can store it in the fridge for up to three days. This keeps the flavors fresh while preventing spoilage. If you want to keep it longer, consider freezing it. To reheat your pasta primavera, use the microwave or stovetop. If using the microwave, place a serving in a bowl. Add a splash of water to keep it moist. Heat for two to three minutes, stirring halfway. For stovetop reheating, add the pasta to a pan with a bit of olive oil. Warm it over medium heat, stirring until hot. This method helps keep the texture intact. Freezing pasta primavera is a great way to save leftovers. First, let it cool completely. Then, divide it into single servings for easy meals later. Use freezer-safe bags or containers. Squeeze out as much air as possible to prevent freezer burn. It can last for up to three months in the freezer. When you're ready to eat, thaw it overnight in the fridge before reheating. For the best results, eat it within one month. Try this simple storage guide to keep your pasta primavera fresh and tasty! For the full recipe, check out the [Full Recipe]. You can use nutritional yeast for a cheesy flavor. It is vegan and healthy. Another option is pecorino cheese, which has a stronger taste. For a nutty flavor, try using ground cashews. Yes, Pasta Primavera is very healthy. It contains lots of fresh vegetables. Whole grain pasta adds fiber. You can control the oil and salt to keep it lighter. This dish is colorful and packed with nutrients. To make Pasta Primavera vegan, simply skip the Parmesan cheese. Use nutritional yeast instead for a cheesy taste. You can also add more vegetables, like mushrooms and spinach, for extra flavor and nutrition. Check the pasta label to ensure it is egg-free. You can find the Full Recipe to get started! Pasta Primavera is a fun and easy dish. We explored key ingredients and tips for cooking. You learned how to make it extra tasty with various flavors. We also discussed how to store and reheat leftovers. Think about trying different veggies or proteins for variety. Enjoy cooking and eating your Pasta Primavera! It’s a dish full of color and flavor. Try your own twists and share your creations.

Pasta Primavera Delightful and Fresh Weeknight Meal

Are you ready to bring a burst of color and flavor to your weeknight dinners? Pasta Primavera is the perfect

- 3 ripe peaches, sliced into wedges - 1 cup fresh arugula (or your choice of mixed greens) - 1/4 cup fresh basil leaves, roughly torn - 200g fresh mozzarella, torn into bite-sized pieces - 1/4 cup balsamic glaze - 2 tablespoons extra virgin olive oil - 1 tablespoon honey (optional, for a touch of sweetness) - Salt and freshly ground black pepper, to taste Each ingredient plays a key role in this salad. The peaches should be ripe, juicy, and sweet. They add a fresh taste that pairs nicely with the creamy mozzarella. I love to use arugula because it gives a peppery kick. You can swap it with mixed greens if you prefer. The basil brings a fragrant note that brightens the dish. For the mozzarella, I suggest using fresh mozzarella. It has a soft texture and a mild flavor that works wonders in this salad. The balsamic glaze adds a sweet tang that ties everything together. Olive oil adds richness, while salt and pepper enhance the flavors. If you like a little sweetness, consider adding honey. You can find the full recipe in the article to create this delightful dish. To start, wash your ripe peaches under cold water. This helps remove any dirt or residue. Next, slice the peaches into wedges. Aim for about six to eight slices per peach. Set these aside for later. Then grab your fresh mozzarella. Tear it gently into bite-sized pieces. This step adds a nice texture to your salad. Now, take a large mixing bowl. Combine the sliced peaches, torn mozzarella, and arugula in it. Be gentle as you mix. You want to keep the mozzarella and peaches intact. Next, add the torn basil leaves. This adds a fresh and aromatic touch to your salad. In a small bowl, whisk together balsamic glaze and olive oil. This creates a rich dressing. Season it with salt and pepper to taste. If you like sweetness, add honey. Whisk until the mixture is smooth and well combined. This dressing will bring all the flavors together. Carefully drizzle the dressing over your salad. Use a large spoon to toss everything gently. This ensures that all ingredients get coated without breaking them apart. Let the salad rest for five minutes. This gives the flavors a chance to meld. When ready to serve, you can present it in a large bowl or plate it individually. For a special touch, drizzle a bit more balsamic glaze over the top. Enjoy this fresh mix of flavors! For the full recipe, check the details above. To find the best peaches, look for ripe, fragrant ones. They should feel slightly soft when you press them gently. A strong peach scent means they are ready to eat. Avoid peaches with bruises or blemishes. These signs can mean they are overripe or spoiled. If you want a creamier texture, consider using burrata cheese. It has a rich, soft center that adds a nice twist. You can also try different cheese options like feta or goat cheese. Each offers a unique flavor that can change the salad's taste. Adjust the sweetness of your dressing to fit your taste. If you like it sweeter, add more honey or choose a sweeter balsamic glaze. You can also experiment with additional herbs like thyme or mint for a unique flavor. Each herb brings a new layer to the dish, making it even more special. For the full recipe, check out Juicy Peach and Mozzarella Delight. Enjoy making this fresh and delicious salad! {{image_4}} When you want to mix things up with your Juicy Peach and Mozzarella Salad, there are many fun options. You can swap out peaches for other seasonal fruits. Mango adds a tropical twist. Strawberries bring a sweet touch. For crunch, toss in some nuts. Walnuts or pecans work great. They add texture and healthy fats. If you want a vegan version, replace mozzarella with dairy-free cheese. Look for options made from nuts or soy. Instead of honey, use maple syrup. It gives sweetness without animal products. Want to make the salad heartier? Add proteins like grilled chicken or shrimp. They pair well with the fruity flavors. You can also include grains like quinoa. This adds fiber and makes the salad filling. For the full recipe, check the main section. To enjoy this salad at its best, eat it fresh within a few hours. This keeps the flavors bright and the textures crisp. If you need to store it, keep the salad parts separate. This will prevent the greens from wilting and the fruit from getting mushy. If you prepared the salad and have leftovers, store it in an airtight container. In the fridge, it will last for up to one day. For the peaches, consider freezing them if you want to save them longer. Just remember, frozen peaches will change in texture, so they are best used in smoothies or baked goods later. If you want to make this salad again, check out the Full Recipe for all the details! Yes, you can prepare individual ingredients in advance. Just combine them right before serving. This keeps everything fresh and tasty. You can add more honey. Another option is to use a sweeter balsamic glaze. This will enhance the natural flavors of the peaches. This salad goes great with grilled meats, crusty bread, or a light white wine. These options make for a complete and satisfying meal. Canned peaches can work in a pinch. However, fresh peaches will give the best flavor and texture. They add a nice crunch and juiciness that canned cannot match. This blog post guides you through making a juicy peach and mozzarella salad. We covered the best fresh ingredients, step-by-step instructions, helpful tips, and tasty variations. With simple adjustments, you can make this salad suit any season or diet. Remember, freshness is key for the best taste. Enjoy experimenting with flavors and ingredients. This salad can be a delightful addition to any meal. So, gather your fresh produce and get started on a dish that’s sure to impress!

Juicy Peach and Mozzarella Salad Fresh and Delicious

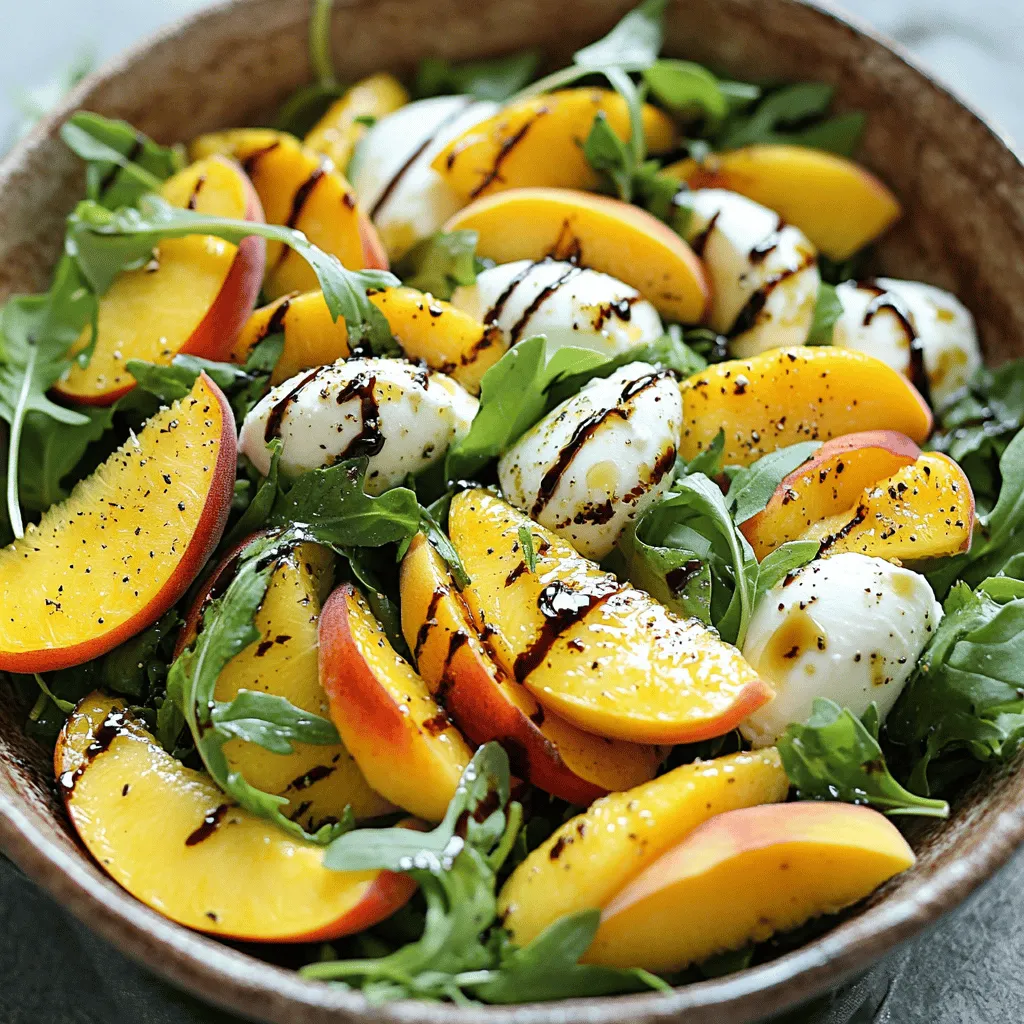
Looking for a refreshing salad that bursts with flavor? Try my Juicy Peach and Mozzarella Salad! This simple dish combines
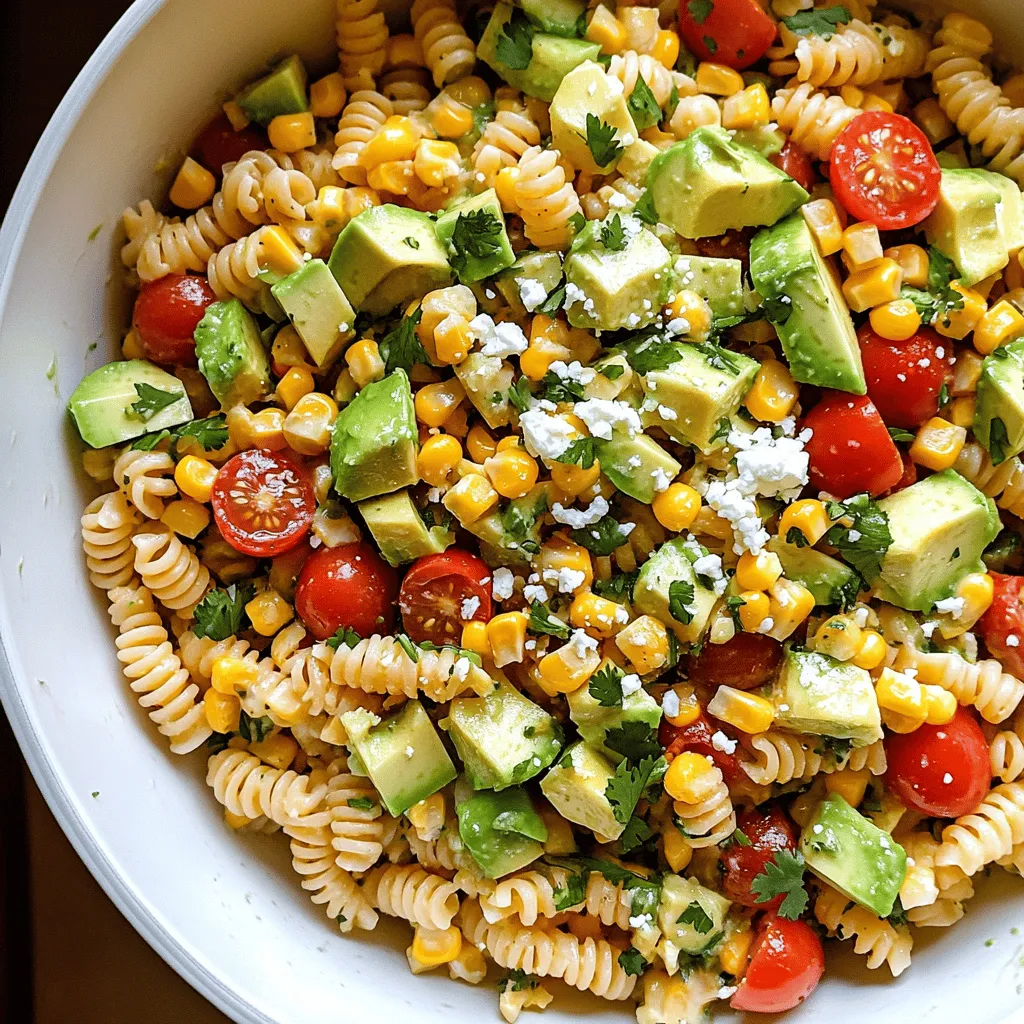
To make a great Mexican street corn pasta salad, you need a few key items. Here’s what you'll need: - 2 cups elbow pasta - 1 cup corn kernels (can be fresh, frozen, or canned) - 1/2 red bell pepper, diced - 1/2 cup red onion, finely chopped - 1 jalapeño, seeds removed and minced These ingredients form the base of the salad. The pasta gives it structure, while the corn adds sweetness. The bell pepper and red onion provide crunch and flavor. The jalapeño adds a hint of heat, making each bite exciting. Now, let’s talk about the dressing. A creamy dressing brings everything together. Here’s what you will need: - 3 tablespoons mayonnaise - 2 tablespoons Greek yogurt - 1 tablespoon lime juice - 1 teaspoon chili powder - Salt and black pepper to taste Mixing mayonnaise with Greek yogurt makes the dressing rich yet light. Lime juice brightens the flavors. Chili powder adds a nice kick. Adjust the salt and pepper to match your taste. Want to take your salad up a notch? Consider adding these optional ingredients: - 1/2 cup feta cheese, crumbled - 1/4 cup fresh cilantro, chopped - Lime wedges for serving Feta cheese adds a salty, creamy touch. Fresh cilantro gives it a pop of color and flavor. Lime wedges make for a great finishing touch. You can squeeze some over the salad before eating for extra zest. For the full recipe, just click [Full Recipe]. Enjoy making your delicious Mexican street corn pasta salad! First, grab a large pot and fill it with salted water. Bring that water to a boil. Once it’s boiling, add the elbow pasta. Cook it until it’s al dente, usually about 8-10 minutes. Al dente means it should still have a slight bite to it. After cooking, drain the pasta in a colander. Rinse it under cold water to stop the cooking. This also cools it down so it won't warm the other salad ingredients. You can use fresh, frozen, or canned corn for this salad. If you choose fresh corn, heat your grill to medium-high. Grill the corn for about 5-7 minutes. Turn it often so it cooks evenly and gets a nice char. If you use frozen corn, just warm it in the microwave or on the stovetop. For canned corn, drain and rinse it under cold water before adding it to the mix. In a large mixing bowl, combine the cooled pasta with the corn and other veggies. Add diced red bell pepper, finely chopped red onion, and minced jalapeño. Don’t forget the crumbled feta cheese! Stir gently to mix everything. You want to make sure all the ingredients are evenly spread out. Now it’s time to make the dressing. In a small bowl, whisk together mayonnaise, Greek yogurt, lime juice, chili powder, and a pinch of salt and pepper. Make sure it’s smooth and well mixed. Pour this dressing over your pasta and veggies. Use a spatula to toss everything together. Cover the bowl and chill it in the fridge for at least 30 minutes. This chilling time helps the flavors blend well. Before serving, fold in some fresh chopped cilantro. Taste and adjust seasoning if you need to. For the full recipe, check out the detailed instructions provided above. You can easily adjust this salad to fit your diet. If you are vegan, swap out the mayo and Greek yogurt for avocado or vegan mayo. You can also use nutritional yeast instead of feta cheese for a cheesy flavor. Feel free to add more veggies! I love adding cherry tomatoes, cucumbers, or even black beans for extra protein. You can also mix in grilled chicken or shrimp for more heartiness. Boost the flavor with spices! Try adding cumin or smoked paprika for a deeper taste. Fresh herbs like parsley or dill can also brighten the dish. Chilling the salad is key. Let it sit in the fridge for at least 30 minutes. This waiting time helps all the flavors mix well. You will taste the difference! Make your pasta salad look appealing by adding fresh cilantro on top. You can also sprinkle extra feta cheese for color and taste. For a fun serving idea, use small mason jars. Layer the salad and dressings inside for a picnic-ready meal. Not only does this look cute, but it also makes serving easy! You can find the full recipe for Mexican Street Corn Pasta Salad in the previous section. {{image_4}} You can switch up the pasta in this salad. Whole wheat pasta adds a nutty flavor and more fiber. Gluten-free pasta is great for those with dietary needs. Both options work well in this dish. Just make sure to cook it al dente, just like you would with regular elbow pasta. Feel free to get creative with your ingredients. For a vegan twist, use a plant-based mayo and skip the feta cheese. You can use nutritional yeast instead, which adds a cheesy flavor. You can also change the vegetables. Try adding diced cucumbers for crunch or cherry tomatoes for sweetness. Other great choices include black beans or avocado for extra creaminess. This pasta salad shines as a side dish. It pairs well with grilled chicken or shrimp. If you want, serve it alongside tacos for a fun meal. You can also enjoy it on its own as a light lunch. For more flavor, sprinkle some chili powder on top before serving. This dish is tasty, colorful, and perfect for summer. Check out the Full Recipe for all the details! To store leftovers of your Mexican Street Corn Pasta Salad, place it in an airtight container. This keeps the flavors fresh and prevents any odors from your fridge. Make sure the salad is cooled before sealing. I recommend using glass containers as they do not absorb odors and are easy to clean. Store the salad in the fridge. Can you freeze the pasta salad? Yes, you can freeze it, but I do not recommend it for best taste and texture. If you choose to freeze, put it in a freezer-safe container. Leave some space at the top, as the salad may expand while freezing. When you want to eat it, thaw it overnight in the fridge. How long can you keep the salad? In the fridge, the Mexican Street Corn Pasta Salad lasts about 3 to 5 days. Always check for any off smells or changes in texture before eating. If you notice any, it’s best to throw it away. Enjoy your salad fresh for the best taste! Yes, you can make this salad ahead of time. I recommend chilling it for at least 30 minutes. This time helps the flavors mix well. The longer it sits, the better it tastes. You can even make it a day before serving. Just keep it covered in the fridge. You can keep this salad in the fridge for up to three days. After that, it may start to lose quality. Look for signs of spoilage, like a sour smell or slimy texture. If it looks or smells off, it's best to throw it away. To reheat leftovers, use the microwave. Start with a low setting to avoid overcooking. Heat in short bursts, stirring often. This helps keep the pasta from getting mushy. You can also enjoy it cold, as the flavors stay great. This blog post walked you through making a delicious pasta salad. You learned about the main ingredients like elbow pasta and corn. We covered the dressing and options for extra flavor. I shared tips for customizing your salad and how to store leftovers. Pasta salad is versatile and easy to adapt. Try different vegetables or dressings to match your taste. Enjoy making it and impress your family or friends with your cooking skills!

Mexican Street Corn Pasta Salad Tasty Summer Dish

Summer’s here, and it’s time to savor the flavors of fresh Mexican Street Corn Pasta Salad! This dish combines crunchy

- 4 boneless, skinless chicken breasts - 1 cup salsa verde (store-bought or homemade) - 2 tablespoons fresh cilantro, finely chopped - 2 tablespoons extra virgin olive oil - 1 teaspoon garlic powder - 1 teaspoon ground cumin - 1 teaspoon fresh lime juice - Salt and pepper to taste - Lime wedges for garnish Gathering the right ingredients is key to making grilled salsa verde chicken. You need fresh chicken breasts, salsa verde, and some spices. I love using fresh cilantro for a bright touch. The olive oil adds richness, while garlic powder and cumin provide depth. Don't forget the lime juice; it brings a zesty kick. You can adjust the salt and pepper to your liking too. - Additional herbs (e.g., oregano or thyme) - Fresh jalapeños for heat - Avocado or sour cream for garnish You can get creative with optional ingredients. Adding fresh herbs like oregano or thyme can spice up the flavor. If you want some heat, toss in fresh jalapeños. For serving, consider avocado or sour cream. These options can elevate your dish and make it even more enjoyable. For the full recipe, check out the recipe section. - In a medium mixing bowl, combine the salsa verde, olive oil, garlic powder, ground cumin, lime juice, and chopped cilantro. - Season this mix with salt and pepper to taste. Stir until the marinade blends well and smells great. - Place the chicken breasts in a large zip-top bag or a shallow dish. - Pour the marinade over the chicken, making sure each piece is well-coated. - Seal the bag tightly or cover the dish. Refrigerate for at least 30 minutes. For more flavor, marinate longer, up to 4 hours. - Preheat your grill to medium-high heat to ensure even cooking. - When ready, take the chicken out of the marinade, letting excess drip back into the bowl. Discard any leftover marinade. - Grill the chicken breasts for 6-7 minutes on one side. Flip and grill for another 6-7 minutes. - The chicken is done when it reaches an internal temperature of 165°F (75°C). Avoid pressing down on the chicken to keep the juices inside. - After cooking, let the chicken rest for about 5 minutes. This helps the juices spread throughout the meat, making each bite tasty. - Slice the grilled chicken or serve it whole. Garnish with lime wedges for extra flavor. You can also drizzle more salsa verde over the top before serving. For the full recipe, you can refer to the earlier section. Enjoy your cooking! To make your grilled salsa verde chicken even better, try these tips: - Add herbs: Mix in fresh oregano or thyme for more depth. - Spice it up: Toss in sliced jalapeños for a spicy kick. - Extra zest: A splash of orange juice can brighten the marinade. - Grilling tips: Preheat your grill well. This helps get nice grill marks. Avoid these common grilling errors: - Don’t skip marinating: Marinating adds flavor and keeps the chicken juicy. - No pressing down: Don’t press the chicken on the grill. This lets juices escape. - Avoid cooking too fast: Cooking over high heat can char the outside and leave the inside raw. - Check for dryness: If your chicken is dry, it may have cooked too long. Use these methods to check if your chicken is cooked: - Meat thermometer: Insert it into the thickest part. Aim for 165°F (75°C). - Visual cues: Look for clear juices. If juices run clear, it’s done. The meat should also be opaque. - Feel test: Press the chicken lightly. It should feel firm, not squishy. For a detailed recipe, check out the Full Recipe. {{image_4}} You can make your own salsa verde at home. Here’s a simple recipe: - 6 tomatillos, husked and rinsed - 1 jalapeño, stemmed and chopped - 1/2 cup fresh cilantro - 1/2 teaspoon salt - 1 tablespoon lime juice - Blend all ingredients until smooth This homemade salsa verde adds a fresh twist to your chicken. You can also use other sauces, like chimichurri or a spicy mango salsa. Each option gives a unique flavor. If you want a change from chicken, try turkey or tofu. Turkey breast can be grilled just like chicken. For tofu, use firm or extra-firm. Marinate it as you would chicken. You can also choose different parts of the chicken. Thighs have more flavor and stay moist. Drumsticks or wings work well too. Each cut can give you a new taste experience. Pair grilled salsa verde chicken with tasty sides. Rice, both white and brown, complements the dish well. Grilled vegetables add color and nutrition. You can also serve a fresh salad for a light option. Consider a corn salad or a simple green salad. These sides make a complete meal that everyone will enjoy. To keep your grilled chicken fresh, place it in an airtight container. This helps seal in flavor and moisture. You can also wrap it tightly in plastic wrap or aluminum foil. Store your leftovers in the fridge. Grilled chicken stays fresh for about 3 to 4 days. Make sure to cool it down before storing to avoid raising the fridge temperature. You can reheat grilled chicken in several ways. The oven works well; preheat it to 350°F (175°C). Place the chicken in a baking dish and cover it with foil. This helps keep it moist. Heat for about 15-20 minutes or until warm. You can also use a microwave, but be careful. Heat it in short bursts to prevent drying out. A splash of water or broth can help retain moisture. If you want to save chicken for later, freezing is a great option. First, let it cool completely. Then, wrap each piece in plastic wrap. Place the wrapped chicken in a freezer bag. This will prevent freezer burn. Label the bag with the date, so you know when to use it. For best quality, aim to use frozen chicken within 2-3 months. To thaw, move it to the fridge overnight. You can also use the microwave for quick thawing, but plan to cook it right away. You should marinate the chicken for at least 30 minutes. If you have more time, aim for 2 to 4 hours. This gives the chicken a better flavor. The longer you marinate, the tastier it gets. Just remember not to exceed 4 hours, as the acid in the salsa verde can change the chicken's texture. Yes, you can use frozen chicken breasts. Just make sure to thaw them completely before marinating. Thawing helps the marinade soak into the meat. If you don’t have time to thaw, cook the chicken longer on the grill. However, fresh chicken will give you the best flavor and texture. You can serve many tasty sides with this dish. Here are a few ideas: - Grilled corn on the cob - Cilantro-lime rice - Roasted vegetables - Fresh avocado salad - Black beans or refried beans - Tortilla chips with guacamole These sides will complement the bright flavors of the grilled salsa verde chicken. You can find the full recipe for grilled salsa verde chicken to get started! Grilled salsa verde chicken is simple and delicious. We covered the key ingredients, preparation steps, and tips to avoid common mistakes. You can add your twist with optional ingredients or variations. Remember, storing leftovers correctly keeps meals fresh longer. Finally, don’t forget to check the internal temperature for safety. Enjoy creating tasty meals that impress family and friends!

Grilled Salsa Verde Chicken Flavorful and Easy Recipe

If you love bold flavors and easy cooking, you’ll enjoy my grilled salsa verde chicken recipe. Marinated in bright salsa

- 1 pound large shrimp, peeled and deveined - 2 tablespoons blackening seasoning - 1 tablespoon olive oil - 3 cups romaine lettuce, chopped into bite-sized pieces - 1 cup cherry tomatoes, halved - 1/2 cup crunchy croutons - 1/4 cup freshly grated Parmesan cheese - 2 tablespoons hot honey (or mix regular honey with chili flakes) - 1 tablespoon freshly squeezed lemon juice - Salt and pepper to taste - Fresh parsley - Chives To create the Hot Honey Blackened Shrimp Caesar Salad, start with fresh shrimp. I love using large shrimp because they hold up well. Blackening seasoning gives them a great flavor and a nice kick. Olive oil helps the spices stick and adds richness. Next, you need crisp romaine lettuce. It adds a refreshing crunch. Cherry tomatoes brighten the dish with color and taste. Croutons give it that satisfying crunch. Parmesan cheese brings a savory note that pairs well. Hot honey is the star here. It adds sweetness and spice. A squeeze of lemon juice adds brightness. Don’t forget to season with salt and pepper to enhance the flavors. For a finishing touch, you can add fresh parsley or chives. They add color and a burst of freshness. This salad is not just a meal; it’s a flavor explosion! For the full recipe, check out the detailed steps to make this dish. To start, grab your shrimp and a medium mixing bowl. Combine the shrimp with blackening seasoning. I like to use two tablespoons for a good kick. Next, add one tablespoon of olive oil. Toss the shrimp well. Make sure every piece is coated with the spices. This step brings out the bold flavors. Now, heat your skillet on medium-high. It should be hot before adding the shrimp. Cook them for about 2 to 3 minutes on each side. You want them to turn opaque and have a slight char. After cooking, remove the skillet from the heat. Drizzle hot honey over the shrimp while they are still warm. This adds a sweet kick that makes the dish special. In a large salad bowl, mix the chopped romaine lettuce with halved cherry tomatoes. Add the crunchy croutons and freshly grated Parmesan cheese. Toss everything gently to combine. This step makes sure each bite has a bit of everything. Now, carefully place the blackened shrimp atop the salad. Spread them out evenly for a nice look. Finally, garnish your salad with freshly chopped parsley or chives. This adds a pop of color and freshness. For the full recipe, check the detailed instructions provided. When you pick shrimp, fresh is often best. Fresh shrimp has a sweet taste and a nice snap. If fresh shrimp isn’t available, frozen shrimp can work well too. Just make sure to thaw it properly. For size, I recommend large shrimp. They cook evenly and provide a nice bite. Look for shrimp that are about 16 to 20 per pound. This size holds up well in salads. Adjusting seasoning can make a big difference. If you like more heat, add extra blackening seasoning. You can also play with the amount of hot honey. It adds a sweet and spicy kick that makes the dish shine. For a fun twist, try different honey types. You can use orange blossom or wildflower honey. Each will bring a new layer of flavor to your dish. Serving in chilled bowls keeps the salad fresh and crisp. A cold bowl enhances the taste of the ingredients. When you drizzle hot honey, do it lightly over the shrimp. This not only looks nice but adds extra flavor. You can also sprinkle fresh parsley or chives on top. This gives a pop of color and freshness to your salad. These tips will help you create a stunning Hot Honey Blackened Shrimp Caesar Salad. For the full recipe, check out the detailed steps above. {{image_4}} You can switch up the shrimp for other seafood like scallops or fish. They will also soak up the blackening spices well. If you prefer, grilled chicken is a great choice too. It adds a nice char and goes well with the hot honey. Just season it the same way and cook until it’s juicy and tender. If you want a creamier touch, try using a classic Caesar dressing. It adds a rich flavor that pairs nicely with the shrimp. For those who prefer vegan options, look for a plant-based Caesar dressing. These dressings can give you that creamy texture without any animal products. Consider mixing in some greens like spinach or arugula. They add a fresh crunch. Roasting vegetables like bell peppers or zucchini can also enhance your dish. They bring out natural sweetness and add depth to the salad. Don’t hesitate to experiment with your favorite veggies! For the Full Recipe, check the previous sections. - Storing leftovers: Place any leftover shrimp Caesar salad in an airtight container. This keeps the shrimp and salad fresh for about 2 days. - Best practices for freshness: Always cool the salad before sealing it. Avoid leaving it out at room temperature for over 2 hours to ensure food safety. - How to freeze shrimp salad: It’s best to freeze the shrimp separately from the salad. Place shrimp in a freezer-safe bag, and remove as much air as possible. The salad can get soggy when frozen. - Thawing tips: To thaw, move the shrimp to the fridge overnight. For a quick option, run the bag under cold water. Do not refreeze cooked shrimp. To turn up the heat, add more blackening seasoning. You can also mix in sliced jalapeños. Another option is to use a spicier hot honey. Consider using a chili sauce for extra flavor. Yes, you can prep parts of this salad ahead of time. Chop the lettuce and veggies a day before. Store them in airtight bags or containers. Cook the shrimp and add them just before serving for the best taste. For a low-carb option, use leafy greens like spinach or kale. You can skip croutons or use a low-carb alternative. Instead of honey, consider using a sugar-free sweetener to keep it keto-friendly. Pair this salad with garlic bread for a tasty side. A light soup also complements it well. Serve it alongside grilled veggies for a colorful plate. For a drink, iced tea or lemon water adds a refreshing touch. For the detailed preparation steps, check out the Full Recipe. This blog post covered a delicious shrimp salad with a zesty twist. We explored the main ingredients, like shrimp, blackening seasoning, and fresh veggies. I shared step-by-step cooking instructions to ensure your shrimp turn out perfect. Remember to play with flavors and garnishes to make it your own. In conclusion, this salad is easy to make and full of flavor. You can adjust the recipe to suit your taste. Enjoy experimenting with different proteins and dressings. This dish is sure to impress at your next meal.

Hot Honey Blackened Shrimp Caesar Salad Delight

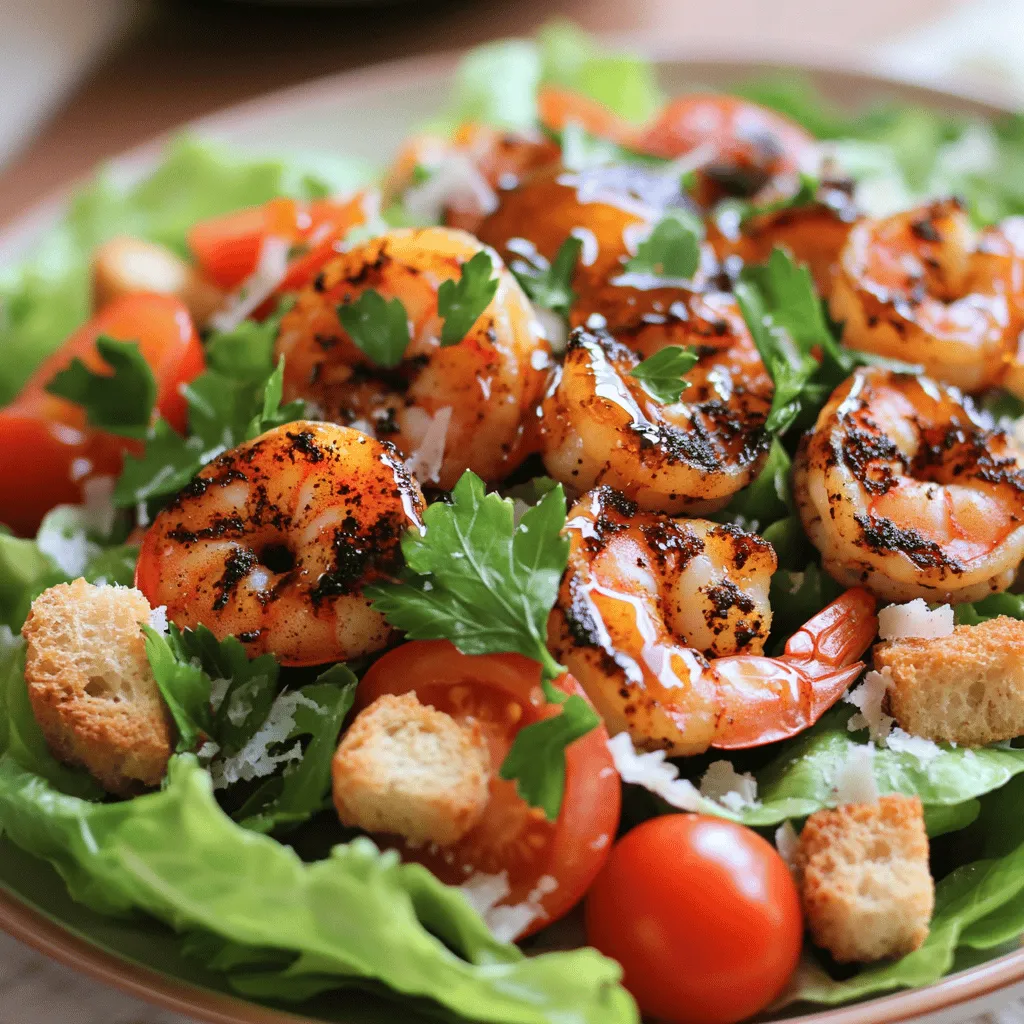
Dive into a flavor explosion with my Hot Honey Blackened Shrimp Caesar Salad Delight! This dish combines spicy shrimp with

For the smoked salmon salad, you need: - 200g smoked salmon, expertly sliced - 4 cups vibrant mixed salad greens (a blend of arugula, spinach, and butter lettuce) - 1 cup cherry tomatoes, halved - 1 cucumber, thinly sliced - 1 small red onion, paper-thin slices - 1 ripe avocado, sliced into crescents - 1 tablespoon capers, rinsed and finely chopped - 1/4 cup fresh chives, chopped - 2 tablespoons Greek yogurt - 1 tablespoon fresh lemon juice - 1 tablespoon extra virgin olive oil - Salt and freshly cracked black pepper to taste You can swap ingredients if needed. Use smoked trout instead of smoked salmon for a different flavor. If you lack chives, green onions work well. You can also use plain yogurt instead of Greek yogurt. For a vegan option, replace the yogurt with silken tofu blended until smooth. If you want a crunch, try radishes instead of cucumbers. Fresh ingredients make this salad great. Fresh salmon adds rich flavor, while crisp greens give a nice crunch. Ripe avocados provide creaminess and balance the dish. When you use fresh tomatoes, they bring sweetness that brightens the salad. Using fresh herbs like chives enhances the taste in each bite. Always pick the best ingredients to make your salad shine. Start by gathering all your ingredients. In a big bowl, mix together the salad greens. Add the halved cherry tomatoes, sliced cucumber, thin red onion, and avocado. Toss these gently, being careful not to mash the avocado. This mix forms a colorful and crunchy salad base that shines with fresh flavors. In a small bowl, combine the chopped capers, chives, Greek yogurt, lemon juice, and olive oil. Whisk until the dressing is smooth and creamy. Taste it, then add salt and pepper to your liking. This dressing adds a zesty kick that pairs well with the salmon. Drizzle the caper chive dressing over your salad mix. Toss everything lightly to coat each piece. Place the smoked salmon slices on top, letting their bright color pop against the greens. For a final touch, sprinkle some extra chives or a few whole capers on top. Serve this salad right away to enjoy its fresh taste. For the full recipe, check the previous section. To boost the taste of your smoked salmon salad, use fresh herbs. Fresh dill or parsley adds a nice touch. You can also mix in some capers for a salty kick. Try using different greens, like kale or radicchio, for more flavor. A dash of hot sauce can add heat if you like spice. Fresh lemon juice brightens the dish, so don’t skip it! Serve your salad in a large, shallow bowl. This allows the colors to shine. Arrange the salmon on top in a fan shape for visual appeal. Garnish with extra chives or whole capers for a pop of color. You can also add edible flowers for a fancy touch. For a unique twist, place the salad on a wooden board, making it rustic and charming. Serve the salad right after making it for the best taste. The greens stay crisp that way. If you need to prep ahead, keep the dressing separate. Mix it in only when you are ready to serve. This keeps everything fresh and delicious. If you have leftovers, eat them within a day for the best flavor and texture. {{image_4}} If you want to change things up, there are many proteins to try. You can use grilled chicken for a hearty twist. Shrimp or crab adds a touch of luxury. Tofu is a great plant-based choice. Each protein brings its own flavor and texture, keeping your salad fresh and exciting. Using seasonal ingredients makes your salad taste better. In spring, try adding fresh peas or radishes for a nice crunch. Summer calls for juicy peaches or strawberries for sweetness. In fall, roasted butternut squash adds warmth, while winter greens like kale offer a hearty bite. Each season gives you new options to explore. While the caper chive dressing is a star, feel free to experiment. A lemon vinaigrette adds brightness. A creamy dill dressing pairs well with smoked salmon. For a spicy kick, try a chipotle dressing. Each dressing can change the flavor profile and keep your salad interesting. For the full recipe, check out the Elegant Smoked Salmon Salad with Caper Chive Dressing. After enjoying your smoked salmon salad, store leftovers in an airtight container. This keeps the salad fresh and prevents odors. Place the salad in the fridge. It will stay good for up to two days. Keep the dressing separate if possible. This helps maintain the crunchiness of the greens. For meal prep, chop your veggies ahead of time. Store them in separate containers. This keeps them fresh and ready to go. You can mix the dressing and store it in a small jar. Just shake it well before use. This way, you can have a quick and tasty meal any day of the week. Smoked salmon lasts about a week in the fridge after opening. Mixed salad greens are best when used within three to five days. Cherry tomatoes stay fresh for about a week stored at room temperature. Cucumber can last up to a week in the fridge. Check all ingredients before use to ensure they are still fresh. For the full recipe, visit the previous section. The best smoked salmon has a rich flavor and silky texture. I recommend looking for *cold-smoked salmon*. It is tender and has a delicate taste. Brands like Nova or Scottish smoked salmon are great choices. Look for pieces that are vibrant and shiny. Avoid any that seem dull or dry. Freshness matters, so check the date on the package. Yes, you can prepare parts of this salad ahead. I suggest you chop the veggies and make the dressing in advance. Just store the salad greens and dressing separately in the fridge. This way, the greens stay crisp. When you’re ready to eat, combine everything. Add the smoked salmon right before serving to keep it fresh. This salad is naturally gluten-free! All the ingredients, like smoked salmon, veggies, and the dressing, are safe. Just be sure to check your yogurt and olive oil for any hidden gluten. If you want to serve it with bread, choose gluten-free bread. Enjoy this dish without worrying about gluten! For the full recipe, check the section above. This blog post covers everything you need to make a delicious salad. We looked at key ingredients and tasty dressings. You learned how to prepare a fresh salad base and make your own chive dressing. We shared tips to enhance flavors and present your dish beautifully. Remember to use fresh ingredients for the best taste. Feel free to try different proteins and dressings. With the right storage, your salad can last longer. Now, you have the tools to create an amazing meal! Enjoy your cooking!

Smoked Salmon Salad with Caper Chive Dressing Delight

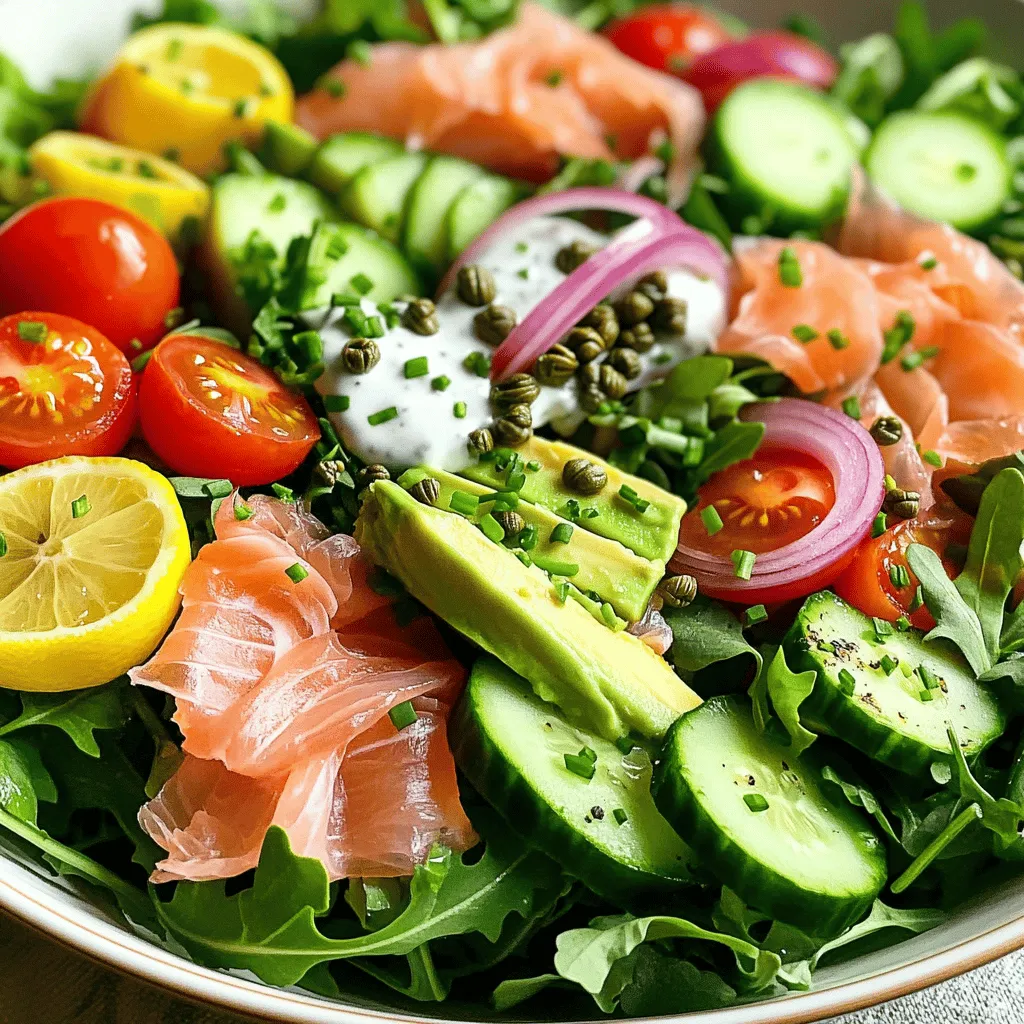
If you love fresh flavors and quick meals, you’re in for a treat! My Smoked Salmon Salad with Caper Chive

- 4 boneless, skinless chicken thighs - 1 cup chipotle BBQ sauce - 2 tablespoons olive oil - 1 teaspoon garlic powder - 1 teaspoon onion powder - Salt and freshly ground black pepper - 4 ears of fresh corn, husked - 1 cup heavy cream - 1 tablespoon unsalted butter - 1 teaspoon smoked paprika - Fresh cilantro for garnish When I make this dish, I focus on quality ingredients. For the chicken, I always choose boneless, skinless thighs. They stay moist and soak up flavors well. The chipotle BBQ sauce adds a nice kick. It brings together smoky and sweet notes that work perfectly with the chicken. For the seasoning, I use garlic powder and onion powder. They enhance the chicken's flavor without being too strong. Don’t forget salt and pepper to taste. These simple seasonings make a big difference. Now let's talk about the creamed corn. I love using fresh corn for this. It has a sweet crunch that frozen corn just can’t match. The heavy cream makes it rich and smooth. Adding smoked paprika gives it a nice depth, while cilantro adds a fresh touch. You can find the complete recipe at [Full Recipe]. Start by mixing the olive oil, garlic powder, onion powder, salt, and pepper in a bowl. This mix helps the chicken soak up all the flavors. Next, coat the chicken thighs well with the marinade. Cover the bowl and place it in the fridge. Let it marinate for at least 30 minutes. This step is key to getting juicy, tasty chicken. While the chicken marinates, preheat your grill to medium-high heat. Now, husk the corn, making sure to remove all the silk. Once the grill is hot, place the corn directly on the grates. Grill the corn for 10 to 12 minutes. Turn it every few minutes so it chars evenly. When it’s done, take the corn off the grill and set it aside to cool. After the corn cools, take your marinated chicken out of the fridge. Place the chicken on the grill and brush it with chipotle BBQ sauce. Grill each side for about 6 to 7 minutes. Keep basting with more sauce as it cooks. You want the chicken to reach an internal temperature of 165°F (75°C). This ensures it’s safe to eat and stays juicy. Now, let’s make the creamed corn. Cut the kernels off the cooled corn cobs and place them in a bowl. In a medium saucepan, melt the butter over medium heat. Add the corn kernels and sauté them for about 3 to 4 minutes. They should become tender. Pour in the heavy cream and sprinkle in the smoked paprika. Stir continuously for around 5 minutes until it thickens and gets creamy. Once the chicken is ready, let it rest for a few minutes. Then, slice it into pieces. On each plate, serve a slice of BBQ chicken next to a scoop of the creamed corn. This pairing makes for a beautiful and tasty meal. To make it look great, sprinkle chopped cilantro over the chicken and creamed corn. This adds a fresh burst of flavor and a nice pop of color to your dish. Enjoy your Chipotle BBQ Chicken with Creamed Grilled Corn feast! - Ensure uniform marination for maximum flavor. Marinate the chicken evenly. This helps every bite be tasty. - Avoid overcooking the chicken for juicy results. Use a meat thermometer to check for 165°F. - Use direct heat for chicken and corn. This gives you nice grill marks and flavor. - Rotate corn for even charring. Turn the corn every few minutes to get that perfect char. - Pair with lime wedges for added zest. The fresh lime juice brightens the dish. - Experiment with side dishes like coleslaw. Coleslaw adds crunch and balances the meal. Make sure to try the full recipe for the best results! {{image_4}} You can change some ingredients to suit your taste. - Use chicken breasts instead of thighs for a leaner option. - Substitute BBQ sauce with a homemade version for a fresh twist. Adding new flavors can make this dish even better. - Add lime juice or zest to the creamed corn for a bright taste. - Incorporate spices like cayenne or chili powder for extra heat. If you do not want to grill, there are other ways to cook. - Bake the chicken in the oven instead of grilling for a different texture. - Roast corn in the oven or on the stovetop for a quick option. Feel free to explore these variations. They can make your chipotle BBQ chicken with creamed grilled corn even more enjoyable. For the full recipe, check out the complete guide to making this flavorful dish! Store leftovers in an airtight container. This keeps the chicken and creamed corn fresh. For the best taste, eat them within 3-4 days. The flavors stay strong this way. If you want to save some for later, freeze the chicken and creamed corn separately. This helps them keep their taste and texture. When you’re ready to eat, thaw them overnight in the fridge before reheating. For a quick meal, use the microwave to reheat the chicken and corn. Just be sure to heat them until hot all the way through. If you want the best texture, reheat on the stovetop. This method warms them gently and keeps them creamy. For the full recipe, check out the detailed steps and tips provided. Marinate the chicken for at least 30 minutes. For the best taste, overnight is ideal. This extra time lets the flavors soak in. You want each bite to be packed with deliciousness. Yes, you can prepare the creamed corn and marinated chicken in advance. This saves time on busy days. Just store the chicken in the fridge and the corn in a separate container. When you're ready, cook them fresh. Great sides to serve with this dish include grilled vegetables, rice, or a fresh salad. Each option adds color and balance to your meal. Try mixing and matching to find your favorite combo. This blog shared a simple yet flavorful recipe for Chipotle BBQ Chicken and creamed corn. You learned about key ingredients, step-by-step cooking methods, and tips for perfect results. Remember to choose the chicken thighs and marinate for rich taste. Feel free to experiment with flavors and sides. Store leftovers properly to enjoy later. Your cooking journey can be fun and tasty! Enjoy making this dish and share it with family or friends.

Chipotle BBQ Chicken with Creamed Grilled Corn Feast

Get ready for a flavor explosion with my Chipotle BBQ Chicken and Creamed Grilled Corn Feast! This dish combines juicy

Lemon posset is simple yet rich. Here are the main ingredients you need for this treat: - 2 cups heavy cream - 3/4 cup granulated sugar - 1/3 cup freshly squeezed lemon juice - Zest of 1 lemon These ingredients create a creamy and tart dessert. The heavy cream gives it a smooth texture. The sugar balances the tartness of the lemon. Fresh lemon juice and zest add bright flavor. Now, let’s look at the garnishes to elevate your posset: - Fresh berries (strawberries, blueberries, or raspberries) - Fresh mint leaves (for garnish) Using fresh berries adds color and sweetness. Mint leaves provide a nice touch of freshness. Together, they make your dessert look and taste amazing. You can find the full recipe [here](#). First, gather your ingredients. In a medium saucepan, mix 2 cups of heavy cream and 3/4 cup of granulated sugar. Place the pan over medium heat. Stir the mixture often. Heat it until the sugar dissolves. The cream should feel hot but not boil, which takes about 5-7 minutes. Once ready, take the pan off the heat. Now, add 1/3 cup of freshly squeezed lemon juice and the zest of 1 lemon. Mix it well to combine. Now, we need to make the mixture smooth. Pour it through a fine mesh sieve into a bowl or measuring jug. This step catches any bits that might spoil the texture. Once strained, distribute the smooth lemon mix into small serving cups. Cover these lightly with plastic wrap to keep them fresh. Place the cups in the refrigerator. Let them chill for at least 4 hours, or even better, overnight. This time allows the posset to set properly. When you're ready to serve, remove them from the fridge. Top each posset with fresh berries and a sprig of mint for a lovely finish. You can find the Full Recipe in the article for more details. To get a smooth lemon posset, you must sieve the mixture. This step is key. It removes any lumps from the cream and catches zest bits. This keeps your posset creamy and nice. After you mix in the lemon juice, let it cool for a bit. Place it in the fridge just after. Cooling helps it set well without forming a skin. When it comes to serving, presentation matters. I recommend garnishing with fresh berries. Strawberries, blueberries, and raspberries add color and flavor. A mint leaf on top makes it pop. You can serve the posset in small cups or ramekins. For a stunning look, place them on a nice platter. Arrange the cups in a circle and add extra berries around them. This adds a lovely touch. You can get creative with flavors. Try adding a splash of vanilla for warmth. Lavender also works well and gives a floral note. For garnish, consider using other fruits too. Thin slices of kiwi or a few pomegranate seeds are fun choices. These variations keep the dessert fresh and exciting. {{image_4}} Lemon posset is a creamy delight that needs careful storage. Always store it in the fridge. Use small cups or ramekins with lids for best results. If you don’t have lids, cover them with plastic wrap. This keeps the posset fresh and prevents a skin from forming. Make sure the wrap does not touch the dessert. Lemon posset lasts for about 4 to 5 days in the fridge. After that, it may lose its texture and flavor. Always check for any off smells or changes in texture before eating. For the best taste, eat it fresh if possible. Enjoy your posset within the first few days for that delightful creaminess! If you want the complete steps, check the Full Recipe. Lemon posset is a creamy dessert that dates back to medieval England. It is simple and made with just three main ingredients: heavy cream, sugar, and lemon juice. The process involves heating cream with sugar and then adding lemon juice to thicken it. This dessert is rich, tangy, and has a silky texture. You can serve it chilled in cups or ramekins. The bright lemon flavor makes it refreshing, perfect for any occasion. Yes, you can make lemon posset in advance. It is great for meal prep. Prepare it up to two days ahead of time. Follow the steps in the recipe, and let it set in the fridge. Cover the cups with plastic wrap to keep them fresh. This dessert needs at least four hours to chill and set, so plan ahead. Making it in advance saves time on busy days or special events. If you want a lighter or dairy-free version of lemon posset, there are great options. You can use coconut cream for a rich flavor without dairy. Another choice is cashew cream, made from soaked cashews blended with water. For a lighter option, try using half-and-half or whole milk, but the texture may be less creamy. Each substitute will change the flavor slightly, so choose based on your taste. You can find the full recipe for this delightful treat online. It includes all the details you need to make lemon posset at home. The recipe is simple and calls for just a few key items. To make this luscious dessert, gather these ingredients: - 2 cups heavy cream - 3/4 cup granulated sugar - 1/3 cup freshly squeezed lemon juice - Zest of 1 lemon - Fresh berries (like strawberries or blueberries) for garnish - Fresh mint leaves for garnish This recipe will guide you through the steps to create a smooth and creamy lemon posset. You will love how easy it is to make. Each bite is a burst of fresh lemon flavor. The texture is rich and creamy, making it a perfect dessert for any occasion. To access the full recipe, you can visit my cooking blog. There, I share tips on how to make this dessert shine. Enjoy the process, and get ready to impress your family and friends with your culinary skills! Lemon posset is a simple yet delicious dessert. You learned about the key ingredients, like heavy cream and lemon juice. I shared step-by-step instructions to make it creamy and smooth. You now know how to garnish it with fresh berries and mint. Remember to chill it well for the best texture. This treat keeps well in the fridge, so enjoy it later too. Try new flavors or toppings to make it your own. Have fun making lemon posset and impress your friends and family!

Lemon Posset Dessert Delightful and Creamy Treat

Are you ready to enjoy a creamy and zesty treat? Lemon Posset is the perfect dessert for you! This delightful

- 8 ounces whole grain pasta (penne or fusilli) - 1 cup fresh corn kernels (or frozen, thawed) - 1 red bell pepper, diced - 1/2 red onion, finely chopped - 1 ripe avocado, diced The main ingredients of this salad create a bright and tasty dish. I love whole grain pasta because it adds fiber and keeps you full longer. Fresh corn brings a sweet crunch. The red bell pepper adds color and a crisp bite. Onions give it a nice zing. Lastly, the avocado adds creaminess. - 2 tablespoons freshly squeezed lime juice - 1 tablespoon extra-virgin olive oil - 1 teaspoon chili powder - Salt and pepper to taste The dressing makes this dish shine. Lime juice gives a zesty kick. Olive oil adds richness. Chili powder brings warmth without too much heat. Salt and pepper tie all the flavors together. This simple blend enhances each bite. - Crumbled feta cheese - Fresh cilantro, chopped Garnishes add a fun touch. Feta cheese adds a salty creaminess. Cilantro gives a fresh, herbal note. These are optional but really make the salad pop. For the full recipe, you can check the link provided. - Bring salted water to a boil. - Cook pasta until al dente. - Drain and rinse under cold water. Start by boiling a large pot of salted water. This adds flavor to the pasta. Once the water boils, add 8 ounces of whole grain pasta, like penne or fusilli. Cook it according to the package directions until it is al dente. This means it should be firm when bitten. After cooking, drain the pasta. Rinse it under cold water to stop the cooking process. This cooling step is crucial for a fresh salad. - Mix chilled pasta with veggies. - Gently incorporate avocado to prevent mashing. In a large bowl, combine the chilled pasta with your veggies. Add 1 cup of fresh corn, 1 diced red bell pepper, 1/2 finely chopped red onion, and 1/2 cup of halved cherry tomatoes. These ingredients bring color and crunch to your dish. Now, carefully add 1 diced ripe avocado. Use a gentle touch so the avocado doesn’t turn to mush. Mixing these together at this stage creates a vibrant base for your salad. - Whisk lime juice, olive oil, and spices. - Adjust seasoning to taste. Next, it’s time to make the dressing. In a small bowl, whisk together 2 tablespoons of freshly squeezed lime juice, 1 tablespoon of extra-virgin olive oil, and 1 teaspoon of chili powder. Add a pinch of salt and pepper to taste. This dressing will add a zesty kick to the salad. Taste it and adjust the seasoning if you want. The right balance makes all the difference. - Drizzle dressing over pasta mixture. - Gently toss to combine. Now, drizzle the dressing over the pasta mixture. Use a spatula to gently toss everything together. You want all the ingredients to be coated in the dressing. This step is key to blending the flavors. Make sure not to be rough, as you want to keep the avocado intact. Once mixed, consider adding fresh cilantro on top for a burst of flavor. Enjoy this fresh dish with friends or family. For the full recipe, check out the detailed instructions above. - Use salted water for better flavor. Salt adds taste to the pasta. - Rinse pasta thoroughly to cool. This stops cooking and prevents mushiness. - Let the salad sit for flavors to meld. This helps all ingredients blend well. - Adjust spices based on personal preference. You can make it as spicy as you like. - Serve in a large bowl or individual plates. This makes it fun and easy to share. - Garnish with cilantro and lime for visual appeal. Fresh herbs and citrus look great and taste bright. {{image_4}} You can easily make this dish even healthier. Instead of whole grain pasta, try quinoa or zucchini noodles. Quinoa adds a nutty taste and packs in protein. Zucchini noodles are low in carbs and very fresh. For the dressing, swap olive oil with Greek yogurt. This gives creaminess while cutting down fat. Greek yogurt also brings extra protein to your meal. Want some extra protein? Add black beans to your salad. They are filling and tasty. You can also add diced jalapeños for a spicy kick. This will give your dish a nice heat that many enjoy. To keep your salad fresh, use seasonal vegetables. Fresh corn tastes best in summer, while roasted sweet potatoes shine in fall. You can also change up your herbs based on what you have. Fresh basil or dill can add a unique touch. Try different dressings too! Use whatever fresh produce you have on hand. A citrus dressing can brighten up the dish. This flexibility makes the salad fun and easy to adapt. For the full recipe, check the earlier section. Store your Healthy Street Corn Pasta Salad in an airtight container. It will stay fresh for up to 3-4 days. If you can, keep the dressing separate. This helps maintain the texture of the salad. I do not recommend freezing this salad. The avocado won't freeze well. It is best enjoyed fresh to keep that crisp texture. You can enjoy this salad cold for a refreshing meal. If you want to reheat it, warm it gently. This way, you avoid making it mushy. Yes, it can be prepared a few hours in advance, but dress just before serving. This keeps the flavors fresh and the avocado from browning. I love making this salad early for parties. It saves me time and helps the flavors blend nicely. By substituting whole grain pasta with gluten-free options, it can be made gluten-free. Look for gluten-free pasta made from brown rice or chickpeas. This way, everyone can enjoy the dish without worry. It pairs well with grilled chicken, fish, or can be served as a side dish for barbecues. The bright flavors of the salad complement many main dishes. You can even enjoy it on its own as a light meal. For the full recipe, check out the details above! This blog post covered how to make a tasty Healthy Street Corn Pasta Salad. We discussed the main ingredients like whole grain pasta and fresh veggies. I outlined the step-by-step instructions to create the salad, along with tips on flavor and presentation. You learned about variations and storage tips to keep it fresh. In conclusion, this salad is easy to make and full of flavor. Experiment with different ingredients to make it your own. Enjoy it as a side dish or a light meal. Fresh, healthy, and delicious—what's not to love?

Healthy Street Corn Pasta Salad Flavorful and Fresh Dish

Looking for a refreshing meal that bursts with flavor? My Healthy Street Corn Pasta Salad is your answer! This dish

- 2 boneless, skinless chicken breasts - 1 cup orzo pasta - 1 ripe avocado, diced - 1 cup cherry tomatoes, halved - ½ cup cucumber, diced - ¼ cup red onion, finely chopped The main parts of this dish are simple yet flavorful. The chicken breasts bring protein and flavor, while the orzo adds a nice chewy texture. Fresh vegetables like avocado, tomatoes, cucumber, and onion add crunch and nutrition. - 3 tablespoons olive oil - 2 tablespoons fresh lemon juice - 1 teaspoon dried oregano - 1 teaspoon dried thyme - Salt and pepper to taste Seasoning is key to great flavor. The olive oil and lemon juice create a bright dressing that lifts the salad. Dried oregano and thyme add earthiness. Salt and pepper tie everything together. - Fresh parsley, chopped (for garnish) - Lemon wedges Garnishes make your dish pop. Fresh parsley adds color and flavor. A lemon wedge gives guests a chance to add more zest if they like. This salad looks great and tastes even better. For the full recipe, check the details above. - Preparing the Marinade Start by grabbing a medium mixing bowl. Whisk together 2 tablespoons of olive oil, fresh lemon juice, dried oregano, dried thyme, and a pinch of salt and pepper. This mix gives the chicken a bright, zesty flavor. - Covering and Refrigerating Add the chicken breasts to the bowl. Make sure they are covered well in the marinade. Cover the bowl with plastic wrap. Let it sit in the fridge for at least 30 minutes. If you have time, let it marinate for 2 hours. This allows the flavors to soak in. - Boiling Water and Adding Salt Fill a pot with water. Add a good amount of salt and bring it to a boil over high heat. Salting the water helps flavor the orzo. - Cooking Time and Rinsing Once the water is boiling, add the orzo. Cook it for about 8 to 10 minutes until it is al dente. Drain the orzo and rinse it under cold water. This stops the cooking process and keeps the orzo from getting mushy. - Preheating the Grill Preheat your grill or grill pan to medium-high heat. A hot grill creates nice grill marks and seals in juices. - Checking Internal Temperature Remove the chicken from the marinade, letting the excess drip off. Grill it for 6 to 7 minutes on each side. Use a meat thermometer to check for 165°F (75°C). Once done, let it rest for a few minutes before slicing. - Mixing Orzo and Veggies In a large mixing bowl, combine the cooled orzo with diced avocado, halved cherry tomatoes, diced cucumber, and finely chopped red onion. Gently stir to mix without mashing the avocado. - Whisking the Dressing In a small bowl, whisk together the last tablespoon of olive oil with a pinch of salt and pepper. This simple dressing ties the salad together. - Tossing the Ingredients Drizzle the dressing over the orzo and veggies. Toss gently to coat everything well. This step adds flavor to each bite. - Slicing Grilled Chicken Slice the grilled chicken into thin strips. This makes it easy to serve over the salad. - Final Presentation Arrange the chicken on top of the orzo salad. Garnish with freshly chopped parsley for a nice pop of color. Serve it in a big bowl to show off all the vibrant ingredients. For the complete recipe, visit the Full Recipe section. Best Marinade Times For the best flavor, marinate the chicken for at least 30 minutes. If you want a deeper taste, aim for up to 2 hours. This helps the chicken soak in all the tasty herbs and lemon. Cooking Tips for Juiciness To keep your chicken juicy, let it rest after grilling. This allows the juices to settle. Grill it until it reaches 165°F (75°C) for safety and flavor. Avoiding Overcooking Cook the orzo according to the package. Aim for al dente, which usually takes about 8 to 10 minutes. Test it a minute or two before the time is up to avoid mushy pasta. Rinsing Benefits After cooking, drain the orzo and rinse it under cold water. This stops the cooking and keeps it from sticking together. Rinsing also cools it down quickly for your salad. Keeping Avocados Fresh To keep avocados fresh, store them whole and uncut until ready to use. If they are cut, sprinkle some lemon juice on them to delay browning. Wrap in plastic wrap and place in the fridge. How to Store Leftover Salad If you have leftover salad, store it in an airtight container. Keep it in the fridge for up to two days. Avoid adding the dressing until you are ready to eat. This keeps the salad crisp. {{image_4}} You can make this salad your own with different proteins. If you love seafood, shrimp works great. Simply grill or sauté it until pink and tender. For a plant-based option, tofu is a fantastic substitute. Press the tofu to remove extra water, then marinate and grill it. Feel free to add more veggies too. Bell peppers bring a sweet crunch. You can chop them up and toss them in the mix. Spinach adds flavor and nutrition. Just toss in a handful for some vibrant greens. If you prefer a creamy dressing, try Greek yogurt. It adds creaminess without too many calories. Mix it with lemon juice for a zesty twist. Another option is a tahini dressing for a nutty flavor. Both add a nice touch to the salad. For a low-calorie choice, use a vinegar-based dressing. Balsamic or apple cider vinegar can brighten up the dish. Just mix it with a dash of olive oil for a light finish. Pair this salad with warm, crusty bread for a complete meal. A nice white wine also complements the flavors well. If you're serving guests, consider a family-style presentation. Use a large bowl and let everyone help themselves. You can even serve it in mason jars for a fun twist. To keep your Grilled Lemon Herb Chicken Avocado Orzo Salad fresh, follow these steps: - Refrigerating Leftovers: After serving, place any leftovers in the fridge. Make sure to cool them to room temperature first. This prevents condensation that can make your salad soggy. - Best Containers for Storage: Use airtight containers to store the salad. Glass containers work well, as do BPA-free plastic ones. This helps keep the ingredients fresh and prevents blending of flavors. - How Long It Lasts in the Fridge: When stored properly, this salad lasts for 3 to 4 days in the fridge. The chicken will remain safe to eat, but the avocado may brown. - Freezing Options: While I don't recommend freezing the salad, you can freeze the chicken separately. Wrap it tightly in plastic wrap and then in foil for the best results. - Best Methods for Keeping Texture: To reheat the chicken, use an oven or skillet. This helps keep its juicy texture. Avoid microwaving, as it can dry it out. - Safe Temperatures: Ensure the internal temperature reaches 165°F (75°C) when reheating. This keeps the dish safe and delicious. You can prepare the salad a few hours before serving. Cook the orzo and let it cool. Marinate and grill the chicken earlier in the day. Store each component separately in the fridge. Combine everything just before serving to keep the salad fresh. Yes, you can use other pasta shapes. Try small shapes like fusilli or penne. Just adjust the cooking time based on the pasta you choose. This way, you can enjoy the same flavors with a different texture. This salad pairs well with crusty bread or a light soup. You can also serve it with grilled vegetables or a fresh fruit platter. These options complement the bright flavors of the salad nicely. Absolutely! The salad holds up well in the fridge. Just keep the dressing separate until you’re ready to eat. This will keep everything fresh and tasty. It’s a great choice for quick lunches or dinners. This salad is packed with nutrients. Chicken provides lean protein. Avocado adds healthy fats. The veggies offer vitamins and minerals. Orzo contributes carbohydrates for energy. Together, they create a balanced meal. Yes! To make it vegan, simply swap the chicken for grilled tofu or chickpeas. Use a vegan-friendly dressing made with olive oil and lemon. The salad will still be delicious and satisfying. Check the Full Recipe for more details on plant-based options. This article covered how to make a Grilled Lemon Herb Chicken Avocado Orzo Salad. We explored key ingredients like chicken, orzo, and fresh veggies. I shared easy steps, helpful tips, and tasty variations to keep it fun. For the best results, marinate your chicken well and choose fresh ingredients. Don’t hesitate to customize this salad to your liking. Enjoy this dish as a meal or side, and remember, cooking should be fun!

Grilled Lemon Herb Chicken Avocado Orzo Salad Delight

Looking for a fresh and tasty meal? You’ll love this Grilled Lemon Herb Chicken Avocado Orzo Salad! This dish combines

Older posts
Newer posts
← Previous Page1 … Page20 Page21 Page22 … Page75 Next →

dsad

© 2025 lazychefmagic • Built with GeneratePress

Our Policies

  • Copyright Policy
  • Cookie Policy
  • GDPR Policy
  • Privacy Policy
  • Disclaimer
  • Terms Of Use

More Information

  • Home
  • About
  • Contact
  • Appetizers
  • Dessert
  • Dinner
  • Drinks
©2025, lazychefmagic About Back To Top