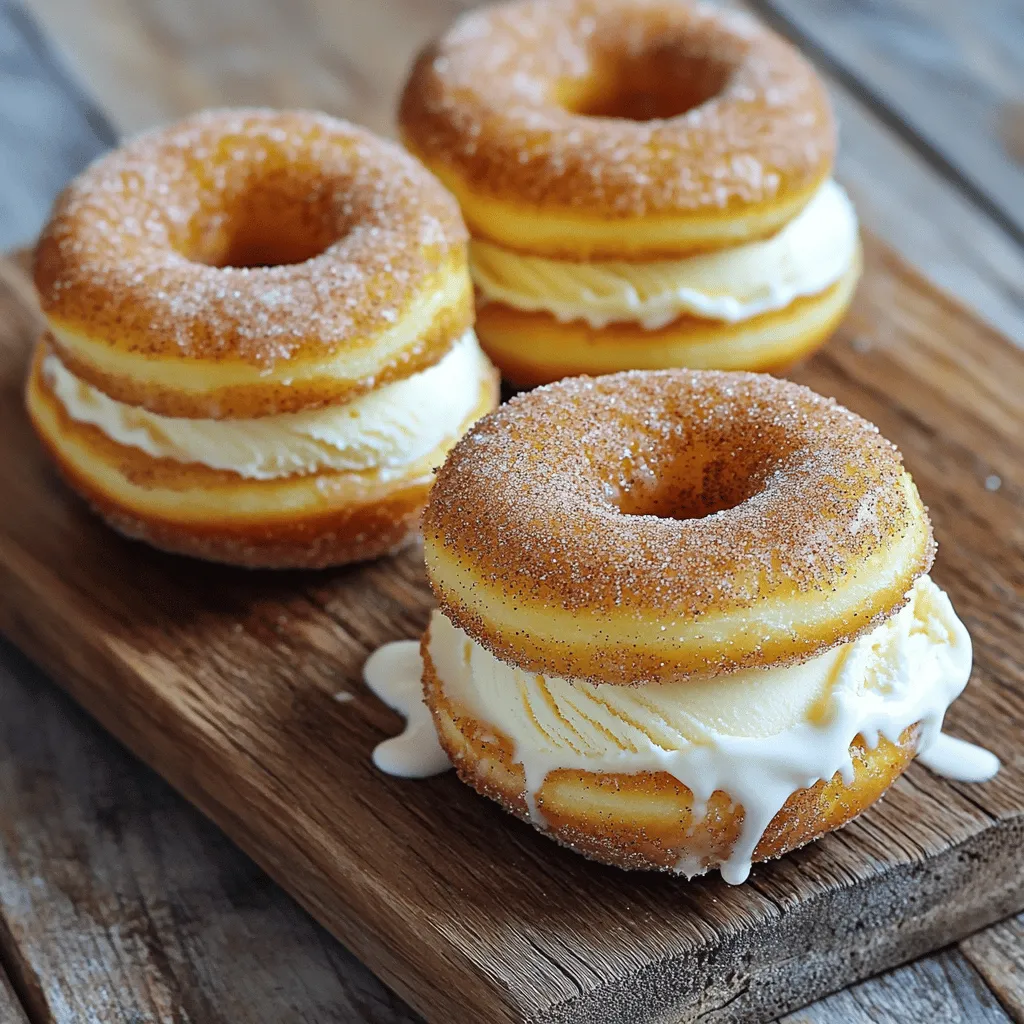
Delicious Apple Cider Donut Ice Cream Sandwiches
Craving a sweet treat that combines fall flavors with a cool twist? Apple Cider Donut Ice Cream Sandwiches are the
Craving a sweet treat that combines fall flavors with a cool twist? Apple Cider Donut Ice Cream Sandwiches are the
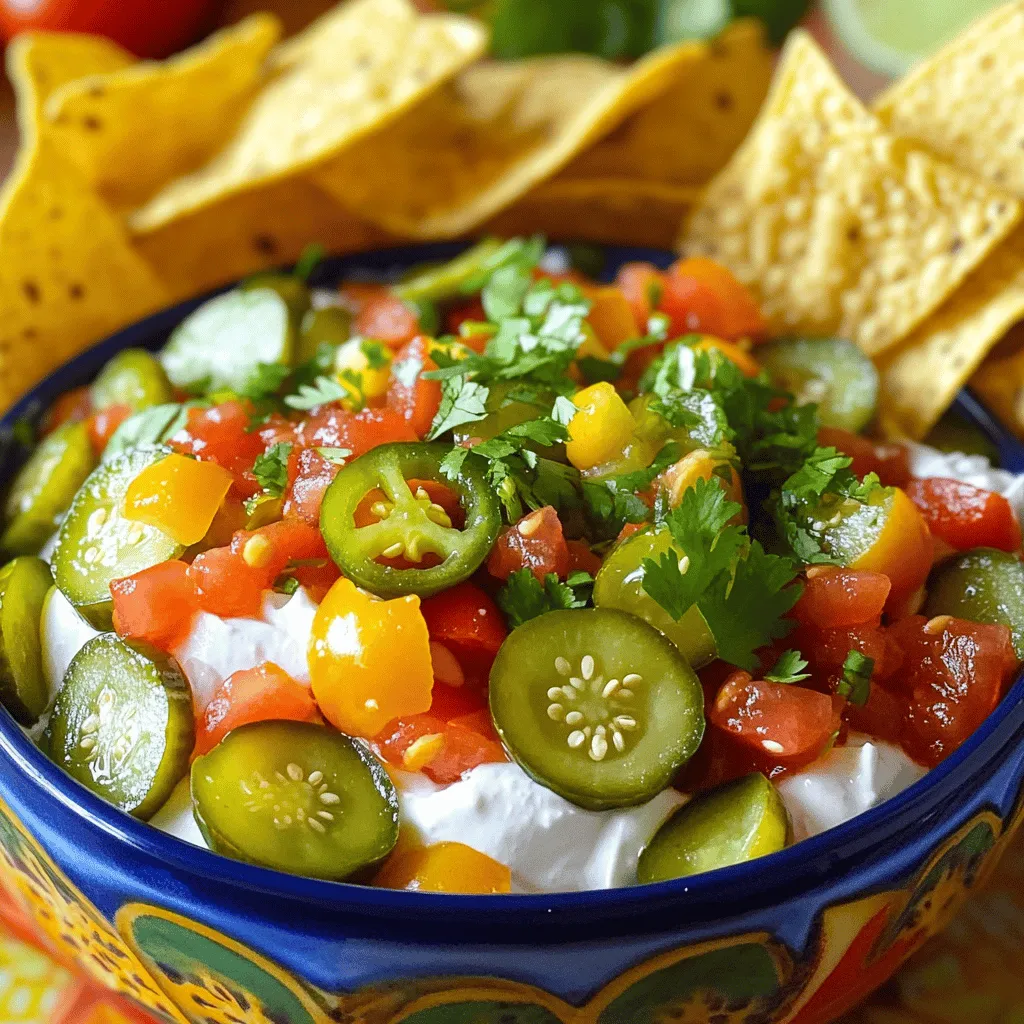
Are you ready to dive into a flavor-packed dip that’ll jazz up your gatherings? Meet Pickle de Gallo Pico Dip!
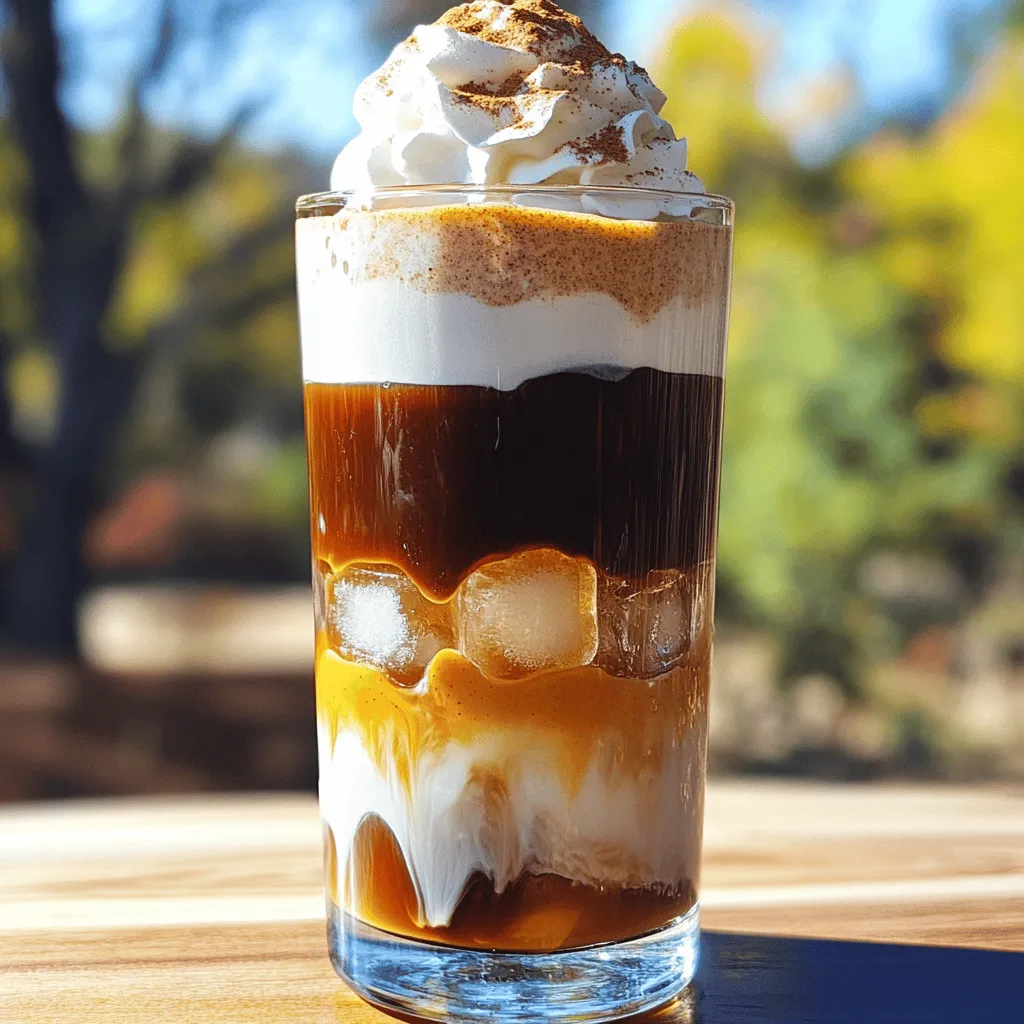
As the leaves change, nothing says fall like a Pumpkin Spice Cold Foam Float. This delicious drink combines cold brew
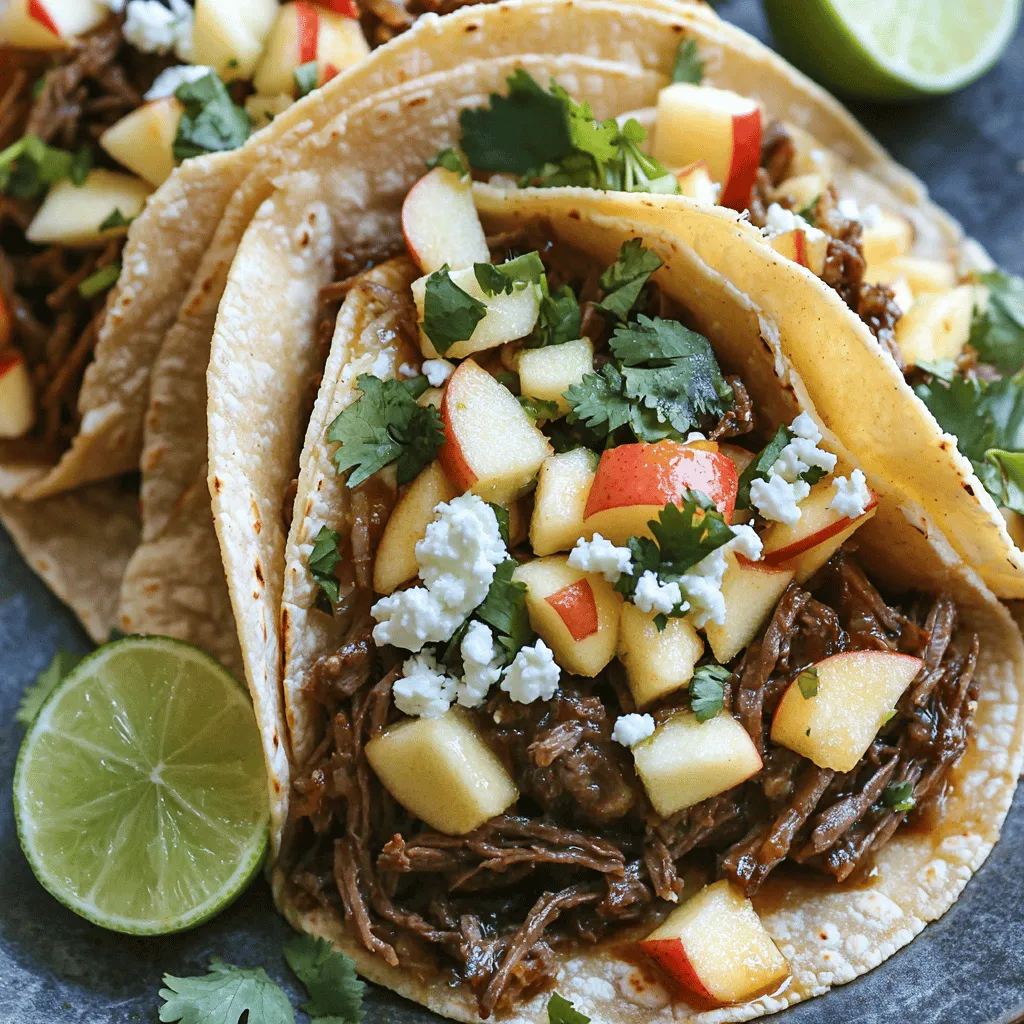
Get ready for a flavor explosion! Cider Braised Short Rib Street Tacos are packed with juicy, tender meat and bright
![- 2 cups elbow macaroni - 2 tablespoons unsalted butter - 2 cups whole milk These main ingredients form the base of our loaded mac and cheese. The elbow macaroni gives a nice bite. The butter adds richness, while whole milk makes the sauce creamy. - 2 cups shredded sharp cheddar cheese - 1 cup cooked chicken, shredded - 1/2 cup cooked bacon bits (optional) For flavor, I love using sharp cheddar cheese. It gives a strong, tasty kick. Adding shredded chicken makes it filling, while bacon bits add a smoky crunch. If you don’t like bacon, you can skip it. - 1/4 cup green onions, finely chopped - 1 teaspoon garlic powder - Optional toppings: diced tomatoes, jalapeños Garnishes bring extra color and taste. Green onions add freshness, and garlic powder boosts flavor. You can also sprinkle on diced tomatoes or jalapeños for some spice. These extras make each bite exciting. For the full recipe, see the section below. 1. Cooking elbow macaroni: Start by boiling water in a large pot. Once it’s boiling, add 2 cups of elbow macaroni. Cook it according to the package directions. You want it to be al dente, so check it a minute early. After cooking, drain the macaroni in a colander and set it aside. 2. Creating the cheese sauce: In the same pot, lower the heat to medium. Add 2 tablespoons of unsalted butter. Let it melt completely. Then, whisk in 2 tablespoons of all-purpose flour. Stir this mix for about a minute. You want to cook it until it bubbles a bit. This helps to remove the raw flour taste. Now, slowly pour in 2 cups of whole milk while whisking. Keep cooking for 2-3 minutes. You want the mix to thicken into a creamy sauce. Stir in 2 cups of shredded sharp cheddar cheese, 1 teaspoon of garlic powder, salt, and pepper. Keep stirring until the cheese melts and the sauce is smooth. Finally, gently fold in the drained macaroni, 1 cup of shredded chicken, and 1/2 cup of cooked bacon bits if you’re using them. Add half of the chopped green onions too. 1. Filling mini phyllo pastry cups: Grab your package of mini phyllo pastry cups. Using a spoon, carefully fill each cup with the macaroni and cheese mix. Make sure to pack it a little to fit well. 2. Packing technique for best results: Packing is key! Press down gently so the mixture holds together. This helps each cup stay intact when baked and makes them easier to serve. 1. Preheating the oven: Preheat your oven to 350°F (175°C). This step is important for even cooking. 2. Baking times and indicators for doneness: Place the filled cups on a baking sheet. Bake them for 15-20 minutes. You’ll know they are done when the tops are golden brown and bubbling. Once they are ready, carefully remove them from the oven. Let them cool for a few minutes before serving. Don’t forget to check out the Full Recipe for more details! To make a smooth and creamy cheese sauce, start with fresh ingredients. Use high-quality cheese, as it melts better. Warm your milk before adding it to the butter and flour mixture. This helps create a silky sauce. Stir constantly as you add cheese to avoid clumps. Never rush this step; patience is key. Common pitfalls with melting cheese include using low-fat options. They often don't melt well. Also, avoid overheating the cheese. This can make it grainy. If your sauce gets too thick, add a splash of milk to loosen it up. For maximum appeal, arrange your football cups on a large platter. Create a fun football field look with fresh herbs. You can add little flags to enhance the game day vibe. Stack the cups in groups of three for a great look. Garnishing adds flair. Consider topping with extra cheese or chopped green onions. Diced tomatoes and jalapeños also bring color and flavor. Choose fun toppings to make each cup unique. You can prepare these cups in advance. Make your macaroni and cheese and fill the cups. Store them in the fridge until game day. Just bake them when you’re ready to serve. This saves time and stress. For ideal pairings, serve with crispy potato chips or soft pretzels. A fresh veggie platter adds a nice crunch. You can also offer dips like ranch or salsa. These snacks complement the creamy mac and cheese perfectly. For the full recipe, check out the loaded mac and cheese football cups. {{image_4}} You can change the flavor of your Loaded Mac and Cheese Football Cups easily. Here are some great ideas: - Different cheese options: Try using gouda, mozzarella, or pepper jack cheese. Each cheese adds its unique taste and texture. Mixing cheeses is also a fun way to play with flavors. - Adding vegetables to the mix: You can sneak in some veggies for added nutrition. Try spinach, bell peppers, or broccoli. They blend well with the cheese and add color to your cups. If you have dietary needs, you can still enjoy these tasty cups. Here’s how: - Making it gluten-free: Use gluten-free pasta and a gluten-free flour mix in your cheese sauce. This way, you can enjoy the same creamy goodness without the gluten. - Vegetarian alternatives: Skip the chicken and bacon if you want a veggie version. You can add more veggies or even some lentils for protein. This keeps it hearty and satisfying. You can adapt these cups for any sports event or holiday. Here are a few fun ideas: - How to adapt for different sports events: Change the toppings to match your favorite team colors. Use blue cheese for a blue team or add red peppers for a red team. - Holiday-themed versions: For Halloween, use pumpkin puree in your cheese sauce. In winter, sprinkle some nutmeg on top for a festive twist. This makes your game day fun and seasonal! Try these variations to make your Loaded Mac and Cheese Football Cups even more exciting. For the complete recipe, check out the [Full Recipe]. To keep your loaded mac and cheese cups fresh, follow these tips: - Store leftovers in airtight containers. This keeps them fresh longer. - Avoid using the original packaging. It may not seal tightly. - Let the cups cool completely before storing them. This prevents moisture buildup. Reheating your mac and cheese cups can be easy. Here are some methods: - Use the oven for the best texture. Preheat it to 350°F (175°C) and bake for about 10-15 minutes. - You can also use the microwave. Place a cup on a plate, cover it with a damp paper towel, and heat for 1-2 minutes. - To avoid sogginess, do not overheat. Check them often as they warm. Freezing your loaded cups is a great option for later. Here’s how: - Place the cooled cups in a single layer on a tray. Freeze them for a couple of hours. - Once frozen, move them to a freezer bag. This saves space and keeps them fresh. - For thawing, move the cups to the fridge overnight. Reheat them in the oven for the best results. You can enjoy these tasty treats anytime! For the complete recipe, check out the Full Recipe section. Yes, you can use other pasta shapes. Try using shells, penne, or fusilli. These shapes hold cheese sauce well. They also add fun textures to your dish. Just remember to cook them until they are al dente. You want them firm enough to fill the cups without breaking. The football cups stay fresh for about three to four days in the fridge. Store them in an airtight container to keep them from drying out. Before serving, reheat them in the oven. This helps restore their crisp texture and cheesy goodness. Yes, you can make these cups gluten-free. Use gluten-free elbow macaroni instead of regular pasta. For the cheese sauce, substitute all-purpose flour with gluten-free flour. This keeps the sauce thick and creamy. Always check labels for any hidden gluten ingredients. Serve these cups on a large platter for a fun display. You can arrange them in rows or create a football field design. Use fresh herbs or decorative flags to enhance the look. Place some extra toppings nearby for guests to customize their cups. This makes it easy and fun for everyone. To add heat, mix in some diced jalapeños or hot sauce into the cheese sauce. You can also sprinkle some cayenne pepper for a kick. Adding pepper jack cheese instead of cheddar gives a nice spicy flavor too. Adjust the spice level based on your taste. Enjoy experimenting with flavors! For the full recipe, check out Loaded Mac and Cheese Football Cups. Loaded mac and cheese football cups are fun and tasty for any game day. We talked about the main ingredients, how to prepare them, and tips to make them shine. Remember, you can customize the flavors and make them fit your crowd's needs. Whether you want spicy or gluten-free options, there’s a version for everyone. Get ready to impress your friends and family with this easy recipe. Enjoy the game and your delicious snacks!](https://lazychefmagic.com/wp-content/uploads/2025/07/fd527b66-7afd-47ef-9e6d-726d8a1e6d18.webp)
Are you ready to score big at your next game day gathering? These Loaded Mac and Cheese Football Cups are
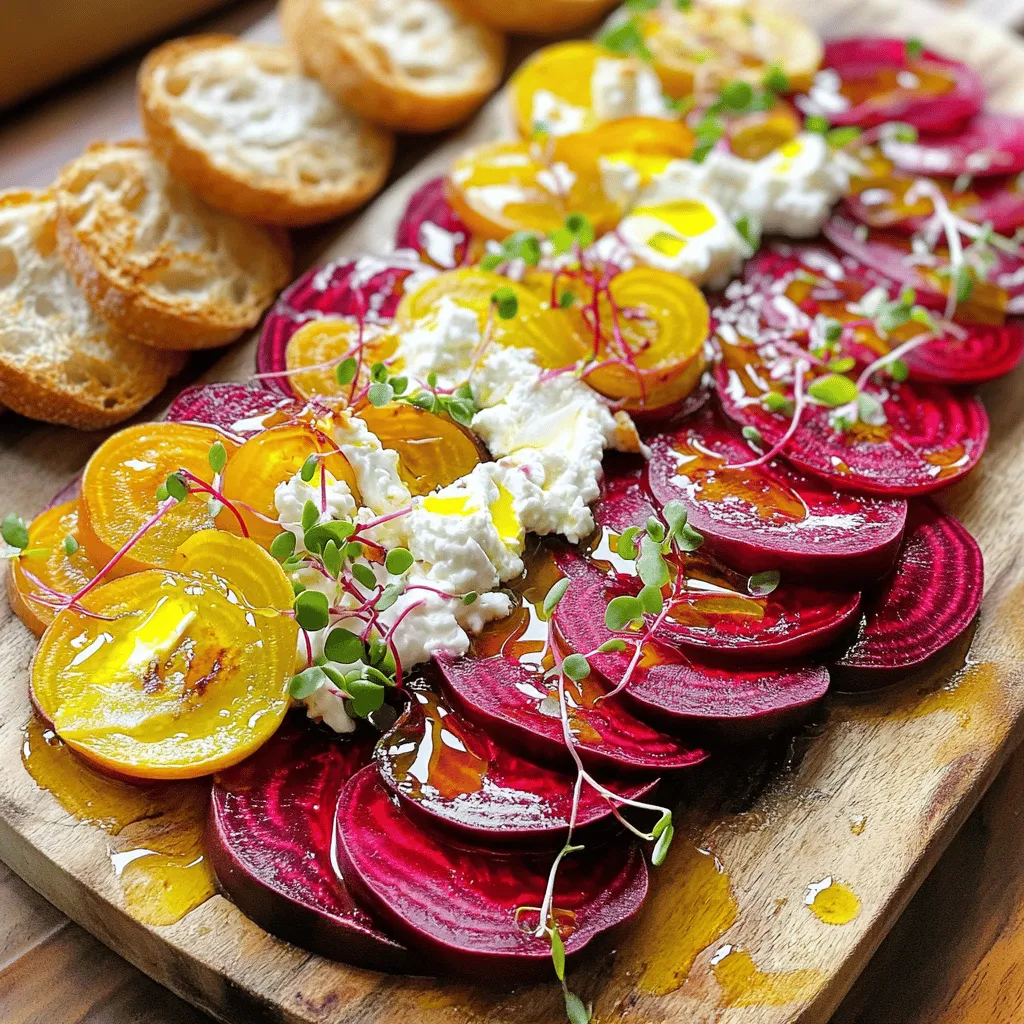
Looking for a unique appetizer to impress your guests? Try my Roasted Beet and Goat Cheese Butter Board Delight! This
![- 1 cup rolled oats - 1 cup unsweetened almond milk (or your choice of milk) - 1/2 cup canned pumpkin puree - 2 tablespoons brown sugar - 1/2 teaspoon pumpkin pie spice - 1/4 teaspoon vanilla extract - Pinch of salt - 1 tablespoon chia seeds (optional) I love using rolled oats because they give a great texture. Almond milk adds a nice creaminess and keeps it light. Canned pumpkin puree brings that lovely fall flavor. Brown sugar adds sweetness, while pumpkin pie spice gives it that warm, cozy depth. The vanilla extract brightens the mix, and a pinch of salt balances the flavors. You can add chia seeds for a boost in fiber and protein. - 1/4 cup chopped pecans - Whipped cream (optional, for garnish) Chopped pecans add crunch and a nutty flavor that pairs well with the oats. If you want to make it extra special, a dollop of whipped cream on top is a treat. It makes the dish feel festive and indulgent. You can even sprinkle some extra pumpkin pie spice for a colorful touch. These ingredients come together to create a delicious breakfast. The flavors blend overnight, making each bite a delightful experience. For the full recipe, check out the detailed instructions. Start by combining the rolled oats and your choice of milk in a mixing bowl. I like using unsweetened almond milk, but any milk works well. Next, mix in the canned pumpkin puree, brown sugar, pumpkin pie spice, and vanilla extract. Don’t forget a pinch of salt for flavor. If you want added texture and nutrition, toss in the chia seeds now. Stir everything together until it is well mixed and the oats are fully soaked. Once your mixture is ready, divide it into two or three jars or containers. Make sure each jar has a uniform amount of the mixture. Seal the jars tightly to keep everything fresh. Place them in the refrigerator. It’s best to let them chill for at least four hours, but overnight is ideal. This allows the oats to soak up all the flavors. When you are ready to eat, give your oats a good stir. If you want a creamier texture, add a splash of milk. Finally, garnish your oats with chopped pecans for a delightful crunch. If you’re feeling indulgent, top it off with a dollop of whipped cream. This simple process turns your oats into a delicious treat! For the complete recipe, check [Full Recipe]. To get the best flavor, soaking time is key. I recommend letting the oats sit overnight. This gives them time to absorb the milk and flavors. If you can’t wait that long, soak them for at least four hours. The longer they soak, the creamier they become. You can adjust the consistency to fit your taste. If you like thicker oats, use less milk. For creamier oats, add a splash of milk in the morning. Stir well to mix it in and enjoy the smooth texture. For a beautiful breakfast, I love using clear glass jars. They show off the lovely layers of oats, pumpkin, and spices. You can also sprinkle extra pumpkin pie spice on top for a pop of color. Try adding some fresh fruit for a bright touch. Sliced bananas or berries pair well with the oats. You could also serve them with yogurt or a side of nuts. This makes breakfast feel special and satisfies your cravings. Check out the [Full Recipe] to create this delicious dish yourself! {{image_4}} You can change the taste of your Brown Sugar Pumpkin Pie Overnight Oats by switching the milk. Use oat milk, coconut milk, or even whole milk to find your favorite flavor. Each type adds a unique twist. For sweetness, try maple syrup instead of brown sugar. It brings a lovely, rich flavor that pairs well with pumpkin. You can also mix in chocolate chips or dried fruit for a fun surprise! If you want gluten-free oats, choose certified gluten-free rolled oats. They are just as tasty and safe for those with gluten issues. For a vegan option, swap regular milk with almond milk or coconut milk. You can also use silken tofu or a nut-based yogurt for a creamy texture. These options keep your oats rich and satisfying, without using dairy. You can store your Brown Sugar Pumpkin Pie Overnight Oats in the fridge for up to five days. This makes them perfect for meal prep! To keep the oats fresh, always use airtight containers. This helps prevent them from drying out or absorbing other smells from the fridge. If you want to enjoy them later in the week, make sure to stir them well before serving. You can add a splash of milk to bring back the creaminess if needed. Yes, you can freeze overnight oats! Just place them in freezer-safe containers. They stay good for about three months. When you’re ready to eat, take them out and let them thaw in the fridge overnight. For a quick fix, you can microwave them for a minute or so. It’s really that easy! Just remember to stir well after thawing to mix everything up again. Enjoy your tasty breakfast whenever you want! To make these oats, follow these steps: 1. In a large mixing bowl, mix 1 cup of rolled oats and 1 cup of unsweetened almond milk. 2. Next, add 1/2 cup of canned pumpkin puree, 2 tablespoons of brown sugar, 1/2 teaspoon of pumpkin pie spice, 1/4 teaspoon of vanilla extract, and a pinch of salt. 3. If you want extra texture and nutrition, include 1 tablespoon of chia seeds. 4. Stir all the ingredients together until well combined. Make sure the oats soak in the liquid. 5. Pour the mixture into two or three jars, ensuring equal servings. 6. Seal the jars tightly and put them in the fridge for at least 4 hours or overnight. 7. In the morning, stir the oats well. If you want creamier oats, add a splash of milk. 8. Top with 1/4 cup of chopped pecans and, if you like, add a dollop of whipped cream. Yes, you can make these oats in advance. I recommend preparing them the night before. They taste best after soaking overnight. You can store them in the fridge for up to 3 days. Just make sure to keep them sealed tightly in jars or containers. This way, they stay fresh and ready for breakfast. To boost the flavor of your oats, consider these mix-ins and toppings: - A drizzle of maple syrup for extra sweetness - A sprinkle of additional pumpkin pie spice for more warmth - Fresh fruit like sliced bananas or apples for added freshness - Nut butter, like almond or peanut, for creaminess - Chocolate chips or shavings for a sweet touch These additions can make your breakfast even more delicious and fun! This article covers how to make Brown Sugar Pumpkin Pie Overnight Oats. You learned about essential ingredients, preparation steps, and serving tips. You also discovered variations and storage options for your oats. Enjoy making this healthy breakfast that you can prepare ahead of time. It’s a simple way to start your day right. Get creative with flavors and toppings to suit your taste. I hope you enjoy every bite!](https://lazychefmagic.com/wp-content/uploads/2025/07/e1e9025c-cd15-48e7-ad5b-c7af5f84e238.webp)
Fall’s favorite flavor meets breakfast in my Brown Sugar Pumpkin Pie Overnight Oats Delight. Picture creamy oats infused with pumpkin
![- Main Ingredients for Sushi Rolls - 2 cups sushi rice - 2 ½ cups water - ¼ cup rice vinegar - 1 tablespoon sugar - 1 teaspoon salt - 1 cup cooked chicken, shredded - ¼ cup buffalo sauce - 1 ripe avocado, sliced - ½ cucumber, julienned - ¼ cup cream cheese, softened - 4 sheets nori (seaweed) - Green onions, finely sliced for garnish - Sesame seeds for garnish - Essential Tools and Equipment - Bamboo sushi mat - Fine mesh strainer - Medium-sized pot or rice cooker - Small saucepan - Sharp knife - Mixing bowls - Damp cloth for knife To make Tailgate Buffalo Chicken Sushi Rolls, gather these ingredients and tools. Each item plays a key role in your sushi-making adventure. The sushi rice forms the base, while the buffalo chicken brings the fun and flavor. Don't forget the creamy avocado and crispy cucumber for texture. Your bamboo sushi mat will help you roll everything up tightly. These ingredients work together to create a delicious and unique dish that everyone will love. Rinsing and Cooking Sushi Rice First, rinse 2 cups of sushi rice under cold water. Use a fine mesh strainer until the water is clear. This step removes extra starch, which helps the rice cook well. Next, cook the rice. In a rice cooker or pot, add the rinsed rice with 2 ½ cups of water. Cook it according to your rice cooker’s instructions. If you’re using a pot, bring it to a boil. Then, cover and lower the heat. Cook for about 18 to 20 minutes until soft. Making Sushi Vinegar While the rice is cooking, make the sushi vinegar. In a small saucepan, mix ¼ cup of rice vinegar, 1 tablespoon of sugar, and 1 teaspoon of salt. Heat it gently over low heat until the sugar dissolves. Once the rice is cooked, transfer it to a large bowl. Gently mix in the vinegar mixture and let it cool at room temperature. Preparing the Buffalo Chicken Filling In a separate bowl, take 1 cup of shredded chicken. Pour in ¼ cup of buffalo sauce and stir well. Make sure the chicken is fully coated in the sauce for a tasty kick. Rolling Technique for Sushi Now, grab a bamboo sushi mat. Place one sheet of nori, shiny side down. With wet hands, spread about ½ cup of sushi rice evenly on the nori. Leave a 1-inch border at the top. In the center, add the buffalo chicken, slices of avocado, julienned cucumber, and a dollop of cream cheese. Carefully lift the bamboo mat closest to you and roll the sushi tightly away from you. Apply gentle pressure to keep everything compact. When you reach the edge of the nori, moisten it with a little water to seal the roll. Cutting the Sushi Rolls Use a sharp knife to slice the roll into 6 to 8 pieces. Keep the knife wet to make clean cuts. Wipe the blade after each slice for the best results. Garnishing for Visual Appeal To finish, garnish the rolls. Sprinkle finely sliced green onions and sesame seeds on top. Arrange the sushi rolls on a platter. Serve with extra buffalo sauce for dipping, and maybe some pickled ginger and wasabi for a fun touch. Enjoy your tailgate buffalo chicken sushi rolls! For the full recipe, check out the detailed steps above. - Key Cooking Methods: Start by rinsing the sushi rice in cold water. Use a fine mesh strainer until the water is clear. This removes extra starch and helps the rice cook evenly. You can cook it in a rice cooker or on the stove. If using a pot, bring water to a boil, then reduce heat and cover. Cook for about 18-20 minutes. - Ideal Vinegar Mixture Ratio: After the rice cooks, make your sushi vinegar. Heat rice vinegar, sugar, and salt together until dissolved. A good ratio is ¼ cup vinegar, 1 tablespoon sugar, and 1 teaspoon salt. Mix this into the rice gently when it's still warm. This adds flavor and helps the rice stick. - Using a Bamboo Sushi Mat: A bamboo mat is key to rolling sushi. Place a sheet of nori on the mat, shiny side down. Wet your hands to stop the rice from sticking. Spread rice evenly, leaving a 1-inch border at the top. - Common Mistakes to Avoid: Don't overfill your sushi! Too many ingredients make it hard to roll. Also, make sure to press the roll tightly. This keeps everything inside. If the nori tears, don’t panic. Just roll gently and keep going. - Suggestions for Extra Ingredients: You can add more fun flavors. Try diced jalapeños for heat or shredded carrots for crunch. Cream cheese adds creaminess, so don't skip it! - Pairing with Dipping Sauces: Buffalo chicken sushi rolls go great with extra buffalo sauce for dipping. You can also use ranch or blue cheese dressing for a classic touch. Try adding some pickled ginger and wasabi for a burst of flavor. These tips will help you make the best Tailgate Buffalo Chicken Sushi Rolls. Enjoy the fun of sushi-making! For the complete recipe, check the [Full Recipe]. {{image_4}} Alternative Proteins You can swap the chicken with turkey or shrimp. Grilled steak also works great. Each protein brings its own flavor. Vegetarian Options For a meatless roll, use tofu or tempeh. You can marinate them in buffalo sauce. Add roasted vegetables for extra taste and texture. Spicy Buffalo Chicken If you love heat, add more buffalo sauce. You can also mix in jalapeños for a kick. This will make your sushi rolls even more exciting. Asian-Inspired Alternatives Try using teriyaki sauce instead of buffalo. It gives a sweet and savory touch. You can add pickled carrots and daikon for a fresh twist. Creative Plating Ideas Arrange your sushi rolls on a long platter. Use a wooden board for a rustic look. You can also fan out the sushi for a stunning display. Serving with Side Dishes Pair your sushi with edamame or seaweed salad. These sides add balance to your meal. You can also serve with extra buffalo sauce for dipping. For the Full Recipe, check back to ensure you have all the steps. To keep your sushi rolls fresh, store them in the fridge. Wrap each roll tightly in plastic wrap. This keeps them from drying out. Place the wrapped rolls in an airtight container. This extra seal helps keep them fresh longer. When you want to eat them again, take them out of the fridge. Sushi rolls taste best when eaten cold. If you want to warm them, use a microwave. Just heat them for a few seconds. Keep an eye on them, so they don't get too hot. You can freeze your sushi rolls if you have extra. Start by wrapping each roll in plastic wrap. This prevents freezer burn. After wrapping, place the rolls in a freezer-safe bag. Squeeze out all the air before sealing. To thaw frozen sushi, move it to the fridge. Let it sit for a few hours or overnight. This slow thawing helps keep the rice from getting mushy. Enjoy your Tailgate Buffalo Chicken Sushi Rolls later with ease! For more details, you can refer to the Full Recipe. You can use apple cider vinegar or white vinegar. Both options give a similar tang. If you need a milder taste, try lemon juice. Each will change the flavor slightly, but they work well in this recipe. Yes, you can prepare them a few hours in advance. Keep the rolls in the fridge, covered with a damp cloth. This helps prevent the rice from drying out. Enjoy them cold or let them sit at room temperature for a bit before serving. Wet your hands before handling the rice. This helps keep it from sticking to your fingers. You can also lightly coat your hands with a little water or oil. Using a clean, sharp knife to slice the rolls will also help. Yes, sushi made with cooked chicken is safe to eat. Cooking the chicken kills any harmful bacteria. This makes it a great option for those who are unsure about raw fish. Rinse the sushi rice well before cooking. This removes excess starch and helps it cook evenly. Use a rice cooker for consistent results. Once cooked, mix in the vinegar gently, and let it cool without stirring too much. This will give you the perfect texture for rolling. For the full recipe and detailed steps, check out the Tailgate Buffalo Chicken Sushi Rolls recipe! Making Buffalo Chicken Sushi Rolls is fun and rewarding. We covered the main ingredients, essential tools, and step-by-step instructions. You learned how to prepare sushi rice, fill rolls, and present them beautifully. I shared tips to perfect your rice and avoid common mistakes. Feel free to experiment with variations and storage methods. These rolls are versatile and can match your taste. Enjoy making sushi and impress your friends with your skills!](https://lazychefmagic.com/wp-content/uploads/2025/07/46d928ed-b2a3-4c9f-9a1e-43382f0947de.webp)
Ready to spice up your game day snacks? These Tailgate Buffalo Chicken Sushi Rolls are a fun twist on traditional
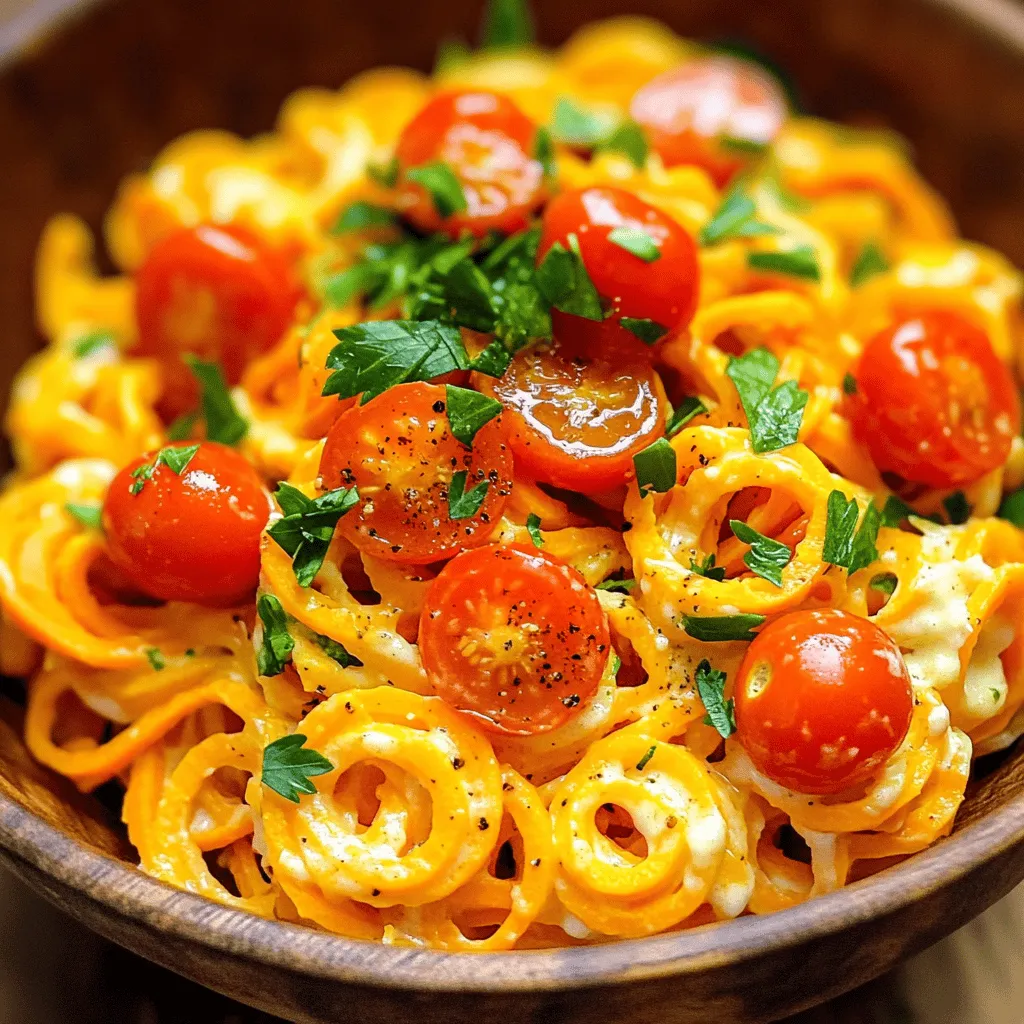
Looking for a tasty twist on a classic dish? I’ve got just the recipe for you! This Spiralized Sweet Potato

Looking for a fun twist on classic fall flavors? Try my Delicious Apple Cider Donut Ice Cream Sandwiches! These treats
