Skip to content
DisclaimerTerms Of UseGDPR PolicyCookie Policy

lazychefmagic

  • Home
  • Drinks
  • Appetizers
  • Dinner
  • Dessert
  • About
  • Contact
  • Privacy Policy
DisclaimerTerms Of UseGDPR PolicyCookie Policy

Amanda

To make the best Pickle de Gallo Pico Dip, you need some fresh ingredients. Here’s what you'll need: - 1 cup diced pickles (dill or sweet) - 1 medium ripe tomato, diced - 1/2 medium red onion, finely chopped - 1-2 jalapeños, minced - 1/4 cup fresh cilantro, chopped - Juice of 1 lime - 1/2 teaspoon garlic powder - Salt and pepper to taste - 1 cup cream cheese, softened - 1 cup shredded sharp cheddar cheese Each ingredient plays a key role in creating a flavor-packed dip. The pickles give a nice crunch and tang. The tomato adds juiciness, while the red onion gives a sweet bite. Jalapeños bring heat, and cilantro adds a fresh note. When you pick your pickles, choose what you like best. Dill pickles give a classic taste, while sweet pickles add a bit of sugar. Cream cheese and cheddar cheese make the dip creamy and rich. Lime juice adds brightness and balances the flavors. Garlic powder gives depth without being too strong. Gather these ingredients before you start. Having everything ready makes cooking easy and fun. You can find the full recipe to guide you through the process. Enjoy making this tasty dip! - Mixing the Fresh Ingredients In a large bowl, add the diced pickles, diced tomato, chopped red onion, and minced jalapeños. Stir gently to mix them well. This step ensures every bite is packed with flavor. Add the chopped cilantro next. Squeeze the lime juice over the mixture. Sprinkle in the garlic powder, salt, and pepper. Stir again to blend all the fresh ingredients. - Incorporating the Cream Cheese In a separate bowl, beat the softened cream cheese. Use a whisk to make it smooth and creamy. There should be no lumps left. This creaminess will help bind the flavors together. Gradually add the pickle mixture to the cream cheese. Fold it in with a spatula gently. Make sure everything combines well without over-mixing. - Finalizing the Dip Transfer the dip to a pretty serving dish. Top it with an even layer of shredded cheddar cheese. This adds a nice touch and great flavor. Cover the dish with plastic wrap. Chill it in the fridge for at least 30 minutes. This step allows the flavors to blend and develop. - Accompaniments for Dipping Serve this dip cold with tortilla chips, crispy crackers, or fresh veggie sticks. The crunchy texture of the chips pairs perfectly with the creamy dip. You can also offer some pita bread for a fun twist. - Presentation Ideas To make it more appealing, garnish the dip with extra cilantro or jalapeño slices. A colorful platter will catch the eye. Use bowls of different sizes for a fun display. You can even add small signs to label each dip option. For the full recipe, check out the earlier section! Adjusting the Heat Level You can make this dip as spicy as you like. If you want less heat, use fewer jalapeños. If you crave more spice, add extra minced jalapeños or even some hot sauce. Always taste as you go. This way, you can get the right level of heat for your taste buds. Adding Extra Ingredients Feel free to mix in other ingredients for a twist. Try adding diced avocado for creaminess. You can also toss in some black olives for a briny touch. Chopped bell peppers add crunch and color, while corn gives a sweet bite. Get creative with your favorite flavors! Best Practices for Keeping Fresh To keep your dip fresh, store it in an airtight container. This helps avoid drying out. Make sure to chill it in the fridge right after serving. It can stay fresh for about 3 days. However, the flavors will taste best within the first day or two. Reheating Instructions If you want to enjoy it warm, you can heat it gently in the microwave. Start with 15-second intervals, stirring in between. Be careful not to heat it too long to avoid the cheese becoming too gooey or tough. Enjoy your Pickle de Gallo Pico Dip warm or cold! {{image_4}} You can use either sweet or dill pickles in this dip. Sweet pickles bring a touch of sugar. They add a nice balance to the spice of jalapeños. Dill pickles, on the other hand, provide a sharp, tangy flavor. This tanginess pairs well with the creamy cheese. Don't be afraid to experiment! Try adding other flavors by using garlic pickles or spicy pickles. Each type can change the taste of your dip. Add your favorite pickles to make it unique. If you want to try something different, you can swap out cream cheese. Mascarpone cheese gives a rich taste. Greek yogurt offers a lighter option. You can mix these in for a fun twist. When it comes to cheddar, there are many options. Use mild cheddar for a smooth flavor. Sharp cheddar adds a bold punch. You can even use smoked cheddar for a unique twist. Mixing cheese types can enhance your dip even more. For more ideas, check the Full Recipe for extra tips on making this dip your own! You can serve this dip with many tasty options. Tortilla chips are a classic choice. They add a great crunch. Fresh vegetable sticks, like carrots or celery, also work well. You can even pair it with crispy crackers for a different texture. The dip is creamy and flavorful, making it a hit with anything you choose. You can store Pickle de Gallo Pico Dip in the fridge for about three days. Make sure to keep it in an airtight container. This helps to keep the flavor fresh. If you notice any changes in taste or smell, it's best to toss it out. Yes, you can make this dip ahead of time! In fact, it tastes even better after sitting for a while. Make it a day before your event and chill it in the fridge. This allows the flavors to meld together beautifully. Just give it a good stir before serving! For the complete recipe, check out the Full Recipe section. - Prep Time: 15 minutes - Cook Time: 30 minutes - Servings: 6-8 Making Pickle de Gallo Pico Dip is a fun and easy way to impress friends. This dip mixes flavors that everyone loves. Here’s how to make it step by step. 1. Mix Fresh Ingredients In a large bowl, gather your fresh ingredients. Combine: - 1 cup diced pickles (dill or sweet) - 1 medium ripe tomato, diced - 1/2 medium red onion, finely chopped - 1-2 jalapeños, minced - 1/4 cup fresh cilantro, chopped Mix these gently, so the flavors blend well. 2. Add Lime and Season Next, squeeze the juice of 1 lime over the mixture. Add: - 1/2 teaspoon garlic powder - A pinch of salt and pepper Stir well to make sure all the flavors meld together. 3. Incorporate the Cream Cheese In another bowl, beat 1 cup of softened cream cheese until smooth. Make sure there are no lumps. Gradually fold in the pickle mixture. Use a spatula to blend gently. 4. Transfer and Chill Move the dip to a pretty serving dish. Top with: - 1 cup shredded sharp cheddar cheese Cover it with plastic wrap and chill in the fridge for at least 30 minutes. This step helps the flavors combine fully. 5. Serve and Enjoy Serve this dip cold with tortilla chips, crunchy crackers, or fresh veggies. Everyone will love this tasty treat! This simple recipe is a crowd-pleaser and perfect for any gathering. Enjoy making it as much as you will enjoy eating it! This blog covered how to make Pickle de Gallo Pico Dip. You saw the key ingredients, the steps to prepare the dip, and some fun ways to serve it. I shared tips on customizing flavors and storing your dip for freshness. Remember, you can adjust the heat and play with different cheeses. Making this dip can be easy and rewarding. Try it at your next gathering, and enjoy the flavors!

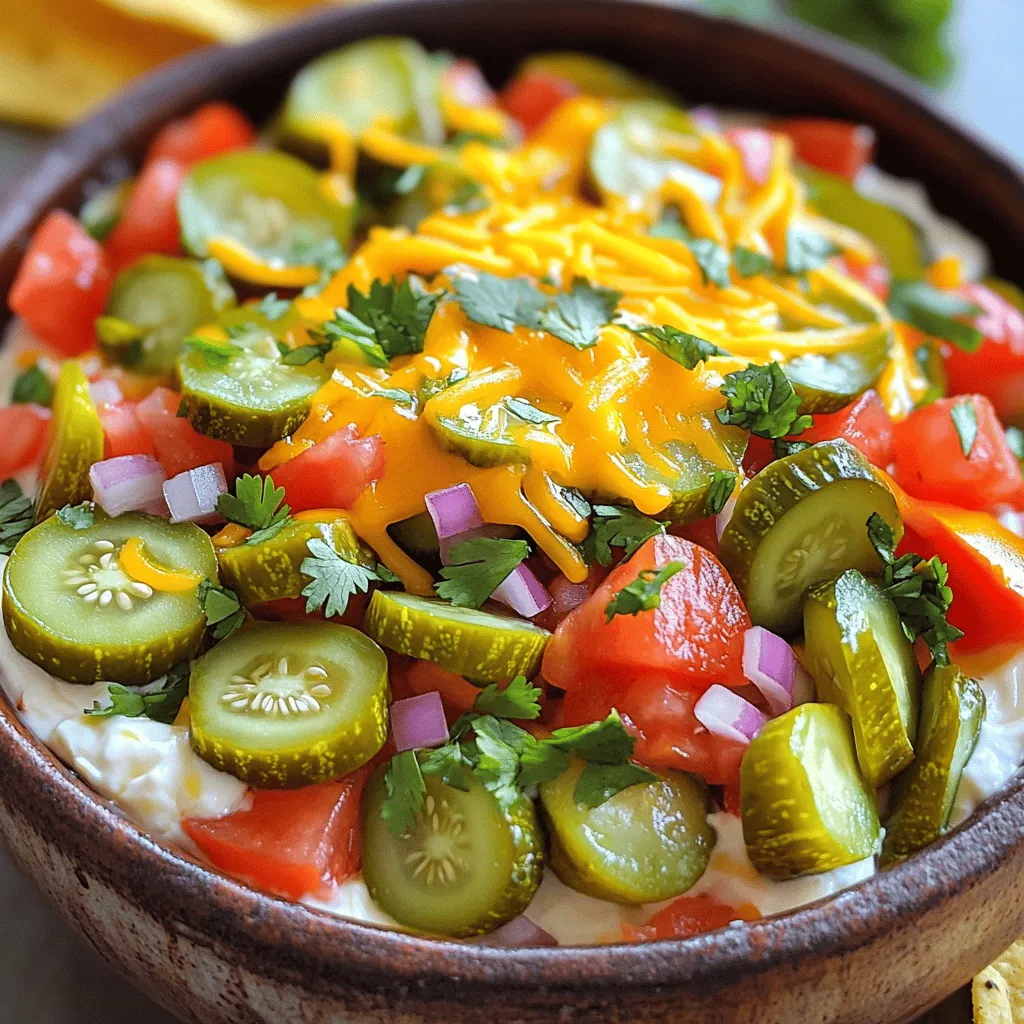
Pickle de Gallo Pico Dip Simple and Tasty Delight

Are you ready to spice up your snack game? This Pickle de Gallo Pico Dip is simple, tasty, and perfect

To craft a Pumpkin Spice Cold Foam Float, you need a few key ingredients. Each one plays a special role in making this drink delightful. You can also customize the recipe to fit your taste. - 1 cup freshly brewed cold coffee or cold brew You can use any coffee you love. Dark roasts add bold flavor. - 1/2 cup milk of your choice Pick dairy or non-dairy options like oat or almond milk. Each adds a unique taste. - 1/4 cup heavy cream This gives a rich and creamy texture. For a lighter option, use half-and-half. - 2 tablespoons pure pumpkin puree Pumpkin puree adds the classic flavor. Make sure it’s pure and not sweetened. - 1 tablespoon pure maple syrup This sweetens the drink naturally. You can swap it for honey or agave. - 1 teaspoon pure vanilla extract Vanilla enhances the overall flavor. Use pure for the best taste. - 1/2 teaspoon pumpkin spice blend This spice mix gives warmth. You can add more if you love spice. - Ice cubes Use for chilling the drink. Fresh ice makes it refreshing. - Whipped cream A dollop on top adds extra creaminess. - Extra pumpkin spice for garnish Sprinkle more spice for a pretty finish. - Milk alternatives If lactose intolerant, almond or soy milk works well. - Sweeteners For a sugar-free option, try stevia or erythritol. - Pumpkin puree alternatives If you can’t find pumpkin puree, use butternut squash puree instead. Feel free to mix and match these ingredients to suit your taste. Enjoy creating your perfect Pumpkin Spice Cold Foam Float! To start, brew your favorite coffee. I like using a medium roast for a balanced flavor. Chill the coffee in the fridge until it’s cold. If you're in a hurry, use pre-packaged cold brew coffee instead. This saves time and still tastes great! Once your coffee is ready, fill a tall glass halfway with ice cubes. Pour the cold coffee over the ice, filling the glass about three-quarters full. Now, let's make the foam! In a mixing bowl, combine these ingredients: - 1/2 cup milk of your choice - 1/4 cup heavy cream - 2 tablespoons pure pumpkin puree - 1 tablespoon pure maple syrup - 1 teaspoon pure vanilla extract - 1/2 teaspoon pumpkin spice blend Use a milk frother or a whisk to mix these ingredients. Whisk quickly until the mixture becomes frothy and light. You want it to look like soft whipped cream. This frothy texture gives your drink a fun and creamy feel. Next, we will assemble the float! Gently spoon the pumpkin spice cold foam over the top of your cold coffee. Try to create a distinct layer. This makes the drink look beautiful and gives you a nice texture contrast as you sip. To make it even prettier, sprinkle a dash of pumpkin spice on top of the foam for garnish. If you want to be extra fancy, add a dollop of whipped cream. You can find the full recipe for this delightful treat in the earlier sections. Enjoy this tasty Pumpkin Spice Cold Foam Float right away! To get the best taste from your pumpkin spice cold foam float, choose a good pumpkin spice blend. I recommend using brands that have natural spices without additives. Look for blends that include cinnamon, nutmeg, and ginger. You can also make your own mix at home, which gives you control over the flavors. Balancing sweetness and spice is key. If you find it too sweet, add a pinch of salt. It can help balance the flavor. If you want more spice, add a bit more of your blend. Always taste as you go. Adjusting the flavors to suit your preference makes it special! You don’t need fancy tools to froth milk. You can use a jar with a lid. Just add milk, close the lid, and shake it hard until it foams. Another great method is using a whisk. Whisk quickly in a bowl until you see bubbles and froth. Common mistakes include over-frothing or not frothing enough. If you over-froth, the foam can become too stiff. If you under-froth, it won’t hold its shape. Aim for a light, airy foam. It should float on your coffee nicely. Garnishing can make your drink pop! Try adding a sprinkle of pumpkin spice on top of the foam. A dollop of whipped cream adds a creamy touch. You can also consider using cinnamon sticks for stirring. When it comes to serving vessels, clear glasses work best. They show off the lovely layers. You can decorate your table with small pumpkins or autumn leaves for a seasonal feel. These little touches enhance the overall experience of your float. For the full recipe, check out the details provided earlier. {{image_4}} You can play with flavors in your pumpkin spice cold foam float. Try adding caramel or chocolate for a rich twist. Seasonal fruits, like fresh apples or pears, can add a fun touch. You might also enjoy a hint of mint or even a splash of orange zest for a bright flavor. These small changes can make your drink feel new and exciting every time. For those who want a dairy-free treat, there are many milk choices. Oat milk and almond milk work well in this recipe. Both provide a creamy texture without the dairy. If you want a vegan float, replace the heavy cream with coconut cream. This adds a slight tropical flavor, which can be quite delightful. The coffee you use can change your float’s taste. You can try flavored coffee or espresso for a stronger kick. Light coffee offers a milder flavor, while dark coffee gives a richer taste. Each option has its pros and cons. Light coffee may not stand up to strong flavors, but it can create a delicate balance. Dark coffee pairs well with sweet toppings, making every sip a treat. To keep your leftover pumpkin puree fresh, store it in an airtight container. Seal it tightly and place it in the fridge. Use it within a week for the best taste. You can also freeze it for longer storage. Just scoop it into ice cube trays. Once frozen, pop the cubes into a zip-top bag. This way, you will have ready-to-use portions for future recipes. For opened milk or cream, keep it in its original container. Make sure to close the lid tightly after each use. Store it in the coldest part of your fridge, not in the door. Generally, opened milk lasts about a week. Always check the expiration date and smell before using. You can make the cold coffee ahead of time. Brew your coffee and chill it in the fridge. This saves time when you want to enjoy your float. You can also prepare the pumpkin spice cold foam in advance. Just store it in the fridge in a sealed container. However, do not assemble the float until you are ready to drink it. The foam stays fluffy when fresh. If you mix it too early, it may lose its light texture. Once you make your pumpkin spice cold foam float, enjoy it within a few hours. It tastes best fresh. If you leave it out for more than two hours, it is best to toss it. Look for signs that it has gone bad. If the cold foam separates or smells sour, do not drink it. Always trust your senses. Stay safe and enjoy your tasty treat right away! A Pumpkin Spice Cold Foam Float is a tasty drink made with cold coffee and a frothy pumpkin spice foam. You pour chilled coffee over ice in a tall glass. Then, you add a whipped foam made from milk, pumpkin puree, and spices on top. The layers create a fun drink that looks great and tastes even better. Yes, you can make this drink vegan! Just swap out the milk and cream for non-dairy options. Almond milk, oat milk, or soy milk work well. Instead of heavy cream, use coconut cream or a vegan whipped topping. These options keep the drink creamy and delicious, making it perfect for everyone. You can adjust the sweetness by changing the maple syrup amount. If you like it sweeter, add more syrup. For less sweetness, use less syrup. You can also use sugar substitutes like agave syrup or stevia. These options help you find your perfect sweetness without losing flavor. If you don’t have pumpkin puree, don’t worry! You can use butternut squash puree or sweet potato puree instead. Flavored syrups, like caramel or vanilla, can add a nice twist. A few drops of vanilla or almond extract can also work well. These options keep your drink exciting and unique. This blog post covered everything you need to make a delicious Pumpkin Spice Cold Foam Float. We explored ingredients, detailed each step, and shared tips to enhance flavor and presentation. Remember, customization is key to making it your own. Experiment with different spices, milk types, or coffee bases. Don't rush the frothing to achieve a creamy texture. By following these steps and tips, you can create a drink that warms your spirit. Enjoy making this seasonal delight!

Pumpkin Spice Cold Foam Floats Delightful Treat Today

Get ready to indulge in a sweet fall treat with my Pumpkin Spice Cold Foam Floats! This delightful drink combines

To make these tacos special, gather the following main ingredients: - 2 lbs beef short ribs - 1 cup non-alcoholic apple cider - 1 medium onion, finely diced - 4 cloves garlic, minced - 2 teaspoons ground cumin - 1 teaspoon smoked paprika - 1 tablespoon olive oil - Salt and pepper to taste - 8 small corn tortillas These ingredients create a rich and tender filling for your tacos. The apple cider adds a sweet and tangy flavor, perfect for the beef. Here are some tasty toppings and sides you can add to your tacos: - 1 cup fresh cilantro, chopped - 1 medium jalapeño, sliced (optional for heat) - 1 cup red cabbage, shredded - Lime wedges for serving These toppings add freshness and crunch. The lime juice brightens the dish and balances the richness of the meat. To make cooking easier, use these kitchen tools: - Large heavy pot or Dutch oven - Wooden spoon - Two forks for shredding meat - Skillet for warming tortillas Having the right tools makes the cooking process smooth and enjoyable. You’ll find that each step flows better when you are well-prepared. For the full recipe, check out the details above! Begin by seasoning the beef short ribs with salt and pepper. Make sure to coat all sides. This step is key for flavor. Next, heat the olive oil in a large pot over medium-high heat. Once hot, add the short ribs. Sear each side for about 3-4 minutes. You want a nice brown crust. After browning, take the ribs out and set them aside. In the same pot, add the diced onion. Cook for about 5 minutes until it’s soft and clear. Stir often to prevent burning. After that, add the minced garlic and cook for one more minute. This will make your kitchen smell amazing! Now, stir in the ground cumin and smoked paprika. This mix adds depth to your dish and coats the onions and garlic. Next, pour in the apple cider. Use a wooden spoon to scrape up any bits stuck to the pot. This adds flavor. Bring the mixture to a gentle simmer. Return the short ribs to the pot, ensuring they are mostly covered by the cider. Cover the pot and lower the heat. Let the ribs cook for 2.5 to 3 hours. You want them fork-tender and easy to shred. When done, take them out to cool a bit and get ready for taco assembly. For the complete cooking guide, check the Full Recipe. When picking beef short ribs, look for meat that has good marbling. Marbling is the white fat inside the meat. This fat makes the ribs tender and juicy. Choose ribs that feel heavy and have a pinkish-red color. Avoid ribs that look dry or brown. Fresh short ribs will give you the best flavor for your cider braised short rib street tacos. Seasoning is key to great taste. Start by using salt and pepper on the short ribs. Be generous. This brings out the meat's natural flavors. After that, add spices like ground cumin and smoked paprika. They add warmth and depth. Mix the spices well with the sautéed onion and garlic. This step makes your dish more flavorful and aromatic as it cooks. Time plays a big role in flavor. For the best results, braise the short ribs for 2.5 to 3 hours. Low and slow cooking breaks down tough fibers, making the meat tender. Check the ribs occasionally. If they start to dry out, add a bit more cider or water. This helps keep them juicy and full of flavor. For a full guide on making these delicious tacos, refer to the Full Recipe. {{image_4}} You can swap beef short ribs with other meats. Pulled pork is a great choice. It has a nice, juicy flavor. You can also use chicken thighs for a lighter option. Beef brisket works well too, giving a rich taste. If you like lamb, that can bring a unique twist. Each meat pairs nicely with the cider braising method. The base recipe is fantastic, but feel free to mix it up! Try adding a chipotle sauce for a smoky kick. You can also use a sweet BBQ sauce for a different flavor. For a zesty touch, a cilantro-lime sauce can brighten the dish. Don’t forget to experiment with spices. Adding some chili powder or even a pinch of cinnamon can change the game. To make this dish vegetarian or vegan, use jackfruit. It resembles pulled meat and absorbs flavors well. Another option is to use mushrooms, which add a hearty texture. For the braising liquid, replace apple cider with vegetable broth. Add some spices to boost the flavor. Topping with fresh veggies like avocado or pickled onions adds a nice crunch. Keep it colorful and flavorful! You can find the full recipe for Cider Braised Short Rib Street Tacos to guide you through this process. Enjoy making your own delicious variations! To store your cider braised short rib street tacos, let them cool first. Place the shredded meat and toppings in separate airtight containers. This keeps everything fresh. The meat will stay good for up to three days in the fridge. The tortillas can last about two days but are best eaten fresh. When you’re ready to enjoy your tacos again, reheat the meat in a pot. Heat it over low heat, stirring often. This warms it without drying it out. For the tortillas, warm them in a dry skillet for about 30 seconds on each side. This brings back their softness. If you want to save for later, freezing is a great option. Place the shredded meat in a freezer-safe bag. Squeeze out any air to prevent freezer burn. You can freeze it for up to three months. When ready to eat, thaw it overnight in the fridge. Then, reheat as mentioned above. For the best taste, avoid freezing the fresh toppings. They are best enjoyed fresh, right before serving. For the full recipe, check [Full Recipe]. Reheating Cider Braised Short Rib Tacos is easy. You can use a skillet or the microwave. For the skillet, heat it on medium. Add the tacos and warm them for about 2-3 minutes per side. This keeps the tortillas soft and the meat warm. In the microwave, place the tacos on a plate. Heat for about 30-60 seconds. Cover them with a damp paper towel to keep them from drying out. Yes, you can make these tacos ahead of time. The short ribs can be cooked and stored in the fridge for up to three days. Just reheat the meat before serving. You can also prep the toppings in advance. Store them in separate containers in the fridge. This makes taco night quick and easy! You can find similar tacos at many Mexican restaurants and food trucks. Look for places that focus on gourmet tacos or street food. Some places might even offer variations with unique ingredients. Ask your friends for recommendations or check food apps to find the best spots near you. Enjoy exploring different flavors! For the full recipe, visit my detailed guide on making Cider Braised Short Rib Street Tacos. Cider braised short rib street tacos bring bold flavors to your table. You learned about essential ingredients, preparation steps, and helpful tips to make them shine. I covered variations for different diets and how to store leftovers properly. Remember, choosing the right meat and perfecting your seasoning is key. Keep exploring these delicious options and enjoy each bite. Happy cooking!

Cider Braised Short Rib Street Tacos Flavorful Treat

Are you ready to elevate your taco game? Cider Braised Short Rib Street Tacos offer rich flavors that will make

To make the best Loaded Mac and Cheese Football Cups, you need these key items: - 2 cups elbow macaroni - 2 tablespoons unsalted butter - 2 tablespoons all-purpose flour - 2 cups whole milk - 2 cups sharp cheddar cheese, freshly shredded - 1 cup mozzarella cheese, freshly shredded - 1 teaspoon garlic powder - 1 teaspoon onion powder - 1/2 teaspoon smoked paprika - Salt and black pepper to taste These ingredients create a rich and creamy base for your cups. The combination of cheddar and mozzarella gives a great flavor and texture. You can add your own twist with these optional items: - 1/2 cup cooked and crumbled turkey sausage - 1/4 cup green onions, thinly sliced - 1/4 cup sour cream - 1/4 cup crispy fried onions (for topping) Feel free to mix and match these extras. They add fun flavors and a nice crunch. To make these tasty cups, you'll need a few basic tools: - Mini muffin tin - Large pot - Whisk - Spoon or small cookie scoop - Cooking spray or melted butter for greasing Having the right tools makes the process smoother and more enjoyable. Now, you’re ready to get cooking! For the full recipe, check out the detailed instructions provided. Start by boiling a large pot of salted water. When the water bubbles, add 2 cups of elbow macaroni. Cook the pasta until it is al dente, following package instructions. Drain the pasta well and set it aside. This step is key for a great texture in your Loaded Mac and Cheese Football Cups. In the same pot, melt 2 tablespoons of unsalted butter over medium heat. Once it’s melted, add 2 tablespoons of all-purpose flour. Whisk this mixture for 1-2 minutes until it turns a light golden color. Gradually pour in 2 cups of whole milk while whisking. Stir until the sauce thickens and becomes smooth, which takes about 3-5 minutes. Next, lower the heat and add 2 cups of sharp cheddar cheese and 1 cup of mozzarella cheese. Sprinkle in 1 teaspoon of garlic powder, 1 teaspoon of onion powder, 1/2 teaspoon of smoked paprika, and salt and black pepper to taste. Stir until the cheese melts and the sauce is creamy. Now it's time to combine everything. Gently fold the cooked macaroni into the cheese sauce. If you want to add 1/2 cup of cooked and crumbled turkey sausage, mix it in now. Preheat your oven to 350°F (175°C) and lightly grease a mini muffin tin. Fill each cup with the mac and cheese mixture, pressing down lightly to pack it in. Bake for 15-20 minutes until the tops are golden brown and slightly crisp. Once out of the oven, let them cool for a bit. Top each cup with 1/4 cup of sour cream, 1/4 cup of crispy fried onions, and a sprinkle of sliced green onions. Enjoy this tasty game snack! For more details, check the Full Recipe. To create the best cheese sauce, start with a roux. This helps to thicken the sauce and gives it a great base. Use equal parts butter and flour. Cooking the roux for a minute or two until golden adds depth. Gradually add milk while whisking to prevent lumps. This step is key! Keep stirring until it thickens and feels creamy. Then, add your cheeses. A mix of sharp cheddar and mozzarella works wonders for flavor and texture. Presentation makes all the difference on game day. Use a mini muffin tin to shape your cups. After baking, let them cool slightly. Then, add a dollop of sour cream on top. This gives a nice contrast to the cheesy cups. Sprinkle crispy fried onions for crunch, and add green onions for color. Arrange the cups on a platter in a fun football shape. This adds excitement to your snack table! You can make these cups ahead of time. Prepare the mac and cheese mixture and fill the muffin tin. Cover it and store it in the fridge for up to 24 hours. When you're ready, bake them straight from the fridge. Just add a few extra minutes to the baking time. This makes game day stress-free. Enjoy delicious snacks without the last-minute rush. For the full recipe, check out the detailed steps above! {{image_4}} If you want a meat-free version, skip the turkey sausage. You can add more veggies instead. Try spinach, bell peppers, or mushrooms. These add great taste and color. You can also mix in some cooked broccoli for a nutrient boost. Cheese choice changes the taste! You can use gouda, fontina, or pepper jack. Gouda gives a rich flavor, while pepper jack adds a spicy kick. Mixing cheeses creates a unique flavor profile. Just make sure to use a good melting cheese. Toppings make your cups even better! Try crispy bacon bits for a salty crunch. You can sprinkle chili flakes for heat or drizzle hot sauce for a zesty touch. Fresh herbs like parsley or cilantro add color and freshness. For a creamy twist, use ranch dressing instead of sour cream. Explore these ideas to make your Loaded Mac and Cheese Football Cups your own. For the full recipe, check out the section above! To keep your leftovers fresh, let the mac and cheese cups cool completely first. Then, place them in an airtight container. Store them in the fridge for up to three days. This way, they stay tasty and safe to eat. If you want to avoid sogginess, try to separate layers with parchment paper. When you're ready to enjoy your leftovers, the best way to reheat them is in the oven. Preheat your oven to 350°F (175°C). Place the cups on a baking sheet. Heat them for about 10-15 minutes. This keeps them crispy on the outside and warm on the inside. You can also microwave them for a quick option. Just heat them in 30-second bursts to avoid drying them out. If you want to store the cups for longer, freezing is a great choice. After they cool, arrange them on a baking sheet. Freeze them for about an hour, then transfer them to a freezer-safe bag. They can last for two to three months in the freezer. When you're ready to eat, thaw them in the fridge overnight before reheating. This keeps the flavor and texture intact. I hope you find these storage tips helpful, and don't forget to check out the Full Recipe for more details! Yes, you can easily make these cups without meat. Just skip the turkey sausage. The cheese and pasta provide great flavor on their own. Add more veggies if you want. Try chopped bell peppers or spinach for a tasty twist. Sharp cheddar is my go-to for mac and cheese. It gives a rich taste. Mozzarella adds creaminess and stretch. You can also mix in gouda or fontina for more depth. Experimenting with different cheeses makes it fun! To keep your cups crispy, bake them until they are golden brown. Use a mini muffin tin for the best shape. Make sure to pack the mixture tightly in each cup. Topping with crispy fried onions adds extra crunch too. Keep an eye on them while baking for the perfect texture. Loaded Mac and Cheese Football Cups are simple and fun to make. We covered the key ingredients, from pasta to cheese sauce. You can customize this dish with optional toppings or different cheeses. I shared tips for the best cheese sauce and how to make these cups ahead of time. Remember, you can store leftovers or freeze them for later. In the end, these bites are perfect for game day or any fun gathering. Enjoy making and sharing this dish!

Loaded Mac and Cheese Football Cups Tasty Game Snack

Game day snacks can make or break your party, and Loaded Mac and Cheese Football Cups are a winning choice!

- Beets - Olive Oil - Goat Cheese - Unsalted Butter - Honey - Fresh Thyme - Walnuts - Fresh Arugula - Artisan Bread or Crackers The star of this dish is the beets. Their sweet, earthy flavor shines when roasted. Olive oil adds richness, while goat cheese gives a creamy texture. Unsalted butter makes the spread smooth and luscious. Honey brings a touch of sweetness that balances all the flavors. Fresh thyme adds a bright herbal note, enhancing the dish. Walnuts provide a nice crunch, making each bite interesting. Fresh arugula adds a peppery taste, perfect for contrast. Artisan bread or crackers are essential for dipping and enjoying the butter board. If you want a different cheese, try feta or cream cheese. These alternatives give a new twist to the flavor. For nuts, pecans or almonds work well too. They add a different crunch and taste. If you follow a vegan diet, use vegan butter and cheese. These swaps keep the spirit of the dish while meeting dietary needs. To make this recipe, you'll need a few tools. A baking sheet is great for roasting the beets. Aluminum foil helps to keep them moist. A mixing bowl is essential for blending the goat cheese and butter. Finally, a rustic serving platter makes a lovely presentation for your butter board. Using these ingredients and tools, you can create a beautiful dish that impresses everyone! Check the Full Recipe for all the details. - Preheat the oven: Set your oven to 400°F (200°C). This is key for roasting. - Wrapping and seasoning the beets: Take each beet and wrap it in aluminum foil. Drizzle with 1 tablespoon of olive oil. Season with salt and pepper before sealing. - Roasting process and cooling: Place the wrapped beets on a baking sheet. Roast for 45-60 minutes. They are done when a fork easily pierces them. Let them cool for a bit. Unwrap, peel, and slice the beets thinly. - Combining ingredients: In a bowl, mix the softened goat cheese, butter, honey, and thyme. - Achieving the perfect consistency: Use a fork or spatula to blend until smooth. This spread should be creamy and easy to spread. - Spreading the goat cheese mixture: On a rustic board, spread the goat cheese butter evenly. Use the back of a spoon to create swirls for style. - Layering the sliced beets: Arrange the beet slices on top of the goat cheese butter. Let some of the spread peek through. - Adding walnuts and finishing touches: Evenly sprinkle the chopped walnuts over the beets. Drizzle a bit of honey on top for extra sweetness. Now, you have a vibrant and delicious Roasted Beet and Goat Cheese Butter Board ready to enjoy. For the complete recipe, check out the [Full Recipe]. To enhance your roasted beet and goat cheese butter board, consider these herbs and spices: - Fresh thyme - Chopped chives - Cracked black pepper - A hint of orange zest These flavors brighten the dish. Mix them into the goat cheese butter or sprinkle on top for extra flair. For dips and spreads, try these: - Hummus - Olive tapenade - Creamy yogurt dip These options add variety. They also give your guests choices for dipping. Make your butter board visually stunning with these tips: - Use a rustic wooden board for a homey feel. - Spread the goat cheese butter smoothly, then create swirls or indents. - Arrange sliced beets in a fan or circular pattern. For gatherings, serve with: - Fresh arugula to add color. - Artisan bread or crunchy crackers for dipping. This setup invites sharing and adds to the fun. Be mindful of these common pitfalls: - Over-roasting the beets: Keep an eye on them. Over-roasting makes them mushy. Aim for tender, not soft. - Inadequate seasoning: Don’t skimp on salt and pepper. Proper seasoning brings out the flavors. Taste as you go! By avoiding these mistakes, you ensure your dish shines. For more details on how to prepare this delicious dish, check the Full Recipe. {{image_4}} You can change this recipe with the seasons. In the fall, add pumpkin seeds and cranberries. They bring a nice crunch and a touch of sweetness. In summer, use fresh fruits, like berries or peaches. You can also try lighter herbs, such as basil or mint. These swaps keep the dish fresh and fun. If you need gluten-free options, serve with gluten-free crackers or veggies. You can also make this dish dairy-free. Use a plant-based butter and a vegan cheese. These changes still keep the flavors tasty. For special occasions, turn your butter board into a holiday theme. Add festive colors with pomegranate seeds or red peppers. You can also mix it with a charcuterie board. Place meats, cheeses, and olives around your butter board. This mix makes for a fun and tasty spread for everyone to enjoy. To keep your Roasted Beet and Goat Cheese Butter Board fresh, use an airtight container. Make sure the lid seals tightly to prevent air from getting in. Store it in the fridge right away to keep it cool. This helps the flavors stay bright. Your butter board should stay fresh for about three days in the fridge. Check for signs of spoilage, like a sour smell or an off-color. If the goat cheese looks dry or the beets are mushy, it’s time to toss it. To enjoy your butter board again, gently warm it. Use the microwave on low power in 10-second bursts. You can also place it in the oven at 300°F for a few minutes. This will help revive the creamy texture without cooking it further. For the full recipe, check out the Roasted Beet and Goat Cheese Butter Board 🥗 section. A butter board is a fun way to serve spreads. It features a base of creamy butter mixed with flavors. You spread this mixture on a board or platter. Then, you add toppings like roasted veggies, herbs, or nuts. It’s great for parties or casual gatherings. You can use it with bread or crackers. This dish invites guests to dig in and share. It makes for a beautiful and tasty presentation. Yes, you can prepare some parts ahead of time. Roast the beets and store them in the fridge for up to three days. You can also mix the goat cheese butter and keep it chilled. Just wait to assemble the board until serving time. This keeps the flavors fresh and vibrant. It’s best to layer the beets and toppings right before serving. This helps maintain the look and taste. You can personalize your butter board in many ways. Here are some ideas: - Swap goat cheese for feta or cream cheese for a different flavor. - Use pecans or almonds instead of walnuts for crunch. - Add fresh herbs like basil or dill for extra flavor. - Mix in spices like smoked paprika or garlic powder for a kick. Feel free to get creative! You can also ask about specific substitutions if you have dietary needs or preferences. This blog post explored how to create a delicious butter board using essential ingredients like beets and goat cheese. We covered substitutions, recommended tools, and step-by-step instructions. I shared tips for flavor pairing and common mistakes to avoid, ensuring your board looks great and tastes better. In conclusion, making a butter board opens up fun, creative dining. Enjoy it your way, from seasonal tweaks to dietary modifications. Keep experimenting and make it a true reflection of your taste!

Roasted Beet and Goat Cheese Butter Board Delight

Looking for a unique appetizer that wows your friends and family? Try my Roasted Beet and Goat Cheese Butter Board

- 1 cup rolled oats - 1 cup unsweetened almond milk - 1/2 cup canned pumpkin puree - 2 tablespoons brown sugar - 1 teaspoon vanilla extract - 1 teaspoon pumpkin pie spice - 1 tablespoon chia seeds - 1/4 cup chopped pecans or walnuts - Whipped cream or coconut whipped topping Gather these ingredients to make your brown sugar pumpkin pie overnight oats. I love using rolled oats as they absorb almond milk well. Canned pumpkin puree adds a rich flavor and creamy texture. For sweetness, I use brown sugar, but feel free to adjust it to your taste. Vanilla extract gives a warm note, while pumpkin pie spice adds that festive touch. Optional ingredients let you customize your oats. Chia seeds thicken the mixture and add fiber. Chopped nuts provide crunch and healthy fats. Finally, a dollop of whipped cream makes it extra special. This recipe is flexible. You can mix and match ingredients based on what you have at home. Check the full recipe for more details on how to combine these flavors! 1. In a large bowl, combine the rolled oats and almond milk. Mix gently until the oats soak up the milk. 2. Next, add the pumpkin puree, brown sugar, vanilla extract, pumpkin pie spice, ground cinnamon, and salt. If you like a thicker texture, toss in chia seeds now. 3. Stir everything well. Make sure each ingredient blends in nicely. You want a smooth mix with no dry spots. 1. Carefully divide the mixture into two or three mason jars or airtight containers. Make sure each jar has an equal amount. 2. Seal the jars tightly. Place them in the fridge overnight. This is key for the oats to absorb all the yummy flavors. 1. In the morning, take your jars out of the fridge. Give the oats a good stir. If they seem too thick, add a splash of almond milk to make them creamier. 2. Top each serving with chopped pecans or walnuts. Add a dollop of whipped cream or coconut whipped topping for a sweet finish. You can find the full recipe above. Enjoy your delicious Brown Sugar Pumpkin Pie Overnight Oats! To get the perfect thickness for your oats, start with the right amount of almond milk. If your oats feel too thick, just add a splash more almond milk. This will help soften the oats and give you that creamy texture. Mixing thoroughly is key. Make sure you stir all the ingredients well. This ensures that every bite has the same great taste. Want to amp up the flavor? Consider adding a pinch of nutmeg or ginger. These spices work well with pumpkin and add warmth. You can also switch up the milk. Try oat milk or coconut milk for a fun twist. Each type of milk brings its own unique taste, making your oats even more exciting. Serving your oats in clear glasses makes them look beautiful. You can see the layers and colors, which is very appealing. Drizzling extra pumpkin puree on top adds a pop of color and flavor. A sprinkle of cinnamon also makes it look fancy. These small touches will impress anyone you serve. {{image_4}} You can easily make this recipe healthier. Instead of brown sugar, try using natural sweeteners like honey or maple syrup. These options add sweetness without refined sugar. You can also adjust the amount of sweetener to fit your taste. Adding protein powder is another great option. This helps make your breakfast more filling. Choose a flavor that complements the pumpkin. Vanilla protein powder works well here. Get creative with flavor! Try mixing in fruits like bananas or apples. These add natural sweetness and extra fiber. You can slice them thin or even mash them up before mixing. You can also experiment with nut toppings. Chopped pecans or walnuts add crunch. Try adding almonds or hazelnuts for a different taste. You can enjoy your overnight oats hot or cold. If you prefer hot oats, warm them up in the microwave for a minute. This can give a cozy feel, especially in colder months. Another fun way to serve is in parfait form. Layer the oats with fruits and nuts in a glass. This makes for a stunning presentation. Plus, it adds a fun texture to each bite. For the full recipe, check out the Brown Sugar Pumpkin Pie Overnight Oats section. To keep your Brown Sugar Pumpkin Pie Overnight Oats fresh, store them in airtight containers. Glass jars work great since they seal tightly. Always place them in the fridge right after making them. This helps the oats soak up the flavor. They can stay good for about 3 to 5 days. Check for any changes in smell or texture before eating. You can freeze these oats if you want to keep them longer. Use freezer-safe containers to avoid freezer burn. Make sure to leave some space in the container for expansion. When you want to eat them, move them to the fridge overnight to thaw. After thawing, stir well to mix everything back together. If they seem too watery, add a little more oats to maintain texture. If you prefer your oats hot, you can reheat them easily. The best method is to use a microwave. Heat them in short bursts, stirring in between. This helps keep the flavor intact. You can also use a stovetop. Just warm them gently in a pot over low heat. If they seem dry, add a splash of almond milk to bring back the creaminess. Enjoy them warm with your favorite toppings from the Full Recipe. Yes, you can easily make this recipe vegan. To do this, simply swap the regular milk for any plant-based milk, like almond or coconut milk. You can also use maple syrup or agave nectar instead of brown sugar. These changes keep the taste rich and sweet, just like the original. You can store your overnight oats in the fridge for up to five days. Just remember to keep them in airtight containers. A good tip is to label them with the date you made them, so you know when to enjoy them. This way, you can always have a quick and tasty breakfast ready! If your oats are too thick in the morning, don't worry! You can easily fix this. Just add a splash of almond milk or your choice of milk and stir well. This will help reach your desired creaminess. Mixing in a little more liquid gives your oats a nice, smooth texture. In this blog post, we explored how to make tasty Brown Sugar Pumpkin Pie Overnight Oats. We covered main ingredients like oats and pumpkin, plus sweeteners and spices. You learned step-by-step instructions, tips for the best texture, and fun variations. Remember, these oats are simple to prepare and customizable. They fit into any diet, whether you want them hot or cold. Try your unique twists to elevate your breakfast. With these easy guides, enjoy a healthy meal that is both delicious and satisfying. Happy cooking!

Brown Sugar Pumpkin Pie Overnight Oats Recipe

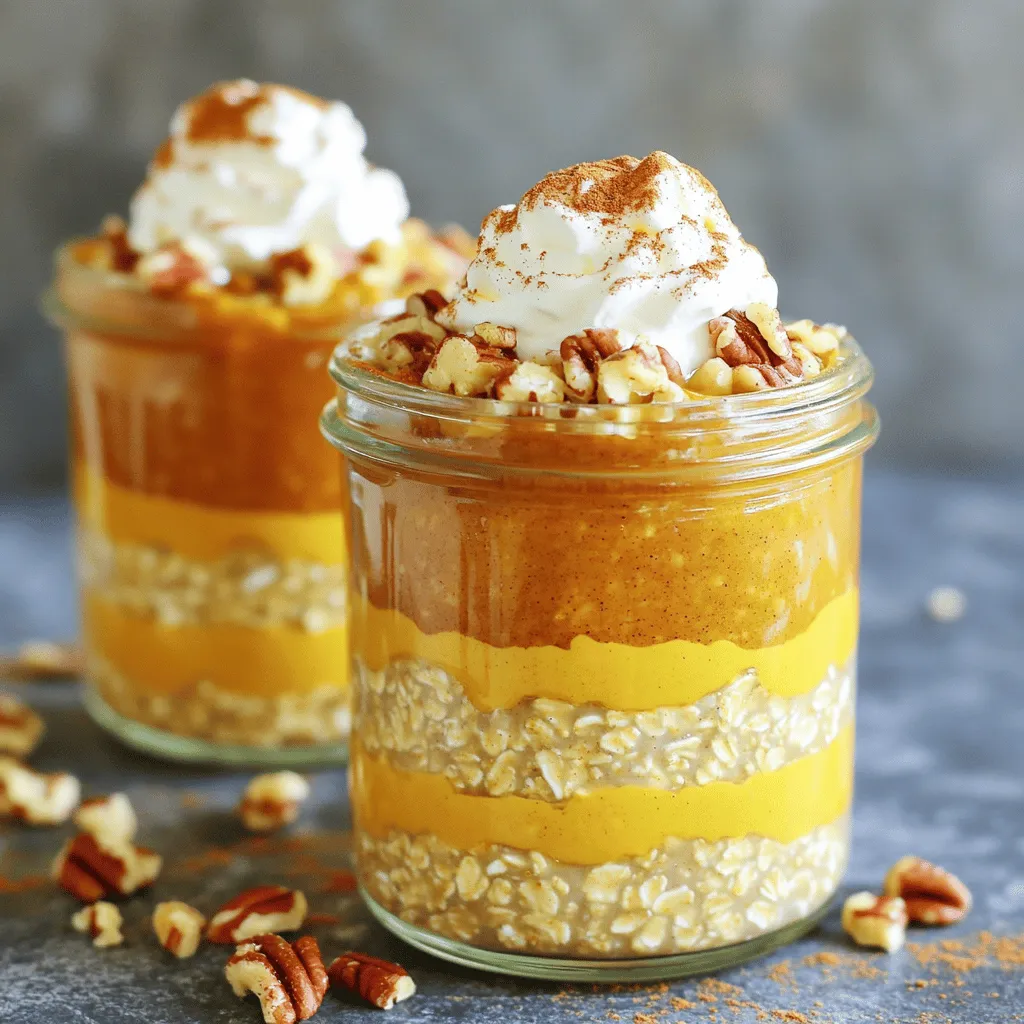
Get ready to indulge in a fall favorite with my Brown Sugar Pumpkin Pie Overnight Oats Recipe! These creamy oats

- 2 cups cooked sushi rice - 1 lb grilled chicken breast, shredded - 1/2 cup buffalo sauce - 1/2 cup cream cheese, softened - 1/4 cup green onions, thinly sliced - 1/2 cup shredded carrots - 1 large cucumber, cut into thin strips - 4 sheets of nori (seaweed) - Sesame seeds for garnish - Soy sauce for serving The star of this dish is the sushi rice. You need to cook it just right. It should be sticky but not too wet. After cooking, let it cool for about 10-15 minutes. This cooling time helps you handle the rice without burning your hands. Next, the grilled chicken shines in this recipe. Shredding it makes it mix well with the buffalo sauce. You can use any leftover chicken you have, too. Just make sure to mix it well with the sauce. You want every piece coated. Buffalo sauce adds heat and flavor. Adjust it based on how spicy you like your food. Remember, you can always add more but can’t take it away. Cream cheese brings a nice creaminess to these rolls. It balances the heat from the buffalo sauce. Make sure it's softened to mix easily with the chicken. The green onions, carrots, and cucumber add crunch and color. You can slice the green onions very thin to mix in well. The carrots and cucumbers should be cut into strips. This will make them easy to roll. Lastly, the nori holds everything together. When you roll it, the nori helps wrap the sushi tightly. Sesame seeds can add a nice touch when you serve your rolls with soy sauce. Check out the Full Recipe for more details on how to bring all these flavors together into delicious Tailgate Buffalo Chicken Sushi Rolls! To start, cook 2 cups of sushi rice according to the package directions. Once it's done, let the rice cool for about 10 to 15 minutes. You want it warm but not hot. This cooling step makes it easier to handle when rolling. Next, grab a large mixing bowl. Combine 1 pound of shredded grilled chicken with 1/2 cup of buffalo sauce. Mix it well until the chicken is fully coated. If you like it hotter, add more buffalo sauce. Adjust the spice to fit your taste. Now, it’s time to assemble! Place a bamboo sushi mat on a clean surface. Lay down one sheet of nori with the shiny side facing down. With wet hands, take about 1 cup of cooled sushi rice and spread it evenly over the nori. Leave a 1-inch border at the top. In the center of the rice, layer the buffalo chicken mixture, a dollop of cream cheese, sliced green onions, shredded carrots, and cucumber strips. Start rolling from the bottom edge of the mat. Gently tuck the filling in as you roll. Keep light pressure to contain the filling. Roll until you reach the edge of the nori without rice. To seal the roll, moisten the uncovered edge of the nori with a bit of water. Press gently to secure it. Using a sharp, wet knife, slice the roll into 6 to 8 pieces. Wipe the knife with a damp cloth between cuts. This keeps the edges clean and neat. Arrange the sushi rolls on a platter. Sprinkle sesame seeds on top for extra flavor and crunch. Serve with soy sauce for dipping. Enjoy your Tailgate Buffalo Chicken Sushi Rolls! For more details, check the Full Recipe. How to prevent sushi rice from sticking: To keep your sushi rice from sticking, rinse it well. This removes extra starch. Use cold water until the water runs clear. After cooking, let the rice cool slightly. Wet your hands before handling the rice. This helps you avoid sticky fingers. Ensuring rolls stay tight and sealed: When rolling, start with the edge closest to you. Tuck the filling in as you roll. Apply light pressure, but not too hard. Use a small amount of water on the edge of the nori to seal it. This makes for a neat, tight roll. Using additional toppings or sauces: You can add more flavor with toppings. Try drizzling extra buffalo sauce on top. You can also use ranch or blue cheese dressing for a nice twist. Fresh herbs like cilantro or parsley can brighten the dish. Suggestions for complementary side dishes: Serve your sushi rolls with crunchy veggie sticks. Carrots, celery, or bell peppers work well. A light salad with a tangy dressing pairs nicely too. You can also include chips or pretzels for some crunch. Best ways to serve at tailgating events: For tailgating, cut the rolls into bite-sized pieces. Place them on a large platter for easy access. You can use colorful toothpicks to make them fun. Keep soy sauce in small cups for dipping. Pairing with drinks or other appetizers: These rolls go well with cold drinks. Try pairing them with light beers or sparkling water. You can also serve them with other snacks like wings or sliders. This makes for a fun, tasty tailgate spread. {{image_4}} You can switch up the protein in your sushi rolls for a new twist. Consider using smoked chicken or rotisserie chicken. These options add a nice depth of flavor. If you're looking for a vegetarian choice, try using tofu or tempeh. Both work well with buffalo sauce and give you that satisfying texture. To keep things exciting, you can change the sauces! While buffalo sauce is classic, ranch or teriyaki sauce can add a fun twist. Don't forget about the veggies! You can mix in bell peppers, avocado, or even jalapeños for an extra kick. Experimenting with different flavors will keep your taste buds happy. Presentation matters, especially for parties! You can serve your sushi rolls on a large platter, maybe with a drizzle of extra sauce on top. For a fun idea, try bento box style serving. Arrange the rolls with some fresh fruit, veggies, and even dipping sauces. This makes for a colorful and inviting spread that everyone will love. For the full recipe, check out the details above. To keep your buffalo chicken sushi rolls fresh, place them in an airtight container. This keeps out air and moisture. Store the rolls in the fridge for up to three days. After that, the rice can dry out, and flavors may fade. If you want to save sushi for later, freezing works well. Wrap each roll tightly in plastic wrap. Then, place them in a freezer bag. They can last in the freezer for up to three months. To eat, remove the rolls and let them thaw in the fridge overnight. If you want to eat them warm, heat them gently in the microwave for about 30 seconds. Keep sushi safe by storing it at the right temperature. Sushi should not sit out for more than two hours. Check for signs that sushi is no longer good. If the rice smells sour or looks dry, it’s best to throw it out. Always trust your senses to keep your meals safe. To make sushi rice stick, you need the right texture. Use short-grain rice that is sticky. Rinse the rice until the water runs clear. This removes extra starch. Cook the rice with slightly less water than usual. After cooking, let it cool for about 10-15 minutes. Stir in a mix of rice vinegar, sugar, and salt for flavor. This not only adds taste but helps the rice bond together. Yes, you can use precooked chicken. Leftover grilled chicken works great. Just shred it into small pieces. Mix it with buffalo sauce in a bowl. This will add flavor without extra cooking time. Using precooked chicken makes this recipe faster and easy. If you don’t like nori, don’t worry. You can use soy paper or rice paper instead. These options are easy to find and tasty. You can also try lettuce leaves for a fresh twist. Each option gives your sushi a unique taste and texture. The spice level depends on the buffalo sauce you use. You can adjust how much sauce you add. For mild rolls, use less sauce. For spicy rolls, add more. Always taste as you mix to find the perfect heat for you. Tailgate Buffalo Chicken Sushi Rolls go well with many sides. Try crispy potato chips for crunch. Veggie sticks with ranch dip add freshness. You can also serve a light salad for balance. These sides make a fun and tasty tailgate spread. In this post, we explored how to create Tailgate Buffalo Chicken Sushi Rolls. We covered ingredients, from sushi rice to chicken and nori. I shared step-by-step instructions for preparing, mixing, assembling, and slicing. You learned tips to avoid common mistakes and enhance flavors. Finally, we discussed variations and storage options. Tailgate Buffalo Chicken Sushi Rolls are fun and delicious. They’re perfect for any gathering. Enjoy your sushi adventure, and don’t hesitate to make it your own.

Tailgate Buffalo Chicken Sushi Rolls Flavorful Delight

Are you ready to elevate your tailgate game? Tailgate Buffalo Chicken Sushi Rolls offer a bold twist on classic flavors.

To create a delightful Spiralized Sweet Potato Carbonara, gather the following ingredients: - 2 medium sweet potatoes, spiralized - 2 large eggs - 1/2 cup grated Parmesan cheese (or nutritional yeast for a vegan option) - 1/2 cup peas (fresh or frozen) - 2 cloves garlic, minced - 1 tablespoon olive oil - Salt and pepper to taste - Fresh parsley, chopped (for garnish) - Red chili flakes (optional, for heat) These ingredients come together to form a creamy and satisfying dish. Sweet potatoes provide a naturally sweet base, while eggs and cheese create a rich sauce. Garlic adds depth, and peas bring a pop of color and flavor. You can choose between real cheese or a vegan option, depending on your needs. Each ingredient plays an important role in this recipe, ensuring you get a tasty and balanced meal. For the full recipe, check the details provided. How to spiralize sweet potatoes To start, grab your spiralizer or mandoline slicer. Cut the ends off the sweet potatoes first. Then, secure the sweet potato in the spiralizer. Twist until you create long, curly noodles. This fun shape adds a great touch to your dish. Letting the noodles rest After spiralizing, place the noodles in a bowl. Sprinkle a pinch of salt over them. Let the noodles rest for about 10 minutes. This step is key. It helps draw out extra moisture, making the noodles perfect for cooking. Whisking eggs and cheese While the noodles rest, let’s make the sauce. In a medium bowl, crack the eggs. Add grated Parmesan cheese to the bowl. Whisk them together until smooth. Sprinkle in a bit of salt and pepper. Set this mixture aside while you cook the noodles. Combining ingredients Once the sweet potato noodles are ready, we’ll combine everything. Make sure the egg and cheese mixture is ready to go when the noodles finish cooking. Sautéing garlic and sweet potatoes In a large skillet, heat olive oil over medium heat. Add minced garlic and sauté for 1 to 2 minutes. Stir often until the garlic smells good but does not brown. It’s important to keep the garlic light to avoid any bitter taste. Adding peas and integrating the sauce After the sweet potatoes have rested, drain them. Add the noodles to the skillet with the garlic. Sauté the noodles for about 5 to 7 minutes. They should soften but still have a slight bite. Then, stir in the peas and cook for another 2 minutes. Adjusting seasoning Remove the skillet from the heat. Let it cool for about a minute. Slowly pour in the egg and cheese mixture. Stir quickly to coat the noodles. The heat will cook the eggs, creating a creamy sauce. Finally, taste your dish. Add more salt, pepper, or chili flakes for heat if you like. Toss everything together well. Now, your Spiralized Sweet Potato Carbonara is ready to enjoy! To get the best texture, let the sweet potatoes rest after spiralizing. This step draws out moisture. You want the noodles to be firm and not soggy. It takes about 10 minutes. This makes a big difference in how they cook later. For al dente noodles, cook them for about 5 to 7 minutes. You want them to be soft but still a bit chewy. This gives the dish a nice bite and makes it more enjoyable. You can easily customize your carbonara to fit your taste. Adding extra vegetables is a great way to enhance the dish. Try bell peppers, spinach, or zucchini for added color and nutrition. You can also add cooked chicken or bacon if you want more protein. Adjusting for dietary preferences is simple, too. If you want a vegan option, use nutritional yeast instead of Parmesan. You can also skip the eggs and make a creamy sauce with blended tofu or cashews. This way, everyone can enjoy this tasty meal! {{image_4}} You can make a vegan version of this dish by substituting the eggs and cheese. Instead of using eggs, blend silken tofu with a bit of lemon juice. This gives you a creamy texture without animal products. For cheese, use nutritional yeast. This adds a cheesy flavor and is great for vegans. - Substituting eggs and cheese: Use silken tofu and nutritional yeast. - Adding nutritional yeast: It enhances flavor and makes it creamy. To take your carbonara to the next level, think about adding some spice. Red chili flakes can give it a nice kick. You can also add fresh herbs for garnish. This not only adds flavor but also makes your dish look appealing. - Spicing it up with red chili flakes: Adds heat and depth. - Additional herbs for garnish: Fresh parsley or basil can brighten the dish. To keep your Spiralized Sweet Potato Carbonara fresh, use an airtight container. This helps prevent moisture loss and keeps the dish tasty. Store it in the fridge for up to three days. When you want to enjoy it again, reheat it gently. Place the carbonara in a skillet over low heat. Stir often to stop it from sticking. This method helps maintain the creamy texture. You can freeze your carbonara for later meals. First, let it cool completely. Then, portion it into freezer-safe bags or containers. Squeeze out the air before sealing. This helps prevent freezer burn. You can freeze it for up to three months. When you're ready to eat, thaw it in the fridge overnight. After it’s thawed, reheat it in a skillet over low heat. Stir in a splash of water or broth if it looks dry. This will help bring back its creamy consistency. Enjoy your delicious meal anytime! Yes, you can use regular potatoes. But the flavor and texture will change. Sweet potatoes have a natural sweetness that regular potatoes lack. This dish will taste less sweet and more earthy. The texture will also be different. Sweet potatoes are creamier and softer when cooked. Regular potatoes tend to be firmer. For the best results, I recommend sticking with sweet potatoes for this recipe. To make this dish gluten-free, you need to check the ingredients. The sweet potatoes already make it gluten-free. However, ensure your Parmesan cheese is gluten-free. Most cheeses are, but it’s always good to read the label. If you want a vegan option, use nutritional yeast instead. This way, you can enjoy a rich flavor without gluten. Yes, you can prep this dish ahead of time. Spiralize the sweet potatoes and store them in the fridge. Keep them in an airtight container. They will stay fresh for a few days. You can also prepare the carbonara sauce in advance. Just mix the eggs and cheese, then store it separately. When you are ready to cook, combine everything. This makes it easy to enjoy a quick meal on busy nights. This blog post covered how to make a healthy and tasty sweet potato carbonara. We discussed the main ingredients, preparation methods, and cooking steps. You learned tips for texture and ways to customize the dish. We also explored vegan options and storage methods for leftovers. Now, you have all the tools to enjoy this delicious meal. Get creative with flavors and enjoy your cooking journey!

Spiralized Sweet Potato Carbonara Delightful and Easy

Are you ready to try a spin on a classic dish? Spiralized Sweet Potato Carbonara is both delicious and easy

- 1 cup pickle brine - 1 cup tomato juice - 1 tablespoon Worcestershire sauce - 1 teaspoon hot sauce - 1 tablespoon fresh lemon juice - 1/2 teaspoon celery salt - 1/2 teaspoon freshly ground black pepper - Fresh dill sprigs - 1/4 cup ripe cherry tomatoes, halved - 1/4 cup cucumber, diced into small cubes Creating Pickle Brine Bloody Mary Popsicles is simple and fun. The main ingredients give these pops their bold flavor. First, the pickle brine adds a tangy zest. Then, tomato juice brings that classic Bloody Mary taste. Worcestershire sauce and hot sauce give it a kick. Fresh lemon juice brightens the mix. For seasoning, I love using celery salt and black pepper. They enhance the taste and add depth. Fresh dill sprigs not only look nice but also add a fresh herbal note. If you want to be playful, consider add-ins. Cherry tomatoes and cucumber not only add crunch but also make the pops visually appealing. You can customize these pops to your taste! For the full recipe, check the detailed instructions. Enjoy this fun summer treat! Start by blending the base ingredients in a medium mixing bowl. Combine 1 cup of pickle brine, 1 cup of tomato juice, 1 tablespoon of Worcestershire sauce, 1 teaspoon of hot sauce, 1 tablespoon of fresh lemon juice, 1/2 teaspoon of celery salt, and 1/2 teaspoon of black pepper. Use a whisk or spoon to mix until smooth. Taste the mixture and adjust flavors according to your preference. Want more spice? Add extra hot sauce. Need more zing? A bit more lemon juice does the trick. Now it’s time to assemble your popsicles. Carefully place halved cherry tomatoes and diced cucumber in your molds. Make sure to distribute them evenly for a nice look. Then, gently pour the brine mixture into each mold. Fill them just below the top; this allows the mixture to expand as it freezes. Next, insert popsicle sticks into the center of each mold. Make sure they are secure to prevent slipping. If your molds have lids, cover them. If not, use plastic wrap to keep freezer odors out. Freeze the molds for at least 6 hours or until they are completely solid. To enjoy your popsicles, hold the molds under warm running water for a few seconds. Gently pull on the sticks until they slide out easily. Enjoy your Pickle Brine Bloody Mary Popsicles as a refreshing summer treat! You can make these popsicles your own. - Adjust the spice level with hot sauce to suit your taste. - Add extra veggies like bell peppers or herbs like parsley for new flavors. To get the best popsicles, follow these tips: - Make sure to freeze them for at least six hours. This ensures they become solid. - Use warm water to run over the molds. This helps release the popsicles easily. A great look makes these popsicles even better. - Garnish with fresh dill before serving. It adds color and flavor. - Serve with extra garnishes like olives or celery sticks for a fun display. For a complete guide, check out the Full Recipe to make your Pickle Brine Bloody Mary Popsicles! {{image_4}} You can add fun flavors to your popsicles. Try mixing in beet juice for a sweet twist. Carrot juice also adds a nice color and taste. If you want something unique, experiment with flavored pickle brine. There are many types, like garlic or spicy brine, that can change the flavor profile. Want a family-friendly treat? Make a virgin version! Simply use only tomato juice and pickle brine. This way, everyone can enjoy them. You can also swap Worcestershire sauce with a vegan option. This makes the popsicle taste just as delicious without animal products. Make your popsicles even more special by using seasonal fruits or veggies. In summer, ripe tomatoes add freshness. In fall, you might use roasted squash. Adding herbs like basil or cilantro can elevate the taste. These herbs provide a fresh burst of flavor that pairs well with the brine. For the full recipe, check out the Pickle Brine Bloody Mary Popsicles! To keep your Pickle Brine Bloody Mary Popsicles fresh, store them in popsicle molds. This helps them freeze well. Make sure to keep them away from strong-smelling foods in the freezer. Strong odors can change their taste. These popsicles taste best within 1-2 weeks after making them. Always check for signs of freezer burn before serving. If they look frosty or dry, it's best to toss them. Fresh popsicles give the best flavor. When you're ready to enjoy your popsicles, thaw them in warm water. This will help them slide out easily. Avoid using the microwave, as it can change their texture. You want them to stay nice and firm! Yes, store-bought pickle brine is a convenient option. It saves time and effort. Many brands offer tasty brines that work well in this recipe. Just choose one that you enjoy. They require a minimum of 6 hours to freeze completely. This allows the flavors to set, giving you a delicious treat. If you can, leave them in the freezer overnight for the best results. Simply double the ingredients and use larger molds. This way, you can make more popsicles at once. It’s great for parties or gatherings. Enjoy sharing these fun treats with friends! These savory popsicles blend bold flavors with fun. We used pickle brine, tomato juice, and spices for a unique treat. You learned how to prepare, freeze, and serve them. Don't forget the options for personal touches and seasonal ingredients. Experiment with flavors and enjoy your creations. These popsicles can surprise your friends and family with their taste and presentation. Enjoy your culinary journey and share these fun recipes in your kitchen!

Pickle Brine Bloody Mary Popsicles Refreshing Summer Treat

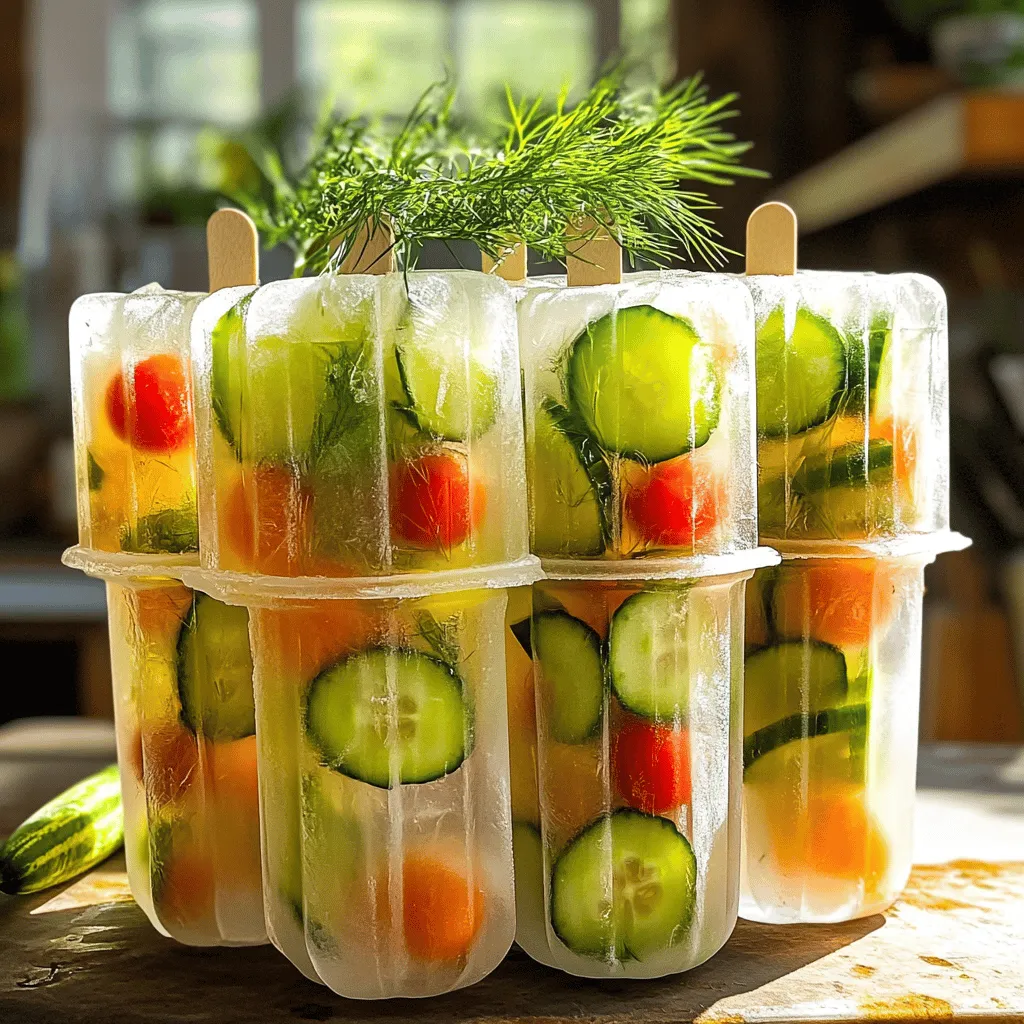
Looking for a unique summer treat? Try Pickle Brine Bloody Mary Popsicles! These refreshing popsicles blend tangy pickle brine and

- Chicken thighs - Cherry cola - Soy sauce - Ketchup - Apple cider vinegar - Garlic powder - Onion powder - Olive oil - Slider buns - Fresh baby spinach or arugula - Sliced pickles The main ingredients are simple but very flavorful. Chicken thighs bring tenderness and juiciness. Cherry cola adds a sweet and tangy flavor. Soy sauce gives a nice umami kick, while ketchup balances it with a hint of sweetness. When it comes to additional ingredients, apple cider vinegar adds a touch of acidity. Garlic powder and onion powder enhance the taste without being too strong. Olive oil is key for grilling and adds richness. For toppings, slider buns hold everything together. Fresh baby spinach or arugula adds a nice crunch and freshness. Sliced pickles provide a tangy bite that contrasts well with the sweetness of the chicken. These ingredients blend to create a fun and tasty meal. You can find the full recipe for Cherry Cola Chicken Sliders in the link above. Each bite feels like a little party! To make the marinade, gather a medium mixing bowl. Add 1 cup of cherry cola, 1/4 cup of soy sauce, and 1/4 cup of ketchup. Pour in 1 tablespoon of apple cider vinegar. Next, add 1 teaspoon of garlic powder and 1 teaspoon of onion powder. Season with salt and pepper. Whisk all these ingredients together until smooth. For marinating time, use a large resealable bag. Place the chicken thighs inside and pour the marinade over them. Make sure the chicken is fully coated. Seal the bag and refrigerate for at least 1 hour. For best results, let it marinate overnight. When you're ready to grill, preheat your grill or grill pan over medium-high heat. It should be hot before you add the chicken. Take the chicken out of the marinade, but keep the marinade for later use. Brush the grill with olive oil to stop sticking. Place the chicken on the grill. Cook each side for about 5-7 minutes. Make sure the chicken reaches 165°F (75°C) inside. While the chicken cooks, pour the reserved marinade into a saucepan. Bring it to a boil, then lower the heat. Let it simmer for about 10 minutes until it thickens slightly. Once the chicken is done, take it off the grill and let it rest for a few minutes. Use two forks to shred the cooked chicken. You can also chop it into small pieces if you prefer. Toss the shredded chicken in the thickened marinade until every piece is coated. For assembly, take the bottom half of a slider bun. Add a generous scoop of the cherry cola chicken. Top with a handful of fresh spinach or arugula. Finish with some sliced pickles. Place the top half of the bun on top. Enjoy your Cherry Cola Chicken Sliders! You can find the Full Recipe for more details and tips. To avoid sticking, brush your grill with olive oil before cooking. This simple step helps the chicken slide right off. Preheat your grill to medium-high heat. Aim for about 5-7 minutes per side. This ensures your chicken cooks evenly and stays juicy. For extra flavor, sprinkle a bit of smoked paprika or chili powder on the chicken. These spices add a nice kick. When it comes to sides, coleslaw or potato salad pairs well. You can also serve these sliders with a side of sweet potato fries for a fun twist. To present your sliders, arrange them on a rustic wooden board. This makes for a charming display. Include a small bowl of pickles and a dish of the thickened marinade as a dipping sauce. This adds flair and flavor, making your sliders look even more inviting. These tips will help you impress your guests at any gathering. Enjoy your delicious creation with friends and family! {{image_4}} You can swap chicken for other proteins. Pulled pork works great with cherry cola. It adds a rich, smoky flavor. Tofu is a fantastic choice for a vegan option. It absorbs the marinade well and gives a nice texture. Turkey is another lean alternative that can also shine in this recipe. Feel free to get creative with spices. Adding smoked paprika gives a nice, warm kick. You can also try chili powder for some heat. Other soda flavors can work too! Root beer can add a unique twist. Lemon-lime soda brings brightness and a fresh taste. If you're gluten-free, use tamari instead of soy sauce. This keeps the flavor while making it safe for your diet. For vegan adaptations, replace chicken with jackfruit or tempeh. Both options soak up the marinade well. Ensure the buns are gluten-free or vegan to match your needs. To keep your Cherry Cola Chicken Sliders fresh, store leftovers in an airtight container. This helps prevent them from drying out or absorbing other odors. They stay good in the fridge for about 3 to 4 days. Before serving again, check for any off smells or discoloration. If it looks or smells funny, it's best to toss it. If you want to save sliders for later, freezing is a great option. Wrap each slider tightly in plastic wrap, then place them in a freezer bag. This method keeps them from getting freezer burn. They can last in the freezer for up to 2 months. When you're ready to eat, take them out and let them thaw in the fridge overnight. You can reheat your sliders in a few ways. The oven method is best for keeping them crispy. Preheat your oven to 350°F (175°C), wrap the sliders in foil, and heat for about 10-15 minutes. If you're in a hurry, the microwave works too. Just place the slider on a microwave-safe plate, cover it with a damp paper towel, and heat for 30 seconds. Check and heat more if needed, but avoid overcooking. Yes, you can use diet cherry cola. However, the flavor will change. Diet cola lacks the full sweetness of regular cola. This may lead to a less rich taste in your sliders. You might want to add a bit of extra sugar or honey to balance it out. If you prefer a lighter version, diet cola will work, but expect a different flavor. I recommend marinating the chicken for at least one hour. For the best taste, try to marinate it overnight. This gives the chicken time to soak up all the tasty flavors. Longer marination makes the chicken more tender and flavorful. Just avoid marinating for more than 24 hours, as it can get mushy. Great sides for these sliders include: - Coleslaw - Sweet potato fries - Grilled corn on the cob - Potato salad - Fresh veggie sticks These sides bring out the sweet and tangy flavors of the sliders. They also add a fresh crunch for a balanced meal. Enjoy experimenting with different combinations! For a full recipe, check out the complete guide on Cherry Cola Chicken Sliders. This blog post provided a detailed guide to making Cherry Cola Chicken Sliders. You learned about the key ingredients, including chicken thighs and cherry cola, and got step-by-step cooking instructions. Tips for grilling, flavor enhancements, and storage info were also included. I hope you feel inspired to try new variations and serve these tasty sliders at your next gathering. Embrace creativity in the kitchen. Enjoy making these delicious bites!

Cherry Cola Chicken Sliders Tasty and Simple Meal

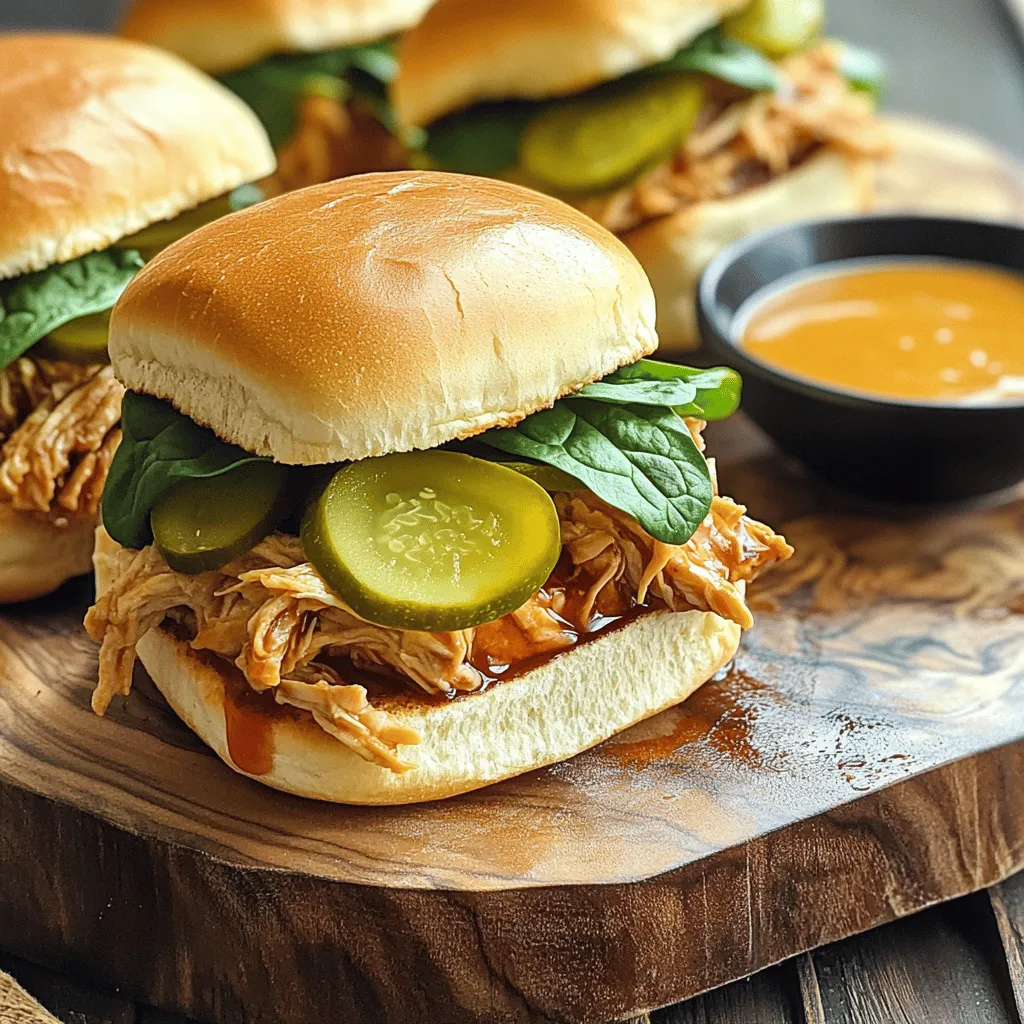
Craving a yummy meal that’s easy to make? Try my Cherry Cola Chicken Sliders! With juicy chicken thighs marinated in

Older posts
Newer posts
← Previous Page1 … Page7 Page8 Page9 … Page75 Next →

dsad

© 2025 lazychefmagic • Built with GeneratePress

Our Policies

  • Copyright Policy
  • Cookie Policy
  • GDPR Policy
  • Privacy Policy
  • Disclaimer
  • Terms Of Use

More Information

  • Home
  • About
  • Contact
  • Appetizers
  • Dessert
  • Dinner
  • Drinks
©2025, lazychefmagic About Back To Top