
Gordon Ramsay Style Roast Turkey Flavorful and Juicy
Are you ready to impress your guests with a roast turkey that’s flavorful and juicy? In this post, I’ll share
Are you ready to impress your guests with a roast turkey that’s flavorful and juicy? In this post, I’ll share
Are you ready to brighten up your meals with a burst of flavor? In this guide, I’ll share my secret

Craving a warm and cozy meal? Let me show you how to make quick homemade butter chicken. This easy comfort
![- 2 tablespoons olive oil - 1 medium onion, finely chopped - 3 cloves garlic, minced - 2 medium jalapeños, deseeded and finely diced - 1 teaspoon ground cumin - 1 teaspoon dried oregano - 1/2 teaspoon ground coriander - 1/4 teaspoon cayenne pepper (adjust based on your spice preference) - 4 cups low-sodium chicken broth - 2 cans (15 oz each) white beans (such as cannellini or great northern), drained and rinsed - 2 cups cooked chicken, shredded (rotisserie chicken is an excellent choice) - 1 cup corn (can be fresh, frozen, or canned) - 1 cup cream cheese, softened to room temperature - 1 cup shredded Monterey Jack cheese - Salt and pepper to taste - Fresh cilantro, roughly chopped for garnish - Lime wedges for serving What can I use instead of chicken and dairy? You can use shredded turkey in place of chicken. For a dairy option, try using cashew cream or coconut cream. These give a nice creaminess to the dish. What can I use instead of spices and beans? If you don’t have cumin, use chili powder as a substitute. For beans, any white bean works, like navy beans or pinto beans. What are some vegan alternatives? To make this chili vegan, swap the chicken for jackfruit or chickpeas. Use a plant-based cream cheese and broth to keep it tasty and creamy. For the full recipe, check out the [Full Recipe]. Enjoy making this delicious dish! To make white chicken chili, start by prepping your ingredients. Chop the onion, mince the garlic, and dice the jalapeños. This step helps you cook faster. It also ensures even cooking. Next, gather your spices: cumin, oregano, coriander, and cayenne pepper. Toasting these spices will bring out their flavor. Heat some olive oil in a large pot. Now, let’s sauté the base ingredients. Add the chopped onion to the hot oil. Cook it for about five minutes until it’s soft and clear. Then, mix in the minced garlic and jalapeños. Cook for two to three more minutes. Stir often to avoid burning. Once the base is fragrant, add your spices. Stir them in for about a minute. This step is crucial for flavor. Then, pour in four cups of chicken broth and add the rinsed white beans. Turn up the heat to get the mixture simmering. After the broth simmers, add shredded chicken and corn. Stir everything together. Let the chili simmer for 15 to 20 minutes. This time allows the flavors to meld and deepen. Once the chili has simmered, turn down the heat. Incorporate the cream cheese into the pot. Stir until it melts and blends smoothly. This gives the chili its creamy texture. Next, add the shredded Monterey Jack cheese. Stir until it melts completely. Now, taste your chili. Adjust the salt and pepper as needed. If you want more heat, add more cayenne pepper. Serve the chili hot. Ladle it into bowls and garnish with fresh cilantro. Add a lime wedge on the side for extra flavor. For a fun crunch, serve with tortilla chips. You can find the Full Recipe to make this delicious dish easily! To boost the flavors in your white chicken chili, start by toasting your spices. Heat them in the pot before adding other ingredients. This brings out their full taste. Just a minute or two will do. Balancing flavors is key. Adding a splash of lime juice brightens the dish. It cuts through the creaminess and adds zing. Always taste your chili as you cook. Adjust the salt and pepper to match your taste. You can use a slow cooker or stovetop for this recipe. The stovetop cooks faster, giving you a rich flavor in less time. The slow cooker lets the flavors blend well over hours. Choose what fits your schedule best. For perfect creaminess, add cream cheese at the end. Stir until it melts into the chili. This makes the dish rich and smooth. Adding Monterey Jack cheese gives it an extra creamy touch. Toppings can make or break your chili. I love to add fresh cilantro and lime wedges. You can also try diced avocado or tortilla strips for crunch. Pair your chili with a cold drink. A light beer or a crisp white wine works well. For a non-alcoholic option, try sparkling water with lime. For the full recipe, check out the complete guide! {{image_4}} You can change the protein in white chicken chili. Try using turkey instead of chicken. It has a similar taste and works well in this dish. If you want a plant-based option, use tofu. Just cube the tofu and add it in when you add the broth. You can also switch the beans. Instead of white beans, you can use black beans or pinto beans. Both will add a different flavor and texture. Keep in mind that the color of your chili will change, but it will still taste great! You can easily adjust the spice level of your chili. If you like it mild, use fewer jalapeños or skip them. For more heat, add more jalapeños or even some serrano peppers. You can also use hot sauce. Add a few dashes while cooking to find your perfect heat. Just remember, you can always add more spice, but you can't take it out once it’s in! White chicken chili can take on different regional styles. For a Mexican-style twist, add corn tortillas or top with avocado slices. This adds flavor and texture. You can also incorporate local flavors. For example, if you live near the coast, try adding shrimp or crab. This gives a unique taste to your chili. Each variation can create a new favorite way to enjoy this dish. For the full recipe, check out the Creamy White Chicken Chili section above! To store white chicken chili, let it cool first. Use an airtight container to keep it fresh. Your chili can last in the fridge for up to four days. If you want to enjoy it later, store it right after it cools. This keeps the taste and texture just right. Freezing is a great way to keep your chili longer. Pour the chili into freezer-safe bags or containers. Leave some space at the top for expansion. Your chili can stay good in the freezer for up to three months. When you're ready to eat, thaw it overnight in the fridge. To reheat, place it in a pot over medium heat. Stir it often until it’s hot. You can also use the microwave for quick warming. Meal prep makes busy days easier. Portion the chili into single servings. This way, you can grab a bowl when you're in a rush. For quick reheating, use the microwave or stovetop. Just remember to stir it well to heat evenly. You can also add fresh toppings when serving to keep it exciting. Enjoy your delicious meal anytime! For full recipe details, check out the [Full Recipe]. What can I serve with white chicken chili? You can serve white chicken chili with many tasty sides. I love crispy tortilla chips for dipping. You might also enjoy some warm, crusty bread. A fresh salad can add a nice crunch. Don't forget toppings like avocado or sour cream for extra flavor! Can I make this recipe in advance? Yes, making this chili ahead is a great idea! It tastes even better the next day. Just store it in the fridge for up to three days. You can also freeze it for later. Just remember to thaw it before reheating! What type of chicken is best for this recipe? I recommend using cooked chicken for this recipe. Rotisserie chicken works well since it’s already seasoned. You can also boil or grill chicken breasts. Just make sure it’s shredded for easy mixing into the chili. Are white beans the only beans I can use? White beans are great, but they aren’t your only choice. You can try black beans or pinto beans if you want. Each will change the look and flavor a bit. Feel free to mix different beans for more fun! How can I make this recipe gluten-free? To make this chili gluten-free, check your broth for gluten. Use a certified gluten-free broth. Avoid any added ingredients with gluten, like certain spices. This way, everyone can enjoy the dish without worry! What adjustments are needed for dairy-free versions? You can swap the cream cheese and Monterey Jack cheese for dairy-free options. Look for plant-based cream cheese and cheese. Coconut cream can also add a nice creaminess. Taste as you go to adjust the flavors! In this blog post, we explored how to make a delicious white chicken chili. We covered the key ingredients, cooking steps, and easy substitutions. You can swap proteins, adjust spice levels, and find great serving ideas. Remember, storage tips help retain the chili's flavor. With these insights, you can create a meal that fits your taste and needs. Enjoy customizing and sharing this comforting dish with others!](https://lazychefmagic.com/wp-content/uploads/2025/07/cc642a74-de7f-41c7-8ea7-25cef63ee55a.webp)
If you’re craving a warm, hearty meal that comes together easily, look no further! I’ll show you how to make
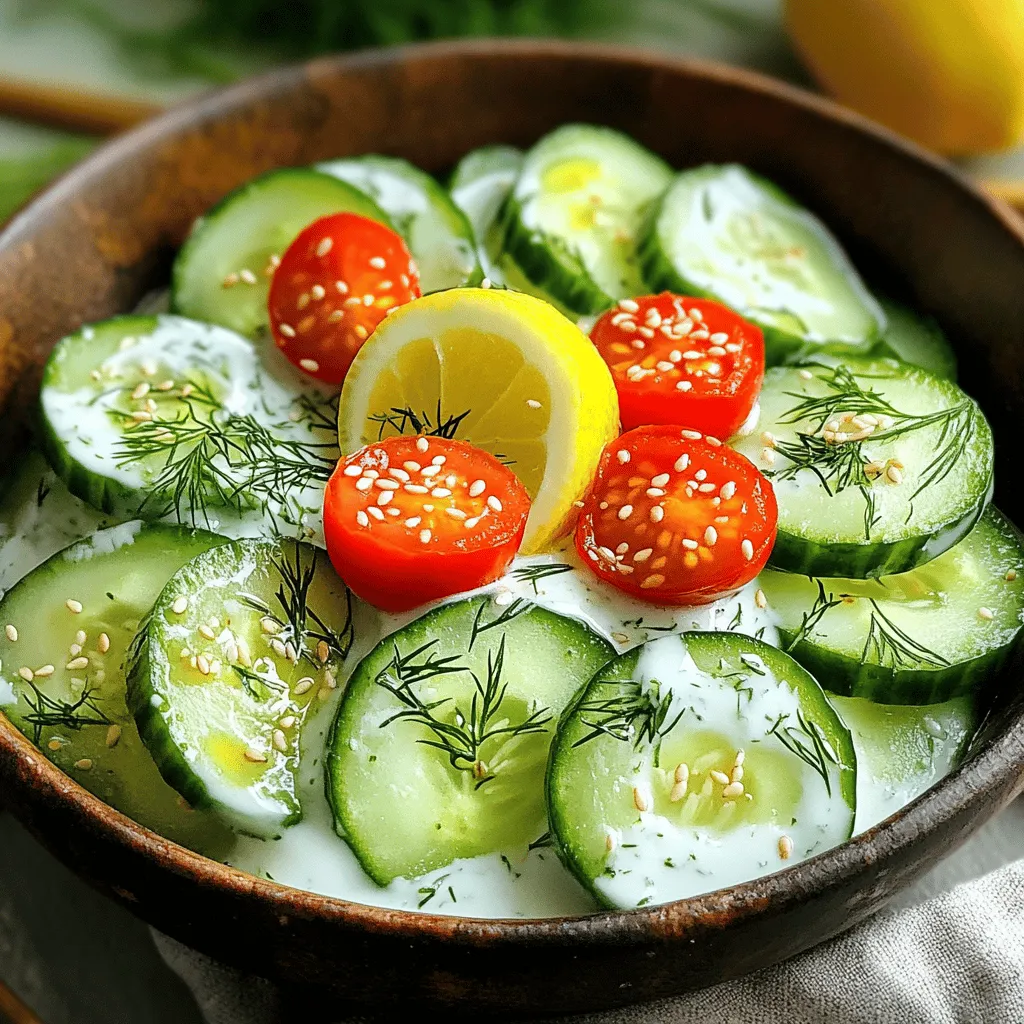
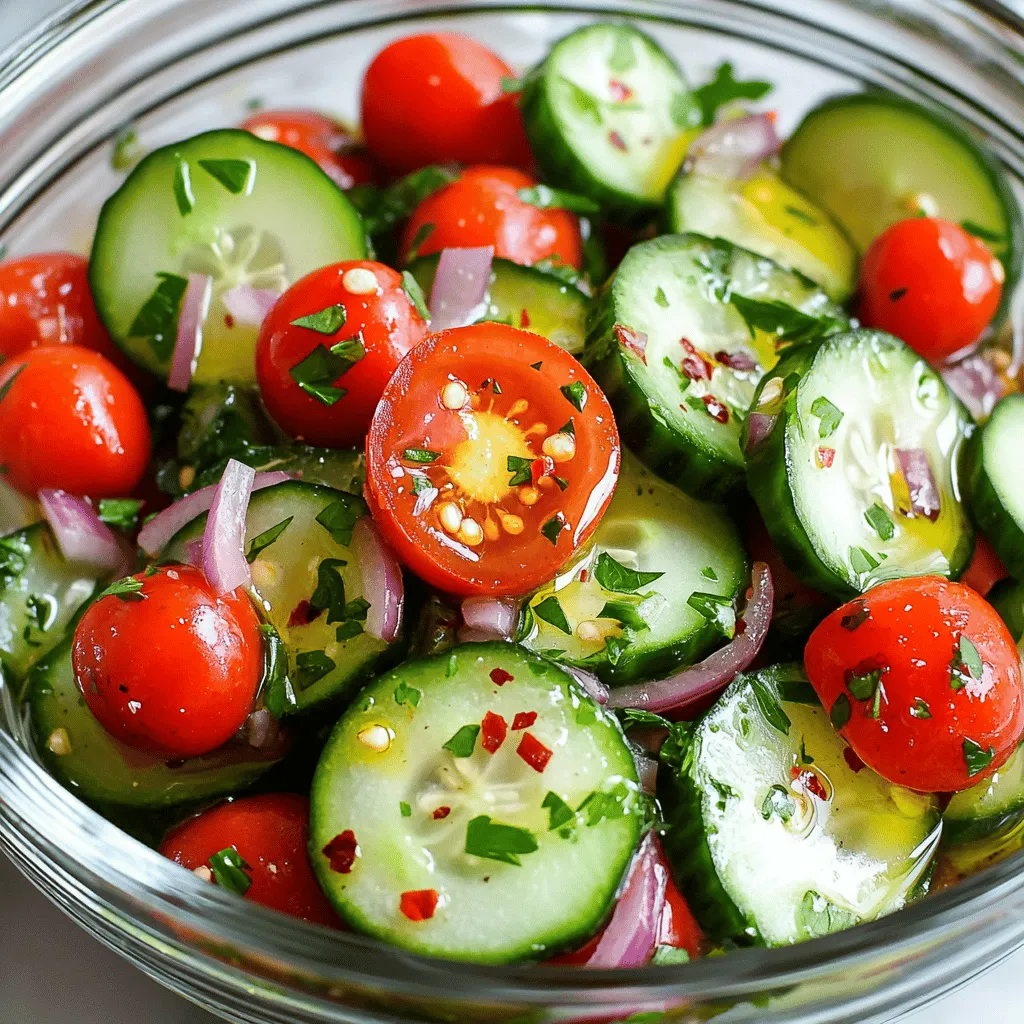
Looking for a refreshing summer dish that’s quick to make? This Creamy Cucumber Salad is your answer! With crisp cucumbers,

Are you ready to spread some holiday cheer? These Peppermint Chocolate Chip Cookies blend rich chocolate with festive peppermint. They

Looking for a quick, tasty meal? Try my Grilled Ranch Garlic Parmesan Chicken Skewers! This easy recipe combines juicy chicken

If you love garlic and cheese, you’re in for a treat! This Cheesy Garlic Bread recipe is both easy and

Get ready to scare up some fun with my Spooky Halloween Snack Mix! This tasty treat combines sweet and salty

Get ready for a spooky treat! My Halloween Chex Mix recipe packs tons of fun and flavor. You can whip
