Skip to content
DisclaimerTerms Of UseGDPR PolicyCookie Policy

lazychefmagic

  • Home
  • Drinks
  • Appetizers
  • Dinner
  • Dessert
  • About
  • Contact
  • Privacy Policy
DisclaimerTerms Of UseGDPR PolicyCookie Policy

Amanda

- 200g fettuccine pasta - 150g shrimp, peeled and deveined - 150g scallops - 1 cup heavy cream - 1 tablespoon olive oil - 2 cloves garlic, minced - 1/2 teaspoon red pepper flakes - 1/2 cup cherry tomatoes, halved - 1/4 cup fresh parsley, chopped - 1/2 teaspoon lemon zest - Salt and pepper to taste - Grated Parmesan cheese for garnish The main ingredients create a rich and creamy dish. Fettuccine blends well with the seafood. Shrimp and scallops provide a sweet and delicate taste. The heavy cream makes the sauce smooth and luscious. Garlic adds aroma, while red pepper flakes give a gentle heat. - 1/2 cup white wine - 1 teaspoon Italian seasoning - 1/4 cup green peas These optional ingredients can elevate your dish. White wine adds depth and brightness. Italian seasoning brings a mix of herbs. Green peas add sweetness and color. - Extra parsley for freshness - Lemon wedges for a citrus kick - Crushed red pepper flakes for heat Garnishes make the dish visually appealing. Fresh parsley brightens the plate. Lemon wedges add a zesty touch. Crushed red pepper flakes let diners adjust the heat. For a full recipe, you can refer to the Ocean Delight Creamy Seafood Pasta. Start by boiling water in a large pot. Add a generous amount of salt to the water. Once it boils, add 200g of fettuccine pasta. Cook it for about 8-10 minutes. You want it to be al dente, which means it should have a slight bite. After cooking, drain the pasta. Save 1/2 cup of the pasta water for later use. Grab a large skillet and heat 1 tablespoon of olive oil over medium heat. Add 2 cloves of minced garlic and 1/2 teaspoon of red pepper flakes. Sauté these for about 30 seconds until fragrant. Next, add 150g of shrimp and 150g of scallops to the skillet. Cook them for 2-3 minutes on each side. The shrimp should turn pink, and the scallops should look golden. Once done, take them out and set them on a plate to keep warm. In the same skillet, pour in 1 cup of heavy cream. Bring it to a gentle simmer. Stir in 1/2 teaspoon of lemon zest. Let the sauce cook for 2-3 minutes while stirring. You want it to thicken a bit, enough to coat the back of a spoon. Now, add the cooked fettuccine, sautéed shrimp, scallops, and 1/2 cup of halved cherry tomatoes to the creamy sauce. Toss everything gently. If the sauce is too thick, add the reserved pasta water a little at a time until it reaches your desired creaminess. Taste your pasta. Season it with salt and pepper to your liking. Remove the skillet from the heat. Sprinkle fresh chopped parsley on top for a pop of color. Serve the creamy seafood pasta in bowls. For extra flavor, add grated Parmesan cheese on each serving. Enjoy your meal! For the full recipe, check the earlier section. To cook seafood well, freshness is key. Always buy seafood that smells like the ocean. When cooking shrimp, look for a bright pink color. For scallops, a golden crust shows they are ready. Avoid overcrowding the pan, as this can lead to steaming instead of searing. Cook shrimp for 2-3 minutes per side. Scallops need about the same time. Use a hot skillet with oil to get a great sear. To make a creamy sauce, use heavy cream. Start with a gentle simmer. Stir in lemon zest for brightness. If the sauce is too thick, add some reserved pasta water. This helps thin it out while keeping flavor. Mix everything carefully to coat the pasta and seafood. The right creaminess makes each bite rich and satisfying. Store leftovers in an airtight container. Keep them in the fridge for up to 2 days. Reheat gently on the stove over low heat. Add a splash of water or cream to restore the sauce. Avoid the microwave if you want to keep the cream nice. Enjoy your creamy seafood pasta again with these tips. For the full recipe, check out the details included earlier. {{image_4}} You can use many types of seafood for this dish. Shrimp and scallops are great, but don’t stop there! You can also try: - Crab meat - Mussels - Clams - Lobster Using a mix of seafood adds flavor and texture. Each kind brings its unique taste. If you want a vegetarian option, skip the seafood. Instead, use: - Grilled zucchini - Sliced mushrooms - Fresh spinach - Artichoke hearts These ingredients add depth and flavor. You can also add plant-based cream for richness. Adjusting the spice level is easy! If you like it mild, use less red pepper flakes. For more heat, add: - Fresh chopped chili - Cayenne pepper - A dash of hot sauce Start with a little, taste, and add more if needed. Balancing flavors makes this dish even better! To store leftover creamy seafood pasta, place it in an airtight container. Make sure to cool the pasta to room temperature first. This helps keep the sauce creamy and fresh. Store the container in the fridge for up to three days. If you think you won't eat it soon, consider freezing it. When you’re ready to eat your leftovers, reheat them carefully. Use a skillet over low heat to warm the pasta gently. Add a splash of water or cream to help bring back the sauce's creaminess. Stir often to prevent sticking. You can also microwave it in short bursts, stirring in between, to keep it moist. If you decide to freeze your creamy seafood pasta, portion it out into smaller containers. This makes it easier to thaw only what you need. Wrap the containers tightly to prevent freezer burn. When you want to eat it, move the container to the fridge the night before. Let it thaw slowly. Then, reheat it on the stove or in the microwave as mentioned before. I recommend using fettuccine for creamy seafood pasta. Its flat shape holds sauce well. You can also try linguine or tagliatelle for a similar effect. Each pasta type adds a unique texture to the dish. Yes, you can use frozen seafood. Just thaw it before cooking. This makes it easy to prepare. Frozen shrimp or scallops work well in this dish. Make sure to pat them dry to avoid excess moisture in your sauce. To make it healthier, try these tips: - Use whole wheat pasta for added fiber. - Swap heavy cream for a lighter option, like Greek yogurt. - Add more vegetables, such as spinach or bell peppers. These changes keep the flavors without losing enjoyment. Yes, you can make the sauce dairy-free. Use coconut milk or almond milk instead of heavy cream. These alternatives add a nice creaminess. You can also add nutritional yeast for a cheesy flavor without dairy. This dish goes well with several side items: - A fresh green salad adds crunch and balance. - Garlic bread is great for soaking up sauce. - Steamed vegetables bring color and nutrients. These sides enhance your meal while keeping it light. For the full recipe, check out the Ocean Delight Creamy Seafood Pasta . In this post, we covered the key ingredients for creamy seafood pasta. We discussed cooking tips, making a rich sauce, and serving it perfectly. I shared variations, such as vegetarian options, and storage tips for leftovers. Creating this dish is easy and rewarding. With these steps, you can impress anyone at your table. Dive into the kitchen and let your cooking skills shine! Enjoy your creamy seafood pasta, and have fun experimenting!

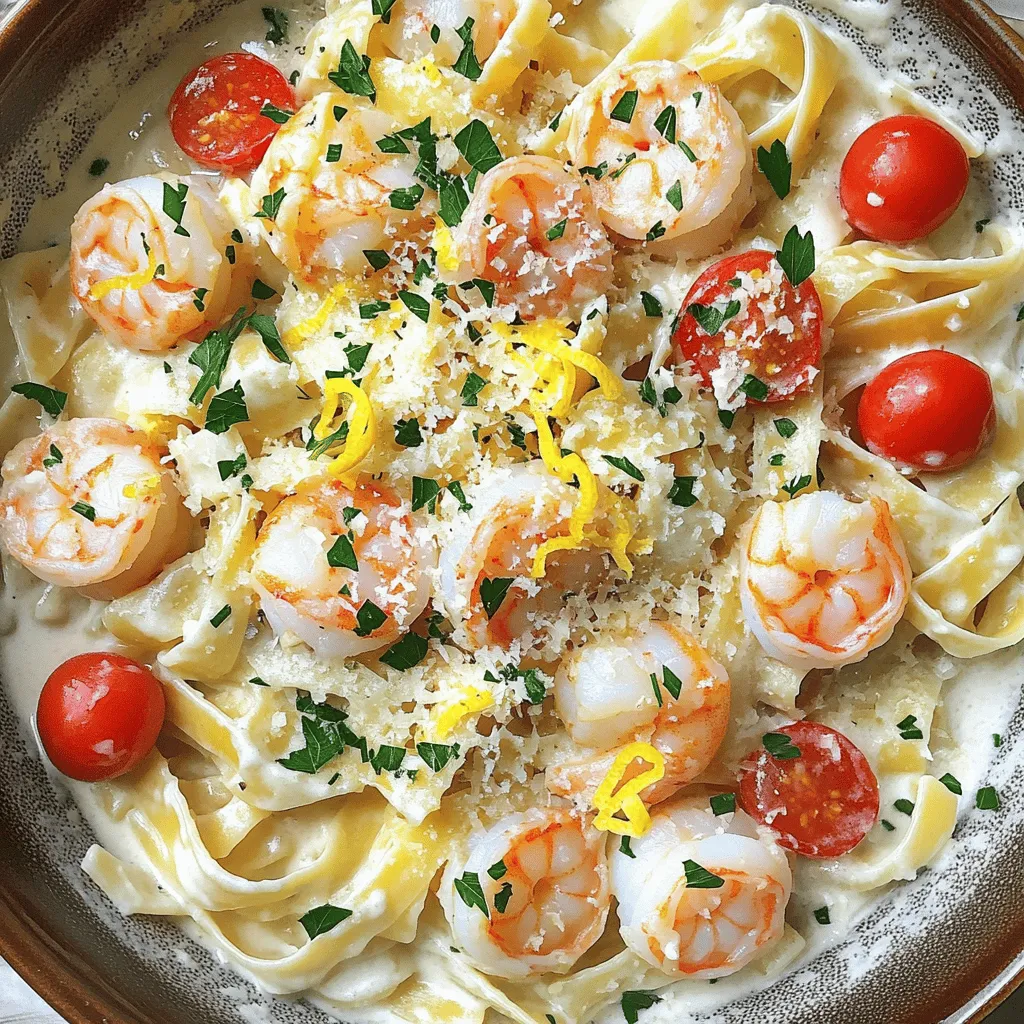
Creamy Seafood Pasta Savory and Quick Meal Recipe

Looking for a quick and savory dinner? This Creamy Seafood Pasta recipe is perfect for you. In just a few

- 12 large sea scallops, cleaned and dried - 4 tablespoons unsalted butter, melted - 4 cloves garlic, minced - 1 tablespoon fresh parsley, chopped - 1 tablespoon lemon juice - Zest of 1 lemon - 1/2 teaspoon red pepper flakes (optional) - Salt and pepper to taste - Breadcrumbs (optional for topping) Gathering the right ingredients is key. Start with quality sea scallops. Choose 12 large ones. Make sure they are clean and dry. This helps them bake evenly. Next, melt 4 tablespoons of unsalted butter. This adds rich flavor. Mince 4 cloves of fresh garlic finely. You want that garlic to blend well. Chop 1 tablespoon of fresh parsley for a touch of color. Squeeze 1 tablespoon of lemon juice for brightness. Don't forget to zest 1 lemon too. The zest boosts the lemon flavor. If you like heat, add 1/2 teaspoon of red pepper flakes. Adjust salt and pepper to your taste. Breadcrumbs are optional. They add a nice crunchy topping. These ingredients create a lovely and savory dish. You can find the Full Recipe for detailed steps and tips. - Preheat oven to 375°F (190°C). - Prepare baking dish with light greasing. First, set your oven to preheat. This step ensures your scallops cook evenly. While the oven heats, grab your baking dish. A little grease on the bottom helps prevent sticking. - Combine melted butter, garlic, parsley, lemon juice, zest, and seasonings. - Whisk until smooth and combined. Next, melt the butter in a bowl. I like to use unsalted butter for better control of flavor. Add minced garlic, chopped parsley, lemon juice, and zest. You can add red pepper flakes if you want some heat. Whisk it all together until smooth. The smell will be amazing! - Dry scallops thoroughly. - Arrange in a single layer in the baking dish. - Drizzle garlic butter mixture over scallops. Now, take your scallops and dry them well with a towel. This step is key to getting that nice sear and texture. Lay the scallops in a single layer in your greased dish. Drizzle the garlic butter mixture generously over them. Every scallop deserves a good coat! - Optional: Sprinkle breadcrumbs on top. - Bake for 12-15 minutes until opaque. - Optional: Broil for 2-3 minutes for a golden finish. If you want a crunchy top, sprinkle some breadcrumbs over the scallops. Then, pop them in the oven for about 12 to 15 minutes. They are done when they look opaque and firm. For a golden finish, switch on the broiler for a few minutes. Just keep an eye on them; you don’t want to burn the top! Enjoy your Garlic Butter Baked Scallops, a dish that's simple yet full of flavor. For the full recipe, check the section above. To get the best flavor and texture, always dry your scallops before cooking. This step removes excess moisture. If scallops are wet, they won't brown properly. Use a paper towel to pat them dry thoroughly. When baking, look for signs of doneness. Scallops should turn opaque and feel firm. They usually take about 12-15 minutes at 375°F (190°C). You can add more flavor to your scallops. Fresh herbs like thyme or basil can elevate the dish. Spices such as paprika or dill also work well. Mix in a touch of Parmesan cheese for a rich taste. Experiment with different types of butter. Garlic herb butter or lemon butter can bring unique flavors. Garnishing makes your dish visually appealing. Fresh parsley or chives add a pop of color. Lemon wedges not only look great but add fresh zest when squeezed. Serve scallops on a bed of greens or with rice for a stunning plate. A sprinkle of paprika can add color and enhance the look. {{image_4}} You can make garlic butter baked scallops even more delicious by adding cheese. Try a sprinkle of Parmesan or Gruyère on top. This will bring a creamy texture and rich flavor. Another fun twist is to use different citrus juices. You can swap lemon juice for lime or orange juice. This change adds a bright taste to the dish. If you need a gluten-free option, use gluten-free breadcrumbs. They work just as well as regular ones. You can also skip the breadcrumbs if you want a lighter dish. For a dairy-free version, replace the butter with olive oil or a dairy-free spread. This keeps the dish tasty while meeting your dietary needs. To keep your garlic butter baked scallops fresh, store them properly. First, let the scallops cool to room temperature. Then, use these best practices: - Place the scallops in an airtight container. - If you have extra garlic butter, pour it over the scallops. - Store in the fridge for up to 2 days. Using glass or BPA-free plastic containers works best for storage. These materials help keep the scallops fresh and safe. Reheating scallops needs care to avoid overcooking them. Here’s how to do it right: - Use the oven: Preheat it to 350°F (175°C). Place scallops in a baking dish and cover with foil. Heat for about 10 minutes. - Use the microwave: Place scallops on a microwave-safe plate. Heat in short bursts of 30 seconds, checking often. For the best taste, enjoy leftovers as is, or add them to pasta or salads. This way, you can savor the flavors of garlic butter baked scallops again! Yes, you can use frozen scallops. First, thaw them safely. Place them in the fridge overnight or run them under cold water for about 30 minutes. After thawing, make sure to pat them dry with a paper towel. Drying helps them sear well and prevents excess water in your dish. Garlic Butter Baked Scallops go well with many sides. Here are some great options: - Creamy mashed potatoes - Lightly seasoned rice - Steamed asparagus - Fresh garden salad - Garlic bread for a crunchy contrast These sides balance the rich flavors of the scallops and create a full meal. Perfectly cooked scallops should look opaque and firm. They will feel slightly springy to the touch. If they are slightly translucent, they need more time. Always watch them closely to avoid overcooking, which can make them tough. For detailed instructions on making Garlic Butter Baked Scallops, check out the [Full Recipe]. This blog post covered everything you need to make delicious garlic butter baked scallops. We discussed the important ingredients, step-by-step instructions, tips for perfecting your dish, and various serving ideas. Now, you're ready to impress your guests or enjoy a tasty meal at home. Remember, the key is in the details. Follow these steps, and your scallops will turn out amazing. Enjoy your cooking adventure!

Garlic Butter Baked Scallops Savory and Simple Dish

If you’re craving a dish that’s both savory and simple, Garlic Butter Baked Scallops are perfect for you! This dish

- Sweet potatoes - Andouille sausage - Vegetables (onion, red bell pepper, garlic) - Spices (smoked paprika, cayenne pepper, salt, pepper) - Olive oil - Garnish (fresh parsley) Choosing fresh ingredients makes a big difference. Look for sweet potatoes that feel heavy and firm. They should have smooth skin. Avoid any with dark spots or wrinkles. For the Andouille sausage, check the label for quality. A good sausage should have a spicy, smoky smell. Spice tolerance varies by person. Adjust the cayenne pepper to fit your taste. If you like it mild, start with less. You can always add more later. Always use fresh spices if possible, as they give the best flavor. Using high-quality olive oil enhances the dish's richness. Look for extra virgin olive oil for a deeper taste. Fresh parsley adds a nice touch at the end. It makes the dish look great and adds a fresh flavor. For the full recipe, check out the details above. - Start by peeling the sweet potatoes. Use a sharp peeler for ease. - Cut the sweet potatoes into ½-inch dice. Keep them uniform for even cooking. - Slice the Andouille sausage into rounds. This helps it brown nicely. - Chop the onion and red bell pepper. Mince the garlic as well. - Heat a large skillet over medium heat. Add olive oil and let it shimmer. - Toss in the diced sweet potatoes. Sauté them for about 10 minutes. Stir often until they turn golden. - Once the sweet potatoes soften, push them to one side. Add the sliced sausage to the other side. Cook for 5-7 minutes until browned. - Mix in the chopped onion, bell pepper, and garlic. Stir well to combine everything evenly. - Sprinkle smoked paprika and cayenne pepper over the mix. Stir thoroughly for even flavor. - Cook for another 5-7 minutes. Make sure all veggies are tender and heated. - Season with salt and pepper to taste. Toss everything to ensure even seasoning. - Remove from heat and let it sit for a minute. This step helps the flavors meld beautifully. For the full recipe, check the earlier section. Enjoy your cooking! For perfect sweet potatoes, cut them into even ½-inch dice. This way, they cook evenly. Sauté them in hot olive oil until they soften. Look for a light golden color. This shows they are ready. For the sausage, slice it thinly. This helps it brown nicely. Cook it separately in the skillet for about 5-7 minutes. Stir it gently to get all sides browned. Pair your dish with fresh greens or a simple salad. A light vinaigrette goes well. You can also serve it with bread to soak up juices. For drinks, a cold iced tea or lemonade works best. When you serve it, use a large platter. It looks great when you spread everything out. Garnish with fresh parsley for a pop of color. To save time, peel and dice sweet potatoes the night before. Keep them in water to prevent browning. You can also slice the sausage and chop veggies ahead of time. This cuts down on prep time. For meal prep, cook a double batch of this dish. Store leftovers in the fridge for easy lunches or dinners later. {{image_4}} You can easily swap out the Andouille sausage for other types. Try chicken sausage or turkey sausage for a lighter option. If you want a plant-based choice, use tempeh or mushrooms for added texture. You can also include different vegetables. Zucchini, carrots, or even kale can add great flavor and color. You can adjust the spice levels to fit your taste. If you like it mild, skip the cayenne pepper. Instead, try sweet paprika for a gentle flavor. On the other hand, if you crave heat, add more cayenne or even some chili powder. To boost flavor, mix in herbs like thyme or rosemary. Fresh herbs can bring a fresh twist to the dish. To make this dish vegan or vegetarian, simply omit the sausage. Add more veggies and some beans for protein. Black beans or chickpeas work great. For gluten-free options, this recipe is already gluten-free. Just check the sausage label to ensure it meets your needs. Enjoy the dish without worrying about gluten! To keep your sweet potatoes and Andouille sausage dish fresh, store leftovers in an airtight container. This will help keep out moisture and odors. Place the container in the fridge. This dish lasts about 3-4 days in the refrigerator. Always check for any signs of spoilage before eating. You can reheat this dish in several ways: - Microwave: Place a serving in a microwave-safe dish. Cover it with a microwave-safe lid or wrap. Heat for 1-2 minutes, stirring halfway through. This method keeps the flavors intact. - Stovetop: Heat a skillet over medium heat. Add a splash of olive oil to prevent sticking. Add the leftover dish and stir occasionally until warmed through. This method helps maintain texture better than the microwave. If you want to save some for later, you can freeze this dish. Here are some tips: - Tips for freezing: Allow the dish to cool completely first. Then, transfer it to a freezer-safe container or bag. Make sure to remove as much air as possible to prevent freezer burn. Label the container with the date before freezing. - Thawing and reheating frozen portions: To enjoy later, take the container out of the freezer. Thaw it in the fridge overnight or use the microwave on the defrost setting. Reheat using one of the methods above to restore the great taste of the dish. For the full recipe, check out the details above. How do I know when sweet potatoes are cooked properly? You can tell sweet potatoes are cooked when they are soft and tender. A fork should slide in easily. This usually takes about 15 minutes of cooking. Keep an eye on them to avoid overcooking. Can I make this dish ahead of time? Yes, you can make this dish ahead of time. Cook it fully and let it cool. Store it in the fridge for up to three days. Reheat it gently on the stove before serving. This enhances the flavors too. What is Andouille sausage and how is it different from other sausages? Andouille sausage is a smoked sausage made from pork. It has a spicy and smoky flavor. This sausage is key to Cajun and Creole dishes. Unlike other sausages, it has a coarser texture and distinct seasoning. Can I use other types of potatoes for this recipe? You can use other types of potatoes, but the taste will change. Russet or Yukon Gold potatoes work well. They will give a different texture and flavor, but may not be as sweet. How can I adjust the spiciness of this dish? To adjust spiciness, change the amount of cayenne pepper. Start with less, then add more if needed. Taste as you go to find your perfect heat level. You can also use milder sausage for less heat. What are some good sides to pair with Sweet Potatoes & Andouille Sausage? Good sides include a fresh green salad or steamed broccoli. Rice or cornbread also pair nicely. These sides balance the meal and add more color to your plate. This recipe combines sweet potatoes and Andouille sausage for a tasty meal. We covered ingredients, cooking steps, and helpful tips for the best results. Remember to choose fresh ingredients for great taste. Feel free to adjust spices to suit your taste. Use this guide to make a delicious dish that fits your preferences. Enjoy your cooking and sharing this meal with others!

Sweet Potatoes & Andouille Sausage Flavorful Dish

Looking for a hearty dish that packs flavor without hours of effort? My Sweet Potatoes & Andouille Sausage recipe is

To make a Tuscan grilled rib eye steak, gather these ingredients: - 2 rib eye steaks (approximately 1 inch thick) - 4 cloves garlic, finely minced - 2 tablespoons fresh rosemary, finely chopped - 2 tablespoons fresh thyme, finely chopped - 1 tablespoon extra virgin olive oil - 1 teaspoon fresh lemon zest - Sea salt and freshly ground black pepper, to taste - 1 cup cherry tomatoes, halved - 1/4 cup balsamic vinegar - Fresh arugula, for serving Fresh herbs bring the dish to life. Rosemary and thyme add depth. They create a fragrant blend that enhances the rich flavor of the rib eye. Fresh herbs also provide a pop of color. This makes your dish not just tasty, but also visually appealing. Using dried herbs lacks the same brightness. Fresh herbs keep your meal vibrant and fresh. I recommend using extra virgin olive oil for this recipe. It adds a fruity note that blends well with the herbs. Season your steak generously with sea salt and black pepper. These basics enhance the natural flavors. If you want to experiment, consider adding herbs like oregano or sage. Each adds its unique twist to the flavor profile. For the best taste, always use high-quality ingredients. Freshness matters in every bite. Start by making the herb paste. In a small bowl, mix together: - 4 cloves garlic, finely minced - 2 tablespoons fresh rosemary, finely chopped - 2 tablespoons fresh thyme, finely chopped - 1 tablespoon extra virgin olive oil - 1 teaspoon fresh lemon zest - Sea salt and freshly ground black pepper, to taste Stir well until it forms a fragrant mix. Take your rib eye steaks and rub the herb paste all over them. Make sure they are well coated. Let the steaks sit at room temperature for about 30 minutes. This step helps the flavors soak in and makes the steak taste great. While your steaks marinate, it's time to prepare the grill. Preheat your grill to medium-high heat. Make sure it gets hot enough to cook the steaks evenly. This step is key to achieving that perfect sear. A well-heated grill gives the meat a nice crust while keeping it juicy inside. Once the grill is hot, place your marinated rib eye steaks on the grates. Cook them for about 4-5 minutes on one side. This timing is for medium-rare doneness. After that, flip the steaks over and cook for another 4 minutes. If you like your steak cooked more, adjust the time accordingly. After grilling, take the steaks off the grill and let them rest on a cutting board for about 5 minutes. Resting is important! It allows the juices to settle, making each bite juicy and tasty. Now, slice the steaks against the grain into thick pieces. Serve them over a bed of fresh arugula and top with the balsamic-marinated cherry tomatoes for added flavor and color. Enjoy your delicious Tuscan Grilled Rib Eye Steak! For the complete process, check the Full Recipe. To cook the rib eye steak just right, use a meat thermometer. Aim for 130°F for medium-rare. Keep in mind that cooking times vary with grill heat. I cook the steak for about 4-5 minutes on one side. After flipping, cook for 4 more minutes. Let the steak rest for 5 minutes after grilling. This step helps the juices settle back in. Flavor is key with rib eye steaks. Use fresh herbs like rosemary and thyme for the best taste. I love making a herb paste with garlic, olive oil, and lemon zest. Rub this paste all over the steak. It adds depth and freshness. For a sweet touch, toss cherry tomatoes in balsamic vinegar. This mix brightens the dish and adds color. Many cooks make the mistake of skipping the rest period. Resting helps keep the steak juicy. Another mistake is not preheating the grill enough. A hot grill gives you those beautiful sear marks. Lastly, don’t be shy with seasoning. A good amount of sea salt and black pepper makes all the difference. For the full recipe, check the Tuscan Herb Grilled Rib Eye Steak. {{image_4}} If you want to switch things up, try different spice blends. A simple mix of smoked paprika and cumin adds a nice depth. You can also use a blend of Italian herbs, like oregano and basil, to boost those Tuscan flavors. For heat, add crushed red pepper. Each blend brings a unique taste to your rib eye. Choosing the right veggies can enhance your meal. Grilled zucchini and bell peppers are great options. They add color and flavor. You can also try sautéed mushrooms for a rich taste. Roasted asparagus pairs well, too. These vegetables complement the juicy steak and make your plate pop. Not everyone has a grill, and that's okay! You can cook rib eye in a cast-iron skillet on the stove. Heat the skillet until it's hot, then sear the steak for 4-5 minutes on each side. You can also broil it in the oven for a quick and flavorful meal. Each method offers a delicious way to enjoy your Tuscan grilled rib eye steak. For the full recipe, check out the detailed steps in the earlier section. After your meal, let any leftover steak cool down. Wrap it tightly in plastic wrap or foil. You can also place it in an airtight container. Store it in the fridge for up to three days. This keeps it fresh and tasty for later. When you're ready to enjoy the leftovers, there are a few ways to reheat the steak. The best method is to use a skillet. Heat it on medium heat and add a splash of olive oil. Place the steak in the skillet and warm it for about 2-3 minutes on each side. You can also use the oven. Preheat it to 250°F (120°C) and place the steak on a baking sheet. Heat it for about 10-15 minutes. This keeps the steak juicy without overcooking it. If you want to keep the steak longer, freezing is a great option. First, wrap it tightly in plastic wrap. Then, place it in a freezer-safe bag or container. Make sure to remove as much air as possible. You can freeze the steak for up to three months. When you’re ready to eat it, thaw it in the fridge overnight before reheating. For more details, check the Full Recipe. You can tell if the steak is perfectly grilled by using a meat thermometer. For medium-rare, the temperature should be 130°F (54°C). Press the steak gently with your finger; it should feel firm but still springy. If you don't have a thermometer, look for a nice brown crust. You want the inside to be warm and juicy. Yes, you can marinate the steak overnight. This helps the flavors soak in deeply. Just make sure to keep it in the fridge. Take it out about 30 minutes before grilling. This way, it can come to room temperature. It makes for a better cook. Tuscan Grilled Rib Eye Steak pairs well with many sides. Here are a few ideas: - Roasted vegetables, like zucchini and bell peppers - Creamy mashed potatoes or polenta - A fresh arugula salad with lemon dressing - Grilled corn on the cob - Garlic bread for that extra crunch These sides will complement the steak's rich flavors and enhance your meal's overall experience. For the full recipe, check out the complete guide! This article covered the key steps to make a great Tuscan Grilled Rib Eye Steak. We discussed the best ingredients, the marinating process, and proper grilling techniques. Fresh herbs and the right oils boost flavors. Remember to check doneness and avoid common mistakes for the best results. Explore variations with spice blends and veggies to keep things interesting. Finally, proper storage helps you enjoy leftovers later. Experiment and have fun grilling your perfect steak every time.

Tuscan Grilled Rib Eye Steak Flavorful and Juicy Dish

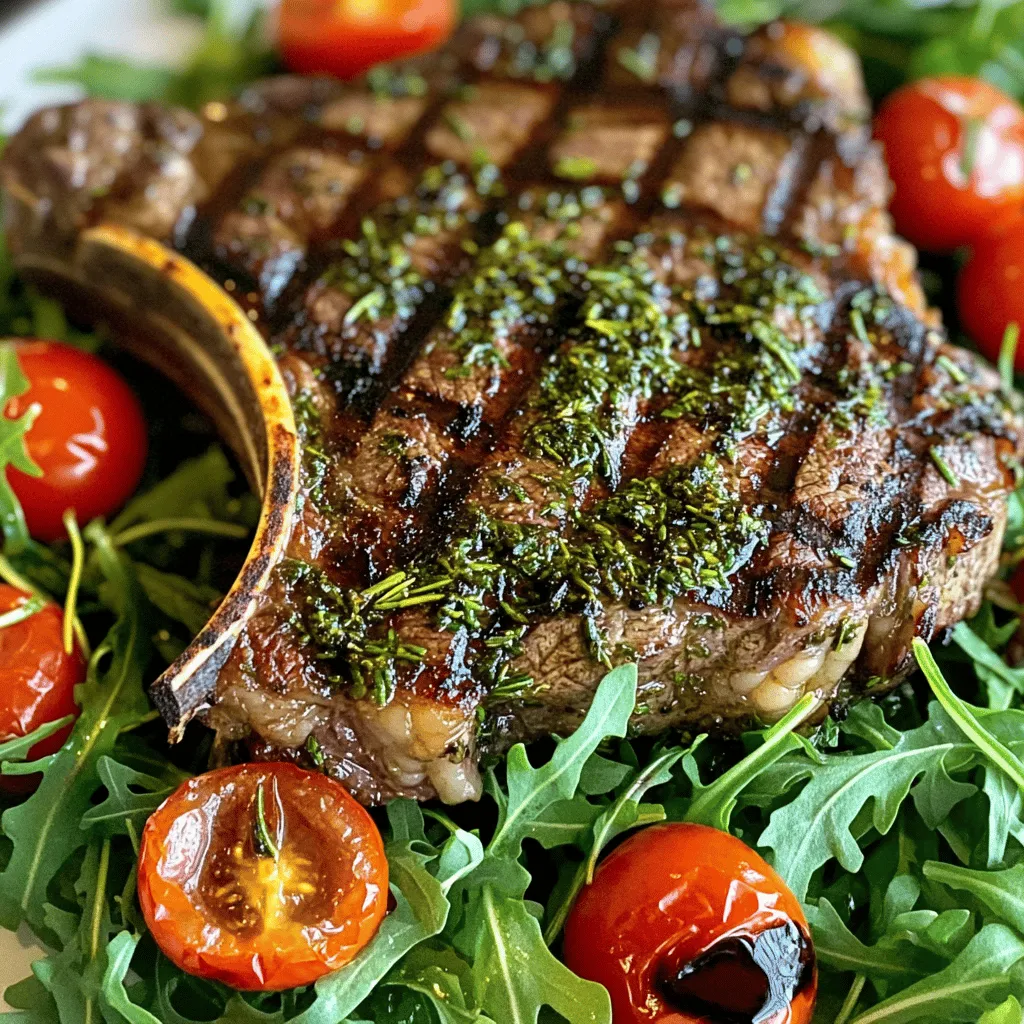
Are you ready to elevate your grilling game? The Tuscan Grilled Rib Eye Steak is a flavorful and juicy dish

To make the best sticky toffee pudding, you need a few key ingredients. These include: - 1 cup pitted Medjool dates, finely chopped - 1 teaspoon baking soda - 1 cup boiling water - 1/4 cup unsalted butter, softened to room temperature - 3/4 cup packed brown sugar - 1 large egg, at room temperature - 1 teaspoon pure vanilla extract - 1 cup all-purpose flour - 1 teaspoon baking powder - 1/2 teaspoon salt - 1/2 cup walnuts, roughly chopped (optional) - 1 cup heavy cream Each ingredient plays a role in creating that rich, moist texture and deep flavor. I often add optional ingredients to enhance the pudding. For example, chopped walnuts give a nice crunch and nutty flavor. You can also use dried fruits, like raisins or cranberries, for added sweetness. These ingredients can make your pudding even more special and unique. If you have dietary needs, you can still enjoy this treat. For a dairy-free version, use coconut oil instead of butter and almond milk instead of heavy cream. If you're gluten-free, substitute all-purpose flour with a gluten-free blend. These changes keep the flavor while catering to different diets. You can find the full recipe for sticky toffee pudding [here](#). First, gather all your ingredients to make the process smooth. Here’s what you need: - 1 cup pitted Medjool dates, finely chopped - 1 teaspoon baking soda - 1 cup boiling water - 1/4 cup unsalted butter, softened to room temperature - 3/4 cup packed brown sugar - 1 large egg, at room temperature - 1 teaspoon pure vanilla extract - 1 cup all-purpose flour - 1 teaspoon baking powder - 1/2 teaspoon salt - 1/2 cup walnuts, roughly chopped (optional) - 1 cup heavy cream Start by preheating your oven to 350°F (175°C). Grease an 8-inch square baking dish or individual ramekins with butter. This step prevents sticking and keeps your pudding intact. Now, let’s make the batter. In a medium bowl, mix the finely chopped dates with baking soda. Pour boiling water over them. Stir gently and let them soak for about 10 minutes. This softens the dates and brings out their sweetness. While the dates soak, cream together softened butter and brown sugar in a large bowl. Use a hand mixer or whisk until it’s light and fluffy. Then, mix in the egg and vanilla extract until everything blends well. Next, sift in the flour, baking powder, and salt. Stir carefully with a spatula or wooden spoon. You want to mix just until combined to keep your pudding tender. Now, fold in the soaked dates and any leftover soaking liquid. If you like walnuts, add those too. Make sure everything is evenly mixed. Transfer the batter into your greased baking dish. Smooth the top with a spatula. Place it in the preheated oven and bake for 25-30 minutes. The pudding is ready when a toothpick comes out clean or with a few moist crumbs. While the pudding bakes, prepare the sticky toffee sauce. In a medium saucepan, mix heavy cream and brown sugar over medium heat. Stir until the sugar dissolves. Let it simmer for 2-3 minutes until it thickens slightly. Once the pudding is done, take it out and cool for about 5 minutes. Drizzle the warm sticky toffee sauce over the top, allowing it to soak in. Serve it warm with more sauce and a dollop of whipped cream or a scoop of ice cream. Enjoy your delightful Sticky Toffee Pudding! For the complete process, check the Full Recipe. To get the best texture, focus on mixing. Start by creaming the butter and sugar well. This step adds air and makes the pudding fluffy. When you add flour, mix just until combined. Overmixing makes the pudding dense. The dates add moisture and sweetness, so don’t skip them. They help create a soft, sticky pudding that everyone loves. One common mistake is using cold ingredients. Always use room temperature butter and eggs. Cold ingredients can lead to uneven mixing and affect the texture. Another mistake is baking too long. Check for doneness with a toothpick. If it comes out clean, it's ready! Don’t let it dry out. Also, avoid using low-quality dates. Good dates are key to great flavor. For the sticky toffee sauce, use heavy cream and brown sugar. This combination gives the sauce its rich taste. Stir constantly over medium heat for the best results. This ensures the sugar dissolves well. Let it simmer briefly to thicken. If you want a deeper flavor, add a splash of vanilla extract. Drizzle the warm sauce over the pudding right after baking for the best sticky experience. For a full recipe, be sure to check out the Sticky Toffee Pudding Delight . {{image_4}} To make a vegan version, swap the egg for a flax egg. Mix one tablespoon of ground flaxseed with three tablespoons of water. Let it sit for a few minutes until it thickens. Use plant-based butter instead of regular butter. Choose almond or oat milk for a rich flavor. The texture remains moist and delightful. You won’t miss the dairy at all! For gluten-free sticky toffee pudding, replace regular flour with a gluten-free blend. Most blends work well, but look for one that has xanthan gum. This helps keep the pudding fluffy. You can also use almond flour, but it may change the texture slightly. Be sure to check your baking powder for gluten-free labeling. Get creative with flavors! Add a pinch of cinnamon or nutmeg for warmth. Consider including orange zest for a citrusy kick. You can also fold in chocolate chips for a decadent twist. If you love nuts, try pecans or hazelnuts instead of walnuts. Each variation brings its own charm, making every bite a new experience. To keep your sticky toffee pudding fresh, let it cool first. After cooling, place it in an airtight container. Store it in the fridge for up to three days. If you want to enjoy it later, you can also wrap it tightly in plastic wrap. When you’re ready to enjoy your pudding, take it out of the fridge. Place the pudding on a microwave-safe plate. Heat it in the microwave for about 30 seconds. Check if it’s warm enough. If not, heat it in 10-second bursts until hot. For a lovely finish, drizzle some warm sticky toffee sauce on top. If you want to keep the pudding longer, freezing is a great option. First, let the pudding cool completely. Then, wrap it tightly in plastic wrap or foil. Place it in a freezer-safe bag or container. It can stay in the freezer for up to three months. When you want to eat it, thaw it in the fridge overnight before reheating. Enjoy your delicious treat anytime! For the full recipe, check out Sticky Toffee Pudding Delight. Sticky toffee pudding is a rich dessert from England. It features a moist cake made with dates, soaked in a warm toffee sauce. The cake is soft and sweet, while the sauce adds a sticky texture. This dessert is often served with cream or ice cream. Yes, you can make sticky toffee pudding ahead of time. Bake the pudding and let it cool. Cover it well and store it in the fridge for up to three days. When ready to serve, reheat it in the oven or microwave. Prepare the toffee sauce fresh for the best flavor. Serve sticky toffee pudding warm. Drizzle the warm toffee sauce over the top. You can add a scoop of vanilla ice cream or a dollop of whipped cream to make it extra special. For a nice touch, sprinkle some chopped nuts on top. You can find sticky toffee pudding in many bakeries or dessert shops. Some grocery stores also sell pre-made versions, often in the frozen section. If you want a fresh experience, many restaurants serve this delightful dessert. For the best taste, try making it at home with the Full Recipe. This post covered sticky toffee pudding from ingredients to storage tips. You learned about key and optional ingredients, plus substitutes for dietary needs. I provided step-by-step guidance for making the pudding and shared tips for the best texture. You now have variations to try, like vegan and gluten-free options. Lastly, I shared how to store and reheat leftovers effectively. Enjoy making this delicious dessert and feel free to experiment with flavors!

Sticky Toffee Pudding Irresistible Dessert Delight

Sticky toffee pudding is a dessert that warms your heart and satisfies your sweet tooth. This rich and gooey treat

- 1.5 pounds baby potatoes, halved - 4 tablespoons unsalted butter - 4 cloves garlic, minced - 1 cup heavy cream - 1/2 cup freshly grated Parmesan cheese - Salt and freshly ground black pepper to taste - 1 tablespoon fresh parsley, finely chopped - Optional: a pinch of red pepper flakes When I make creamy garlic sauce potatoes, I love to start with baby potatoes. They are small and tender. Halving them helps them cook evenly. Next, I use unsalted butter to create a rich base for the sauce. Garlic is key here; it adds a lovely aroma and flavor. The heavy cream brings the dish to life. It makes the sauce smooth and rich. Adding freshly grated Parmesan cheese gives it a cheesy taste that you will adore. You can adjust the cheese to your liking, but I recommend using fresh for the best flavor. For seasoning, I always reach for salt and freshly ground black pepper. These bring out the taste of the potatoes and sauce perfectly. A sprinkle of fresh parsley adds color and freshness. If you like a bit of heat, toss in a pinch of red pepper flakes. This recipe is simple and perfect for sharing with friends and family. You can find the full recipe [here](Full Recipe). - First, wash the baby potatoes thoroughly. - Cut each potato in half and place them in a large pot. - Fill the pot with salted water until the potatoes are covered. - Bring the water to a boil and cook for 15-20 minutes. - Check if the potatoes are tender by piercing them with a fork. - Once cooked, drain the potatoes in a colander and set them aside. - In a large skillet, melt the unsalted butter over medium heat. - When the butter bubbles, add the minced garlic. - Sauté the garlic for 1-2 minutes until it smells great. - Be careful not to let the garlic brown, as it can taste bitter. - Lower the heat and slowly pour in the heavy cream while stirring. - Gradually add the grated Parmesan cheese, stirring until melted. - Add the drained potatoes to the skillet with the garlic cream sauce. - Gently mix the potatoes with the sauce using a spatula. - Make sure each potato half is well coated in the creamy sauce. - Season with salt and freshly ground black pepper to taste. - If you like some heat, sprinkle in a pinch of red pepper flakes. - Let the mix warm together on low heat for about 5 minutes. - Stir occasionally to help the flavors blend nicely. For the full recipe, check out the detailed instructions above. Enjoy this creamy garlic sauce potatoes dish! - Ensure potatoes are evenly coated in sauce. This gives them great flavor. - Avoid browning the garlic for a perfect flavor. Sauté it just until fragrant. - Serve in shallow bowls with extra parsley and Parmesan. This adds color and style. - Consider using a garnish of grilled herbs. Fresh herbs enhance the dish's look. - Stir continuously while adding cream to prevent scorching. This keeps the sauce smooth. - Let the sauce simmer gently for maximum flavor. A slow simmer melds the tastes perfectly. For a complete guide on making this dish, check out the Full Recipe. {{image_4}} You can easily switch up the flavor of creamy garlic sauce potatoes. Try adding different herbs, like thyme or rosemary. These herbs bring fresh tastes to the dish. You can also add cooked bacon or pancetta. This extra richness gives the potatoes a savory boost that many will love. If you want to change the cheese, Gruyère or cheddar cheese works well. Both add a unique twist to the creaminess. For those who avoid dairy, consider dairy-free alternatives. They can make this dish vegan while keeping it delicious. Looking for some heat? Add cayenne pepper to your sauce for a spicy kick. You can also include lemon zest. This fresh citrus note brightens the flavors and adds a fun twist. Each spice option allows you to customize the dish to your taste. Explore these variations to make your creamy garlic sauce potatoes even more delightful. For the full recipe, check out the Creamy Garlic Sauce Potatoes section. Store any leftovers in an airtight container in the fridge. This keeps them fresh. Enjoy them within 3 days for the best quality. The creamy texture and flavor will remain intact if stored properly. To reheat, use a skillet on low heat. This helps keep the sauce creamy and smooth. If the sauce thickens, add a splash of cream. This will bring back that rich, velvety texture. While freezing is not recommended for the best texture, you can freeze them. Place the dish in a freezer-safe container. To enjoy later, thaw it overnight in the fridge before reheating. Be aware that the cream sauce may change a bit in texture after freezing. Yes, you can use different potatoes. Yukon Gold potatoes give a rich, buttery taste. Red potatoes are waxy, and they hold their shape well. Sweet potatoes add a touch of sweetness that pairs nicely with garlic. Each type offers a unique flavor and texture. Absolutely! This dish is perfect for meal prep. You can cook the potatoes and sauce ahead of time. Just store them in an airtight container in the fridge. They stay tasty for up to three days. To make it dairy-free, swap the heavy cream for coconut cream. Use a dairy-free cheese to keep the creamy flavor. This way, you can still enjoy the dish without dairy. These potatoes pair well with many dishes. Try grilled chicken, steak, or roasted vegetables. A fresh salad also balances the rich flavors of the sauce. Yes, you can prepare the dish ahead. Just skip the final heating step. Store the potatoes and sauce together and reheat them before serving. This makes it quick and easy when you're ready to eat. For the complete recipe, check the [Full Recipe]. This recipe for creamy garlic sauce potatoes is simple and fun. You learned about the key ingredients, how to prepare them, and tips for a perfect dish. Remember to mix in your favorite herbs or cheeses for a twist. Proper storage is key to enjoy every bite later. I hope you try this recipe and impress your family. These creamy potatoes will surely be a hit on your dinner table. Enjoy every creamy, garlicky bite!

Creamy Garlic Sauce Potatoes Delightful and Easy Dish

Ready to elevate your potato game? These Creamy Garlic Sauce Potatoes are both delightful and easy to make. With just

- 1 pound large shrimp, peeled and deveined - 1 cup panko breadcrumbs - 4 cloves garlic, finely minced - 1/4 cup freshly grated Parmesan cheese - 2 tablespoons fresh parsley, meticulously chopped - 1 teaspoon smoked paprika - 1/2 teaspoon sea salt - 1/4 teaspoon freshly cracked black pepper - 1/4 cup extra-virgin olive oil - Zest of 1 large lemon Gathering these ingredients is simple. Start with fresh, large shrimp. Look for shrimp that are firm and have a slight ocean smell. Panko breadcrumbs are key for crispiness. They give the shrimp that satisfying crunch. Fresh garlic adds flavor, and parmesan cheese brings a lovely umami touch. Chopped parsley brightens the dish. It adds a hint of color and freshness. Smoked paprika gives depth and a subtle smokiness that enhances the overall taste. Sea salt and black pepper are must-haves for seasoning. Extra-virgin olive oil helps the breadcrumbs stick and adds rich flavor. Finally, lemon zest gives a burst of citrus that brightens the shrimp. This recipe is all about balance and flavor. Each ingredient plays a vital role, making the dish both tasty and simple. For the full recipe, check the details above. - Preheat your oven to 400°F (200°C). - Line a baking sheet with parchment paper. This step helps prevent sticking and makes cleanup easy. - In a large bowl, combine: - 1 cup panko breadcrumbs - 4 cloves garlic, finely minced - 1/4 cup freshly grated Parmesan cheese - 2 tablespoons fresh parsley, meticulously chopped - 1 teaspoon smoked paprika - 1/2 teaspoon sea salt - 1/4 teaspoon freshly cracked black pepper Stir these ingredients together until they mix well. The panko gives a great crunch, while the garlic and cheese add flavor. - Take 1 pound of large shrimp, peeled and deveined. - In a separate bowl, toss the shrimp with: - 1/4 cup extra-virgin olive oil - Zest of 1 large lemon This step ensures every shrimp gets a nice flavor boost. - Next, coat each shrimp with the breadcrumb mixture. Press them gently to ensure a good layer sticks. - Arrange the coated shrimp on your prepared baking sheet. Make sure they are spaced out well. - Bake for 12-15 minutes. Keep an eye on them. They are done when they turn pink and the breadcrumbs are golden. For a full recipe, check out the detailed steps above. Enjoy your crispy garlic shrimp! To get that perfect crunch, use panko breadcrumbs. They are lighter than regular ones. This helps create a crispy crust. Here are some best practices: - Use fresh panko: Old breadcrumbs can lose their crispness. Make sure they are fresh for the best results. - Spray with oil: A light spray of oil on the breadcrumbs helps them brown nicely. For an even coating on the shrimp, follow these tips: - Dry shrimp well: Pat them dry with a paper towel. Less moisture helps the coating stick. - Press firmly: When coating, press the shrimp into the breadcrumbs. This helps them stick better. To tell when shrimp are done, look for the color. Cooked shrimp turn pink and opaque. They should also have a nice curve. If they are curled and firm, they are ready. Adjust the bake time based on shrimp size: - Smaller shrimp: Bake for 10-12 minutes. - Larger shrimp: Bake for 12-15 minutes. Keep an eye on them. Overcooked shrimp can get tough. For a great presentation, serve the garlic shrimp on a nice platter. Add lemon wedges for a pop of color. A sprinkle of fresh parsley makes it look even better. Consider these condiments and sides: - Marinara sauce: A small bowl alongside the shrimp makes a great dip. - Salad: A simple green salad pairs well for a fresh touch. Check out the Full Recipe for more detailed instructions and tips! {{image_4}} You can easily add more flavor to your shrimp. Try using fresh herbs like basil or thyme. A pinch of cayenne pepper can give a nice kick too. Instead of Parmesan cheese, consider using feta or nutritional yeast. Both options still provide a great taste without losing the dish's essence. For gluten-free versions, swap out regular breadcrumbs for gluten-free panko. Many brands offer great options that still give a nice crunch. If you want to cut back on calories, you can use less oil or bake without breadcrumbs. The shrimp will still be tasty, just a bit lighter. Want to try something new? You can use an air fryer for crispy garlic shrimp. It cuts down on cooking time and uses less oil. Simply set your air fryer to 375°F and cook for about 8-10 minutes. If you prefer stovetop cooking, heat a skillet over medium-high heat. Add a bit of oil and cook the shrimp until they turn pink. This method gives you a nice sear and keeps the shrimp juicy. For the full recipe, check out the complete instructions. To keep your leftover crispy garlic shrimp fresh, store them in the fridge. Place the shrimp in an airtight container. This helps lock in the taste and texture. I recommend using glass or plastic containers with tight-sealing lids. This way, your shrimp stay crispy for a couple of days. If you want to save your crispy garlic shrimp for later, freezing is a great option. Allow the shrimp to cool completely after baking. Then, arrange them in a single layer on a baking sheet. Freeze them for about an hour. This prevents them from sticking together. After that, transfer the shrimp to a freezer-safe bag or container. Be sure to remove as much air as possible. When you're ready to eat the frozen shrimp, thaw them in the fridge overnight. For reheating, preheat your oven to 350°F (175°C). Place the shrimp on a baking sheet and heat them for about 10 minutes. This will help keep them crispy, just like fresh! If you're in a hurry, you can reheat them in the microwave, but they may lose some crispiness. Enjoy your tasty shrimp anytime! For the full recipe, check out the Oven Baked Crispy Garlic Shrimp section. To add heat, you can mix in some crushed red pepper flakes. Start with a pinch, then taste. You can also use chili powder or cayenne pepper in the breadcrumb mix. If you like more heat, increase the amount. Another option is to serve the shrimp with a spicy dipping sauce. A sriracha mayo or garlic chili sauce works well. Yes, you can use frozen shrimp! Just make sure to thaw them first. Place the frozen shrimp in the fridge overnight or run them under cold water until thawed. Pat them dry with paper towels. This helps the oil and breadcrumbs stick better. Follow the same steps in the Full Recipe for coating and baking. You can serve these shrimp with many sides. A fresh salad with mixed greens and a tangy dressing balances the meal. Roasted vegetables like asparagus or broccoli add color and nutrition. For something hearty, try garlic bread or rice. These pair nicely and soak up any extra garlic flavor. You’ve learned how to make crispy garlic shrimp with simple steps and tasty ingredients. The key is using fresh shrimp and panko breadcrumbs for the best crunch. Don’t forget the tips to keep your shrimp tender and flavorful. Try different herbs and spices to mix things up. You can even explore other cooking methods like the stove or air fryer. With the right storage, these shrimp can last, so enjoy them later! Dive into this meal and elevate your cooking game today.

Oven Baked Crispy Garlic Shrimp Tasty and Simple Dish

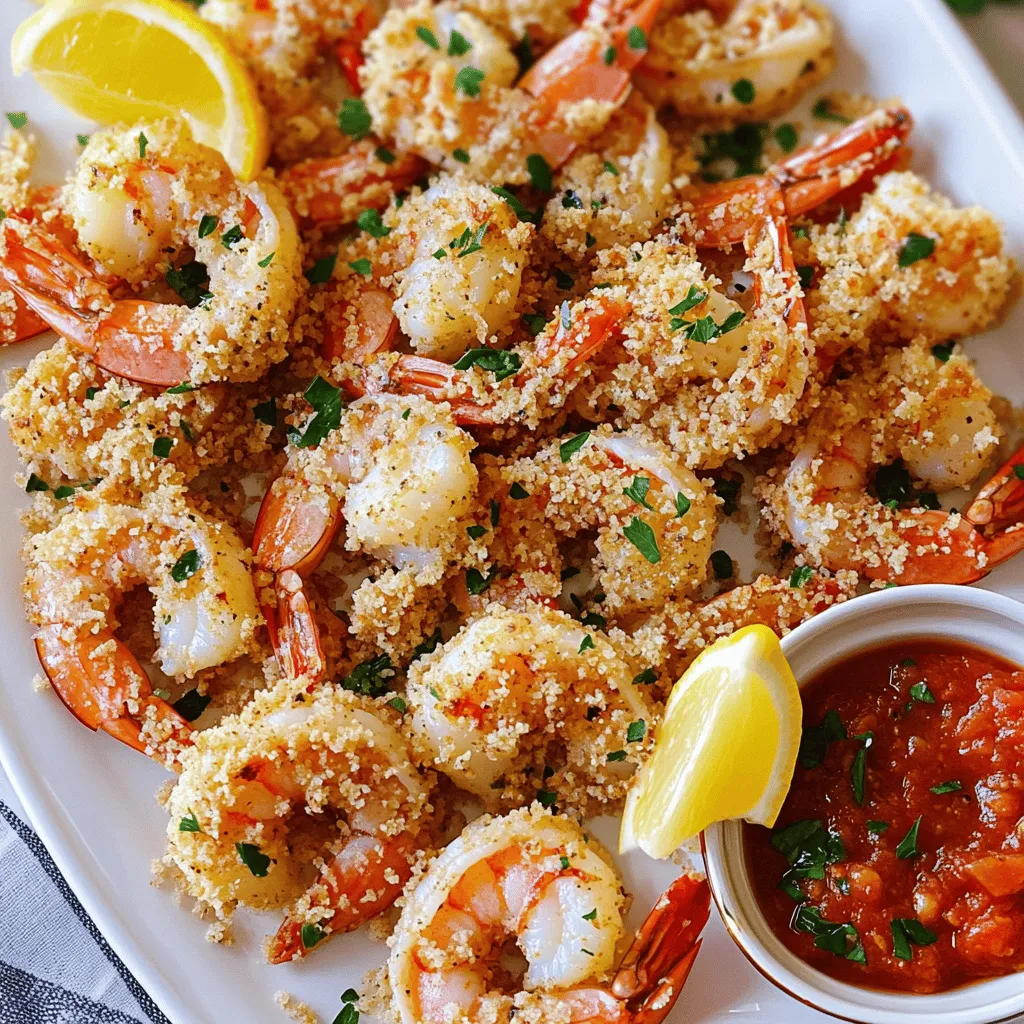
Looking for a fast and tasty dish? Let’s dive into Oven Baked Crispy Garlic Shrimp! This meal is simple to

- 2 lbs beef chuck roast - 4 dried guajillo chiles - 2 dried ancho chiles - 4 cups beef broth - Corn tortillas For the main ingredients, beef chuck roast is key. It has good fat, making it tender. The guajillo and ancho chiles add rich flavor and a touch of heat. Beef broth keeps the meat juicy and flavorful. Corn tortillas are perfect for wrapping the savory beef. - Fresh cilantro - Diced onion - Lime wedges Garnishes bring the dish to life. Fresh cilantro adds brightness. Diced onion gives a nice crunch. Lime wedges add a zesty kick when squeezed over the tacos. - Ground cumin - Dried oregano - Sweet paprika - Salt and pepper These optional seasonings can enhance your birria. Ground cumin adds warmth and depth. Dried oregano offers a hint of earthiness. Sweet paprika lends a lovely color. Don’t forget salt and pepper to taste. For a full recipe with all the steps, check out the [Full Recipe]. To start, I toast the guajillo and ancho chiles. Heat a dry skillet over medium heat. Add the chiles and toast for about 2-3 minutes. Keep turning them until they smell nice and fragrant. Be careful not to burn them; burnt chiles taste bitter. After toasting, remove the chiles from the heat and let them cool for a few minutes. For the sauce, you need the toasted chiles, onion, garlic, ground cumin, dried oregano, paprika, and beef broth. Once the chiles are cool, place them in a blender. Add the onion and garlic next. Pour in 1 cup of beef broth. Blend everything until it’s smooth. If the sauce feels too thick, add more beef broth a little at a time until you reach the right consistency. Now it's time to cook the meat. In your slow cooker, arrange the beef chunks in an even layer. Generously sprinkle salt and pepper on the beef. Pour the blended chile sauce over the top. Then, add the remaining beef broth. Give it a gentle stir to coat the meat well. Cover the slow cooker with the lid. Set it to low heat and cook for 8 hours. The long cooking time helps the beef become tender. You’ll know the beef is ready when it shreds easily with a fork. After cooking, carefully take the beef out of the slow cooker. Place it on a cutting board. Use two forks to shred the meat into bite-sized pieces. Return the shredded beef to the slow cooker. Mix it well with the sauce for added flavor. To make the tacos, heat a skillet over medium heat. Warm the corn tortillas for about 30 seconds on each side. This helps them become soft and easy to fold. Spoon the beef and sauce mix onto each tortilla. Top with freshly chopped cilantro and diced onion. These toppings add great flavor and texture. Now you can enjoy your delicious Slow Cooker Birria Tacos! For the full recipe, check the earlier section. Choosing the right cut of beef is key. I recommend beef chuck roast. It has fat and marbling. This makes the meat juicy and tender. You want to cut it into 1-2 inch chunks. This helps it cook evenly. Cooking low and slow is very important. Set your slow cooker to low heat for 8 hours. This process breaks down tough fibers. Your beef will be fork-tender and full of flavor. To boost the taste, add herbs and spices. Try bay leaves or thyme for extra depth. You can also add a pinch of cinnamon. It gives a lovely warmth to the dish. For side dishes, pair tacos with Mexican rice or refried beans. A fresh salad with lime dressing works well too. These sides balance the rich flavors of birria. Serving tacos can be fun and creative. Use a colorful platter to make your meal pop. Arrange the tacos in a circle for a festive look. You can also stack them for height. Garnishes add flair. Fresh cilantro and diced onion make great toppings. Use lime wedges for a zesty squeeze. This adds brightness to each bite. For a fun touch, try decorative toothpicks to hold them together. For the full recipe, check out the recipe details above. {{image_4}} You can use other meats for birria. Lamb adds a rich flavor. Pork is another great choice. It gives a new twist to a classic dish. For a vegetarian option, try jackfruit. It shreds well and absorbs flavors nicely. You can also use mushrooms. They add a savory taste and meaty texture. The sauce is key to birria tacos. You can try different chili types. For a milder sauce, use pasilla chiles. They offer a sweet flavor. For more heat, add chipotle chiles. They bring a smoky taste. You can also play with spices. Add cinnamon for warmth or cloves for depth. These unique spices can change the flavor profile completely. Taco style matters! You can choose between soft and crunchy tacos. Soft tortillas let the meat shine. They soak up the sauce well. Crunchy tacos add a fun texture. Both styles are delicious! Serve them with consomé. This rich broth is perfect for dipping. It enhances the entire meal experience. To keep your birria tacos fresh, place leftovers in airtight containers. Make sure to cool them down first. When stored properly, they last up to four days in the fridge. Always label your containers with the date. This way, you’ll know when to enjoy them again. If you want to save some for later, freezing is a great option. Place the cooled meat and sauce in freezer-safe bags. Remove as much air as possible before sealing. You can freeze them for up to three months. To reheat, thaw in the fridge overnight. Then, warm them on the stove for the best taste. Use glass or plastic containers that are safe for the freezer. Avoid using regular plastic bags, as they can tear easily. This helps prevent freezer burn. Always keep your leftovers in single portions. This makes it easier to grab what you need without thawing the whole batch. You should cook birria tacos for about 8 hours on low heat. This time allows the beef to become tender and flavorful. If you cook on high, reduce the time to around 4 to 5 hours. Factors like the size of the meat chunks and your slow cooker model can affect cooking duration. Always check the beef for tenderness. Yes, you can use other meats for birria. Lamb and pork work well as alternatives. They give a different flavor and texture to the dish. Lamb has a richer taste, while pork can be sweeter. Each meat adds its unique twist to the classic recipe. Traditional toppings include fresh cilantro, diced onion, and lime wedges. These garnishes enhance the flavor and add freshness. You can also try avocado slices, crumbled cheese, or salsa for a creative touch. The right toppings make the tacos even more enjoyable. To add heat to your birria tacos, use spicy chiles like arbol or serrano. You can blend them into the sauce for an extra kick. Adjust the amount based on your heat preference. Adding a dash of hot sauce before serving also boosts spice levels. Slow cooker birria tacos are easy and full of flavor. We covered the main ingredients, like beef and chiles, and shared step-by-step cooking tips. You learned about enhancing flavors and storing leftovers. These tacos are great with many meats and toppings. Feel free to try new flavors and styles. Remember, cooking is all about fun and creativity. Enjoy making these tasty tacos for your family and friends!

Slow Cooker Birria Tacos Flavorful and Savory Meal

If you’re craving a meal that bursts with flavor and warmth, slow cooker birria tacos are the way to go.

- 1 cup (200g) granulated sugar - 1/2 cup (115g) unsalted butter, melted - 2 large eggs - 1 teaspoon vanilla extract - 1/3 cup (40g) unsweetened cocoa powder - 1/2 cup (65g) all-purpose flour - 1/4 teaspoon salt - 1/4 teaspoon baking powder - 16 oz (450g) cream cheese, softened - 1/2 cup (100g) granulated sugar - 2 large eggs - 1 teaspoon vanilla extract - 1/4 cup (60ml) sour cream - 1/2 cup (90g) chocolate chips (optional) - Chocolate syrup - Fresh berries This brownie cheesecake combines rich flavors and smooth textures. The brownie base offers a deep chocolate taste, while the cheesecake layer adds creaminess. You can also add chocolate chips for an extra treat. Use the full recipe for detailed steps to create this delicious dessert. First, preheat your oven to 350°F (175°C). This step is key for even baking. Next, grab a 9-inch springform pan. You can grease the pan lightly or line it with parchment paper. Both methods help the cake come out easily. In a medium bowl, mix one cup of sugar with half a cup of melted butter. Stir until combined. Next, add two large eggs, one at a time. Mix well after each egg. Then, add one teaspoon of vanilla extract. In a separate bowl, combine one-third cup of cocoa powder, half a cup of all-purpose flour, a quarter teaspoon of salt, and a quarter teaspoon of baking powder. Gradually add this mixture to the wet ingredients, stirring until just combined. Pour the brownie batter into the prepared springform pan, spreading it evenly. In a large bowl, beat 16 oz of softened cream cheese with half a cup of sugar. Mix until smooth. Add in two eggs, one at a time, mixing well after each. Then, stir in one teaspoon of vanilla extract and a quarter cup of sour cream. If you want extra chocolate, fold in half a cup of chocolate chips. This makes the cheesecake layer rich and creamy. Pour the cheesecake mixture over the brownie layer in the springform pan. Smooth the top with a spatula. Place the pan in the preheated oven and bake for about 45 to 50 minutes. The edges should look golden, but the center may still jiggle a bit. This is normal and will set as it cools. Once baked, turn off the oven. Leave the oven door slightly open and let the cheesecake cool inside for one hour. This helps prevent cracks. After an hour, transfer the pan to the fridge. Chill for at least four hours or overnight for the best texture. To serve, carefully remove the sides of the springform pan. Use a hot, dry knife to slice the cheesecake for clean edges. You can top it with chocolate syrup or fresh berries for a fun touch. Enjoy your delicious brownie cheesecake with friends and family! You can find the Full Recipe above for more details. When making brownie cheesecake, avoid overmixing the batter. This can lead to a dense texture. Make sure to measure all ingredients accurately. Using too much flour or sugar can change the cake's taste. Also, don’t skip the cooling step. Cooling in the oven helps prevent cracks. This small detail makes a big difference in your cheesecake. To get a creamy cheesecake, use room-temperature cream cheese. Cold cream cheese will clump and not mix well. Mix the cream cheese and sugar until smooth, but don’t overbeat. Adding sour cream helps add creaminess too. Always bake at a low temperature to keep it soft and creamy. A water bath can also help keep the heat even. To cut clean slices of your brownie cheesecake, use a sharp knife. Dip the knife in hot water, then wipe it dry before cutting. This method helps create smooth edges. Always wipe the knife between cuts to keep it clean. This way, each slice looks perfect and inviting. Enjoy your beautifully sliced dessert with friends and family. For the full recipe, check out the detailed steps and measurements. {{image_4}} You can easily adjust the brownie cheesecake to fit your needs. For a gluten-free option, swap regular flour for almond flour or a gluten-free blend. If you're dairy-free, use a plant-based cream cheese and butter. For lower sugar, try using a sugar substitute like erythritol. These swaps keep the delicious taste while catering to dietary needs. Want to jazz up your brownie cheesecake? Add flavors like coffee or mint. For coffee, mix in one tablespoon of instant coffee granules into the brownie batter. This adds a deep, rich taste. If mint is your thing, use mint extract instead of vanilla in the cheesecake mixture. Just a teaspoon will give you a refreshing twist! While the classic brownie base is tasty, you can explore new crusts. Try a cookie crust made from crushed Oreos or graham crackers. If you want a nutty flavor, use crushed pecans or walnuts mixed with butter. Each crust brings its own flair, making your brownie cheesecake unique and exciting. Check out the Full Recipe for more delicious ideas! To keep your brownie cheesecake fresh, store it in the fridge. Wrap it well with plastic wrap or place it in an airtight container. This prevents it from absorbing other smells. Keep it on a middle shelf, not in the door. The middle shelf has a more stable temperature. If you want to save some for later, freezing is great. Slice the cheesecake and wrap each piece in plastic wrap. Then, place the wrapped slices in a freezer bag. Squeeze out as much air as you can before sealing. This keeps the cheesecake tasty. You can freeze it for up to three months. In the fridge, your brownie cheesecake stays good for about a week. If you freeze it, it lasts longer. Just remember, once you thaw it, eat it within three days. For the best taste, enjoy it fresh! Check out the Full Recipe for more details. Yes, you can use a store-bought brownie mix. This saves time and is easy. Just follow the package instructions for baking. Make sure to bake it in a 9-inch springform pan. Let it cool before adding the cheesecake layer. Using a mix does not change the taste much. It can still be rich and tasty. To check if the cheesecake is done, look for a few signs. The edges should be slightly firm, but the center may still jiggle a bit. This jiggle is normal. You will bake it at 350°F for about 45-50 minutes. After baking, leave it in the oven for an hour. This helps it set better and avoid cracks. Yes, you can make brownie cheesecake ahead of time. It tastes even better after a day in the fridge. Prepare it and let it cool. Then, wrap it well and store it in the fridge. It will stay fresh for about 3 to 4 days. Just remember to take it out 30 minutes before serving. For the best serving, slice the cheesecake with a hot, dry knife. This helps get clean cuts. You can serve it plain or with toppings. Some great toppings are chocolate syrup or fresh berries. A dollop of whipped cream also adds a nice touch. Make each slice look pretty for your guests. Enjoy every bite of this rich dessert! For the detailed steps, check the Full Recipe. You now know how to make a tasty brownie cheesecake. We covered the ingredients and step-by-step instructions to create this sweet treat. I shared tips for creamy cheesecake and how to avoid mistakes. We discussed fun variations and how to store your cake for later. Try this recipe for your next event. It will impress friends and family. Enjoy every bite of your new dessert masterpiece!

Brownie Cheesecake Rich and Creamy Dessert Recipe

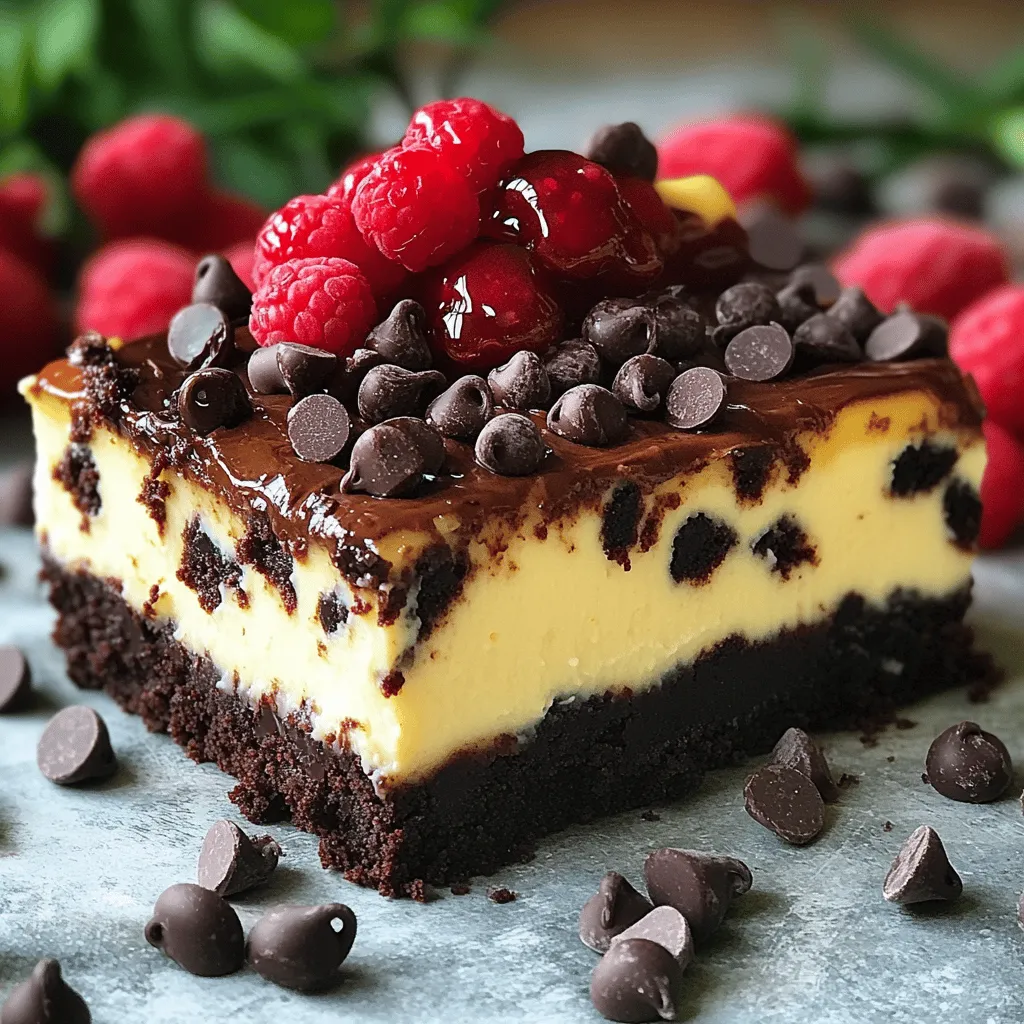
Are you ready to elevate your dessert game? This Brownie Cheesecake recipe combines rich, fudgy brownies with a smooth, creamy

- 1 lb ground beef - 1 cup shredded cheddar cheese - 1/2 cup shredded mozzarella cheese - 2 cloves garlic, minced - 2 tablespoons grated Parmesan cheese - 1 teaspoon garlic powder - 1 tablespoon Worcestershire sauce - 1/2 teaspoon salt - 1/2 teaspoon black pepper - 1 tablespoon fresh parsley, finely chopped (for garnish) - 1 package refrigerated biscuit dough (10 biscuits) - 1 tablespoon olive oil (for brushing) Garlic Parmesan Cheeseburger Bombs are a feast for your taste buds. Each bite delivers a burst of flavor. The ground beef sits at the core of this dish. It brings a savory taste that pairs well with the cheeses. I use both cheddar and mozzarella for a cheesy experience. The sharpness of cheddar blends with the stretchy mozzarella. I add minced garlic for a fragrant and tasty kick. The Parmesan cheese on top adds a rich finish. Seasonings play a vital role. Garlic powder enhances the garlic flavor. Worcestershire sauce adds depth and umami. Salt and black pepper round out the taste, making it balanced. Fresh parsley gives a pop of color and freshness. The biscuit dough wraps around all these flavors. It forms a golden crust that is soft inside. Brushing the dough with olive oil helps it bake perfectly. These ingredients come together to create a dish that feels special. You can find the full recipe to guide you through each step. - Preheat oven to 375°F (190°C). - Line a baking sheet with parchment paper. Start by getting your oven hot. This step helps the bombs cook evenly. The parchment paper keeps the bombs from sticking to the pan. It also makes cleanup a breeze. - Combine ground beef with seasoning ingredients. - Ensure an even mix. In a medium bowl, add your ground beef. Toss in minced garlic, Worcestershire sauce, garlic powder, salt, and black pepper. Use your hands or a spatula to mix well. Make sure every bite is full of flavor. - Form beef mixture into patties. - Enclose cheese in patties. - Prepare and encase in biscuit dough. Now, divide the beef mix into ten parts. Roll each part into a small patty. Place a cube of cheddar and a cube of mozzarella in the center. Fold the beef around the cheese. Roll it into a ball shape. Next, take the biscuit dough and roll it flat. Place a beef ball in the middle. Gather the dough around the ball and pinch it shut. This keeps the cheese inside while it cooks. These steps build layers of flavor and fun in each bite. You can find the complete instructions in the Full Recipe. Using fresh garlic makes a big difference. Fresh garlic has a strong, bright taste that garlic powder can't match. I always choose fresh for a bold flavor. You can also adjust the seasoning to your liking. Don't be afraid to add more salt or pepper. Taste as you go to find your perfect mix. Check for doneness by cutting one bomb in half. The beef should be brown and juices clear. If you see any pink, put them back in the oven. To prevent the dough from burning, brush it lightly with olive oil. This helps it bake evenly and gives it a nice golden color. Pair these bombs with your favorite sauces. Ketchup, mustard, or ranch dip work well. You can also serve them with crispy fries or a fresh salad. These sides complement the rich flavors of the bombs. For the full recipe, check the earlier section. {{image_4}} You can change the cheese in these bombs to suit your taste. Try using pepper jack for a spicy kick. Swiss cheese also melts well and adds a nice flavor. If you want that creamy touch, mix in some cream cheese. This will make the filling extra smooth and rich. If you prefer a lighter option, use ground turkey or chicken. Both choices work well and keep the dish tasty. For a meat-free version, try plant-based meat. There are many brands that mimic beef and work just as well in this recipe. Feel free to play with the seasonings. Adding some smoked paprika or chili powder brings a new depth. Fresh herbs like thyme or basil can also enhance the flavor. Don't shy away from experimenting with sauces too. Barbecue or sriracha adds a fun twist to the bombs. For the full recipe, check out the details above! You should always store leftovers in airtight containers. This keeps them fresh. When stored properly, Garlic Parmesan Cheeseburger Bombs last up to three days in the fridge. You can enjoy them as a quick meal or snack. To freeze, wrap each bomb tightly in plastic wrap. Place them in a freezer bag or container. This method helps keep them fresh for up to three months. When you want to eat them, simply thaw in the fridge overnight. For reheating, preheat your oven to 350°F (175°C). Bake for about 15 minutes. This restores their crispy outer layer while keeping the inside juicy. Before serving, reheat the bombs in the oven. This method ensures they taste fresh and delicious. Avoid using the microwave, as it can make them soggy. To keep the flavor and texture, let them cool for a few minutes after reheating. Then, serve with your favorite dip or sauce for extra flavor. Garlic Parmesan Cheeseburger Bombs take about 35 minutes to make. This includes 15 minutes for prep and 18 minutes in the oven. You want the tops to be golden brown, and the centers cooked through. Always check the internal temperature to ensure it reaches 160°F (71°C) for safety. Yes, you can make these ahead of time! Prepare the cheeseburger bombs and place them on the baking sheet. Cover them and store them in the fridge for up to 24 hours. When you're ready to bake, just add a few extra minutes to the cooking time. For long-term storage, freeze the uncooked bombs. When frozen, they last for about three months. These cheesy delights pair well with many sides. Try dipping them in ketchup, ranch, or garlic aioli. A simple green salad adds a fresh touch. You could also serve them with crispy fries or sweet potato wedges. For drinks, a cold soda or a light beer complements the flavors nicely. In this blog post, we explored the recipe for Garlic Parmesan Cheeseburger Bombs. We covered essential ingredients, like ground beef, cheeses, and biscuit dough. You learned step-by-step instructions to create these tasty snacks. We also shared tips for perfecting flavor, ensuring proper cooking, and storage methods. Finally, variations allow you to customize these bites. Enjoy making these easy, flavorful bombs that are perfect for any meal or snack time!

Garlic Parmesan Cheeseburger Bombs Flavorful Delight

Ready for a tasty twist on two favorites? Garlic Parmesan Cheeseburger Bombs combine juicy beef and gooey cheese, all wrapped

Older posts
Newer posts
← Previous Page1 … Page11 Page12 Page13 … Page44 Next →

dsad

© 2025 lazychefmagic • Built with GeneratePress

Our Policies

  • Copyright Policy
  • Cookie Policy
  • GDPR Policy
  • Privacy Policy
  • Disclaimer
  • Terms Of Use

More Information

  • Home
  • About
  • Contact
  • Appetizers
  • Dessert
  • Dinner
  • Drinks
©2025, lazychefmagic About Back To Top