Skip to content
DisclaimerTerms Of UseGDPR PolicyCookie Policy

lazychefmagic

  • Home
  • Drinks
  • Appetizers
  • Dinner
  • Dessert
  • About
  • Contact
  • Privacy Policy
DisclaimerTerms Of UseGDPR PolicyCookie Policy

Amanda

- 1 lb (450g) boneless chicken thighs, cut into 1-inch pieces - 1/4 cup fresh basil leaves, finely chopped - Zest and juice of 1 large lemon - 2 cloves garlic, finely minced - 1 teaspoon honey These main ingredients create the heart of the dish. Boneless chicken thighs give a juicy bite. Fresh basil adds a lovely aroma and flavor. Lemon juice and zest bring brightness. Garlic and honey balance the flavors perfectly. - 3 tablespoons extra virgin olive oil - Salt and freshly ground pepper to taste Olive oil adds richness and helps the marinade stick. Salt and pepper enhance all the flavors. You can also add other herbs, like oregano or thyme, for extra kick. - Mixing bowl - Skewers (metal or soaked wooden) - Grill or grill pan A mixing bowl helps blend the marinade well. Skewers hold the chicken and make it easy to grill. A grill or grill pan gives those nice char marks and flavor. For the full recipe, check out the detailed instructions on how to bring these ingredients together into a delightful meal. - In a large bowl, mix the fresh basil, lemon zest, and lemon juice. - Add the olive oil, minced garlic, honey, salt, and pepper. - Whisk the mixture until it blends well. - Next, add the chicken pieces, making sure they are covered. - Cover the bowl and set it in the fridge for at least 30 minutes. - If you use wooden skewers, soak them in water for 30 minutes. - This helps stop them from burning on the grill. - Once soaked, thread the marinated chicken onto the skewers. - Leave some space between each piece for even cooking. - Preheat your grill to medium-high heat. - Place the skewers on the grill and cook for 8-10 minutes. - Turn them every few minutes for even cooking. - Check that the chicken reaches 165°F internally. - Once done, take the skewers off the grill to rest. - Resting lets the juices spread, keeping the chicken tender. For the full recipe, check the detailed instructions in the recipe section. To get those nice grill marks, start by preheating your grill. A hot grill sears the chicken well. This helps lock in moisture and flavor. When grilling, flip the skewers gently. Don’t turn them too much. Let them cook for a few minutes before checking. For the best flavor, marinate your chicken for at least 30 minutes. If you have time, two hours brings out even more zest. You can also add other herbs to the marinade. Try thyme, oregano, or even rosemary for a twist. Make sure the chicken reaches an internal temperature of 165°F (75°C). Use a meat thermometer for accuracy. After grilling, rest the chicken for about five minutes. This helps the juices settle, keeping the chicken tender. You can find the full recipe for these Lemon Basil Chicken Skewers [here](#). {{image_4}} You can switch the chicken for shrimp or tofu. Shrimp cooks quickly, so use a short marinade. For tofu, press out moisture first. Then, cut it into cubes. Adjust the marinade by adding more garlic for shrimp or using soy sauce for tofu. This makes each protein shine with flavor. Mix in veggies for colorful skewers. Bell peppers, zucchini, and cherry tomatoes work well. Cut vegetables into similar sizes for even cooking. If you use mixed skewers, cook them longer. Aim for about 12-15 minutes total. This helps the chicken and veggies cook perfectly together. Want to switch up the taste? Use lime or orange juice instead of lemon. Each option adds a unique twist. You can also try other herbs like cilantro or mint. These herbs give the dish a fresh vibe. Experiment to find your favorite combo! After enjoying Lemon Basil Chicken Skewers, store any leftovers in the fridge. Place them in an airtight container. They stay fresh for about 3 to 4 days. If you want to keep them longer, freezing is a great option. Wrap the skewers tightly in plastic wrap, then place them in a freezer-safe bag. They can last up to 3 months in the freezer. To reheat your skewers without drying them out, use an oven or a skillet. Preheat your oven to 350°F (175°C). Place the skewers on a baking sheet and cover them with foil. Heat for about 10-15 minutes. If using a skillet, add a splash of water and cover. This helps steam and keeps the chicken juicy. When defrosting frozen skewers, place them in the fridge overnight. This keeps them safe and helps maintain their quality. You can prepare Lemon Basil Chicken Skewers ahead for quick meals. Marinate the chicken a day before and store it in the fridge. When ready, skewer and grill them. For easy meal prep, pack the skewers with sides like rice or salad. Use meal prep containers to keep everything organized and ready to enjoy. Yes, you can use chicken breasts. They are leaner than thighs. This means they can dry out faster. Chicken thighs stay moist and tender, even when grilled. If you choose breasts, watch the cooking time closely to avoid dryness. You can marinate chicken for 30 minutes to 2 hours. For the best flavor, aim for about 1 hour. Longer marination can make the chicken too salty. Always refrigerate the chicken while it marinates to keep it safe. These skewers pair well with many sides. Consider serving them with: - Fresh salad - Grilled vegetables - Rice or quinoa - Garlic bread All these options complement the bright lemon and basil flavors. Yes, you can grill indoors. Use a grill pan or a broiler. Preheat your grill pan over medium-high heat. Cook the skewers for about 8-10 minutes, turning often. Keep a close eye on them to avoid burning. To wrap up, making Lemon Basil Chicken Skewers is simple and fun. You learned about the key ingredients like chicken thighs, fresh basil, and zesty flavors. We covered how to marinate, grill, and serve them perfectly. Don’t forget the tips for flavor and texture. Whether you try shrimp or add veggies, the options are endless. With the right storage and reheating techniques, leftovers can stay tasty too. Enjoy your cooking adventures, and share this easy recipe with friends!

Lemon Basil Chicken Skewers Juicy and Flavorful Dish

Get ready to fire up the grill! In this post, I’ll share my favorite recipe for Lemon Basil Chicken Skewers.

To make Nutella banana bread, gather these key ingredients: - 3 ripe bananas, thoroughly mashed - 1/2 cup Nutella, plus extra for drizzling - 1/2 cup granulated sugar (or substituting with honey for a healthier twist) - 1/3 cup unsalted butter, gently melted - 1 teaspoon pure vanilla extract - 1 teaspoon baking soda - A pinch of salt - 1 1/2 cups all-purpose flour - 1/2 cup chopped walnuts (optional for added crunch) - 1/4 cup chocolate chips (optional for an indulgent touch) You can easily swap some ingredients if needed. For sugar, use honey or maple syrup. This will add a different sweetness. If you want it dairy-free, use coconut oil instead of butter. You can also choose almond or oat milk to replace regular milk in the recipe. For flour, whole wheat flour works as a healthier option. To make your banana bread even more special, try adding some fun ingredients. Here are some ideas: - Chopped nuts like pecans or almonds for crunch - Dried fruit, such as cranberries or raisins, for a sweet twist - Spices like cinnamon or nutmeg to enhance the aroma - A splash of espresso for a coffee flavor - Swirls of peanut butter for a nutty taste These add-ins can take your banana bread to the next level! You can find the Full Recipe to guide you through the process. Enjoy experimenting! Start by preheating your oven to 350°F (175°C). This step is key for even baking. Next, take a 9x5-inch loaf pan and grease it well with butter or non-stick spray. This ensures your banana bread comes out easily after baking. In a large bowl, mash your ripe bananas until smooth. This should yield about 1 ½ cups of mashed bananas. Add the melted butter and mix until combined. Next, stir in the sugar or honey, Nutella, and vanilla extract. Mix these well until they form a creamy mixture. Now, sprinkle the baking soda and salt over this mix. Gently fold them in. Be careful not to overmix at this point. Gradually add the flour, mixing just until you see no dry flour left. If you want more flavor and crunch, fold in the walnuts and chocolate chips. This adds a nice surprise in every bite. Pour the batter into your prepared loaf pan. Use a spatula to smooth the top for a nice finish. Place the pan in your preheated oven. Bake for 60-70 minutes. To check if it’s done, insert a toothpick into the center. If it comes out clean or with a few moist crumbs, your bread is ready. When done, take the bread out and let it cool in the pan for about 10 minutes. Then, move it to a wire rack to cool completely. This helps the texture stay just right. For the best taste, serve warm with extra Nutella drizzled on top. Enjoy the rich flavors of this Nutella banana bread! To get that perfect moist texture, use very ripe bananas. The browner, the better! Mash them well to avoid lumps. When mixing, gently fold the flour in just until combined. Overmixing can make your bread dense. Let the batter rest for a few minutes before baking. This helps the flavors blend. Nutella pairs well with nuts like walnuts or pecans. They add a nice crunch. You can also mix in chocolate chips for extra sweetness. Want a twist? Try adding a pinch of cinnamon or a splash of espresso for warmth. These flavors work great with the banana. If your banana bread sinks in the middle, it might be due to too much liquid. Make sure your bananas are not overly mashed. If it’s too dry, check your oven temperature; it may be too high. To fix uneven baking, rotate the pan halfway through the baking time. For more detailed steps and a full recipe, you can check out the Nutella Banana Bread Delight. {{image_4}} You can add nuts on top of the bread for a tasty crunch. I love using chopped walnuts or pecans. They offer a nice contrast to the soft bread and rich Nutella. Just sprinkle them over the top before baking. This small step gives your banana bread a lovely texture and a little extra flavor. If you want a healthier option, you can swap out the sugar. Honey works great in this recipe. It adds sweetness without processed sugar. You can also try maple syrup or agave nectar. Each option gives a unique twist. Remember, these choices keep the banana bread moist and tasty while reducing refined sugar. Don't be afraid to get creative! You can add spices like cinnamon or nutmeg for warmth. They blend well with the bananas and Nutella. Another fun twist is to mix in dried fruits, like cranberries or apricots. They add a bit of chewiness and extra flavor. You could even try a splash of espresso for a coffee kick. These little changes can make your banana bread exciting and new. For more details, check out the Full Recipe. To keep your banana bread fresh, wrap it tightly in plastic wrap. You can also place it in an airtight container. This helps prevent it from drying out. Store it at room temperature for up to three days. If you want it to last longer, consider freezing it. Freezing banana bread is super easy! First, slice the bread for quick servings. Then, wrap each slice in plastic wrap. Place the wrapped slices in a freezer bag. This way, you can enjoy a piece whenever you want. Frozen banana bread can last for about three months. Just remember to label the bag with the date! To enjoy your banana bread warm, you can reheat it in different ways. The oven is great for even heating. Preheat your oven to 350°F (175°C). Place the slice on a baking sheet and warm it for about 10 minutes. You can also use a microwave for quick heating. Just heat a slice for 15-20 seconds. If you want a crispy edge, try a toaster oven instead! Always check the warmth before diving in! Yes, you can use frozen bananas! Just thaw them first. Frozen bananas often become very soft, which makes them easy to mash. This works well in your banana bread. The flavor stays great, and the bread remains moist and yummy. To check if your banana bread is done, use a toothpick. Insert it into the center of the loaf. If it comes out clean or with a few moist crumbs, it is ready. Baking time is usually 60-70 minutes, but ovens can vary. Keep an eye on it towards the end. Nutella banana bread pairs well with many tasty treats. Here are some ideas: - Warm Nutella drizzle for extra chocolatey goodness - A dollop of whipped cream for a creamy touch - Fresh fruit like strawberries or raspberries for a fresh burst - A scoop of vanilla ice cream for a dessert treat - Coffee or tea as a cozy drink to enjoy with your slice These pairings will elevate your experience and make each bite even more delightful. For the full recipe, check the recipe section above! This blog post covered everything you need for great banana bread. We discussed key ingredients, substitutions, and flavor add-ins. I shared step-by-step baking instructions to get perfect results. Tips for texture and flavor helped prevent issues. Variations, like Nutella and healthier options, offered fun twists. Lastly, store and freeze leftovers properly to enjoy later. Banana bread can be simple and satisfying. Experiment with flavors and enjoy your creation!

Nutella Banana Bread Irresistibly Moist and Easy

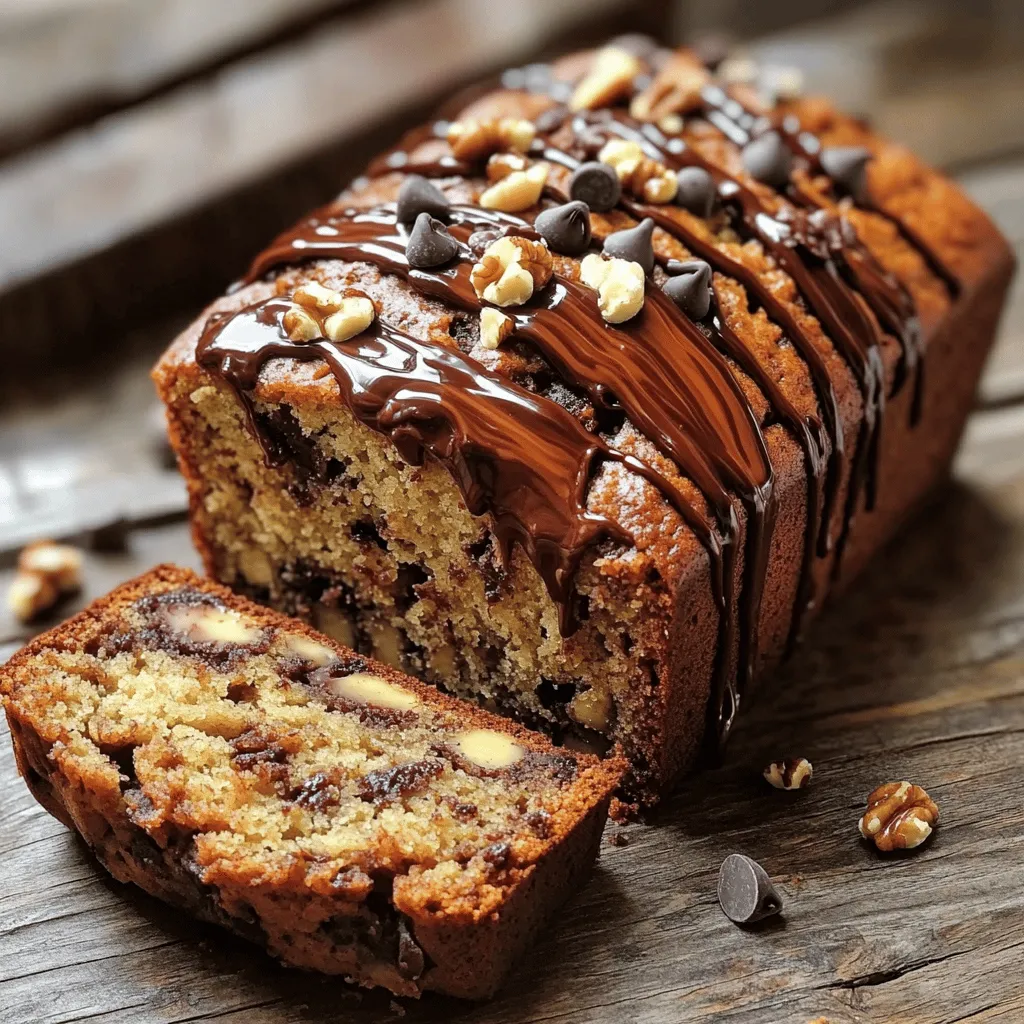
Are you ready to bake something truly delicious? This Nutella Banana Bread is not just easy; it’s also irresistibly moist!

To make Creamy Cajun Chicken Pasta, gather these items: - 2 boneless, skinless chicken breasts, sliced into thin strips - 8 oz fettuccine or penne pasta - 1 tablespoon Cajun seasoning - 2 tablespoons olive oil - 1 small onion, finely diced - 3 cloves garlic, minced - 1 red bell pepper, sliced into thin strips - 1 cup heavy cream - 1 cup chicken broth - ½ cup freshly grated Parmesan cheese - Salt and freshly ground black pepper to taste - Fresh parsley, chopped (for garnish) Measuring ingredients correctly is key for success. Here’s how to measure: - For the pasta, use a kitchen scale for 8 oz or a standard measuring cup. - Use a tablespoon for the Cajun seasoning and olive oil. - A small onion typically weighs about 4 oz. - For heavy cream and chicken broth, use a measuring cup for accurate amounts. - Grate the Parmesan cheese fresh for the best flavor. You can swap some ingredients if needed. Here are some ideas: - Use skinless turkey breasts instead of chicken for a leaner option. - Substitute whole wheat pasta for a healthier choice. - If you want a dairy-free version, use coconut cream instead of heavy cream. - For a vegetarian twist, try using mushrooms or tofu in place of chicken. - If you can’t find Cajun seasoning, mix paprika, cayenne, and garlic powder as a substitute. Exploring these ingredient options makes this dish flexible and fun! For the full recipe, check the detailed instructions. To start, boil water in a large pot. Add a pinch of salt to the water. Once the water is boiling, add 8 oz of fettuccine or penne pasta. Cook it according to the package instructions until it is al dente. This usually takes about 8-10 minutes. After cooking, drain the pasta in a colander. Make sure to save about ½ cup of the pasta water. This water will help adjust the sauce later. Next, take 2 boneless, skinless chicken breasts. Slice them into thin strips. In a mixing bowl, sprinkle 1 tablespoon of Cajun seasoning over the chicken. Mix well to coat each piece of chicken. This will give the chicken great flavor. Heat 2 tablespoons of olive oil in a large skillet over medium-high heat. When the oil is hot, add the chicken strips. Cook them for 5-7 minutes until they are golden brown and cooked through. Use a slotted spoon to remove the chicken and set it aside on a plate. In the same skillet, add 1 small diced onion and 1 sliced red bell pepper. Sauté these for about 3-4 minutes until they are soft. Then, add 3 minced garlic cloves and stir for another minute. Be careful not to burn the garlic! After that, pour in 1 cup of chicken broth. Turn up the heat and let it simmer gently. Scrape up the brown bits from the skillet; this adds flavor. Reduce the heat again and mix in 1 cup of heavy cream. Let it cook for 2-3 minutes until the sauce thickens slightly. Now, return the cooked chicken to the skillet along with the drained pasta. Toss everything together to coat the pasta in the sauce. If the sauce is too thick, slowly add some reserved pasta water until it reaches your desired thickness. Finally, stir in ½ cup of freshly grated Parmesan cheese. Mix until it melts into the sauce. Season with salt and freshly cracked black pepper. To serve, top with chopped fresh parsley for a nice touch. For the full recipe, check the complete list of ingredients and instructions. Enjoy your meal! To make your creamy Cajun chicken pasta really pop, use fresh ingredients. Fresh herbs, like parsley, can brighten the dish. You can also add a squeeze of lemon juice for a tangy kick. If you love spice, try adding a pinch of cayenne or some hot sauce. This will boost the Cajun flavor without overpowering the dish. For a smoky taste, consider adding smoked paprika. Getting the chicken just right is key. First, make sure to slice the chicken breasts into thin strips. This helps them cook evenly and stay juicy. When cooking, let the chicken rest for a few minutes after removing it from the skillet. This keeps the juices inside. To check for doneness, cut into a piece; it should be white all the way through. Sometimes, things don’t go as planned. If your sauce is too thick, add a little reserved pasta water. This will help loosen it up. If it’s too thin, let it cook a bit longer to thicken. If the pasta sticks together, toss it with a little olive oil right after draining. Lastly, if the flavors seem flat, a dash of salt or a sprinkle of Cajun seasoning can help. {{image_4}} If you love seafood, try adding shrimp or crab. Start by sautéing the seafood in the same skillet. Cook until it's opaque and tender. This change brings a fresh taste to your dish. I often use shrimp with a touch of Cajun spice for extra flavor. You can follow the same steps from the full recipe, just replace the chicken with your seafood choice. For a meatless option, use vegetables like zucchini, mushrooms, and spinach. Sauté the veggies in olive oil until tender. Add Cajun seasoning to enhance the flavor. You can use a mix of your favorite vegetables. This way, you get all the creamy goodness without the meat. Feel free to add chickpeas for protein and texture. Cajun food can pack a punch. If you prefer less heat, use a mild Cajun seasoning. Start with a small amount and adjust to your taste. You can also add a dash of cream or yogurt to cool it down. If you want more spice, add cayenne pepper or hot sauce. Taste as you go to find your perfect balance. To store your creamy Cajun chicken pasta, first let it cool down. Once it reaches room temperature, transfer it into an airtight container. Make sure to press out excess air before sealing. This helps keep the pasta fresh. Store it in the fridge for up to three days. If you want to keep it longer, freezing is a great option. When you're ready to enjoy your leftovers, reheat them gently. You can use a microwave or a stovetop. If using a microwave, place the pasta in a microwave-safe dish. Add a splash of water or chicken broth to keep it moist. Heat on medium power for two to three minutes, stirring halfway through. If using the stovetop, place the pasta in a skillet over low heat. Stir regularly and add a bit of liquid to prevent sticking. This keeps your dish creamy and delicious. To freeze your creamy Cajun chicken pasta, store it in a freezer-safe container. Make sure to label it with the date. It can last up to three months in the freezer. When you're ready to eat, thaw it in the fridge overnight. Reheat as mentioned earlier. Always check the texture after reheating; you might need to add a bit of cream or broth to restore its creaminess. Enjoy your meal again with the same bold flavors! You can pair this pasta with simple sides. A fresh green salad adds a nice crunch. Garlic bread is perfect for scooping up the creamy sauce. Roasted vegetables also make a great side dish. To make this dish healthier, use whole wheat pasta. You can add more veggies like spinach or zucchini. Swap heavy cream for a lighter option like Greek yogurt or coconut milk. Yes, you can use any pasta you like. Penne, fettuccine, or even spaghetti works well. Choose what you have on hand for a quick meal. To make this dish dairy-free, replace heavy cream with a plant-based cream. Use nutritional yeast instead of Parmesan for a cheesy flavor. Check the Cajun seasoning for dairy ingredients. The total time to make Creamy Cajun Chicken Pasta is about 30 minutes. Prep takes around 10 minutes, and cooking takes the rest. It's quick, easy, and delicious. You learned about the key ingredients for creamy Cajun chicken pasta, including substitutions. We covered each step, from cooking the pasta to making the sauce. I shared tips to get the best flavor and avoid common mistakes. We also explored variations for seafood and vegetarian options and provided storage tips. This dish is flexible and fun to make. Use what you have and enjoy the process!

Creamy Cajun Chicken Pasta Easy Dinner Delight

Looking for an easy dinner that bursts with flavor? You won’t want to miss my Creamy Cajun Chicken Pasta! This

When making homemade salsa verde, fresh ingredients are key. Here’s what you will need: - 10 tomatillos, husked and rinsed - 1 jalapeño, stemmed and halved - 1 small onion, quartered - 2 cloves garlic, peeled - 1/2 cup fresh cilantro, finely chopped - 1 tablespoon lime juice - Salt, to taste - 1 tablespoon olive oil (optional) Each ingredient adds a unique flavor. Tomatillos give a tangy base. Jalapeños add heat, so adjust to your taste. The onion and garlic provide depth. Fresh cilantro brings brightness. Lime juice adds a zesty kick. Salt enhances all the flavors. Olive oil can make the salsa smoother, but it is not a must. These ingredients create a fresh and vibrant salsa verde. You can easily find them at your local market. For the full recipe, check out the [Full Recipe]. 1. Preheat the oven to 425°F (220°C). This heat helps to roast the veggies well. 2. Arrange the tomatillos, jalapeño, onion, and garlic on a baking sheet. Keep them in a single layer. 3. Roast them for 15-20 minutes until soft and charred. This process boosts their flavor. 1. Once roasted, let the vegetables cool for a few minutes. This makes them safe to handle. 2. In a blender or food processor, combine the cooled veggies. Add the cilantro for a fresh taste. 3. Squeeze in lime juice, and sprinkle salt to taste. If you want, add olive oil for creaminess. 1. Blend the mixture to your preferred texture. You can make it smooth or leave it chunky. 2. Taste your salsa verde and adjust the seasoning as needed. Add more lime juice or salt if desired. 3. Transfer your vibrant salsa into a bowl. Let it sit for at least 30 minutes. This resting time helps the flavors meld beautifully together. For the full recipe, check out the detailed cooking steps above! You can adjust your salsa verde to fit your taste. Start with the jalapeño. If you want it spicy, add more jalapeño. For a milder salsa, use less or remove the seeds. Next, think about lime juice. Adding more lime juice gives your salsa a zesty kick. This brightens the flavors. Don’t stop there! You can add fresh herbs, like mint or parsley. These add a unique touch and fresh flavor. Experiment until you find your favorite mix. Serving is key to enjoying your salsa. Use a colorful bowl to make it pop. This makes your dish look even more appealing. Garnish with fresh cilantro on top. This adds a nice touch and enhances the flavor. Salsa verde goes well with many foods. Serve it with crispy tortilla chips for a crunchy snack. It also pairs great with grilled meats, adding a fresh burst to your meal. For the full recipe, check out [Full Recipe]. {{image_4}} You can add a fun twist to your salsa verde. Diced pineapple or mango brings sweetness. This sweet touch pairs well with the tomatillos. For more flavor, try adding roasted peppers. Roasted peppers give your salsa a smoky taste. This combination makes your salsa unique and refreshing. Want to switch things up? Substitute tomatillos with green tomatoes. This change gives a different taste while keeping it fresh. You can also experiment with herbs. Try adding parsley or mint for a fresh kick. These herbs can brighten your salsa and add depth. If you love heat, increase the jalapeño amount. You can add serrano peppers for extra spice. This will make your salsa verde really pack a punch! You can also include spices like cumin or coriander. These spices add warmth and complexity to your dish. Adjust these ingredients to fit your taste. For the full recipe, check out the [Full Recipe]. To keep your homemade salsa verde fresh, store it in an airtight container. This will help maintain its bright flavors. The salsa is best consumed within 5-7 days. After that, it may lose its taste and texture. If you want to save some for later, freeze your salsa. Portion it into freezer bags or containers. Make sure to leave some space, as liquids expand when frozen. When ready to eat, thaw it in the fridge overnight. It’s a quick way to have fresh salsa on hand! Always check your salsa before using it. Look for off-odors or any discoloration. If you see mold, it's best to discard the salsa. Trust your senses; they can help you avoid eating spoiled food. Enjoy your zesty salsa verde with peace of mind! Salsa verde is a green sauce made from fresh tomatillos. It has a bright, tangy flavor and a little heat from jalapeño. The basic ingredients include: - 10 tomatillos, husked and rinsed - 1 jalapeño, stemmed and halved - 1 small onion, quartered - 2 cloves garlic, peeled - 1/2 cup fresh cilantro, finely chopped - 1 tablespoon lime juice - Salt, to taste - 1 tablespoon olive oil (optional) This salsa is fresh, zesty, and perfect for many dishes. It pairs well with tacos, grilled meats, or even chips. Yes, you can make salsa verde ahead of time. I recommend preparing it a day before you need it. Store it in an airtight container in the fridge. This allows the flavors to blend well. Just give it a good stir before serving. Homemade salsa verde lasts about 5-7 days in the fridge. Be sure to keep it in an airtight container to maintain freshness. If you want to keep it longer, you can freeze it. It will last up to 3 months in the freezer. Salsa verde is very versatile. Here are some great ideas: - Use it as a dip with tortilla chips. - Spoon it over grilled chicken or fish. - Drizzle it on tacos or burritos. - Pair it with roasted vegetables for a fresh twist. Feel free to get creative with how you use salsa verde! It can add a burst of flavor to many meals. For the full recipe, check out the zesty homemade salsa verde section above. Salsa verde is easy to make and full of flavor. We covered the ingredients and steps needed for a tasty batch. You can adjust spice and add unique flavors to fit your taste. Remember to store it right to keep it fresh. Don’t hesitate to try variations, like fruit-infused options or spicy twists. Enjoy your salsa with chips or grilled meats. I hope you have fun making it!

Homemade Salsa Verde Fresh and Flavorful Recipe

Craving a zesty kick to elevate your meals? This Homemade Salsa Verde recipe is your answer! Bursting with flavors from

For a delicious Lemon Garlic Roasted Asparagus, gather these simple items: - 1 pound fresh asparagus, trimmed - 3 tablespoons extra virgin olive oil - 4 cloves garlic, finely minced - Zest of 1 medium lemon - Juice of 1 medium lemon - 1 teaspoon sea salt - ½ teaspoon freshly ground black pepper - ¼ teaspoon red pepper flakes (optional for a hint of heat) - 2 tablespoons freshly grated Parmesan cheese (optional for a savory touch) If you want to change things up, here are some great swaps: - Use avocado oil instead of olive oil for a different flavor. - Try shallots if you don’t have garlic. They add a mild sweetness. - Lemon juice can be swapped with lime juice for a tangy twist. - No Parmesan? Use nutritional yeast for a dairy-free option. Choosing fresh asparagus is key for great flavor. Here’s how to pick the best: - Look for bright green color with no brown spots. - The stalks should be firm and straight, not limp. - Check the tips; they should be closed and compact. - Thicker asparagus has a meatier texture, while thinner ones are tender. Enjoy making this dish with fresh ingredients! For the full recipe, check out the details above. 1. Start by preheating your oven to 425°F (220°C). This heat is key for roasting. 2. Wash the asparagus under cool water to clean it. Trim off the tough ends. 3. Use a large bowl to mix 3 tablespoons of olive oil, 4 minced garlic cloves, the zest, and juice of 1 lemon. Add 1 teaspoon of sea salt, ½ teaspoon of black pepper, and ¼ teaspoon of red pepper flakes if you like some heat. Whisk until well-blended. 4. Add the trimmed asparagus to the bowl. Toss gently to coat every spear with the lemon garlic mix. 5. Line a baking sheet with parchment paper. This helps the asparagus not stick. 6. Spread the asparagus in a single layer on the sheet. This allows for even roasting. 7. Roast in the oven for about 12-15 minutes. Look for bright green color and a tender-crisp texture. 8. If you want a savory touch, sprinkle 2 tablespoons of grated Parmesan cheese over the asparagus in the last 2 minutes of roasting. This adds a nice finish. 9. Once roasted, take the asparagus out of the oven. Let it cool for about a minute. 10. Serve immediately! For a pretty look, garnish with extra lemon zest. 11. Arrange the asparagus on a nice platter. Drizzle with a bit of olive oil and salt for extra flavor. This method will give you the best Lemon Garlic Roasted Asparagus. Follow the steps for a tasty side dish every time! For the full recipe, check the earlier section. To roast asparagus perfectly, you need high heat. Preheat your oven to 425°F (220°C). This hot oven helps the asparagus cook well. Spread the asparagus in a single layer. This step allows the hot air to reach every spear. Keep an eye on the time. Roast for 12 to 15 minutes until they look bright green and tender-crisp. You can add extra flavor with a few simple tricks. Try adding lemon zest for a fresh kick. If you like heat, sprinkle in red pepper flakes. A touch of Parmesan cheese adds a savory twist too. Lastly, drizzle a bit of extra virgin olive oil before serving. This makes the dish even more appealing. One common mistake is overcrowding the baking sheet. If the spears touch, they will steam instead of roast. Another mistake is not trimming the tough ends. Always cut off the hard parts for a better bite. Lastly, don’t skip the seasoning. Salt and pepper are key to making the flavors pop. For more details, check out the Full Recipe. {{image_4}} You can easily swap ingredients in this recipe. If you want a nutty flavor, try adding nuts like almonds or walnuts. For a dairy-free option, skip the Parmesan cheese or use a plant-based version. You can also replace olive oil with avocado oil for a different taste. If you like spices, add a pinch of cumin or paprika to the mix. These simple swaps can change the dish without losing its essence. You can cook asparagus in different ways. Grilling gives it a smoky flavor. Simply toss the asparagus in the same lemon garlic mix and place it on the grill. Cook for about 5-7 minutes, turning often until it’s tender. Steaming is another great method. It keeps the asparagus crisp and bright green. Just steam it for 3-5 minutes before tossing it with the lemon garlic mixture. Both methods bring out unique flavors! You can add herbs and spices to make this dish even better. Fresh herbs like parsley or thyme can brighten the flavor. If you love a bit of heat, add more red pepper flakes or some chili powder. A squeeze of lime can work well too. These combinations can enhance the taste and make the dish your own. Try experimenting with different flavors to find your favorite mix! After enjoying your Lemon Garlic Roasted Asparagus, you might have some left. Let the asparagus cool to room temperature. Then, place it in an airtight container. Store it in the fridge for up to three days. If you want to keep it fresh longer, consider freezing it. To reheat your leftovers, preheat your oven to 350°F (175°C). Spread the asparagus evenly on a baking sheet. Heat it for about 5-7 minutes or until it’s warm. You can also use the microwave. Place the asparagus on a microwave-safe plate and cover it with a damp paper towel. Heat in short bursts of 30 seconds, checking often. If you want to freeze the asparagus, start by blanching it. Boil it for 2-3 minutes, then plunge it into ice water to stop cooking. Drain and dry the asparagus before placing it in a freezer bag. Remove excess air and seal it tightly. Store in the freezer for up to 3 months. When you're ready to use it, there’s no need to thaw. Just roast it directly from frozen for an easy meal. For the full recipe, check out the earlier sections. Roast asparagus for about 12 to 15 minutes. The time can change based on your oven. Look for a bright green color and a tender-crisp texture. If you want them softer, roast longer. Just be careful not to overcook them. Yes, you can use frozen asparagus. However, fresh asparagus gives the best taste and texture. If using frozen, thaw them first and pat them dry. This helps avoid sogginess when roasting. Adjust the roasting time to about 10 to 12 minutes for frozen asparagus. You can pair Lemon Garlic Roasted Asparagus with many dishes! It goes great with grilled chicken, baked fish, or even pasta. It makes a colorful side for any meal. You can also serve it with a fresh salad or a grain dish like quinoa for a balanced plate. For the full recipe, check the section above. We explored how to prepare and enjoy delicious Lemon Garlic Roasted Asparagus. You learned about the best ingredients and where to find fresh asparagus. I shared step-by-step cooking methods and tips for perfect roasting. You can try easy variations and flavor swaps to keep it exciting. Remember to store leftovers properly for future meals. This simple dish brightens any meal. Enjoy experimenting with the recipe and sharing it with others!

Lemon Garlic Roasted Asparagus Tasty and Easy Recipe

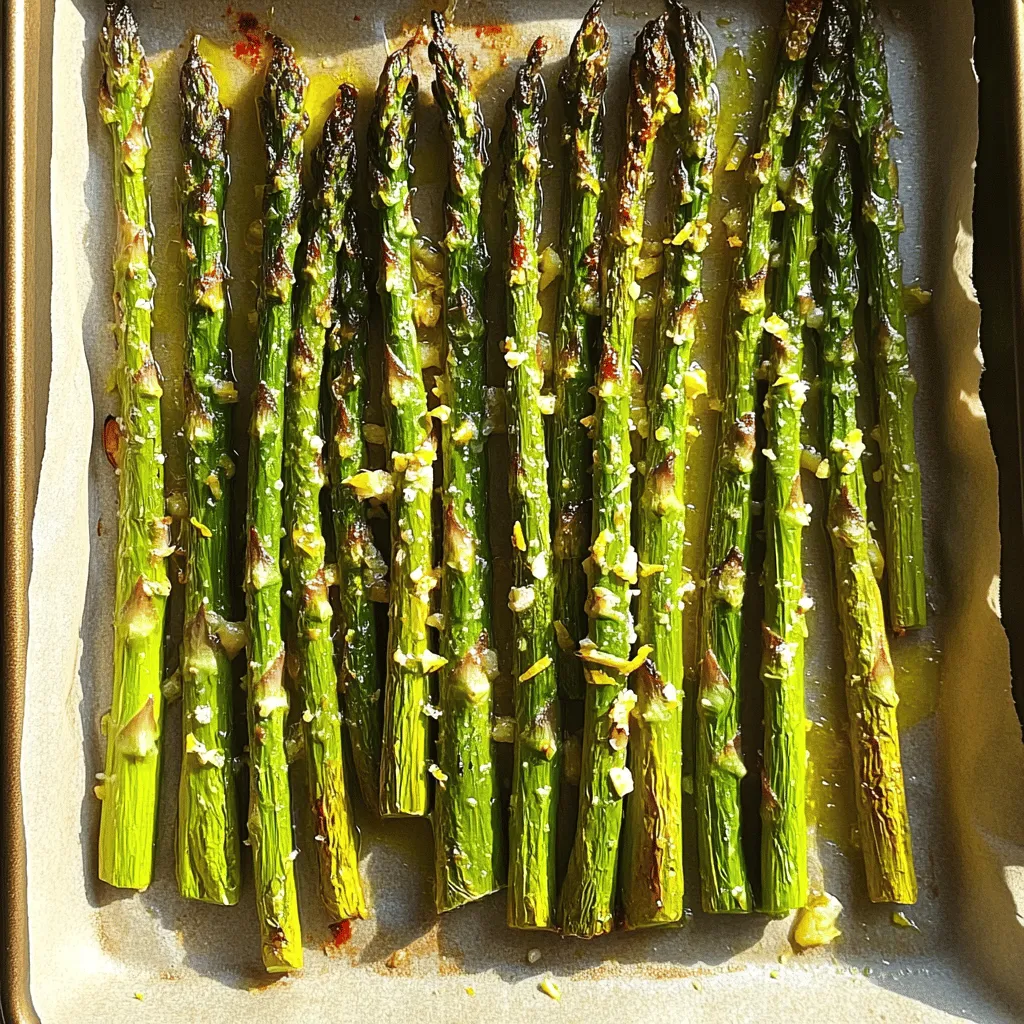
Looking to elevate your dinner with a delicious side? Try my Lemon Garlic Roasted Asparagus! This easy recipe brings out

- 200g rice noodles - 1 cup carrots, shredded - 1 red bell pepper, julienned - 1 cucumber, thinly sliced - 1 cup bean sprouts - 1/4 cup fresh cilantro, chopped - 2 green onions, sliced into rounds - 1 red chili, finely chopped (adjust for desired spice level) - 2 tablespoons sesame oil - 2 tablespoons low-sodium soy sauce - 1 tablespoon fresh lime juice - 1 tablespoon sugar or honey - 1 tablespoon crushed peanuts (for garnishing) - Salt and pepper to taste When I make this spicy Thai noodle salad, I love using fresh ingredients. The rice noodles are the base. They add a nice texture. The carrots and bell pepper give color and crunch. Cucumber provides a refreshing taste. Bean sprouts add a crisp bite. For herbs, I always use fresh cilantro. It gives a bright flavor. Green onions add a mild onion taste. The red chili is key for spice. You can adjust how much you use based on your heat preference. The dressing is simple yet flavorful. Sesame oil brings a nutty taste. Low-sodium soy sauce adds depth. Fresh lime juice gives a zesty kick. Sugar or honey balances the flavors. Finally, I like to sprinkle crushed peanuts on top. They add a wonderful crunch. This salad is a feast for the eyes and the taste buds. For the complete recipe, refer to the Full Recipe section. To start, boil a large pot of water. Once it bubbles, add 200g of rice noodles. Cook them according to the package. Usually, this takes about 4 to 6 minutes. You want them al dente, so watch closely. After cooking, drain the noodles and rinse them under cold water. This stops the cooking and helps prevent sticking. While your noodles cook, prep the fresh veggies. Shred 1 cup of carrots, julienne 1 red bell pepper, and thinly slice 1 cucumber. You can use a box grater for the carrots or a food processor. This step is key for texture and flavor. Fresh veggies make your salad crunchy and colorful. In a small bowl, mix the dressing. Combine 2 tablespoons of sesame oil, 2 tablespoons of low-sodium soy sauce, 1 tablespoon of fresh lime juice, and 1 tablespoon of sugar or honey. Add 1 finely chopped red chili for heat. Whisk until it’s well combined. Taste it! Adjust with salt and pepper for a balanced flavor. Now, add the drained noodles to your large bowl of veggies. Pour the dressing over the noodle and vegetable mix. With gentle hands, toss everything together. Make sure every noodle and veggie piece gets coated with the dressing. This ensures a great taste in every bite. For a stunning display, use clear glass bowls. This shows off the vibrant colors of the salad. Transfer the salad to the bowls or a large platter. Top with chopped fresh cilantro, sliced green onions, and crushed peanuts for that extra crunch. Garnishing with lime wedges adds zest and beauty to your dish. Remember, you can find the full recipe in the earlier sections. Enjoy your colorful and fresh spicy Thai noodle salad! To get the spice just right, start with one red chili. If you want more heat, add another chili. You can also remove the seeds if you want it milder. Always taste as you go. Everyone has a different spice tolerance, so adjust it to your liking. If you want to make this salad vegan, swap out the honey for maple syrup. You can also use tamari instead of soy sauce for a gluten-free option. Keep the flavor strong by adding more herbs or a splash of lime juice. This keeps the salad vibrant and exciting without animal products. Fresh herbs make a big difference. I love adding fresh mint or basil. These herbs brighten the dish. You can also use seasonal vegetables like bell peppers in summer or shredded cabbage in winter. This adds color and crunch, making your salad even more delightful. Check out the [Full Recipe] for all the details to create your perfect Spicy Thai Noodle Salad! {{image_4}} You can boost your Spicy Thai Noodle Salad by adding protein. Chicken and shrimp are great options. They cook quickly and pair well with the salad's flavors. For a vegetarian choice, try tofu. Cut it into cubes and pan-fry until golden. - Chicken: Grill or sauté until cooked through. Slice into strips and mix in. - Shrimp: Quickly stir-fry in a hot pan until they turn pink. - Tofu: Use firm tofu, pan-fry, or bake until crispy. These methods keep the protein juicy and tasty. The dressing is key to this salad's flavor. While the original recipe is great, you can mix it up! Try peanut sauce for a nutty taste or a spicy sriracha dressing for more heat. - Nut-free dressing: Use sunflower seed butter instead of peanut butter. - Gluten-free dressing: Swap regular soy sauce for tamari. These variations keep your salad exciting and cater to different diets. Adding more veggies can change the salad's look and taste. Use seasonal produce to keep it fresh. In summer, add zucchini or corn. In fall, consider roasted squash or sweet potatoes for warmth. - Unusual ingredients: Try adding radishes for crunch or mango for sweetness. Experimenting with vegetables adds fun and variety to your dish. To store your Spicy Thai Noodle Salad, place it in an airtight container. This keeps flavors fresh and prevents spills. You can store the salad in the fridge for up to three days. After that, the veggies may lose their crunch and taste. You can freeze Spicy Thai Noodle Salad, but I don't recommend it. Freezing can change the texture of the noodles and vegetables. If you still want to freeze it, pack it in a freezer-safe container. When you want to eat it, thaw it in the fridge overnight. Reheat it gently in a pan, but do not cook it again. To keep your veggies crunchy, store them separately from the noodles. This helps them stay crisp. For the dressing, store it in a small jar or bowl. Add it just before serving to keep the salad fresh and flavorful. To lower the heat, add fewer red chilies. You can also omit the chili altogether. If you find it too spicy after mixing, try adding more veggies or noodles to balance the heat. A bit of sugar can also tone down the spice. Yes, you can make this salad ahead of time. Prepare the noodles and veggies, then store them separately. Mix them right before serving to keep everything fresh. The dressing can also be made early and stored in the fridge. If you cannot find rice noodles, use thin spaghetti or soba noodles. Cook them according to package instructions. Rinse with cold water to stop cooking and prevent sticking. You can make this salad gluten-free by using gluten-free soy sauce. Many brands offer this option. Always check the label to ensure it meets your needs. Yes, fruits can add a nice touch. Try adding mango, pineapple, or sliced avocado. They pair well with the spicy flavors and add sweetness. This salad is full of fresh veggies, which are low in calories and high in vitamins. Carrots provide beta-carotene, while bell peppers add vitamin C. The healthy fats from sesame oil and peanuts boost heart health too. This makes for a nutritious meal. For the full recipe, check the detailed instructions above. This Spicy Thai Noodle Salad strikes a balance of flavor, texture, and freshness. You now have the complete list of ingredients and easy steps to prepare it. Don't forget the tips for spice control and variations to make it your own. This dish is great for any meal and can be stored well. Enjoy experimenting with ingredients and flavors that suit you. With this recipe, you can whip up a tasty salad that will please everyone. Keep it fresh, fun, and delicious!

Spicy Thai Noodle Salad Fresh and Flavorful Recipe

Looking for a fresh and zesty twist on your meal? This Spicy Thai Noodle Salad is just the thing! With

- 3 ripe bananas - 1/3 cup coconut oil - 1 teaspoon vanilla extract - 1/2 cup packed brown sugar - 1 large egg To bake this tasty bread, start with three ripe bananas. The riper the bananas, the sweeter the bread. Use 1/3 cup of melted coconut oil for moisture and flavor. Next, add 1 teaspoon of vanilla extract for a warm aroma. You will need 1/2 cup of packed brown sugar to sweeten the mix. Finally, crack in 1 large egg to bind all the ingredients together. - 1 teaspoon baking soda - Pinch of fine sea salt - 1 teaspoon ground cinnamon For the bread to rise, we need 1 teaspoon of baking soda. A pinch of fine sea salt enhances the flavors. Add 1 teaspoon of ground cinnamon for a cozy hint of spice. - 1 1/2 cups all-purpose flour - 1/2 cup chocolate chips - 1/4 cup chopped walnuts (optional) Next, grab 1 1/2 cups of all-purpose flour for structure. Stir in 1/2 cup of chocolate chips for that classic treat. If you like a crunchy texture, toss in 1/4 cup of chopped walnuts. You can find the complete recipe under [Full Recipe]. - Preheat the oven to 350°F (175°C). - Grease a 9x5 inch loaf pan lightly with some oil or baking spray. - First, mash the bananas in a large bowl until smooth. - Then, mix in the melted coconut oil until it blends well. - Next, pour in the vanilla extract and add the brown sugar. - Stir these until the mixture is smooth and creamy. - In a separate bowl, whisk together the baking soda, sea salt, and cinnamon. - Gradually add this dry mix to the wet banana blend. - Stir gently until just combined, avoiding overmixing to keep the bread light. - Now, incorporate the beaten egg into the batter. - Carefully fold in the chocolate chips and walnuts, if you like. - Transfer the batter into the greased loaf pan. - Smooth the top with a spatula for an even bake. - Bake for about 60 minutes, checking for doneness with a toothpick. - If the toothpick comes out clean, the bread is ready! Follow these steps, and you will create a delightful chocolate chip banana bread that everyone will love. For a full recipe, check out the detailed instructions above! To avoid dense bread, do not overmix the batter. Mix just until the flour is combined. This keeps the bread light and fluffy. Use ripe bananas; they add moisture and sweetness. Best practices for mixing include whisking the dry ingredients well. This helps distribute the baking soda and spices evenly. For serving, slice the bread and place it on a wooden board. Garnish with fresh banana slices and a sprinkle of cinnamon. You can drizzle melted chocolate on top for extra flair. Pair banana bread with yogurt or a scoop of ice cream. This makes a great breakfast or dessert option. If your bread is too moist, bake it a little longer. You can also reduce the banana amount next time. For dry bread, try adding a bit more coconut oil. To ensure even baking, rotate the pan halfway through. This helps the bread bake evenly and rise nicely. {{image_4}} You can make this chocolate chip banana bread even better with some fun additions. Try adding nuts like pecans or almonds for a nice crunch. These nuts can add great flavor and texture. You can also sprinkle in some spices like nutmeg or ginger. These spices bring warmth and a hint of spice to each bite. If you want to change the sweetness, consider using honey or maple syrup. They can replace brown sugar and give a unique taste. You can also use sugar substitutes if you seek a healthier option. These sweeteners can help cut down on calories while still keeping your bread tasty. Making this bread vegan is easy! Swap the egg for a flax egg made with ground flaxseed and water. This simple change keeps the bread moist. For a gluten-free version, you can replace all-purpose flour with almond or oat flour. Both options work well and still taste great. Enjoy experimenting with these variations! To keep your chocolate chip banana bread fresh, store it at room temperature. Wrap it in plastic wrap or foil. This method helps keep the bread moist. If your kitchen is warm, you can refrigerate it. However, this may change the texture slightly. If you want to save some for later, freezing is a great option. First, slice the banana bread. Wrap each slice in plastic wrap tightly. Then, place the slices in a freezer bag. Make sure to remove as much air as possible. When you’re ready to eat, thaw the bread in the fridge overnight for the best texture. Homemade banana bread can stay fresh for about 3 to 5 days at room temperature. In the fridge, it lasts about a week. If you freeze it, it can last up to 3 months. Always check for spoilage. Signs include mold or a sour smell. If you see or smell anything off, it’s best to toss it. Yes, you can use frozen bananas. Frozen bananas are easy to mash. They are also sweeter than fresh bananas. This adds great flavor to your bread. Just thaw them before using. Drain any extra liquid before mixing. The best way to check is with a toothpick. Insert it into the center of the bread. If it comes out clean, the bread is done. Look for a golden-brown color on top. The bread should also spring back when touched lightly. Yes, you can double this recipe. Use a larger mixing bowl to combine ingredients. Make sure to use two loaf pans if needed. Baking time may change, so check for doneness. Larger batches are great for sharing or freezing. You can use butter or vegetable oil instead. Applesauce is also a good choice for less fat. If you have allergies, try avocado oil. Each option gives a slightly different taste but works well. This recipe for chocolate chip banana bread combines simple, tasty ingredients with easy steps. You learned how to prepare, mix, and bake your bread for a perfect result. Remember, experimenting with flavors and storing your bread correctly can enhance your baking game. Keeping these tips in mind will help you create a delicious treat every time. Enjoy sharing your tasty banana bread with friends and family. Dive in and start baking!

Chocolate Chip Banana Bread Easy and Tasty Recipe

Craving something sweet and comforting? This Chocolate Chip Banana Bread recipe is perfect for you! With just a few simple

To make a great chicken tikka masala, you need some key ingredients: - 1 lb (450g) boneless, skinless chicken thighs, cut into bite-sized pieces - 1 cup plain yogurt - 2 tablespoons garam masala - 1 tablespoon turmeric - 1 tablespoon ground coriander - 1 tablespoon cumin - 1 teaspoon chili powder - 1 teaspoon salt - 3 tablespoons vegetable oil - 1 medium onion, finely chopped - 4 cloves garlic, minced - 1-inch piece fresh ginger, minced - 1 can (14 oz) diced tomatoes - 1 cup coconut milk - Fresh cilantro, chopped (for garnish) The chicken thighs give a tender bite. Yogurt adds a creamy texture. The spices create that warm, aromatic flavor. The onion, garlic, and ginger enhance the dish with their savory notes. Diced tomatoes and coconut milk add moisture and richness. Fresh cilantro brings a burst of color and taste. When cutting chicken, aim for even pieces. This helps them cook at the same rate. Marinate the chicken in yogurt and spices for at least 30 minutes. If you have more time, marinate it overnight. This makes the meat extra flavorful and tender. Handle spices with care. Too much can overwhelm the dish. Start with the amounts listed in the recipe. Taste as you go. You can always add more if you like it spicier. Use fresh spices when possible. They pack a punch of flavor. For the best results, gather all your ingredients before you start. This ensures a smooth cooking experience. Happy cooking! For the complete steps, check out the Full Recipe. To start, you need to marinate the chicken. In a large bowl, mix the chicken with yogurt and spices. Use these spices: - 2 tablespoons garam masala - 1 tablespoon turmeric - 1 tablespoon ground coriander - 1 tablespoon cumin - 1 teaspoon chili powder - 1 teaspoon salt Make sure the chicken is well-coated. For the best flavor, let it marinate for at least 30 minutes. If you have more time, refrigerate it for up to 24 hours. Next, set your Instant Pot to Sauté mode. Once it's hot, pour in the vegetable oil. Add a medium onion, finely chopped. Sauté the onion for about 3-4 minutes. You want it soft and translucent. Then, add 4 cloves of minced garlic and 1-inch piece of minced ginger. Sauté for another 1-2 minutes. Stir often until the garlic softens and the aroma fills your kitchen. Now, it’s time to cook the chicken. Add the marinated chicken to the pot. Spread it out and let it brown slightly for about 5 minutes. Stir occasionally to avoid sticking. Pour in a can of diced tomatoes. Make sure to include the juice. Stir everything to combine the flavors. Turn off Sauté mode. Carefully pour in 1 cup of coconut milk and stir gently. Close the lid of the Instant Pot. Set the steam release valve to sealing. Choose the Manual or Pressure Cook option. Set the time for 10 minutes at high pressure. After cooking, let the pressure release naturally for 10 minutes. Then, do a quick release for any remaining steam. Open the lid carefully and stir the chicken tikka masala well. Taste it and adjust any seasoning if needed. Serve hot, garnished with fresh cilantro. Enjoy it over basmati rice or with warm naan for a delightful meal. For the full recipe, check the details above. To make the best chicken tikka masala, avoid common mistakes. One mistake is not marinating the chicken long enough. Marinate for at least 30 minutes. For the best flavor, try marinating for up to 24 hours. This gives the spices time to soak in. Another mistake is rushing the sautéing step. Sauté the onions, garlic, and ginger until soft. This adds rich flavor to your dish. Ensure the chicken pieces are coated well in the spice mix. This helps create the right texture. You want a creamy sauce without lumps. Stir in the coconut milk gently. This makes the sauce smooth. If it feels too thick, add a splash of water or broth. If you're dairy-free, you can replace yogurt and milk. Use almond yogurt or cashew cream. These options work well and keep the dish creamy. You can adjust spices to suit your taste. If you like it milder, reduce the chili powder. For more heat, add a pinch of cayenne pepper. Taste as you go, and make it your own. Feel free to explore other ingredients. Add bell peppers or peas for extra color and nutrition. You can find the Full Recipe to guide you through these options. {{image_4}} You can switch the chicken for other proteins. Chicken breast works well. It gives a leaner option. Paneer is great for a vegetarian choice. It absorbs flavors and adds creaminess. For a vegan version, use tofu. Tofu soaks up the spices nicely. You can also try chickpeas for a hearty meal. Each protein brings a unique taste and texture. Adding vegetables makes the dish healthier. Try spinach or bell peppers for color. Carrots can add a nice crunch. You can also use peas for a pop of sweetness. They all work well in the sauce. To change the flavor, add extra spices. A pinch of cinnamon adds warmth. Cardamom gives a nice floral note. You can also add a splash of lemon juice for brightness. These tweaks can make your dish stand out. To keep your chicken tikka masala fresh, store it in an airtight container. Place it in the fridge within two hours of cooking. This helps prevent spoilage. Your dish will stay good for up to three days. Make sure to let it cool before sealing. If you want to keep it longer, you can freeze it. Just use a freezer-safe container or bag. The tikka masala can last for about three months in the freezer. When you’re ready to eat it, thaw it overnight in the fridge. To reheat your chicken tikka masala, the Instant Pot is a great choice. Set it to Sauté mode on low. Add a splash of water or extra coconut milk to keep the dish moist. Stir gently as it heats. This method keeps flavors bright and prevents drying out. You can also use the microwave. Place the tikka masala in a bowl, cover it, and heat in short bursts. Stir it every minute to ensure even heating. Always check the temperature before serving to ensure it’s hot throughout. You cook Chicken Tikka Masala for 10 minutes on high pressure. After cooking, let the pressure drop naturally for 10 minutes. Then, do a quick release to finish. This method keeps the chicken tender and juicy. If you want to add more flavors, you can let it marinate longer. An extra hour or overnight works great. Yes, you can use frozen chicken! Just add a few extra minutes to the cooking time. Cook for 12-15 minutes on high pressure. Make sure to separate the pieces as best as you can. It is best to thaw the chicken first if you can. This way, the spices coat the meat better. Serve this dish with steamed basmati rice or warm naan bread. Both soak up the sauce well. You can also add a side salad or roasted veggies. For a refreshing touch, a yogurt cucumber raita pairs nicely too. These sides balance the rich flavors of the tikka masala. For the complete recipe, check out the Full Recipe. It includes all the steps and tips for success. Making Chicken Tikka Masala in an Instant Pot is easy and fun. I covered the key ingredients, like chicken, yogurt, and spices, and shared tips for prepping them right. You learned the step-by-step process for marinating and cooking, along with tricks to avoid common mistakes. Remember, you can switch proteins and adjust flavors to make it your own. Store leftovers correctly and reheat them to keep the taste alive. For more details, find the full recipe to try this tasty dish today!

Savory Instant Pot Chicken Tikka Masala Dish

Are you ready to whip up a delicious Instant Pot Chicken Tikka Masala? This savory dish packs bold flavors, tender

To make cinnamon sugar churros, you need a few key ingredients: - 1 cup water - 2 tablespoons granulated sugar - 1/2 teaspoon salt - 1/4 cup unsalted butter, cut into pieces - 1 cup all-purpose flour - 2 large eggs, at room temperature - 1 teaspoon vanilla extract These ingredients come together in a fun way. The water, sugar, salt, and butter create a rich base when boiled. Then, we add flour and eggs to form a dough that puffs up beautifully when fried. For the cinnamon sugar coating, you will need: - 1/4 cup granulated sugar - 1 tablespoon ground cinnamon Mix these two well to create a sweet topping. If you need alternatives, consider using coconut sugar or a sugar substitute. These work well for special diets without losing flavor. Choosing the right oil is key for frying churros. Here are some tips: - Best types of oil: Use vegetable or canola oil. They have high smoke points and won't affect the churros' taste. - Oil temperature guide: Heat the oil to 375°F (190°C). This temp helps churros fry evenly, giving them a golden color. Follow these tips for the best churros. You can find the full recipe to help you get started on this tasty journey! To make the dough for your churros, start by combining the wet ingredients. In a medium saucepan, add 1 cup of water, 2 tablespoons of sugar, 1/2 teaspoon of salt, and 1/4 cup of unsalted butter. Heat this mixture over medium heat. Stir until it boils and the butter melts completely. Once boiling, take the saucepan off the heat. Quickly stir in 1 cup of all-purpose flour. Use a wooden spoon or spatula to mix until a smooth dough forms. It should pull away from the sides of the pan. Let it cool for about 10 minutes. Now, it’s time to add the eggs. Add 2 large eggs one at a time. Mix well after each egg until smooth. Finally, stir in 1 teaspoon of vanilla extract. This will make your dough glossy and ready for frying. Next, prepare the oil for frying. Heat oil in a deep fryer or large pot to 375°F (190°C). Use a candy thermometer to check the temperature. This step is vital for the best texture. While the oil heats, fill a piping bag with your churro dough. Use a star tip for that classic shape. Pipe the dough into 6-inch long strips directly into the hot oil. Keep a safe distance to avoid splashes. Fry each churro for about 2-3 minutes on each side. Look for a golden brown color and a nice puff. Once they are golden, carefully remove the churros using a slotted spoon. Let the excess oil drip off, then place them on a paper towel-lined plate to absorb more oil. When your churros are warm, it’s time to coat them in cinnamon sugar. In a bowl, mix 1/4 cup of granulated sugar with 1 tablespoon of ground cinnamon. Roll each churro in this mix while it’s still warm. This gives them that sweet and spicy finish. For serving, arrange the churros on a large platter. Lightly dust with extra cinnamon sugar for a pretty look. You can add small bowls of warm chocolate sauce or caramel for dipping. This makes your churros even more special. Enjoy your delicious treat! For the complete recipe, see the Full Recipe section. The oil temperature is key. Keep it at 375°F (190°C). This hot oil makes the churros puff up and turn golden. If it's too cold, churros can soak up oil and become greasy. Use a candy thermometer to check the heat. To avoid soggy churros, fry them in small batches. Overcrowding the pan cools the oil quickly. This makes it hard for churros to crisp up. Give each churro space to fry well. You can add chocolate or caramel flavors to your churros. Melt dark chocolate and dip them for a rich taste. Or, drizzle warm caramel for a sweet touch. Don’t be afraid to experiment! Try adding spices like nutmeg or extracts like almond. These can change the flavor profile. A little can make a big difference! Avoid overcrowding the frying pan. This can lead to uneven cooking. Stick to frying a few churros at a time. Let the dough cool before adding eggs. If you add eggs too soon, they can cook in the heat. This changes the texture and makes mixing harder. Always cool the dough for about 10 minutes before mixing in eggs. For the complete process, refer to the Full Recipe for more tips. {{image_4}} You can make churros gluten-free by changing the flour. Use almond flour or rice flour instead of all-purpose flour. Each option alters the taste and texture slightly. Almond flour adds a nutty flavor, while rice flour keeps it light. Keep an eye on the dough. Adjust water based on the flour you choose. Start with 1 cup and add more if needed. This way, your churros stay soft and tasty. To make churros vegan, you need egg replacements. You can use flaxseed meal or applesauce. Mix 1 tablespoon of flaxseed with 2.5 tablespoons of water. Let it sit for 5 minutes. This gives a nice egg-like texture. For a dairy-free option, replace butter with coconut oil or vegan butter. Both will keep flavors rich and creamy. Your churros will still taste amazing without animal products. Churros can be more fun with unique flavors. Try chocolate churros for a rich twist. Add cocoa powder to the dough for a chocolatey delight. For spiced churros, mix in nutmeg or ginger. These spices give a warm, festive taste. You can even dip them in chocolate sauce for extra flavor. Enjoy experimenting to find your favorite! To keep your churros fresh, place them in an airtight container. Make sure they cool to room temperature first. This helps prevent sogginess. If stored properly, they will stay good for about two days. To reheat churros, preheat your oven to 350°F (175°C). Place the churros on a baking sheet. Heat them for about 10 minutes. This will restore their crispiness. Avoid using the microwave, as it can make them chewy. You can freeze churros before or after frying. If freezing before frying, pipe the dough into strips. Place them on a baking sheet lined with parchment paper. Once they freeze solid, transfer them to a freezer bag. If you freeze them after frying, let them cool completely. Wrap each churro in plastic wrap. Then, place them in a freezer bag. They can last up to three months in the freezer. To defrost, move the churros to the fridge overnight. For best taste, reheat them in the oven as mentioned above. Churros can stay fresh for two days at room temperature. If refrigerated, they can last about a week. When frozen, they remain good for up to three months. Watch for signs of spoilage. If they become hard or dry, they are not good to eat. Also, check for any off smells or unusual colors. Proper storage helps keep your churros delightful and tasty. For the complete recipe, refer to the Full Recipe section. To keep your churros from being oily, focus on a few key steps. - Tips for proper frying: Always heat your oil to 375°F (190°C). Use a thermometer to check the temperature. If the oil is too cool, churros absorb more oil. Fry only a few at a time. This helps maintain the oil’s temperature. - Drainage techniques after frying: Use a slotted spoon to lift churros out of the oil. Let them rest on a plate lined with paper towels. This removes excess oil, keeping them crisp. Yes, you can prepare churros in advance. - Best practices for making churros in advance: Make the dough and pipe the churros. Place them on a tray lined with parchment paper. Chill them in the fridge until ready to fry. - How to keep them warm and fresh before serving: Keep fried churros in a warm oven at 200°F (93°C). This will keep them warm without cooking them further. Pairing churros with tasty dips makes them even better. - Popular dipping sauces: Warm chocolate sauce and caramel sauce are favorites. You can also try a creamy vanilla sauce for a fun twist. - Other dessert pairings to enhance your churro experience: Serve churros with ice cream or fruit. They pair well with strawberries or bananas for a fresh touch. You can find churros in several places. - Local vendors or establishments known for churros: Many fairs and food trucks sell churros. Check local dessert shops or bakeries too. - Online delivery options and recipes for homemade churros: Some restaurants offer delivery. You can also make your own churros at home. For a full recipe, check the details above. In this post, we explored how to make delicious cinnamon sugar churros. We covered essential ingredients and step-by-step instructions for perfect churros. I shared tips for frying, coating, and serving, along with ways to avoid common mistakes. You can also try gluten-free and vegan options or add unique flavors. Store leftovers properly to enjoy later. Remember, with a few simple tips, you can make churros just right. Enjoy your churro-making journey and impress your friends and family with your tasty treats!

Cinnamon Sugar Churros Delightful Snack Recipe

Cinnamon sugar churros are a delightful snack that you can easily make at home! Their crispy outside and soft inside

- 1 cup cream cheese, softened - 1/2 cup powdered sugar - 1 teaspoon pure vanilla extract - 1/2 cup heavy whipped cream - 1 cup graham cracker crumbs - 1/4 cup unsalted butter, melted - Fresh seasonal fruit (strawberries, blueberries, raspberries) - Optional chocolate chips or caramel sauce To make these tasty no-bake cheesecake bites, you need simple and fresh ingredients. Start with cream cheese. It should be softened, so it blends easily. The powdered sugar adds sweetness. The vanilla extract gives a lovely flavor. Heavy whipped cream makes the filling light and fluffy. For the crust, graham cracker crumbs are a must. They give a nice crunch. The melted butter helps hold the crumbs together. Lastly, add toppings. Fresh fruit like strawberries or blueberries adds color and taste. You can also drizzle chocolate or caramel sauce for extra fun. These ingredients come together for an easy and delicious treat. For the full recipe, check out the details on how to mix and chill these bites! - Step 1: Beat the softened cream cheese in a bowl. Use an electric mixer to make it smooth. - Step 2: Gradually add the powdered sugar and vanilla. Mix until it's creamy and lump-free. - Step 3: In a clean bowl, fold in the heavy whipped cream. Use a spatula to keep it fluffy. - Step 4: Mix the graham cracker crumbs with melted butter. Stir until it looks like damp sand. - Step 5: Press the crust mixture into a mini muffin tin. Use about one tablespoon for each cup. - Step 6: Fill each crust with the cream cheese mixture. Smooth the top with a spatula. - Step 7: Refrigerate the bites for at least two hours. This helps them firm up well. Enjoy the ease of making these no-bake cheesecake bites! For the full recipe, check out the Full Recipe. - Make sure your cream cheese is at room temperature. This helps it blend easily. - Gently fold in the whipped cream. This keeps the mixture light and fluffy. To get the best texture, always use softened cream cheese. Cold cream cheese can cause lumps. When you fold in the whipped cream, do it slowly. This keeps air in the mixture, making each bite creamy. - Arrange the cheesecake bites on a decorative platter. It adds a nice touch. - Garnish each bite with a sprig of mint. This adds color and freshness. A beautiful presentation makes your treats even more appealing. Use a bright platter to show off the bites. The mint adds a pop of green that looks great. - Think about adding flavors like citrus zest or chocolate. This can change the taste of your bites. Adding a dash of lemon or orange zest can elevate the flavor. If you love chocolate, try mixing in chocolate chips. This small change can make a big difference in taste. For the full recipe, check out the details above. {{image_4}} You can easily change the flavors of your no-bake cheesecake bites. One fun option is chocolate. To make chocolate no-bake cheesecake bites, add 1/2 cup of melted chocolate to the cream cheese mixture. This gives a rich, sweet treat that chocolate lovers will adore. Another great choice is fruit-infused cheesecake bites. You can use lemon or raspberry for a fresh twist. For lemon, add the zest of one lemon and a tablespoon of lemon juice to the cream cheese. For raspberry, mix in raspberry puree to the filling for a fruity punch. You can make these bites fit many diets. For gluten-free options, use gluten-free graham crackers in your crust. This keeps the taste and texture while being safe for those with gluten allergies. If you want vegan adaptations, substitute regular cream cheese with plant-based cream cheese. Use coconut whipped cream instead of heavy whipped cream. These swaps keep the bites creamy and delicious without dairy. Hosting a party? Create a DIY customize-your-bite station. Set out different toppings like crushed nuts, fresh fruit, and chocolate chips. Let your guests build their own cheesecake bites. This makes for a fun and interactive dessert experience, where everyone can create their perfect treat. For the full recipe, check the section above to get started today! To keep your no-bake cheesecake bites fresh, store them in an airtight container. Place the container in the fridge. They will stay good for up to five days. Be sure not to stack them, as this can ruin their shape. If you want to enjoy them later, chill them right after making. If you have leftovers, freezing is a great option. First, let the cheesecake bites cool completely in the fridge. Then, place them in a single layer on a baking sheet. Freeze them for about two hours. Once they're firm, transfer them to a freezer bag or container. They can last up to three months in the freezer. For the best taste, eat your cheesecake bites within five days if stored in the fridge. If frozen, try to eat them within three months for the best flavor and texture. Always check for any signs of freezer burn or spoilage before enjoying. Feel free to explore the [Full Recipe] for more details on making these tasty treats! No-bake cheesecake bites can last up to five days in the refrigerator. Store them in an airtight container. If you want them to last longer, you can freeze them. They will stay fresh in the freezer for about two months. Just make sure to wrap them well to avoid freezer burn. Yes, you can use different types of crusts. Some great options include: - Oreos for a chocolatey flavor - Nuts, like almonds or pecans, for a crunchy base - Gluten-free cookie crumbs for a gluten-free option Feel free to experiment with what you like best! You can get creative with toppings! Some ideas include: - Drizzling melted chocolate or caramel sauce - Adding crushed cookies for extra crunch - Sprinkling shredded coconut for a tropical twist - Using different fruits, like kiwi or mango, for a fresh taste Mix and match to find your favorite combination! Absolutely! You can prepare no-bake cheesecake bites ahead of time. Make them up to two days in advance. Just store them in the fridge until you’re ready to serve. For longer storage, freeze them and let them thaw in the fridge overnight before serving. This makes it easy to enjoy a sweet treat anytime! For the full recipe, check here. You learned how to make no-bake cheesecake bites, starting with key ingredients like cream cheese and graham crackers. Following simple steps, you can create a tasty dessert. With tips on texture, presentation, and ways to customize your treats, you have the tools to impress. Remember, these bites are easy to adapt for various diets and occasions. Whether served at a party or a family dinner, enjoy your delicious creations!

No-Bake Cheesecake Bites Easy and Delicious Treat

If you crave a sweet treat that’s quick and easy, these No-Bake Cheesecake Bites are perfect! With just a few

Older posts
Newer posts
← Previous Page1 … Page26 Page27 Page28 … Page45 Next →

dsad

© 2025 lazychefmagic • Built with GeneratePress

Our Policies

  • Copyright Policy
  • Cookie Policy
  • GDPR Policy
  • Privacy Policy
  • Disclaimer
  • Terms Of Use

More Information

  • Home
  • About
  • Contact
  • Appetizers
  • Dessert
  • Dinner
  • Drinks
©2025, lazychefmagic About Back To Top