Skip to content
DisclaimerTerms Of UseGDPR PolicyCookie Policy

lazychefmagic

  • Home
  • Drinks
  • Appetizers
  • Dinner
  • Dessert
  • About
  • Contact
  • Privacy Policy
DisclaimerTerms Of UseGDPR PolicyCookie Policy

Amanda

- 1 medium head of cauliflower (or 4 cups pre-riced cauliflower) - 1 cup frozen mixed vegetables - 3 green onions - 2 cloves garlic - 2 large eggs - 3 tablespoons soy sauce - 1 tablespoon sesame oil - 1 tablespoon olive or avocado oil - Salt and black pepper - 1 teaspoon grated fresh ginger - Fresh cilantro leaves or sesame seeds for garnish Cauliflower fried rice is a smart choice for a healthy meal. It tastes great and is easy to make. You will need a head of cauliflower to start. You can also use pre-riced cauliflower if you want to save time. This riced cauliflower serves as a perfect base for your dish. Next, gather your colorful mixed vegetables. Frozen mixed vegetables save you prep time and add fun flavors. Green onions add a fresh crunch. Garlic gives a nice aroma. You will also need two eggs for protein. They help bind the dish together. For flavor, you will need soy sauce and sesame oil. They add that classic fried rice taste. Olive or avocado oil works well for cooking. Don’t forget salt and pepper to enhance all the flavors. If you want to boost the flavor even more, consider adding fresh ginger. It adds a nice zing. For a finishing touch, garnish your dish with cilantro or sesame seeds. This adds color and a pop of flavor. Check out the Full Recipe for details on how to put it all together! - Step 1: Prepare the cauliflower If you're using a whole head, cut it into florets. Use a food processor to pulse the florets. Aim for a rice-like texture. If you have pre-riced cauliflower, just set it aside. - Step 2: Heat the oil In a large skillet or wok, pour in olive or avocado oil. Heat it over medium heat until it shimmers. - Step 3: Sauté aromatics Add the minced garlic to the hot oil. If you like ginger, toss it in now. Sauté for about 30 seconds until fragrant, but don’t let it burn. - Step 4: Cook the vegetables Stir in the frozen mixed vegetables. Cook for about 3-4 minutes until tender and heated through. - Step 5: Scramble the eggs Push the vegetable mix to one side of the skillet. Pour the beaten eggs into the empty space. Scramble the eggs until fully set, then mix them with the veggies. - Step 6: Add cauliflower rice Pour the riced cauliflower into the skillet. Stir all the ingredients together. Cook for an additional 5-7 minutes until the cauliflower is tender and golden. - Step 7: Season the mixture Add the soy sauce and sesame oil. Stir thoroughly to coat everything evenly. Taste and season with salt and black pepper if needed. - Step 8: Finish with green onions Sprinkle the sliced green onions on top. Mix gently to spread them throughout the fried rice. - Step 9: Serve hot Remove the skillet from the heat. Serve your cauliflower fried rice hot. For extra flavor, garnish with fresh cilantro leaves or a sprinkle of sesame seeds. Enjoy this tasty dish! For more details, check the Full Recipe. To rice cauliflower, you can use a food processor or a box grater. If you use a food processor, pulse the florets until they look like rice. Be careful not to over-process them. This can turn your cauliflower mushy. Using a box grater gives you more control, but it takes longer. For the best texture, cook the cauliflower for about 5 to 7 minutes. You want it tender but not mushy. Stir it often to ensure even cooking. Fresh herbs can really boost the flavor of your dish. Try adding cilantro or basil just before serving. These herbs add freshness and brightness. You can also use alternative sauces. If you want a kick, try sriracha or teriyaki sauce instead of soy sauce. Cauliflower is low in calories and high in nutrients. It is a great source of vitamins C and K. It also has antioxidants that can benefit your health. One big plus is that cauliflower is low in carbs. This makes it a great choice for anyone on a low-carb diet. It can replace traditional rice without losing flavor or satisfaction. Enjoy your delicious and healthy cauliflower fried rice with these tips! {{image_4}} You can boost the protein in your cauliflower fried rice. Try adding chicken, shrimp, or tofu. These choices add flavor and texture. If you want to make them even tastier, marinate your proteins before cooking. Use soy sauce, garlic, and ginger for a simple marinade. Let them soak for at least 30 minutes. This step makes a big difference. Don’t be afraid to switch up the veggies. You can use many different vegetables in your fried rice. Some great options include bell peppers, broccoli, or zucchini. Think about what's in season, too! Fresh, seasonal vegetables often taste better and are more nutritious. Mix and match based on what you like or have on hand. If you need to make dietary changes, cauliflower fried rice is very flexible. For gluten-free options, use tamari instead of soy sauce. This swap keeps the flavor while meeting your needs. If you're vegan, skip the eggs. You can add more veggies or an extra serving of tofu for protein. The dish remains tasty and filling without the eggs. For the full recipe, check out the Cauliflower Fried Rice section. To store leftover cauliflower fried rice, place it in an airtight container. This keeps the rice fresh and prevents odors. Your fried rice will stay good for about 3 to 5 days in the fridge. Make sure it cools down to room temperature before sealing it. This helps avoid moisture buildup, which can make it soggy. If you want to keep your cauliflower fried rice longer, freezing is a great option. Place the cooled fried rice in a freezer-safe bag or container. Try to remove as much air as possible to prevent freezer burn. It can last for about 2 to 3 months in the freezer. To thaw, simply move the container to the fridge for several hours or overnight. You can also use the microwave on the defrost setting. This is quick but may make the rice a bit wet. When you’re ready to enjoy your cauliflower fried rice, reheat it in a skillet over medium heat. This method brings back the texture. Stir frequently to heat it evenly. If it seems dry, add a splash of water or soy sauce. To avoid sogginess, do not cover the pan while reheating. This helps steam escape and keeps the rice from getting mushy. Enjoy your meal, knowing it can taste just as good as the first time! You can rice cauliflower in two easy ways. First, use a food processor. Cut the cauliflower into small florets. Place them in the processor. Pulse until they look like rice. Second, use a box grater. Grate the florets on the large holes. Both methods work well. I suggest the food processor for speed. Yes, you can prepare cauliflower fried rice ahead of time. Cook it fully and let it cool. Store it in an airtight container in the fridge. It will stay fresh for about three days. To reheat, use a skillet over medium heat. Add a splash of water to keep it from drying out. One common mistake is overcooking the cauliflower. It can turn mushy and lose its texture. Another mistake is using too much liquid, which makes the dish watery. Stick to the recipe for the right amount of soy sauce. This keeps your fried rice tasty and firm. Yes, cauliflower fried rice is keto-friendly. A cup of riced cauliflower has about 5 grams of carbs. This is much lower than regular rice, which has around 45 grams. It fits well in a low-carb diet. Enjoy it without guilt while keeping your carb count low! Cauliflower fried rice is a tasty and healthy dish. We covered essential ingredients, step-by-step cooking methods, and tips to ensure flavor and texture. You can customize it with proteins or veggies to suit your taste. Proper storage helps maintain freshness, and reheating ensures it stays delicious. This dish is a great low-carb option, perfect for meal prep. Enjoy your culinary adventure with cauliflower fried rice! It's simple, fun, and satisfying. Keep experimenting with different flavors to make it your own. Happy cooking!

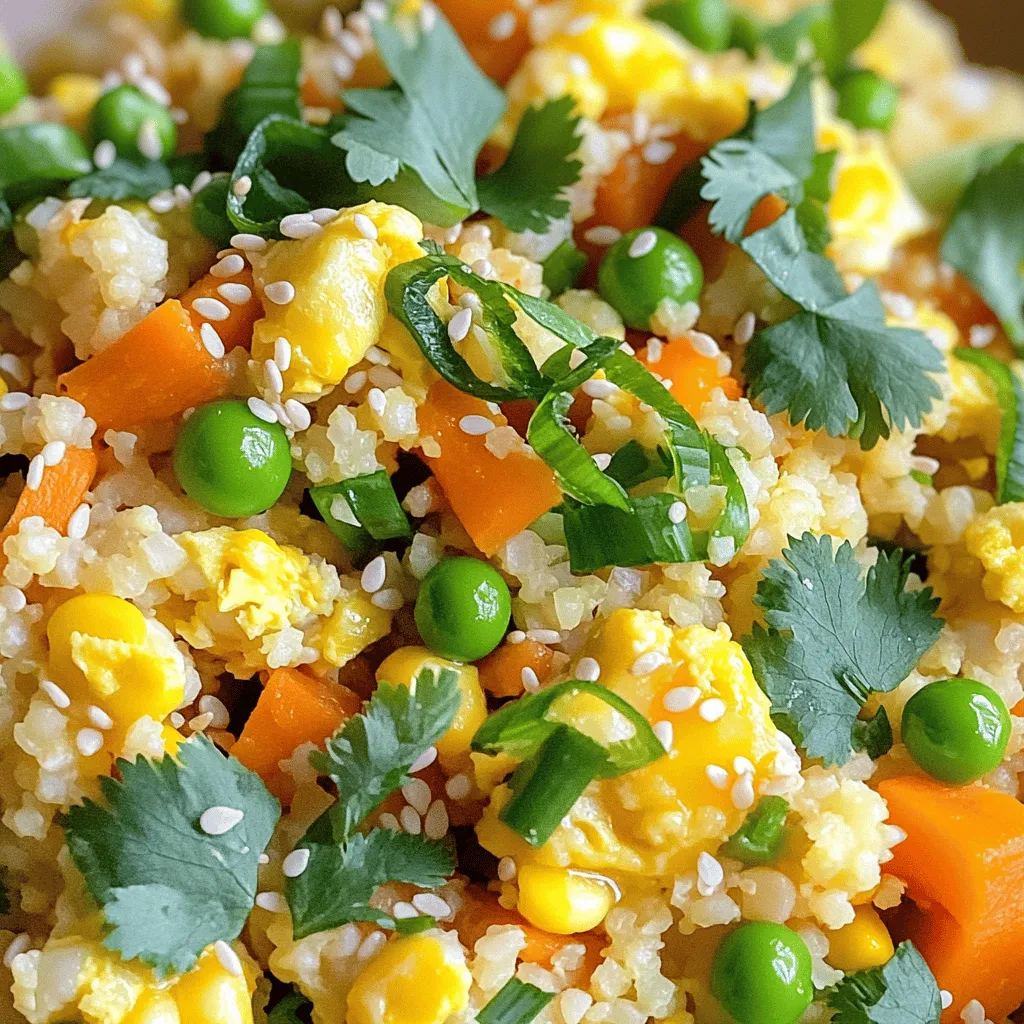
Cauliflower Fried Rice Flavorful and Satisfying Meal

Are you ready to transform your meals with a healthy twist? Cauliflower fried rice gives you all the savory flavor

To make tasty Caprese Salad Skewers, gather these main ingredients: - 12 cherry tomatoes - 12 fresh basil leaves - 12 small mozzarella balls (bocconcini) - 2 tablespoons balsamic glaze - 1 tablespoon extra virgin olive oil - Salt and pepper to taste These fresh ingredients create a burst of flavor. The tomatoes add sweetness, the basil gives a fresh aroma, and the mozzarella offers creaminess. You can add a pinch of red pepper flakes for heat. This brings a nice kick to your skewers. Other options include: - Avocado slices - Prosciutto - Grilled zucchini These add-ons can change the flavor profile while keeping the dish fresh and vibrant. Feel free to mix and match! You can use either bamboo or metal skewers. Bamboo skewers are easy to find and disposable. They work well for short-term use. Metal skewers last for years and are great for repeated use. Just remember to soak bamboo skewers in water for about 30 minutes before use. This helps prevent burning on the grill. For the full recipe, make sure to follow the steps I mentioned earlier. Enjoy your fresh and flavorful Caprese Salad Skewers! Start by rinsing the cherry tomatoes and basil leaves in cool water. Dry them gently with a clean paper towel. Take your mozzarella balls out of their packaging and let them sit for a minute to drain excess liquid. This helps keep your skewers from getting soggy. Grab a skewer and begin assembling. First, slide on one cherry tomato. Next, add a fresh basil leaf. Then, thread on a mozzarella ball. Repeat this pattern, adding 4-5 of each item to the skewer. This colorful mix makes the skewers look great and taste amazing! Once your skewers are ready, lay them on a platter. Drizzle extra virgin olive oil and balsamic glaze over them. Sprinkle salt and pepper to enhance the flavors. If you like some heat, add a pinch of red pepper flakes on top. For a fun display, stand the skewers in a jar or lay them flat on a serving dish. For the full recipe, check the original source. Enjoy your fresh and flavorful Caprese salad skewers! For Caprese salad skewers, fresh ingredients are key. Here’s how to pick the best: - Cherry Tomatoes: Look for firm, bright tomatoes. They should feel heavy for their size. - Basil Leaves: Choose vibrant green leaves. Avoid any that look wilted or brown. - Mozzarella Balls: Select small, fresh mozzarella balls. They should be soft and moist. This trio creates a burst of flavor that shines on the skewer. How you present your skewers can wow your guests. Here are some fun ideas: - Vertical Display: Stand skewers upright in a jar filled with rice or beans. This looks great and saves space. - Platter Art: Lay them flat on a platter. Drizzle balsamic glaze in a zigzag pattern for a pop of color. - Garnish: Add fresh herbs or edible flowers around the skewers. This adds beauty and freshness. Your presentation can make your dish more inviting and fun. Making Caprese salad skewers should be easy, but some common mistakes can happen: - Overcrowding: Don’t pack too many ingredients on each skewer. This can make them hard to eat. - Ignoring Flavor: Skip the salt and pepper at the end. These enhance the taste of fresh ingredients. - Using Stale Ingredients: Always use fresh products. Stale or overripe ingredients can ruin the dish. Avoiding these pitfalls will ensure your skewers taste great and look appealing. For a full recipe, check out the [Full Recipe]. {{image_4}} You can change things up with different ingredients. Try adding sliced avocado or prosciutto. Both add rich flavors. You can also use different cheeses, like feta or goat cheese. Each cheese changes the taste. Seasonal veggies, like bell peppers or zucchini, work well too. Mix and match to find your favorite combo! While balsamic glaze is classic, you can swap it for other dressings. A simple lemon vinaigrette adds a fresh zing. Or, try a pesto drizzle for a herbaceous kick. You can even use a creamy ranch or a spicy aioli. Experiment with what you love! Caprese skewers can easily fit a vegetarian or vegan diet. For a vegan option, swap mozzarella for marinated tofu or vegan cheese. You still get great flavor and texture. Use a vegan dressing to keep it plant-based. These skewers stay vibrant and tasty for everyone! To keep your Caprese salad skewers fresh, wrap them tightly in plastic wrap. Place them in an airtight container. This method keeps them from drying out. If you have extra balsamic glaze, store it in a small jar. These skewers last about 2 to 3 days in the fridge. The tomatoes and basil stay fresh for a time, but the mozzarella can get soggy. Check the skewers each day to ensure they are still good to eat. You can serve leftover skewers cold or at room temperature. If you prefer warm skewers, heat them gently in the oven. Set the oven to low heat, around 300°F (150°C). Heat just until warm, not hot. This keeps the flavors bright and fresh. You can use feta cheese or cubed cheddar. Both add a nice touch. Feta has a tangy flavor. Cheddar adds a sharpness. If you want a creamy option, try goat cheese. It pairs well with tomatoes and basil. Yes, you can make these skewers ahead of time. Just prepare them a few hours before your event. Store them in the fridge. This keeps them fresh and tasty. Drizzle the oil and balsamic glaze just before serving. You can mix and match ingredients. Try adding olives or grilled vegetables. Use different herbs like mint or parsley. For a fun twist, add prosciutto or salami. Each skewer can be unique. Guests will love trying different flavors. You can make a fresh salad with the extras. Mix leftover tomatoes, basil, and mozzarella in a bowl. Drizzle with olive oil and balsamic glaze. Or make a sandwich with the ingredients. They also make a great snack on their own. For a fresh start, try the Full Recipe for more ideas. You learned how to make tasty Caprese Salad Skewers. We discussed ingredients, assembly, and storage. I shared tips to enhance flavor and avoid mistakes. You can get creative with variations and dressings. Now you have the tools to impress friends at your next gathering. Enjoy making these fun and fresh skewers. They are sure to be a hit!

Caprese Salad Skewers Fresh and Flavorful Delight

Caprese Salad Skewers are a fresh and tasty treat! Packed with juicy tomatoes, creamy mozzarella, and fragrant basil, these easy-to-make

For a fresh and tasty mango salsa with avocado, gather these ingredients: - Ripe mango (peeled and diced) - Ripe avocado (diced) - Red onion (finely chopped) - Red bell pepper (diced) - Jalapeño pepper (minced) - Fresh cilantro (roughly chopped) - Fresh limes (juiced) - Extra virgin olive oil - Salt and freshly cracked black pepper Each ingredient plays a key role. The mango adds sweetness, while the avocado gives creaminess. The red onion and bell pepper offer crunch and color. Jalapeño adds a spicy kick. Fresh cilantro brightens the flavor, and lime juice brings in acidity. Olive oil helps blend all the flavors together. Salt and pepper enhance the taste, making it all pop. This recipe is not just about flavors; it also packs in nutrition. Mango is rich in vitamins A and C. Avocado provides healthy fats and fiber. Together, they create a salsa that is both healthful and delicious. For the complete cooking steps, check out the Full Recipe. 1. In a medium bowl, combine the diced mango, avocado, red onion, red bell pepper, and jalapeño. 2. Carefully add the chopped cilantro. Use a spatula to gently fold the mix. This keeps the avocado pieces intact. 3. In a small bowl, whisk together the lime juice and olive oil until fully mixed. 4. Drizzle the lime and oil dressing over the salsa mixture. 1. Season the salsa with salt and freshly cracked black pepper. Stir gently to blend the flavors. 2. Let the salsa marinate at room temperature for at least 15 minutes. This helps the flavors mix and taste better. For the full recipe, check out the detailed instructions. Enjoy making this fresh and vibrant mango salsa with avocado! To choose a ripe mango, look for one that feels slightly soft when you press it. The skin should have a vibrant color, often yellow or red, depending on the type. A ripe mango will also have a sweet, fruity aroma at the stem end. Avoid any that feel too hard or have dark spots. When it comes to avocados, check for a slight give when you squeeze them gently. The skin should be dark green or black, depending on the variety. If it feels firm, it is not ripe yet. A few brown spots are fine, but avoid any with large dark patches or wrinkles. To dice mangoes without waste, start by cutting off the cheeks from the pit. Hold the mango upright, slice down along the pit, and then carefully dice the flesh in a grid pattern before scooping it out. For jalapeños, use a sharp knife. Cut off the stem and slice it in half lengthwise. Use a spoon to remove the seeds and ribs, which hold most of the heat. Then, chop the halves into small pieces. Always wash your hands after handling jalapeños to avoid irritation. {{image_4}} You can switch up the peppers in this salsa. Try using green bell peppers for a milder taste. For more heat, use a serrano pepper instead of jalapeño. You can also add fruits like pineapple or peach. These fruits add sweetness and extra flavor. Diced pineapple gives a nice tropical twist. Chopped peaches can make it juicy and fresh. This mango salsa fits many diets. To make it vegan, ensure your olive oil is pure and fresh. The salsa is naturally gluten-free, so it’s great for gluten-sensitive folks. Serve it with corn chips or on top of grilled meats. If you want a light meal, add it to salads or grain bowls. This makes the dish versatile for everyone. For the full recipe, check out the details above. To keep your mango salsa fresh, choose the right container. I recommend using an airtight container. This helps keep out air and moisture. Glass or plastic containers work well. Make sure to store the salsa in the refrigerator. It can last about 3 to 5 days. If you see any signs of spoilage, it's best to throw it away. If you want to save salsa for later, you can freeze it. To freeze fresh salsa, divide it into smaller portions. This makes it easy to thaw just what you need. Use freezer-safe bags or containers. Leave some space in the container for the salsa to expand as it freezes. When you’re ready to use it, thaw the salsa in the fridge overnight. You can also use the microwave for quick thawing. Just heat it on low power for a short time. After thawing, stir the salsa well before serving. The texture may change slightly, but the flavor stays great! For the full recipe, check back to enjoy this delicious twist on salsa. Yes, you can! Make the mango salsa a few hours before serving. This gives the flavors time to blend. Just keep it covered in the fridge until you are ready to serve. Fresh salsa tastes best when made close to serving time, but it still holds up well. Mango salsa will last about 2 to 3 days in the fridge. Store it in an airtight container for the best results. If you notice that the avocado starts to brown, you can add more lime juice to slow this process. You can use frozen mango if fresh mango is not available. Just let it thaw completely and drain any excess liquid. Frozen mango may be softer but will still add great flavor to your salsa. Mango salsa pairs well with many dishes. Enjoy it with tortilla chips for a crunchy snack. You can also serve it on tacos, grilled chicken, or fish. The fresh flavors of the salsa enhance any meal. Check out the Full Recipe for more ideas! Mango salsa brings vibrant flavors to any dish. You learned about the fresh ingredients, step-by-step prep, and tips for the best results. I shared ideas for fun variations, storage options, and answered common questions. Creating this salsa is easy, tasty, and versatile. Enjoying it with friends makes it even better. Make this dish your own, and experiment with flavors. You’ll impress everyone at your next gathering. Happy salsa making!

Mango Salsa with Avocado Healthy and Flavorful Twist

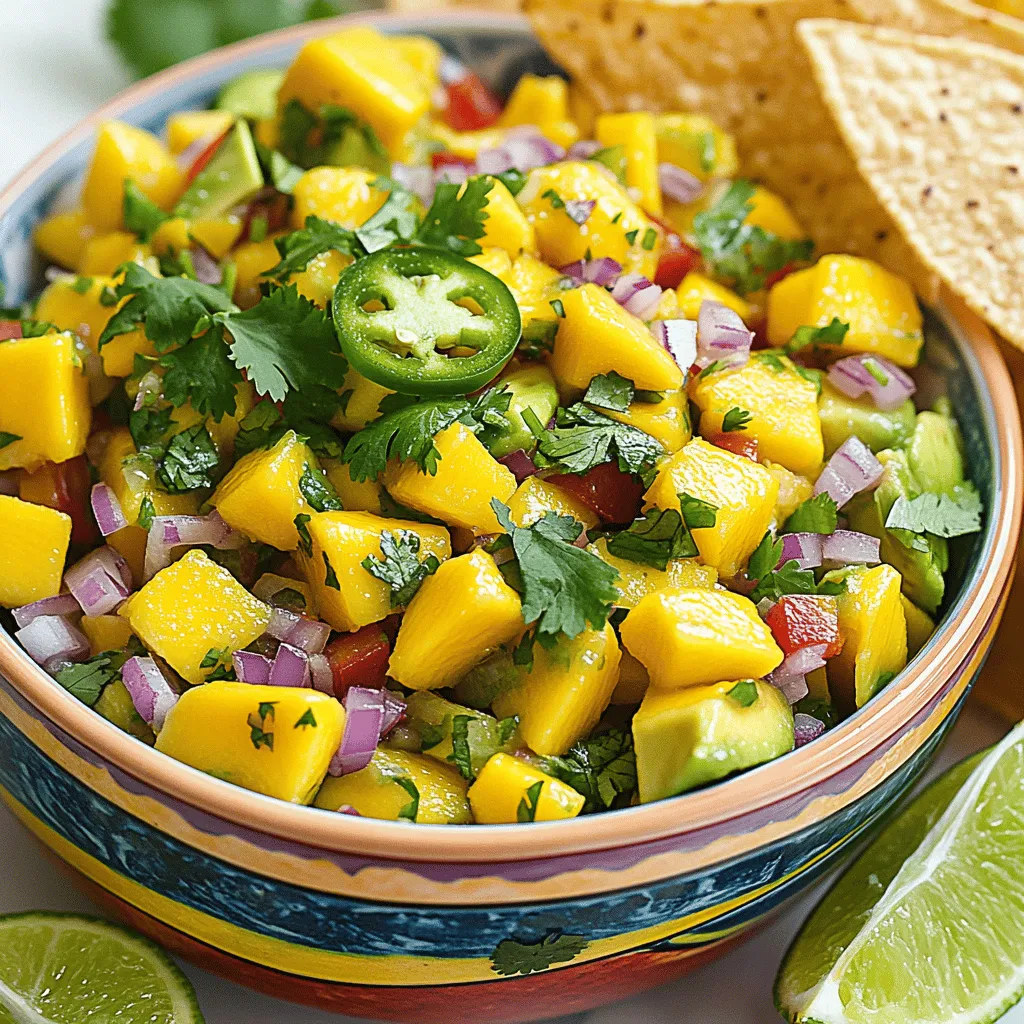
Looking to add a fresh burst of flavor to your meals? Try my Mango Salsa with Avocado! This delightful recipe

To make your cheesy cauliflower bake, gather these key ingredients: - 1 large head of cauliflower, cut into uniform florets - 1 cup shredded sharp cheddar cheese, divided - 1/2 cup cream cheese, softened at room temperature - 1/2 cup sour cream - 1/2 cup finely grated Parmesan cheese - 2 cloves garlic, finely minced - 1 teaspoon onion powder - 1 teaspoon smoked paprika - Salt and freshly cracked black pepper to taste - 1/4 cup fresh chives, chopped (for garnish) You can add a twist to your bake with these optional ingredients: - 1/2 cup breadcrumbs for a crispy topping These additions can elevate the texture and flavor, making your dish even more exciting. This cheesy cauliflower bake is not just tasty but also packs some nutrition. Here’s a breakdown per serving (assuming 6 servings): - Calories: 250 - Protein: 10 grams - Carbohydrates: 10 grams - Fat: 20 grams - Fiber: 2 grams This dish offers a balance of flavors and nutrients, making it a great option for any meal. For the full recipe, check out the recipe section above. - Preheating the Oven First, set your oven to 375°F (190°C). This warmth helps the dish cook evenly. - Cooking the Cauliflower Next, bring a large pot of salted water to a boil. Add the cauliflower florets and cook them for 5-7 minutes. You want them tender but still a bit firm. After cooking, drain the florets and let them cool a bit. In a big mixing bowl, combine the softened cream cheese, sour cream, and 3/4 cup of shredded cheddar cheese. Then add the Parmesan cheese, minced garlic, onion powder, and smoked paprika. Don’t forget a pinch of salt and black pepper. Use a spatula or whisk to mix until smooth. This creamy base is key to your bake’s flavor. Now, gently fold the cooked cauliflower into the cheesy mixture. Make sure each floret gets coated but don’t break them. Pour the whole mix into a greased baking dish, spreading it evenly. If you like a crunchy top, sprinkle breadcrumbs over the bake. If not, add the rest of the cheddar cheese. Bake for 20-25 minutes until the cheese bubbles and the top turns golden. After baking, let it cool for a few minutes, then add freshly chopped chives for a lovely finish. This process makes for a delicious and comforting meal, perfect for sharing. For the full recipe, check out the [Full Recipe]. To get the best texture for your cheesy cauliflower bake, focus on cooking the cauliflower just right. Boil it for 5-7 minutes until tender but firm. This keeps it from turning mushy. Drain it well, so excess water does not make the dish watery. When mixing it with cheese, fold gently. This helps keep the florets intact and not broken down. Avoid overcooking the cauliflower. If you cook it too long, it will lose its structure. Also, be careful with salt. Too much can overpower the dish. Make sure to mix the cheese base well. A lumpy base will not coat the cauliflower evenly. Finally, if you use breadcrumbs, don’t forget to toast them lightly. This gives a nice crunch. Serve your cheesy cauliflower bake hot, right from the oven. You can place it in individual ramekins for a fun touch. For a pop of color, sprinkle chopped chives on top. This dish pairs well with roasted chicken or a fresh salad. If you want a heartier meal, serve it alongside some grilled steak. You can find the full recipe to create this delicious dish. {{image_4}} To make a low-carb version of cheesy cauliflower bake, you can use more veggies. Instead of cauliflower, try broccoli or zucchini. These options keep the dish healthy and tasty. You can also skip the breadcrumbs for a lighter meal. Opt for almond flour or crushed pork rinds as a crunchy topping if you want a little texture. This way, you enjoy the cheese without too many carbs. You can swap cheeses based on your taste. If sharp cheddar isn't your favorite, use mozzarella for a mild flavor. Gouda adds a rich taste, while feta brings a tangy twist. Cream cheese gives a creamy base, but you can replace it with ricotta for a lighter texture. Try mixing different cheeses to create your perfect blend. Just keep the total amount the same to maintain the creamy texture. Add-ins can make your cheesy bake even better. Spinach or kale adds nutrients and color. You can mix in cooked bacon or ham for a savory kick. Want some heat? Add jalapeños or red pepper flakes. For a smoky flavor, include smoked sausage. You can even toss in cooked quinoa for added protein. The options are endless! Just remember to adjust cooking times if you add more ingredients. For the full recipe, click here to see how to bring all these ideas together. To store your Cheesy Cauliflower Bake, allow it to cool first. Then, place it in an airtight container. This keeps it fresh for up to three days in the fridge. Make sure to cover it well to prevent drying out. You can also store it in the baking dish if you prefer. Just wrap it tightly with plastic wrap or foil. When you're ready to eat leftovers, preheat your oven to 350°F (175°C). Place the dish in the oven for about 15-20 minutes. This warms it evenly and keeps it nice and cheesy. You can also microwave individual portions for about 1-2 minutes. Check if it’s hot throughout before serving. If you have extra, you can freeze it! Cut the bake into portions and place them in freezer-safe bags. Be sure to squeeze out as much air as possible. It can last up to three months in the freezer. To enjoy later, thaw it in the fridge overnight. Then, reheat as mentioned before. Enjoy the same great taste! Yes, you can use frozen cauliflower. It is a great option if you want to save time. Just make sure to thaw it first. Drain any excess water after thawing. This helps keep your bake from getting too watery. I love using sharp cheddar cheese for its strong flavor. It melts well and adds richness. You can also mix in Monterey Jack or Gruyère for a different taste. Parmesan cheese gives a nice salty kick too. Use a combination for the best results. To make this dish gluten-free, skip the breadcrumbs. Instead, add more cheese on top for a delicious finish. You can also use gluten-free breadcrumbs if you want that crispy topping. Just check the label to be sure they are gluten-free. For the full recipe, check out the Cheesy Cauliflower Bake details. This blog post showed you how to make Cheesy Cauliflower Bake. We covered key ingredients, preparation steps, and storage tips. You learned how to mix the cheesy base and assemble the dish. I shared common mistakes to avoid and texture tips for the perfect bake. Now you can enjoy delicious low-carb options, cheese substitutions, and tasty add-ins. Remember, the secret is in the details. Use quality ingredients, and enjoy this dish in many ways!

Cheesy Cauliflower Bake Creamy and Simple Recipe

If you’re craving a warm, cheesy dish that’s also good for you, this Cheesy Cauliflower Bake is for you! With

To create a delightful mushroom risotto, gather these key ingredients: - 1 ½ cups Arborio rice - 5 cups vegetable broth (homemade or low-sodium) - 1 cup wild mushrooms (like chanterelles, morels, or shiitake), cleaned and sliced - 1 medium onion, finely chopped - 2 cloves garlic, minced - ½ cup grated Parmesan cheese (plus extra for serving) - 3 tablespoons olive oil - 2 tablespoons unsalted butter - 1 cup fresh spinach, chopped - 1 teaspoon fresh thyme leaves - Salt and pepper to taste - Fresh parsley, chopped (for garnish) You can enhance your risotto with these optional ingredients: - A splash of white wine for acidity - Lemon zest for a fresh kick - Crushed red pepper for heat - Peas or asparagus for color and texture The choice of mushrooms makes a big impact. I recommend these varieties: - Chanterelles: They have a fruity taste and firm texture. - Morels: These mushrooms are nutty and earthy. - Shiitake: They add a rich, smoky flavor. - Button: These are easy to find and mild in taste. Using a mix of these mushrooms can elevate your dish. Experiment with what you like best! For the full recipe, check out the detailed instructions to create your creamy wild mushroom risotto. Start by warming the vegetable broth. Pour 5 cups into a medium saucepan. Heat it over low flame. Keep it warm as you cook the risotto. The warm broth helps the rice cook evenly. In a large skillet, add 2 tablespoons of olive oil and 1 tablespoon of butter. Heat this over medium heat. Once the butter melts, add 1 finely chopped onion. Cook it for about 5 minutes until it turns soft and smells great. Next, add 2 minced garlic cloves and 1 cup of sliced wild mushrooms. Stir this mixture and cook for 5 to 7 minutes. The mushrooms should soften and release some moisture. Season with salt, pepper, and 1 teaspoon of fresh thyme. Now it's time to add the Arborio rice. Pour in 1 ½ cups of rice and mix it well with the veggies. Let the rice toast for around 2 minutes. Stir often until the edges of the rice grains look slightly clear. Now, it’s time to add the warm broth. Use a ladle to pour in the broth one scoop at a time. Stir constantly as you add it. Wait until most of the liquid is soaked up before adding the next ladle. This step takes about 20 to 25 minutes. It’s key for that creamy texture you want. When the rice is creamy and cooked to al dente, turn off the heat. Stir in 1 cup of chopped fresh spinach, the last tablespoon of butter, and ½ cup of grated Parmesan cheese. Mix everything well. Taste it and adjust the seasoning. Remove the skillet from heat and let it sit for a couple of minutes. This helps the flavors blend nicely. Now, you can check out the full recipe to see all the steps in one place! - Use Arborio rice: This rice has a high starch content. It helps create that creamy texture. - Warm your broth: Always keep the broth warm. Adding cold broth can slow cooking. - Stir often: Stirring helps release the starches in the rice. This makes your risotto creamy. - Add broth gradually: Pour in one ladle at a time. Wait until it absorbs before adding more. - Season as you go: Add salt and pepper during cooking. This builds layers of flavor. - Skipping the toasting step: Don’t skip toasting the rice. It adds a nutty flavor. - Adding too much broth at once: This can lead to mushy rice. Take your time. - Neglecting the resting phase: Let the risotto sit after cooking. This helps the flavors meld. - Not tasting as you cook: Always taste. Adjust seasoning for the best flavor. - Using low-quality cheese: Invest in good Parmesan. It makes a big difference in taste. - Butter and cheese are key: Stir in butter and Parmesan at the end. This adds richness and creaminess. - Don’t rush: Allow the rice to absorb the broth slowly. This is crucial for texture. - Consider adding cream: A splash of cream can enhance creaminess, but it’s not necessary. - Incorporate starchy vegetables: Adding pureed butternut squash or pumpkin can boost creaminess. - Use fresh herbs: Fresh herbs not only add flavor but can also enhance the overall texture. For more on making this dish, check the Full Recipe. {{image_4}} If you want a tasty vegetarian option, this risotto is perfect. Just skip the meat and focus on the rich, earthy flavors of mushrooms. You can use any type of mushrooms you love. Morels, shiitakes, and button mushrooms work well. The creaminess comes from the cheese, which adds a nice touch. You can follow the Full Recipe for a great base. For a vegan twist, leave out the cheese and butter. You can use coconut cream to add richness. Nutritional yeast is a great substitute for cheese. It gives a cheesy flavor without any animal products. Use vegetable broth as the base. This version is still rich and creamy, keeping the comforting feel intact. You can easily change the flavor of your risotto. Add fresh herbs like basil or parsley for a fresh taste. Nuts like pine nuts or walnuts can add crunch. A splash of white wine gives a nice zing. You can also try adding lemon zest for brightness. Each of these choices makes the dish unique and personal. Experiment and find your favorite combination! To store leftover risotto, first let it cool down. Place it in an airtight container. Make sure to seal it well to keep out air. You can keep it in the fridge for up to three days. If you want to save it longer, consider freezing. When reheating risotto, add a splash of broth or water. This helps bring back its creamy texture. Heat it slowly in a pan over low heat. Stir often to avoid sticking. You can also use the microwave. Just cover it and heat in short bursts. To freeze risotto, portion it into smaller containers. This makes it easier to heat later. Make sure to label each container with the date. Frozen risotto will last up to three months. When you’re ready to eat, thaw it in the fridge overnight before reheating. Enjoy a warm bowl of comfort with minimal effort. For the full recipe, check out the Mushroom Risotto Delightful Creamy Comfort Food. The classic way to make risotto starts with high-starch rice. Arborio rice is most common. You cook the rice slowly, adding warm broth bit by bit. This helps the rice release its starch, creating a creamy texture. Start by sautéing onions and garlic in oil. Add the rice and toast it for a few minutes. Gradually stir in the broth until the rice is tender. Finish with cheese and butter for a rich flavor. For a detailed guide, check the Full Recipe. Yes, you can use different types of rice, but results vary. Arborio rice is best for its creamy texture. Carnaroli rice is also great; it has a firmer bite. If you try long-grain rice, it won’t be as creamy. It’s all about starch content. Stick with short or medium-grain types for the best results. Risotto lasts about three to four days in the fridge. Store it in an airtight container to keep it fresh. When ready to eat, reheat it gently on the stove. Add a splash of broth or water to restore its creaminess. Don’t microwave if you want to keep the texture smooth. Mushroom risotto is a simple dish with rich flavors. We covered its key ingredients, including tasty mushrooms and optional spices. Followed step-by-step instructions to make it creamy and delicious. I shared tips to avoid common mistakes and achieve the perfect texture. You can also explore vegetarian and vegan variations to suit your taste. In the end, this dish is all about balance and personal touch. Enjoy your cooking adventure with mushroom risotto!

Mushroom Risotto Delightful Creamy Comfort Food

Looking for a dish that brings warmth and comfort to your table? Mushroom risotto is the answer. This creamy delight

- 1 can (15 oz) chickpeas - 2 tablespoons extra virgin olive oil - 1 tablespoon honey or maple syrup - 1 teaspoon smoked paprika - 1/2 teaspoon cayenne pepper - 1 teaspoon garlic powder - 1/2 teaspoon ground cumin - Salt, to taste - Freshly ground black pepper, to taste Let’s dive into the heart of this recipe. Each ingredient plays a vital role in flavor and texture. Chickpeas give a hearty base and a great crunch. Extra virgin olive oil helps them roast nicely. Honey or maple syrup adds a sweet touch. Smoked paprika gives that warm, smoky flavor. The cayenne adds a kick, and you can adjust it to your taste. Garlic powder and ground cumin deepen the flavor profile. Finally, salt and pepper bring all these elements together. - Fresh herbs for garnish - Alternative sweeteners Feel free to get creative! Fresh herbs like parsley or cilantro add a fresh burst. If you prefer different sweeteners, try agave nectar or date syrup for a unique twist. This recipe is not only tasty but also healthy! Each serving contains around 120 calories. Chickpeas are high in protein and fiber, which help keep you full. They contain about 6 grams of protein and 5 grams of fiber per serving. This makes them a smart snack choice. You get energy without the crash. Plus, they are loaded with essential vitamins and minerals. Enjoying these roasted chickpeas gives you a nutritious and satisfying treat! Start by preheating your oven to 400°F (200°C). This step is key for crispiness. Next, grab a baking sheet and line it with parchment paper. This helps with easy cleanup and stops the chickpeas from sticking. Open the can of chickpeas and drain them well. Rinse them under cold water to remove any canning liquid. This keeps the flavor fresh. Now, spread the chickpeas on a clean kitchen towel. Pat them dry gently. Removing moisture is important for that perfect crunch. In a medium bowl, mix together the olive oil, honey (or maple syrup), smoked paprika, cayenne pepper, garlic powder, ground cumin, and a pinch of salt and pepper. Whisk this until it's smooth. This mix gives the chickpeas their sweet and spicy kick. Add your dried chickpeas to the bowl. Toss them well so each piece is coated with the tasty mix. Transfer the coated chickpeas onto your lined baking sheet. Spread them out in a single layer. This helps them roast evenly. Now, place the baking sheet in the oven. Roast for 25 to 30 minutes, stirring halfway through. Watch for that golden brown color; it means they are ready! Once they are done, take the chickpeas out of the oven and let them cool for a few minutes. They will get crunchier as they cool. When serving, use a vibrant bowl for a nice look. You can sprinkle a bit of sea salt on top. Drizzle with extra honey or maple syrup for a sweet finish. Pair them with dips like tzatziki or hummus for a fun snack. For the full recipe, check the links above! To get that perfect crunch in your roasted chickpeas, start by drying them well. After rinsing, lay them on a clean towel. Pat them dry gently to remove moisture. This step is key. Wet chickpeas won’t crisp up in the oven. Also, avoid overcrowding on the baking sheet. Spread the chickpeas out in a single layer. If they are too close, they will steam instead of roast. Less steam means more crunch! You can adjust the spice levels to fit your taste. If you want it spicier, add more cayenne pepper. For a milder version, use less. The beauty of this recipe is that you can play with flavors! Explore different flavor profiles too. Try adding curry powder for warmth or chili powder for a kick. You can mix in herbs like rosemary or thyme for a fresh twist. Pair your roasted chickpeas with dips for a fun snack. Tzatziki or hummus works great! These dips add creaminess and flavor. For party ideas, serve them in small bowls on a platter. They make a great finger food. You can also mix them with nuts for a crunchy snack mix. Enjoy experimenting with these ideas! {{image_4}} You can make sweet and spicy roasted chickpeas even more exciting by adding herbs and spices. Try adding: - Cumin for a warm flavor. - Paprika for a smoky kick. - Dried herbs like thyme or rosemary for freshness. You can also choose between sweet and savory options. If you want a sweeter taste, use more honey or maple syrup. For a savory twist, skip the sweetener and add more spices like chili powder or onion powder. This recipe can easily fit many diets. It’s vegan and gluten-free as is. If you want a nut-free option, you’re in luck! This recipe contains no nuts, making it safe for those with nut allergies. For a lower-calorie version, try using less oil. You can even bake them without oil for a crunchy snack that still packs a flavor punch. Sweet and spicy roasted chickpeas are great on their own, but they also pair well with other snacks. Mix them with: - Popcorn for a crunchy, savory treat. - Dried fruit like cranberries for a sweet and salty combo. - Nuts like almonds or walnuts for extra protein. You can also serve them with healthy sides. Pair your chickpeas with dips like hummus or guacamole. These snacks make a perfect addition to a party platter or a quick healthy snack at home. Store your leftover roasted chickpeas in an airtight container. Glass jars work best for this. Keep them at room temperature if you plan to eat them soon. For longer storage, you can place them in the fridge. To keep them crunchy, avoid stacking them too high in the jar. If you want to enjoy your roasted chickpeas again, reheating is easy. Preheat your oven to 350°F (175°C). Spread the chickpeas on a baking sheet and heat for about 10 minutes. This method helps regain their crispiness. Avoid using the microwave, as it can make them soggy. Roasted chickpeas stay fresh for about 3 to 5 days at room temperature. If you store them in the fridge, they can last up to a week. Signs of spoilage include a soft texture or an off smell. If they taste stale or chewy, it’s best to toss them. Roasted chickpeas can last for about a week when stored properly. To keep them fresh, place them in an airtight container. Store this container in a cool, dry place away from sunlight. If you see any signs of moisture or they become soft, it’s time to toss them. For the best crunch, eat them within a few days. Yes, you can make roasted chickpeas without oil. You can use vegetable broth to coat the chickpeas instead. This method will lower the fat content. However, the texture may not be as crispy. Baking times may also vary, so keep an eye on them until they reach your desired crunch. Roasted chickpeas are a healthy snack choice. They are packed with protein and fiber, which help keep you full. They also contain vitamins and minerals like iron and magnesium. Compared to chips, roasted chickpeas have less fat and fewer calories. They make a great alternative for anyone looking for a nutritious snack. Leftover chickpeas can be used in many ways. You can add them to salads for extra crunch. They also work well in soups or stews for added protein. You can blend them into hummus or chickpea dip too. Get creative! They are versatile and can enhance many dishes. In this post, we explored how to make delicious roasted chickpeas. We started with the main ingredients and their nutritional values. Then, we walked through each step, from preheating to serving. I shared tips on achieving the perfect crunch and offered several variations. Remember, these snacks are easy to customize and store, ensuring fresh taste for days. Roasted chickpeas can be a fun and healthy addition to your meals or gatherings. With these simple steps, you can enjoy a tasty, nutritious snack anytime!

Sweet and Spicy Roasted Chickpeas Healthy Snack Recipe

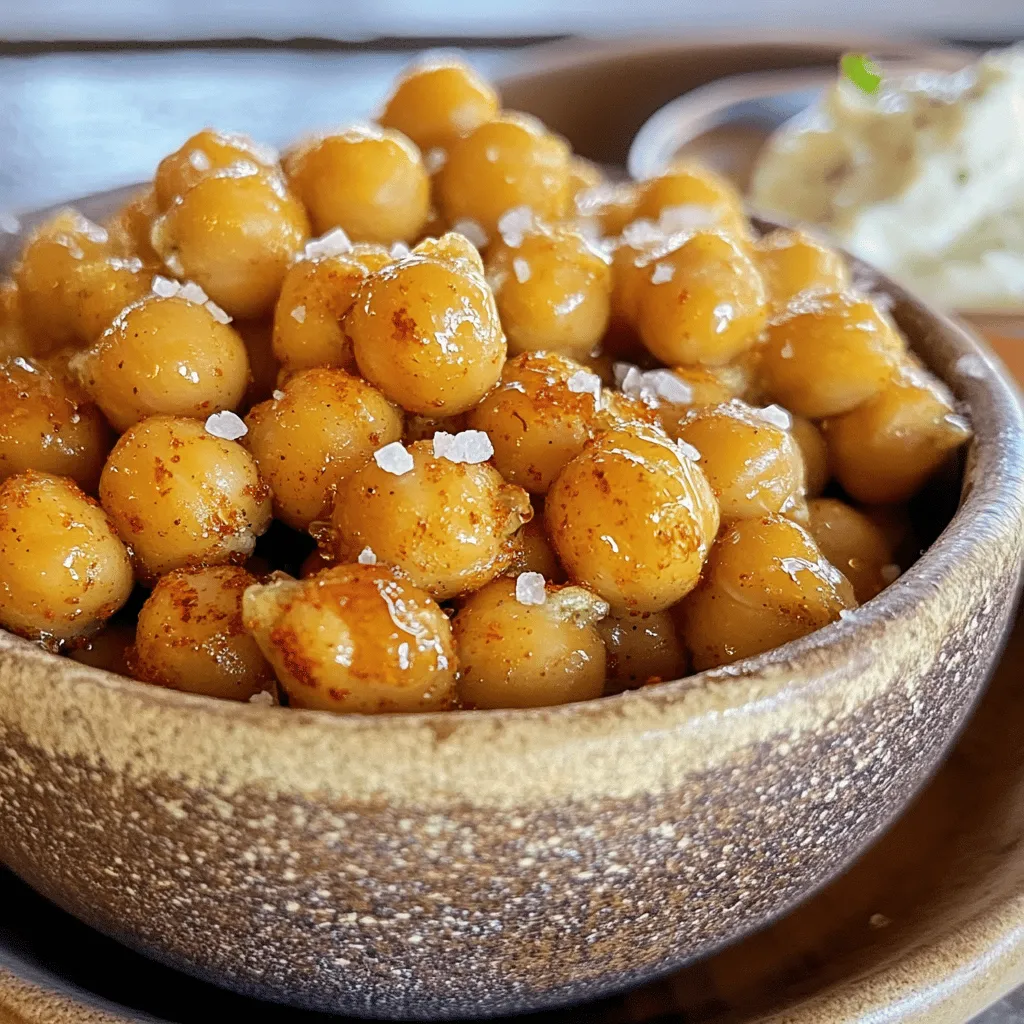
Looking for a snack that’s both delicious and healthy? Let me introduce you to Sweet and Spicy Roasted Chickpeas! This

For these spring rolls, fresh veggies are key. They give flavor and crunch. Use these ingredients: - 1 cup cabbage, finely shredded - 1 medium carrot, julienned - 1 bell pepper (any color), sliced thin - 1 cup bean sprouts - 1 green onion, finely chopped We need some strong flavors to make our rolls pop. These add depth and warmth: - 2 cloves garlic, minced - 1 teaspoon ginger, freshly grated - 2 tablespoons soy sauce - 1 teaspoon sesame oil - Salt and pepper to taste The right wrappers hold everything together. Here’s what you need: - 20 spring roll wrappers - Oil for frying - Additional seasoning You can find the full recipe in the article. This mix of fresh veggies and tasty spices makes these spring rolls a perfect treat. They are fun to make and even better to eat! Start by mixing your veggies. In a big bowl, combine: - 1 cup cabbage, finely shredded - 1 medium carrot, julienned - 1 bell pepper, sliced thin - 1 cup bean sprouts - 1 green onion, finely chopped Mix them well. This step ensures all flavors blend nicely. Next, heat a skillet over medium heat. Add a little oil. When the oil is hot, toss in: - 2 cloves garlic, minced - 1 teaspoon ginger, freshly grated Sauté these for about one minute. You want them fragrant but not brown. Now, add your mixed vegetables to the skillet. Stir-fry for 3-4 minutes. The goal is to soft them up while keeping some crunch. Pour in: - 2 tablespoons soy sauce - 1 teaspoon sesame oil Toss everything together. Add salt and pepper to taste. Once mixed, take the skillet off the heat. Let the filling cool for a few minutes. This step helps with rolling later. Now, let’s roll the spring rolls! Lay a spring roll wrapper on a clean surface. Position one corner facing you. Grab about 2-3 tablespoons of the veggie filling. Place it near the corner closest to you. Fold the bottom corner over the filling. Tuck in the side corners. Now, roll the wrapper away from you. Keep it snug but not too tight. To seal the roll, use a dab of water on the top edge. Repeat this with the rest of the wrappers and filling until done. Ready to cook? Heat oil in a deep frying pan to 350°F (175°C). Carefully place the spring rolls in batches into the hot oil. Fry them for about 4-5 minutes. They should turn a nice golden-brown color. Turn them occasionally for even cooking. When they are crispy, use a slotted spoon to take them out. Place them on paper towels to soak up extra oil. Serve them hot and enjoy! For the full recipe, check the complete instructions. To get crispy veggie spring rolls, oil temperature matters. Heat your oil to 350°F (175°C). This is hot enough to fry the rolls quickly, creating a golden crust. Fry in small batches to avoid lowering the oil temperature. Each batch should cook for about 4-5 minutes. Turn them occasionally to brown evenly. This method keeps the inside tender and the outside crispy. One common mistake is overfilling the spring rolls. This can lead to tearing and soggy wrappers. Use only 2-3 tablespoons of filling per roll. Make sure to seal them well with water to prevent leaks. Another pitfall is using wet wrappers. Always dry your wrappers before filling. This helps them stay crispy during frying. To serve your crispy rolls, arrange them on a decorative platter. You can pair them with sweet chili sauce or soy sauce for dipping. For a pop of color, sprinkle sesame seeds on top. Fresh cilantro adds flavor and beauty. These details make your dish stand out. Enjoy the visual appeal as much as the taste! {{image_4}} You can easily change the filling in your spring rolls. Tofu, mushrooms, or zucchini all work great. - Tofu: Firm tofu adds a nice texture. Press and cube it, then sauté it with your veggies. - Mushrooms: Use shiitake or button mushrooms for a rich flavor. Slice them thin and cook until soft. - Zucchini: Spiralized or julienned zucchini gives a fresh crunch. Just be careful not to overcook it. These options let you customize your spring rolls based on what you like or have on hand. You can adapt this recipe for different diets. It can be vegan, gluten-free, or low-carb. - Vegan: This recipe is already vegan-friendly. Just make sure to use plant-based sauces. - Gluten-Free: Use rice paper wrappers instead of traditional wheat-based ones. They are easy to find at most stores. - Low-Carb: Substitute vegetables for wrappers. Lettuce leaves can serve as a fresh wrap, keeping things light. Making these changes helps you enjoy spring rolls no matter your diet. Dipping sauces can enhance your spring roll experience. Here are some tasty options: - Sweet Chili Sauce: This sauce adds a sweet and spicy kick. It pairs well with the veggies. - Soy Sauce: A classic choice, soy sauce adds saltiness and depth. - Peanut Sauce: Creamy and nutty, this sauce makes a fun dip. - Sriracha: For those who love heat, a drizzle of Sriracha can spice things up. Offering a variety of sauces makes your meal more fun and flavorful. After you make your crispy veggie spring rolls, store any leftovers properly. Place them in an airtight container. This helps keep them fresh. If you want to store them longer, freeze them. Wrap each spring roll in plastic wrap, then place them in a freezer bag. This way, they won’t stick together. To reheat your spring rolls, use an oven or an air fryer. Preheat your oven to 375°F (190°C). Place the spring rolls on a baking sheet. Heat for about 10-15 minutes. This method keeps them crispy. If you use an air fryer, set it to 350°F (175°C) and heat for about 5-7 minutes. Both methods make them crispy again. Crispy veggie spring rolls last about 3-4 days in the fridge. If you freeze them, they can last up to 2 months. Just remember, the sooner you eat them, the better they will taste! For the full recipe, check the earlier section to recreate this delicious treat. To make spring rolls crispy, start by using the right oil. Heat oil to 350°F (175°C). Use a deep-frying pan for best results. Fry in small batches to avoid crowding. This keeps the oil hot. Fry for about 4-5 minutes. Make sure they turn golden brown. Drain on paper towels to remove excess oil. Yes, you can bake spring rolls! Preheat your oven to 425°F (220°C). Place the rolls on a baking sheet lined with parchment paper. Brush them lightly with oil. Bake for 15-20 minutes, turning halfway. They won’t be as crispy as fried ones, but they will still taste great. For dipping sauces, I recommend sweet chili sauce or soy sauce. Both add a nice flavor. You can also try peanut sauce for a creamy twist. A spicy sriracha mayo works well too. Each sauce adds a fun taste to your spring rolls. For more ideas, check out the Full Recipe. Crispy veggie spring rolls are fun to make and delicious to eat. We covered fresh veggies, flavor boosters, and cooking techniques. I shared tips on achieving the perfect crunch and ideas for storage. Remember to try new fillings and sauces for variety. With practice, you’ll make spring rolls that everyone loves. Enjoy your cooking journey, and don’t shy away from experimenting!

Crispy Veggie Spring Rolls Perfectly Delicious Treat

Are you ready for a delicious treat? Crispy Veggie Spring Rolls are the perfect snack or appetizer. Packed with fresh

- Rolled oats: They are the main base for your bars. Oats provide heartiness and fiber. - Mixed nuts: Choose your favorites like almonds, walnuts, or pecans. Nuts add crunch and healthy fats. - Sweeteners: Use honey or maple syrup for natural sweetness. They help bind the bars together. - Nut butter options: Peanut butter or almond butter works best. Nut butter adds creaminess and flavor. - Dried fruits: Add raisins, cranberries, or apricots for a chewy texture and extra sweetness. - Seeds: Sunflower or pumpkin seeds can boost nutrition. They add crunch and healthy nutrients. - Flavorings: A dash of vanilla extract or ground cinnamon can enhance the taste. These add warmth and depth. - Calories per serving: Each bar has about 150 calories. They are filling yet light. - Macro breakdown: - Protein: Approximately 4 grams per bar. - Fats: Roughly 6 grams per bar, mostly from nuts and nut butter. - Carbs: Around 20 grams per bar, thanks to oats and sweeteners. Using these ingredients, you can create delicious and nutritious granola bars. Check out the Full Recipe for step-by-step guidance! First, preheat your oven to 350°F (175°C). This step is important for even cooking. While the oven heats, grab an 8x8 inch baking pan. Line it with parchment paper, leaving some extra paper hanging over the edges. This makes it easy to lift the bars out once they cool. In a large mixing bowl, combine the rolled oats, mixed nuts, and sunflower seeds. Stir these dry ingredients well to make sure they mix evenly. This mix is the base of your granola bars. Next, melt the honey and peanut butter together. Use a small saucepan over low heat. Stir it continuously until smooth. This takes just a few minutes. Remove it from heat and mix in the vanilla, ground cinnamon, and fine sea salt. This blend adds flavor and sweetness. Pour the warm honey-peanut butter mix over your dry ingredients. Use a spatula or wooden spoon to mix it all together. Make sure every oat and nut gets coated evenly. This is key for good texture. Transfer the mixture into your lined baking pan. Press it down firmly with the spatula, creating a snug layer. Bake in the oven for about 20-25 minutes. Keep an eye on it; you want golden edges but a chewy center. Once baked, take it out and let it cool on a wire rack for about 15 minutes. Lift the bars using the parchment paper. Allow them to cool completely. Finally, use a sharp knife to cut them into bars or squares. Store your homemade granola bars in an airtight container for freshness. Enjoy this easy and nutritious recipe from the [Full Recipe]. To make the best granola bars, press the mixture firmly into the pan. This helps the bars hold together. If you don’t press them down, they may crumble when you cut them. Use the back of a spatula or your hands to pack it tightly. Next, monitor the baking time closely. The bars should bake for about 20-25 minutes. Look for golden edges, and keep the center chewy. If they bake too long, they will become hard and dry. Remember, you want that perfect balance of crunch and chewiness. Store your granola bars in an airtight container. This keeps them fresh and prevents them from drying out. I recommend using a glass or plastic container with a tight lid. You can keep them at room temperature for up to a week. If you want them to last longer, freeze them! Wrap each bar in plastic wrap and place them in a freezer-safe bag. They will stay good for about three months in the freezer. Avoid overbaking your granola bars. Checking them a few minutes before the suggested time helps. If they look too dark, take them out. Also, don't skip measuring your ingredients. Accurate measurements ensure that the bars turn out well. Each ingredient plays a role in texture and flavor. Adjusting even one can change the outcome of your homemade granola bars. {{image_4}} You can easily mix up the flavors in your granola bars. Here are two tasty ideas: - Chocolate chip granola bars: Just add 1/2 cup of chocolate chips to the mix. They melt slightly when baked, adding a sweet touch. - Coconut and almond granola bars: Use 1/2 cup of shredded coconut and swap nuts for almonds. This gives a tropical flavor. If you have specific dietary needs, you can adjust your bars easily. - Gluten-free options: Use gluten-free oats and ensure your nut butter is also gluten-free. Many brands are safe to eat. - Vegan alternatives: Replace honey with maple syrup. This keeps your bars vegan while still sweet. No-bake granola bars are quick and easy. You can make them in just a few minutes. - Quick no-bake recipes: Combine oats, nut butter, and sweetener in a bowl. Press the mixture into a pan. Chill until set, then cut. - Differences in texture and taste: No-bake bars are softer and chewier than baked ones. They also have a more intense flavor from the nut butter. Try these variations to keep your snacks fresh and exciting! For the full recipe, check out the Crunchy Nutty Granola Bars Delight section. Enjoy your cooking! You can make your granola bars look great. Wrap each bar in parchment paper. Tie them with twine for a charming look. This way, they are easy to grab for busy days. You can also serve them with yogurt or fresh fruit. This adds more flavors and makes a tasty snack or breakfast. Think about portioning the granola bars for the week. Cut them into squares and store them in bags. This makes it easy to grab a snack when you need one. You can also pack them in lunchboxes. They are a great treat for kids and adults alike. Pair your granola bars with the right drinks. Try a glass of milk, tea, or coffee. These drinks complement the flavors well. You can also enjoy the bars with other snacks. Fresh fruit or nuts make great sides. They add variety to your snack time and keep you satisfied. If you want nut-free granola bars, you can use seeds instead. Sunflower seeds and pumpkin seeds work well. You can also add extra oats or puffed rice for crunch. These swaps keep the texture nice and add flavor without nuts. Yes! Customizing your granola bars is fun. You can change the sweeteners too. If you don't like honey, use maple syrup or agave. Add dried fruits like cranberries or apricots. You can even mix in chocolate chips or coconut flakes for a twist. Homemade granola bars can last up to a week in an airtight container. Store them in a cool, dry place. If you want them to last longer, freeze them. They keep well for up to three months in the freezer. Just wrap them tightly. If your granola bars crumble, they might not have enough binding. Make sure to use enough honey or nut butter. Press the mixture firmly into the pan before baking. You can also try adding a bit of water or more nut butter if it seems dry. You now have all the steps and tips to make great granola bars. Remember, starting with rolled oats and adding your favorite nuts and sweeteners sets the base. Mixing your dry and wet ingredients well is key. Don’t forget to press the mixture firmly for the best texture. You can easily swap ingredients to fit your taste or diet. Enjoy them as snacks or in lunchboxes. With practice, you’ll create bars you'll love and share. Happy cooking!

Homemade Granola Bars Easy and Nutritious Recipe

Looking for a simple, healthy snack that’s full of flavor? Homemade granola bars are the answer! With just a few

- 1 (8 oz) package cream cheese, softened to room temperature - 1/2 cup powdered sugar - 1/4 cup brown sugar, packed - 1 teaspoon pure vanilla extract - 1/2 cup caramel sauce (store-bought or homemade) - 2-3 crisp apples (such as Granny Smith or Honeycrisp), cored and sliced into wedges To make this dip really shine, you need rich cream cheese. It gives a nice, smooth base. Adding powdered sugar and brown sugar brings sweetness and depth. The caramel sauce completes the flavor by adding a sweet, buttery taste. Fresh apples add a crisp and tart bite that balances the sweetness. - Chopped nuts (such as pecans or walnuts) - Ground cinnamon For extra crunch, sprinkle some chopped nuts on top. Pecans or walnuts work great here. A dash of ground cinnamon adds warmth and spice to the dip. It makes each bite even more delightful. - Electric mixer - Mixing bowl - Serving dish You will need an electric mixer to whip the cream cheese. A mixing bowl is essential for combining all the ingredients. Finally, a nice serving dish showcases your dip. For the complete recipe, you can check the Full Recipe section. Enjoy making this treat! - Softening the cream cheese Start by taking the cream cheese out of the fridge. Let it sit on the counter for about 30 minutes. This softens the cheese and makes mixing easier. - Mixing the ingredients In a large mixing bowl, use an electric mixer. Beat the softened cream cheese until smooth, which takes about 2 minutes. Gradually add in the powdered sugar, brown sugar, and vanilla extract. Mix until fluffy and well combined, around 2-3 minutes. - Spreading and layering Transfer the creamy mixture into a serving dish. Spread it evenly across the bottom. Next, drizzle caramel sauce over the cream cheese. Make sure it covers the whole layer for the best flavor. - Chilling the dip Cover the dish with plastic wrap. Chill it in the fridge for about 30 minutes. This step helps the flavors blend together and makes the dip even creamier. - Arranging apple slices While the dip chills, slice your apples into wedges. Choose crisp varieties like Granny Smith or Honeycrisp. Arrange the apple slices around the dip for easy access. - Drizzling additional caramel For a sweet touch, drizzle extra caramel sauce on top of the dip or around the apple slices. This adds extra flavor and makes the dish look inviting. - Enhancing with cinnamon After chilling, sprinkle ground cinnamon over the dip. This not only boosts the taste but also adds a lovely visual appeal. - Garnishing with nuts If you like, top the dip with chopped nuts such as pecans or walnuts. This adds a nice crunch and a nutty flavor, making each bite delightful. By following these steps, you’ll create a stunning and tasty caramel apple dip with cream cheese. For the complete recipe, check out the Full Recipe. To get a smooth and creamy dip, start with room temperature ingredients. This makes it easy to mix. Cold cream cheese is hard to blend and can cause lumps. Set the cream cheese out for about 30 minutes before use. Next, use proper mixing techniques. Use an electric mixer on medium speed. Beat the cream cheese until it's fluffy. This takes about 2 minutes. Gradually add in the sugars and vanilla. Continue mixing for 2-3 minutes until everything is well combined. You can adjust the sweetness levels to fit your taste. If you want a richer flavor, add a bit more brown sugar. If the dip is too sweet, mix in a touch of cream cheese. This keeps it balanced and tasty. Adding a dash of salt or spices can also enhance the flavor. A small pinch of sea salt brightens up the dip. You can also try adding a bit of nutmeg or allspice for a unique twist. When it comes to apples, not all varieties are the same. I recommend using Granny Smith or Honeycrisp apples. Their crisp texture and tartness contrast well with the sweet dip. For dipping, slice the apples into wedges. This makes it easy to grab them. You can also serve the dip with pretzels, graham crackers, or even banana slices. Enjoy the mix of flavors and textures! For the full recipe, check out the Caramel Apple Delight Dip. {{image_4}} You can make your caramel apple dip even more fun with some easy tweaks. Adding chocolate or toffee bits gives a sweet crunch. Just sprinkle them on top of the dip. You can also mix in flavored cream cheese, like strawberry or pumpkin. This adds a new taste that works great with the caramel. If you want a lighter dip, try using Greek yogurt instead of cream cheese. It gives you a creamy texture with less fat. You can also swap out regular sugar for low-carb sweeteners. This way, you can enjoy the dip without the extra carbs. Embrace the seasons with your caramel apple dip! In the fall, add pumpkin spice to the mix. It brings a warm flavor that matches the season. For the holidays, think about adding peppermint extract. This gives your dip a festive twist that everyone will love. For the full recipe, check out the [Full Recipe] for caramel apple dip with cream cheese. To keep your caramel apple dip fresh, cover it tightly with plastic wrap. Place it in the fridge right after serving. This helps maintain its creamy texture and taste. When storing apple slices, sprinkle a little lemon juice on them. This will stop them from browning too quickly. Keep them in an airtight container to stay crisp. Can you freeze caramel apple dip? Yes, but it's not the best idea. Freezing can change the texture. If you must freeze it, place it in a freezer-safe container. When it’s time to serve, thaw it in the fridge overnight. Stir it well before you serve to restore some creaminess. The dip tastes best for about three days in the fridge. After that, it may lose some flavor. Look for signs of spoilage like a sour smell or a change in color. If you notice any, it’s best to toss it out. Enjoy your delicious treat fresh! Caramel apple dip lasts about 5-7 days in the fridge. To keep it fresh, store it in an airtight container. Always check for signs of spoilage before serving. If it smells off or has changed color, it’s best to throw it out. Yes, you can make caramel apple dip a day ahead. Just cover it well and store it in the fridge. The flavors will blend nicely. When ready to serve, add the apples just before. This keeps them fresh and crunchy. The best apples for this dip are Granny Smith and Honeycrisp. Granny Smith apples are tart and crisp, which balances the sweet dip. Honeycrisp apples are sweet and juicy, adding a different flavor. Other good options include Fuji and Gala apples. Each brings a unique taste to your dip experience. You now have everything you need to make delicious caramel apple dip. We covered the main ingredients like cream cheese and caramel sauce, along with optional garnishes that add flavor and fun. I shared tools to make your prep easy and tips to keep it creamy. You even learned about variations and how to store your dip well. Get creative with flavors, and enjoy your tasty treat at any gathering. Remember, a little planning goes a long way in making this dip a crowd favorite. Happy dipping!

Caramel Apple Dip with Cream Cheese Delightful Treat

Are you ready for a sweet treat that brings joy to any gathering? My Caramel Apple Dip with Cream Cheese

- 1 cup rolled oats - 2 cups almond milk (or milk of choice) - 2 ripe bananas, mashed - 1/4 cup peanut butter - 2 tablespoons maple syrup (or honey) - 1/2 teaspoon vanilla extract - 1/2 teaspoon ground cinnamon - A pinch of salt - Optional toppings: sliced bananas, nuts, chia seeds, dark chocolate chips To make peanut butter banana overnight oats, you need simple and fresh ingredients. The rolled oats are the base. They soak up the almond milk and flavors. You can use any milk you like, but almond milk adds a nice touch. Ripe bananas add natural sweetness. They also give a creamy texture when mashed. Peanut butter brings protein and flavor. You can choose smooth or crunchy peanut butter based on your taste. Maple syrup or honey adds sweetness. Vanilla extract enhances the flavor. Ground cinnamon adds warmth, while a pinch of salt balances the sweetness. For extra fun, you can add toppings. Sliced bananas, chopped nuts, chia seeds, or dark chocolate chips create texture and flavor. You can mix and match toppings to suit your mood. This simple recipe makes breakfast exciting and healthy. You can find the full recipe in the earlier section. Enjoy making your peanut butter banana overnight oats! - In a large bowl, mix 1 cup of rolled oats with 2 cups of almond milk. - Stir well until all oats soak up the milk. - Next, add 2 ripe bananas, mashed. Mix until fully combined. - Now, incorporate 1/4 cup of peanut butter into the oat mixture. - Add 2 tablespoons of maple syrup for sweetness, 1/2 teaspoon of vanilla extract, and 1/2 teaspoon of ground cinnamon. - Don’t forget a pinch of salt. Mix until smooth and creamy. - Divide the oat mixture into two mason jars or airtight containers. - Seal the jars and place them in the fridge to soak overnight. - This lets the oats absorb all the yummy flavors. To get the right texture for your peanut butter banana overnight oats, you can adjust the consistency. If the oats seem too thick, add a splash of almond milk. Mix it in well until you reach your desired creaminess. Sweetness is also key in this recipe. After mixing, take a small taste. If you want it sweeter, add a bit more maple syrup or honey. Just stir well, and you’re good to go! Serving your oats in mason jars makes breakfast feel special. These jars not only look cute but also help keep your oats fresh. Just divide the mixture evenly into each jar. For a pop of color and flavor, think about garnishing. Sliced bananas on top give a fresh look. A drizzle of peanut butter adds a nice touch, too. You can even sprinkle some chopped nuts for a bit of crunch. Enjoy your beautiful creation! {{image_4}} You can switch up the taste of your overnight oats easily. Try a chocolate peanut butter version for a sweet twist. Just mix in a few tablespoons of cocoa powder with the peanut butter. This gives you a rich chocolate flavor that pairs well with bananas. If you prefer a nut-free option, use sunflower seed butter or pumpkin seed butter instead of peanut butter. This keeps the creamy texture while avoiding nuts. Toppings can change the whole dish. Try adding seasonal fruits like berries, peaches, or apples. These fruits enhance the flavor and add color. For a crunch, sprinkle different nuts or seeds on top. Almonds, walnuts, or pumpkin seeds work great. You can also add chia seeds for extra nutrition. These simple changes keep your breakfast fun and exciting. Check out the Full Recipe for more ideas! To keep your peanut butter banana overnight oats fresh, store them in airtight containers. Mason jars work well for this. Make sure the lids seal tightly. This helps keep your oats from drying out and losing flavor. You can store these oats in the fridge for up to five days. Just remember to check for any changes in smell or texture before eating. If they look or smell off, it's best to toss them. If you want to make a larger batch, you can freeze your overnight oats. To freeze, place the jars in the freezer. Leave some space at the top of the jar. Oats expand when frozen. They can last up to three months in the freezer. When you're ready to eat, move the jar to the fridge. Let it thaw overnight. If they're a bit thick, stir in some almond milk. Enjoy your tasty breakfast without any hassle! Peanut Butter Banana Overnight Oats last about 3 to 5 days in the fridge. This makes them perfect for meal prep. Just store them in airtight containers. The oats may soak up moisture, so check the texture. If they seem too thick, add a splash of milk before eating. Yes, you can easily make these oats vegan. Just use almond milk or any plant-based milk. Instead of honey, use maple syrup for sweetness. Both swaps keep the recipe tasty and plant-based. If you want a different flavor, try almond butter or sunflower seed butter. Both options work well in this recipe. They add yummy taste and keep the oats creamy. Just make sure to choose a nut or seed butter that you enjoy. Yes, overnight oats can be gluten-free. Just use certified gluten-free oats to ensure no cross-contamination. Most oats are naturally gluten-free, but check the label. This makes them safe for those with gluten sensitivities. In this blog post, we explored how to make delicious Peanut Butter Banana Overnight Oats. We covered key ingredients, step-by-step instructions, tips for perfecting texture and flavor, as well as storage info and fun variations. These oats are easy to prepare and customizable. You can adjust flavors and toppings to fit your taste. Ensuring you follow tips for storage lets you enjoy them longer. Try these oats for a quick breakfast! You’ll love how simple and tasty they are.

Peanut Butter Banana Overnight Oats Simple Recipe

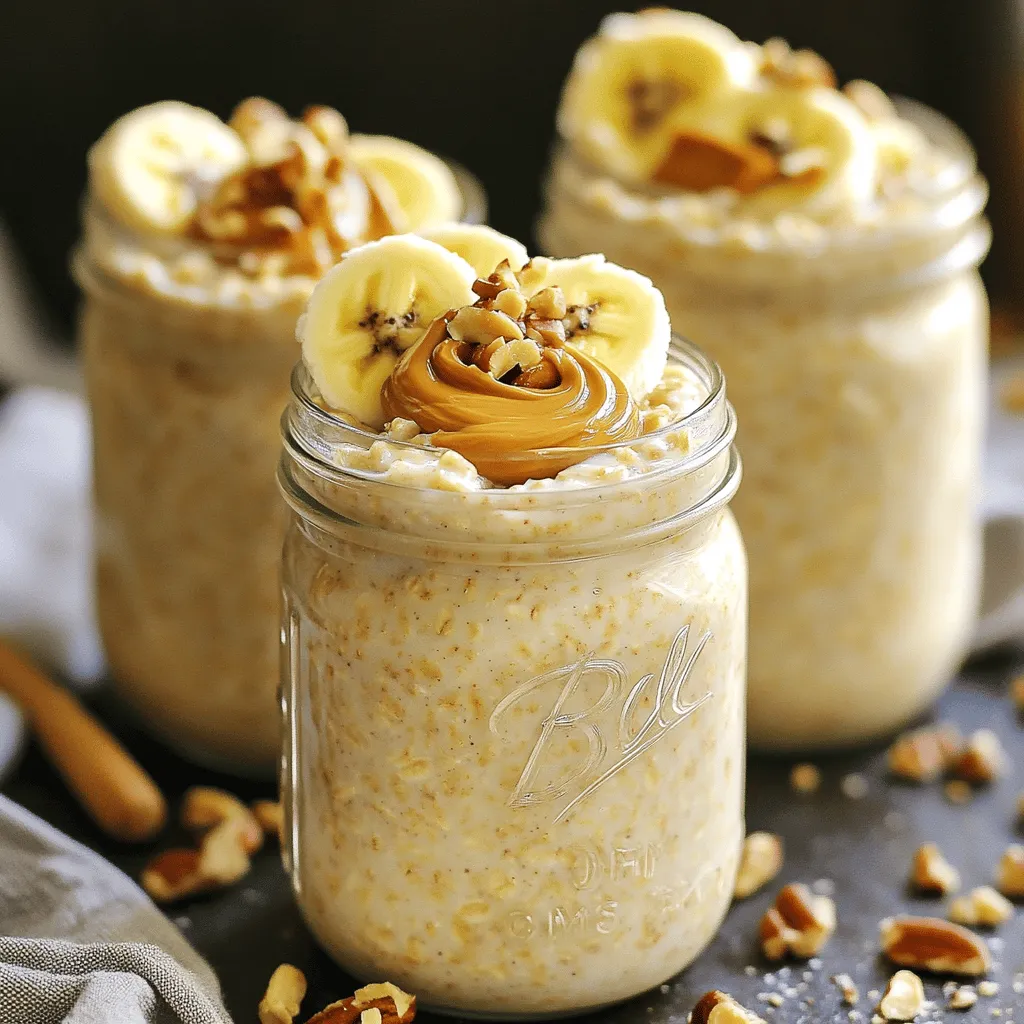
Do you want a quick and tasty breakfast that’s easy to make? Peanut Butter Banana Overnight Oats are your answer!

Older posts
Newer posts
← Previous Page1 … Page29 Page30 Page31 … Page43 Next →

dsad

© 2025 lazychefmagic • Built with GeneratePress

Our Policies

  • Copyright Policy
  • Cookie Policy
  • GDPR Policy
  • Privacy Policy
  • Disclaimer
  • Terms Of Use

More Information

  • Home
  • About
  • Contact
  • Appetizers
  • Dessert
  • Dinner
  • Drinks
©2025, lazychefmagic About Back To Top