Skip to content
DisclaimerTerms Of UseGDPR PolicyCookie Policy

lazychefmagic

  • Home
  • Drinks
  • Appetizers
  • Dinner
  • Dessert
  • About
  • Contact
  • Privacy Policy
DisclaimerTerms Of UseGDPR PolicyCookie Policy

Amanda

When making Pesto Caprese Pasta Salad, you need fresh and simple ingredients. Here’s what you will need: - 2 cups rotini pasta - 1 cup cherry tomatoes, halved - 1 cup fresh mozzarella balls, halved - 1 cup fresh basil leaves, torn - ½ cup basil pesto (homemade or store-bought) - 2 tablespoons extra virgin olive oil - Salt and freshly ground black pepper to taste - ¼ cup pine nuts, toasted (optional for added texture) - Balsamic glaze for drizzling (optional for garnish) Each ingredient plays a key role. The rotini pasta holds the pesto well, making every bite flavorful. Cherry tomatoes add a juicy burst, while fresh mozzarella brings creaminess. The torn basil leaves add a fragrant touch that brightens the dish. Using basil pesto gives the salad its signature taste. Extra virgin olive oil adds richness, while salt and pepper enhance all the flavors. Toasted pine nuts add a delightful crunch if you choose to include them. Drizzling balsamic glaze adds a sweet note to finish. This recipe is versatile, and you can easily adjust it to fit your taste. For the full recipe, check out the detailed instructions provided. To start, boil a large pot of salted water. Once it bubbles, add the rotini pasta. Cook it according to the package for about 8-10 minutes. You want it al dente. After cooking, drain the pasta and rinse it under cold water. This stops the cooking and keeps it firm. While the pasta cooks, grab your cherry tomatoes and fresh mozzarella. Halve the tomatoes and mozzarella balls. This makes them bite-sized and easy to mix. Next, take fresh basil leaves and gently tear them into smaller pieces. This helps release their lovely aroma. In a big bowl, mix the cooled rotini pasta with the halved cherry tomatoes, halved mozzarella balls, and torn basil leaves. Use a spatula to fold everything together. Be gentle, so you don’t break the mozzarella. For a crunchy twist, toast some pine nuts. Heat a dry skillet over medium heat. Stir the pine nuts for about 3-4 minutes until they turn golden brown. Let them cool before adding to the salad. This little step adds a nice texture. Cover the pasta salad with plastic wrap and place it in the fridge. Let it chill for at least 30 minutes. Chilling gives the flavors time to blend and creates a refreshing taste. When you're ready to serve, scoop the pasta salad into bowls or onto a platter. Finish it off with a drizzle of balsamic glaze. This adds a sweet touch and makes the dish look beautiful. Enjoy your Pesto Caprese Pasta Salad! For the complete recipe, check out the Full Recipe. To get al dente pasta, cook it in boiling salted water. The pasta should be firm but not hard. Follow the package instructions for the best timing. Usually, this takes about 8 to 10 minutes. As soon as it's done, drain the pasta. Rinsing it under cold water halts the cooking. This step keeps the pasta from getting mushy. Fresh basil and mozzarella make a big difference. They bring bright flavors to your dish. When you pick basil, choose vibrant, green leaves. They should smell strong and fresh. For mozzarella, look for soft balls that feel creamy. The right pesto matters, too. Homemade pesto is best, but store-bought works well if it's high quality. Check for fresh ingredients in the list. To boost flavor, consider adding other herbs. Oregano or parsley can add a nice touch. You might also try adding some diced bell peppers for crunch. If you want to switch it up, alternative dressings can work. A light vinaigrette or a creamy dressing can change the taste. Just remember to keep it fresh and simple! For the full recipe, check the link. {{image_4}} For those with dietary needs, here are some great options: - Gluten-free pasta options: Use brown rice or quinoa pasta for a gluten-free dish. These options maintain a nice texture and flavor. - Vegan alternatives: Swap fresh mozzarella for vegan cheese. Nutritional yeast can add a cheesy flavor without dairy. You can change up your salad with seasonal ingredients: - Vegetables to consider based on seasons: In summer, add cucumbers for crunch. Autumn brings roasted butternut squash for warmth. Spring can include peas for sweetness. - Protein additions: Grilled chicken or shrimp can make this salad heartier. Just cook the protein and toss it in with the other ingredients. To spice up your salad, consider these tweaks: - Spicy variations with ingredients like jalapeños: Add sliced jalapeños for a kick. This heats up the dish and adds a nice contrast to the creamy cheese. - Using different types of cheese: Try feta or goat cheese if you want to switch it up. These cheeses can add a tangy flavor that complements the pesto. Feel free to get creative with your Pesto Caprese Pasta Salad. With these variations, you can enjoy a new twist every time! To keep your Pesto Caprese Pasta Salad fresh, store it in the fridge. Use an airtight container to reduce air exposure. This will help keep the flavors intact. If you have a large batch, divide it into smaller portions. This makes it easy to grab a serving later. Always let the salad cool before sealing. This helps prevent condensation, which can make it soggy. You can enjoy this pasta salad cold or at room temperature. Reheating is not necessary. If you prefer it warm, use a microwave. Heat it for short bursts. Stir in between to warm it evenly. Avoid overheating, as this can make the pasta mushy. If you want to revive the flavors, add a little extra pesto or olive oil. Your salad stays fresh for about three days in the fridge. Look for signs of spoilage like a sour smell or slimy texture. If the tomatoes become mushy or the basil wilts, it’s time to toss it out. Keeping an eye on your leftovers helps ensure you enjoy the best flavors. For the full recipe, refer back to the earlier sections. Yes, you can make this salad ahead of time. It tastes even better after chilling. I suggest preparing it a few hours before serving. This gives the flavors time to mix. Store it in the fridge in an airtight container. If you need a substitute for pesto, you have options. You can use store-bought sauces like sun-dried tomato or olive tapenade. A simple dressing of olive oil, lemon juice, and garlic also works well. Feel free to get creative with different flavors. This salad is great for meal prep. It keeps well in the fridge for up to three days. Pack it in individual containers for easy grab-and-go meals. Just make sure to keep the balsamic glaze separate until you’re ready to eat. You can definitely add cooked chicken to your salad. It adds protein and makes the dish heartier. Use grilled or rotisserie chicken for best results. Just chop it into bite-sized pieces and mix it in with the other ingredients. For a full recipe, please refer to the [Full Recipe]. You now have a simple and tasty recipe for Pesto Caprese Pasta Salad. We covered the key ingredients, like rotini pasta, cherry tomatoes, and fresh mozzarella. You learned how to prepare each component while ensuring great flavor. We explored different ways to customize the salad based on your diet and preferences. Making this dish ahead is easy, and it stores well. Enjoying fresh, quality ingredients makes all the difference. Try it out and impress your friends!

Pesto Caprese Pasta Salad Delicious and Simple Dish

Looking for a dish that’s both tasty and easy to make? Try Pesto Caprese Pasta Salad! With fresh ingredients like

- 1 lb (450g) chicken breast, cut into 1-inch cubes - 1/4 cup low sodium soy sauce - 2 tablespoons honey - 2 cloves garlic, finely minced - 1 tablespoon fresh ginger, grated You need chicken breast for protein. The soy sauce adds salt and umami flavor. Honey gives a sweet touch. Garlic and ginger add warmth and zest. Together, these ingredients create a rich marinade for your skewers. - 1/4 cup green onions, chopped (for garnish) - 1 tablespoon sesame seeds (for garnish) Green onions add a fresh crunch and bright color. Sesame seeds give a nutty flavor and a nice look. These garnishes make your dish even more appetizing. - Wooden skewers - Grill Wooden skewers hold everything together. Soak them in water for 30 minutes to prevent burning. A grill gives that perfect char and smoky taste. This equipment is key to making your teriyaki chicken skewers shine. For full details on how to prepare these delicious skewers, check the Full Recipe. To start, whisk together the following ingredients in a medium bowl: - 1/4 cup low sodium soy sauce - 2 tablespoons honey - 1 tablespoon rice vinegar - 2 cloves garlic, finely minced - 1 tablespoon fresh ginger, grated - 1 teaspoon sesame oil Make sure to whisk until the honey dissolves completely. If you find the honey is too thick, warm it slightly before mixing. This helps it blend better. Next, place the cubed chicken breast into a resealable bag or a shallow dish. Pour the marinade over the chicken. Make sure each piece gets coated. Seal the bag or cover the dish tightly. Refrigerate the chicken for at least 30 minutes. For the best taste, let it marinate for up to 2 hours. This time allows the chicken to absorb the flavors fully. While the chicken marinates, preheat your grill to medium-high heat, around 375°F (190°C). This temperature gives the chicken a nice sear. Once the chicken has marinated, thread the cubes onto soaked wooden skewers. Leave a small gap between pieces. This helps them cook evenly. Place the skewers on the grill. Grill for 10-12 minutes. Turn them occasionally for even cooking. Brush some reserved marinade on the chicken in the last few minutes for extra flavor. Check for doneness by ensuring the chicken reaches an internal temperature of 165°F (75°C). This ensures it is safe to eat and juicy. For the full recipe, refer to the previous section. To get perfect grill marks on your teriyaki chicken skewers, preheat the grill to medium-high heat. This helps the chicken sear quickly. When you place the skewers on the grill, do not move them for the first few minutes. This allows the grill to create those beautiful lines. Leave gaps between chicken pieces on the skewers. This space helps hot air circulate. As a result, the chicken cooks evenly and stays juicy. You can use the reserved marinade to brush on the chicken while grilling. This adds extra flavor and gives a nice glaze. Make sure to set aside some marinade before adding chicken. Never reuse marinade after chicken has been in it. Consider using complementary sauces. A drizzle of chili sauce or a sprinkle of lime juice can brighten the dish. These flavors work well with the sweet teriyaki. For a stunning presentation, arrange the skewers on a wooden board. This rustic look will enhance your meal. You can also add fresh herbs like cilantro or basil for a pop of color. Consider garnishing with thinly sliced cucumbers or bell peppers. These add color and crunch. Drizzle extra teriyaki sauce over the skewers for a glossy finish. It makes the dish more appealing and flavorful. For the full recipe, check out the Teriyaki Chicken Skewers section above! {{image_4}} You can add vegetables to your skewers for extra flavor and color. Great options include: - Bell peppers - Zucchini - Cherry tomatoes - Onions - Mushrooms Cut these vegetables into similar sizes as the chicken pieces. This helps them cook evenly. For cooking times, grill vegetables for about 8-10 minutes. If you want them crispy, skewer them separately. Just remember to check that they are tender but not mushy. You don’t have to stick with chicken. You can try other meats like beef or shrimp. Cut them into 1-inch cubes, just like the chicken. For beef, marinate it for about an hour. Shrimp cooks faster, so marinate for just 20-30 minutes. If you're vegetarian, use firm tofu. Cut the tofu into cubes and press it to remove excess water. Marinate the tofu for at least 30 minutes. It will soak up the teriyaki flavor nicely. Want to mix things up? Experiment with different marinades. Try using orange juice or pineapple juice instead of the rice vinegar. You can also add spices like chili flakes or black pepper for some heat. Herbs like cilantro or basil can add freshness to your skewers. Just chop them finely and mix them into the marinade. This small change can make a big difference in flavor! For more ideas, check the Full Recipe to guide your cooking adventure. To keep your teriyaki chicken skewers fresh, store them in the fridge. Use an airtight container. This helps keep moisture in and prevents drying out. They stay good for up to three days. If you want to save them longer, freeze the skewers. Wrap them tightly in plastic wrap, then place in a freezer bag. They can last for up to three months in the freezer. When you're ready to eat leftovers, you want to keep that great flavor. The best way to reheat skewers is in the oven. Preheat your oven to 350°F (175°C). Place the skewers on a baking sheet. Heat them for about 10-15 minutes. This keeps the chicken juicy and tasty. You can also use a microwave if you're short on time. Just cover the skewers with a damp paper towel. Heat for 1-2 minutes, checking often to avoid overcooking. For easy meals later, consider pre-marinating the chicken. You can marinate it the night before. This saves time on busy days. Also, think about portioning the chicken. You can make small packs for quick snacks or lunches. This way, you grab what you need without fuss. Having prepped meals can make your week easier and more delicious! To ensure that your chicken is safe to eat, check its internal temperature. Use a meat thermometer. The chicken should reach 165°F (75°C). This is the safe cooking temperature. Look for visual signs too. The chicken should no longer be pink inside. The juices should run clear. If you see these signs, your chicken is likely cooked well. Yes, store-bought teriyaki sauce can save time. Some good brands include Kikkoman and Soy Vay. They offer a nice balance of flavor. You may want to adjust the sauce. If it's too sweet, add a splash of vinegar. For more depth, mix in fresh garlic or ginger. This can enhance the taste. The best marinating time is around 30 minutes to 2 hours. This allows the flavors to soak in. Marinating for too long can change the texture. If you marinate for over 2 hours, the chicken might become mushy. Keep an eye on the time for the best results. Several sides complement teriyaki chicken. Try steamed rice or quinoa for a filling meal. You can also serve it with a fresh cucumber salad. For a colorful plate, add grilled veggies like bell peppers. These add flavor and nutrients. With these sides, you create a balanced meal that everyone will enjoy. In summary, this blog post covers everything about making Teriyaki Chicken Skewers. We discussed main and garnishing ingredients, the right equipment, and clear instructions. You learned tips for grilling, ways to enhance flavor, and variations for different diets. Finally, we explored storage practices and answered common questions. With these insights, you can create a delicious dish that impresses everyone. Enjoy grilling and experimenting with flavors, and make each meal memorable!

Flavorful Teriyaki Chicken Skewers Easy Recipe Guide

Are you ready to impress your friends at the next cookout? My easy recipe for flavorful teriyaki chicken skewers will

- 1 cup frozen strawberries - 1 ripe banana, sliced - 1/2 cup Greek yogurt (or plant-based yogurt) - 1/2 cup almond milk (or any milk of your choice) - 1 tablespoon honey or maple syrup (optional) - 1 tablespoon chia seeds - Granola - Sliced fresh strawberries - Banana slices - Shredded coconut - Mixed nuts - Edible flowers (for garnish) The main ingredients bring together the best flavors. Frozen strawberries give a chill and sweetness. Using a ripe banana adds creaminess and natural sugar. Greek yogurt, or plant-based yogurt, adds protein and tang. Almond milk keeps the mix smooth and light. Honey or maple syrup can add just the right touch of extra sweetness. Chia seeds are a tiny powerhouse of nutrition. For toppings, you can get creative! Granola adds a nice crunch. Fresh strawberries and banana slices look beautiful and taste great. Shredded coconut brings a tropical vibe. Mixed nuts add more texture and healthy fats. Finally, edible flowers make your bowl stunning. They bring a pop of color and a hint of flavor. With these simple yet vibrant ingredients, you create a Strawberry Banana Smoothie Bowl that is fun and tasty. For the full recipe, follow the instructions and enjoy this delightful treat! - Begin by adding all main ingredients to a blender. - Use frozen strawberries, a ripe banana, Greek yogurt, almond milk, and chia seeds. - Blend until smooth and creamy. - Pause to scrape down the sides for even mixing. - Adjust sweetness as needed by blending in honey or syrup. - Pour the smoothie into a bowl, creating a smooth surface. - Arrange toppings in an aesthetically pleasing way. - Use granola, fresh fruit slices, and shredded coconut for a colorful look. - Sprinkle additional chia seeds and edible flowers on top. - These add beauty and a touch of flavor. - Enjoy your bowl right away for the best taste! Follow these steps for a delightful treat that looks great and tastes even better. For the complete recipe, check out the Full Recipe. - Use a high-speed blender for best results. This helps achieve a smooth texture. - Pause to scrape down the sides for even blending. This ensures all ingredients mix well. - Choose shallow bowls to highlight colors. A wide surface makes it look inviting. - Drizzle honey for added shine and flavor. This small touch elevates the dish's appeal. - Substitute yogurt with a dairy-free option. Almond or coconut yogurt works great. - Experiment with different toppings based on preference. You can add nuts, seeds, or fruits you love. Each choice can make your smoothie bowl unique. Enjoy creating your perfect blend! {{image_4}} You can change up the flavors in your smoothie bowl. Try adding spinach for a green smoothie. It adds nutrients without a strong taste. You can also introduce nut butter, like almond or peanut, for creaminess. This will make your bowl richer and more filling. Make your smoothie bowl fun with seasonal fruits. Swap strawberries for blueberries or peaches when they are in season. This adds a fresh twist. You can also change the toppings based on what you find at the market. This keeps your smoothie bowl exciting and new. Want a vegan option? Use plant-based yogurt and almond milk instead. This keeps your bowl tasty while meeting dietary needs. If you need more protein, add a scoop of protein powder. This boosts the nutrition without changing the flavor much. Store any leftover smoothie in the fridge for up to 24 hours. This keeps it fresh and tasty. Freeze leftovers in an airtight container for up to a month. Thaw before serving for best results. This way, you can enjoy your smoothie bowl later. - Keep toppings separate to maintain crunch. This ensures your bowl stays appealing and satisfying. - Use a mason jar for easy transport. It makes taking your smoothie bowl on-the-go simple and mess-free. By following these storage tips, you can enjoy your Strawberry Banana Smoothie Bowl whenever you want! The recipe serves 2. This means you can enjoy one bowl and share the other. Perfect for a breakfast date or a sweet snack! Yes, you can make the base ahead. Just remember to add the toppings right before serving. This keeps them fresh and crunchy. You can add flax seeds or protein powder to boost nutrition. Flax seeds provide fiber and healthy fats. Protein powder adds a protein punch, making your bowl even more filling. This blog post covered a delicious smoothie bowl recipe. You learned about the main ingredients, step-by-step instructions, and tips for perfecting your bowl. We explored fun variations and discussed how to store leftovers properly. To sum up, making a smoothie bowl is easy and customizable. You can create a tasty, healthy meal that suits your taste and needs. Try it out and enjoy the process! Your perfect smoothie bowl awaits.

Strawberry Banana Smoothie Bowl Fun and Tasty Treat

Looking for a refreshing treat that’s easy to make? The Strawberry Banana Smoothie Bowl is perfect for you! Packed with

To make creamy avocado pasta, gather these items: - 12 oz spaghetti or linguine - 2 ripe avocados, pitted and flesh carefully scooped out - 2 cloves garlic, minced - 2 tablespoons fresh lemon juice (about 1 lemon) - 1/4 cup fresh basil leaves, plus extra for garnish - 1/4 cup extra virgin olive oil - 1/4 cup grated Parmesan cheese (or nutritional yeast for a vegan alternative) - Salt and freshly cracked black pepper to taste - 1/4 teaspoon red pepper flakes (optional, for those who like it spicy) - Handful of cherry tomatoes, halved, for garnish You can easily adjust this recipe to fit your needs. Here are some swaps: - Use gluten-free pasta for a gluten-free option. - Replace Parmesan with nutritional yeast for a vegan dish. - Swap olive oil with avocado oil for a different flavor. - For a nut-free version, skip any nuts in similar recipes. This dish not only tastes great but also packs a nutritional punch: - Avocados: Rich in healthy fats and fiber. They support heart health. - Garlic: Boosts immunity and adds flavor. It has many health benefits. - Lemon Juice: Helps with digestion and adds a fresh taste. - Basil: Offers antioxidants and adds vibrant flavor. - Olive Oil: Packed with healthy fats, it promotes good heart health. - Parmesan Cheese: Adds protein and calcium for strong bones. - Cherry Tomatoes: Provide vitamins A and C, supporting skin health. These ingredients work together to create a satisfying meal that is good for you! For the full recipe, check the details provided earlier. To cook the pasta, start by boiling salted water in a big pot. Bring it to a rolling boil. Add 12 oz of spaghetti or linguine. Cook it according to the package directions until it is al dente, usually about 8 to 10 minutes. Before draining, set aside 1 cup of the starchy pasta water. Drain the pasta and put it in a large mixing bowl. Now, let’s make the sauce. Grab a food processor and add the scooped flesh from 2 ripe avocados, 2 minced garlic cloves, and the juice of 1 lemon. Toss in 1/4 cup of fresh basil leaves, 1/4 cup of extra virgin olive oil, and 1/4 cup of grated Parmesan cheese. Season with a pinch of salt and pepper. Blend everything until it is smooth and creamy. If it feels too thick, add a little bit of the reserved pasta water until you like the texture. Pour the creamy avocado sauce over the drained pasta in your mixing bowl. Using tongs, gently toss the pasta until it is well coated with the sauce. If the sauce is too thick, add more reserved pasta water slowly until it reaches your preferred creaminess. Taste the pasta and adjust the seasoning with more salt, pepper, or lemon juice if needed. For a spicy kick, mix in optional red pepper flakes. This recipe makes a delightful dish that is fresh and satisfying. For the full recipe, check out the details above. To get the best texture for your creamy avocado pasta, focus on blending. Use a food processor for a smooth sauce. Start with ripe avocados; they should be soft but not brown. If your sauce is too thick, add a bit of the reserved pasta water. This helps create a nice, velvety feel. Always blend until the mixture is creamy and well combined. Adding flavor is key to a great dish. Start with salt and pepper. Fresh lemon juice brightens the sauce. You can also add more garlic for a bolder taste. Fresh basil gives a nice herbal note. If you want heat, add red pepper flakes. For a twist, try mixing in some sun-dried tomatoes or olives. These can elevate your dish further. Watch out for overcooking the pasta. You want it al dente, with a slight bite. Another mistake is not tasting before serving. Adjust the seasoning as needed. Avoid using unripe avocados; they won’t blend well. Lastly, don’t skip the pasta water; it’s essential for the sauce’s creaminess. Following these tips will help you create a delightful dish every time. For more details, check out the Full Recipe. {{image_4}} You can make this dish vegan with just a few swaps. Instead of Parmesan cheese, use nutritional yeast. It gives a cheesy flavor without any dairy. You can also add extra herbs like parsley or cilantro for more taste. This version remains creamy, green, and delicious! If you need a gluten-free meal, swap regular pasta with gluten-free spaghetti or linguine. Many brands offer tasty options made from brown rice or quinoa. These pasta types work well and keep the dish light. Just cook them al dente for the best texture. Want to boost the nutrition? Try adding protein or vegetables. Grilled chicken or shrimp makes a great addition. For a plant-based choice, add chickpeas or lentils. You can also toss in veggies like spinach, peas, or zucchini. They not only add color but also make the dish healthier. To store your creamy avocado pasta, place it in an airtight container. Make sure it cools down first. This will help keep the pasta fresh. Store it in the fridge for up to three days. The avocado sauce may darken a bit, but it still tastes great. When you're ready to eat your leftovers, reheat gently. Use a microwave-safe bowl and cover it with a lid or paper towel. Heat in short bursts of 30 seconds. Stir between each burst to avoid hot spots. If the sauce is too thick, add a splash of water or olive oil to loosen it. Freezing creamy avocado pasta is not the best option. The avocado can change texture and taste when frozen. If you must freeze it, keep in mind that the sauce may not be as smooth. Place it in a freezer-safe container. Use it within one month for the best quality. When ready to eat, thaw in the fridge overnight, then reheat as explained above. Yes, you can make this pasta ahead of time. Cook the pasta as directed and prepare the sauce. However, I recommend storing them separately. This way, the pasta stays fresh, and the sauce does not brown. When you are ready to eat, combine them and warm them up gently. You can add a little pasta water to loosen the sauce if needed. To make creamy avocado pasta without cheese, simply skip the Parmesan. Use nutritional yeast instead for a cheesy flavor. Blend your avocados, garlic, lemon juice, basil, and olive oil until smooth. Nutritional yeast adds a nice umami taste. You can also add a bit more lemon juice to enhance the flavor. Creamy avocado pasta pairs well with many sides. A light salad with fresh greens is a great choice. You can also serve it with crusty bread for a satisfying meal. Roasted vegetables or grilled chicken can add more texture and flavor. Don't forget a sprinkle of extra basil on top for a fresh touch! In this blog post, we explored how to make creamy avocado pasta. We covered ingredients, cooking steps, and tips to perfect your dish. You can enjoy variations like vegan or gluten-free options too. Remember to store leftovers well for future meals. Cooking should be fun and tasty! Use this dish to impress friends or family. With practice, you'll master creamy avocado pasta in no time. Enjoy your cooking journey!

Creamy Avocado Pasta Delightful and Easy Recipe

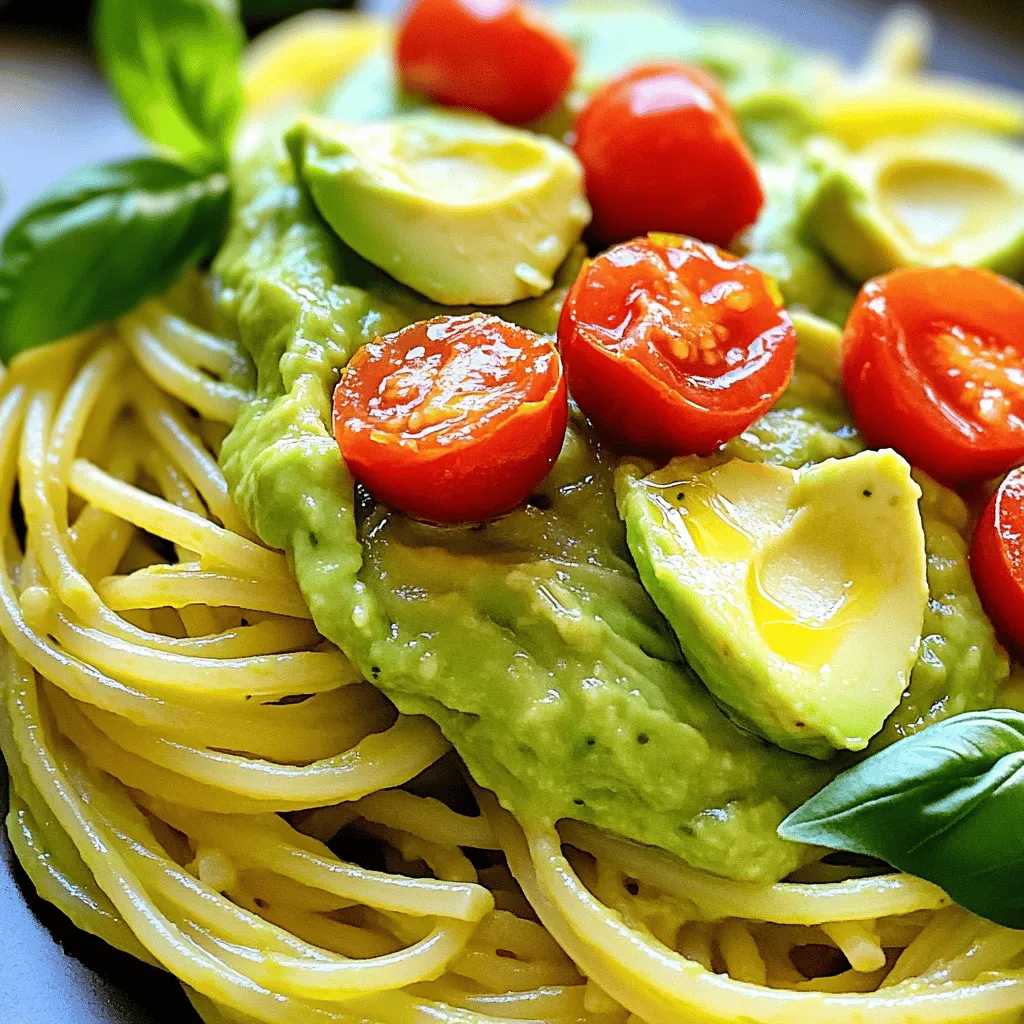
Are you ready to enjoy a delicious and creamy avocado pasta that’s easy to make? This delightful recipe brings fresh

To make these no-bake chocolate oatmeal cookies, you need some simple ingredients: - 1 cup rolled oats - 1/2 cup natural peanut butter - 1/2 cup honey or maple syrup - 1/4 cup unsweetened cocoa powder - 1 teaspoon vanilla extract - 1/2 teaspoon salt - 1/2 cup shredded coconut (optional) - 1/2 cup mini chocolate chips (optional) You can swap ingredients if needed. Here are some ideas: - Alternatives for natural peanut butter: You can use almond butter or sunflower seed butter if you have nut allergies. - Sweeteners: Honey gives a rich flavor, while maple syrup adds a unique taste. Both work well, so choose your favorite. - Using dairy-free chocolate chips: If you want a vegan option, choose dairy-free chocolate chips. They will still add great flavor. These ingredient swaps can help you customize your cookies to fit your taste and diet. For the full recipe, check out the complete guide! To start, grab a medium saucepan. Place it on low heat. Add the natural peanut butter, honey (or maple syrup), cocoa powder, and salt. Stir these together with a wooden spoon. Keep stirring until the mixture is smooth. This should take about 2 to 3 minutes. Be careful! Don't let it boil, as we want a creamy texture that blends well. Once your chocolate mixture is ready, take it off the heat. Now, it’s time to mix in the rolled oats. Pour them into the saucepan. Gently fold them into the chocolate mixture. Make sure every oat is coated well. If you like, add in shredded coconut and mini chocolate chips. This gives the cookies a fun surprise in every bite. Mix until everything is evenly distributed. Next, prepare a baking sheet with parchment paper. Use a cookie scoop or a tablespoon to drop spoonfuls of the mixture onto the sheet. Shape them into cookie rounds as you go. Once all the cookies are formed, place the baking sheet in the fridge. Chill them for at least 30 minutes. This step is key! Chilling helps the cookies firm up and keeps their shape. After they chill, transfer them to an airtight container. Keep them in the fridge to stay fresh. For the full recipe, check out the original source. - Cookies not holding shape: If your cookies spread out or don't hold their shape, check the ratio of oats to wet ingredients. You may need to add more oats to help them firm up. Ensure your mixture is thick enough before you scoop it out. - Mixture too dry or too wet: If your mixture feels too dry, try adding a little more peanut butter or honey. If it's too wet, mix in extra oats. Finding the right balance is key for perfect cookies. - Adding spices or extracts: A pinch of cinnamon or nutmeg can add warmth to your cookies. You can also try almond extract for a unique twist. Experiment to find your favorite flavor. - Tips for achieving the best chocolate flavor: Use high-quality cocoa powder for a rich taste. Adding mini chocolate chips deepens the chocolate flavor too. Mix them in with the oats for a delightful surprise. - Pairing ideas with beverages: These cookies go great with cold almond milk or hot coffee. You can even serve them with a scoop of vanilla ice cream for a fun dessert. - Presentation tips for social gatherings: Arrange cookies on a colorful platter. You can garnish with a sprinkle of shredded coconut or a drizzle of melted chocolate for a polished look. {{image_4}} You can change the flavor of your no-bake chocolate oatmeal cookies. If you want to switch from peanut butter, you can use almond or sunflower seed butter. Each option gives a different taste while keeping the texture similar. Another fun idea is to add dried fruits like raisins or cranberries. They add a sweet twist and boost nutrition. For those who need gluten-free options, you can use certified gluten-free oats. This change makes the cookies safe for those with gluten allergies. If you follow a vegan diet, replace honey with maple syrup. You can also ensure your chocolate chips are dairy-free. These small swaps make the recipe fit many diets. Get creative with your cookies by adding nuts and seeds. Chopped walnuts or sunflower seeds add crunch and nutrition. You can also experiment with different types of chocolate. Dark chocolate or white chocolate chips can change the flavor and look of your cookies. Each choice provides a new taste experience and makes your cookies special. To keep your no-bake chocolate oatmeal cookies fresh, use an airtight container. This helps keep moisture out and flavors in. Plastic wrap can work, but it often allows air in. I recommend an airtight container for best results. Store the cookies in the refrigerator. They will stay fresh for about one week. If you want to enjoy them later, follow the freezing instructions below. You can freeze these cookies for later use. First, let them cool completely. Then, place them in a single layer on a baking sheet. Freeze them for about one hour. After that, transfer the cookies to an airtight freezer bag. This method keeps them from sticking together. When you want to eat them, take out only what you need. Thaw them in the fridge overnight for best texture. Avoid microwaving them, as that can make them too soft. Understanding freshness is key to enjoying your cookies. Look for signs of quality. If they become hard or dry, they may no longer taste great. Always check for any off smells. If they smell funny, it’s best to toss them out. For the best flavor, consume your cookies within a week. If you freeze them, they can last up to three months. Store them well to maintain their deliciousness! You can tell your no-bake cookies are ready when they feel firm to the touch. The mixture should not be gooey. Refrigeration is key. Chill them for at least 30 minutes. This helps them set and hold their shape. Yes, you can make these cookies ahead of time. They store well in the fridge. Just place them in an airtight container after they set. They will stay fresh for up to a week. This is great for meal prepping desserts during busy weeks. If you need an alternative to rolled oats, try quick oats or even gluten-free oats. Both work well in this recipe. If you want a nutty flavor, consider using crushed nuts instead. These options fit various dietary needs. Yes, no-bake cookies can be healthy. They contain oats, which are high in fiber. Natural peanut butter provides protein and healthy fats. Honey or maple syrup adds natural sweetness. Just watch the portion size to keep them balanced. Absolutely! You can personalize your cookies with different mix-ins. Try adding chopped nuts, dried fruits, or seeds for added texture. You can also use flavored chocolate chips for a fun twist. This makes each batch unique and delicious. For the full recipe, check out the main section. In this post, we covered essential ingredients, step-by-step instructions, and tips for no-bake cookies. You learned various substitutions, variations, and storage methods to fit your needs. Remember, these cookies are easy to customize and can suit any diet. Enjoy experimenting with flavors and textures. With these simple steps, you can create treats that everyone will love. Get creative and have fun in your kitchen!

No-Bake Chocolate Oatmeal Cookies Easy Treat Recipe

Craving a sweet treat but short on time? These No-Bake Chocolate Oatmeal Cookies are a quick and easy solution! You

- 4 bone-in, skin-on chicken thighs - 1/4 cup honey - 1/4 cup Dijon mustard - 2 tablespoons soy sauce (or tamari for a gluten-free option) - 1 tablespoon apple cider vinegar - 2 cloves garlic, minced - 1 teaspoon fresh thyme leaves (or 1/2 teaspoon dried thyme) - 1 teaspoon smoked paprika - Salt and freshly ground black pepper, to taste - 1 tablespoon olive oil - Fresh parsley, finely chopped (for garnish) You can add your twist to this dish. Here are some ideas: - Lemon juice for a zesty flavor - Red pepper flakes for a spicy kick - Maple syrup instead of honey for a different sweetness - Mustard powder for extra tanginess - Fresh herbs like rosemary or basil for added aroma This recipe serves four. Each serving has about: - Calories: 380 - Protein: 27g - Carbohydrates: 15g - Fat: 25g - Fiber: 0g - Sugar: 9g This dish is balanced and satisfying. It provides protein from chicken, healthy fats from olive oil, and flavor from honey and mustard. For a full recipe, check out the complete guide. Start by preheating your oven to 400°F (200°C). This step is key to cooking the chicken evenly. While the oven warms up, grab a medium bowl. In this bowl, mix together the honey, Dijon mustard, soy sauce, apple cider vinegar, and minced garlic. Add fresh thyme, smoked paprika, and a pinch of salt and pepper. Whisk until the mixture is smooth and well combined. This marinade gives the chicken its rich flavor. Take a large resealable bag or a shallow dish for the chicken thighs. Place the chicken thighs in it and pour the marinade over them. Make sure every piece is coated well. Seal the bag or cover the dish tightly with plastic wrap. Let it sit in the fridge for at least 30 minutes. If you have more time, you can let it marinate for up to 2 hours. This step allows the flavors to soak into the meat. After marinating, heat a tablespoon of olive oil in a large oven-safe skillet over medium-high heat. Once the oil is hot, carefully take the chicken out of the marinade, allowing extra sauce to drip off. Place the thighs skin-side down in the skillet. Sear them for about 5-7 minutes until the skin is golden brown and crispy. Next, flip the chicken over with tongs. Pour the rest of the marinade over the chicken thighs. Then, transfer the skillet to your preheated oven. Bake for 25-30 minutes. You know the chicken is ready when it reaches an internal temperature of 165°F (74°C). The juices should run clear when you cut into it. Follow these steps closely for tender, flavorful honey mustard chicken thighs. You can find the full recipe in the previous section. Enjoy your cooking adventure! For the best flavor, marinate your chicken thighs for at least 30 minutes. If you have time, let them sit for up to 2 hours. This allows the honey mustard mix to soak into the meat. Use a resealable bag or a dish to hold the chicken and marinade. Make sure all pieces are covered well. This helps the flavors infuse and keeps the chicken juicy. To get that nice, crispy skin, start by searing the chicken thighs skin-side down in a hot pan. Use medium-high heat and let them cook for 5-7 minutes until golden brown. Avoid moving them around too much. When you flip them, they should release easily from the pan. This method locks in moisture and gives you that crunchy texture. Always check the internal temperature of your chicken. Use a meat thermometer to ensure the thickest part of the thigh reads 165°F (74°C). This step guarantees your chicken is safe to eat and perfectly cooked. Letting it rest for 5 minutes after baking will also keep it moist and tender. Enjoy your flavorful honey mustard chicken thighs! For the full recipe, click here. {{image_4}} Adding herbs can boost flavor. I love using fresh thyme or rosemary. Simply mix chopped herbs into the marinade for more depth. You can try parsley or basil too. These herbs enhance the dish without overpowering it. Fresh herbs add a bright touch to each bite. Grilling gives chicken a smoky flavor. Marinate the thighs as usual. Preheat your grill to medium-high heat. Grill each thigh for 6-8 minutes on each side. Check for a nice char and cook until the internal temperature hits 165°F. The grill marks will make your dish look great! For some heat, add red pepper flakes to the marinade. Start with a pinch and adjust to your taste. You can also mix in a splash of hot sauce. This variation gives a fun twist to the sweet and tangy taste. It’s perfect for those who love bold flavors. After cooking, let the honey mustard chicken thighs cool. Place them in an airtight container. Store in the fridge for up to three days. This keeps the chicken safe and tasty for later meals. To freeze the chicken, first let it cool completely. Wrap the thighs tightly in plastic wrap or aluminum foil. Then, place them in a freezer-safe bag or container. Properly stored, they can last for up to three months. Thaw in the fridge overnight before reheating. To reheat, use the oven for best results. Preheat to 350°F (175°C). Place the chicken on a baking sheet. Cover with foil to keep moisture in. Heat for about 15-20 minutes, or until warmed through. You can also use a microwave. Heat on medium power for 1-2 minutes, checking often to avoid drying out. For a crispy skin, a quick broil for 2-3 minutes works wonders. Enjoy your flavorful honey mustard chicken thighs! To make Honey Mustard Chicken Thighs, first, gather your ingredients. You need chicken thighs, honey, Dijon mustard, soy sauce, apple cider vinegar, garlic, thyme, smoked paprika, salt, pepper, and olive oil. Mix the honey, mustard, soy sauce, vinegar, garlic, thyme, paprika, salt, and pepper in a bowl. Pour this marinade over the chicken and let it sit for at least 30 minutes. Sear the chicken in a hot pan, then bake it in the oven until fully cooked. You can find the full recipe for detailed steps. Yes, you can use boneless chicken thighs. They will cook faster than bone-in thighs. Adjust your cooking time to about 20-25 minutes in the oven. Always check the chicken’s internal temperature. It should reach 165°F (74°C) for safe eating. These chicken thighs pair well with many sides. Consider serving them with roasted vegetables, rice, or quinoa. You can also add a fresh salad or mashed potatoes. These sides enhance the flavors and create a balanced meal. Leftovers can last for about 3-4 days in the fridge. Store them in an airtight container to keep them fresh. Reheat the chicken in the oven or microwave until it is hot throughout. Enjoy your flavorful meal again! In this post, we covered how to make tasty honey mustard chicken thighs. You learned about key ingredients and how to prepare them. I shared tips for crispy skin and marinating chicken well. You can choose different flavors for your dish. Also, we discussed how to store and reheat your leftovers. Enjoy your cooking! With these steps and ideas, you can create a delicious meal every time. Happy cooking!

Flavorful Honey Mustard Chicken Thighs Recipe

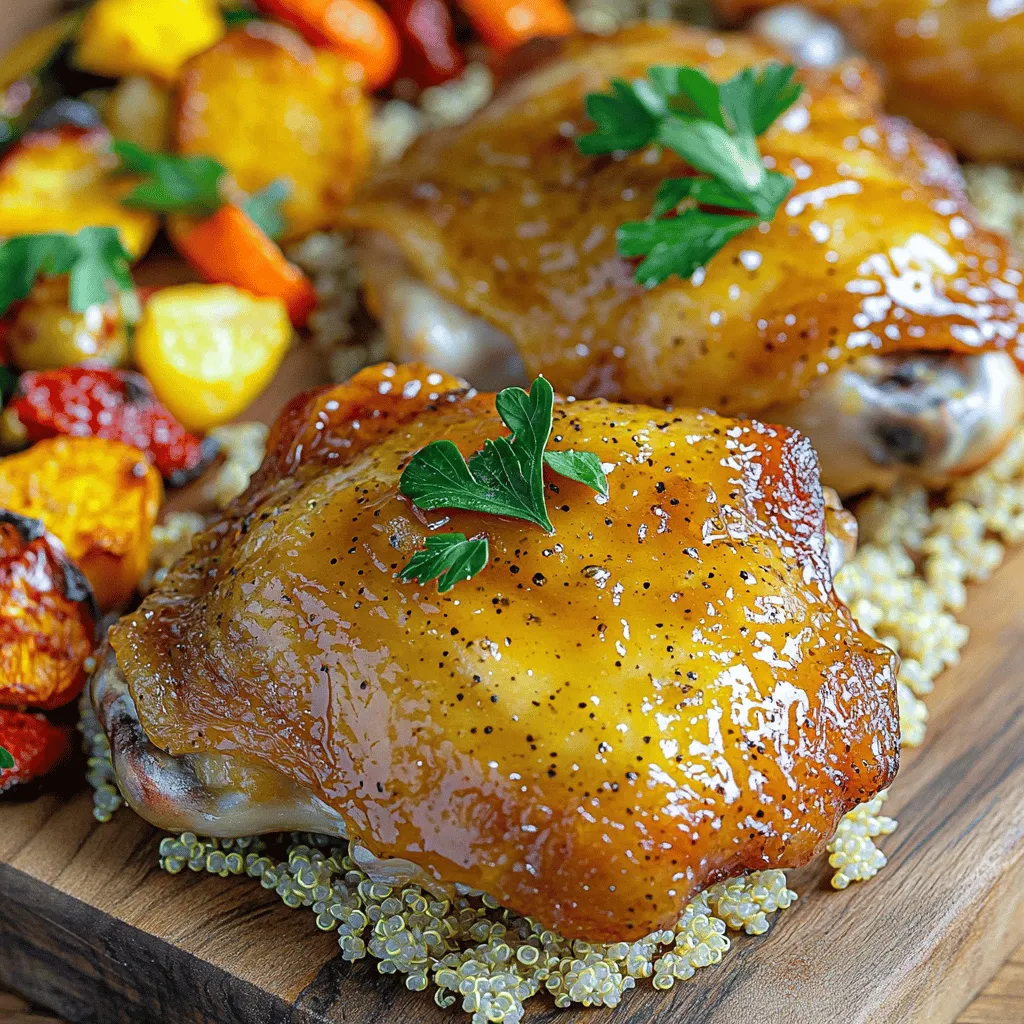
Are you ready to sink your teeth into a dish that’s bursting with flavor? My Honey Mustard Chicken Thighs recipe

To make Buffalo Cauliflower Bites, gather these simple ingredients: - 1 medium head of cauliflower, cut into bite-sized florets - 1 cup all-purpose flour - 1 teaspoon garlic powder - 1 teaspoon onion powder - 1 teaspoon smoked paprika - ½ teaspoon salt - ½ teaspoon black pepper - 1 cup water (or plant-based milk for added creaminess) - 1 cup buffalo sauce (your choice of store-bought or homemade) - 2 tablespoons olive oil - Fresh parsley, chopped (for garnish) Buffalo Cauliflower Bites offer a tasty snack with moderate calories. Each serving has roughly: - Calories: 200 - Protein: 5g - Carbs: 30g - Fat: 9g - Fiber: 3g These bites are a great source of vitamins and minerals. Cauliflower is low in calories while providing fiber and antioxidants. The spices add flavor without extra calories. You can easily swap some ingredients based on your needs: - Use gluten-free flour instead of all-purpose flour for a gluten-free option. - Replace water with plant-based milk for a creamier batter. - Try different hot sauces for a unique flavor twist. - If you dislike cauliflower, use broccoli or Brussels sprouts instead. These substitutions keep the dish delicious while catering to your tastes or dietary needs. Check out the Full Recipe for more details on making these bites. First, you need to preheat your oven to 450°F (230°C). This step is crucial for getting that crispy texture. While the oven heats, grab a medium head of cauliflower. Cut it into bite-sized florets. You want them small enough to cook well but big enough to hold the batter. Next, take a large mixing bowl. Combine the all-purpose flour, garlic powder, onion powder, smoked paprika, salt, and black pepper. Whisk these dry ingredients together. Make sure there are no lumps. Slowly add in the water or plant-based milk. Stir continuously until the batter is smooth. Now, take each cauliflower floret and dip it into the batter. Make sure each piece is fully coated. Place the coated florets on a lined baking sheet. Leave some space between each piece for even cooking. Once your cauliflower is ready, it's time to bake! Put the baking sheet in the preheated oven. Bake for about 20 minutes. You want them to turn a lovely golden brown. This is when they start to develop a crispy exterior. After 20 minutes, carefully check the cauliflower. If they look good, take them out. It's time for the sauce! In a separate bowl, mix the buffalo sauce with the olive oil. This mixture will add flavor and moisture. Drizzle the sauce over the baked cauliflower bites. You can also toss them in the bowl to coat them evenly. Return the coated cauliflower bites to the oven. Bake for another 10-15 minutes. This step helps the sauce stick and adds extra crispiness. Once done, take them out and let them cool for a couple of minutes. Finally, for a pop of color, garnish your buffalo cauliflower bites with chopped fresh parsley. Now, you can enjoy this flavorful vegan snack! For the full recipe, check the earlier section. To get that perfect crispy texture, use cold water or plant-based milk in your batter. This helps create a light and airy coating. Coat each floret well in the batter before baking. Leave space between each piece on the baking sheet. This allows hot air to circulate and crisp them up. Bake at a high temperature of 450°F (230°C) for the best results. Flip the bites halfway through baking for even crispness. To reheat your buffalo cauliflower bites, preheat your oven to 350°F (175°C). Spread the bites on a baking sheet in a single layer. Bake for about 10-15 minutes, or until they are hot and crispy again. You can also use an air fryer at 350°F (175°C) for about 5-7 minutes. Avoid using the microwave, as it can make them soggy. Serve the buffalo cauliflower bites as a fun snack or appetizer. Pair them with a creamy dip, like ranch or blue cheese dressing, for added flavor. You can also add them to salads or wraps for a spicy kick. For a colorful touch, garnish with freshly chopped parsley. This adds both flavor and a nice visual appeal. Enjoy the deliciousness! {{image_4}} You can easily make Buffalo Cauliflower Bites even spicier. Just add more hot sauce to the batter. You can also sprinkle some cayenne pepper into the dry mix for an extra kick. If you love heat, try using a spicier buffalo sauce. This will give you a blast of flavor and spice. If you need a gluten-free version, swap the all-purpose flour with gluten-free flour. You can use almond flour or chickpea flour. Both options work well and keep the bites crispy. Just check the labels to ensure they are certified gluten-free. Feel free to get creative with sauces and seasonings. You can try BBQ sauce for a smoky twist. Teriyaki sauce can add a sweet and savory flavor. For a tangy kick, use a garlic aioli or ranch dressing. Experiment with different spices like cumin or chili powder for unique tastes. Each option gives a fresh spin on this tasty snack. For the full recipe, check the section above. After you enjoy your buffalo cauliflower bites, let them cool. Place the leftovers in an airtight container. Store them in the fridge for up to three days. This keeps them fresh and tasty for your next snack. To freeze your cauliflower bites, first allow them to cool completely. Next, lay them out on a baking sheet in a single layer. Freeze them for a few hours until solid. Then, transfer them to a freezer bag or container. They will last for up to three months in the freezer. Reheat leftover bites in the oven for the best results. Preheat the oven to 350°F (175°C). Spread the bites out on a baking sheet. Heat them for about 10–15 minutes until they are hot and crispy again. You can also use an air fryer for a quicker option. Just set it to 350°F and heat for about 5–7 minutes. Enjoy them as if they were just made! Buffalo Cauliflower Bites have a bold flavor. They go great with cooling dips. Classic choices are ranch dressing and blue cheese dressing. You can also try a creamy avocado dip or a tahini sauce. These sauces balance the spicy heat of the buffalo sauce. Experiment to find your favorite! Yes, you can prepare Buffalo Cauliflower Bites in advance. You can coat the florets with batter and store them in the fridge. This keeps them fresh for up to 24 hours. Just bake them when you're ready. You can also bake them ahead and reheat them later. This saves time when hosting guests or enjoying a quick snack. To cut calories, use less batter on the cauliflower. You can also switch to a lighter sauce. Try using a low-calorie buffalo sauce or make your own with hot sauce and vinegar. Another tip is to bake instead of frying. This keeps the bites crispy without adding extra fat. Enjoy your tasty snack while keeping it light! For the full recipe, check out the detailed instructions above. In this article, we explored the essential elements of making Buffalo Cauliflower Bites. We covered the ingredients, cooking steps, and tips for the best texture. You learned how to store leftovers and more variations to try. Remember, these bites are easy to customize and perfect for any gathering. With these details, you can now enjoy making this dish successfully. Embrace your creativity and have fun in the kitchen!

Buffalo Cauliflower Bites Flavorful Vegan Snack Recipe

Are you ready to spice up your snack game? These Buffalo Cauliflower Bites are a flavorful vegan delight you can’t

- 2 pounds russet potatoes, peeled and chunked - 4 cloves garlic, minced - 1/2 cup unsalted butter - 1 cup heavy cream, warmed - 1/2 cup sour cream - Salt and pepper, to taste - 2 tablespoons fresh chives for garnishing - 1/4 teaspoon smoked paprika for flavor enhancement I love using russet potatoes for creamy garlic mashed potatoes. They have the right starch level to give a fluffy texture. The garlic adds great taste. You can mash it with a potato masher or use an electric mixer for a smoother finish. You can swap russet potatoes for Yukon gold for a creamier feel. They have a buttery flavor that works well too. If you want a lighter version, substitute heavy cream with milk or plant-based cream. This keeps the dish rich but less heavy. - Potato masher or electric mixer - Large pot for boiling - Colander for draining - Serving dish Gather your tools before you start. The right tools make the process smoother. A large pot is crucial for boiling the potatoes. A colander helps drain them well. Start by boiling the potatoes and garlic until they are tender. This step is key. Use a large pot and fill it with water. Add a generous pinch of salt. The salt helps flavor the potatoes. Bring the water to a rolling boil over medium-high heat. Carefully add the diced potatoes and minced garlic. Cook for about 15 to 20 minutes. You’ll know they are ready when a fork goes through easily. While the potatoes cook, melt the butter and combine it with the cream. Use a small saucepan over low heat for this. Add the butter pieces along with the warmed heavy cream. Stir occasionally until the butter melts. The mixture should be warm but not boiling. This temperature helps blend well with the potatoes later. After cooking, drain the potatoes and garlic in a colander. Return them to the pot for a minute. This helps evaporate any extra moisture. Now, it’s time to mash! Use a potato masher or an electric mixer to mash the potatoes. Aim for a smooth and creamy texture. If you want it creamier, add the warm butter and cream mixture gradually. Stir continuously for the best results. Finally, fold in the sour cream for added richness. Taste the mashed potatoes. Adjust the seasoning with salt, pepper, and smoked paprika for extra flavor. You can find the full recipe [here](#). To get creamy garlic mashed potatoes, you need the right tools. I recommend using a potato masher or an electric mixer. Both tools help you achieve a smooth and fluffy texture. If you want some chunks in your potatoes, a masher works best. For a super creamy finish, use an electric mixer. When it comes to consistency, feel free to adjust with cream or milk. If your potatoes are too thick, add a splash of warmed cream or milk. Stir it in until you reach your desired creaminess. To boost the flavor, consider adding fresh herbs or spices. Chives, parsley, or rosemary can brighten the dish. You can also mix in some garlic powder or onion powder for an extra punch. For a fun twist, try adding a bit of crushed red pepper for heat. Toppings can also enhance the flavor. A sprinkle of crispy bacon bits or grated cheese adds a savory touch. You can also drizzle a bit of truffle oil for a luxurious finish. Serving creamy garlic mashed potatoes can be simple yet elegant. Use a rustic serving bowl for a homey feel. You can also divide them into individual bowls for guests. Garnish your potatoes with fresh chives and a sprinkle of smoked paprika. This adds both color and flavor. For a touch of flair, create a little well in the center and drizzle olive oil. It looks great and adds a rich flavor. {{image_4}} You can easily make cheesy garlic mashed potatoes. Just add grated cheese, and you get a richer flavor. Cheddar, Gruyère, or even cream cheese work well. Mix it in after you mash the potatoes. The cheese will melt and create a gooey texture. It makes every bite even more delightful. For a fresh twist, try garlic herb mashed potatoes. Use fresh herbs like parsley, rosemary, or thyme. Chop them finely and stir them in after mashing. The herbs add a burst of flavor and a pop of color. This variation is perfect for a spring dinner or holiday feast. If you want a vegan version, swap the dairy for plant-based alternatives. Use almond milk or coconut cream instead of heavy cream. For butter, try vegan butter or olive oil. You can even use cashew cream for extra richness. This dish stays creamy and satisfying without any animal products. Feel free to explore these variations to find your favorite! For the complete recipe, check out the [Full Recipe]. To keep creamy garlic mashed potatoes fresh, let them cool first. Place them in an airtight container. This helps prevent drying out. Store in the fridge for up to three days. When ready to enjoy, check for any signs of spoilage. If it smells off or looks unusual, throw it away. When reheating, you want to keep them creamy. The microwave works well, but add a splash of milk or cream. Heat in short bursts, stirring in between. This helps them heat evenly. You can also use a saucepan over low heat. Stir often to avoid sticking. If they seem dry, add a bit more cream. You can freeze creamy garlic mashed potatoes for later use. First, let them cool completely. Spoon them into freezer-safe bags or containers. Remove as much air as possible to prevent freezer burn. They can last up to two months in the freezer. To thaw, place them in the fridge overnight. Reheat gently to bring back their creaminess. If you want to know the full recipe, check the full recipe section. Yes, you can prepare creamy garlic mashed potatoes in advance. To do this, follow these steps: - Make the mashed potatoes as usual and let them cool. - Store them in an airtight container in the fridge for up to two days. - When ready to serve, reheat them gently on the stove or in the microwave. - Add a splash of warm cream or milk to help restore their creamy texture. For mashed potatoes, russet and Yukon gold potatoes are the best choices. Here’s why: - Russet potatoes have a high starch content, making them fluffy and light. - Yukon gold potatoes are creamier and offer a rich flavor. - Mixing both types can give you a perfect balance of texture and taste. To boost the flavor of your mashed potatoes, consider these tips: - Use roasted garlic instead of raw for a sweeter taste. - Add herbs like thyme or rosemary for a fresh twist. - Mix in cream cheese or cheddar cheese for extra creaminess. - A drizzle of truffle oil can elevate the dish to gourmet status. - Always taste and adjust seasoning with salt and pepper to your liking. For the complete recipe, see the [Full Recipe]. Creamy garlic mashed potatoes are easy to make with the right steps. Start with russet potatoes, garlic, and butter. Add cream and sour cream for a rich taste. You can change up the flavors with herbs or even cheese. Store leftovers properly, and use the best reheating methods to keep them creamy. Whether cooking for a family meal or a gathering, these potatoes are sure to please. Experiment with variations to find your favorite, and enjoy a timeless dish that brings comfort to any table.

Creamy Garlic Mashed Potatoes Rich and Comforting Dish

Are you ready to transform your dinner with a dish that’s rich and comforting? Creamy garlic mashed potatoes will become

- 2 lbs chicken wings - 1 tablespoon baking powder - 1 teaspoon salt - 1/2 teaspoon freshly ground black pepper - 1 teaspoon garlic powder - 1/2 teaspoon onion powder - 1/4 cup unsalted butter, melted - 4 cloves garlic, finely minced - 1/2 cup finely grated Parmesan cheese - 2 tablespoons fresh parsley, finely chopped - Additional salt and pepper, to taste - Baking sheet - Aluminum foil - Wire rack - Mixing bowl - Small saucepan Gathering these ingredients is the first step to making crispy garlic Parmesan wings. The chicken wings are the star of this dish. You need two pounds to ensure everyone has enough. The baking powder helps create a crispy texture. Salt and pepper add flavor. Garlic powder and onion powder bring warmth and depth. For the sauce, unsalted butter is key. It melts and blends with garlic, creating a rich flavor. Freshly minced garlic is a must for that intense garlic taste. Parmesan cheese adds creaminess and a salty kick. Lastly, fresh parsley gives a pop of color and freshness. You will also need some basic kitchen tools. A baking sheet lined with aluminum foil makes cleanup easy. A wire rack is crucial for proper airflow around the wings, which helps them crisp up. A mixing bowl is needed for tossing the wings in the spice mix. Use a small saucepan to melt the butter and combine the sauce ingredients seamlessly. You can find the complete instructions in the Full Recipe. - Preheat oven to 425°F (220°C). - Line baking sheet with aluminum foil and place wire rack on top. First, I preheat my oven. This is key to getting wings crispy. I line my baking sheet with foil. This makes for easy cleanup later. I then place a wire rack on top. The rack helps air flow around the wings, making them crispier. - Toss chicken wings in baking powder and spices. - Arrange wings in a single layer on the wire rack. Next, I grab the chicken wings and toss them in a large bowl. I add baking powder, salt, pepper, garlic powder, and onion powder. Each wing needs a good coat of spices. Once mixed well, I arrange the wings in a single layer on the wire rack. This spacing is crucial for that perfect crispiness. - Bake for 40-45 minutes until golden and crispy. - Flip wings halfway for even cooking. I place the baking sheet in the oven and let the wings bake. I set a timer for 40-45 minutes. When the timer beeps, I check for golden color and crispness. I flip the wings halfway through for even cooking. This step makes sure they turn out great. - Melt butter and sauté minced garlic. - Stir in Parmesan cheese and parsley. While the wings bake, I prepare the garlic Parmesan sauce. I melt the butter in a small saucepan over medium heat. Once it melts, I add minced garlic. I sauté the garlic for about 2-3 minutes until it smells amazing. Then, I stir in the Parmesan cheese and parsley. This sauce is rich and full of flavor! - Toss wings in garlic Parmesan sauce. - Bake for an additional 5-7 minutes to crisp. After baking, I take the wings out of the oven. I toss them in the garlic Parmesan sauce in a large bowl. I make sure each wing is coated. Then, I return the sauced wings to the wire rack. I bake them again for 5-7 minutes. This helps the sauce stick and adds extra crispiness. Enjoy these crispy garlic Parmesan wings! You can find the full recipe if you want to recreate this dish. For crispy garlic Parmesan wings, air circulation is key. - Use a wire rack to allow air circulation. - Ensure wings are not overcrowded on the baking sheet. When you place wings on the rack, it helps them cook evenly. This method also prevents sogginess. If wings touch, they will steam instead of crisp. Flavor is everything when it comes to wings. - Adjust garlic and cheese quantities for stronger flavors. - Experiment with additional spices like paprika or cayenne. If you love garlic, don’t be shy! Add more minced garlic for that punch. If you crave heat, sprinkle in cayenne or a splash of hot sauce. Spice blends can also bring a fun twist. Wings should look as good as they taste. - Garnish with fresh parsley and serve with dipping sauces. - Serve on a platter for a festive appearance. A sprinkle of parsley adds a nice green touch. Serve with ranch or blue cheese for dipping. This not only enhances flavor but also makes your dish pop! A beautiful platter will impress guests and keep them coming back for more. {{image_4}} Want some heat with your wings? Add cayenne pepper or hot sauce to your marinade. This gives the wings a nice kick. You can mix in about one teaspoon of cayenne for a mild spice. If you like it hot, go for two teaspoons. Toss the wings in the spicy marinade before baking. This adds flavor and heat to every bite. To make your wings more aromatic, add fresh herbs. Try thyme or rosemary in your garlic Parmesan sauce. Chop the herbs finely and stir them into the sauce. This will give your wings a fresh, earthy taste. You can add about one tablespoon of each herb. It’s a simple way to elevate your dish and impress your guests. For a twist, try cooking your wings in an air fryer or on the grill. An air fryer cooks them quickly and keeps them crispy. Cook at 400°F for about 25 minutes. If you prefer grilling, cook the wings over medium heat. Grill for about 15 minutes, turning often to avoid burning. Both methods create a delicious, crispy texture. Store leftover wings in an airtight container for up to 3 days. This keeps them fresh and tasty. When you’re ready to enjoy them again, just take them out of the fridge. Reheat in the oven to keep them crispy. Set your oven to 350°F (175°C) and place the wings on a baking sheet. Avoid using the microwave, as it can make the wings soggy. If you want to save some for later, freeze unbaked wings in marinade for future use. This makes for a quick meal later. Just thaw them in the fridge before cooking, and you’ll have a delicious treat ready to bake. Bake for 40-45 minutes, flipping halfway for even cooking. This time helps achieve a nice golden color and crispiness. Keep an eye on them towards the end for that perfect crunch. Yes, prepare and store them in the fridge, then bake before serving. This makes game day stress-free. You can enjoy tasty wings without rushing at the last minute. Pair with ranch dressing, celery sticks, and a fresh salad. The cool ranch balances the rich wings. Celery adds a nice crunch, making it a fun spread for everyone. Yes, but thaw them completely before following the recipe instructions. It is key for even cooking. If they are still frozen, they won’t crisp up as well. Use baking powder and a wire rack to elevate the wings while baking. This method allows air to flow around the wings. Crispy wings come from good air circulation! These crispy garlic Parmesan wings are easy to make and full of flavor. You learned about the main ingredients and the steps to prepare them perfectly. I shared tips for achieving that desired crispiness and various ways to personalize your wings. Remember, presentation matters too! Serve these wings hot for the best taste, and don’t forget to store leftovers properly. With a few simple tweaks, you can make them your own. Dive in and enjoy a tasty treat that everyone will love!

Crispy Garlic Parmesan Wings Perfect for Game Day

Get ready for game day with my crispy garlic Parmesan wings! These tasty treats are easy to make and pack

- 1 lb beef sirloin or tenderloin - 8 oz egg noodles - 1 cup sour cream The main ingredients are key to making a great beef stroganoff. I love using beef sirloin or tenderloin for this dish. It gives that tender texture. The egg noodles soak up the sauce well, adding a nice touch. Sour cream adds creaminess and tang. - Olive oil - Worcestershire sauce - Smoked paprika Olive oil is best for searing the beef. It helps achieve that nice brown crust. Worcestershire sauce adds depth to the sauce. Smoked paprika gives a hint of smokiness. These elements work together to create rich flavors. - Salt and black pepper - Fresh parsley Salt and black pepper are essential for seasoning. They enhance the natural flavors of the dish. Fresh parsley adds brightness and color. It makes the dish look more appealing. For the complete cooking process, check out the Full Recipe. To cook the egg noodles, bring a pot of salted water to a boil. Add the noodles and cook them until they are al dente. This usually takes about 6-8 minutes. Once cooked, drain the noodles and transfer them to a warm pot. Cover the pot to keep them warm and prevent sticking. For a perfect sear, heat olive oil in a large skillet over medium-high heat. When the oil shimmers, add the sliced beef in small batches. Avoid crowding the pan, as this can steam the meat. Sear each side for 2-3 minutes until it has a nice brown crust. Once browned, move the beef to a plate to keep warm. In the same skillet, lower the heat slightly. Add the sliced onions and mushrooms. Sauté for about 5-7 minutes until the onions are clear and the mushrooms turn golden. Then, add minced garlic and stir for another minute. Garlic adds a rich flavor that enhances the dish. Sprinkle all-purpose flour over the onion and mushroom mix. Stir well to coat all the veggies. Cook this for about 1 minute to remove the raw flour taste. Gradually pour in beef broth while stirring constantly. This helps prevent lumps from forming. Next, add Worcestershire sauce, smoked paprika, salt, and pepper. Return the seared beef to the skillet and reduce the heat to low. Gently fold in the sour cream until everything is mixed. Heat through for about 5 minutes, stirring occasionally. Taste your sauce and adjust the seasoning if needed. To serve, spoon the creamy beef stroganoff over the warm egg noodles. Make sure to distribute the beef and sauce evenly. For a fresh touch, sprinkle finely chopped parsley on top just before serving. Consider serving with steamed vegetables or a crisp green salad for a complete meal. For more details, check the [Full Recipe]. To make a classic beef stroganoff, choose the right cut of beef. I suggest using beef sirloin or tenderloin. These cuts are tender and flavorful. Fresh ingredients are also key. Use fresh mushrooms and onions for the best taste. Fresh herbs can brighten up your dish too. One common mistake is overcooking the beef. This can make it tough and chewy. Sear the beef quickly, just until browned. Another mistake is not seasoning properly. Always season your beef and sauce with salt and pepper. This step brings out all the flavors. You can enhance your stroganoff with optional ingredients like Dijon mustard. It adds a nice tang. Also, consider using different types of mushrooms. Cremini or shiitake mushrooms can add depth. You can even mix in some caramelized onions for extra sweetness. If you want to try the complete dish, check out the Full Recipe. {{image_4}} To make a meatless beef stroganoff, you can swap out the beef for mushrooms or lentils. Both options bring a hearty texture to the dish. Use about 8 ounces of mixed mushrooms, like cremini and shiitake, for a rich flavor. For a creamy touch, substitute sour cream with cashew cream or plain yogurt. These swaps maintain the tasty essence of stroganoff while keeping it vegetarian. If you prefer chicken or turkey, simply replace the beef with 1 pound of thinly sliced chicken breast or turkey breast. Cook the meat the same way as you would the beef. For a unique twist, consider seafood. Shrimp or scallops can add a delightful taste. Just sauté them until pink and tender, then follow the same sauce-making steps. While egg noodles are classic, you can try other noodles or grains. Fettuccine, penne, or even rice can work well. If you need gluten-free options, use rice noodles or quinoa. Both choices have great textures and absorb the sauce nicely. Feel free to experiment and find what you enjoy most. For the full recipe, check out the details provided earlier. To keep your Beef Stroganoff fresh, refrigerate leftovers in an airtight container. Make sure to cool it to room temperature before sealing it. This dish stays good for 3 to 4 days in the fridge. Always check for signs of spoilage before eating. If you want to store Stroganoff for longer, freezing is a great choice. Use a freezer-safe container and leave some space at the top for expansion. For best taste, consume within 3 months. When you're ready to eat, thaw it in the fridge overnight. You can reheat Beef Stroganoff using either a microwave or stovetop. If using a microwave, heat in short bursts and stir often. If using the stovetop, do so over low heat. Always stir in a little extra sour cream to avoid separation in the sauce. This keeps it creamy and delicious. Enjoy your meal! To make Beef Stroganoff from scratch, follow these key steps: 1. Cook the noodles: Boil them until al dente. 2. Sear the beef: Cook it in batches for a nice brown crust. 3. Sauté onions and mushrooms: Make them soft and golden. 4. Create the sauce: Use flour to thicken, then add broth and seasonings. 5. Combine everything: Mix in the beef and sour cream before serving. For taste adjustments, you can add more smoked paprika or Worcestershire sauce. This adds depth and richness to the dish. Yes, you can substitute sour cream. Here are some alternatives: - Greek yogurt for a tangy flavor. - Cream cheese for a rich texture. - Heavy cream for extra creaminess. Each choice will change the flavor. Greek yogurt adds tang, while cream cheese makes it richer. Heavy cream will give it a velvety finish. Beef Stroganoff pairs great with several sides. Here are some suggestions: - Mashed potatoes: Creamy and smooth, they soak up the sauce. - Green beans: They add a nice crunch and color. - Steamed broccoli: A healthy option that balances the richness. To complete the meal experience, serve with a fresh salad or crusty bread for dipping. To adjust the recipe for larger servings, scale your ingredients. Here’s how: - Double the meat: Use 2 lbs of beef. - Increase the noodles: Use 16 oz of egg noodles. - Adjust the sauce: Use 2 cups of sour cream and broth. Cooking times may slightly change. Keep an eye on the beef as it cooks to avoid overcooking. You want it tender and juicy. Beef Stroganoff is a tasty dish that combines beef, noodles, and a creamy sauce. We covered the main ingredients, cooking steps, and helpful tips. You learned about variations, including vegetarian options and different protein choices. Remember to avoid common mistakes like overcooking the beef. Keep the flavors fresh and bold with the right ingredients. With these steps, you can make a delicious meal that everyone will enjoy. Now, go ahead and impress your family or friends with your new cooking skills!

Classic Beef Stroganoff Rich and Flavorful Dish

Are you ready to savor a timeless dish that warms the soul? Classic Beef Stroganoff is rich, creamy, and full

Older posts
Newer posts
← Previous Page1 … Page35 Page36 Page37 Page38 Next →

dsad

© 2025 lazychefmagic • Built with GeneratePress

Our Policies

  • Copyright Policy
  • Cookie Policy
  • GDPR Policy
  • Privacy Policy
  • Disclaimer
  • Terms Of Use

More Information

  • Home
  • About
  • Contact
  • Appetizers
  • Dessert
  • Dinner
  • Drinks
©2025, lazychefmagic About Back To Top