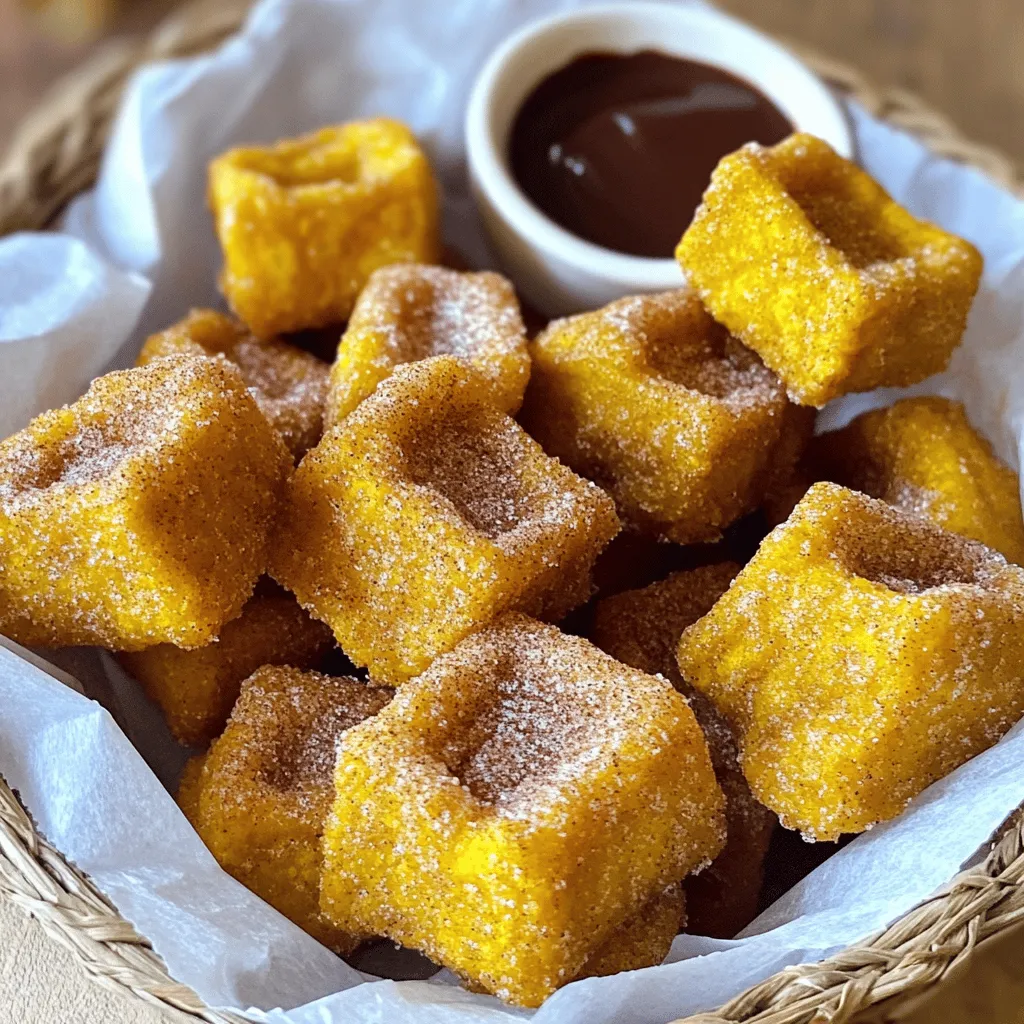
Pumpkin Churro Bites Irresistible Fall Treat Recipe
Fall is here, and it’s time for a tasty treat! If you love the warm flavors of pumpkin spice, you’ll
Fall is here, and it’s time for a tasty treat! If you love the warm flavors of pumpkin spice, you’ll
. This recipe includes all the steps and tips for making these tasty treats. Enjoy baking! You learned how to make Maple Glazed Pumpkin Donuts. We discussed the key ingredients, like pumpkin puree and maple syrup, and shared step-by-step instructions for baking. I provided tips for perfect texture, glazing techniques, and even variations for extra flavor. Remember, you can customize these donuts to fit your taste. With practice, you’ll impress everyone with your baking skills. Enjoy these delicious treats fresh or stored for later. Happy baking!](https://lazychefmagic.com/wp-content/uploads/2025/07/51446d9f-9ad2-47a1-b036-0a78858fa062.webp)
Autumn is here, and it’s time to embrace the cozy flavors of the season! What better way to celebrate than
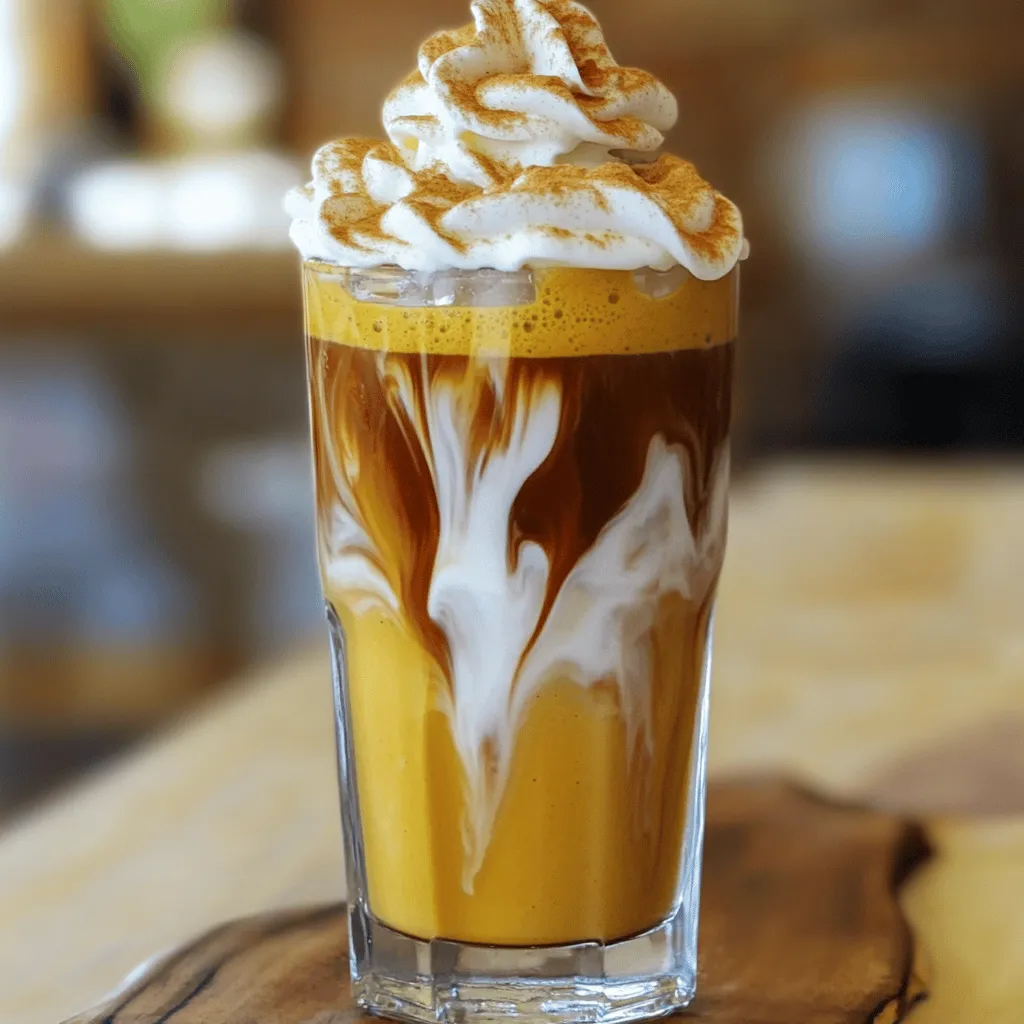
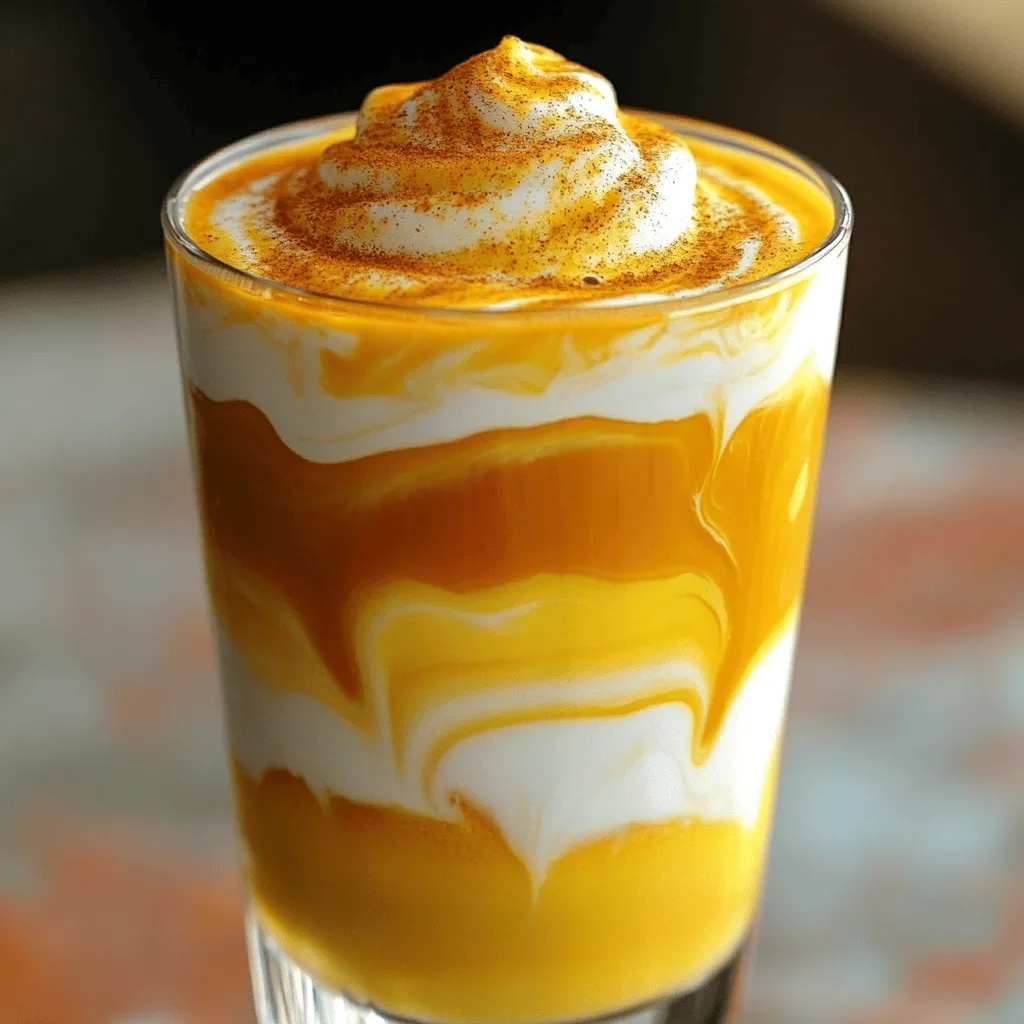
Fall is here, and there’s no better way to celebrate than with an Iced Pumpkin Spice Latte! This rich and
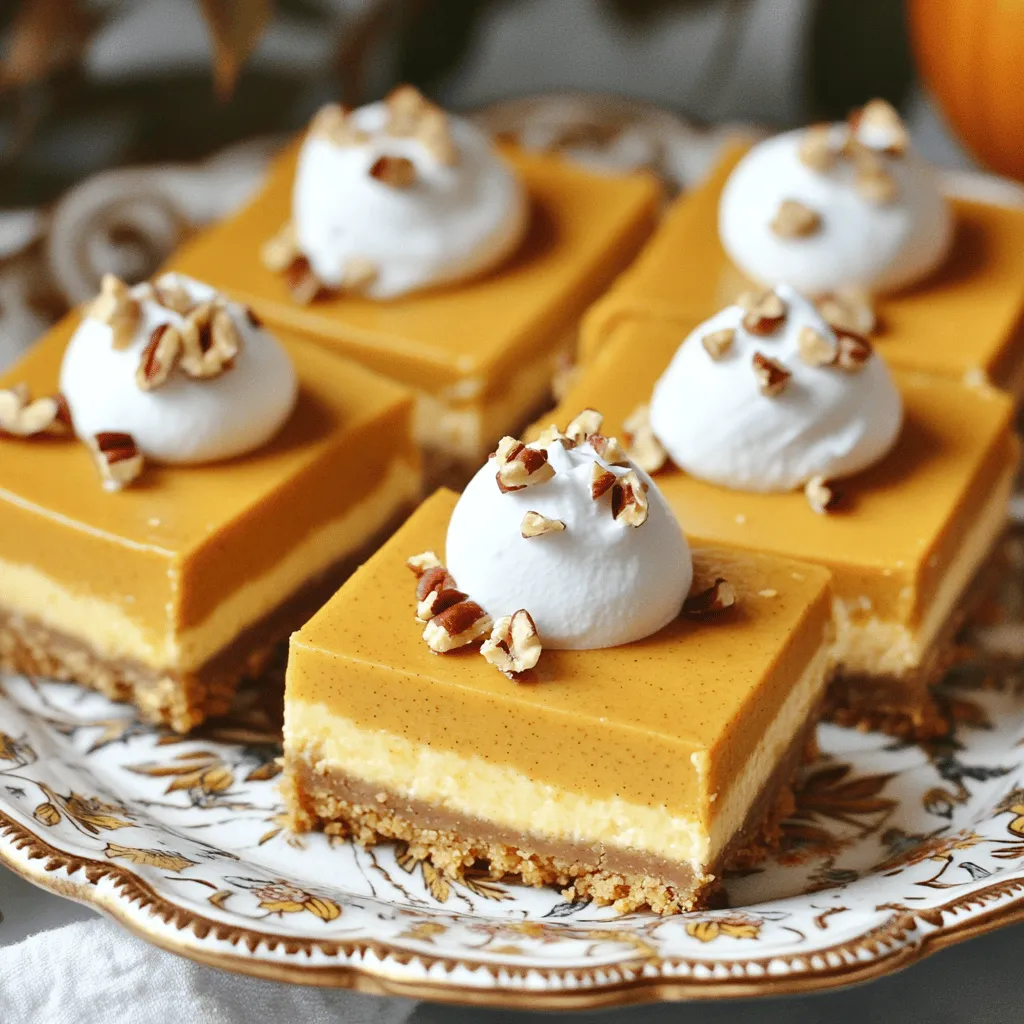
Craving a delicious fall treat that’s super easy to make? You’ll love these No-Bake Pumpkin Cheesecake Bars! This recipe combines
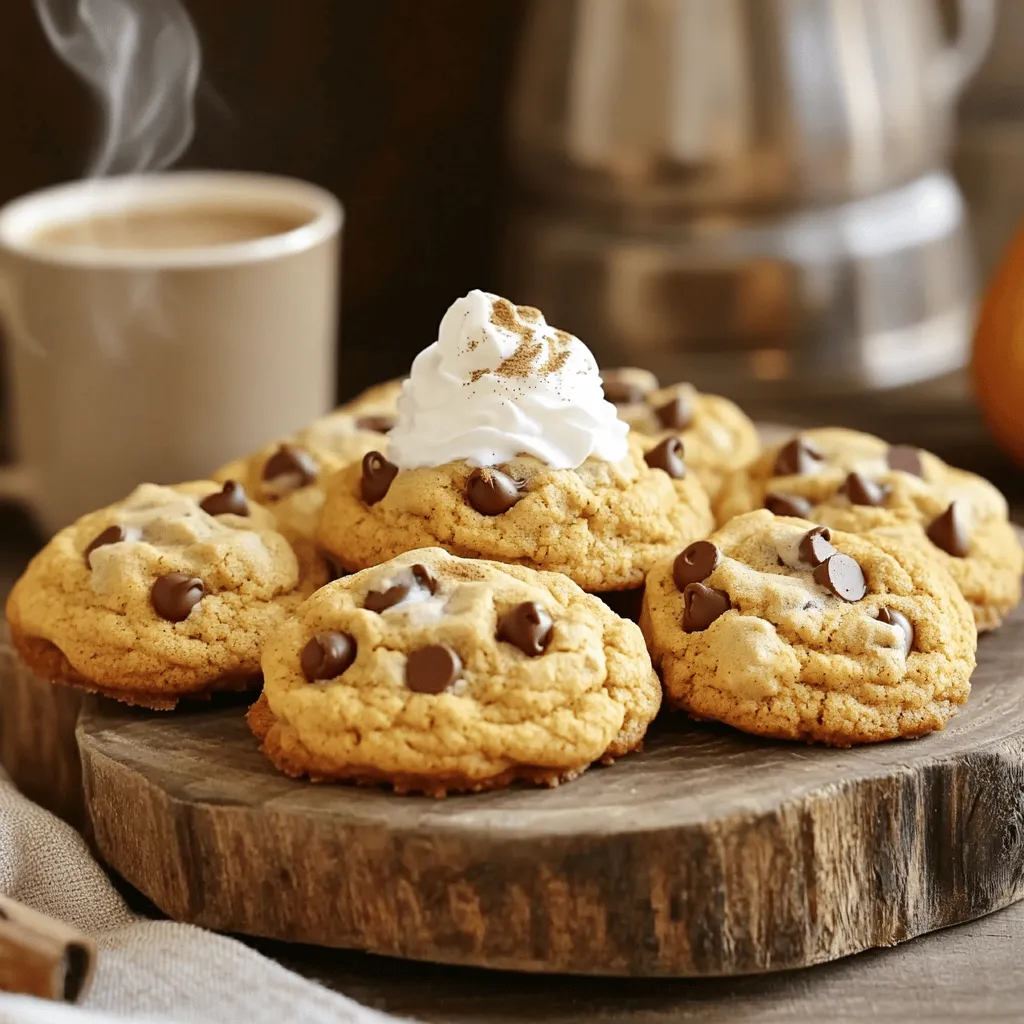
Fall is here, and it’s time to enjoy the cozy flavors of the season with Pumpkin Spice Latte Cookies. These
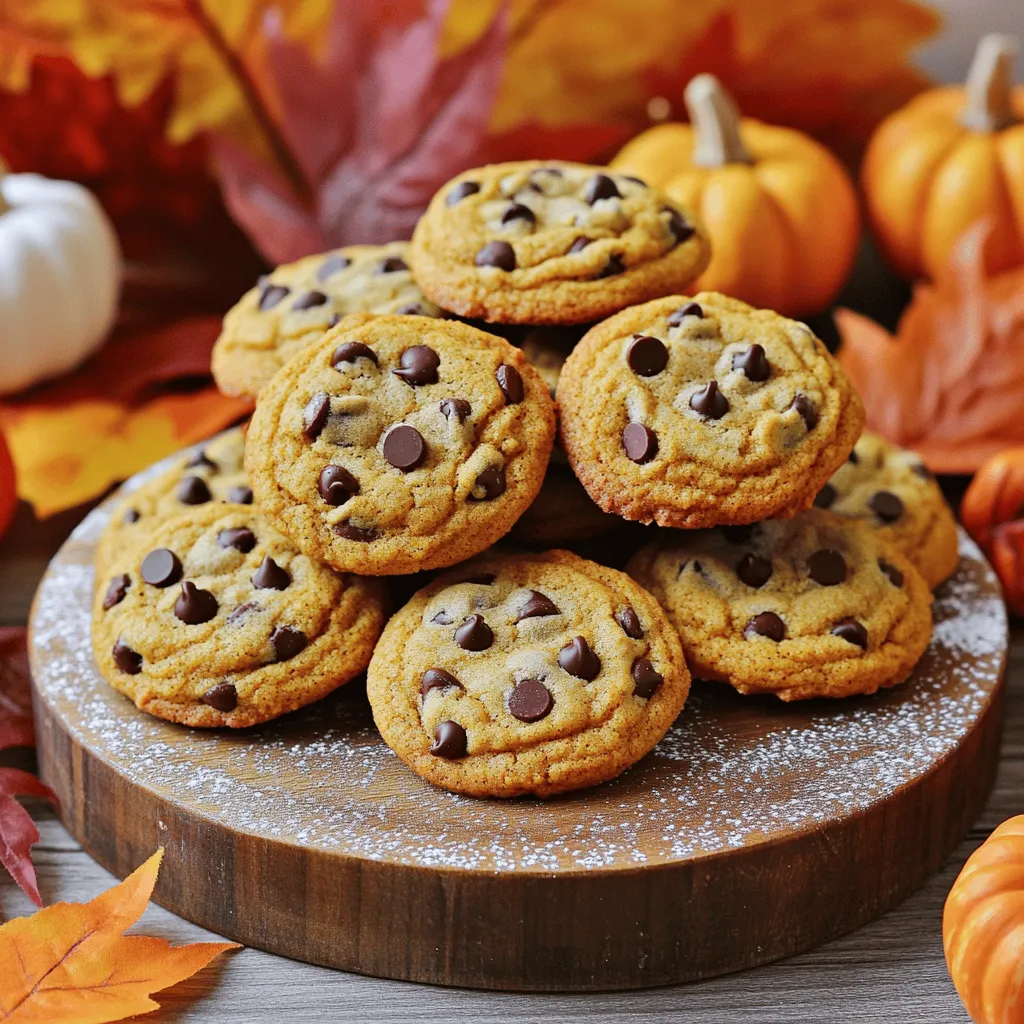
If you love the cozy flavors of fall, you’ll adore these Pumpkin Chocolate Chip Cookies! This simple recipe brings together
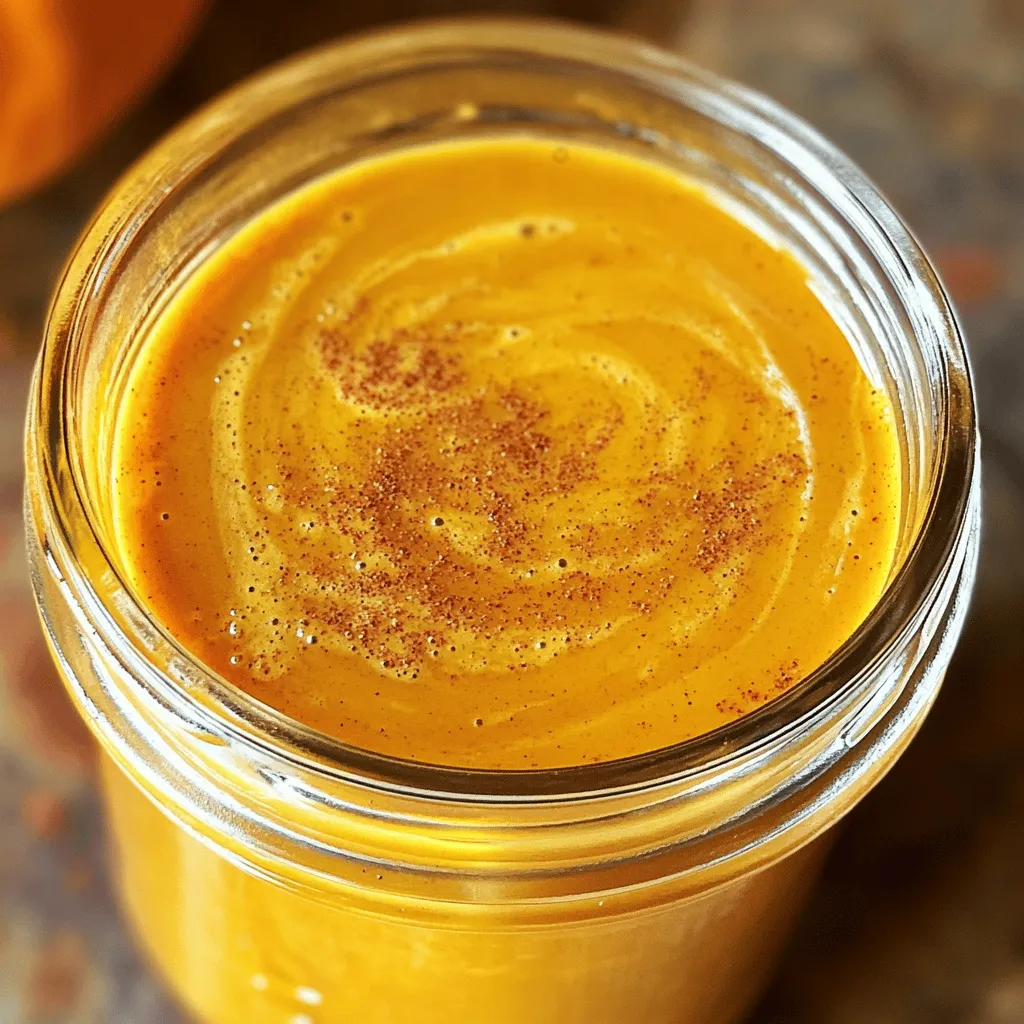
Are you craving that cozy pumpkin spice flavor from Starbucks? You’re in luck! I’ll show you how to make a
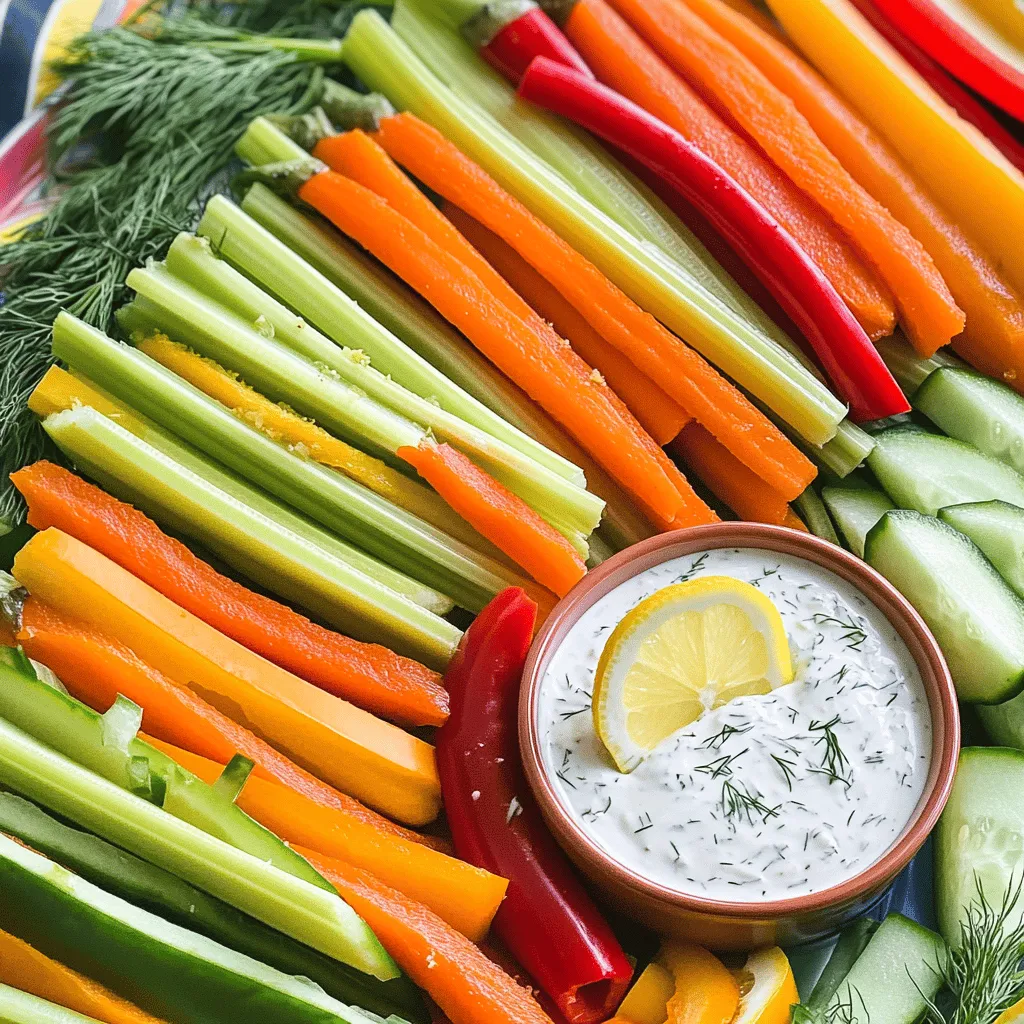
Are you looking for a tasty snack that fits your keto lifestyle? I’ve got you covered with Keto Veggie Sticks
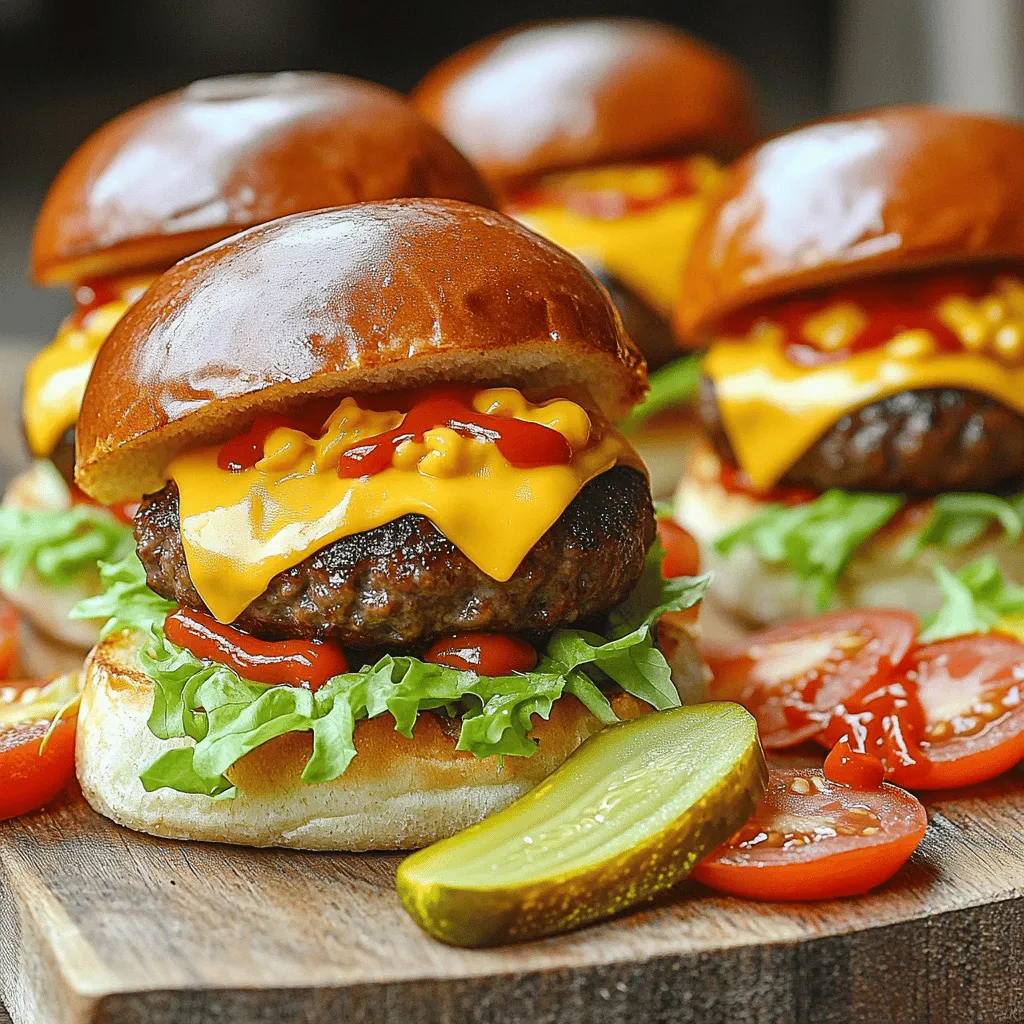
If you’re looking for a crowd-pleaser at your next gathering, cheeseburger sliders are the answer! These mini delights are easy
Are you ready to bring the cozy taste of fall to your home? In this guide, we’ll dive into making
