Skip to content
DisclaimerTerms Of UseGDPR PolicyCookie Policy

lazychefmagic

  • Home
  • Drinks
  • Appetizers
  • Dinner
  • Dessert
  • About
  • Contact
  • Privacy Policy
DisclaimerTerms Of UseGDPR PolicyCookie Policy

Amanda

- 1 lb ground beef (80/20) - 12 slider buns - 6 slices of cheddar cheese, halved - Condiments and toppings To make these sliders, you need to gather some essential items. Start with one pound of ground beef. I prefer using the 80/20 blend. This gives the beef a good mix of flavor and juiciness. Next, grab twelve slider buns. Soft, fresh buns work best. You will also need cheese. I suggest six slices of cheddar cheese, cut in half. Don't forget the condiments! Ketchup, mustard, and your favorite toppings help create the perfect bite. - Bacon strips for bacon cheeseburger sliders - Avocado or guacamole for an extra twist Want to take your sliders up a notch? Consider adding bacon. A few crispy strips can turn regular sliders into delicious bacon cheeseburger sliders. You can also add creamy avocado or guacamole for an extra twist. They add great taste and creaminess. - Overview of calories, fat content, protein, and carbohydrates Cheeseburger sliders are tasty, but it's good to know what you eat. Each slider has about 200 calories. They also contain around 12 grams of fat and 10 grams of protein. Carbohydrates come in at about 18 grams per slider. If you're mindful of your diet, these numbers can help you enjoy your meal while keeping track of what you eat. For the full recipe, check the recipe section above! - First, I mix 1 pound of ground beef with seasonings. I use 1 teaspoon of garlic powder, 1 teaspoon of onion powder, and 1 teaspoon of smoked paprika. I add salt and pepper to taste. This mix gives great flavor to the beef. - Next, I divide the beef into 12 equal portions. I shape each portion into a small patty. I make sure the patties are a bit larger than the slider buns. This helps them fit nicely after cooking. - I heat my grill or skillet over medium-high heat until it is hot. I place the patties on it and cook for 3 to 4 minutes on one side. Then, I flip them and cook for another 2 minutes. I cook them until they reach my preferred doneness. - As the patties near the end of cooking, I add a half-slice of cheddar cheese on each one. I cover the grill or skillet with a lid. This helps the cheese melt quickly, usually in about a minute. - While the cheese melts, I toast the slider buns lightly. I can do this on the grill or in a toaster until they are golden brown. - To put the sliders together, I start with a cheesy patty on the bottom half of each toasted bun. Then, I add a handful of shredded lettuce, a spoonful of diced tomatoes, and a few slices of dill pickles on top. - Finally, I drizzle ketchup and mustard over everything. I place the top half of the bun on each slider, pressing down gently. - I serve the sliders warm. I keep extra toppings and condiments on the side for guests to customize their burgers as they like. For the full recipe, check the earlier section! To make tender sliders, avoid over-mixing the meat. When you mix the ground beef with seasonings, do it gently. This keeps the meat tender and juicy. If you mix too much, the sliders can become tough. For even browning, heat your grill or skillet well before adding the patties. Medium-high heat works best. Cook the patties for about 3-4 minutes on one side. Then flip them and cook for another 2 minutes. This method helps achieve that perfect golden crust. To boost flavor, use seasonings like garlic powder, onion powder, and smoked paprika. These add a great taste to your patties. You can also marinate the meat in your favorite sauce for extra zing. For cheese, cheddar is a classic choice. But you can try others like pepper jack or Swiss for variety. Each cheese brings its own flavor, adding fun to the sliders. At gatherings, you can serve sliders on a large platter. Stack them up for a fun look. Offer a variety of toppings, like shredded lettuce, diced tomatoes, and sliced pickles. This lets guests build their own sliders. Pair your sliders with sides like crispy fries or a fresh salad. For drinks, serve soda, beer, or lemonade. These pair nicely with the savory flavors of the sliders. For the full recipe, check out the detailed instructions above. {{image_4}} For bacon cheeseburger sliders, you'll need some extra ingredients. Here’s what to add: - 1 lb ground beef (80/20) - 6 slices of bacon, cooked and crumbled - 12 slider buns - 6 slices of cheddar cheese, halved - Condiments and toppings To make these sliders, mix the bacon with the beef before you shape the patties. This adds a nice crunch and flavor. Cook the patties as usual and top each with cheese. The cheese melts into the bacon, giving a rich taste. If you want vegetarian or vegan sliders, you can swap the beef. Use these options: - 1 lb plant-based burger patties - 12 slider buns - Vegan cheese slices - Condiments and toppings You can also use cooked black beans or chickpeas to make patties. Just mash them and mix with breadcrumbs and spices. This keeps the sliders hearty and satisfying. Breakfast sliders are a fun twist. Here’s how to make them: - 1 lb ground beef or breakfast sausage - 12 slider buns - 6 scrambled eggs - 6 slices of cooked bacon - Cheese slices (optional) - Condiments like hot sauce For breakfast sliders, cook the sausage or beef first. Then, scramble the eggs. Layer the sausage, eggs, and bacon on each slider bun. This combo is perfect for brunch or a morning gathering. For more details on how to create these delicious variations, check the Full Recipe. To keep your cooked sliders fresh, use an airtight container. Place wax paper between layers to prevent sticking. Store them in the fridge for up to three days. If you have leftovers, assemble the sliders just before serving. This keeps the buns from getting soggy. For best results, reheat sliders in the oven. Preheat your oven to 350°F (175°C). Place the sliders on a baking sheet and cover with foil. Heat for about 10-15 minutes, or until warm. You can also use a microwave, but this may make the buns chewy. Heat them for about 30 seconds, then check. If you want to freeze sliders, do so before cooking. Wrap each patty tightly in plastic wrap. Then, place them in a freezer bag. Store them for up to three months. When ready to eat, thaw them in the fridge overnight. Cook them as normal, then assemble with buns and toppings. Cheeseburger sliders can last in the fridge for about 3 to 4 days. Make sure to store them in an airtight container. This keeps them fresh and safe to eat. If you want to enjoy them later, I recommend eating them within this time frame. Yes, you can make cheeseburger sliders ahead of time. You can cook the patties and store them in the fridge. Assemble the sliders just before serving to keep the buns fresh. You can also prep all the toppings ahead. This helps save time on busy days. Many local eateries and chains serve great cheeseburger sliders. Some popular places include: - Shake Shack - White Castle - Red Robin These spots often have unique spins on sliders, making your dining experience fun. You can also check out local diners that might have homemade-style sliders. You learned how to make delicious cheeseburger sliders. We covered the needed ingredients, preparation steps, and cooking tips. I shared ways to customize your sliders with optional toppings and variations. You now have great ideas for serving and storing your sliders. Try these steps at your next gathering, and impress your friends. Enjoy creating tasty sliders that everyone will love!

Cheeseburger Sliders Perfect for Any Gathering

If you’re looking for a crowd-pleaser at your next gathering, cheeseburger sliders are the answer! These mini delights are easy

- Heavy cream - Whole milk or 2% milk - Pumpkin puree - Maple syrup - Vanilla extract - Pumpkin pie spice - Pinch of salt To make the Starbucks Pumpkin Cream Cold Foam, you need a few simple ingredients. Each one adds to the rich flavor and creamy texture. You can find all these items easily at the store. Start with heavy cream. This gives the foam its thick and airy feel. Next, use whole milk or 2% milk. This helps balance the richness of the cream. Pumpkin puree is the star of the show. It brings that warm, sweet flavor we all love in fall. Then, add maple syrup for sweetness. You can adjust this to your taste. Vanilla extract adds a nice depth. It pairs well with the pumpkin flavor. Next is pumpkin pie spice. This spice mix usually has cinnamon, nutmeg, and ginger. It really makes the foam taste cozy. Finally, a pinch of salt helps enhance all the flavors. These ingredients create the perfect base for your Pumpkin Cream Cold Foam. For the full recipe, check out the steps later in the article. First, gather your ingredients. You need pumpkin puree, maple syrup, vanilla extract, pumpkin pie spice, and a pinch of salt. In a medium bowl, combine these items. Use a whisk to mix until everything is smooth and blended. This step is key, as it sets the base flavor for your foam. Make sure there are no lumps. The mixture should feel light and creamy. Next, take another bowl and add the heavy cream and milk. Use an electric mixer or a milk frother. Beat the mixture on medium speed. This is important because a steady speed helps create soft peaks. Watch closely; soft peaks mean the cream is fluffy but not too stiff. If it looks like it holds its shape but is still smooth, you’re ready for the next step. Now it’s time to combine the mixtures. Gently fold the pumpkin mix into the whipped cream. Use a spatula and be careful. You want to keep that light and airy texture. Fold slowly until combined, but don’t overmix. Once mixed, transfer the foam to a chilled container. Let it sit in the fridge for about 15 minutes to enhance the flavors. When serving, fill a glass with your favorite iced coffee or cold brew. Leave some space at the top for the foam. Spoon the pumpkin cream cold foam on top generously. This creates a beautiful layer. For a fun touch, use a clear glass to show off the layers. Enjoy your drink with a sprinkle of pumpkin pie spice on top for a festive flair. To make the pumpkin cream cold foam even better, you can adjust the sweetness with maple syrup. If you like it sweeter, add a bit more syrup. Start with two tablespoons, then taste. Add more if needed. Maple syrup adds a warm flavor that blends well with pumpkin. Maintaining foam consistency is key. When you whip the cream and milk, stop when you see soft peaks form. This means the foam is light and airy. If you whip too long, it can turn into butter. Gently fold in the pumpkin mixture so you keep the fluffy texture. Choosing the right glass is important. A clear glass shows off the beautiful layers of coffee and foam. This makes your drink look fancy. You can use a tall glass for a big drink or a smaller one for a quick sip. Adding garnishes can make your drink pop. A sprinkle of pumpkin pie spice on top adds a nice touch. You can also use a drizzle of caramel or chocolate syrup for extra sweetness. These little details make your pumpkin cream cold foam even more fun to enjoy. {{image_4}} You can change the recipe for Pumpkin Cream Cold Foam to suit your needs. If you want a vegan option, swap heavy cream and milk for coconut cream and almond milk. This will give you a rich flavor without using dairy. You can also use oat milk, which froths well and adds a nice taste. Another fun twist is to add flavored syrups. Try vanilla, caramel, or even hazelnut. These syrups can enhance the sweetness and add depth to the foam. Just remember to adjust the amount of maple syrup you use, so it’s not too sweet. Seasonal spices can take your Pumpkin Cream Cold Foam to the next level. Add a dash of nutmeg or cinnamon for warmth. These spices bring a cozy feel, perfect for chilly days. You can also try adding a bit of ginger for a spicy kick. For holidays, think about how to serve this delicious foam. For Halloween, serve it in a spooky cup with Halloween-themed decorations. For Thanksgiving, use clear glasses to show off the layers of foam and coffee. You can even dress it up with whipped cream and sprinkles for a festive touch. By making these small changes, you can create a new twist on the classic recipe. Explore these variations to find what you love most! For the full recipe, check out the earlier section. To keep your pumpkin cream cold foam fresh, use an airtight container. This helps avoid odors from your fridge. You can store it in the fridge for up to three days. If you want to keep it longer, consider freezing it. Using an ice cube tray works well. Just pour the foam into the tray, freeze, and pop out the cubes when you need them. If your foam needs a little love, try re-whipping it. Use an electric mixer on low speed for best results. Check the foam's texture; it should be light and airy. Before serving, let it sit at room temperature for a few minutes. This will help it soften up. You want it creamy and ready for your coffee. Starbucks Pumpkin Cream Cold Foam is creamy and rich. It has a mix of simple, tasty ingredients that create a unique fall flavor. Here are the common ingredients: - Heavy cream - Whole milk or 2% milk - Pumpkin puree - Maple syrup - Vanilla extract - Pumpkin pie spice - Pinch of salt This blend gives the foam its smooth texture and delightful taste. The pumpkin puree adds a nice fall flavor, while the spices make it warm and cozy. You can make your Pumpkin Cream Cold Foam just how you like it! Here are some fun ways to personalize your drink: - Sweetness: Adjust the maple syrup to make it sweeter or less sweet. - Milk Choice: Use almond milk or oat milk for a dairy-free option. - Flavor Boost: Add flavored syrups like caramel or hazelnut for extra flavor. - Spice Level: Increase the pumpkin pie spice for a stronger taste. These changes let you create a drink that fits your taste perfectly! No, the Pumpkin Cream Cold Foam is not available all year. It is a seasonal treat. You can usually find it in late summer and fall, around September to November. This makes it feel special and something to look forward to each year. Starbucks Pumpkin Cream Cold Foam stands out among other drinks. It has a unique texture and flavor. Unlike a regular cold brew, the foam adds creaminess and a pumpkin kick. It's lighter than a pumpkin spice latte, which can be quite sweet and heavy. If you like cold drinks with a festive twist, the Pumpkin Cream Cold Foam is a great choice. You can enjoy the same flavors without feeling too full! You've learned how to make delicious pumpkin cream cold foam. We covered the key ingredients, step-by-step instructions, helpful tips, and fun variations. This foam is easy to customize and can fit any season. If you store it well, you can enjoy it longer. Try new flavors and serving ideas that suit your style. Enjoy your homemade treat and share it with others!

Starbucks Pumpkin Cream Cold Foam Tasty Recipe Guide

Are you ready to bring the cozy taste of fall to your home? In this guide, we’ll dive into making

- 1 lb ground beef - 12 slider buns - 6 slices cheddar cheese (halved) - 1 tablespoon Worcestershire sauce - 1 teaspoon garlic powder - 1 teaspoon onion powder - 1 cup shredded lettuce - 1 large tomato (sliced) - 1/2 cup dill pickles (sliced) - 1/4 cup ketchup - 1/4 cup yellow mustard When I make Cheeseburger Game Day Sliders, I focus on fresh, bold flavors. The ground beef serves as the star of the dish. It’s important to choose good quality beef for the best taste. I like to use 80/20 beef for juicy sliders. Slider buns are key for holding all the goodness together. I prefer soft, fluffy buns that soak up all the flavors. The cheddar cheese adds a rich, creamy layer. I cut each slice in half so it melts perfectly over each patty. The seasonings bring everything together. Worcestershire sauce adds depth and umami. Garlic powder and onion powder give a nice kick. Remember to season with salt and pepper to taste. Toppings make these sliders fun and fresh. Crunchy lettuce adds texture, while juicy tomato slices bring brightness. Dill pickles add a nice tang. I always keep ketchup and mustard on hand for that classic cheeseburger bite. For the Full Recipe, check out the complete guide to craft these delicious sliders! To start, gather your ground beef, Worcestershire sauce, garlic powder, onion powder, salt, and pepper. Place all these items in a large bowl. Now, mix them together. Use your hands to combine the ingredients. Make sure you mix until everything is even but don’t overwork the beef. Overmixing can make it tough. We want tender sliders, not hockey pucks! Next, divide the beef mixture into 12 equal portions. Each portion should be about the size of a golf ball. Gently shape each ball into a patty. Make them a bit larger than the slider buns. They will shrink as they cook. This ensures your sliders fit perfectly on the buns and are not too small. Now it’s time to cook! Preheat your grill or skillet to medium-high heat. This step is key for a good sear. Once hot, place the patties on the grill or skillet. Cook them for about 3 minutes on one side. Then flip the patties over. Right after flipping, place half a slice of cheddar cheese on each patty. Cook for another 2-3 minutes. You want the patties cooked through and the cheese melted. For more details on preparing these sliders, check out the Full Recipe. To make juicy sliders, choose ground beef with a fat content of 80/20. This mix keeps your sliders moist and flavorful. If the meat is too lean, your sliders may dry out. Cook sliders on medium-high heat for the best results. This temperature helps the meat sear nicely. A good sear locks in juices and adds flavor. Aim for an internal temperature of 160°F to ensure doneness. Add cheese during the last minute of cooking. This timing allows it to melt perfectly without burning. Half a slice of cheddar works great for sliders. If you're looking for alternatives, try pepper jack for a spicy kick or Swiss for a milder taste. Each cheese brings a unique flavor and texture to your sliders. Don’t skip seasoning your beef mix. Adding Worcestershire sauce, garlic powder, and onion powder can boost flavor. You can also mix in smoked paprika for a deeper taste. Toasting the buns is key. It adds crunch and prevents sogginess. Butter the cut sides lightly before toasting. This simple step creates a golden, crispy surface for your sliders. For the full recipe, check out the detailed instructions. {{image_4}} You can easily change up your sliders with fun add-ins. Adding crispy bacon gives a rich, savory bite. If you like heat, try diced jalapeños for a spicy kick. Different types of cheese can also elevate your sliders. Swiss, pepper jack, or even blue cheese can add depth to your flavor. The right sauce can make your sliders shine. Specialty sauces like garlic aioli or barbecue sauce add a unique twist. You can also swap out traditional condiments. Try sriracha mayo or a tangy relish for new tastes that excite your palate. You can make these sliders for everyone. Use plant-based patties to cater to vegetarians. They cook up just as nicely and soak up flavors well. For vegans, vegan cheese and fresh toppings can make your sliders satisfying. Options like avocado, mushrooms, or roasted peppers work wonderfully, too. For the complete Cheeseburger Game Day Sliders recipe, check out the Full Recipe. To keep your sliders fresh, cool them quickly. Place them on a plate at room temperature for about 30 minutes. After that, store them in an airtight container. This will help keep them from drying out. You can use glass or plastic containers with tight lids. These containers work best to keep the sliders tasty for a few days. You can reheat your sliders in two ways: the oven or the microwave. For the oven, preheat it to 350°F. Wrap the sliders in foil to keep them moist. Heat for about 10-15 minutes. In the microwave, place the sliders on a plate. Cover them with a damp paper towel. Heat for 30 seconds at a time until warm. The oven keeps the slider quality better, while the microwave is quicker. If you want to save some for later, freezing is a great option. Start by cooling the sliders completely. Place them in a single layer on a baking sheet. Freeze them for about an hour until solid. Then, transfer them to a freezer bag. Remove as much air as you can to prevent freezer burn. To thaw, move the sliders to the fridge overnight. You can reheat them as explained above. This method keeps them tasty and fresh, ready for your next game day! You can make sliders ahead of time by preparing the beef mix and shaping the patties. Store them in the fridge for up to a day. Just cover the patties with plastic wrap to keep them fresh. You can also cook the patties in advance and store them in the fridge. Reheat them when you are ready to serve. When you heat them, add the cheese so it melts nicely. Yes, you can make cheeseburger sliders in the oven. Preheat your oven to 350°F (175°C). Place the shaped patties on a baking sheet lined with parchment paper. Bake for about 15 to 20 minutes. When they are close to done, add cheese on top and bake for another 2-3 minutes until melted. This method is great for making a large batch at once. Some great sides for cheeseburger sliders include: - Crispy fries - Onion rings - Coleslaw - Potato salad - Veggie sticks with dip These sides are easy to prepare and will please your guests on game day. You can even mix and match them for fun! In this post, we explored how to make delicious cheeseburger sliders. We discussed key ingredients, like ground beef and cheddar cheese, and covered seasonings to enhance flavor. You learned step-by-step how to prepare, shape, and cook your patties. I shared tips to keep sliders juicy and variations to try, including vegetarian options. Remember, great sliders start with quality ingredients and careful cooking. Experiment with flavors to find your perfect taste. Enjoy your sliders and make them your own!

Cheeseburger Game Day Sliders Tasty and Fun Treat

Welcome to the ultimate game day treat: Cheeseburger Game Day Sliders! These tasty bites bring all the big flavors of

- 1 cup canned pumpkin puree - 1 cup brown sugar, packed - 1/2 cup granulated sugar - 1/2 cup unsalted butter, softened - 1 large egg - 1 teaspoon pure vanilla extract - 2 cups all-purpose flour - 1 teaspoon baking soda - 1 teaspoon baking powder - 1 teaspoon pumpkin pie spice - 1/2 teaspoon sea salt - 1 cup chocolate chips (or substitute with your favorite mix-ins) Each ingredient plays a key role in making these cookies chewy and flavorful. The canned pumpkin puree brings moisture and a lovely autumn taste. Brown sugar adds depth and chewiness, while the granulated sugar gives a slight crisp. Softened butter ensures a creamy mix, and the egg binds everything perfectly. The flour provides the structure, and the baking soda and powder help them rise. Pumpkin pie spice gives that warm fall flavor, and sea salt balances the sweetness. Finally, chocolate chips (or your choice of mix-ins) add a delightful surprise in every bite. If you don't have canned pumpkin puree, you can use homemade pumpkin puree. For a different sweet flavor, try coconut sugar instead of brown sugar. If you need a dairy-free option, use vegan butter. You can also replace the egg with a flax egg (1 tablespoon flaxseed meal mixed with 2.5 tablespoons water). For a gluten-free version, use a gluten-free flour blend. Lastly, if you prefer, you can swap the chocolate chips for nuts, dried fruits, or even white chocolate to suit your taste. First, preheat your oven to 350°F (175°C). This step is key for even baking. While the oven heats up, prepare your baking sheets. Line two sheets with parchment paper. This helps prevent sticking and makes clean-up easy. Next, take a large mixing bowl. Add the softened butter, brown sugar, and granulated sugar. Use a hand mixer or stand mixer to beat these ingredients. Mix on medium speed until smooth and creamy. This should take about 3-5 minutes. The mix should look light in color. Now, it’s time for the star of the show: pumpkin! Add the canned pumpkin puree, large egg, and pure vanilla extract to your sugar mix. Blend these on low speed until everything is well combined. The mixture should look even and smooth. In a separate bowl, whisk together the dry ingredients. Combine the all-purpose flour, baking soda, baking powder, pumpkin pie spice, and sea salt. Make sure these are mixed well; this helps with even flavor throughout the cookies. Slowly incorporate your dry mix into the wet pumpkin mixture. Use a spatula or wooden spoon to stir gently. Mix just until everything is combined. Be careful not to overmix; this helps keep the cookies chewy. Fold in the chocolate chips or your favorite mix-ins. Using a cookie scoop or tablespoon, drop rounded dough balls onto the prepared sheets. Space them about 2 inches apart. Place the sheets in the preheated oven and bake for 10-12 minutes. Watch for light golden edges and soft centers. Once baked, let the cookies cool on the sheet for about 5 minutes. Then, transfer them to a wire rack to cool completely. For the full recipe, refer back to the beginning. Enjoy your delicious chewy pumpkin cookies! To get that chewy texture, use brown sugar. It keeps moisture in the cookies. Make sure to mix the dough just enough. Overmixing can lead to tough cookies. Always underbake slightly. The centers should look soft when you take them out. They will firm up as they cool. One common mistake is using cold ingredients. Make sure your butter and egg are at room temperature. This helps the dough mix evenly. Also, do not skip the resting time. Letting the dough chill for at least 30 minutes can improve texture. Another mistake is not measuring flour correctly. Too much flour can make the cookies dry. When mixing, use a gentle hand. Start with low speed when adding dry ingredients. This helps avoid a flour cloud in your kitchen. Combine until you see no dry spots. Fold in chocolate chips last, so they stay intact. For a fun twist, mix in nuts or dried fruits for extra flavor. For the full recipe, check out the Ultimate Chewy Pumpkin Cookies. {{image_4}} You can switch up the spices in your chewy pumpkin cookies. Try adding extra cinnamon or nutmeg for a cozy taste. If you want a hint of warmth, consider a dash of ginger. You can also use different extracts. Almond or maple extract adds a unique twist. Feel free to experiment until you find your favorite blend. Mix-ins can enhance the flavor and texture of your cookies. Add chopped nuts like walnuts or pecans for crunch. Dried fruits like cranberries or raisins provide a chewy contrast. You can even try white chocolate chips for a sweet touch. Each mix-in gives the cookie new life. Just remember to keep the total amount around one cup, so the dough stays balanced. For a gluten-free version, replace all-purpose flour with a gluten-free blend. Make sure it has xanthan gum for proper texture. To create a vegan cookie, swap the egg for flaxseed meal or applesauce. Use vegan butter to maintain that rich flavor. These options ensure everyone can enjoy these delicious chewy pumpkin cookies. Check the Full Recipe for more details on making these adaptations. To store your baked cookies, let them cool completely. Place them in an airtight container. This helps keep them soft and chewy. You can also layer them between sheets of wax paper to prevent sticking. Store the container in a cool, dry place. These cookies will stay fresh for up to one week. If you want to enjoy your cookies later, freezing is a great option. Start by cooling the cookies fully. Then, place them in a single layer on a baking sheet. Freeze them for about 1-2 hours. Once they are firm, transfer them to a freezer bag. Be sure to remove as much air as possible. You can freeze them for up to three months. To reheat your cookies, remove them from the freezer and let them thaw at room temperature. For warm cookies, preheat your oven to 350°F (175°C). Place the cookies on a baking sheet and heat for about 5-7 minutes. This will restore their chewy texture. Enjoy your Ultimate Chewy Pumpkin Cookies fresh from the oven! For the full recipe, check out the Ultimate Chewy Pumpkin Cookies. You can tell when the cookies are done by checking the edges. The edges should turn light golden brown. The centers will look soft and may seem slightly underbaked. This means they will continue to cook as they cool. Yes, you can use homemade pumpkin puree. Just make sure it is smooth and not too watery. Drain any excess liquid, as it can change the cookie texture. These cookies stay fresh for about one week at room temperature. Store them in an airtight container to keep them soft and chewy. Serve the cookies with a warm drink, like apple cider or coffee. You can also add a scoop of vanilla ice cream on top for a tasty dessert. For a fun twist, try pairing them with a cream cheese frosting for extra flavor. Check out the Full Recipe for more ideas! This blog post covered everything you need for baking pumpkin cookies. We talked about the right ingredients, measurements, and substitutes. You learned step-by-step instructions, tips for perfect cookies, and fun variations. We also shared how to store your cookies and answered common questions. Baking can be fun and easy, especially with these tips. Enjoy making your cookies and experimenting with flavors!

Chewy Pumpkin Cookies Perfect for Fall Treats

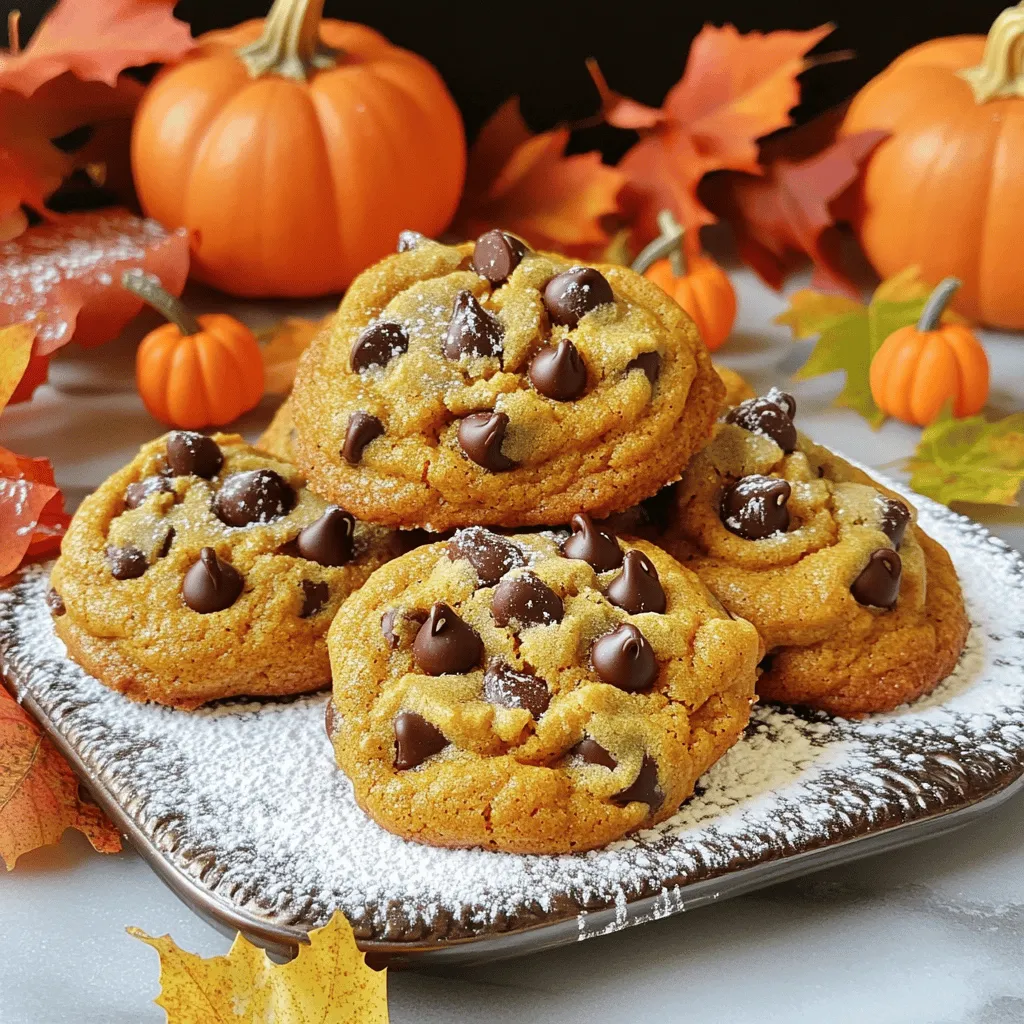
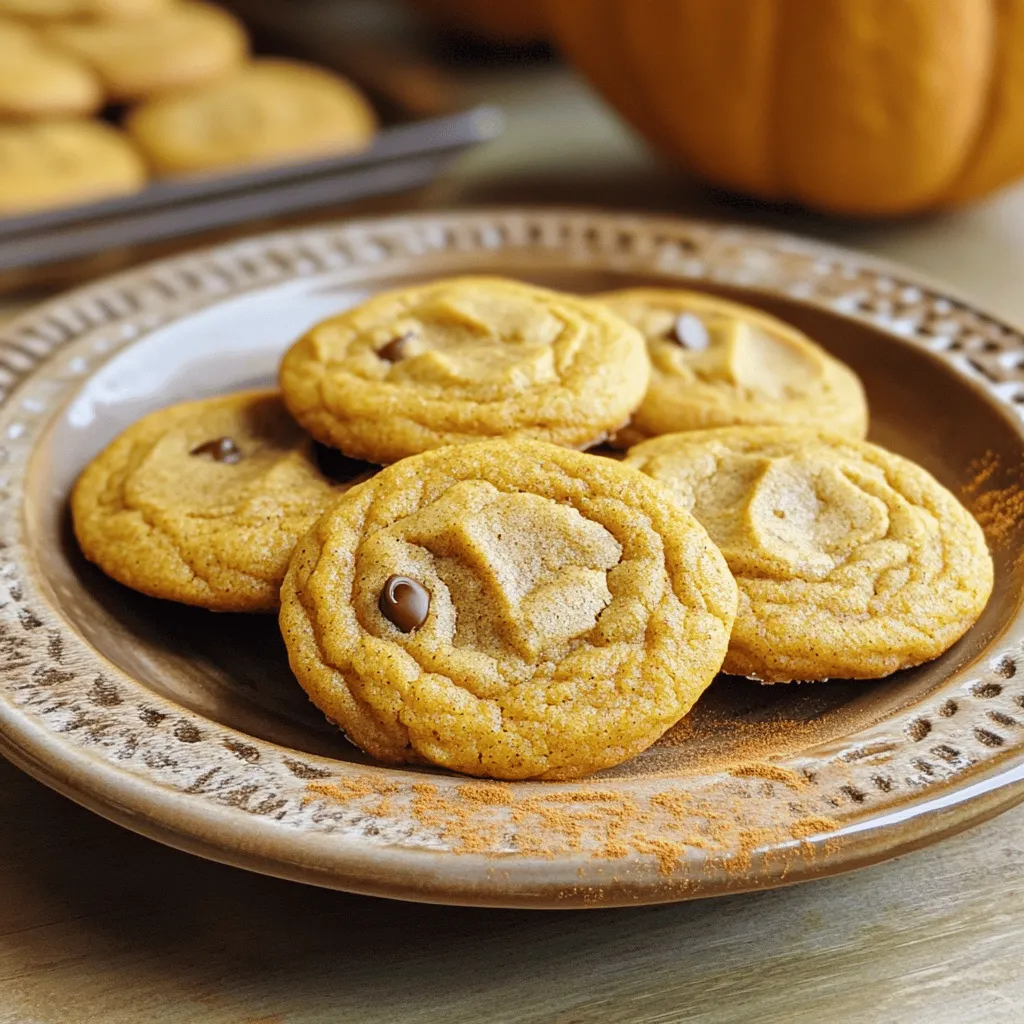
Fall is here, and what better way to celebrate than with chewy pumpkin cookies? These delightful treats are perfect for

To make delicious pumpkin streusel muffins, gather these main ingredients: - 1 cup all-purpose flour - 1 cup whole wheat flour - 1 teaspoon baking powder - 1 teaspoon baking soda - 1 teaspoon ground cinnamon - 1/2 teaspoon ground nutmeg - 1/2 teaspoon salt - 1 cup canned pumpkin puree - 3/4 cup granulated sugar - 1/2 cup brown sugar, packed - 1/2 cup vegetable oil - 2 large eggs - 1 teaspoon vanilla extract These ingredients create a rich, moist base for your muffins. The pumpkin puree adds moisture and flavor. The mix of all-purpose and whole wheat flour gives a nice texture. For the crunchy topping, you'll need: - 1/2 cup rolled oats - 1/3 cup brown sugar, packed - 1/4 cup all-purpose flour - 1 teaspoon ground cinnamon - 1/4 cup cold butter, cut into small cubes The streusel topping adds a sweet crunch. The oats give it a hearty feel. Mixing in the cold butter helps create those nice, crumbly bits. Using these ingredients from the full recipe ensures your muffins turn out perfect every time. Enjoy the delightful blend of spices and textures in each bite. Preheat Oven Set your oven to 350°F (175°C). This heat is perfect for baking muffins. Preheating helps them rise well. Prepare Muffin Tin Line a muffin tin with paper liners. This makes it easy to remove the muffins later. Plus, it keeps the tin clean. Combine Dry Ingredients In a large bowl, mix these dry items: - 1 cup all-purpose flour - 1 cup whole wheat flour - 1 teaspoon baking powder - 1 teaspoon baking soda - 1 teaspoon ground cinnamon - 1/2 teaspoon ground nutmeg - 1/2 teaspoon salt Whisk them together well. This helps evenly distribute the baking powder and spices. Combine Wet Ingredients In a separate bowl, blend these wet ingredients: - 1 cup canned pumpkin puree - 3/4 cup granulated sugar - 1/2 cup brown sugar, packed - 1/2 cup vegetable oil - 2 large eggs - 1 teaspoon vanilla extract Stir until the mix is smooth and all items are mixed well. Gently Mix Wet and Dry Ingredients Carefully add the dry mix to the wet mix. Use a spatula or wooden spoon. Stir until just combined. Do not overmix! This keeps your muffins light and fluffy. Prepare and Add Streusel Topping In a small bowl, mix these for the streusel: - 1/2 cup rolled oats - 1/3 cup brown sugar, packed - 1/4 cup all-purpose flour - 1 teaspoon ground cinnamon - 1/4 cup cold butter, cut into small cubes Use a fork to mix until it looks like coarse crumbs. Sprinkle this topping on each muffin batter. Bake Time and Temperature Spoon the pumpkin batter into each lined cup, filling them about two-thirds full. Bake for 18-20 minutes. They are ready when a toothpick comes out clean or with a few moist crumbs. After baking, let the muffins cool in the tin for 5 minutes. Then, transfer them to a wire rack to cool completely. For the full recipe, refer to the detailed instructions above. Enjoy your warm and cozy pumpkin streusel muffins! How to Avoid Dense Muffins To keep your muffins light and fluffy, measure your flour correctly. Use a spoon to fill your measuring cup and then level it off with a knife. Too much flour makes dense muffins. Also, always check your baking powder and soda for freshness. Expired leavening agents won’t rise well. Importance of Not Overmixing Mix your batter gently. Stir until just combined. If you overmix, gluten forms, and your muffins become tough. This is key to soft, tender muffins. Use a spatula or a wooden spoon to fold in the dry ingredients. Serving Warm with Butter Serve these muffins warm right from the oven. A pat of butter melts and adds rich flavor. The warmth enhances the spices and pumpkin taste. Adding a Dusting of Powdered Sugar For a sweet touch, dust your muffins with powdered sugar. This adds a lovely finish and a hint of sweetness. It looks beautiful and tastes great. How to Store Leftover Muffins Store any leftover muffins in an airtight container. Keep them at room temperature for up to three days. This keeps them fresh and moist. Best Practices for Freezing Muffins To freeze, wrap each muffin in plastic wrap, then place them in a freezer bag. Label the bag with the date. They last up to three months. When ready to enjoy, thaw at room temperature or microwave for a few seconds. For the complete process, check the Full Recipe. {{image_4}} Gluten-Free Option You can swap the all-purpose flour with gluten-free flour. Use a blend designed for baking. This keeps the texture similar while making the muffins gluten-free. Dairy-Free Considerations For a dairy-free version, replace the butter in the streusel with coconut oil or a dairy-free spread. Use almond milk or oat milk instead of regular milk if needed. Adding Nuts or Chocolate Chips Mix in chopped nuts or chocolate chips into the batter for extra crunch or sweetness. Walnuts or pecans work well for a nutty flavor. Chocolate chips add a rich touch that pairs nicely with pumpkin. Seasonal Spice Alternatives You can change the spices to suit your taste. Try adding ginger, allspice, or cardamom for a different twist. Each spice brings its own warmth and depth to the muffins. Muffins as a Breakfast Sandwich Use the muffins as a base for a breakfast sandwich. Add a slice of cheese, a fried egg, or even some crispy bacon. This makes a hearty, on-the-go meal. Muffin Parfaits with Yogurt and Fruit Create a tasty parfait by layering muffin pieces with yogurt and fresh fruit. This makes for a fun and healthy snack or dessert. Use any seasonal fruit for freshness. For every variation, feel free to experiment and make it your own. The Full Recipe gives you a great base to start from. Enjoy the flavors! Pumpkin streusel muffins are tasty and nutritious. Each muffin has around 200 calories. They provide a good mix of carbs, fats, and protein. Here’s a quick look at the main nutrients: - Calories: 200 - Carbohydrates: 30 grams - Protein: 3 grams - Fat: 8 grams - Fiber: 2 grams The pumpkin puree in these muffins is packed with vitamins. It contains vitamin A, which is good for your eyes. The spices, like cinnamon and nutmeg, have health benefits too. They can help with digestion and boost your mood. I suggest eating one muffin as a serving. This fits well into a balanced diet. If you want to enjoy more, pair it with a piece of fruit or yogurt. This adds fiber and protein, making your snack more filling. For daily intake, limit sugar to about 25 grams for women and 36 grams for men. These muffins have some sugar, so be aware of how many you eat. Portion control is key, so try cutting them in half if you're sharing. Want to make these muffins even healthier? You can lower the sugar. Use less granulated sugar or swap it for a natural sweetener. Applesauce is a great choice to cut sugar without losing flavor. Adding seeds is another smart trick. Chia or flaxseeds boost fiber and omega-3s. Just sprinkle a tablespoon into your batter. You’ll get extra nutrition without changing the taste much. For the full recipe, refer to the link above. Enjoy your healthy baking! Can I use fresh pumpkin instead of canned? Yes, you can use fresh pumpkin. First, cook the pumpkin until soft. Then, mash it well. Make sure to drain any excess water. This will help keep your muffins from getting too wet. What can I substitute for vegetable oil? You can use melted coconut oil or applesauce. Both options add moisture. Each gives a unique flavor to the muffins. Why are my muffins sinking? Muffins can sink if the batter is too wet. It can also happen if the oven is not hot enough. Make sure to measure your ingredients carefully. Check your oven temperature with an oven thermometer. How to tell when muffins are done baking? To check if the muffins are done, insert a toothpick into the center. If it comes out clean or with a few crumbs, they are ready. The tops should look golden brown. How long do pumpkin muffins last? Pumpkin muffins can last up to 4 days at room temperature. You can store them in an airtight container. For longer storage, consider freezing them. Best way to reheat muffins for freshness? Reheat muffins in the oven at 350°F for about 5-10 minutes. You can also use the microwave for about 15-30 seconds. Enjoy them warm for the best taste! This article outlined the ingredients and steps for making pumpkin streusel muffins. You learned about key ingredients, from flour to pumpkin puree. I shared tips to prevent dense muffins and served delicious variations. You can easily adapt these muffins for different diets and preferences. Baking these muffins can be fun and rewarding. Enjoy the process and the tasty results!

Pumpkin Streusel Muffins Delightfully Warm Treat

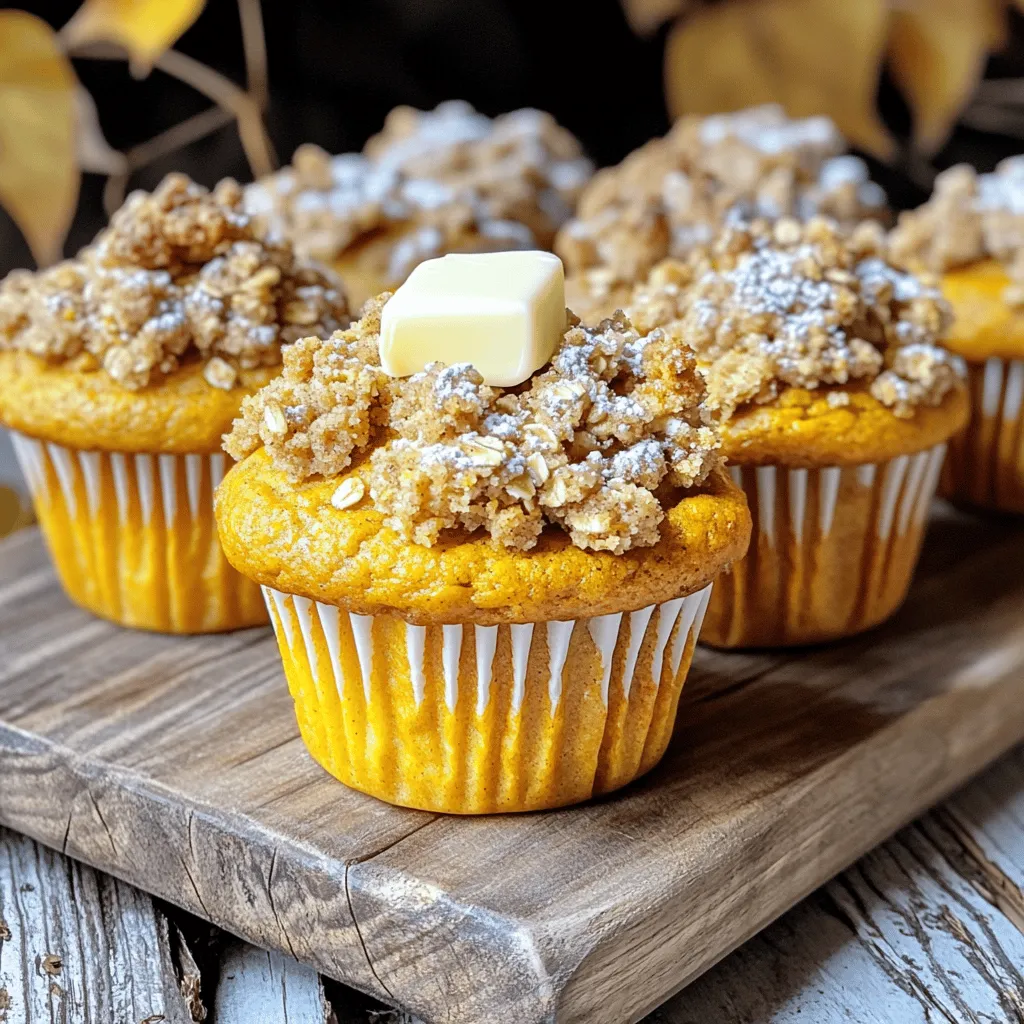
Fall is here, and what better way to celebrate than with warm Pumpkin Streusel Muffins? These muffins hug your senses

- 1 cup all-purpose flour - 1 teaspoon baking powder - 1 teaspoon baking soda - 1/2 teaspoon salt - 1 teaspoon ground cinnamon - 1/2 teaspoon ground nutmeg - 1/2 teaspoon ground ginger I start with all-purpose flour. This is the base of our muffins. Baking powder and baking soda help them rise. Salt adds flavor, while spices like cinnamon, nutmeg, and ginger give that warm, cozy taste. Each spice brings a unique note, making every muffin a delight. - 1/2 cup granulated sugar - 1/2 cup packed brown sugar - 1/2 cup vegetable oil - 2 large eggs - 1 cup canned pumpkin puree - 1 teaspoon vanilla extract Next, I mix the sugars. Granulated sugar gives sweetness, and brown sugar adds depth. Vegetable oil keeps the muffins moist. Eggs bind everything together. Canned pumpkin puree is key for flavor and texture. Lastly, I add vanilla extract for a warm aroma that enhances the overall taste. - 8 oz cream cheese, softened to room temperature - 1/4 cup granulated sugar - 1 large egg - 1 teaspoon vanilla extract For the cheesecake filling, I use cream cheese for richness. I blend it with sugar to sweeten, then add an egg to help it set. The vanilla extract here makes the filling smooth and flavorful. This filling adds a wonderful surprise inside each muffin. This combination of ingredients makes pumpkin cheesecake muffins a treat. They are easy to make, and you can find the full recipe for more detailed steps. First, preheat your oven to 350°F (175°C). This step is key for a good bake. While the oven heats, grab your muffin tin. You can either line it with paper liners or lightly grease each cup with cooking spray or butter. This prevents sticking and makes for easy muffin removal. In a medium bowl, beat 8 ounces of softened cream cheese with 1/4 cup of granulated sugar. You want it smooth and creamy. Next, add 1 large egg and 1 teaspoon of vanilla extract. Mix it all together until it’s well combined. Set this filling aside while you work on the muffins. In a large bowl, sift together the dry ingredients: 1 cup of all-purpose flour, 1 teaspoon of baking powder, 1 teaspoon of baking soda, 1/2 teaspoon of salt, and your spices—1 teaspoon of ground cinnamon, 1/2 teaspoon of ground nutmeg, and 1/2 teaspoon of ground ginger. This step ensures everything is mixed well. In another bowl, whisk together 1/2 cup of granulated sugar, 1/2 cup of packed brown sugar, 1/2 cup of vegetable oil, 2 large eggs, 1 cup of canned pumpkin puree, and 1 teaspoon of vanilla extract. Whisk until the mixture is smooth and there are no lumps. Now, it’s time to combine everything. Gradually pour the wet mixture into the bowl with the dry ingredients. Stir gently with a spatula or wooden spoon until just combined. It’s okay if there are a few lumps; don’t overmix. Next, spoon about 2 tablespoons of the pumpkin muffin batter into each muffin cup. Then, add about 1 tablespoon of the cheesecake filling right in the center. Finally, cover it with another 2 tablespoons of the pumpkin batter. This helps encase the filling. Place the muffin tin in the preheated oven and bake for 18-22 minutes. To check if they are done, insert a toothpick into the center. Make sure to avoid the cheesecake filling. It should come out clean. Once they are baked, let them cool in the tin for about 5 minutes. Then transfer the muffins to a wire rack to cool completely. Enjoy making these delicious pumpkin cheesecake muffins! For the full recipe, check the provided instructions. To make the best pumpkin cheesecake muffins, avoid overmixing. When you combine the wet and dry ingredients, mix just until you see no dry flour. This keeps your muffins soft. If you stir too much, your muffins may become tough. Next, ensure your oven is at the right temperature. Preheat it to 350°F (175°C) before baking. An oven thermometer can help confirm the heat. If your oven runs cool, your muffins may not rise well. After your muffins cool, dust them with powdered sugar for a lovely touch. This adds sweetness and looks great. You can also add festive garnishes. Try using pumpkin seeds or a sprinkle of cinnamon on top. These small details make your muffins pop on the plate. One common mistake is not checking ingredient temperatures. Always use room-temperature eggs and cream cheese. Cold ingredients do not blend well, which affects your muffin texture. Another mistake is not measuring ingredients correctly. Use a kitchen scale for accuracy. Too much flour can lead to dry muffins. Always level off measuring cups for the best results. {{image_4}} You can change the taste of your pumpkin cheesecake muffins with fun add-ins. Try adding chocolate chips for a sweet twist. They melt into the muffin, making each bite a treat. You can also mix in nuts, like walnuts or pecans, for a nice crunch. If you want to switch it up, use other squash types. Butternut squash or zucchini can work just as well as pumpkin in this recipe. If you need gluten-free muffins, swap the all-purpose flour for a gluten-free blend. This keeps the texture light and fluffy. For a dairy-free option, use vegan cream cheese in the filling. You can also replace the eggs with flaxseed meal mixed with water. This makes the muffins tasty and friendly for all diets. You can add holiday spices to make these muffins special for the season. Try adding cloves or allspice for extra warmth. Toppings can also change the vibe. For Halloween, decorate with candy corn or chocolate drizzle. At Christmas, a sprinkle of crushed peppermint can add a festive touch. There are so many ways to make these muffins fit any occasion! Pumpkin cheesecake muffins last about two days at room temperature. To keep them fresh, place them in an airtight container. If you do not have one, wrap them in plastic wrap. This keeps them moist and tasty. If you want to store the muffins longer, put them in the fridge. They can last up to a week when stored properly. Use a sealed container or a zip-top bag to keep them fresh. This stops them from drying out and keeps them soft. Freezing muffins is easy and great for later use. Wrap each muffin in plastic wrap, then place them in a freezer bag. Make sure to push out as much air as you can. This helps prevent freezer burn. When you want to enjoy them, just take one out and heat it. You can microwave them for about 30 seconds or bake them at 350°F (175°C) for 10-15 minutes. This brings back their soft texture. For the full recipe, check out the details above. To make pumpkin cheesecake muffins from scratch, follow these steps: 1. Preheat your oven to 350°F (175°C). 2. Prepare the muffin tin by lining it with paper liners or greasing each cup. 3. Make the cheesecake filling by beating cream cheese, sugar, egg, and vanilla until smooth. 4. Mix the dry ingredients like flour, baking powder, and spices in one bowl. 5. Whisk the wet ingredients like sugars, oil, eggs, and pumpkin in another bowl until blended. 6. Combine both mixtures gently, being careful not to overmix. 7. Fill muffin cups with batter, add the cheesecake filling, and top with more batter. 8. Bake for 18-22 minutes, then cool before serving. This simple process gives you fluffy muffins with a creamy center. Yes, you can use fresh pumpkin instead of canned. Fresh pumpkin offers a bright flavor. To use fresh pumpkin, start by roasting or steaming it. After cooking, mash it until smooth. Use the same amount of fresh pumpkin as the recipe calls for canned. However, canned pumpkin is often more convenient. It saves time and ensures consistent results. Pumpkin cheesecake muffins can last for about three days at room temperature. Keep them in an airtight container to prevent drying out. In the fridge, they can stay fresh for up to a week. If you want to keep them longer, you can freeze muffins. Just wrap them well in plastic wrap and store in a freezer bag. You can serve pumpkin cheesecake muffins with a warm drink like coffee or tea. They pair well with a dollop of whipped cream on top. For a festive touch, sprinkle some cinnamon or nutmeg. You can also serve them with a side of yogurt or a fruit salad to balance the flavors. Yes, you can make mini muffins instead of regular-sized ones. To do this, use a mini muffin tin and reduce the baking time. Bake mini muffins for about 12-15 minutes. Keep an eye on them to ensure they don’t overbake. This smaller size makes for a great bite-sized treat! You now have everything you need to make delicious pumpkin cheesecake muffins. We covered the key ingredients, from dry to wet, and the cheesecake filling. I shared step-by-step instructions to guide you through baking. You learned useful tips to avoid common mistakes. Lastly, we explored fun variations and storage options. Try these muffins at your next gathering. They will impress everyone! Baking is about joy and creativity, so enjoy the process. Happy baking!

Pumpkin Cheesecake Muffins Delightful and Easy Bake

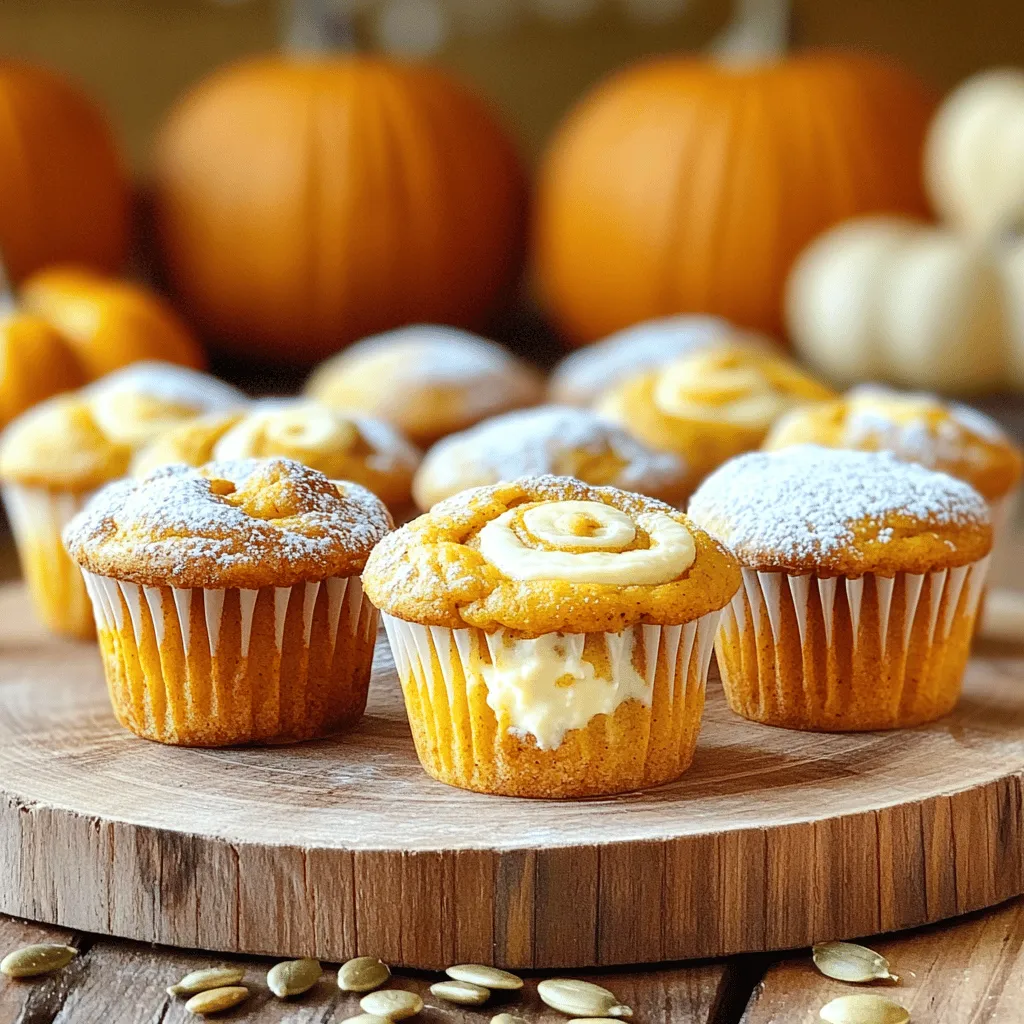
If you love fall flavors, you’ll adore these Pumpkin Cheesecake Muffins! They combine rich pumpkin and creamy cheesecake in each

- 1 cup unsweetened almond milk - 1/2 cup canned pumpkin puree - 1/4 cup pure maple syrup - 1 teaspoon vanilla extract - 1 teaspoon pumpkin pie spice - 1/4 teaspoon ground cinnamon - A pinch of sea salt Gathering the right ingredients is key to making the best skinny pumpkin spice coffee creamer. The almond milk gives it a nice base, and the pumpkin puree adds that classic fall flavor. Maple syrup brings in natural sweetness, while vanilla extract enhances the taste. Pumpkin pie spice and cinnamon warm up the mix, making it cozy. A pinch of sea salt balances the flavors perfectly. This creamer is low in calories, perfect for anyone watching their intake. Each serving has about 50 calories, which is far less than many store-bought creamers. Traditional creamers can have 100 calories or more per serving. By choosing this skinny version, you enjoy the rich flavor without the guilt. It’s a win for both your taste buds and your waistline. To make your skinny pumpkin spice coffee creamer, start by gathering your ingredients. You need unsweetened almond milk, canned pumpkin puree, pure maple syrup, vanilla extract, pumpkin pie spice, ground cinnamon, and a pinch of sea salt. Here’s how to mix them: 1. In a medium saucepan, pour in the almond milk and add the pumpkin puree. 2. Place the saucepan over medium heat. 3. Use a whisk to blend the mixture until smooth. Make sure there are no lumps. For a smooth mix, whisk slowly and thoroughly. Remember to keep the heat moderate to avoid burning. Heat it until it's warm but not boiling. This should take about 5 minutes. Straining is key for a nice texture. After heating, remove the saucepan from the heat. Let it cool for a few minutes. Then, pour the creamer through a fine mesh strainer into a clean glass jar. This step removes any lumps. Once strained, let the creamer cool completely before sealing it. An airtight lid keeps it fresh in the fridge for up to 7 days. Shake well before each use, as the ingredients may separate. Serve your cozy creamer in a glass. To enhance the look, sprinkle extra cinnamon on top. You can drizzle a bit of maple syrup for added sweetness. This creamer pairs well with various coffee types. Try it with a rich espresso or a light brew. Each sip will feel like a warm hug on a fall day. For the full recipe, check out the details above! To make your Skinny Pumpkin Spice Coffee Creamer just right, you can adjust the spice levels. If you love a strong flavor, add more pumpkin pie spice or cinnamon. If you want it milder, cut back a bit. It’s all about your taste! You can also experiment with sweetness. If you prefer it sweeter, add more maple syrup. If you want it less sweet, use less or try a sugar-free option. One common mistake is heating the mixture too fast. Heat it slowly on medium heat. This way, it warms evenly and does not boil. Another mistake is not straining the mixture properly. Straining helps remove lumps and gives a smooth texture. Always use a fine mesh strainer to get the best results. For best storage, keep your creamer in a clean glass jar with a tight lid. This keeps it fresh longer. The shelf life is about 7 days in the fridge. Check for signs of spoilage, like an off smell or changes in color. If it looks or smells strange, it’s best to toss it. Always shake it well before using, as the ingredients may separate over time. {{image_4}} If you want to change things up, try different spices. Instead of pumpkin pie spice, use cinnamon, nutmeg, or even cardamom. These spices add warmth and depth. You can also try adding extracts. For a nutty twist, a splash of hazelnut extract works great. It gives your creamer a unique taste that you'll love. For a creamy, dairy-free version, coconut milk is a fantastic choice. It adds a rich flavor and texture. You can also try oat milk or soy milk. Both options give a smooth finish and work well in coffee. Just make sure to use unsweetened versions to keep it light. Maple syrup is my go-to sweetener, but you can switch it out. Agave nectar or stevia are good options too. They keep the flavor without adding too many calories. Natural sweeteners like honey or coconut sugar can also work. Just remember, each sweetener has its own taste, so adjust to fit your liking. Store your Skinny Pumpkin Spice Coffee Creamer in a clean glass jar. An airtight container works best to keep it fresh. Make sure the jar is sealed tightly after each use. This helps keep out air and light, which can spoil the flavor. Always shake the jar well before using, as the ingredients may separate. Can you freeze coffee creamer? Yes, you can freeze it! Freezing is a great way to store extra creamer. Pour the creamer into ice cube trays for easy use later. Once frozen, pop the cubes into a freezer bag. This method makes it easy to thaw just what you need. To thaw, simply leave the cubes in the fridge overnight. You can also microwave them in short bursts. Be careful not to heat too long, as it may curdle. How long does creamer last in the fridge? Your homemade creamer lasts about 7 days in the fridge. For the best taste, use it within the first few days. After that, always check for any signs of spoilage, like off smells or changes in texture. For optimal flavor, aim to enjoy it by the end of the week. This way, you get the most out of every cozy cup! To make this creamer, start by heating almond milk and pumpkin puree together. Use a whisk to mix them well. Next, add maple syrup, vanilla, pumpkin pie spice, cinnamon, and salt. Heat this mix gently for about five minutes, but do not boil. After that, let it cool a bit, then strain it into a jar. This will help keep the texture smooth. Finally, seal the jar and store it in the fridge. You can find the Full Recipe for more details. Yes, this creamer is a good choice for weight loss. Each serving is low in calories, making it a smart option. It uses almond milk, which is lower in calories than regular cream. Plus, the pumpkin puree adds fiber, which helps you feel full. This creamer gives you flavor without a lot of added calories. You can make this creamer ahead of time. It stays fresh in the fridge for up to seven days. Use an airtight jar for the best storage. Just remember to shake it well before using, as ingredients may separate. Making it in advance saves time and lets you enjoy it all week. This blog post shared how to create a delicious skinny pumpkin spice coffee creamer with simple ingredients. You learned about the benefits, step-by-step instructions, and storage tips for freshness. Perfecting your own creamer opens doors to many flavors and options. Remember to have fun while experimenting and avoid common mistakes. Making this creamer can add a cozy touch to your coffee routine while supporting your health goals. Enjoy your tasty creations!

Skinny Pumpkin Spice Coffee Creamer Cozy and Delicious

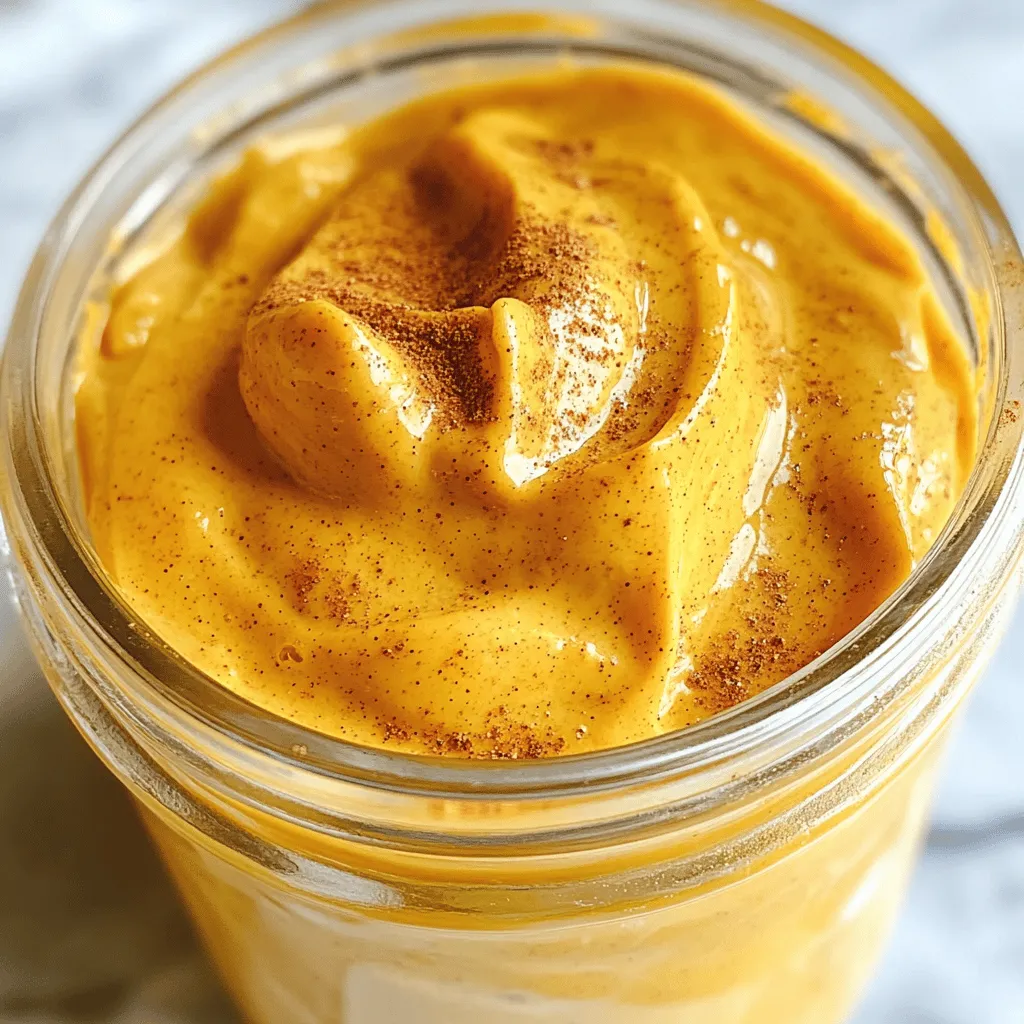
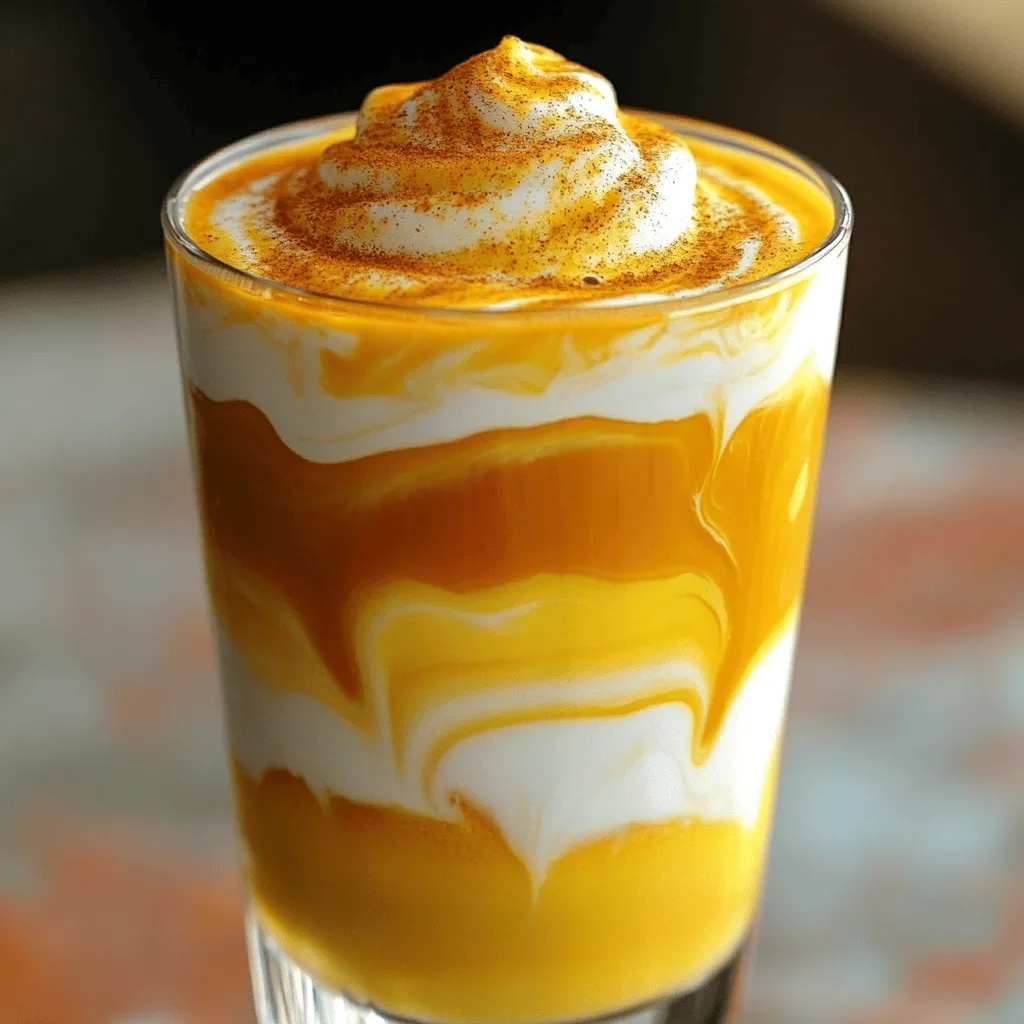
Fall is here, and so is the craving for cozy flavors! My Skinny Pumpkin Spice Coffee Creamer is the perfect

- 1 cup canned pumpkin puree - 1/2 cup packed brown sugar - 1/4 cup granulated sugar - 1/2 cup unsalted butter, softened - 1 large egg - 2 teaspoons pure vanilla extract - 2 cups all-purpose flour - 1 teaspoon baking soda - 1 teaspoon baking powder - 1 teaspoon pumpkin pie spice - 1/2 teaspoon salt - Optional mix-ins: 1/2 cup semi-sweet chocolate chips, 1/4 cup finely chopped pecans When I make pumpkin spice cookie bites, I love the blend of flavors. The canned pumpkin puree brings moisture and a rich taste. Brown sugar adds depth, while granulated sugar gives a nice sweetness. Softened butter is key for a creamy texture, making the cookies melt in your mouth. The egg acts as a binder, helping all the ingredients stick together. Pure vanilla extract adds a warm, comforting taste. All-purpose flour gives structure, while baking soda and baking powder help the cookies rise. Pumpkin pie spice offers that classic fall flavor with hints of cinnamon and nutmeg. Don’t forget salt! It balances the sweetness and enhances all the flavors. If you want to mix it up, try adding chocolate chips or pecans. They add a delightful crunch and richness to each bite. For the full recipe, refer to the section above. - Preheat the oven to 350°F (175°C). - Prepare the baking sheet with parchment paper. Start by making your kitchen cozy. Preheating the oven helps your cookie bites bake evenly. The parchment paper stops them from sticking to the sheet. This step is key. - Cream butter and sugars. - Incorporate pumpkin puree, egg, and vanilla. Now, grab a large bowl. Use a hand mixer or stand mixer to cream the softened butter with brown and granulated sugars. This takes about 2 to 3 minutes. The mix should be light and fluffy. Next, add the pumpkin puree, egg, and vanilla. Blend well until it’s smooth and lump-free. - Mix flour, baking soda, baking powder, pumpkin pie spice, and salt. In another bowl, mix the flour, baking soda, baking powder, pumpkin pie spice, and salt. Whisk these together until they are well combined. This ensures that every cookie bite is packed with flavor. - Gradually add dry mix to wet mixture. - Optional: Fold in chocolate chips and pecans. Gently add the dry mix to the wet mixture. Use a spatula or wooden spoon to stir until just combined. Don’t overmix, or your cookies may end up tough. If you want to add chocolate chips or pecans, now is the time! Fold them in carefully. - Portion dough onto the baking sheet. - Bake and cool time. Using a tablespoon or cookie scoop, drop rounded balls of dough onto the baking sheet. Leave about 2 inches between each one. Bake for 10 to 12 minutes, until the edges are golden. The centers might look soft. They will firm up as they cool. Let them cool on the sheet for 5 minutes before moving them to a wire rack. For the complete recipe details, check out the Full Recipe. Enjoy making these delightful treats! To get the best cookie texture, start with room temperature butter. This helps create a nice, fluffy base. Cream the butter and sugars well. Aim for a light and airy mix. It should take about 2-3 minutes. Next, avoid overmixing when you add the dry mix. Stir just until you see no dry flour. Overmixing can make the cookies tough. We want soft and chewy bites, not hard rocks! For a charming look, serve your cookie bites on a rustic platter. This adds a warm feel to your treat. After placing the cookies, lightly dust them with powdered sugar. This simple touch makes them look even more inviting. Pair your pumpkin spice cookie bites with a warm drink. Hot cocoa or spiced cider works great. The warmth of the drink complements the spices in the cookies. Together, they create a cozy fall treat that everyone will love. For more details, check out the [Full Recipe]. {{image_4}} You can easily change the flavor of your pumpkin spice cookie bites. Adding spices like cinnamon or nutmeg boosts warmth. Both spices pair well with pumpkin. You can also try different mix-ins. Dried fruits like cranberries add a nice tartness. White chocolate chips can give a sweet twist. These simple swaps keep the cookies fun and fresh. Want a healthier cookie bite? You can make them gluten-free. Just swap all-purpose flour for gluten-free flour. It works well in this recipe. You can also reduce sugar. Use less brown sugar and granulated sugar. You can try using stevia or honey too. These choices keep the cookie tasty without added calories. Make these cookie bites festive! You can add holiday-themed decorations. Use colored frosting or sprinkles. Think about making pumpkin spice treats year-round. You can add pumpkin spice to pancakes, muffins, or even oatmeal. The flavor shines in so many dishes, making every season special. For the full recipe, check out the detailed steps to make these yummy bites. To keep your pumpkin spice cookie bites fresh, use an airtight container. This method helps prevent them from drying out. Store them at room temperature for up to five days. If you want to keep them longer, consider freezing. You can freeze unbaked cookie dough for later use. Once you mix the dough, scoop it into balls and place them on a baking sheet. Freeze them for about two hours. After they are frozen, transfer the dough balls to a freezer bag. This method helps save space. When you're ready to bake, take the dough out of the freezer. Let it thaw in the fridge overnight. Once thawed, bake as you normally would. They will taste fresh even after freezing! To reheat cookie bites, place them in the oven. Set it to 350°F (175°C) and warm them for about five minutes. This method helps maintain their soft texture and rich flavor. You can also use the microwave, but be careful not to overheat. A few seconds should be enough. Enjoy your tasty fall treat! Can I use fresh pumpkin instead of canned? Yes, you can use fresh pumpkin. Just roast and puree it first. This adds a nice taste. However, canned pumpkin is more consistent. It saves time, too. How do I know when the cookies are done baking? Look for light golden edges. The centers may look soft; that’s okay. They will firm up as they cool. If you press lightly, they should spring back. Can I freeze pumpkin spice cookie bites? Yes, you can freeze them. Place cooled bites in an airtight container. They last for about three months. Just thaw them at room temperature before serving. What can I use instead of butter? You can use coconut oil or applesauce. Both work well in this recipe. They add moisture and flavor. Just use the same amount as butter. Can I replace the egg with a vegan alternative? Yes, you can replace the egg with flaxseed meal. Mix one tablespoon with three tablespoons of water. Let it sit until it thickens. This works great in cookies! What are the best drinks to pair with pumpkin spice cookie bites? Pair your cookie bites with warm spiced cider or hot cocoa. Both drinks enhance the fall flavors. You can also try chai tea for a nice mix. How can I dress up my cookie bites for a special occasion? You can arrange them on a rustic platter. Dust with powdered sugar for a festive touch. Add a few cinnamon sticks or fall leaves for decoration. For these tasty Pumpkin Spice Cookie Bites, you need these simple ingredients: - 1 cup canned pumpkin puree - 1/2 cup packed brown sugar - 1/4 cup granulated sugar - 1/2 cup unsalted butter, softened - 1 large egg - 2 teaspoons pure vanilla extract - 2 cups all-purpose flour - 1 teaspoon baking soda - 1 teaspoon baking powder - 1 teaspoon pumpkin pie spice - 1/2 teaspoon salt - 1/2 cup semi-sweet chocolate chips (optional) - 1/4 cup finely chopped pecans (optional) To make these cookie bites, follow these steps: 1. Preheat your oven to 350°F (175°C). Line a baking sheet with parchment paper. 2. In a large bowl, cream the softened butter, brown sugar, and granulated sugar. Mix until fluffy, about 2-3 minutes. 3. Add the pumpkin puree, egg, and vanilla extract. Mix until smooth, with no lumps. 4. In another bowl, combine the flour, baking soda, baking powder, pumpkin pie spice, and salt. Whisk until even. 5. Gradually add the dry mix to the wet mix. Stir gently until just combined. Don't overmix! 6. If using, fold in chocolate chips or chopped pecans evenly. 7. Scoop rounded balls of dough onto the baking sheet, spacing them about 2 inches apart. 8. Bake for 10-12 minutes, until the edges are golden. The centers may look soft. 9. Cool on the baking sheet for 5 minutes, then transfer to a wire rack to cool completely. - Prep Time: 15 min - Total Time: 25 min - Servings: 24 cookie bites For a lovely look, arrange your cookie bites on a rustic platter. Dust with powdered sugar for a festive touch. Enjoy with a warm drink like spiced cider or hot cocoa. This recipe makes the perfect cozy treat for fall! You now have all the details to make delicious pumpkin spice cookie bites. We covered ingredients, step-by-step instructions, and tips for the best results. Remember to store them well to keep them fresh. You can also try fun variations and serving ideas. Enjoy baking these treats to share or savor on your own. Happy baking!

Pumpkin Spice Cookie Bites Irresistible Fall Treat

Fall is here, and it’s time to indulge in my favorite Pumpkin Spice Cookie Bites! These treats are soft, delicious,

To make these tasty vegan pumpkin spice cookies, you need some simple ingredients. Here’s what you’ll need: - 1 cup canned pumpkin puree - 1/2 cup coconut sugar - 1/3 cup pure maple syrup - 1/4 cup coconut oil, melted - 1 teaspoon vanilla extract - 1 1/2 cups whole wheat flour - 1 teaspoon baking soda - 1 teaspoon baking powder - 1 teaspoon pumpkin pie spice - 1/2 teaspoon ground cinnamon - 1/4 teaspoon ground nutmeg - 1/4 teaspoon salt - 1/2 cup vegan chocolate chips (optional) Each ingredient adds flavor and some health benefits to the cookies: - Canned pumpkin puree: It’s rich in vitamin A and fiber. This helps your vision and digestion. - Coconut sugar: This has a lower glycemic index than regular sugar. It can help keep your blood sugar stable. - Maple syrup: It’s full of antioxidants and minerals. This sweetener also adds a unique taste. - Coconut oil: It contains healthy fats, which can support heart health. - Whole wheat flour: This adds fiber, helping with digestion and making you feel full. - Pumpkin pie spice: This mix of spices is great for flavor and may boost your mood. - Vegan chocolate chips (optional): They add extra sweetness and joy to your cookies. You can add more fun to your cookies with these optional ingredients: - Vegan chocolate chips: These add a sweet touch and make the cookies even more delicious. - Nuts: Chopped walnuts or pecans can give a nice crunch. - Dried fruit: Adding raisins or cranberries can provide a chewy texture. Feel free to mix and match these options to make your cookies truly your own. For the full recipe, check out the details above! Start by preheating your oven to 350°F (175°C). This temperature ensures the cookies bake evenly. Next, line a baking sheet with parchment paper. This step keeps your cookies from sticking and makes cleanup easy. In a large bowl, combine the wet ingredients. Add 1 cup of canned pumpkin puree, 1/2 cup of coconut sugar, 1/3 cup of pure maple syrup, 1/4 cup of melted coconut oil, and 1 teaspoon of vanilla extract. Use a whisk to mix them until smooth. This blend creates a rich base for your cookies. Take another bowl and mix the dry ingredients. Combine 1 1/2 cups of whole wheat flour, 1 teaspoon of baking soda, 1 teaspoon of baking powder, 1 teaspoon of pumpkin pie spice, 1/2 teaspoon of ground cinnamon, 1/4 teaspoon of ground nutmeg, and 1/4 teaspoon of salt. Whisk these together well. This mixture adds flavor and helps the cookies rise. Gradually add the dry mix to the wet mix. Stir gently until just combined; avoid overmixing. If you like, fold in 1/2 cup of vegan chocolate chips. Use a tablespoon or cookie scoop to drop dough onto the baking sheet. Leave space between each cookie, as they will spread while baking. Bake for 12-15 minutes. Look for lightly golden edges and set centers. Once baked, remove the cookies from the oven. Let them cool on the baking sheet for 5 minutes. After that, transfer them to a wire rack to cool completely. For serving, stack the cookies on a decorative plate. Sprinkle some extra pumpkin pie spice on top. Pair them with a glass of non-dairy milk for a delightful treat. For more details, check out the Full Recipe. You will find all the ingredients and steps to create these festive and flavorful vegan pumpkin spice cookies. Enjoy baking! Overmixing can make your cookies tough. Mix the wet and dry ingredients until they just combine. If you see a few dry spots, that’s okay! They will mix more as the dough sits. For soft and chewy cookies, focus on the right balance of ingredients. Use the right amount of pumpkin puree and coconut oil. These keep the cookies moist. If you want a crunchier cookie, add a bit more flour. Always preheat your oven to 350°F (175°C). This helps the cookies rise properly. Use parchment paper on your baking sheet to prevent sticking. Space the cookies well apart, as they will spread. Bake for 12-15 minutes. Look for golden edges and set centers. Remove them from the oven and let them cool on the sheet for five minutes before moving them. This helps them finish cooking and stay soft. Try these tips to make your vegan pumpkin spice cookies perfect every time! For a detailed guide, check the Full Recipe. {{image_4}} To make these cookies gluten-free, use a gluten-free flour blend. Look for blends that include almond flour or coconut flour. These options keep the cookies soft and tasty. You may need to adjust the liquid a bit, as gluten-free flours can absorb more moisture. Start with the same amount and add a touch more if needed. You can add fun flavors to your cookies! Try mixing in nuts like walnuts or pecans for a crunchy bite. Dried fruits like cranberries or raisins also work great. These additions bring new tastes and textures, making each cookie unique. Experiment with spices too! A pinch of ginger or cloves can enhance the pumpkin flavor. Using different sweeteners can change the taste. Maple syrup offers a rich, warm flavor. It also adds moisture to the cookies. Agave syrup is another option, and it’s slightly sweeter. If you prefer less sugar, reduce the amount slightly. Both sweeteners can help create a chewy texture and keep the cookies soft. For the full recipe, check out the details above. To keep your vegan pumpkin spice cookies fresh, store them in an airtight container. This helps maintain moisture and prevents them from becoming hard. You can layer the cookies with parchment paper to avoid sticking. Keep them at room temperature for up to one week. If you want to enjoy them longer, consider freezing. Freezing is a great way to save your cookies for later. First, let the cookies cool completely. Then, place them in a single layer on a baking sheet. Freeze until solid, then transfer them to an airtight container or freezer bag. They can last up to three months in the freezer. Remember to label the bag with the date for easy tracking. When you’re ready to eat your frozen cookies, there are easy ways to warm them up. You can microwave a cookie for about 10-15 seconds. Alternatively, preheat your oven to 350°F (175°C) and bake for 5-7 minutes. This helps restore the soft texture and warms the spices, making them smell amazing. For the best taste, enjoy them warm! Yes, you can use fresh pumpkin. First, cook and puree the pumpkin. Make sure it's thick and not too watery. This helps keep your cookies from being soggy. Fresh pumpkin adds a nice flavor, making your cookies taste even better. These cookies stay fresh for about five days at room temperature. Store them in an airtight container to keep them soft. If you want them to last longer, you can freeze them. They can stay good for up to three months in the freezer. Yes, you can make these cookies nut-free. Substitute coconut oil for other oils like canola or vegetable oil. For the flour, use oat flour or any nut-free flour blend. Just check the labels to ensure they're free from nuts and cross-contamination. If your dough feels dry, add a little plant milk. Start with a tablespoon at a time. Mix well and check the texture. The dough should be moist but not sticky. This will help your cookies turn out soft and chewy. Serve these cookies warm for the best taste. You can stack them on a plate for a nice look. Pair them with a glass of non-dairy milk or a hot drink. This makes for a cozy treat during any season. For an extra touch, sprinkle some pumpkin pie spice on top. If you want the full recipe, check out the complete guide. You learned how to make vegan pumpkin spice cookies from start to finish. We covered the key ingredients and their health benefits, guiding you through each step of baking. I shared tips to achieve the best texture and delicious variations to try. Plus, you now have storage advice to keep your cookies fresh. Enjoy creating these tasty treats. Happy baking, and remember to share them with friends!

Vegan Pumpkin Spice Cookies Festive and Flavorful Treat

Are you ready to spice up your baking with a warm touch? These Vegan Pumpkin Spice Cookies blend cozy flavors

- 1 lb (450g) ground beef - 8 slider buns - 4 slices American cheese, each slice halved - 1 cup shredded lettuce - 1 small onion, finely chopped - 8 dill pickle slices - ½ cup mayonnaise - 2 tablespoons ketchup - 2 tablespoons yellow mustard - 1 tablespoon sweet pickle relish - 1 tablespoon onion powder - 1 tablespoon garlic powder - Salt and pepper, to taste To create these Copycat Big Mac Sliders, you need a few key ingredients. First, ground beef forms the base of the sliders. It brings the savory flavor and juicy texture everyone loves. Next, slider buns hold all the goodness together. Choose soft, fresh buns for the best experience. American cheese adds creaminess and that classic taste. Halving the slices helps them fit perfectly on each slider. Now, let’s talk toppings. Shredded lettuce, finely chopped onions, and dill pickle slices add crunch and freshness. They balance the richness of the beef and cheese. Don’t forget the special sauce! This is key to mimicking that famous flavor. It combines mayonnaise, ketchup, yellow mustard, and sweet pickle relish. This sauce adds tanginess and creaminess, making every bite heavenly. For an extra flavor boost, consider optional seasonings like onion powder, garlic powder, salt, and pepper. They enhance the beef's taste and bring warmth to each slider. You can find the full recipe in the section above, which details how to turn these ingredients into a delicious meal everyone will enjoy. 1. Preheat your oven to 350°F (175°C). This helps cook your sliders evenly. 2. Lightly grease a baking dish. This keeps the patties from sticking. 3. In a large bowl, combine ground beef, onion powder, garlic powder, salt, and pepper. 4. Use your hands or a spoon to mix well. This ensures all flavors blend. 5. Form the mixture into small patties. Shape them to fit the slider buns. 1. Arrange the patties in the greased baking dish. Make sure they have space. 2. Bake in the oven for about 15-20 minutes. They are done when juices run clear. 1. While the patties bake, prepare the special sauce. In a bowl, mix mayonnaise, ketchup, yellow mustard, and sweet pickle relish. 2. Stir until the sauce is creamy and smooth. 3. After baking, take the patties out of the oven. Place each patty on the bottom half of a slider bun. 4. Add half a slice of American cheese on each patty. The heat will melt the cheese slightly. 5. Spoon special sauce generously over the cheese. 6. Layer on shredded lettuce, chopped onions, and a dill pickle slice for crunch. 7. Cover with the top half of the buns. 8. For extra flavor, brush the tops of the buns with melted butter. 9. Return the sliders to the oven for 5 more minutes. This warms the buns and gives them a nice toast. 10. Once done, cut the sliders into individual servings. Serve warm for a tasty treat. For the full recipe, check the link provided. Enjoy your delicious Copycat Big Mac Sliders! For juicy patties, always use fresh ground beef. Aim for an 80/20 lean-to-fat ratio. This mix keeps the patties moist and tasty. Form the patties gently; avoid packing them too tight. This helps them stay tender. To melt cheese effectively, place the cheese on hot patties right after baking. Cover the dish with foil for a minute. This traps steam and helps the cheese melt evenly. Using fresh toppings makes a big difference. Fresh lettuce, chopped onions, and dill pickles add crunch and taste. Pre-packaged toppings may lack flavor and freshness. Choose fresh ingredients whenever you can. Brushing melted butter on the buns adds rich flavor. It also gives them a crispy texture. Just a light brush before baking can elevate your sliders. For a beautiful display, serve the sliders on a bright platter. Add a small bowl of extra special sauce for dipping. This makes it fun for guests. Pair your sliders with crispy fries or a fresh salad. This adds color and variety to your meal. You can also include pickles on the side for a classic touch. {{image_4}} You can switch the ground beef for other meats. Turkey or chicken works well. For a plant-based version, try veggie patties or black bean patties. Each option gives a new twist, so feel free to experiment! Toppings can take your sliders to the next level. Try adding crispy bacon for crunch. Jalapeños add heat if you like spice. Different cheeses, like pepper jack or cheddar, can also change the flavor. Get creative and mix it up! The sauce is key for flavor. You can spice it up by adding hot sauce or sriracha. Try mixing in barbecue sauce for a smoky taste. A dash of mustard can add tang. Each change makes your sliders unique and fun to enjoy! To keep your leftover sliders fresh, store them in an airtight container. Place a piece of parchment paper between the sliders to prevent them from sticking. You can also wrap them tightly in plastic wrap. This method helps keep the flavors intact and prevents sogginess. Store them in the fridge for up to three days. If you want to enjoy these sliders later, freezing is a great option. Start by cooling the patties completely. Once cooled, wrap each patty in plastic wrap. Then, place them in a freezer-safe bag. Label the bag with the date to keep track. You can freeze the patties for up to three months. When you're ready to eat, just thaw them in the fridge overnight. To reheat your sliders while keeping them tasty, use the oven. Preheat it to 350°F (175°C). Place the sliders on a baking sheet and cover them with foil. Heat for about 10-15 minutes or until warmed through. This method helps keep the buns soft and the patties juicy. For best results, avoid the microwave, as it can make the sliders rubbery. Copycat Big Mac Sliders are mini burgers inspired by the famous Big Mac. They pack the same flavors into a bite-sized treat. You get juicy beef patties, melty cheese, and a special sauce that tastes just like the original. Add fresh lettuce, onions, and pickles, and you have a perfect comfort food. The sliders are fun for parties or family dinners. These sliders are quick to prepare. It takes about 15 minutes to prep and 20 minutes to cook. So, in just 40 minutes, you can serve a plate of eight sliders. This makes them great for busy weeknights or last-minute gatherings. You won’t spend hours in the kitchen. Yes, you can easily customize these sliders to fit your taste. Try using ground turkey or chicken for a lighter option. You can swap American cheese for cheddar or pepper jack for extra flavor. Feel free to add toppings like bacon or jalapeños for a spicy kick. Each person can make their own version, so everyone is happy. In this guide, we covered how to make tasty sliders. We detailed the main ingredients, special sauce, and optional seasonings. You'll find step-by-step instructions, tips for cooking, and ways to enhance flavor. We also shared storage practices and answered common questions about customization and preparation times. Enjoy making these sliders your own. They are fun, delicious, and perfect for any occasion. Your cooking will shine with these easy steps!

Copycat Big Mac Sliders Flavorful Comfort Food Treat

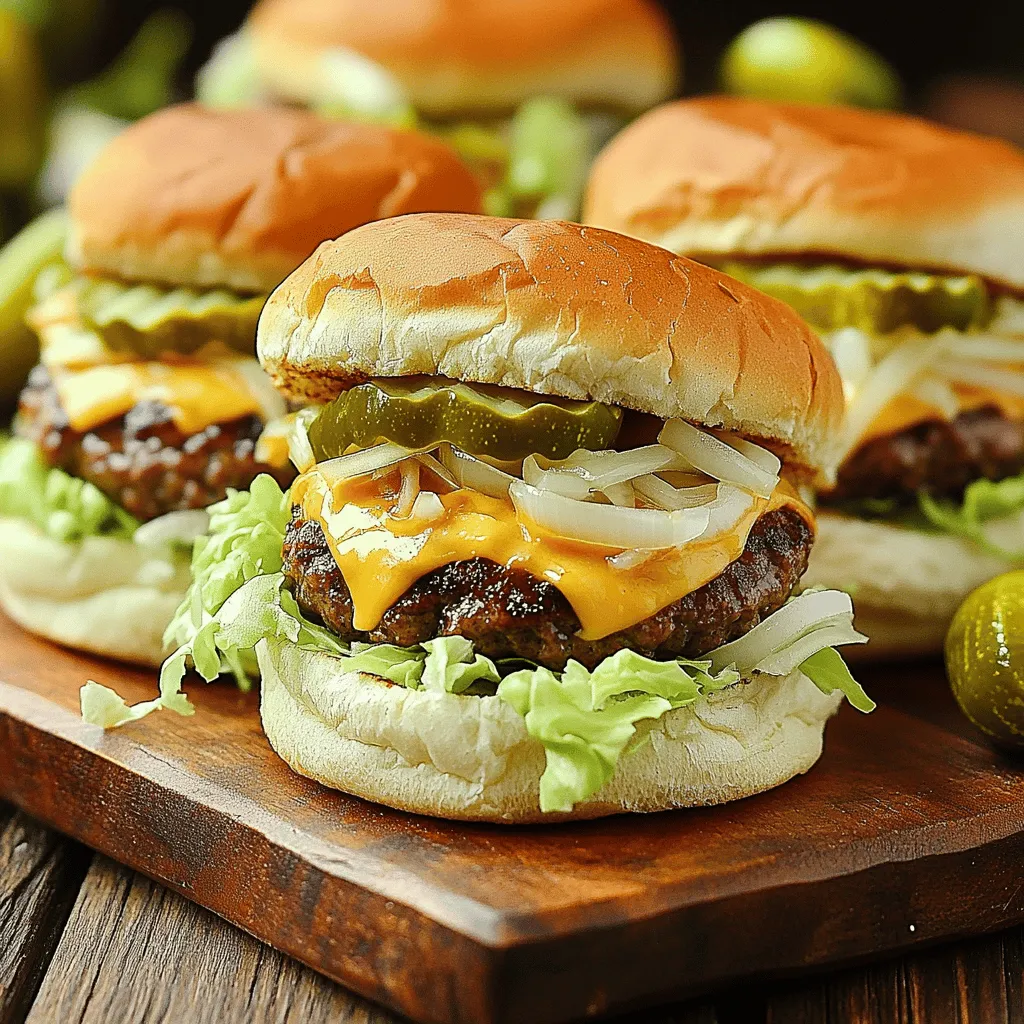
Craving comfort food that’s quick and easy? You’re in the right place! These Copycat Big Mac Sliders pack all the

Older posts
Newer posts
← Previous Page1 … Page4 Page5 Page6 … Page74 Next →

dsad

© 2025 lazychefmagic • Built with GeneratePress

Our Policies

  • Copyright Policy
  • Cookie Policy
  • GDPR Policy
  • Privacy Policy
  • Disclaimer
  • Terms Of Use

More Information

  • Home
  • About
  • Contact
  • Appetizers
  • Dessert
  • Dinner
  • Drinks
©2025, lazychefmagic About Back To Top