Skip to content
DisclaimerTerms Of UseGDPR PolicyCookie Policy

lazychefmagic

  • Home
  • Drinks
  • Appetizers
  • Dinner
  • Dessert
  • About
  • Contact
  • Privacy Policy
DisclaimerTerms Of UseGDPR PolicyCookie Policy

Amanda

- Canned chickpeas: 1 can (15 ounces), drained and rinsed - Olive oil: 2 tablespoons - Spices: 1 teaspoon smoked paprika, 1 teaspoon garlic powder, salt, and pepper - Fresh vegetables: - 4 cups mixed salad greens (like arugula, spinach, and romaine) - 1 cup cherry tomatoes, halved - 1 cucumber, diced - 1 small red onion, thinly sliced - 1 ripe avocado, diced - Dressing components: - Juice of 1 medium lemon - 2 tablespoons tahini - 1 tablespoon honey or maple syrup (optional) This salad is simple and healthy. Each ingredient plays a key role. The chickpeas add protein and crunch. The olive oil gives richness. The spices bring warmth and flavor. Fresh veggies add color and nutrients. The lemon juice brightens the salad. Tahini adds creaminess, while honey or maple syrup gives a touch of sweetness. You can find the full recipe in detail to guide you. Enjoy crafting this crispy chickpea salad! 1. Preheat your oven to 400°F (200°C). This heat helps make the chickpeas crispy. 2. In a bowl, mix the drained chickpeas with olive oil and spices. Use smoked paprika, garlic powder, salt, and pepper. 3. Toss the chickpeas well. Make sure every chickpea gets some seasoning. 4. Spread the chickpeas on a baking sheet in a single layer. This step helps them roast evenly. 5. Roast the chickpeas for 25-30 minutes. Shake the pan halfway through cooking. This keeps them from sticking and helps them crisp up nicely. 1. In a large bowl, combine the salad greens with fresh vegetables. Use cherry tomatoes, cucumber, red onion, and diced avocado. 2. In a small bowl, whisk together lemon juice, tahini, and honey if you like it sweet. Add salt and pepper to taste. 3. Pour the dressing over the salad ingredients. Toss gently to coat everything well. 1. Once the chickpeas are done, let them cool slightly. Then, add them to the salad. 2. Toss the salad again to mix the warm chickpeas with the fresh veggies. 3. For a great look, serve the salad in a large, shallow bowl. 4. Scatter some extra crispy chickpeas on top. Add lemon wedges for a bright touch. For more details, check out the Full Recipe. To get those chickpeas extra crispy, you must spread them in a single layer on the baking sheet. This allows the heat to reach all sides, making them crisp up nicely. If they are too crowded, they will steam instead of roast. Also, don't forget to shake the pan halfway through roasting. This simple action helps the chickpeas brown evenly and adds to their crunch. If you want to switch things up, there are great substitutes for tahini. You can use nut butters like almond or cashew. Greek yogurt is also a tasty alternative. If you want a different homemade dressing, try mixing olive oil with balsamic vinegar or lemon juice. Both options can add a fresh twist to your salad. Chickpeas are packed with protein and fiber. They help keep you full and support digestion. The greens in your salad, like spinach and arugula, are full of vitamins and minerals. They provide essential nutrients for your body. Don't forget about the healthy fats from avocado and olive oil. These fats are good for your heart and can help you absorb more nutrients. Enjoying this salad means you get a tasty meal and many health benefits. {{image_4}} You can change this salad to fit your taste. Try adding different vegetables like bell peppers, carrots, or radishes. These add color and crunch. You can also include proteins such as grilled chicken or chickpea patties for extra nutrition. If you're gluten-free, you can skip the tahini and use sunflower seed butter instead. For a vegan option, replace honey with maple syrup. This keeps the salad sweet without using animal products. Want to spice it up? You can add chili powder or cayenne pepper to the chickpeas for some heat. For a unique twist, try adding cumin or coriander. These spices give your salad a warm flavor. When it comes to dressings, you don’t have to stick to tahini. You can use yogurt, vinaigrette, or even a spicy peanut dressing. Each option changes the taste and feel of your salad. Seasonal produce can make your salad shine. In summer, add juicy peaches or strawberries for sweetness. In fall, try roasted butternut squash or apples for a hearty touch. Adapting your salad based on what's fresh keeps it exciting. You’ll enjoy new tastes and textures throughout the year. Use the [Full Recipe] to start your crispy chickpea salad adventure today! To keep your crispy chickpea salad fresh, store each component separately. This helps maintain the salad's crunch. Use airtight containers for the salad greens, chickpeas, and dressing. Keep the chickpeas in a container lined with paper towels to absorb moisture. This will help them stay crispy longer. Roasted chickpeas can be stored in the fridge for a few days. If you want to reheat them, use the oven or an air fryer. This will help revive their crispiness. Eating the salad cold is also great! It offers a refreshing taste. But keep in mind that the chickpeas may lose some crunch after a day. You can store the salad in the fridge for about 3 days. After that, check for any signs of spoilage. Look for wilted greens or off smells. If the chickpeas feel soft or mushy, it’s time to toss them. Always trust your senses when deciding if food is safe to eat. For the full recipe, check out the Crispy Chickpea Salad details to enjoy this delightful dish! Yes, you can prepare this salad ahead of time. To keep it fresh, store the crispy chickpeas separately. Mix the salad greens and fresh veggies in a large bowl. Add the dressing just before serving. This way, the salad stays crisp, and the chickpeas stay crunchy. You can add many proteins to this salad. Grilled chicken or roasted tofu work well. Shrimp or hard-boiled eggs are also great options. Each adds flavor and makes the dish more filling. This salad is versatile, so feel free to try your favorites. Yes, this salad is perfect for meal prep. Prepare the ingredients in advance and store them in containers. Keep the dressing on the side until you're ready to eat. This way, you can enjoy a fresh and tasty meal throughout the week. To make this salad gluten-free, replace tahini with sunflower seed butter or a homemade dressing. Check labels on other ingredients to ensure they are gluten-free. Using fresh vegetables and chickpeas will keep your salad delicious and safe for gluten-sensitive diets. Crispy chickpea salad is easy to make and full of flavor. We covered main ingredients, step-by-step instructions, and tasty tips. Remember to roast chickpeas for the best crunch. You can switch up veggies and dressings to keep things exciting. This salad is not just healthy; it’s also quick to prepare. Storing leftovers? Keep them fresh and delicious. Overall, this dish fits perfect for meal prep or a quick lunch. Enjoy experimenting with this recipe to make it your own!

Crispy Chickpea Salad Simple and Healthy Choice

Looking for a healthy, simple dish that packs a crunch? Crispy Chickpea Salad is the answer! Loaded with fresh veggies

- 1 lb (450 g) sirloin steak, thinly sliced against the grain - 4 cups fresh broccoli florets - 3 tablespoons soy sauce - 2 tablespoons oyster sauce - 1 tablespoon cornstarch - 1 tablespoon vegetable oil - 2 cloves garlic, minced - 1 teaspoon ginger, grated - 1 cup beef broth - 1 tablespoon sesame oil - Cooked rice, for serving When making Easy Beef and Broccoli, choose fresh and high-quality ingredients. The sirloin steak should be tender and well-marbled. This cut gives great flavor and texture. Fresh broccoli florets should be bright green and crisp for the best results. Each serving of Easy Beef and Broccoli has about: - Calories: 350 - Protein: 30g - Fat: 15g - Carbohydrates: 30g This meal is balanced, offering protein from the beef and fiber from the broccoli. It’s a smart choice for a healthy dinner. To make your meal even better: - Serve Easy Beef and Broccoli with steamed jasmine rice or brown rice. - Add a side of spring rolls for extra crunch. - Pair it with green tea or a light soda to refresh your palate. These sides work well and make your dinner feel special. Enjoy the blend of flavors and textures! For more details, check the Full Recipe. Marinating the Beef To start, cut the sirloin steak into thin strips. This helps it cook fast and stay tender. In a bowl, mix 1 tablespoon of soy sauce, 1 tablespoon of cornstarch, and half of the minced garlic with the beef. Make sure every piece is coated well. Let it sit for about 15 minutes. This step adds flavor and makes the beef juicy. Blanching Broccoli Next, bring a pot of water to a boil. Add the broccoli florets and let them cook for just 2 minutes. This keeps the broccoli bright and crisp. After that, quickly transfer them to a bowl of ice water. This ice bath stops the cooking. It helps the broccoli keep its nice green color and crunch. Stir-Frying the Beef Heat a large skillet or wok over medium-high heat. Add 1 tablespoon of vegetable oil. Once it's hot, add the marinated beef. Stir-fry it for 2 to 3 minutes. Look for a nice brown color but keep it slightly undercooked in the middle. This keeps it tender. Remove the beef from the skillet and set it aside. Creating the Sauce In the same skillet, add the rest of the minced garlic and the grated ginger. Stir these for about 30 seconds. You want to bring out their wonderful smells. Then, pour in the beef broth, remaining soy sauce, and oyster sauce. Mix it well and let it simmer for about 2 minutes. This builds deep, rich flavors. Final Assembly Return the cooked beef to the skillet. Add the blanched broccoli too. Stir everything together, letting the flavors blend. Cook for another 3 to 4 minutes. This ensures the beef cooks fully and the broccoli stays tender-crisp. Finally, drizzle sesame oil over the dish and stir it in for extra flavor. Serve the beef and broccoli over a mound of cooked rice. Use shallow bowls for a nice look. To finish, sprinkle sesame seeds and thinly sliced scallions on top. This adds a pop of color and enhances the dish's appeal. You can find the full recipe for a detailed guide. You can swap the sirloin for flank steak or ribeye. These cuts work well and stay tender. If you want a lighter option, use chicken or tofu. For veggies, try snap peas or bell peppers. If you need gluten-free, use tamari instead of soy sauce. To lower sodium, choose low-sodium soy sauce and broth. To tenderize beef, try using baking soda. Lightly sprinkle it on the meat and let it sit for 15 minutes. Rinse and pat dry before cooking. If you prefer your beef well done, stir-fry a bit longer. For medium-rare, keep an eye on the beef. Remove it from the heat once it’s browned but slightly pink inside. If your broccoli is overcooked, don't worry! You can revive it. Toss the broccoli into ice water for a few minutes. This helps it regain crunch. For flavor balance, taste the sauce as you cook. If it’s too salty, add a bit of sugar or more broth. This can help tone down strong flavors. For more tips, check out the Full Recipe. {{image_4}} You can easily swap the beef for chicken or tofu. Chicken works well because it cooks fast. Use boneless, skinless chicken thighs or breasts. Slice them thin, just like the beef. Tofu is a great choice too. Firm tofu holds its shape well. Press it first to remove extra water. Then, cut it into cubes and marinate it just like the beef. This gives you a tasty meal no matter the protein you pick! Don't stop at broccoli! Other veggies add color and flavor. Carrots are sweet and crunchy. Slice them thin for quick cooking. Bell peppers bring a nice crunch and sweetness too. Snow peas are another lovely option. They add a pop of color and cook fast. You can mix and match your favorite vegetables to create a fun, colorful dish. Just remember to adjust cooking times to keep everything tender-crisp! Feel free to play with the sauce! You can add more soy sauce for saltiness. A splash of rice vinegar gives a nice tang. Want some heat? Add crushed red pepper or chili paste. You can also try hoisin sauce for a sweet twist. Mix in some sesame seeds for added crunch. The sauce is where you can really show your style and make this dish your own. For the full recipe, check out the complete guide. To keep your Easy Beef and Broccoli fresh, store leftovers in an airtight container. Refrigerate them within two hours of cooking. This keeps the beef and broccoli safe to eat. For longer storage, freeze the dish. Use freezer-safe bags or containers for best results. Ensure you remove as much air as possible. This helps prevent freezer burn. When reheating, I recommend using the stovetop. Place the dish in a skillet over medium heat. Add a splash of water or broth. Stir often to warm it evenly. This method keeps the beef tender and the broccoli crisp. You can also use a microwave. Cover the dish loosely to trap steam. Heat in short bursts, stirring in between, until hot. In the fridge, your Easy Beef and Broccoli lasts about 3 to 4 days. If you freeze it, it can last up to 3 months. Just remember to label the containers with the date. This way, you can enjoy it later without worry. Always check for signs of spoilage before eating leftovers. The best cut for stir-fry is sirloin steak. It is tender and flavorful. You can also use flank steak or ribeye. Cut the beef against the grain. This method makes each bite easier to chew. Look for cuts that have good marbling. This means they have small streaks of fat. Fat gives flavor and keeps the beef juicy. Yes, you can prepare this dish ahead of time. Cook the beef and broccoli, then cool them quickly. Store them in airtight containers. Place them in the fridge for up to three days. When you are ready to eat, reheat in a skillet. Add a splash of beef broth to keep it moist. This method helps keep the flavors fresh. To keep broccoli bright green, blanch it first. Boil water in a pot and add the broccoli for two minutes. After that, transfer it to ice water. This stops the cooking and keeps the color. When you stir-fry, cook the broccoli just until tender-crisp. This gives it a nice crunch and bright color. To add heat, try different spices or sauces. You can add red pepper flakes for a kick. Sriracha or chili paste also works well. If you prefer mild flavors, skip the spices. You can always add them later for your taste. Start with a small amount and taste as you cook. Adjust until you reach the right level for you. In summary, Easy Beef and Broccoli is a simple and delicious dish. You learned about the ingredients, preparation, and cooking steps to achieve great flavor. It’s important to know tips for substitutions and storage. Remember, you can customize the dish with various proteins and veggies. I hope this guide inspires your next meal. Enjoy making this tasty recipe and sharing it with others. You’ll impress family and friends with your skills in the kitchen!

Easy Beef and Broccoli Quick and Tasty Recipe Guide

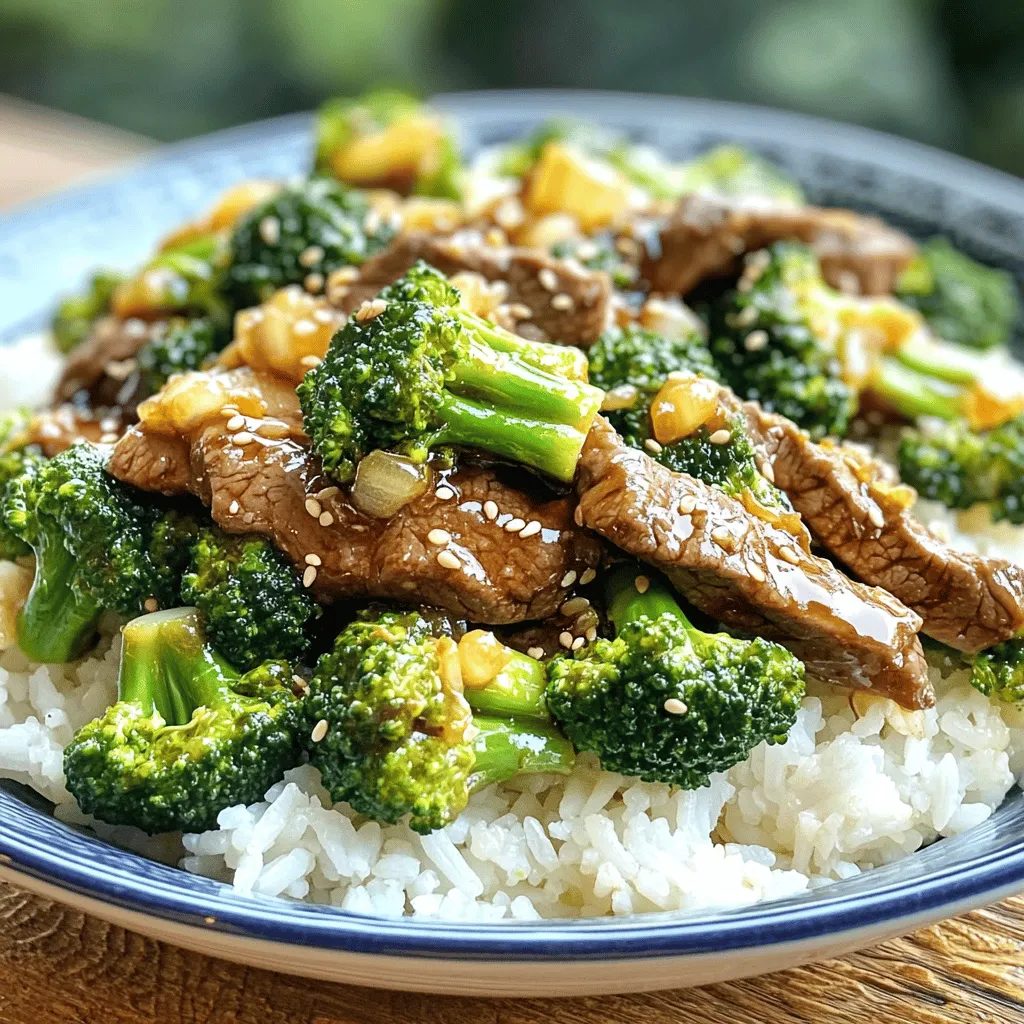
Looking for a quick and tasty dinner? This Easy Beef and Broccoli recipe delivers big flavor with minimal effort! I’ll

- 2 cups rotini pasta - 2 cups cooked chicken, shredded - 2 cups fresh broccoli florets - 1 cup heavy cream - 1 cup Alfredo sauce (store-bought or homemade) - 1 cup shredded mozzarella cheese - 1/2 cup grated Parmesan cheese - 1 teaspoon garlic powder - 1 teaspoon onion powder - 1/2 teaspoon freshly ground black pepper - 1/4 teaspoon salt - 1 tablespoon fresh parsley, chopped (for garnish) This dish is all about simple, fresh ingredients. Start with rotini pasta. Its spiral shape holds sauce well. Use cooked chicken that you can shred easily. If you have leftover chicken, it works great! Fresh broccoli adds color and crunch. For the creamy base, heavy cream and Alfredo sauce blend perfectly. You can buy Alfredo sauce or make your own. Mozzarella cheese gives it that gooey, cheesy goodness. Parmesan adds a rich flavor. Seasonings like garlic powder and onion powder add depth. Black pepper and salt enhance all the flavors. Finally, fresh parsley brightens the dish. This recipe is quick and easy. With these ingredients, you will create a tasty meal. For the complete cooking details, check the Full Recipe. Enjoy every bite! Set your oven to preheat at 350°F (175°C). This step is key for even cooking. In a large pot, bring salted water to a rolling boil. Add the rotini pasta and cook according to the package instructions. Aim for an al dente texture. Once cooked, carefully drain the pasta and return it to the pot. While the pasta cooks, take a steamer basket and place it inside a saucepan filled with a couple of inches of water. Bring the water to a boil. Next, add the broccoli florets to the basket. Cover and steam for about 3-4 minutes. The broccoli should be bright green and tender. After steaming, mix the broccoli into the pot with the drained pasta. In a medium mixing bowl, whisk together the heavy cream and Alfredo sauce. Add garlic powder, onion powder, black pepper, and salt. Make sure the mixture is smooth and well combined. Pour the creamy sauce over the pasta and broccoli mix. Gently add the shredded chicken. Toss everything together until the pasta, broccoli, and chicken are fully coated with the sauce. Lightly grease a 9x13 inch baking dish. Transfer the creamy mixture into the dish, spreading it out evenly. Top it off with a generous layer of shredded mozzarella cheese, followed by grated Parmesan cheese for added depth of flavor. Carefully place the baking dish in the preheated oven. Bake for 25-30 minutes. You want the cheese to melt, bubble, and turn a golden brown. Once baked, remove the dish from the oven. Let it cool for about 5 minutes. Before serving, sprinkle with fresh parsley for a burst of color and freshness. To keep your pasta from sticking, stir it often while it cooks. Use plenty of water and salt. For bright green broccoli, steam it for just 3-4 minutes. You want it tender but still crisp. This keeps the color and nutrients intact. This creamy chicken Alfredo bake goes great with a fresh green salad. The crunch of the salad balances the rich dish. You can also serve it with garlic bread for a hearty meal. For a twist, add some roasted vegetables on the side. For a beautiful presentation, serve the bake right from the dish. Sprinkle extra grated Parmesan on top for a nice touch. A bit of fresh parsley adds color and freshness. These small details make your meal look even more inviting. {{image_4}} You can switch up the protein in your creamy chicken Alfredo bake. If you want a different taste, try using cooked shrimp or diced turkey. Both options bring a unique twist to the dish. You can even use ground beef or sausage for a heartier meal. Just make sure to cook the meat fully before mixing it in. This way, your bake stays tasty and safe. For a meatless creamy Alfredo bake, simply skip the chicken. Add more veggies instead, like mushrooms, bell peppers, or spinach. These will add great flavor and nutrients. You can also use beans for extra protein. Chickpeas or white beans work well here. Just stir them in with the pasta and sauce. You’ll enjoy a fulfilling meal that everyone will love. To boost the flavor of your creamy chicken Alfredo bake, add herbs and spices. Fresh basil or thyme can bring a fresh taste. You might also try red pepper flakes for some heat. A squeeze of lemon juice can add brightness. Just mix these into your sauce before baking. These small changes can take your dish to the next level. To store leftovers, let the dish cool completely. Transfer it to an airtight container. This helps keep it fresh. You can store it in the fridge for up to three days. When ready to eat, check for any signs of spoilage. For freezing, first let the dish cool down. Cut it into portions, then wrap each piece tightly in plastic wrap. Place the wrapped portions in a freezer-safe bag or container. This way, you can save it for up to three months. To reheat, remove the wrap and thaw it in the fridge overnight. To keep the creamy texture, reheat in the oven at 350°F. Cover the dish with foil to prevent drying out. Bake for about 20 minutes or until heated through. You can also use the microwave. Heat in short bursts and stir frequently. This helps maintain the creaminess. Remember, slow reheating is key to a delicious meal! To make a simple Alfredo sauce, you need just a few ingredients. Start with 1 cup of heavy cream. Heat it in a pan over medium heat. Then, add 1/2 cup of grated Parmesan cheese. Stir until the cheese melts. Add salt and pepper to taste. For extra flavor, add 1 clove of minced garlic. Cook for a few more minutes, and your sauce is ready! This sauce is rich and creamy, perfect for your bake. Yes, you can use different pasta shapes! While rotini works great, other shapes like penne, fusilli, or farfalle are also tasty. Just ensure that the pasta cooks well and holds the sauce. Each shape gives a unique bite, making your dish fun and exciting. If you need a lighter option, you can use half-and-half or whole milk. For a dairy-free option, try coconut milk or almond milk. Just remember, these alternatives may change the texture and flavor slightly. Adjust seasonings as needed to keep it delicious. Your creamy chicken Alfredo bake lasts about 3 to 4 days in the fridge. Store it in an airtight container to keep it fresh. If you notice any change in smell or texture, it’s best to throw it away. Yes, preparing this dish ahead of time is easy! You can assemble the bake a day before and keep it in the fridge. Just cover it tightly. When you're ready to eat, bake it straight from the fridge. It may take a few extra minutes to cook through. This recipe serves about 6 people. If you want smaller portions, you can cut it into 8 servings. Each serving is filling, so even a smaller piece will satisfy. Absolutely! This creamy chicken Alfredo bake is great for meal prep. You can divide it into portions and store them in containers. It reheats well, making it perfect for quick lunches or dinners during the week. For the complete recipe, check out the [Full Recipe](#). This blog post guides you through making a creamy chicken Alfredo bake. We covered the ingredients, from rotini pasta to rich cheeses, ensuring tasty results. You learned step-by-step instructions for cooking and assembling your dish, plus essential tips for great flavor and presentation. Remember, you can swap proteins and even go vegetarian. Storing and reheating suggestions help keep leftovers fresh. Enjoy making this dish that’s easy to prep and delicious to share. Your culinary skills are sure to impress!

Creamy Chicken Alfredo Bake Tasty and Simple Dish

Looking for a cozy meal that’s easy to make and sure to please? You’ve found it here with my Creamy

- 1 lb chicken thighs - 1 can coconut milk - 2 tbsp red curry paste - Onion, garlic, ginger - Bell pepper, green beans - Fish sauce, brown sugar - Lime juice, cilantro, salt, and pepper Gathering the right ingredients is key to making Coconut Curry Chicken shine. Start with chicken thighs. I prefer them for their rich flavor and tenderness. Next, you need coconut milk. It adds creaminess and balances the spice. Don't forget the red curry paste. This is where the magic begins. For aromatics, chop up a medium onion, mince two cloves of garlic, and grate a small piece of ginger. These enhance the dish’s depth. Add a bell pepper for sweetness and some green beans for crunch. Finally, for seasoning, pick up some fish sauce and brown sugar. They balance flavors well. Squeeze in lime juice for brightness. Top it off with fresh cilantro, and you have a colorful mix. This Coconut Curry Chicken recipe is simple yet packed with flavor. For the complete guide, check the Full Recipe. - Heat 2 tablespoons of olive oil in a large skillet over medium-high heat. - Add 1 finely chopped onion. Cook for 3-4 minutes until it turns soft and fragrant. - Next, add 2 minced garlic cloves and 1-inch grated ginger. Stir for about 1 minute. This step brings out amazing flavors. - Now, add 1 pound of bite-sized chicken thighs to the skillet. - Season with salt and pepper. Cook for 5-6 minutes until the chicken is browned. Stir often to cook evenly. - Once browned, stir in 2 tablespoons of red curry paste. Let it cook for 2 minutes. This will deepen the flavor. - Pour in 1 can of coconut milk. Mix well to combine. - Bring the mixture to a gentle simmer. - Add 1 thinly sliced bell pepper and 1 cup of green beans. If you want, add 1 tablespoon of fish sauce and 1 tablespoon of brown sugar. - Let the curry simmer for 10-15 minutes. Check that the chicken is cooked and the veggies are tender. - Lastly, squeeze in the juice of 1 lime for brightness. Adjust salt and pepper as needed. For a full recipe, check it out [here](#). To make your coconut curry chicken shine, balance the flavors with fresh lime juice. The tartness of lime cuts through the richness of the coconut milk. You can squeeze in juice right before serving. It makes a big difference. Using fresh herbs, like cilantro, adds a burst of freshness. Sprinkle them on top just before serving. This simple step enhances both taste and look. Sautéing is key to a great curry. Start by heating olive oil in your pan. Add the onion and cook until soft. This step builds a strong flavor base. For even cooking, cut the chicken into uniform pieces. This helps it cook at the same rate. Stir often to avoid burning and ensure all sides brown nicely. Serve your coconut curry chicken over fluffy jasmine rice or nutty quinoa. The grains soak up the sauce and add texture. For a beautiful look, garnish your dish with lime wedges. A sprinkle of extra cilantro adds color and aroma. This little touch makes your meal feel special and inviting. {{image_4}} You can swap chicken for tofu or shrimp. Both options work well in this dish. Tofu gives a nice texture and absorbs flavors. Shrimp cooks quickly and adds a sweet taste. For vegetables, feel free to get creative. You can use carrots, zucchini, or snap peas. These add color and crunch. Just make sure to cut them into similar sizes for even cooking. Do you like your curry mild or spicy? To keep it mild, use less red curry paste. You can also add a bit of coconut milk for creaminess. If you want it spicier, add more paste or include fresh chili peppers. Taste as you go. This way, you can find your perfect heat level. Coconut curry varies by region. Thai coconut curry is often sweeter and lighter. It uses ingredients like basil and lime. Indian coconut curry has a deeper flavor. It may include spices like cumin and coriander. You can mix and match these styles for a unique dish. Try adding your favorite spices or herbs to make it your own. Store your leftover Coconut Curry Chicken in an airtight container. It keeps well in the fridge for up to four days. When you reheat, warm it gently on low heat. Stir often to avoid burning. You can also microwave it for about two minutes. Just add a splash of water to keep it moist. If you want to save some for later, you can freeze the curry. Portion it into freezer-safe containers. It stays fresh for up to three months. When you’re ready to eat, thaw it overnight in the fridge. Reheat it on the stove or in the microwave until hot. Stir it well to ensure even heating. In the fridge, your Coconut Curry Chicken lasts about four days. Look for signs of spoilage, like a sour smell or discoloration. If it smells off or looks strange, don’t eat it. Always trust your senses to keep your meals safe and tasty. Yes, you can make Coconut Curry Chicken in advance. It tastes even better after the flavors blend. Just cook the dish as per the Full Recipe. Let it cool before storing. Use airtight containers for best results. Store it in the fridge for up to three days. Coconut Curry Chicken pairs well with many sides. Here are a few suggestions: - Steamed jasmine rice - Fluffy quinoa - Naan bread - Crispy spring rolls - Fresh salad with lime dressing These sides balance the rich flavors of the curry. Yes, this recipe is great for meal prep. To store, let the curry cool first. Then, divide it into individual portions. Use airtight containers for easy storage. It lasts in the fridge for about three days. To reheat, warm it gently on the stove or in the microwave. Stir well to ensure even heating. Yes, you can make Coconut Curry Chicken vegetarian. Substitute chicken with plant-based ingredients like tofu or chickpeas. Use the same cooking method and spices. This keeps the flavors rich and satisfying. You can also add more vegetables like cauliflower or carrots for extra nutrition. This blog post covered how to create a delicious Coconut Curry Chicken. You learned about the main ingredients, cooking steps, and variations to try. With tips for perfecting flavor and presentation, you can make this dish stand out. Remember, you can customize the recipe to fit your taste. Whether you keep it simple or add your twist, this curry will impress. Explore, experiment, and enjoy sharing your creation with others! Cooking can be fun and rewarding. Happy cooking!

Coconut Curry Chicken Simple and Flavorful Recipe

Are you ready to spice up your dinner routine? This Coconut Curry Chicken recipe is simple, flavorful, and guaranteed to

For a fresh and flavorful Peach Caprese Salad, gather these ingredients: - 3 ripe peaches, sliced into thin wedges - 1 cup fresh mozzarella balls (bocconcini) - 1 cup cherry tomatoes, halved - 1 cup fresh basil leaves, torn if large - 2 tablespoons balsamic glaze for drizzling - 1 tablespoon extra virgin olive oil - Salt and freshly cracked black pepper, to taste You can swap some ingredients based on what you have: - Use burrata instead of mozzarella for a creamier texture. - Try heirloom tomatoes, as they add color and taste. - If peaches are out of season, use nectarines or plums. - For a vegan option, skip the cheese and add avocado. To choose the best peaches, look for these signs: - Pick peaches that are slightly soft but not mushy. - Their skin should be smooth and fragrant. - Choose mozzarella balls that are moist and plump. - For tomatoes, look for bright colors and a firm feel. - Fresh basil should be vibrant green with no brown spots. Using fresh ingredients makes a big difference in taste. This Peach Caprese Salad will shine with the right produce. Check the [Full Recipe] for more details on making this dish. To start, gather your ingredients. You need three ripe peaches, one cup of fresh mozzarella balls, and one cup of halved cherry tomatoes. Also, have a cup of fresh basil leaves, balsamic glaze, and olive oil ready. Wash the peaches well. Slice them into thin wedges and set them on a plate. This will help keep them fresh and tasty. Now, take a large serving bowl or platter. Arrange the peach slices in a pretty circle. This makes a lovely base for your salad. Next, scatter the mozzarella balls and cherry tomatoes around the peaches. Mix them up to create a colorful look. Gently tuck fresh basil leaves between the peaches and mozzarella. This adds great flavor and aroma to your dish. Drizzle olive oil and balsamic glaze over the salad. Make sure each part gets some dressing. Sprinkle a bit of salt and cracked black pepper on top. This brings out the best flavors in your ingredients. Using your hands, toss the salad lightly. Be careful not to break the delicate peach slices. Let the salad sit for about five minutes. This allows the flavors to blend nicely. When ready to serve, use a large wooden board or a white platter for a stunning presentation. You can add extra basil leaves on top for a fresh touch. For the full recipe, check out the details above. To enhance flavors in your Peach Caprese Salad, think about pairing. The sweetness of peaches works well with creamy mozzarella. Cherry tomatoes add a bright, tangy bite. Fresh basil brings a herbal note that ties it all together. Don’t forget to drizzle balsamic glaze; it adds a rich sweetness. A sprinkle of salt helps to balance the flavors. Use freshly cracked black pepper for a little kick. Experiment with flavors to find your perfect mix! How you serve your salad matters! Start with a large white platter for a clean look. Arrange the peach slices in a circle, creating a lovely base. Scatter mozzarella balls and cherry tomatoes around the peaches. The colors should pop! Tuck fresh basil leaves throughout for a burst of green. Drizzle the olive oil and balsamic glaze just before serving. Garnish with extra basil for a final touch. This makes your dish look fresh and inviting! Pair your Peach Caprese Salad with a light white wine. A Sauvignon Blanc or a Pinot Grigio works well. These wines enhance the salad's flavors without overpowering them. For sides, consider grilled chicken or fish. Their savory taste complements the salad perfectly. You can also serve it with crusty bread for a hearty meal. Mix and match until you find your favorite pairing! Check the Full Recipe for more ideas. {{image_4}} You can change the flavors of your Peach Caprese Salad with the seasons. In summer, fresh peaches shine. In fall, try adding sliced apples or pears for crunch. In winter, consider roasted sweet potatoes for warmth. In spring, fresh strawberries can add a sweet touch. Each fruit brings its own twist, making the salad exciting year-round. This salad is already great for vegetarians. To make it vegan, swap mozzarella for vegan cheese. You can use cashew cheese or almond-based cheese. These options still give you that creamy texture. If you want a nutty flavor, try adding toasted pine nuts or walnuts. They add great crunch and taste without dairy. You can also give the salad a regional flair. For an Italian twist, add prosciutto or salami for a salty punch. If you want a Mexican vibe, try adding avocado and lime juice. You can swap the balsamic glaze for a spicy chili sauce for a kick. Each region's flavors can make your Peach Caprese Salad unique. Don’t forget to check the Full Recipe for more ideas! After enjoying your Peach Caprese Salad, store any leftovers in an airtight container. This will help keep your salad fresh longer. Make sure to place the salad in the fridge right away. It will stay good for about two days. To keep the salad fresh, store the dressing separately. Balsamic glaze and olive oil can make the salad soggy if mixed too early. When ready to eat, drizzle the dressing just before serving. Also, avoid cutting the peaches too early. Whole peaches stay fresh longer than cut ones. You don't need to reheat this salad. Peach Caprese is best served cold. If you find it too cold, let it sit at room temperature for a few minutes. This will help bring out the flavors. Enjoy your Peach Caprese Salad fresh to savor every bite! For the full recipe, check out the [Full Recipe]. To make Peach Caprese Salad, start with fresh peaches. Slice three ripe peaches into thin wedges. Next, take one cup of fresh mozzarella balls and one cup of halved cherry tomatoes. Arrange the peach slices on a large platter. Scatter the mozzarella balls and tomatoes around the peaches. Then, add torn fresh basil leaves throughout. Drizzle two tablespoons of balsamic glaze and one tablespoon of olive oil over the salad. Finally, season with salt and black pepper. Toss gently and let it rest for five minutes before serving. You can find the full recipe above. Yes, you can prepare this salad in advance, but keep a few things in mind. Slice the peaches just before serving to prevent browning. You can wash and halve the tomatoes and mozzarella ahead of time. Also, mix the dressing in advance. Combine the olive oil and balsamic glaze in a jar. Store each part separately in the fridge. Assemble the salad close to serving time for the best taste and texture. Balsamic glaze is a classic choice for Peach Caprese Salad. It adds sweetness and tang. You could also try a lemon vinaigrette for a zesty kick. A simple mix of olive oil, lemon juice, salt, and pepper can work well too. Experiment with your favorite dressings to find what you like best! Absolutely! Adding protein can make the salad more filling. Grilled chicken or shrimp complements the flavors nicely. For a vegetarian option, try adding chickpeas or sliced avocado. You could also include prosciutto for a savory twist. Be creative and adapt to your taste! Peach Caprese Salad is healthy and refreshing. Peaches are rich in vitamins A and C, which support your immune system. Mozzarella provides protein and calcium, good for bones. Fresh basil adds antioxidants, which help fight inflammation. This salad is low in calories and high in nutrients, making it a great choice for a healthy meal! This blog post shared simple ways to create a tasty Peach Caprese Salad. We covered essential ingredients, how to prep and serve them, and fresh tips for pairing and presentation. You also learned about different variations and how to store leftovers. Enjoy making this salad your own. Remember, fresh ingredients and a bit of creativity elevate flavors. Now, go ahead and impress your friends and family with a fresh peach twist!

Savory Peach Caprese Salad Fresh and Flavorful Dish

Summer brings fresh flavors, and nothing shines like a Peach Caprese Salad. This dish blends juicy peaches, creamy mozzarella, and

To make Lemon Herb Grilled Salmon, you need a few key items: - 4 salmon fillets (about 6 oz each) - 1/4 cup extra virgin olive oil - 3 tablespoons freshly squeezed lemon juice - 2 cloves garlic, finely minced - 1 tablespoon fresh dill, chopped - 1 tablespoon fresh parsley, chopped - 1 teaspoon dried oregano - Salt and freshly ground black pepper, to taste - Lemon wedges, for serving These ingredients work together to create a bright and zesty flavor that brings the salmon to life. The fresh herbs add a lovely aroma and taste. You can enhance the dish with these optional items: - 1 teaspoon lemon zest - 1 teaspoon honey for a touch of sweetness - 1/2 teaspoon red pepper flakes for heat - A splash of white wine for depth These extras can take your dish to another level. Each adds a unique twist that you might enjoy. When picking salmon, choose high-quality fillets. Look for: - Wild-caught salmon for the best flavor and nutrients - Freshness: bright color and no strong fishy smell - Sustainability: check for sources that follow eco-friendly practices Fresh, wild-caught salmon gives you the best taste and health benefits. It's worth the extra effort to find the right fish. For the full recipe, check out the [Full Recipe]. To start, gather your ingredients. You need olive oil, lemon juice, garlic, dill, parsley, oregano, salt, and pepper. In a small bowl, mix the olive oil, lemon juice, and minced garlic. Next, add the chopped dill, parsley, and oregano. Stir in a pinch of salt and pepper. Whisk everything together until well blended. This marinade will give the salmon a fresh and zesty flavor. Now it's time to marinate your salmon. Take four salmon fillets and place them in a resealable bag or a shallow dish. Pour the marinade over the salmon, making sure each fillet is well coated. Seal the bag tightly or cover the dish. Refrigerate for at least 30 minutes. For a deeper flavor, let it sit for up to 2 hours. This step is key to making the salmon taste great. Preheat your grill to medium-high heat. It must be hot enough to sear the salmon nicely. While the grill heats up, take a paper towel and dip it in oil. Lightly coat the grill grates with the oil to prevent sticking. Once the grill is ready, take the salmon out of the marinade. Let any extra marinade drip off. Place each fillet skin-side down on the grill. Grill for about 5-6 minutes without moving the salmon. This keeps those nice grill marks. After 5-6 minutes, gently flip the fillets using a spatula. Grill them for another 4-5 minutes. The salmon is done when it flakes easily with a fork. Once cooked, take the salmon off the grill and let it rest for a few minutes. This helps keep the fish tender. Now, your lemon herb grilled salmon is ready to serve. For the full recipe, check the earlier section. To grill salmon just right, follow these tips: - Preheat the grill to medium-high heat. This helps create a nice sear. - Oil the grill grates with a paper towel dipped in oil. This keeps the salmon from sticking. - Use skin-on fillets. The skin helps hold the fish together while cooking. - Don't flip too soon. Let the salmon cook undisturbed for 5-6 minutes. - Check for doneness by using a fork. It should flake easily when done. Here are some common mistakes when grilling salmon: - Skipping the marinade. It adds great flavor. Always marinate for at least 30 minutes. - Grilling cold salmon. Bring it to room temperature before grilling to cook evenly. - Overcooking the fish. Salmon can dry out quickly. Aim for an internal temp of 145°F. - Not resting the salmon. Let it rest for a few minutes after grilling. This helps keep it juicy. You can serve Lemon Herb Grilled Salmon in many tasty ways: - On a platter. Arrange the salmon with lemon wedges and fresh herbs for a colorful look. - With grilled veggies. Pair it with seasonal vegetables like zucchini or bell peppers. - On a bed of greens. Serve the salmon on a light salad for a refreshing meal. - With a side of rice or quinoa. This adds a nice texture and flavor to your meal. For the full recipe, check out the [Full Recipe]. Enjoy your cooking! {{image_4}} You can change the flavor of your lemon herb grilled salmon by trying different marinades. Here are some tasty ideas: - Soy Sauce Marinade: Replace the lemon juice with soy sauce for a savory twist. - Honey Mustard Marinade: Mix together honey, mustard, and olive oil for a sweet kick. - Spicy Marinade: Add hot sauce or chili flakes for a spicy kick. Each of these options offers a unique taste. Feel free to experiment! Pairing your grilled salmon with the right sides can enhance your meal. Here are some great choices: - Grilled Vegetables: Zucchini, bell peppers, and asparagus work well on the grill. - Rice Pilaf: A light rice dish adds nice texture and flavor. - Green Salad: A fresh salad with mixed greens and a light vinaigrette complements the fish. These sides create a balanced and delicious meal. If you don’t have fresh herbs, you can still make a great marinade. Here are some substitutes: - Dried Herbs: Use dried dill, parsley, and oregano. Use about one-third of the amount. - Herb Pastes: You can use herb pastes or sauces found in stores for flavor. - Spice Blends: Try a fish seasoning blend as a quick option. These substitutes keep the dish tasty and easy to prepare. You can find the Full Recipe for more details on how to make this dish. To keep leftover grilled salmon fresh, store it in an airtight container. Make sure to let it cool to room temperature first. This helps prevent moisture buildup. Place the salmon in the container and cover it tightly. It will stay good in the fridge for up to three days. If you plan to eat it later, consider freezing it. When you want to reheat your grilled salmon, do it gently. Preheat your oven to 275°F (135°C). Place the salmon on a baking sheet lined with parchment paper. Cover it with foil to keep it moist. Heat for about 15-20 minutes, or until warm. Alternatively, you can use the microwave. Place the salmon on a microwave-safe plate. Heat it for about 1 minute on low power. Check it and heat for another 30 seconds if needed. To freeze grilled salmon, wrap each piece tightly in plastic wrap. Then, place it in a freezer bag or container. Remove as much air as possible before sealing. This helps to prevent freezer burn. Grilled salmon can be frozen for up to three months. When ready to eat, thaw it in the fridge overnight. You can then reheat it using the tips above. For the full recipe, check out the Lemon Herb Grilled Salmon recipe. The best way to check if salmon is cooked is to look at its color and texture. Cooked salmon changes from a bright red to a lighter pink. It should also flake easily with a fork. If it still looks raw or is hard to flake, it needs more time. Use a food thermometer if you want to be sure. The safe internal temperature for salmon is 145°F. Yes, you can use frozen salmon for grilling. However, it’s best to thaw it first. Thawing helps the salmon cook evenly. You can thaw it in the fridge overnight or place it in cold water for faster results. Once thawed, you can marinate it just like fresh salmon. Follow the Full Recipe for best results! You should marinate salmon for at least 30 minutes. This allows the flavors to soak in. You can marinate it for up to 2 hours for a richer taste. Avoid marinating for too long, as the acid in the marinade can break down the fish and make it mushy. In this blog post, we explored how to make delicious lemon herb grilled salmon. We covered key and optional ingredients, while also discussing the best types of salmon. You learned step-by-step instructions for marinating and grilling, plus tips to avoid common mistakes. We shared variations and how to store leftovers effectively. Perfect your grilled salmon with these ideas for amazing flavor. Enjoy tasty meals with ease!

Lemon Herb Grilled Salmon Simple and Tasty Recipe

If you love simple, tasty meals, this Lemon Herb Grilled Salmon recipe is for you! I’ll show you how to

To make stuffed zucchini boats, you will need the following items: - 4 medium zucchini - 1 cup quinoa, rinsed and drained - 2 cups vegetable broth - 1 can (15 oz) black beans, drained and rinsed - 1 cup diced tomatoes (fresh or canned) - 1 small red onion, finely chopped - 1 red bell pepper, diced - 2 cloves garlic, minced - 1 teaspoon ground cumin - 1 teaspoon chili powder - 1/2 teaspoon smoked paprika - Salt and pepper, to taste - 1 cup shredded cheese (cheddar or a Mexican blend) - Fresh cilantro, for garnish - 1 tablespoon olive oil Each serving of stuffed zucchini boats offers a balanced meal. It includes protein from quinoa and beans. Zucchini adds fiber and vitamins. The cheese provides calcium, while the veggies bring extra nutrients. Here’s a quick breakdown per serving: - Calories: Approximately 300 - Protein: 12g - Carbohydrates: 40g - Fiber: 8g - Fats: 10g You can easily adjust this recipe to fit your taste or dietary needs. Here are some ideas: - Swap quinoa with brown rice or farro for a different grain. - Use lentils instead of black beans for added protein and fiber. - Try a different cheese, like feta or goat cheese, for a tangy twist. - Replace red bell pepper with green or yellow for a color change. - If you want a vegan option, skip the cheese or use a plant-based alternative. For a full recipe, you can refer to the Zesty Quinoa and Black Bean Stuffed Zucchini Boats. 1. Preheat the Oven: Start by preheating your oven to 375°F (190°C). This helps ensure even cooking. 2. Prepare the Zucchini: Slice each zucchini in half lengthwise. Use a spoon to scoop out the inner flesh. Leave a little border for the “boats.” Set aside the scooped zucchini flesh for later. 3. Sauté Vegetables: In a medium saucepan, heat one tablespoon of olive oil over medium heat. Add the chopped red onion and diced red bell pepper. Sauté for 5 minutes until tender. 4. Combine Seasonings: Stir in the reserved zucchini flesh, cumin, chili powder, smoked paprika, salt, and pepper. Cook for another 3 minutes, mixing well. 5. Cook Quinoa: Add the rinsed quinoa and vegetable broth to the pan. Bring to a boil, then lower the heat. Cover and let it simmer for 15 minutes until the quinoa is fluffy. 6. Mix in Beans and Tomatoes: Remove from heat and fold in the black beans and diced tomatoes. Taste the mixture and adjust seasoning if needed. 7. Stuff the Zucchini: Line a baking sheet with parchment paper. Place the zucchini boats cut side up on the sheet. Fill each boat with the quinoa mixture. Press down slightly to pack it well. 8. Add Cheese: Sprinkle shredded cheese over each stuffed zucchini boat. Make sure they are well-covered for a melty finish. 9. Bake: Put the baking sheet in the preheated oven. Bake for 20-25 minutes. The zucchini will be tender, and the cheese will melt and bubble. 10. Cool and Garnish: Take the zucchini boats out of the oven. Let them cool for a few minutes. Before serving, sprinkle fresh cilantro on top for flavor. - Cut Zucchini Evenly: Make sure to slice the zucchini evenly. This helps them cook at the same rate. - Pack Filling Firmly: When stuffing the boats, pack the filling firmly. This ensures they hold together well during baking. - Rotate the Baking Sheet: Halfway through baking, rotate the baking sheet. This helps promote even cooking and browning. This simple recipe for stuffed zucchini boats gives you a flavorful and healthy meal. Check the full recipe for more details! To get the best zucchini boats, choose medium-sized zucchinis. They are easier to scoop and fill. Slice them in half lengthwise. Use a small spoon to remove the soft flesh, leaving enough around the edge for support. This keeps them sturdy. Next, do not overcook the zucchini. Bake them just until soft, about 20-25 minutes. This helps keep their shape and bright color. Also, preheat your oven to 375°F (190°C) before baking. A hot oven cooks everything evenly. Seasoning is key in stuffed zucchini boats. Use spices like cumin and chili powder for warmth. Smoked paprika adds a nice touch, giving a hint of smoke. Taste your filling before stuffing. Adjust salt and pepper to suit your taste. Fresh herbs like cilantro make a big difference. They add color and a burst of flavor. You can also add a squeeze of lime juice before serving. It brightens the dish and balances the flavors. One common mistake is not scooping enough zucchini flesh. Leave too much, and your filling won’t fit. Another mistake is overcooking the zucchini. They should be tender but not mushy. Don’t skip the cheese on top! It creates a nice melty layer that makes the dish appealing. Lastly, remember to let the stuffed zucchini cool for a few minutes before serving. This helps the filling set and makes them easier to eat. With these tips, you will create perfect stuffed zucchini boats every time. For the full recipe, check out the Zesty Quinoa and Black Bean Stuffed Zucchini Boats. {{image_4}} You can fill zucchini boats with many tasty options. Here are a few ideas: - Ground Meat: Use beef or turkey for a hearty meal. - Rice Mixtures: Combine rice with beans or veggies for a filling dish. - Seafood: Try shrimp or crab for a fresh touch. - Cheesy Blends: Mix cream cheese with spinach for a rich filling. These choices let you customize your boats based on your mood or what you have at home. Making stuffed zucchini vegan or gluten-free is easy. Here are some tips: - Vegan: Substitute cheese with vegan cheese or nutritional yeast. Use lentils or chickpeas instead of meat. - Gluten-Free: Ensure quinoa and all canned goods are labeled gluten-free. Skip any bread crumbs or wheat-based fillers. These swaps keep your meal light but full of flavor. Toppings can elevate your stuffed zucchini boats. Consider these fun ideas: - Fresh Herbs: Add basil or parsley for a fresh burst. - Avocado: Top with slices of avocado for creaminess. - Hot Sauce: A drizzle of hot sauce can give it a spicy kick. - Nuts and Seeds: Sprinkle pumpkin seeds or walnuts for crunch. These toppings can add texture and flavor that make each bite exciting. For a full recipe to try, check out the zesty quinoa and black bean stuffed zucchini boats. Store your leftover stuffed zucchini in an airtight container. Place them in the fridge, where they will last for about 3 to 5 days. Make sure to let them cool down before sealing the container. This helps keep them fresh and prevents moisture buildup. To reheat your stuffed zucchini, preheat your oven to 350°F (175°C). Place the zucchini boats on a baking sheet and cover them with foil. Bake for about 15 to 20 minutes, or until heated through. You can also use a microwave. Just place one or two boats on a plate and heat for about 1 to 2 minutes. If you want to freeze stuffed zucchini, first let them cool completely. Wrap each boat tightly in plastic wrap or foil. Then, place them in a freezer-safe bag. They can last for up to 3 months in the freezer. When you're ready to eat, thaw them in the fridge overnight. Reheat as mentioned above. This way, you’ll enjoy a delicious meal even later! For the full recipe, check out the Zesty Quinoa and Black Bean Stuffed Zucchini Boats. It takes about 20 to 25 minutes to cook stuffed zucchini boats in the oven. Preheat your oven to 375°F (190°C) before placing them inside. This ensures they bake evenly. The zucchini should be tender, and the cheese should melt nicely. Yes, you can prepare stuffed zucchini ahead of time. You can make the filling a day early and store it in the fridge. When you are ready to bake, stuff the zucchini and place them in the oven. This saves you time on busy days. Stuffed zucchini boats pair well with many sides. Here are a few ideas: - A fresh garden salad - Steamed vegetables like broccoli or green beans - Quinoa or rice pilaf - Garlic bread or crusty rolls - A light soup, such as tomato or minestrone These options will round out your meal, making it hearty and satisfying. For more details, check the Full Recipe. Stuffed zucchini boats are tasty, healthy, and easy to make. We covered the key ingredients needed, shared nutritional facts, and offered substitutions. You learned clear steps for preparation and cooking, plus tips for even results. We discussed techniques, seasoning options, and mistakes to avoid for perfect dishes. Variations let you explore different fillings and toppings, including vegan choices. Lastly, we highlighted storage methods for leftovers and reheating tips. Remember, stuffed zucchini can fit many diets and please various tastes. With these ideas, you can create amazing meals that everyone will love.

Stuffed Zucchini Boats Flavorful and Healthy Meal

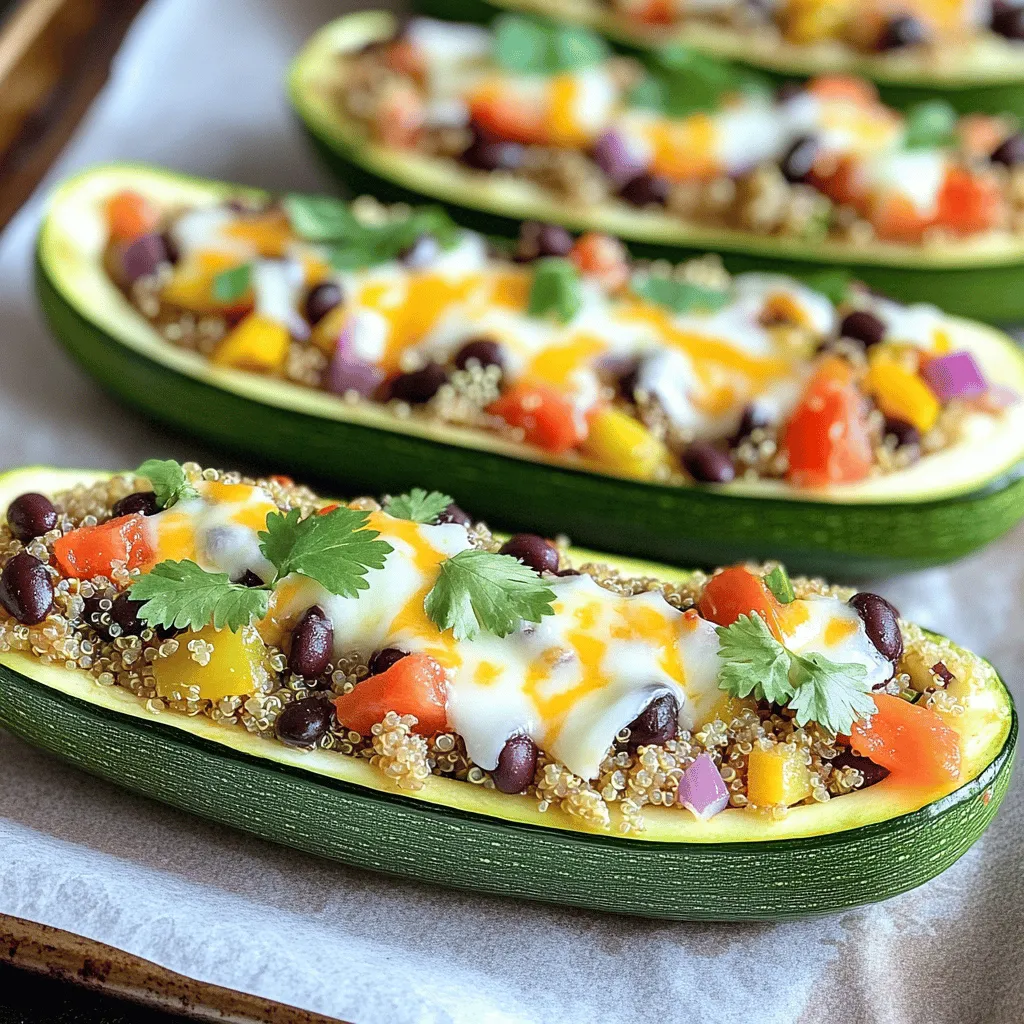
Want a meal that’s both tasty and healthy? Stuffed zucchini boats might be your new favorite! These flavorful delights pack

Here’s what you need to make a tasty Peanut Butter Banana Smoothie: - 2 ripe bananas - 2 tablespoons peanut butter - 1 cup almond milk (or preferred milk variety) - 1 tablespoon honey or maple syrup (optional) - 1/2 cup Greek yogurt - 1/4 teaspoon pure vanilla extract - 1 tablespoon chia seeds (optional) - Ice cubes (optional) Each ingredient plays a special role. The ripe bananas bring natural sweetness and creaminess. Peanut butter adds a rich, nutty flavor. Almond milk keeps it light and smooth. Greek yogurt enhances the creaminess and adds protein. Pure vanilla extract gives a lovely aroma. Chia seeds boost nutrition, while ice cubes chill the drink. You can find the full recipe for this delightful smoothie to enjoy. Mix and match these ingredients to suit your taste! - Start by peeling the ripe bananas. Break them into chunks. - Place the banana chunks into your blender. - Now, add the peanut butter, almond milk, Greek yogurt, and vanilla extract. This creates a creamy base. - If you want a sweeter smoothie, include honey or maple syrup to taste. - For a health boost, add chia seeds to the mix. - Blend all ingredients together on high speed. Your goal is a smooth and creamy texture. - If you like it chilled, throw in some ice cubes. Blend again until the mix is cold. - After blending, taste your smoothie. If it needs more sweetness, add more honey or maple syrup. Blend briefly to mix. Enjoy your Peanut Butter Banana Bliss Smoothie! For the full recipe, check out the complete instructions above. To create an amazing peanut butter banana smoothie, start with ripe bananas. Ripe bananas have natural sweetness that makes your smoothie taste great. You can choose between smooth or crunchy peanut butter based on what you like. Smooth peanut butter gives a creamy texture, while crunchy adds fun bites. If your smoothie is too thick, just add more milk. This helps you reach your preferred consistency. Serving matters! Present your smoothie in tall glasses to make it look fancy. A sprinkle of chia seeds on top can add a nice touch. For extra flair, add a slice of banana on the rim of each glass. You could also drizzle some peanut butter on top for decoration. This makes your drink look as good as it tastes! {{image_4}} You can switch things up to create new flavors in your Peanut Butter Banana Smoothie. Here are some fun ideas: - Coconut milk: Use coconut milk instead of almond milk. It adds a tropical flavor that is refreshing and sweet. - Greens: Toss in a handful of spinach or kale. It boosts nutrients without changing the taste much. - Flavored yogurt: Try using flavored Greek yogurt. It gives extra taste and creaminess to your smoothie. If you have dietary needs, you can easily adjust this recipe: - Vegan option: Skip the Greek yogurt to make it vegan. The smoothie will still be creamy and tasty. - Nut-free choice: Swap peanut butter for almond or sunflower seed butter. This change keeps the flavor delicious without nuts. After making your Peanut Butter Banana Smoothie, store leftovers in an airtight container in the fridge. This keeps your smoothie fresh and tasty. For the best flavor and texture, try to drink it within 24 hours. It will taste best when it's still creamy and cold. If you want to save some for later, you can freeze portions of your smoothie. Just pour the smoothie into ice cube trays or small containers. When you're ready to enjoy it, blend the frozen portions. This gives you a thicker smoothie texture, perfect for a hot day. Plus, it's a great way to enjoy a quick treat! What are the health benefits of a Peanut Butter Banana Smoothie? This smoothie is packed with nutrients. Bananas provide potassium, which is great for your heart. Peanut butter offers healthy fats and protein, which help keep you full. Greek yogurt adds calcium and probiotics for gut health. Together, they make a balanced snack or meal. Can I make this smoothie ahead of time? Yes, you can. Just blend all the ingredients and store the smoothie in the fridge. It stays fresh for up to 24 hours. If it thickens, just stir in a bit of milk before drinking. What’s the best way to sweeten the smoothie? I recommend using honey or maple syrup. Start with a small amount and taste as you go. If your bananas are ripe, you may not need any extra sweetener. Is it okay to use frozen bananas for this recipe? Absolutely! Frozen bananas make the smoothie extra creamy and cold. Just peel and slice your bananas before freezing. They will blend well and give you a nice texture. For the full recipe, check out Peanut Butter Banana Bliss Smoothie. This blog post covered creating a delicious Peanut Butter Banana Smoothie. We explored the perfect ingredients, step-by-step preparation, and tips for a great taste. You learned how to customize the recipe to fit your needs and how to store leftovers. In conclusion, this smoothie is an easy and tasty option for a snack or breakfast. Try making it your own with different ingredients! Enjoy your smooth and creamy creation.

Peanut Butter Banana Smoothie Creamy and Delicious Treat

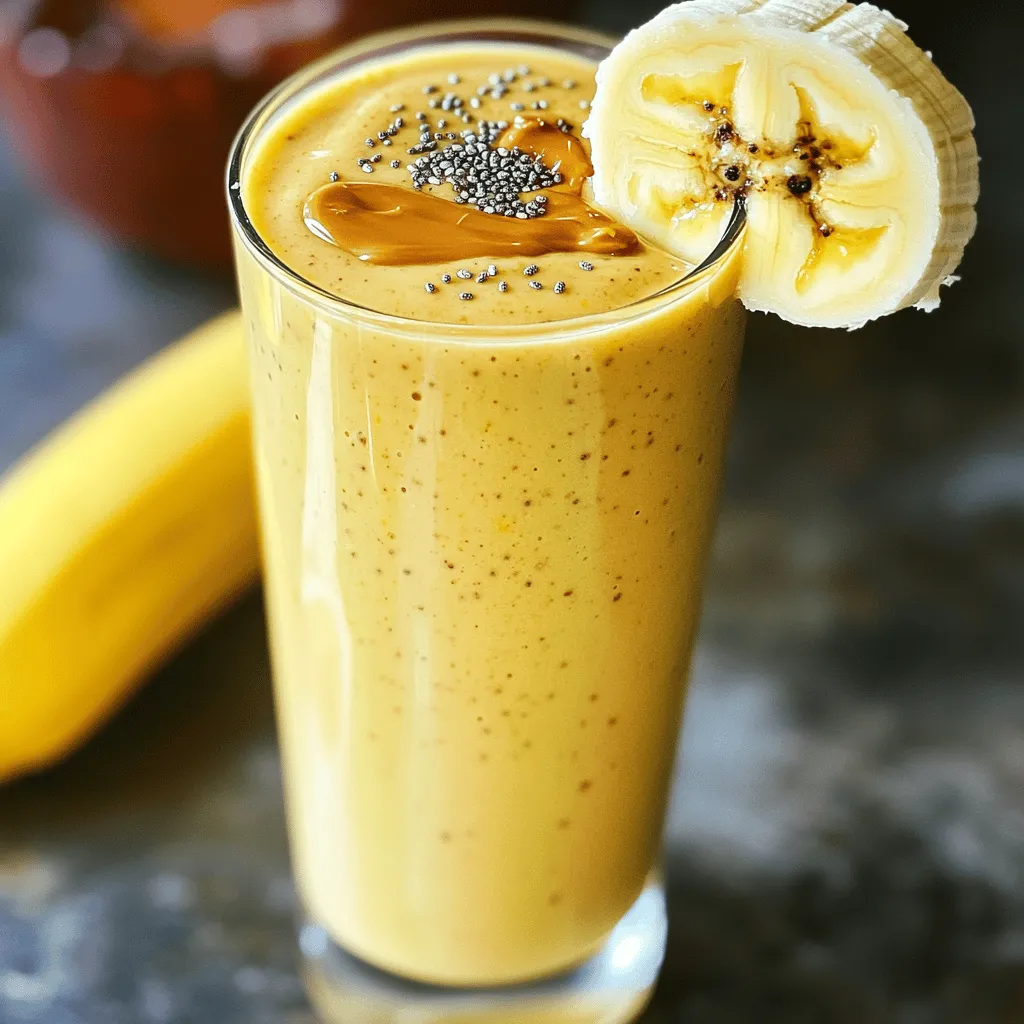
Looking for a tasty and healthy treat? The Peanut Butter Banana Smoothie is both creamy and delicious! This smoothie packs

To make perfect chocolate dipped strawberries, gather these key ingredients: - 1 pound fresh strawberries, thoroughly rinsed and gently dried - 8 ounces dark chocolate (preferably 70% cocoa for richness) - 4 ounces white chocolate (for elegant drizzling) - 1 tablespoon coconut oil (optional, for enhanced smoothness of chocolate) - A sprinkling of sea salt (for a savory contrast) - Parchment paper (to facilitate easy cooling) These ingredients ensure that your strawberries taste amazing and look stunning. If you can't find fresh strawberries, several great options exist. You can use: - Raspberries: They offer a tart flavor that pairs well with chocolate. - Bananas: Cut them into bite-sized pieces for a sweet treat. - Pineapple: Fresh pineapple chunks dipped in chocolate can be a tropical twist. These substitutions still create a fun and tasty experience. When selecting chocolate, consider your flavor preference. Dark chocolate has a rich taste and pairs well with strawberries. It also has health benefits due to its higher cocoa content. White chocolate, on the other hand, is sweet and creamy. It adds a nice contrast when drizzled over dark chocolate. For the best results, use a mix of both. This combination gives a balance of flavors and makes your strawberries look even more appealing. Start with fresh strawberries. Rinse them well under cool water. Then, gently pat them dry with a clean kitchen towel. It’s key to dry them fully. Any leftover moisture can make the chocolate slide off. Don’t skip this step! Use a microwave-safe bowl to melt dark chocolate. Chop it into small pieces for even melting. Add coconut oil if you want a smoother texture. Microwave in 30-second bursts. Stir after each burst until smooth. You can also use a double boiler on the stove. Just let the chocolate melt gently over simmering water. Hold each strawberry by the green stem. Dip it into the melted chocolate, covering about two-thirds of the berry. Let the extra chocolate drip back into the bowl. This helps keep your coating smooth. Place the dipped strawberries on parchment paper. Repeat until all are coated. For a complete guide, check the Full Recipe. To get a smooth coat on your strawberries, use the right chocolate. Dark chocolate with 70% cocoa melts well and gives a rich taste. Always melt your chocolate slowly. Use a microwave or a double boiler. If using a microwave, heat it in short bursts. Stir after each burst to avoid burning. Adding coconut oil can help make the chocolate extra smooth. This tip is key for your success. When you drizzle white chocolate, make sure it’s fully melted. Use a fork or a piping bag for control. Start from the top of the strawberry and let the chocolate flow down. This method creates a beautiful design. You can also make fun patterns. Experiment with different styles to make your strawberries unique. For serving, place your chocolate-dipped strawberries on a nice platter. Arrange them in a fun pattern to catch the eye. You can also use cupcake liners to make them look fancy. This adds a cute touch for parties or gifts. For a pop of color, try adding fresh mint leaves around the platter. This simple idea enhances the overall look and makes your treat even more tempting. {{image_4}} You can enhance your chocolate-dipped strawberries with extracts or liqueurs. A few drops of vanilla or almond extract can add depth to the chocolate flavor. If you want a kick, consider using orange liqueur or raspberry liqueur. Just mix these into the melted chocolate before dipping. This slight twist gives your treat a unique flavor that impresses everyone. Toppings can take your chocolate-dipped strawberries to the next level. Use crushed nuts like almonds or pistachios for a crunchy texture. Colorful sprinkles can make them fun and festive, perfect for kids' parties. Shredded coconut adds a tropical touch. Simply sprinkle your choices on top of the chocolate while it's still warm. This not only looks great but also adds more taste. You can make chocolate-dipped strawberries fit any holiday theme. For the Fourth of July, use red strawberries, white chocolate, and blue sprinkles. This simple idea makes your dessert festive and fun. For Halloween, try using dark chocolate and add orange sprinkles or edible glitter. Adapting your strawberries for seasons makes them special for any celebration. To keep your chocolate dipped strawberries fresh, store them in the fridge. Place them in a single layer on a plate or a baking sheet lined with parchment paper. Cover the strawberries lightly with plastic wrap. This will protect them from odors and moisture. Avoid stacking them, as this can cause the chocolate to get damaged. Chocolate dipped strawberries will stay fresh for about 1 to 2 days in the fridge. The chocolate may soften after a day, but the flavor remains. Always check for any signs of spoilage before eating. Strawberries can spoil quickly, so enjoy them soon after making them! Freezing chocolate dipped strawberries is not ideal. The texture may change when thawed. However, if you must freeze them, place them on a baking sheet to freeze individually first. Once frozen, transfer them to an airtight container. They can last for about a month in the freezer. When ready to eat, let them thaw in the fridge to minimize moisture. For best results, enjoy them fresh! Yes, you can use milk chocolate. Milk chocolate will give a sweeter taste. It melts well too. Just remember, it will not have the rich flavor of dark chocolate. If you love milk chocolate, go for it! If your chocolate is thick, add a bit of coconut oil. Start with a teaspoon and mix it in. This will help the chocolate become smooth again. You can also microwave it in short bursts. Stir well after each time. Lumpy chocolate means it may have overheated. Add a little bit of vegetable oil to the mix. Stir it in slowly. This should help smooth out the lumps. If it stays lumpy, try using a new bowl and melt it again gently. - Where can I buy pre-made chocolate dipped strawberries? You can find pre-made chocolate dipped strawberries at many grocery stores and bakeries. Look in the fresh fruit or dessert section. Some online shops also offer them, making it easy to order. - Can I make these strawberries ahead of time? Yes, you can make chocolate dipped strawberries ahead of time. Store them in the fridge for up to two days. Just keep them in an airtight container to keep them fresh. - What occasions are perfect for serving chocolate dipped strawberries? Chocolate dipped strawberries are great for many occasions. They are perfect for birthdays, anniversaries, and holidays. You can also serve them at parties or as a sweet treat for date night. They always impress! Chocolate dipped strawberries are an easy and fun treat. We covered key ingredients, melting techniques, and tips for the perfect dip. You can change flavors and toppings to fit any event. Remember to store them right for the best taste. With these steps, anyone can create a great snack. Now, go ahead and enjoy making your own delicious chocolate dipped strawberries!

Chocolate Dipped Strawberries Irresistible Treat Recipe

Do you want a delicious treat that impresses everyone? Chocolate dipped strawberries are easy to make and look stunning. This

- 1 large head of cauliflower - 1 cup all-purpose flour - 1 cup unsweetened almond milk - 1 cup buffalo sauce - Garlic powder, onion powder, smoked paprika - Salt and black pepper - Melted vegan butter (optional) - Fresh parsley for garnish - Celery sticks - Ranch or blue cheese dressing I love how simple these ingredients are. You just need a large head of cauliflower. This is the star of the dish. The batter needs flour and almond milk. This mix makes the cauliflower crispy. You can also use regular milk if you prefer. Next, we add buffalo sauce. This sauce gives the bites their classic spicy flavor. For the best taste, I recommend a good quality sauce. Now, let’s talk about the seasonings. Garlic powder, onion powder, and smoked paprika add depth to the flavor. Don’t forget salt and black pepper to enhance everything. If you want a richer taste, melted vegan butter is a great choice. For a fresh touch, I like to add chopped parsley as a garnish. It adds color and a little freshness. When serving, crunchy celery sticks are a must. They balance the heat of the buffalo sauce. Pair your bites with ranch or blue cheese dressing for dipping. These bites are not just tasty; they are also fun to eat! For the full recipe, check out the section above. - Preheat oven to 450°F (230°C). - Prepare a baking sheet with parchment paper. - In a large bowl, whisk together the flour, almond milk, garlic powder, onion powder, smoked paprika, salt, and black pepper. Mix until smooth to create a thick batter. - Dip each cauliflower floret into the batter. Make sure it is fully coated. Let any extra batter drip off. - Arrange the coated florets on the baking sheet. Space them out so they are not crowded. - Bake for 20-25 minutes. Turn them halfway through cooking to ensure even crisping. - In a separate bowl, combine buffalo sauce with melted vegan butter if you want. Mix well to blend the flavors. - Once the cauliflower is baked, toss the hot bites in the buffalo sauce until they are well covered. - Return the coated cauliflower bites to the oven. Bake for an additional 10-15 minutes. This will make them extra crispy. - Once done, take them out and let them cool for a minute. Garnish with chopped parsley before serving. For the full recipe, check out the complete guide! To get the best crispiness from your Buffalo Cauliflower Bites, properly space the florets on the baking sheet. If they are too close, they will steam instead of crisp up. I always use parchment paper for easy cleanup and to prevent sticking. This way, the bites come off easily and stay crispy. Adjusting the spice levels in your buffalo sauce can make a big difference. If you prefer it milder, mix in some honey or maple syrup. For extra heat, add more hot sauce or a pinch of cayenne pepper. Another great tip is to marinate the cauliflower in the buffalo sauce before baking. This helps the florets absorb more flavor, making every bite delicious. When serving, I like to set up a large platter. Arrange the buffalo cauliflower bites neatly and add crunchy celery sticks for color. A small bowl of ranch or blue cheese dressing for dipping makes it fun. To finish, sprinkle some fresh chopped parsley on top. This adds a nice pop of green and makes the dish look inviting. {{image_4}} You can change the batter to fit your needs. If you want a gluten-free option, try chickpea flour instead of all-purpose flour. Chickpea flour adds a nice nutty taste and works great. For a different texture, use plant-based milks like soy or oat milk. Each milk will add its own flavor. This way, you can customize the bites to fit your diet. Want to kick up the heat? Use a spicy buffalo sauce. You can find many brands at the store, or make your own at home. Another fun option is to add nutritional yeast. It gives a cheesy flavor that pairs well with the spicy sauce. This option is great for vegan diets and adds a nice depth to the dish. Buffalo cauliflower bites make a great snack or appetizer. Pair them with crunchy celery sticks for a fresh touch. You can also serve a small bowl of ranch or blue cheese dressing for dipping. This adds creaminess and balances the heat. If you want a full meal, try serving them with a side salad or sweet potato fries. These sides complement the flavors and make your meal more complete. Check out the Full Recipe for more ideas on how to enjoy this dish! To keep your buffalo cauliflower bites fresh, place them in an airtight container. This helps prevent them from getting soggy. You can use glass or plastic containers with tight lids. If you want to maintain their crispiness, try placing a paper towel at the bottom of the container. This absorbs extra moisture. When reheating, the oven is the best choice. Preheat your oven to 350°F (175°C). Spread the bites on a baking sheet. Heat them for about 10-15 minutes. This keeps them crispy and tasty. Avoid the microwave if you can. It can make them soft and chewy. If you must use it, heat in short bursts. Check every 30 seconds to avoid overcooking. You can freeze buffalo cauliflower bites for later. Let them cool completely first. Then, place them in a freezer-safe bag. Squeeze out excess air before sealing. They will stay good for about 1-2 months. For the best flavor and texture, use them within that time. When you're ready to eat, just bake them directly from frozen. Add a few extra minutes to the cooking time. To add more heat, use extra buffalo sauce. You can also try hot sauce. Mixing cayenne pepper into the batter is another option. Adjusting the spiciness is simple. Start with small amounts and taste as you go. Yes, you can prep them in advance. Cut the cauliflower and mix the batter ahead of time. Store them in the fridge for up to a day. When ready to cook, just dip the florets and bake them. They will still taste fresh and delicious. Buffalo cauliflower bites pair well with many drinks. Try some cold beer or a refreshing soda. For appetizers, serve with celery sticks and carrot sticks. You can also add a bowl of ranch or blue cheese dressing for dipping. This combo brings a perfect balance to the meal. Buffalo cauliflower bites are a great snack. They have fewer calories than traditional buffalo wings. Cauliflower is high in vitamins and fiber. It's also low in carbs, making it a smart choice. When you use almond milk and skip excess butter, you keep them light. Overall, they fit well in a healthy diet. Buffalo Cauliflower Bites are a fun and tasty dish to make. We covered simple ingredients, step-by-step instructions, and helpful tips. You can easily adjust flavors and heat levels to fit your taste. Whether you serve them as a snack or side dish, they are sure to impress. Don’t forget to try different variations and keep some for later. Enjoying healthy food can be easy and delicious!

Buffalo Cauliflower Bites Flavorful and Easy Recipe

Looking for a flavorful snack that’s easy to make? These Buffalo Cauliflower Bites are just what you need! With just

Older posts
Newer posts
← Previous Page1 … Page68 Page69 Page70 … Page74 Next →

dsad

© 2025 lazychefmagic • Built with GeneratePress

Our Policies

  • Copyright Policy
  • Cookie Policy
  • GDPR Policy
  • Privacy Policy
  • Disclaimer
  • Terms Of Use

More Information

  • Home
  • About
  • Contact
  • Appetizers
  • Dessert
  • Dinner
  • Drinks
©2025, lazychefmagic About Back To Top