![- 1 pound large shrimp, peeled and deveined - 3 tablespoons extra virgin olive oil - Zest and juice of 2 limes The main ingredients create a bright and fresh flavor. The large shrimp make this dish filling. Olive oil adds richness, while lime brings a zesty punch. You can use fresh or bottled lime juice. - 2 cloves garlic, finely minced - 1 teaspoon smoked paprika - 1 teaspoon ground cumin - 1 teaspoon chili powder - Salt and freshly ground black pepper, to taste These spices add depth and warmth. Garlic enhances the savory notes. Smoked paprika gives a nice smoky touch. Cumin adds an earthy flavor. Chili powder brings just the right amount of heat. Adjust salt and pepper to your taste. - A handful of fresh cilantro, chopped - Lime wedges, for serving Fresh cilantro adds a burst of color and freshness. Lime wedges are perfect for squeezing over the shrimp. They enhance the zesty flavor. Serve the shrimp on a platter for a beautiful presentation. For the full recipe, check the section above. - Whisk together marinade ingredients. - Coat shrimp in the marinade. - Refrigerate for at least 30 minutes. Start by mixing the marinade. In a bowl, combine olive oil, lime zest, lime juice, minced garlic, smoked paprika, cumin, chili powder, salt, and black pepper. Whisk these until they blend well. This mix brings out bright and zesty flavors. Next, add your peeled and deveined shrimp. Make sure each shrimp gets coated with the marinade. Cover the bowl with plastic wrap or a lid. Place it in the fridge for at least 30 minutes. This step is key, as it allows the shrimp to soak up all those delicious flavors. - Preheat grill to medium-high heat. - Soak wooden skewers in water. Before grilling, heat your grill to medium-high. This helps to get those perfect grill marks and a nice char. If you use wooden skewers, soak them in water for about 15 minutes. This helps prevent burning and keeps your shrimp safe. - Skewer marinated shrimp. - Grill for 2-3 minutes on each side. - Check for doneness: pink and opaque. Now, it’s time to skewer your shrimp. Thread them onto the soaked skewers, leaving a little space between each one. This ensures even cooking. Place the skewers on the grill. Grill each side for about 2-3 minutes. Look for the shrimp to turn pink and opaque. Don’t overcook them! Overcooked shrimp can become tough and chewy. Once they’re done, carefully take them off the grill. Let them rest for a minute. Garnish with chopped cilantro and serve with lime wedges. For the full recipe, check the original instructions. To get great shrimp, avoid overcooking. Cook them until they turn pink and opaque. This takes about 2-3 minutes on each side. If you cook them too long, they will become tough. Always use fresh lime juice. It gives the shrimp a bright and zesty flavor, making them taste fresh and vibrant. Bottled lime juice lacks the same punch. For a beautiful dish, arrange the grilled shrimp on a serving platter. This makes the dish look inviting. Garnish with chopped cilantro and lime wedges to add color. Fresh herbs always make food pop. The lime will also give your guests an extra splash of flavor. These shrimp shine when served with grilled vegetables or a fresh salad. The cool veggies balance the zesty shrimp. You might also consider rice or quinoa for a complete meal. Both add a nice texture and help soak up the shrimp's juicy flavor. For the full recipe, check out the detailed steps above. {{image_4}} You can add extra spice to your shrimp by using cayenne. This will give the dish a nice kick. If you prefer a milder flavor, try using dried oregano. It adds an earthy taste that complements shrimp well. For a colorful twist, add chopped bell peppers or onions to your skewers. These veggies not only look great but also add sweetness. You can also swap shrimp for chicken or tofu. Both will soak up the zesty lime flavor too. If you don't have a grill, don't worry! You can use an oven broiler instead. Just spread the skewers on a baking sheet and broil for a few minutes. Another option is to cook the shrimp in a pan on the stovetop. This gives you a quick and easy way to enjoy your Zesty Lime Grilled Shrimp. For the full recipe, check out the main section! After enjoying your zesty lime grilled shrimp, you need to store leftovers properly. Refrigerate leftover grilled shrimp within 2 hours of cooking. Use an airtight container to keep them fresh. This way, they stay tasty for up to 3 days. Want to save some shrimp for later? You can freeze the marinated uncooked shrimp. This is a great way to have a quick meal ready. Just remember to thaw them in the refrigerator before grilling. This keeps the taste fresh and delicious. When it's time to eat your leftovers, reheating is key. The best way is in a skillet or oven. This method keeps the shrimp tender. Avoid using the microwave, as it can make them rubbery. Enjoy your flavorful meal again without losing quality! For the full recipe, check out [Full Recipe]. Look for shrimp to be pink and opaque, firm to the touch. Cook them for 2-3 minutes on each side. If they curl tightly, they may be overcooked. Yes, just ensure they are thawed before marinating. Thaw shrimp overnight in the fridge or quickly under cold water. This step helps the shrimp absorb the marinade well. Consider options like roasted vegetables, rice, or a fresh salad. You can also serve them in tacos or on a bed of greens. Each option adds a nice touch to your meal. Yes, prepare the marinade a day in advance for enhanced flavor. This gives the spices more time to blend and develop a richer taste. Just keep it in the fridge until you’re ready to use it. For a detailed recipe, check out the Full Recipe for Zesty Lime Grilled Shrimp. Zesty Lime Grilled Shrimp is easy and fun to make. You learned about the key ingredients, like shrimp, lime, and spices. I shared steps on marinating, grilling, and serving. Remember to avoid overcooking for that tender bite. Feel free to try new spices or even other proteins. With leftover tips, you can enjoy this dish anytime. I hope you feel inspired to fire up the grill. Delicious meals like this bring joy to the table!](https://lazychefmagic.com/wp-content/uploads/2025/04/75a65dc1-5525-4ee1-abe8-cbaaf63642a5.webp)
Zesty Lime Grilled Shrimp Flavorful Summer Delight
Get ready to savor summer with my Zesty Lime Grilled Shrimp! This vibrant dish bursts with flavor, making your taste
Get ready to savor summer with my Zesty Lime Grilled Shrimp! This vibrant dish bursts with flavor, making your taste
![- 2 cups rolled oats - 1 cup pecans, roughly chopped - 1/2 cup nut butter (suggestions: almond butter, peanut butter) - 1/3 cup pure maple syrup - 1/4 cup honey or agave syrup - 1/2 teaspoon vanilla extract - 1/2 teaspoon ground cinnamon - 1/4 teaspoon sea salt - Optional add-ins: dried cranberries, mini dark chocolate chips These ingredients create a tasty and wholesome snack. Rolled oats form the base, giving each bar a hearty texture. Pecans add crunch and a rich flavor. Nut butter binds everything together, making it chewy. I suggest using pure maple syrup for its natural sweetness. Honey or agave syrup works well if you prefer. Vanilla extract brings warmth to the bars, while ground cinnamon adds a cozy spice. A pinch of sea salt enhances all the flavors. For a fun twist, consider adding dried cranberries or mini dark chocolate chips. These optional ingredients can change the taste and texture to your liking. You can find the full recipe in the article above, which guides you through the process step by step. Enjoy making these delicious Maple Pecan Granola Bars! - Preheat the oven to 350°F (175°C). - Prepare and line an 8x8 inch baking pan with parchment paper. This helps you remove the bars easily after baking. - Mix 2 cups of rolled oats and 1 cup of chopped pecans on a baking sheet. - Toast them for 10 minutes. Be sure to stir halfway for even browning. - Combine 1/2 cup almond butter, 1/3 cup maple syrup, 1/4 cup honey, 1/2 teaspoon vanilla extract, 1/2 teaspoon ground cinnamon, and 1/4 teaspoon sea salt in a saucepan over low heat. - Stir until the mixture is smooth and well combined. - Mix the toasted oats and pecans with the wet ingredients in a large bowl. - Press the mixture firmly into your prepared pan and bake for 15-20 minutes. Look for a golden brown edge. - Cool the pan for 10 minutes. Then, lift the granola slab using the parchment overhang. - Let it cool completely on a wire rack before slicing into bars. This recipe is simple yet rewarding, and you can find the full recipe above for more details. Enjoy your delicious snack! To make great maple pecan granola bars, start by toasting your oats and nuts. This step adds a nice crunch and deeper flavor. Spread them on a baking sheet and toast at 350°F for ten minutes. Stir halfway through to ensure even browning. Next, you need to press the mixture firmly into the pan. Use the back of a spatula or your hands to pack it down. This step is key. It helps the bars hold together once baked. Want to make your bars even tastier? Add a sprinkle of nutmeg or ginger for extra spice. These flavors pair well with maple and pecans. If you don’t have almond butter, feel free to use peanut butter or any other nut butter you like. Each option will give a slightly different taste. Make your bars look as good as they taste! Stack them on a rustic wooden board for a charming display. You can garnish with extra pecans or a drizzle of maple syrup on top. For a portable snack, wrap each bar in parchment paper. Not only does this look nice, but it also makes them easy to grab on the go. Check out the Full Recipe for more details on making these delicious snacks! {{image_4}} You can change the nuts in your granola bars. Instead of pecans, try walnuts or almonds. Both add a nice crunch. You can even mix nuts for a fun twist. Seeds are a great addition too. Chia seeds add fiber and a slight crunch. Flaxseeds are rich in omega-3 fatty acids. A handful of seeds can boost the nutrition of your bars. Try adding chocolate and coconut to your maple pecan bars. Mini dark chocolate chips melt into sweet pockets of goodness. Shredded coconut gives a tropical flavor and chewiness. You can also use dried fruits for flavor. Dried apricots or mango add a fruity touch. Mix in your favorite dried fruit for a fun surprise in each bite. To make these bars vegan, swap honey for agave syrup. This keeps the sweetness while fitting vegan diets. You can also choose a nut butter like almond or peanut that’s made without added sugars. Check your oats to ensure they are gluten-free. Many oats are processed with gluten products. Opt for certified gluten-free oats to keep your snack safe for everyone. For the [Full Recipe], follow these tips to create a delicious snack that fits your needs! To keep your Maple Pecan Granola Bars fresh, use airtight containers. Glass or plastic containers both work well. Make sure to seal them tightly to keep air out. You can store these bars at room temperature for a week. If you want to keep them longer, store them in the fridge. The cool air helps maintain their texture and flavor. Homemade granola bars last about one week at room temperature. If you store them in the fridge, they can last up to two weeks. Store-bought bars may last longer, up to several months, due to preservatives. Watch for signs of spoilage, like a change in smell or texture. If they feel too hard or crumbly, it's time to toss them. Freezing your granola bars is a great option for longer storage. To freeze, wrap each bar in plastic wrap or foil. Place them in a freezer bag, then seal it tightly. They can last up to three months in the freezer. When you're ready to eat, simply take a bar out and let it thaw at room temperature. For the best texture, enjoy them after they have thawed completely. Homemade granola bars have a nice balance of chewiness and crunch. The oats provide a hearty base, while the nuts add a satisfying crunch. When you bite into one, you feel the soft and chewy center. This mix makes them fun to eat and enjoyable as a snack. Yes, you can easily make these granola bars vegan. Instead of honey, use agave syrup. For the nut butter, almond butter works great, but feel free to use any nut or seed butter you like. These swaps keep the bars tasty and suitable for vegans. You can get creative with mix-ins! Try adding seeds like pumpkin or sunflower for extra crunch. You can also add dried fruits like apricots or mango for a fruity burst. If you love chocolate, toss in some dark chocolate chips too. The options are endless! Yes, these granola bars are a healthy snack option. They contain whole grains from oats, healthy fats from nuts, and natural sweeteners like maple syrup. They also provide fiber, which is good for digestion. Just be mindful of portion sizes since they are calorie-dense. You can find pre-made maple pecan granola bars at many grocery stores. Look for brands like KIND, Nature Valley, or Larabar. Health food stores often carry a variety of options too. These can be a quick alternative when you're short on time. For the full recipe, check out the detailed instructions above. You can create delicious granola bars at home using simple ingredients and steps. We discussed how to prepare the mixture, bake it, and cut it into bars. You learned tips for the best texture and flavor. Variations can match your tastes, too. Homemade bars are not only easier to customize but also healthier. Enjoy these tasty treats as a snack or breakfast. Remember, making them yourself can be fun and rewarding!](https://lazychefmagic.com/wp-content/uploads/2025/04/2d1f59f7-78e6-44b5-bf2a-e71d97ea7330.webp)
If you’re searching for a tasty and wholesome snack, you’re in the right place! These Maple Pecan Granola Bars are
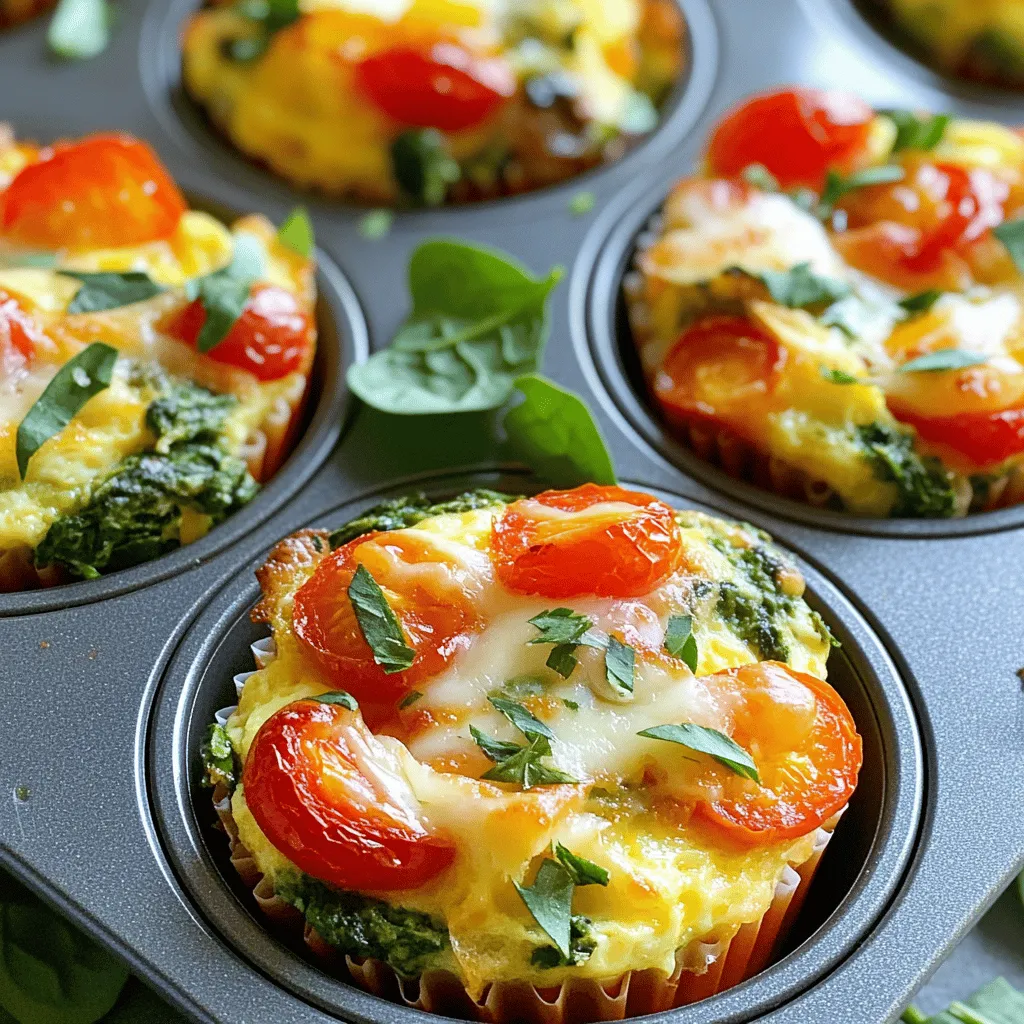
Are you ready to make a quick, healthy breakfast? These egg muffins with veggies offer a perfect blend of taste
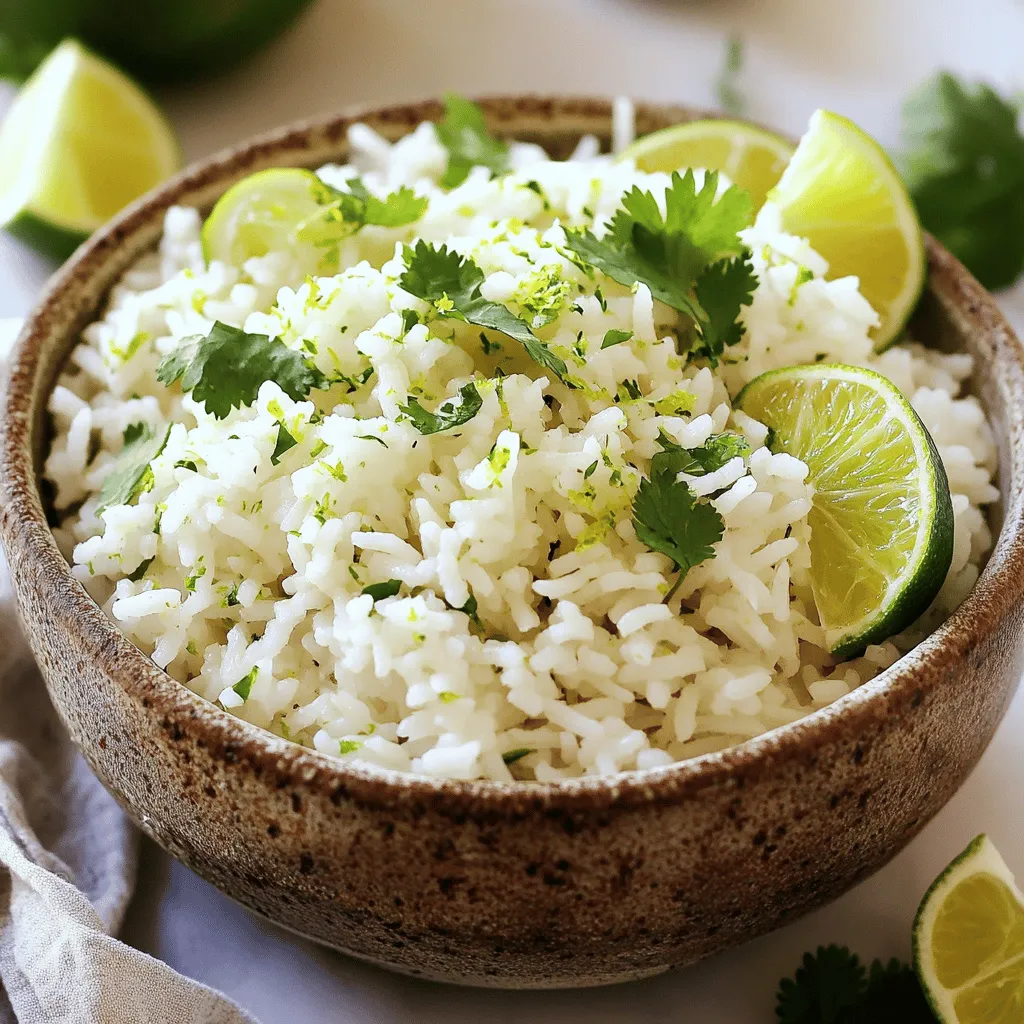
Elevate your meals with Lime Cilantro Rice, a bright side dish bursting with flavor. This easy-to-make recipe uses simple ingredients
![- Canned chickpeas - Mixed greens - Cherry tomatoes - Cucumber - Red onion - Feta cheese (optional) - Tahini - Lemon juice - Water - Extra virgin olive oil - Smoked paprika - Garlic powder - Ground cumin - Sea salt and black pepper In this crispy chickpea salad, you will find many fresh and healthy ingredients. The main star is canned chickpeas, which add protein and fiber. I love using mixed greens, like spinach and arugula, to give the salad a fresh base. Cherry tomatoes add sweetness and color, while cucumber brings a nice crunch. A bit of red onion adds flavor, and feta cheese is optional but delicious. For the dressing, I use tahini, which is creamy and rich. Fresh lemon juice adds a zesty kick, and I mix in water to get the right consistency. To flavor the chickpeas, I drizzle them with extra virgin olive oil. Smoked paprika and garlic powder give a warm taste. Ground cumin adds depth, while sea salt and black pepper enhance all the flavors. You can find the full recipe at the bottom, but these ingredients will help you create a delightful salad that is both crispy and healthy! - Preheat your oven to 400°F (200°C). - Line a baking sheet with parchment paper. - Open the can of chickpeas, then drain and rinse them well. - In a mixing bowl, add the chickpeas. - Drizzle with olive oil and mix well. - Sprinkle smoked paprika, garlic powder, ground cumin, sea salt, and black pepper over the chickpeas. - Toss to coat each chickpea evenly with spices. - Spread the seasoned chickpeas on the baking sheet. - Make sure they are in a single layer for even cooking. - Place the baking sheet in the oven. - Bake for 25-30 minutes. - Stir the chickpeas halfway through to help them crisp up. - They should turn golden brown and become crunchy. - While the chickpeas roast, grab a large salad bowl. - Add mixed greens, halved cherry tomatoes, diced cucumber, and sliced red onion. - Toss the salad ingredients gently to mix them. - In a small bowl, whisk tahini, lemon juice, and water until smooth. - Adjust the dressing with more water if needed for the right thickness. - Once the chickpeas are crispy, let them cool for a few minutes. - Add the chickpeas to the salad bowl. - Drizzle the tahini dressing over the salad. - Toss everything gently to coat well. - If you want, sprinkle feta cheese on top. - Add freshly chopped parsley for color and taste. - Serve the salad right away for the best flavor. To make the best crispy chickpeas, start by ensuring they are well-drained. After rinsing, dry them with a clean towel. This step helps remove extra moisture, which is key for crispiness. Next, use a single layer roasting technique. Spread the chickpeas on your baking sheet without crowding them. This allows hot air to circulate and gives you that perfect crunchy texture. To boost flavor, consider adding extra spices. You can try cayenne pepper for heat or onion powder for a savory kick. Fresh herbs also elevate the taste. Chopped parsley or cilantro adds a fresh note and color to your salad. For a beautiful plate presentation, layer the greens at the bottom of your bowl. Then, add the roasted chickpeas on top. This showcases their golden color. Pair this salad with grilled chicken or a warm pita for a complete meal. Enjoy this crispy chickpea salad fresh from the oven for the best experience. For the full recipe, check out the Crispy Chickpea Salad section. {{image_4}} You can change up the dressing for your crispy chickpea salad. A creamy avocado dressing adds richness. Just blend ripe avocados with lime juice, garlic, and a little water. This gives a smooth and tasty twist. If you prefer a lighter option, try a lemon vinaigrette. Mix fresh lemon juice, olive oil, salt, and pepper. This brightens the flavors in the salad and pairs well with the crispy chickpeas. You can also add more vegetables to your salad. Bell peppers bring crunch and color. Shredded carrots add sweetness and a pop of orange. Feel free to mix and match your favorite veggies. For protein, grilled chicken or tofu are excellent choices. Grilled chicken adds a savory touch. Tofu provides a plant-based boost. Both options keep your meal filling and nutritious. If you want vegan options, skip the feta cheese. You can add more veggies or use a nut cheese for flavor. This keeps the salad tasty and satisfying without dairy. For gluten-free needs, this salad is perfect as is. All ingredients are gluten-free, making it safe for those with dietary restrictions. Enjoy this fresh and healthy delight without worry! To keep your crispy chickpea salad fresh, store it in the fridge. Use an airtight container to lock in flavors and moisture. This way, your salad remains crunchy and tasty. It’s best to keep the chickpeas separate from the greens. This prevents the salad from getting soggy. To maintain the crispiness of your chickpeas after storing, reheat them in an oven. Spread them on a baking sheet. Heat them at 350°F (175°C) for about 10 minutes. This will revive their crunch. Avoid microwaving them, as this can make them soft. Your salad can last about 3 days in the fridge. However, the chickpeas can stay crispy for up to a week if stored separately. Always check for freshness before eating leftovers. If you notice any off smells or textures, it’s best to throw it away. Enjoying fresh food is key! For the full recipe and more tips, check out the [Full Recipe]. Yes, you can prepare some parts early. Here are tips for pre-assembling: - Chickpeas: Roast them ahead and store in an airtight container. They stay crispy for a day. - Vegetables: Wash and chop your mixed greens, tomatoes, cucumber, and onion. Keep them in the fridge in a sealed container. - Dressing: Make the tahini dressing and store it for up to a week. Just give it a good stir before using. - Combine Later: Wait to mix everything until just before serving. This keeps your salad fresh and crunchy. If you cannot use tahini, here are some great alternatives: - Sunflower Seed Butter: This works well and adds a nutty flavor. - Greek Yogurt: For a creamy touch, use plain Greek yogurt. - Peanut Butter: It adds a unique taste but make sure it’s smooth. - Hummus: This offers a similar texture and flavor. These options cater to different dietary needs and preferences. Making crispy chickpeas in an air fryer is quick and easy. Follow these steps: 1. Preheat the Air Fryer: Set it to 400°F (200°C). 2. Prepare Chickpeas: Drain and rinse your chickpeas. Pat them dry with a towel. 3. Season: Toss the chickpeas with olive oil, smoked paprika, garlic powder, cumin, sea salt, and black pepper. 4. Air Fry: Place the seasoned chickpeas in a single layer in the air fryer basket. Cook for about 15-20 minutes. 5. Shake: Halfway through, give the basket a shake for even cooking. These crispy chickpeas will be a delightful addition to your salad. For the full recipe, check out the Crispy Chickpea Salad section. This blog post covered a tasty salad with crispy chickpeas. We explored main ingredients like chickpeas, greens, tomatoes, and optional feta. You learned how to prepare and roast chickpeas for the perfect crunch. We shared tips to enhance flavor and serve it well. You can tweak the dressing and add different veggies or proteins. Lastly, we covered how to store leftovers and keep everything fresh. Enjoy making this salad your own, and remember, cooking should be fun and easy. Keep experimenting with flavors!](https://lazychefmagic.com/wp-content/uploads/2025/04/b5373eaf-2db1-4197-9154-50b74cd44625.webp)
Looking for a fresh and healthy dish that packs a crunch? You’ve found it! This Crispy Chickpea Salad is a
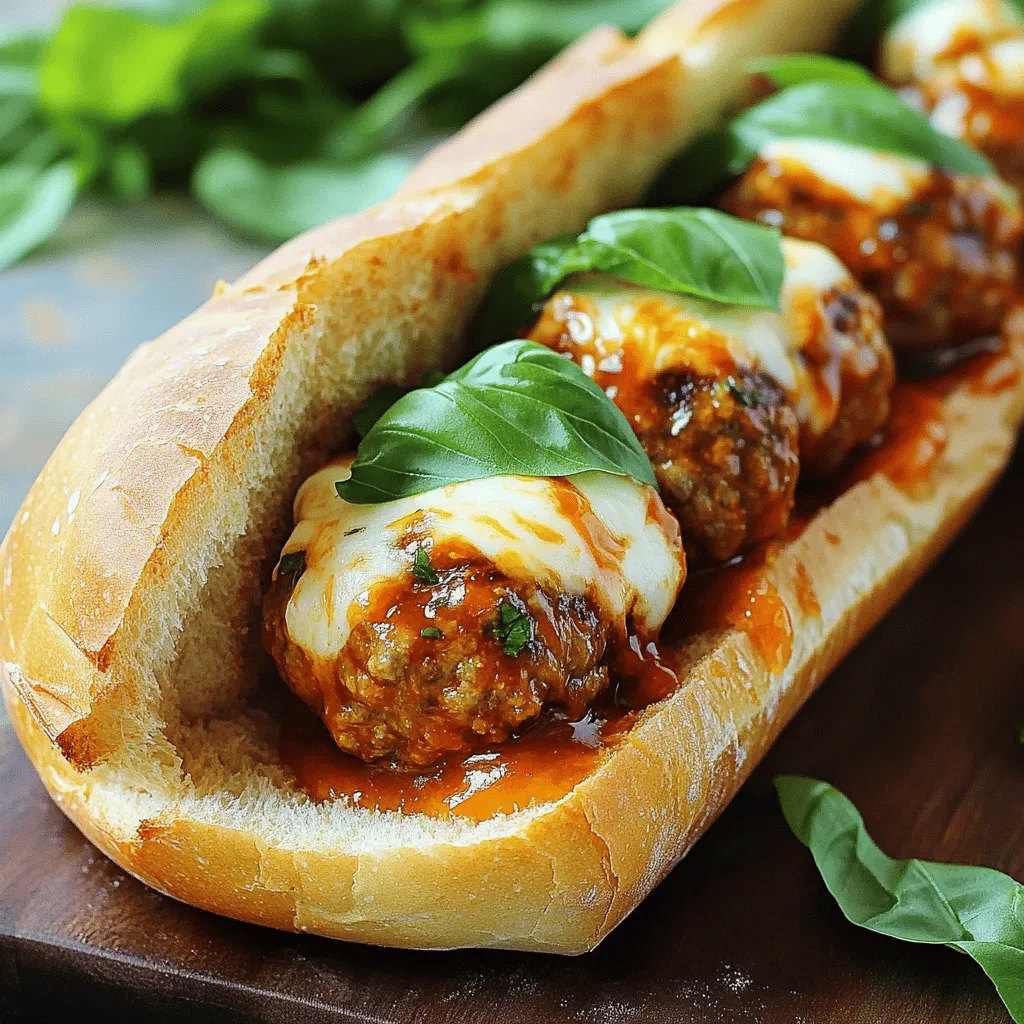
Are you ready to take your sandwich night to a whole new level? Sweet and spicy meatball subs are not
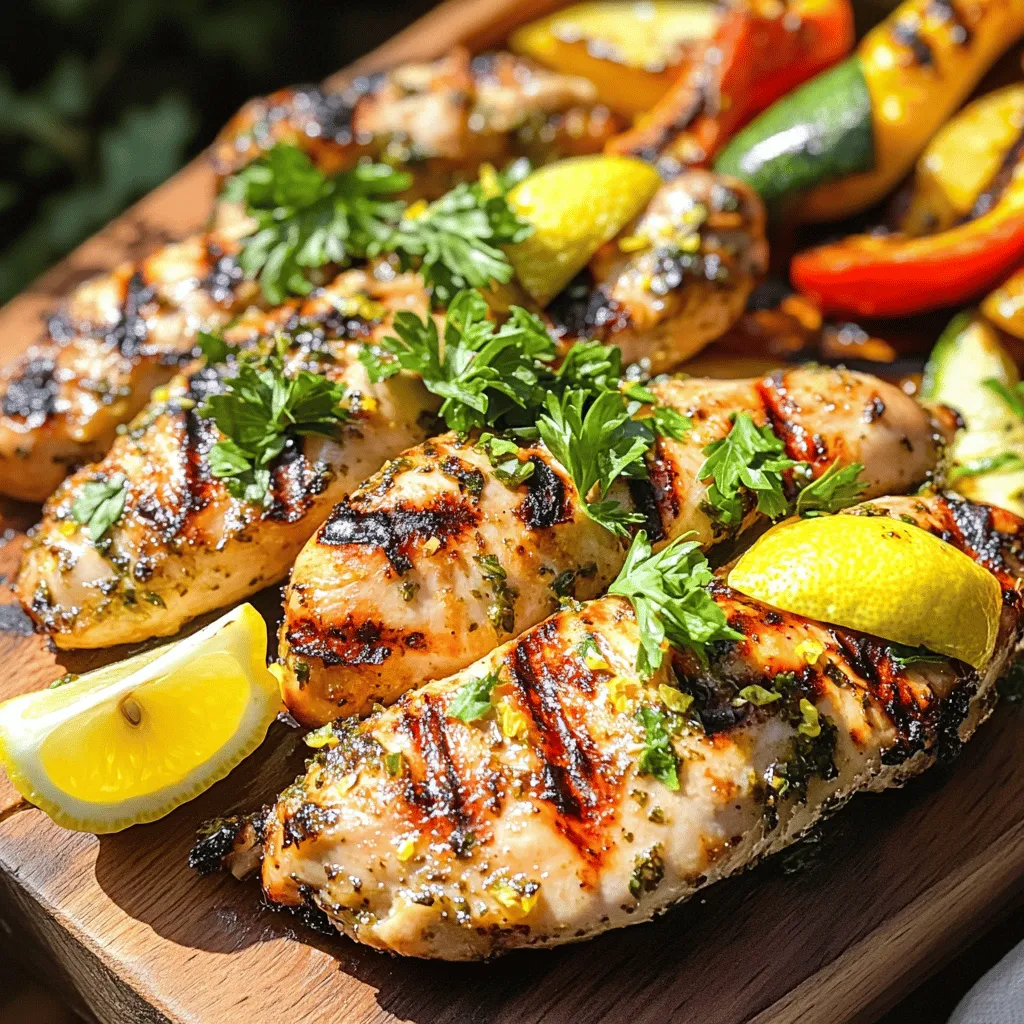
Looking for a delicious way to fire up your grill? You’re in the right spot! Today, I’ll share my favorite
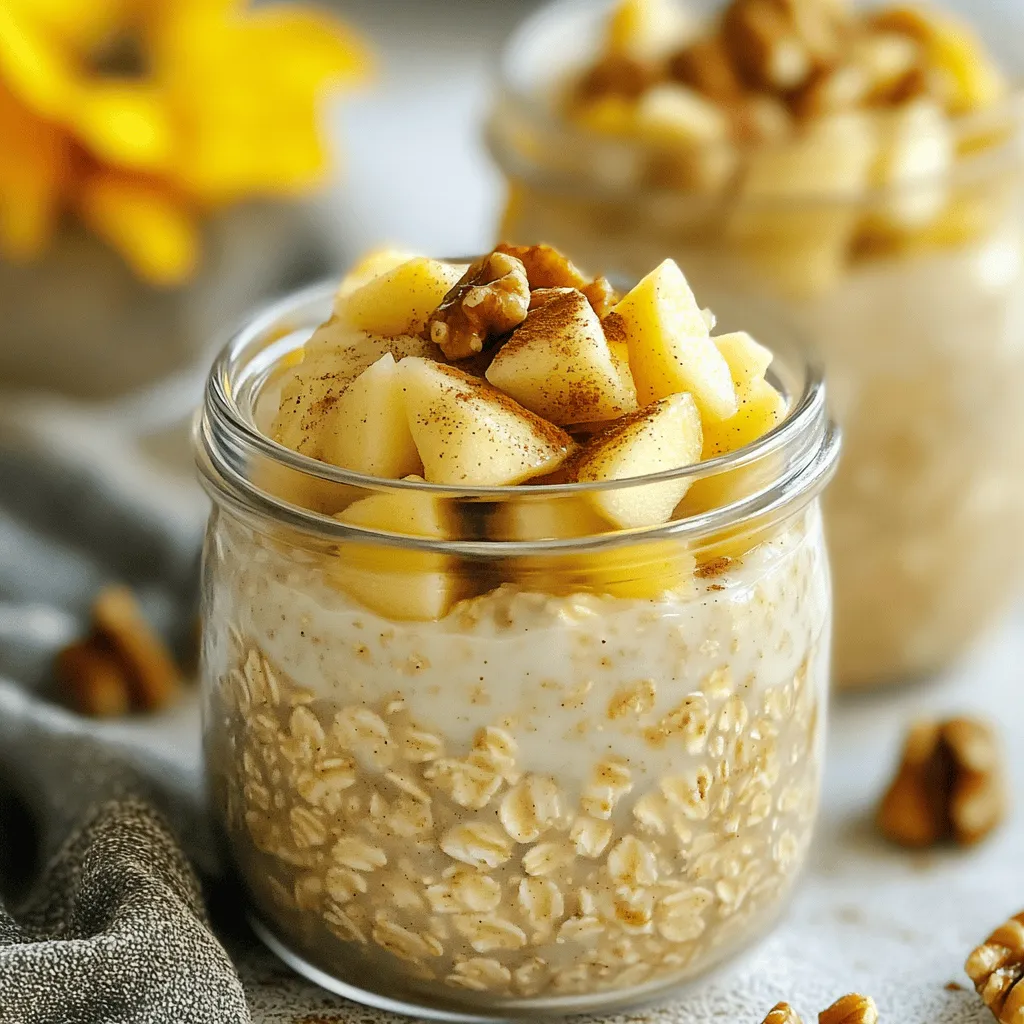
Start your day with a tasty boost! Apple Cinnamon Overnight Oats are simple and nutritious. With just a few ingredients,
![To make the best chocolate chip pancakes, start with these dry ingredients: - 1 cup all-purpose flour - 1 tablespoon granulated sugar - 2 teaspoons baking powder - 1/2 teaspoon baking soda - 1/4 teaspoon salt These dry ingredients give the pancakes their structure and fluffiness. The flour helps bind everything together. Sugar adds a touch of sweetness, while baking powder and baking soda help the pancakes rise. Salt enhances the flavors. Next, gather your wet ingredients. You will need: - 1 cup buttermilk (or 1 cup milk mixed with 1 tablespoon vinegar) - 1 large egg - 2 tablespoons unsalted butter, melted - 1 teaspoon pure vanilla extract Buttermilk adds richness and tang. If you don’t have buttermilk, the vinegar trick works great. The egg binds the batter, while melted butter ensures a soft texture. Vanilla extract adds a lovely aroma and flavor. You can get creative with optional add-ins. Here are some ideas: - 1/2 cup semi-sweet or dark chocolate chips - Nuts (like walnuts or pecans) - Fresh fruit (like blueberries or banana slices) Adding chocolate chips is a must for flavor. Nuts add crunch, while fruit brings freshness to each bite. Feel free to mix and match based on what you love! This recipe makes delightful pancakes that everyone will enjoy. For the full recipe, follow the steps I shared earlier. To start, gather your dry ingredients. In a large bowl, mix together: - 1 cup all-purpose flour - 1 tablespoon granulated sugar - 2 teaspoons baking powder - 1/2 teaspoon baking soda - 1/4 teaspoon salt Whisk these well. This helps to blend them and avoid clumps. Next, you need your wet ingredients. In a separate bowl, whisk together: - 1 cup buttermilk (or 1 cup milk mixed with 1 tablespoon vinegar) - 1 large egg - 2 tablespoons melted unsalted butter - 1 teaspoon pure vanilla extract Make sure this mixture is smooth. Now, gently pour the wet ingredients into the dry ingredients. Stir lightly with a spatula. Stop mixing when you see a few lumps. This keeps your pancakes fluffy. Finally, fold in: - 1/2 cup semi-sweet or dark chocolate chips Ensure the chips are spread throughout the batter. Now it’s time to cook! Preheat a non-stick skillet over medium heat. Lightly grease it with butter or oil. Pour about 1/4 cup of batter onto the skillet for each pancake. Cook for 2-3 minutes. You will see bubbles forming on the surface. The edges should look set. Carefully flip the pancake using a spatula. Cook the other side for another 1-2 minutes. Look for a golden brown color. Continue this process until all the batter is used. You may need to add more butter or oil to the skillet to keep it non-stick. Serve your pancakes warm. Stack them high on a plate for a great look. Drizzle with rich maple syrup. You can also top them with whipped cream and more chocolate chips. For extra flair, dust with powdered sugar or add a sprig of mint. Pair with fresh fruit for a colorful and tasty meal. Enjoy the sweet bliss of these decadent chocolate chip pancakes! To make your pancakes fluffy, use fresh baking powder. Mix dry ingredients well to aerate them. When you add the wet ingredients, stir gently. A few lumps in the batter are okay. Avoid overmixing; it makes the pancakes dense. Let the batter rest for a few minutes before cooking. This helps bubbles form, which gives pancakes a nice rise. One common mistake is using cold ingredients. Always use room temperature eggs and buttermilk. This helps the batter mix better. Another mistake is cooking on too high heat. Medium heat works best for even cooking. If the skillet is too hot, pancakes can burn outside and stay raw inside. Lastly, don’t skip greasing the skillet. It prevents sticking and ensures easy flipping. Preheat your skillet or griddle for about 5 minutes before cooking. Use a small amount of butter or oil to coat the surface. Pour a consistent amount of batter for each pancake. A 1/4 cup is perfect. Watch for bubbles forming. This means it’s time to flip. Cook pancakes until they are golden brown on both sides. Always keep cooked pancakes warm in an oven set to low while you finish the batch. For the full recipe, refer to the detailed instructions provided. {{image_4}} To make chocolate chip pancakes a bit healthier, try these swaps: - Use whole wheat flour instead of all-purpose flour. - Replace sugar with mashed bananas or unsweetened applesauce. - Use less butter or switch to avocado oil. These changes keep the flavor but add more nutrients. You can enjoy your pancakes without guilt. Want to mix things up? Add fun flavors! Here are some ideas: - Mix in a pinch of cinnamon for warmth. - Add a dash of nutmeg for a cozy kick. - Toss in some chopped nuts like walnuts or pecans. These additions can elevate your pancake game. You’ll surprise your taste buds with each bite! If you need a gluten-free version, it’s easy! Just use gluten-free flour blends. Look for brands that work well in pancakes. Make sure to check for certified gluten-free labels. This way, you can enjoy delicious pancakes without worry. For the full recipe, you can refer to the earlier section. After you make your chocolate chip pancakes, you might have some left. To keep them fresh, place them in an airtight container. You can layer parchment paper between pancakes to prevent sticking. Store them in the fridge if you plan to eat them soon, usually within 3 days. Reheating pancakes is easy. You can use a microwave or a skillet. If using a microwave, place one pancake on a plate and cover it with a damp paper towel. Heat it for about 20 seconds. For the skillet, heat it on low and warm each side for about 1 minute. This keeps them soft and tasty. Freezing pancakes is a great way to save them for later. Let the pancakes cool completely first. Then, stack them with parchment paper in between and place them in a freezer bag. Make sure to remove as much air as possible. They can last up to 2 months in the freezer. To reheat, simply microwave or toast them for a quick breakfast treat. For the full recipe, check the previous sections! Yes, you can use regular milk. Mix one cup of milk with one tablespoon of vinegar. Let it sit for a few minutes. This makes a simple buttermilk substitute. It adds nice flavor and helps the pancakes rise well. To cut back on sweetness, reduce the sugar. You can use only one teaspoon of sugar. You can also leave out the chocolate chips or use a dark chocolate that is less sweet. This change gives you a more balanced taste. There are many tasty toppings! Here are some great choices: - Maple syrup - Whipped cream - Fresh strawberries or bananas - Chopped nuts like walnuts or pecans - A sprinkle of powdered sugar - A scoop of vanilla ice cream Feel free to mix and match these toppings for fun flavors. You can also use the [Full Recipe] to create your ideal pancake stack! In this post, I shared how to make delicious pancakes. We covered the right dry and wet ingredients, plus some fun add-ins. I provided clear steps for preparation, cooking, and serving. With helpful tips, I showed how to avoid mistakes and make pancakes fluffy. We also explored variations like healthier choices and gluten-free options. Finally, I shared how to store and reheat your leftovers. Enjoy making these pancakes, and try different toppings to find your favorite!](https://lazychefmagic.com/wp-content/uploads/2025/04/e9ff1fd7-3175-46f1-bcda-0c2ef9e07814.webp)
Get ready to transform your mornings with my easy recipe for chocolate chip pancakes! These fluffy delights are the ultimate
![- Salmon fillets (4 pieces) - Fresh herbs (parsley, dill, thyme) - Lemon (juiced and sliced) - Olive oil and garlic - Additional spices - Marinade variations - Calories per serving: About 350 - Protein content: Approximately 30 grams - Overview of vitamins and minerals: Rich in Omega-3s, vitamin D, and B vitamins This Lemon Herb Grilled Salmon recipe is not just easy; it's full of flavor and healthy. You can use fresh herbs like parsley, dill, and thyme to make it shine. Lemons add a bright taste that makes the salmon pop. The olive oil keeps the fish moist and delicious. If you want to add a twist, try some spices like paprika or cumin. You can even switch up the herbs based on what you have. This way, you can make it your own. For nutrition, this dish packs a punch. Each serving has about 350 calories. You get around 30 grams of protein, which is great for muscle health. Plus, salmon is full of Omega-3 fatty acids, good for your heart. It also brings vitamins like D and B, which are key for energy and bone health. You can find the full recipe [here]. To start, let's mix the marinade. Grab a small mixing bowl. Add 2 tablespoons of extra virgin olive oil. Then, juice one lemon and add the juice to the bowl. Don't forget the zest! Next, add 3 cloves of finely minced garlic. Toss in 2 tablespoons of chopped parsley, 1 tablespoon of fresh dill, and 1 tablespoon of fresh thyme leaves. Finally, season with salt and pepper to taste. Whisk everything together until it looks bright and mixed. Marinating is key! It allows flavors to soak into the fish. This step makes your salmon juicy and flavorful. Aim to marinate for at least 30 minutes. If you have more time, let it sit for up to 2 hours. Now, let’s marinate the salmon. Place 4 salmon fillets in a shallow dish or a resealable bag. Pour the marinade over the fillets. Make sure every piece is coated well. Cover the dish or seal the bag tightly. This helps the marinade work its magic. For the best flavor, aim for that 30-minute mark. But if you can wait, longer is better. Just remember, don’t marinate too long. The acid from the lemon can change the texture of the fish. While the salmon is marinating, preheat your grill. Set it to medium-high heat, about 375°F to 400°F. This is the sweet spot for grilling salmon. Once the salmon has marinated, remove the fillets. Let any extra marinade drip off. Discard the leftover marinade responsibly. Place the salmon skin-side down on the grill. Grill for about 6-7 minutes. Avoid moving it around; let it cook. After that time, flip the fillets carefully with a spatula. Grill for another 4-5 minutes. You’ll know it’s done when it flakes easily with a fork. For a fun twist, grill some lemon slices too! Place them on the grill during the last minute. They should get nice char marks in just 1-2 minutes. This is how you create a delicious Lemon Herb Grilled Salmon. Get ready for a tasty meal! For more details, check out the Full Recipe. To check if your salmon is done, look for a few signs. The flesh should change from translucent to opaque. Also, it should flake easily with a fork. A digital meat thermometer is your best friend here. Aim for an internal temperature of 145°F. Avoid common mistakes to ensure great results. First, don't move the salmon too much on the grill. Let it sear for about 6-7 minutes before flipping. Second, be careful with the heat. Too hot, and the outside may burn before the inside cooks. Adjusting seasoning can make a big difference. If you like it spicy, add a pinch of red pepper flakes to the marinade. For a sweeter taste, try a bit of honey. Taste your marinade before you add it to the fish. This way, you can tweak it to your liking. To add zest, use fresh herbs. Chopped chives or basil can bring a nice twist. You can also sprinkle some lemon juice right before serving. It brightens the dish and enhances the lemon flavor. For plating, arrange the salmon on a colorful platter. Place each fillet on a bed of greens for contrast. Top with grilled lemon slices to add a pop of color. Fresh herbs can also add visual appeal. Serve the salmon with sides that complement its flavors. Steamed asparagus or a fresh salad works well. A light quinoa dish also pairs nicely. This adds texture and keeps the meal balanced. {{image_4}} You can easily change the flavor of Lemon Herb Grilled Salmon. Try adding fresh herbs like basil or cilantro for a different taste. You can also use spices like paprika or cumin if you like some heat. For a more citrusy kick, mix in orange or lime juice with your marinade. Each option adds a unique twist, keeping your meals fun and exciting. If you don’t have a grill, you can still enjoy this dish. Oven-baking is a great choice. Preheat your oven to 400°F. Place the marinated salmon on a baking sheet and cook for about 12-15 minutes. You can also broil the salmon. Set your broiler to high and cook for 6-8 minutes, watching closely to avoid burning. Both methods yield tasty results without losing flavor. Pair your Lemon Herb Grilled Salmon with tasty sides. Steamed asparagus brings a nice crunch and color. A fresh mixed greens salad adds a crisp texture. You can also serve it with quinoa or rice for a hearty meal. Roasted vegetables like zucchini or bell peppers complement the salmon’s flavors well. These sides create a balanced plate that everyone will enjoy. To keep your leftover Lemon Herb Grilled Salmon fresh, place it in an airtight container. Store it in the fridge. It is best to eat it within three days for the best flavor and safety. If you want to enjoy it later, follow these steps: - Cool the salmon: Let it cool to room temperature before storing. - Seal it well: Use a tight-fitting lid to prevent air from getting in. Keeping it in the fridge helps maintain its taste and texture. If you want to freeze your cooked salmon, you can do that too. Wrap each fillet tightly in plastic wrap. Then, place it in a freezer-safe bag. This method helps prevent freezer burn. Cooked salmon can last about two to three months in the freezer. When it’s time to eat, thaw the salmon in the fridge overnight for the best results. Avoid using hot water, as it can lead to uneven thawing. After thawing, you can reheat it gently in the oven or on the stovetop. For more detailed instructions, you can check the full recipe. If you can't find salmon, try these fish options: - Trout - Mahi-mahi - Tilapia - Cod These fish work well with the same marinade. They each have a mild flavor that matches nicely with lemon and herbs. To check if salmon is done, look for these signs: - The flesh changes from bright pink to a lighter color. - It flakes easily when you poke it with a fork. - The internal temperature reaches 145°F. These signs show that your salmon has cooked through perfectly. Yes, you can grill salmon without skin. Here are some tips: - Use a non-stick grill spray for easy cooking. - Place the fillets on a piece of foil to prevent sticking. - Flip the salmon gently using a spatula. These steps will help you grill skinless salmon with ease. Pair your salmon with these tasty side dishes: - Steamed asparagus - Mixed greens salad - Quinoa or rice - Roasted vegetables These sides complement the fresh flavors of the salmon. Absolutely! You can prepare the marinade in advance. Here are some tips: - Mix all the marinade ingredients a day before. - Store it in an airtight container in the fridge. - Marinate the salmon just before grilling. This saves time and keeps your meal fresh. You can find the full recipe for Lemon Herb Grilled Salmon in the [Full Recipe]. This detailed guide will help you create this delicious dish step-by-step. This article covered everything you need for Lemon Herb Grilled Salmon. I shared required and optional ingredients, plus nutrition facts. I gave you step-by-step instructions for marinating and grilling. I included tips for perfect grilling and ways to mix up the flavors. You also learned how to store leftover salmon and answers to common questions. Now, you can enjoy this tasty dish confidently. Get grilling and savor the fresh flavors!](https://lazychefmagic.com/wp-content/uploads/2025/04/120aec2f-afb3-410f-8727-eccf543fb021.webp)
Ready to elevate your dinner game? This Lemon Herb Grilled Salmon recipe is both flavorful and simple, perfect for any
