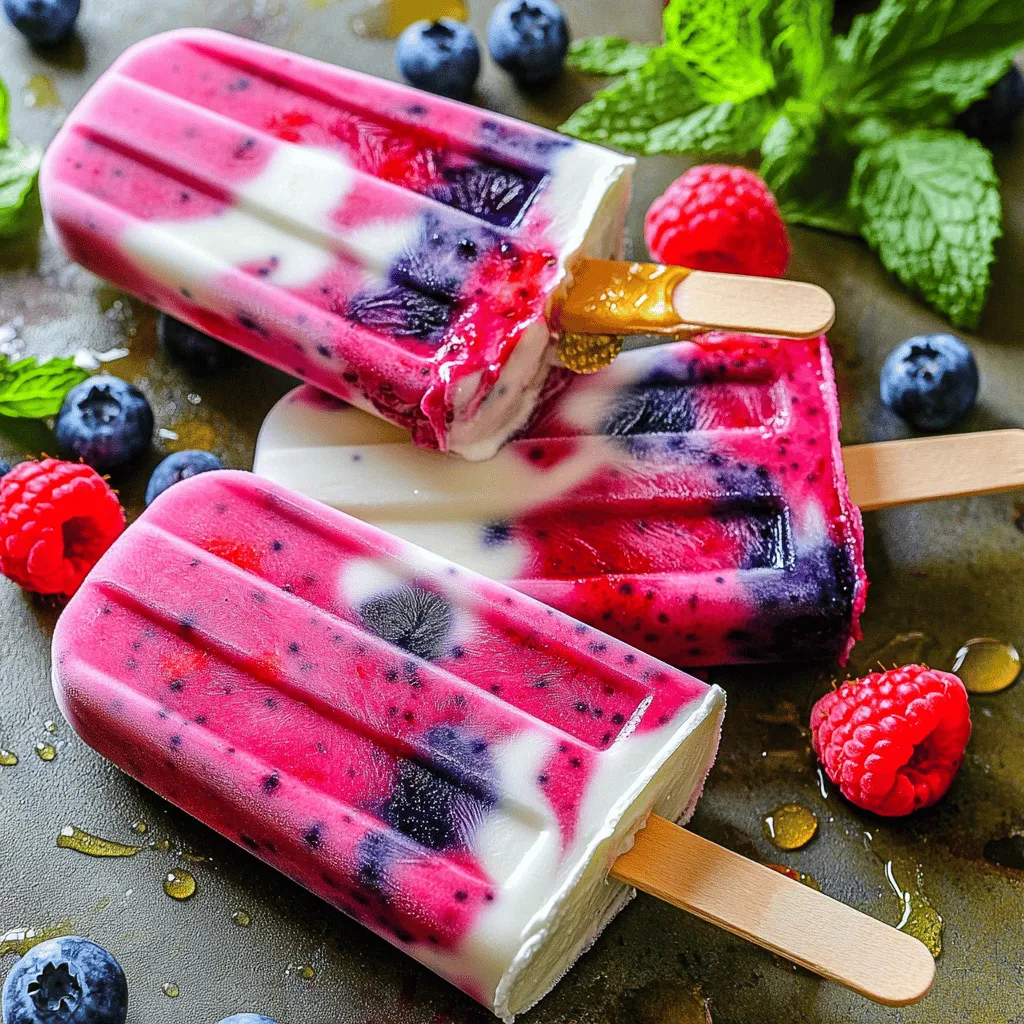
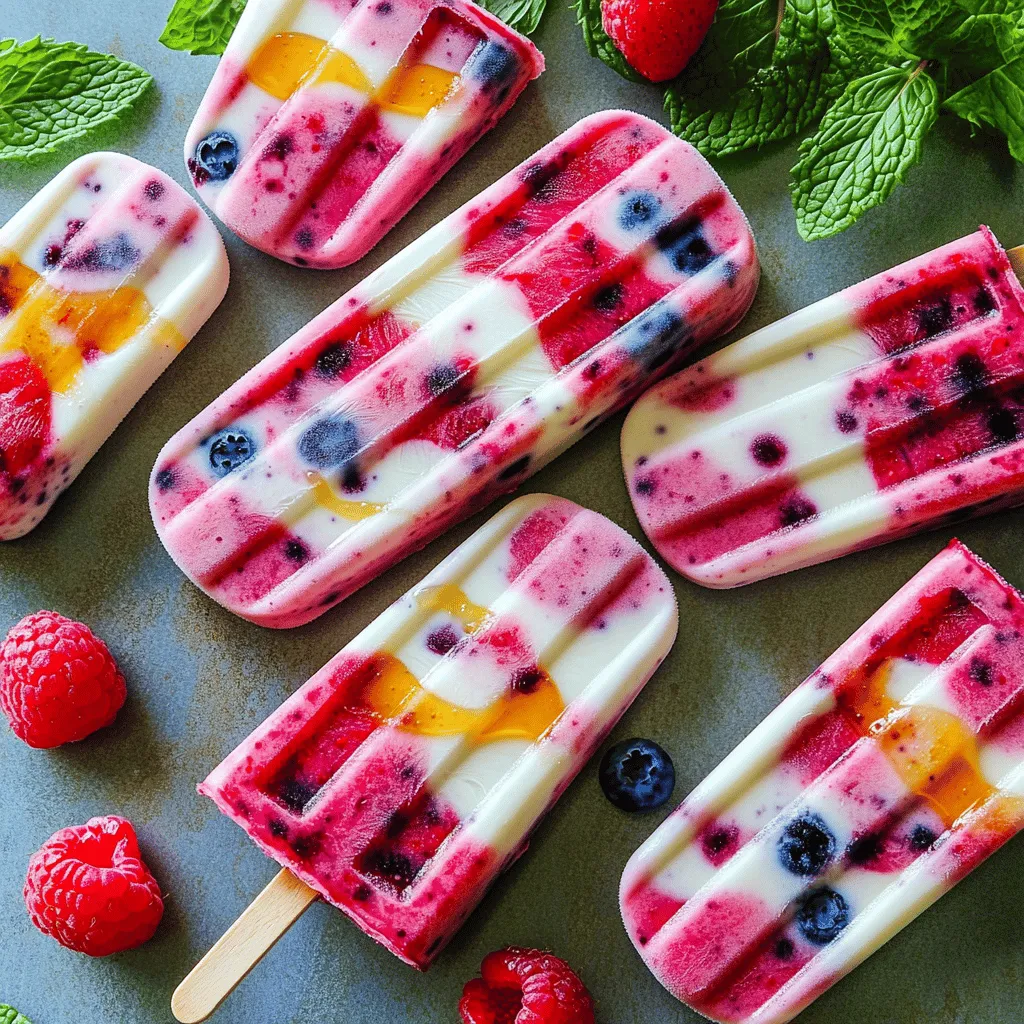
Looking for a tasty way to stay cool and healthy? You’ve come to the right place! These Berry Smoothie Popsicles are packed with fruit, Greek yogurt, and your favorite milk. They are simple to make and perfect for hot days. I’ll share fun tips and tasty variations to keep you refreshed and happy. Let’s dive into making this cool treat together!
Ingredients
Main Ingredients
– 2 cups mixed berries (strawberries, blueberries, raspberries)
– 1 cup Greek yogurt (plain or vanilla)
– 1 cup almond milk (or milk of choice)
The main ingredients in these popsicles are simple. Mixed berries pack a fruity punch. You can use fresh or frozen berries. Strawberries add sweetness, while blueberries and raspberries add tang. Greek yogurt makes the popsicles creamy and thick. You can choose plain yogurt for a neutral taste or vanilla for extra flavor. Almond milk keeps the mixture light, but you can swap it for any milk you like.
Sweeteners and Flavor Enhancers
– 2 tablespoons honey or maple syrup
– 1 teaspoon pure vanilla extract
For sweetness, I use honey or maple syrup. Both sweeteners blend well and add a nice taste. Adjust the amount based on how sweet you want the popsicles. The vanilla extract brings out the berry flavors. It makes each bite more enjoyable.
Optional Garnish
– Fresh mint leaves
Garnishing adds a lovely touch. Fresh mint leaves brighten up the popsicles. They also add a hint of freshness. You can sprinkle them on top before serving. This small step makes a big difference in presentation.
Step-by-Step Instructions
Preparing the Smoothie Base
First, set up your blender. Add the mixed berries, Greek yogurt, almond milk, honey, and vanilla extract. Blend all the ingredients on high. You want a smooth and creamy texture. Stop to scrape down the sides. This helps mix everything well. Taste it. If you want it sweeter, add more honey or maple syrup. Blend again until it’s just right.
Filling Popsicle Molds
Next, pour the smoothie mixture into popsicle molds. Use a spoon to fill each mold to the top. Leave a little space at the top. This allows the popsicle to expand as it freezes. Once filled, take popsicle sticks and insert them right into the center. This stops them from wobbling while they freeze.
Freezing Process
Now, it’s time to freeze your popsicles. Place the molds in the freezer for at least 4 to 6 hours. This is the best time for them to freeze solid. To check if they are ready, just touch the popsicle. If it feels firm and solid, it’s done. If not, leave them in the freezer a bit longer. Once they’re ready, your berry smoothie popsicles are good to go!
Tips & Tricks
Choosing the Best Berries
When picking berries, fresh is best. Seasonal berries taste the sweetest. In summer, strawberries shine. Blueberries are great in late spring. Raspberries are perfect for early summer.
To select ripe berries, look for bright colors. Avoid any with soft spots or mold. Smell them too; ripe berries have a sweet scent. If you can, buy local. Fresh picked berries have the best taste.
Sweetness Adjustment
Taste your smoothie mix before freezing. If it’s not sweet enough, add more honey or maple syrup. Stir well to blend in the sweetness. Start with a little, and keep tasting. You can always add, but it’s hard to take away.
If you want alternatives, try agave syrup or stevia. These can offer a different flavor. Adjust until you find what you like best.
Smoothie Consistency
For creamy popsicles, blend well. If your mix feels too thick, add a bit more milk. Blend again until smooth. If you see chunks, keep blending.
If your popsicles freeze too hard, it means too much liquid. If they are icy, they may not have enough yogurt. Finding the right balance is key. Testing your mix helps you learn what works.
Variations
Flavor Combinations
You can mix and match different fruits with your berry smoothie popsicles. Try adding bananas for creaminess. Or, use peaches for a sweet twist. Pineapple adds a tropical flair. For a berry blend, use blackberries or cranberries.
You can also switch your yogurt type. Greek yogurt has a nice thick texture. If you prefer something lighter, try regular yogurt. For a tangy kick, use coconut yogurt. Each option changes the flavor and texture slightly.
Dairy-Free and Vegan Options
To make these popsicles dairy-free, substitute Greek yogurt with coconut yogurt or almond yogurt. Use oat milk or soy milk instead of almond milk. These alternatives keep the popsicles creamy without dairy.
For vegan-friendly versions, ensure your sweeteners are plant-based. Use maple syrup or agave nectar. This swap keeps the recipe completely vegan while still tasting great.
Additional Ingredients
Want to boost nutrition? Add a handful of spinach or kale to your blend. Both greens blend well and add vitamins without changing the taste much.
You can also toss in chia seeds or flaxseeds for extra fiber. Nuts like almonds or walnuts add healthy fats and a nice crunch. Just remember to keep the balance in mind, so your popsicles stay yummy!
Storage Info
How to Store Popsicles
To keep your Berry Smoothie Popsicles fresh, place them in an airtight container. This helps prevent freezer burn. You can also wrap each popsicle in plastic wrap, making it easy to grab one when you want. Write the date on the container. This way, you always know how long they have been stored.
Freezer Storage Time
These popsicles taste best when enjoyed within two months. After that, they may lose flavor and texture. Check for ice crystals on the surface. If you see these, it means they are not fresh anymore. Also, if they smell off, it’s best to toss them out.
Thawing Tips
To remove popsicles from molds, run warm water on the outside of the mold for a few seconds. This helps loosen the popsicles. Gently pull on the sticks to release them. For best results, let them sit at room temperature for a couple of minutes before serving. This makes them easier to bite into!
FAQs
Can I use frozen berries instead of fresh?
Yes, you can use frozen berries! They are often picked at peak ripeness. This means they are just as tasty as fresh berries. Frozen berries also save time. They blend smoothly and chill your popsicles faster. Just remember to let them thaw a bit before blending. This helps your blender work better.
How long do these popsicles last in the freezer?
These popsicles can last up to three months in the freezer. To keep them fresh, store them in an airtight container or wrap them well. This helps prevent freezer burn. If they start to taste off or have ice crystals, it’s time to toss them.
Can I make these without added sugar?
Absolutely! You can skip added sugar and still enjoy these popsicles. Use ripe fruits for natural sweetness. You can also add mashed bananas or applesauce to sweeten them. If you want a little sweetness, use stevia or monk fruit as a zero-calorie option.
What are the health benefits of berry smoothie popsicles?
Berry smoothie popsicles pack a healthy punch! Here are some benefits:
– Vitamins and Minerals: Berries are rich in vitamins C and K. They help boost your immune system.
– Fiber: The Greek yogurt adds protein and probiotics. This supports gut health and keeps you full.
– Low-Calorie Treat: Compared to store-bought pops, these are lower in sugar and calories.
– Antioxidants: Berries contain antioxidants that fight inflammation and help your body.
These popsicles are not just a treat; they are a smart choice for snacking!
You now know how to make berry smoothie popsicles with ease. Start with fresh mixed berries and choose your favorite yogurt. Adjust the sweetness to your taste and have fun with different flavors. Remember to store them right for long-lasting treats. These popsicles are not just delicious; they also provide health benefits. Try adding greens or nuts for more nutrition. Enjoy this cool, tasty snack all summer long!