Are you ready to satisfy your family’s cravings with a fun and tasty meal? Cheesy Oven-Baked Tacos are your answer! This simple dish combines savory ground meat, crispy taco shells, and melty cheese for a fun twist on taco night. Not only are they easy to prepare, but everyone can customize their own tacos. Dive into this recipe and discover why this dish is a family favorite!
Why I Love This Recipe
- Quick and Easy: This recipe is perfect for a busy weeknight, taking only 35 minutes from prep to plate.
- Customizable: With various toppings and fillings, you can easily adjust this dish to suit your taste preferences.
- Family-Friendly: Kids and adults alike will love these cheesy tacos, making it a great meal for the whole family.
- Deliciously Cheesy: The combination of cheddar and Monterey Jack cheese creates a gooey, irresistible topping.
Ingredients
Main Ingredients
- 12 small taco shells
- 1 lb ground beef or turkey
- 1 cup shredded cheddar cheese
- 1 cup shredded Monterey Jack cheese
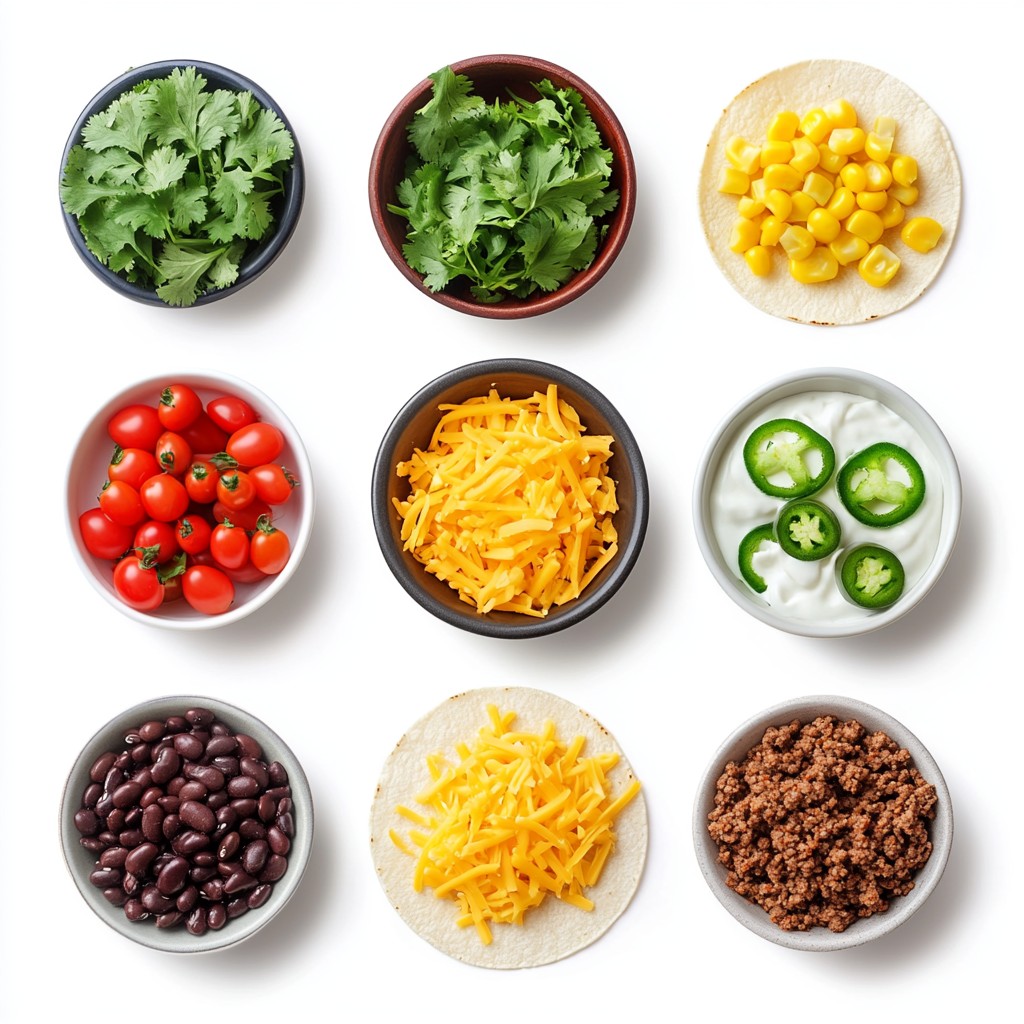
The main ingredients for Cheesy Oven-Baked Tacos are simple yet delicious. You can use either ground beef or turkey. Both options work well and give you great flavor. Taco shells are essential to hold all the yummy fillings. I recommend using small shells for the best bite-sized tacos. The cheese is where the magic happens. A mix of cheddar and Monterey Jack melts beautifully and adds a rich taste.
Additional Ingredients
- 1 cup black beans, drained and rinsed
- 1 cup corn kernels (fresh, frozen, or canned)
- 1 cup diced tomatoes (fresh or canned)
- 1 tablespoon taco seasoning
- Salt and pepper to taste
- 1/2 cup sour cream (for topping)
- 1/4 cup fresh cilantro, finely chopped (for garnish)
- Sliced jalapeños (optional, add for extra heat)
Adding vegetables makes these tacos even better. Black beans and corn add fiber and sweetness. Diced tomatoes provide freshness and moisture. Taco seasoning brings all the flavors together. Don't forget salt and pepper to taste! For toppings, sour cream adds creaminess, while cilantro gives a fresh kick. If you like heat, sliced jalapeños are a perfect choice. They can take your tacos to the next level!
Step-by-Step Instructions
Preparing the Oven and Meat
First, preheat your oven to 375°F (190°C). This step is key for crispy tacos. While the oven heats, take a large skillet. Add 1 pound of ground beef or turkey to the skillet. Cook the meat over medium heat until it turns brown. This should take about 5 to 7 minutes. If you see any grease, drain it off. Next, stir in 1 tablespoon of taco seasoning. Add a splash of water, about 1/4 cup, and mix well. Let the mixture simmer for about 5 minutes. Stir it a few times. Now, taste the meat and adjust with salt and pepper as needed.
Filling the Taco Shells
Grab a large baking dish and arrange your 12 small taco shells upright. This keeps them steady while you fill them. Using a spoon, fill each taco shell halfway with the seasoned meat mixture. Make sure to spread the meat evenly. After that, layer 1 cup of black beans over the meat in each shell. Next, add 1 cup of corn kernels and 1 cup of diced tomatoes. Spread these ingredients evenly in all the shells.
Finally, cover each taco shell with a generous amount of shredded cheddar cheese and Monterey Jack cheese. Aim for about 1 cup of each cheese to ensure they melt nicely.
Baking and Garnishing
Place your baking dish in the preheated oven. Bake the tacos for about 15 to 20 minutes. You want the cheese to melt, bubble, and turn a little golden. After baking, remove the dish from the oven and let the tacos cool for a few minutes. Drizzle about 1/2 cup of sour cream over each taco for creaminess. Finish by garnishing with 1/4 cup of finely chopped fresh cilantro. For an extra kick, add sliced jalapeños if you like. Serve your cheesy oven-baked tacos warm and enjoy!
Tips & Tricks
Cooking Tips
To ensure even cooking of meat, use a large skillet. Break up the meat with a spatula. Cook it over medium heat until it is browned and no pink remains. Stir often to avoid burning. Drain any excess fat after cooking.
For optimal melting of cheese, add it in layers. First, sprinkle a base layer over the meat and veggies. This helps the cheese melt better. Use a mix of cheddar and Monterey Jack for great flavor. Bake until the cheese is bubbly and slightly golden.
Serving Suggestions
Pair Cheesy Oven-Baked Tacos with simple sides. A fresh salad or rice works great. You can also serve chips and salsa for a fun crunch. For drinks, try soda, lemonade, or iced tea to balance the flavors.
For presentation ideas, serve the tacos on a colorful platter. Garnish with cilantro and jalapeños for a pop of color. You can even add lime wedges for a zesty touch. This will make your meal look as good as it tastes!
Pro Tips
- Tip Title: Use Fresh Ingredients: For the best flavor, opt for fresh vegetables and high-quality meats. Fresh ingredients can elevate the overall taste of your tacos.
- Tip Title: Customize Your Heat: Adjust the level of spiciness by adding diced jalapeños or using spicy taco seasoning. This allows you to cater to your heat preference.
- Tip Title: Experiment with Cheeses: Try mixing different types of cheese, such as pepper jack or queso blanco, for unique flavors and textures.
- Tip Title: Let Them Cool: Allow the baked tacos to cool for a few minutes before serving. This helps the fillings set slightly, making them easier to eat.
Variations
Meat Alternatives
You can swap out the ground beef or turkey for chicken. Just cook it the same way. If you want a vegetarian option, use black beans or lentils. Both options taste great and are healthy.
Flavor Enhancements
To make your tacos even better, add spices like cumin or chili powder. You can also drizzle hot sauce or salsa on top for a kick. These simple changes give your tacos unique flavors that excite your taste buds.
Homemade Alternatives
Making your own taco shells is easy and fun. Just press dough into small rounds and bake them until crispy. You can also try using corn tortillas or lettuce for a lighter option. For cheese, mix different types like pepper jack or queso fresco. This way, you can create a taco that’s just right for you!
Storage Info
Storing Leftovers
To keep your cheesy oven-baked tacos fresh, use airtight containers. Store them in the fridge for up to three days. If you have a lot of leftovers, freeze them. Wrap each taco in plastic wrap, then place them in a freezer bag. They can last up to three months in the freezer. Remember to label your bag with the date!
Reheating Tips
Reheating tacos can be simple if you do it right. The best way is to use the oven. Preheat your oven to 350°F (175°C). Place the tacos on a baking sheet and cover them with foil. Heat for about 10-15 minutes. This helps keep the shells crispy and the cheese melted. You can also use the microwave, but be aware that the shells may get soft. If you choose this method, heat them in short bursts, about 30 seconds at a time. Enjoy your leftovers just like the first time!
FAQs
How can I make Cheesy Oven-Baked Tacos vegetarian?
To make Cheesy Oven-Baked Tacos vegetarian, you can use plant-based options. Try using lentils, black beans, or crumbled tofu instead of meat. These options add protein and flavor. You can also mix in diced bell peppers, onions, or zucchini for extra veggies. Just season them as you would the meat, using taco seasoning to keep that great taste.
Can I freeze Cheesy Oven-Baked Tacos?
Yes, you can freeze Cheesy Oven-Baked Tacos! First, allow them to cool completely. Then, wrap each taco tightly in plastic wrap or foil. Place them in a freezer-safe bag. When you want to eat them, thaw them overnight in the fridge. Reheat in the oven at 375°F (190°C) for about 15 to 20 minutes. This keeps them warm and tasty.
What can I serve with Cheesy Oven-Baked Tacos?
Cheesy Oven-Baked Tacos go well with many side dishes. Some tasty options include:
- Mexican rice
- Refried beans
- Fresh guacamole
- A simple salad with avocado and lime dressing
- Corn on the cob
For drinks, try pairing them with:
- Fresh lemonade
- Iced tea
- A light beer or margarita
These sides add flavor and balance to your taco night!
Cheesy oven-baked tacos are simple to make and full of flavor. We covered all the key ingredients, from meat choices to tasty toppings. I shared step-by-step instructions for perfect cooking results. You also learned helpful tips and fun variations to try. Remember, you can customize these tacos to fit your taste. Make them ahead and store your leftovers for later. Enjoy this delicious dish at your next meal!