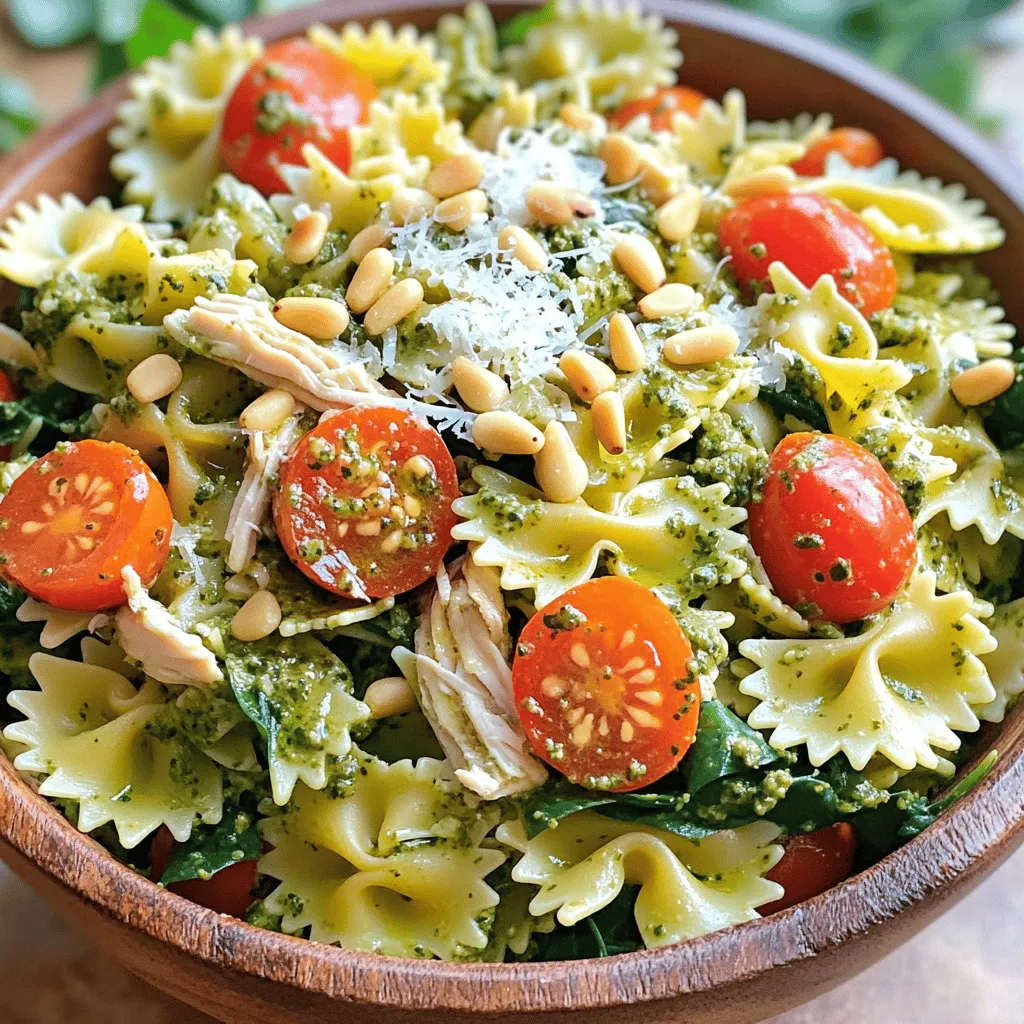
Looking for a fresh and flavorful dish that’s easy to make? You’ve found it! My Chicken Pesto Pasta Salad is packed with taste and quick to prepare. In this blog post, I’ll share the perfect ingredient mix, easy steps, and clever tips to make your salad shine. Whether you want a light meal or a fun side, this salad is your go-to recipe for any occasion. Let’s dive in!They hold the pesto well.
– Chicken: Use cooked chicken breast. Shredded or diced adds texture.
– Cherry Tomatoes: Halve them to bring out their sweetness and vibrant color.
– Spinach: Fresh spinach adds a nice green touch. Roughly chop it for easy bites.
– Basil Pesto: This is the heart of the dish. It gives a rich and herby flavor.
– Parmesan Cheese: Grated cheese adds a creamy, savory note to the mix.
– Pine Nuts: Toast them for added crunch. They elevate the dish’s texture.
– Salt and Pepper: Always taste and season to enhance the flavors.
– Olive Oil: Use it if you want an extra touch of richness.
Ingredient Substitutions
Feel free to swap ingredients based on your taste:
– Pasta: Use gluten-free pasta if needed. Other shapes work too.
– Chicken: Try chickpeas for a vegetarian twist.
– Spinach: Use kale or arugula for different greens.
– Pesto: Make your own or use sun-dried tomato pesto for variety.
– Parmesan: Nutritional yeast can replace cheese for a vegan option.
– Pine Nuts: Replace with walnuts or almonds if you have allergies.
These ingredients come together to create a dish that is fresh and flavorful. Enjoy making this delightful Chicken Pesto Pasta Salad!
Step-by-Step Instructions
Preparation of Ingredients
Start with a large mixing bowl. First, cook your pasta. I recommend farfalle or rotini. Cook it until tender but firm. Drain and cool the pasta under cold water. Next, take your chicken breast. You can shred it or cut it into small pieces. Make sure it is cooked and safe to eat. Rinse the cherry tomatoes and cut them in half. Chop the fresh spinach roughly for a nice bite.
Mixing and Combining Steps
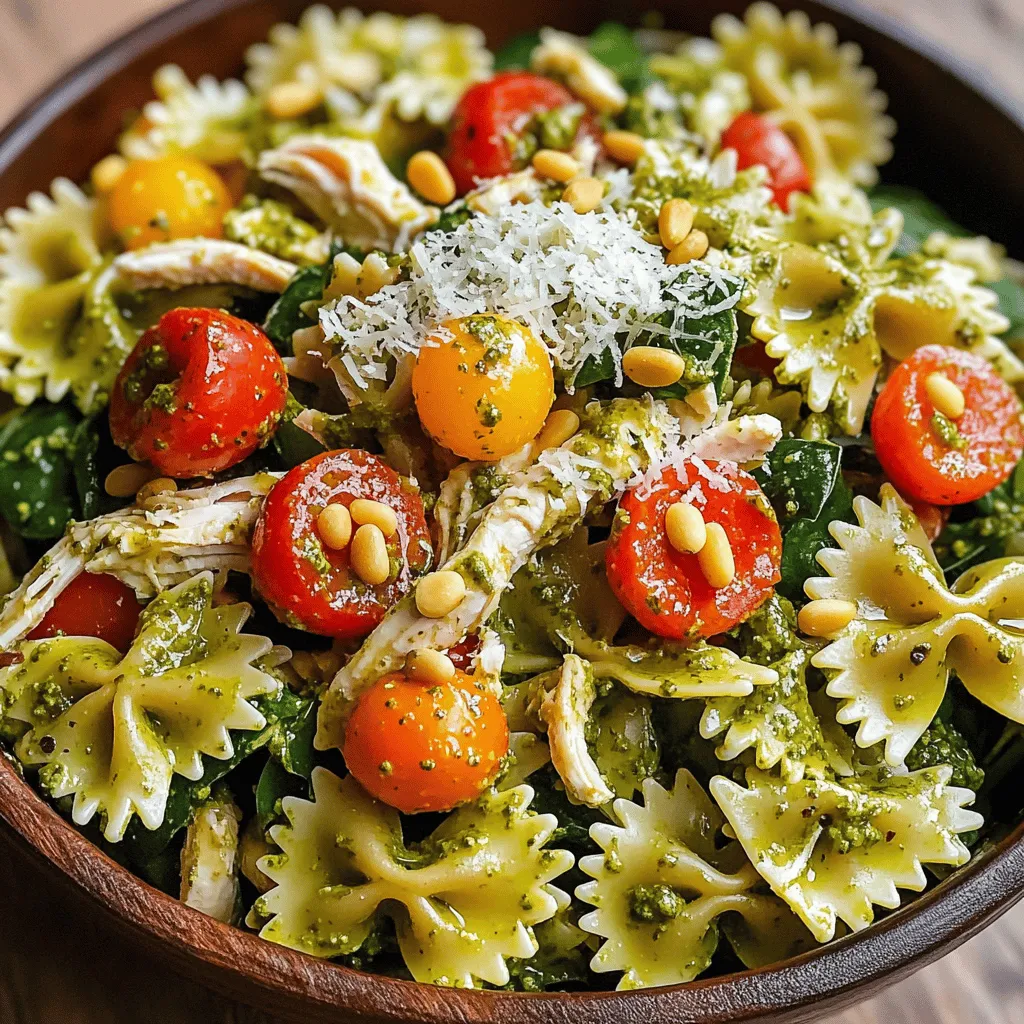
Add the cooled pasta to your bowl. Follow with the chicken pieces. Toss them gently to mix. Now, add the halved cherry tomatoes and chopped spinach. Pour in the basil pesto next. Use a spatula to combine it all well. You want every piece of pasta to be covered in pesto. Sprinkle in the grated Parmesan cheese and toasted pine nuts. Toss everything again until it is blended.
Tips for Flavor Enhancement
Taste your salad and add salt and pepper. You want it to have a nice balance. If you like, drizzle olive oil for extra flavor. Cover the bowl with plastic wrap or a lid. Place it in the fridge for at least 30 minutes. This helps the flavors mix well. When you serve, consider garnishing with extra pine nuts and fresh basil. This adds a lovely touch to the dish.
Tips & Tricks
Best Practices for Cooking Pasta
When cooking pasta, use a large pot. Fill it with water and add a good amount of salt. This helps the pasta gain flavor while it cooks. Bring the water to a rolling boil first. Add the pasta and stir to prevent sticking. Cook according to package directions for perfect texture. Test the pasta a minute or two before the time is up. It should be al dente, or firm to the bite. Drain the pasta and rinse it under cold water. This stops the cooking process and cools the pasta for your salad.
Adjusting Seasoning and Flavor Profiles
Taste is key in any dish, especially pasta salad. After mixing your salad, always taste it. If it needs more flavor, add salt, pepper, or extra pesto. You can also squeeze some fresh lemon juice for brightness. If you want a richer flavor, try adding a bit more grated Parmesan cheese. Keep tasting until it feels just right. Remember, you can always add more, but you can’t take it out!
Serving Suggestions for Presentation
To make your Chicken Pesto Pasta Salad stand out, think about how you present it. Use a large, colorful bowl for serving. This adds visual appeal and makes it inviting. Consider portioning the salad into individual bowls. Top each with extra pine nuts and a sprinkle of cheese. Fresh basil leaves can add a nice pop of green. This not only makes it look great but also adds freshness. For a fun twist, serve with a slice of lemon on the side. This gives guests a chance to add a zesty touch if they want.
Variations
Protein Substitutes
You can switch up the protein in Chicken Pesto Pasta Salad. If you want a vegetarian option, use chickpeas or tofu. Both options add protein and keep it filling. You can also try shrimp or turkey if you want a different meat. These choices keep the salad fresh and fun.
Gluten-Free Option
If you need a gluten-free choice, use gluten-free pasta. Many brands make great options that taste delicious. Look for pasta made from rice or corn. These options cook well and still hold up in the salad. You won’t miss the regular pasta at all.
Add-ons for Extra Flavor
Add-ins can boost the flavor and texture of the salad. Consider adding bell peppers for a sweet crunch. You can also toss in artichoke hearts or olives for a briny kick. For cheese lovers, try feta or mozzarella balls for creaminess. Fresh herbs like parsley or arugula can add brightness too. Each add-on gives you a chance to customize your dish. Make it your own!
Storage Info
How to Store Leftovers
Store your Chicken Pesto Pasta Salad in an airtight container. This keeps it fresh and tasty. Place the salad in the fridge if you want to eat it later. It can last about 3 days. Make sure to seal it well. If you see any wetness or change in smell, toss it out.
Freezing Tips for Long-Term Storage
Freezing is a great way to keep your salad longer. However, the texture may change when thawed. To freeze, place the salad in a freezer-safe bag. Remove as much air as you can before sealing. It can last up to 2 months in the freezer. When you’re ready to eat, thaw it in the fridge overnight.
Reheating Guidelines
Reheat your Chicken Pesto Pasta Salad gently. You can use a microwave for a quick fix. Heat it in 30-second intervals to avoid overcooking. Stir it well between intervals. You can also serve it cold for a refreshing meal. A quick drizzle of olive oil can enhance the flavor when you reheat.
FAQs
How can I make Chicken Pesto Pasta Salad in advance?
You can make Chicken Pesto Pasta Salad a day ahead. First, follow the recipe steps. After mixing, cover the salad well. Store it in the fridge. This allows the flavors to blend. When you are ready to serve, stir it gently. You may want to add a sprinkle of fresh cheese or nuts before serving. This keeps it fresh and tasty.
Can I use homemade pesto instead of store-bought?
Yes, you can use homemade pesto. In fact, it can make the dish even better. Homemade pesto has a fresh taste that store-bought may lack. Just ensure it’s well-balanced with garlic, basil, and nuts. You can adjust the flavor to fit your taste. This gives your salad a personal touch.
What types of pasta work best for this salad?
For this salad, I recommend farfalle or rotini. These shapes hold the pesto well. They also add nice texture to each bite. You can also use penne or fusilli if you prefer. Just remember to cook the pasta al dente. This keeps it firm and perfect for mixing.
This blog post helps you create a tasty Chicken Pesto Pasta Salad. We covered the key ingredients and provided tips for flavor. The step-by-step guide ensures you understand preparation and mixing. You can also explore variations, including protein swaps and gluten-free options. Proper storage methods keep leftovers fresh.
In closing, this recipe is simple and fun. Enjoy trying different flavors and ingredients. It’s a meal that can impress anyone! Dive in and make it your own!