Looking for a fresh and tasty dish? My Crispy Chickpea Salad is just what you need! Packed with crunch and flavor, this salad makes for a wonderful meal or side. Easy to whip up, it’s full of healthy ingredients that will satisfy your hunger. Dive into this quick guide to learn how to turn simple chickpeas into a delightful treat you can enjoy any time!
Ingredients
Main Ingredients for Crispy Chickpea Salad
– 1 can (15 oz) chickpeas, drained and thoroughly rinsed
– 2 tablespoons extra virgin olive oil
– 1 teaspoon smoked paprika
– 1 teaspoon garlic powder
– 1/2 teaspoon cayenne pepper (adjust based on spice preference)
– Salt and black pepper to taste
– 1 cup mixed greens (spinach and arugula)
– 1/2 cucumber, diced into bite-sized pieces
– 1 bell pepper (any color), diced
– 1/4 red onion, thinly sliced
– 1/4 cup cherry tomatoes, halved
– 2 tablespoons tahini
– 1 tablespoon fresh lemon juice
– 1-2 tablespoons water (to adjust dressing consistency)
Optional Ingredients for Enhanced Flavor
You can add more to your salad for extra flavor. Consider these options:
– Avocado for creaminess
– Feta cheese for a salty kick
– Fresh herbs like parsley or cilantro for brightness
– Nuts or seeds for crunch
Nutritional Information Overview
This salad is not just tasty; it’s also good for you. Here is a quick overview:
– High in protein from chickpeas
– Packed with vitamins from fresh veggies
– Healthy fats from olive oil and tahini
– Full of fiber for digestive health
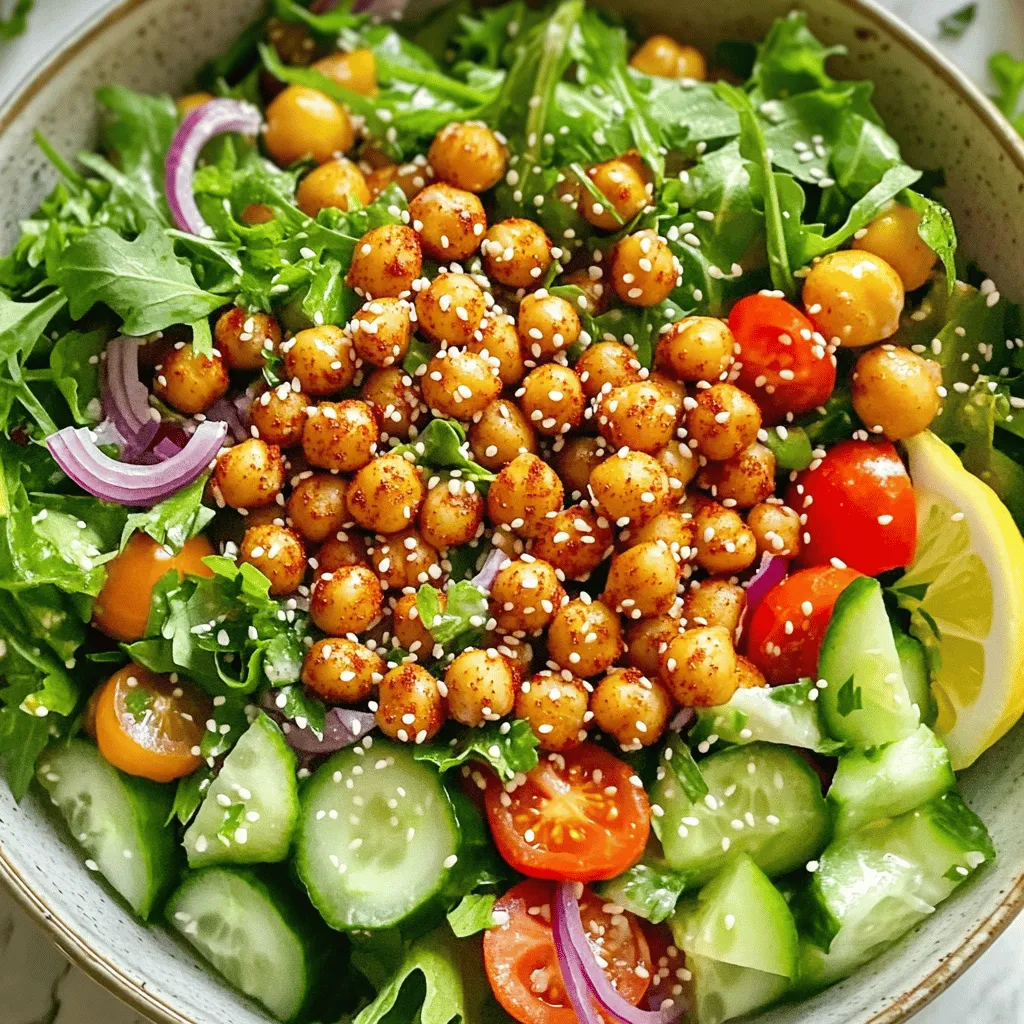
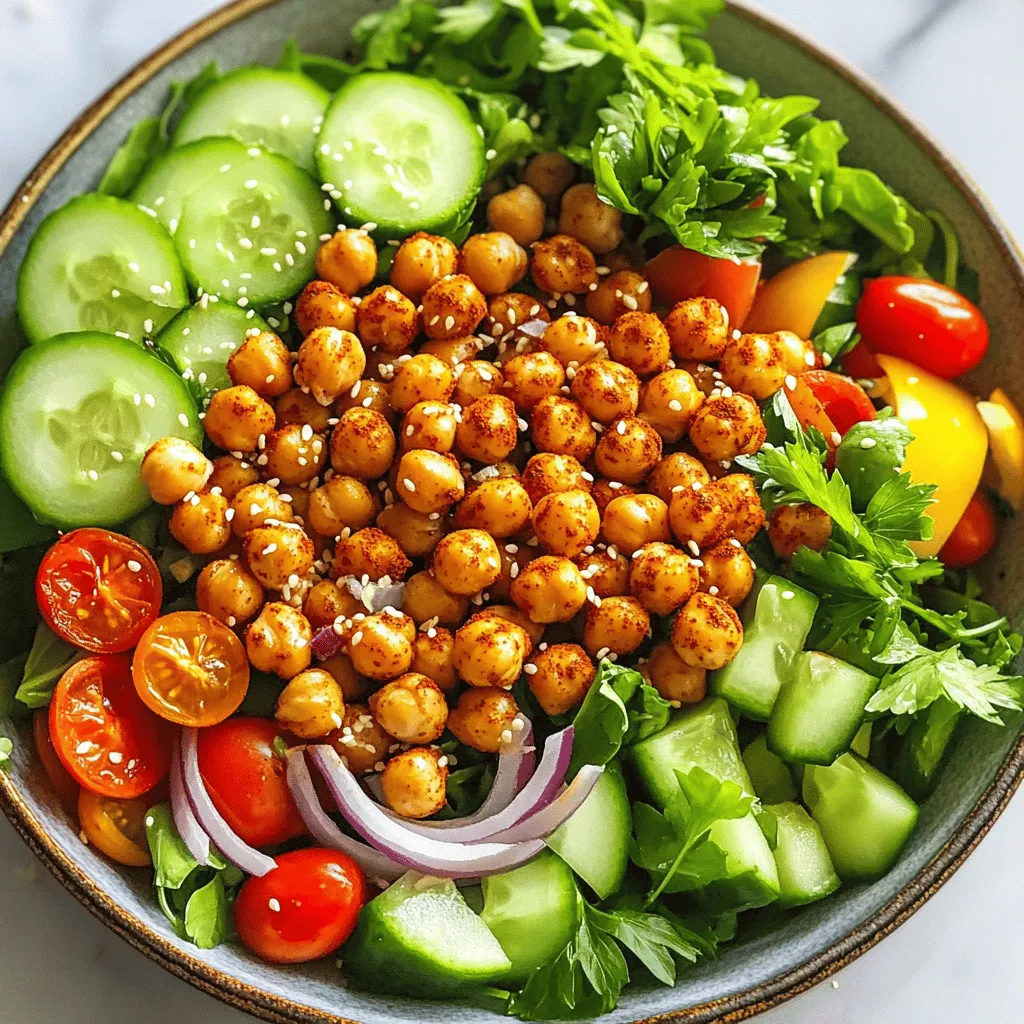
This crispy chickpea salad is a fresh and vibrant dish.
Step-by-Step Instructions
Preparing the Chickpeas for Crispiness
To make crispy chickpeas, you need to start with a can of chickpeas. Drain and rinse them well. This step removes extra salt and liquid. Next, preheat your oven to 400°F (200°C). Spread the chickpeas on a baking sheet in a single layer. Drizzle with olive oil and season with smoked paprika, garlic powder, cayenne pepper, salt, and black pepper. Toss the chickpeas so they are fully coated. Roast them for 25-30 minutes. Shake the pan halfway through. This helps them get crispy all around. They will turn golden and crunchy when ready.
Assembling the Salad Base
While the chickpeas roast, let’s prepare the salad base. Grab a large bowl and add mixed greens. I love using a blend of spinach and arugula for a fresh taste. Next, add diced cucumber, bell pepper, sliced red onion, and halved cherry tomatoes. Toss these ingredients gently. This mix adds color and texture to your salad. It’s simple, but it brings great flavor.
Creating the Tahini Dressing
For the tahini dressing, take a small bowl. Whisk together tahini and fresh lemon juice. Slowly add water while whisking until the dressing is smooth. You can adjust the thickness by adding more water if needed. A pinch of salt makes it taste even better. Once the chickpeas cool, mix them into the salad. Drizzle the creamy dressing over everything and toss gently. This helps combine all the flavors. Serve right away for the best crunch. You can also chill it for up to 30 minutes to blend the taste.
Tips & Tricks
Achieving Perfectly Crispy Chickpeas
To make the best crispy chickpeas, start by rinsing and draining them well. Pat them dry with a clean towel. Moisture is your enemy here. Once dry, toss them with olive oil and spices. The oil helps them crisp up in the oven. Spread them out on a baking sheet. Make sure they sit in one layer. This step is key to crispiness. Roast them at 400°F (200°C) for 25-30 minutes. Shake the pan halfway through to ensure even cooking. You want them golden and crunchy.
Recommended Serving Suggestions
This salad is great on its own, but you can enhance it. Serve it with warm pita bread or over quinoa for a hearty meal. Add some avocado slices for creaminess. You might also sprinkle feta cheese for a salty kick. Fresh herbs, like parsley or cilantro, can boost the flavor. For an extra crunch, top it with sesame seeds.
Common Mistakes to Avoid
One common mistake is not drying the chickpeas enough. If they’re wet, they won’t get crispy. Avoid overcrowding the baking sheet. If they’re too close, they will steam instead of roast. Don’t skip the shaking step while roasting. It helps them cook evenly. Lastly, serve the salad right after mixing. This keeps the chickpeas crunchy. If you wait too long, they may lose their crispness. Enjoy this crispy chickpea salad fresh and flavorful!
Variations
Different Dressing Options
You can switch up the dressing for your crispy chickpea salad. Try a yogurt-based dressing for a creamy touch. Mix plain yogurt with lemon juice, salt, and herbs. This gives a tangy flavor. You can also use balsamic vinegar for a sweet and sharp taste. A simple olive oil and vinegar mix works well too. Just combine equal parts for a fresh vibe.
Adding Additional Vegetables
Feel free to add more veggies to your salad. Carrots add crunch and color. Dice them small or shred them for easy mixing. Radishes bring a peppery kick and look pretty. You can also toss in some corn for sweetness. Avocado slices make it creamy and rich. The more, the merrier!
Protein Add-ins for Heartiness
To make the salad more filling, consider adding protein. Grilled chicken or shrimp pairs well with the chickpeas. For a vegetarian option, add tofu or tempeh. Both soak up flavors and add texture. You can also sprinkle some feta cheese or goat cheese for extra taste. These additions will make your salad a complete meal.
Storage Information
How to Store Leftover Salad
To keep your leftover salad fresh, put it in an airtight container. Make sure to store it in the fridge. This will help maintain the crispness of the veggies for up to two days. If you want to keep the chickpeas crunchy, store them separately. This way, they won’t become soggy from the dressing.
Best Practices for Storing Crispy Chickpeas
For the best storage of crispy chickpeas, let them cool completely first. Then, place them in a glass or plastic container with a tight lid. Use parchment paper at the bottom to absorb moisture. Store them at room temperature for up to three days. Avoid refrigerating them, as that can make them lose their crunch.
Reheating Tips for Leftovers
If you want to reheat the crispy chickpeas, use the oven. Preheat your oven to 350°F (175°C). Spread the chickpeas on a baking sheet in a single layer. Heat them for about 10 minutes, or until they’re warm and crispy again. Avoid using the microwave, as it can make them soft.
FAQs
Can I make the salad ahead of time?
Yes, you can make this salad ahead of time. Prepare the chickpeas and salad base separately. Store the roasted chickpeas in an airtight container. Keep the salad base in the fridge. When you’re ready to serve, add the crispy chickpeas on top. This way, they stay crunchy and fresh. If you mix everything too early, the chickpeas may lose their texture.
What are some alternative beans to use?
You can use other beans if you like. Some good options include black beans, white beans, or kidney beans. Each type brings a unique flavor and texture. Just make sure to rinse and drain them well. Roasting them can work, but their texture may differ from chickpeas.
How can I make this salad vegan-friendly?
This salad is already vegan-friendly! The chickpeas, veggies, and tahini dressing all fit a vegan diet. Just make sure to check your tahini brand. Some may use non-vegan ingredients, but most are plant-based. Enjoy your healthy and vibrant crispy chickpea salad!
This blog post covered the key steps to make a tasty crispy chickpea salad. You learned about the main ingredients, how to prepare the chickpeas, and the best dressings. I shared tips for perfect texture and common mistakes to avoid. You also discovered different ways to customize your salad and how to store leftovers.
In closing, this salad is healthy, easy, and fun to make. You can enjoy it today and experiment with new flavors tomorrow.