Looking for a delicious and fun bite-sized treat? Garlic Parmesan Cheeseburger Bombs are the answer! These tasty bites pack flavorful beef, melty cheese, and aromatic garlic all wrapped in soft biscuit dough. They're perfect for game day, parties, or a quick family dinner. In this post, I’ll show you how to make these easy bombs that will impress everyone at your table. Let’s get cooking!
Why I Love This Recipe
- Delicious Flavor Combination: The mix of garlic and Parmesan with juicy beef creates an irresistible taste that everyone loves.
- Quick and Easy: With just a few simple steps, you can whip up these cheesy bombs in no time, making them perfect for busy weeknights.
- Fun to Eat: These handheld bombs are not only delicious but also fun to serve and enjoy, great for gatherings or game days.
- Customizable: You can easily tweak the filling ingredients or add your favorite toppings to make them uniquely yours.
Ingredients
Main Ingredients
- 1 lb ground beef
- 1 cup shredded cheddar cheese
- 1/2 cup grated Parmesan cheese
Seasoning and Additional Ingredients
- 3 cloves garlic, minced
- 1 teaspoon onion powder
- 1 teaspoon garlic powder
- 1 teaspoon smoked paprika
- Salt and pepper to taste
Dough Preparation
- 1 package refrigerated biscuit dough
- 2 tablespoons unsalted butter, melted
- 1 tablespoon fresh parsley, chopped (for garnish)
- Optional: Sliced pickles and ketchup for serving
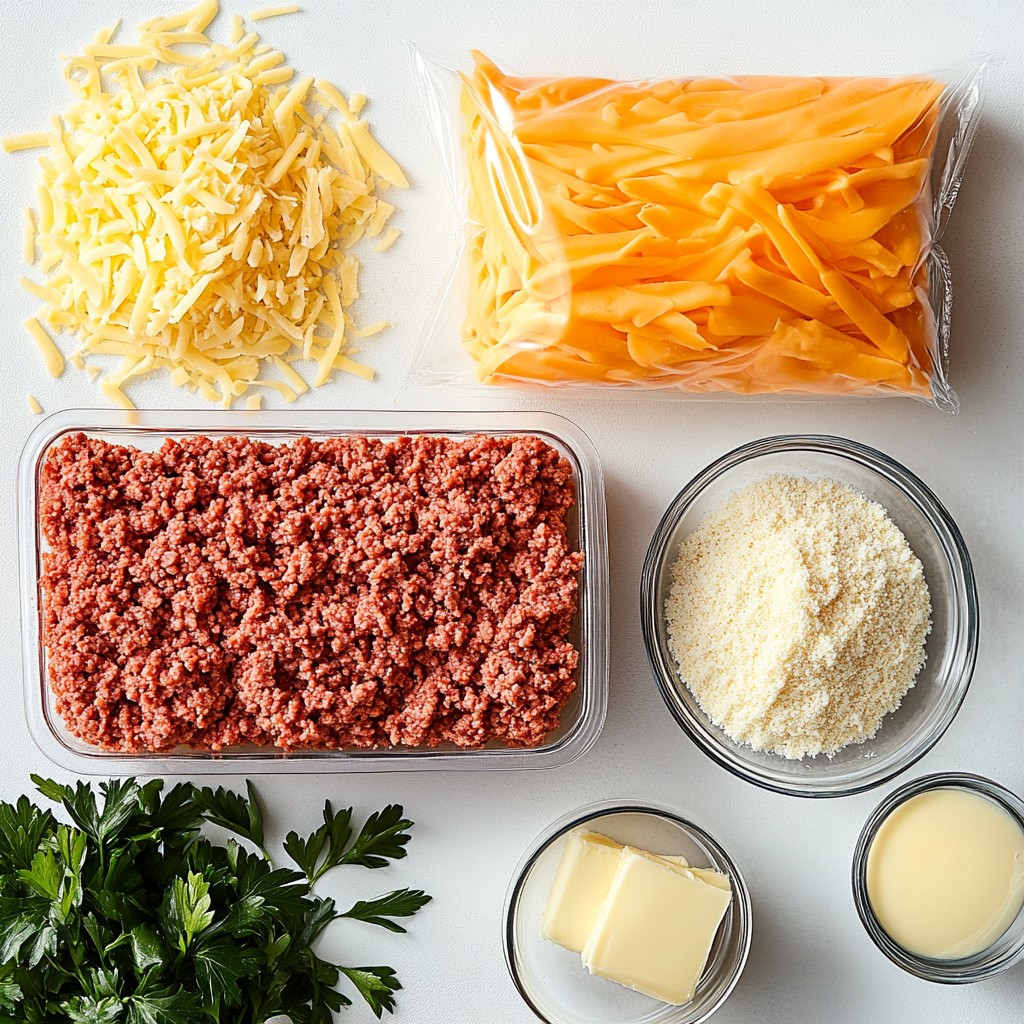
When I create Garlic Parmesan Cheeseburger Bombs, I focus on fresh, simple ingredients. Ground beef is my main base. It becomes savory and rich when mixed with cheeses like cheddar and Parmesan. The cheeses melt perfectly, adding a creamy texture.
I love adding garlic to my beef. It brings a punch of flavor. I use fresh garlic, minced finely. Onion powder and garlic powder deepen the taste, while smoked paprika adds a lovely warmth. Don't forget salt and pepper to enhance all these flavors.
I choose refrigerated biscuit dough for a quick, easy wrap. It puffs up nicely and holds the filling well. Once I prepare the dough, I brush the tops with melted butter. This gives a golden, shiny finish.
For a fun twist, I often serve these bombs with sliced pickles and ketchup. This adds extra flavor and crunch. You can also sprinkle fresh parsley on top for a pop of color. These ingredients come together to create a delicious, bite-sized treat!
Step-by-Step Instructions
Preheat and Prepare
- Preheat the oven to 375°F (190°C).
- In a large bowl, combine 1 pound of ground beef, 1 cup of shredded cheddar cheese, 1/2 cup of grated Parmesan cheese, 1/4 cup of breadcrumbs, and 3 cloves of minced garlic. Add 1 teaspoon of onion powder, 1 teaspoon of garlic powder, 1 teaspoon of smoked paprika, and salt and pepper to taste. Mix until well combined.
Form and Wrap
- Take a small handful of the beef mixture and shape it into a mini patty about 1.5 inches wide. You should make around 10 to 12 patties.
- Open the package of refrigerated biscuit dough. Place each biscuit on a clean surface and flatten it gently with your hands.
- Put one mini patty in the center of each biscuit. Bring the edges of the dough over the patty and pinch them closed. Make sure there are no gaps to keep the filling inside.
Bake and Serve
- Place the wrapped cheeseburger bombs seam-side down on a baking sheet lined with parchment paper.
- Brush the tops with 2 tablespoons of melted butter to help them turn golden as they bake.
- Bake in the oven for 15 to 20 minutes until the biscuits puff up and turn golden brown. The filling should be cooked through.
- Once baked, let them cool for a few minutes. Brush with extra melted butter and sprinkle with chopped fresh parsley. Serve warm with sliced pickles and ketchup for a tasty treat!
Tips & Tricks
Cooking Techniques
Best methods for sealing biscuit dough To seal biscuit dough well, first, flatten each biscuit evenly. Place a mini patty at the center. Then, fold the dough over the patty. Pinch the edges tightly to close it. Make sure no filling leaks out while baking.
How to ensure even cooking of the filling For even cooking, make sure your mini patties are uniform in size. This helps them cook at the same rate. Keep an eye on the baking time. Check for a golden brown color on the biscuits.
Garnishing Suggestions
Alternative garnishes for added flavor You can add more flavor by using different herbs. Chopped chives or cilantro can work well. A sprinkle of crushed red pepper adds heat. Don’t forget to serve with sliced pickles or a drizzle of your favorite sauce.
Presentation tips for serving Serve these bombs on a big platter. This makes them look inviting. You can add fresh parsley on top for color. Pair them with a small bowl of ketchup for dipping.
Flavor Enhancements
Additional spices for more kick If you want some heat, try adding cayenne pepper. A little goes a long way. You can also mix in some Italian seasoning for a fresh taste. Experiment with spices to find your favorite blend.
Cheese alternatives or mix-ins For a twist, swap cheddar for mozzarella. It melts beautifully and gives a gooey texture. You can also mix in cream cheese for a rich filling. This makes each bite even more delicious and creamy.
Pro Tips
- Use Fresh Garlic: Freshly minced garlic will provide a stronger and more vibrant flavor compared to pre-minced options.
- Experiment with Cheese: Feel free to mix different cheeses like mozzarella or pepper jack for a unique twist on the flavor profile.
- Seal Well: Make sure to pinch the biscuit dough tightly around the patty to prevent any leakage while baking.
- Serve Immediately: These bombs are best enjoyed fresh out of the oven while they're warm and gooey.
Variations
Different Cheeses
You can get creative with cheeses. Instead of cheddar, try mozzarella for a milder taste. Gouda adds a rich, buttery flavor. Pepper jack gives a nice kick. For a creamy twist, add cream cheese to the beef mixture. This makes each bite extra smooth and rich. The cheese melts perfectly, keeping the filling nice and gooey.
Healthier Alternatives
If you're looking for lighter options, use ground turkey instead of beef. Plant-based meat is also a great choice. They are just as tasty but lower in fat. For the dough, consider whole wheat or gluten-free biscuit dough. These swaps still give you that fluffy texture but with added health benefits. You can enjoy these bombs guilt-free.
Flavor Customizations
Want to spice things up? Add jalapeños for a fiery kick. They blend well with the beef and cheese. You can also mix in veggies like bell peppers or onions. This not only adds flavor but also boosts the nutrition. Experimenting with different toppings makes each batch unique and fun.
Storage Info
Refrigeration Guidelines
To store leftovers, let the bombs cool first. Place them in an airtight container. This keeps them fresh and tasty. I recommend using glass or plastic containers with tight-fitting lids. You can also wrap them in plastic wrap if you prefer.
Freezing Instructions
To freeze uncooked bombs, wrap each one in plastic wrap. Then, place them in a freezer bag. This helps protect them from freezer burn. If you have cooked bombs, let them cool before freezing. Place them in a single layer in a freezer-safe container. For thawing, take them out and leave them in the fridge overnight. To reheat, bake at 350°F (175°C) for about 10-15 minutes.
Shelf Life
In the fridge, your Garlic Parmesan Cheeseburger Bombs stay good for about 3-4 days. If you freeze them, they last much longer. Expect around 2-3 months of freshness. Make sure to label your containers with dates to keep track.
FAQs
How long do Garlic Parmesan Cheeseburger Bombs take to cook?
Garlic Parmesan Cheeseburger Bombs take about 40 minutes in total. Here’s the breakdown:
- Prep Time: 20 minutes
- Baking Time: 15-20 minutes at 375°F (190°C)
This means you can whip them up quickly for a tasty snack or meal.
Can I make these bombs ahead of time?
Yes, you can make these bombs ahead of time. Here are a few tips:
- Prep in Advance: You can prepare the beef mixture and form the patties a day before. Store them in the fridge.
- Assemble Later: When ready to cook, wrap the patties in biscuit dough. Bake them fresh for the best taste.
- Reheating Options: If you have leftovers, reheat them in the oven at 350°F (175°C) for about 10-15 minutes. This keeps them crispy.
Are Garlic Parmesan Cheeseburger Bombs gluten-free?
If you need gluten-free options, yes, you can make these bombs gluten-free! Here’s how:
- Biscuit Dough: Use gluten-free biscuit dough available at many stores.
- Ground Beef: Fresh ground beef is gluten-free, so you’re good there.
- Seasoning: Always check labels on seasonings to ensure they are gluten-free.
With these easy swaps, everyone can enjoy these tasty bites!
This article covered how to make tasty Garlic Parmesan Cheeseburger Bombs. We discussed key ingredients like ground beef, cheeses, and seasoning. I walked you through simple steps to prep, form, and bake these delicious treats. You also learned tips for customization and storage.
These bombs are perfect for snacks or meals. Enjoy experimenting with flavors and sharing them with friends or family. Happy cooking!