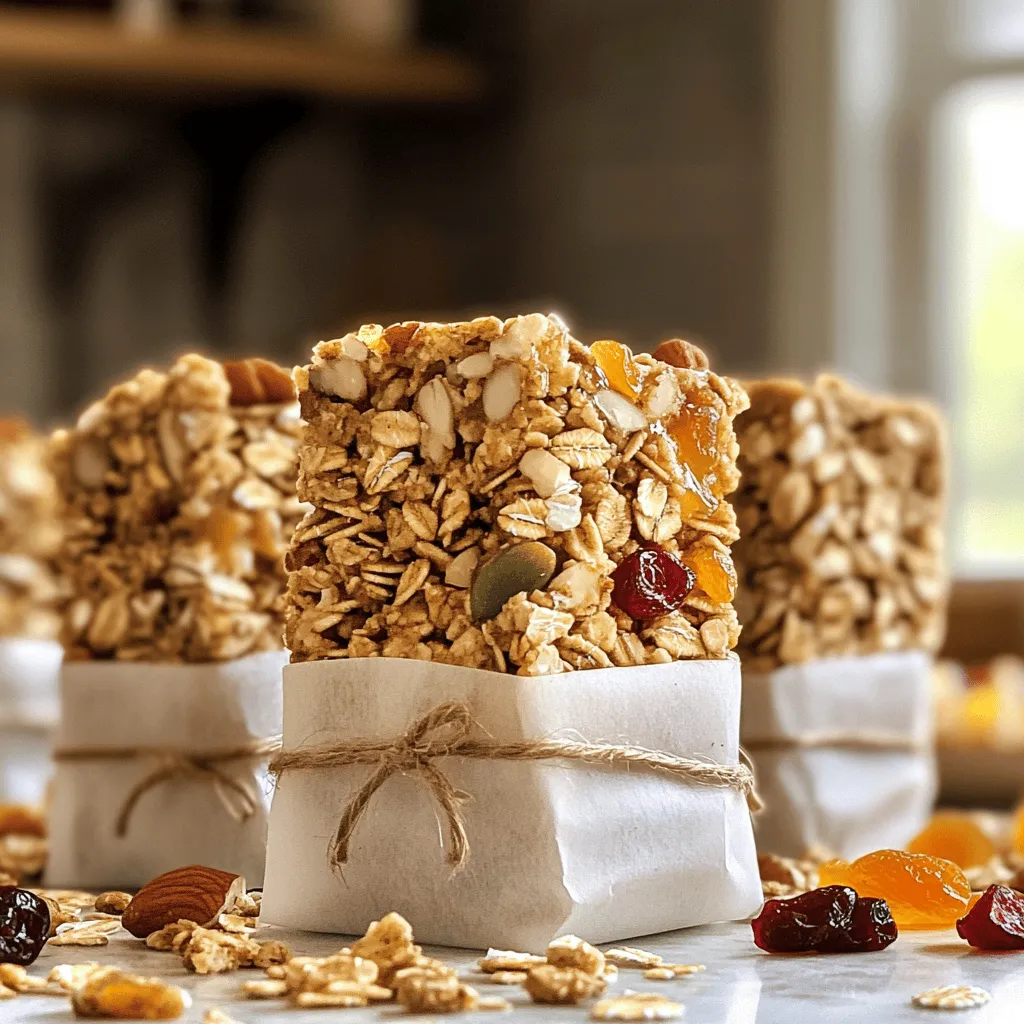
Looking for a simple, healthy snack that’s full of flavor? Homemade granola bars are the answer! With just a few basic ingredients like oats, nuts, and sweeteners, you can whip up a delicious treat. I’ll guide you through easy steps, tips, and variations, ensuring you create the perfect snack for busy days. Let’s dive into making your own nutritious granola bars that everyone will love!
Ingredients
Key Ingredients for Granola Bars
– Rolled oats: They are the main base for your bars. Oats provide heartiness and fiber.
– Mixed nuts: Choose your favorites like almonds, walnuts, or pecans. Nuts add crunch and healthy fats.
– Sweeteners: Use honey or maple syrup for natural sweetness. They help bind the bars together.
– Nut butter options: Peanut butter or almond butter works best. Nut butter adds creaminess and flavor.
Optional Add-ins
– Dried fruits: Add raisins, cranberries, or apricots for a chewy texture and extra sweetness.
– Seeds: Sunflower or pumpkin seeds can boost nutrition. They add crunch and healthy nutrients.
– Flavorings: A dash of vanilla extract or ground cinnamon can enhance the taste. These add warmth and depth.
Nutritional Information
– Calories per serving: Each bar has about 150 calories. They are filling yet light.
– Macro breakdown:
– Protein: Approximately 4 grams per bar.
– Fats: Roughly 6 grams per bar, mostly from nuts and nut butter.
– Carbs: Around 20 grams per bar, thanks to oats and sweeteners.
Using these ingredients, you can create delicious and nutritious granola bars.
Step-by-Step Instructions
Preparing the Baking Pan
First, preheat your oven to 350°F (175°C). This step is important for even cooking. While the oven heats, grab an 8×8 inch baking pan. Line it with parchment paper, leaving some extra paper hanging over the edges. This makes it easy to lift the bars out once they cool.
Combining Dry Ingredients
In a large mixing bowl, combine the rolled oats, mixed nuts, and sunflower seeds. Stir these dry ingredients well to make sure they mix evenly. This mix is the base of your granola bars.
Making the Wet Mixture
Next, melt the honey and peanut butter together. Use a small saucepan over low heat. Stir it continuously until smooth. This takes just a few minutes. Remove it from heat and mix in the vanilla, ground cinnamon, and fine sea salt. This blend adds flavor and sweetness.
Combining Wet and Dry Ingredients
Pour the warm honey-peanut butter mix over your dry ingredients. Use a spatula or wooden spoon to mix it all together. Make sure every oat and nut gets coated evenly. This is key for good texture.
Baking and Cooling
Transfer the mixture into your lined baking pan. Press it down firmly with the spatula, creating a snug layer. Bake in the oven for about 20-25 minutes. Keep an eye on it; you want golden edges but a chewy center. Once baked, take it out and let it cool on a wire rack for about 15 minutes. Lift the bars using the parchment paper. Allow them to cool completely. Finally, use a sharp knife to cut them into bars or squares. Store your homemade granola bars in an airtight container for freshness.
Tips & Tricks
Best Practices for Perfect Bars
To make the best granola bars, press the mixture firmly into the pan. This helps the bars hold together. If you don’t press them down, they may crumble when you cut them. Use the back of a spatula or your hands to pack it tightly.
Next, monitor the baking time closely. The bars should bake for about 20-25 minutes. Look for golden edges, and keep the center chewy. If they bake too long, they will become hard and dry. Remember, you want that perfect balance of crunch and chewiness.
Storage Tips
Store your granola bars in an airtight container. This keeps them fresh and prevents them from drying out. I recommend using a glass or plastic container with a tight lid.
You can keep them at room temperature for up to a week. If you want them to last longer, freeze them! Wrap each bar in plastic wrap and place them in a freezer-safe bag. They will stay good for about three months in the freezer.
Common Mistakes to Avoid
Avoid overbaking your granola bars. Checking them a few minutes before the suggested time helps. If they look too dark, take them out.
Also, don’t skip measuring your ingredients. Accurate measurements ensure that the bars turn out well. Each ingredient plays a role in texture and flavor. Adjusting even one can change the outcome of your homemade granola bars.

Variations
Flavor Variations
You can easily mix up the flavors in your granola bars. Here are two tasty ideas:
– Chocolate chip granola bars: Just add 1/2 cup of chocolate chips to the mix. They melt slightly when baked, adding a sweet touch.
– Coconut and almond granola bars: Use 1/2 cup of shredded coconut and swap nuts for almonds. This gives a tropical flavor.
Dietary Variations
If you have specific dietary needs, you can adjust your bars easily.
– Gluten-free options: Use gluten-free oats and ensure your nut butter is also gluten-free. Many brands are safe to eat.
– Vegan alternatives: Replace honey with maple syrup. This keeps your bars vegan while still sweet.
No-Bake Granola Bars
No-bake granola bars are quick and easy. You can make them in just a few minutes.
– Quick no-bake recipes: Combine oats, nut butter, and sweetener in a bowl. Press the mixture into a pan. Chill until set, then cut.
– Differences in texture and taste: No-bake bars are softer and chewier than baked ones. They also have a more intense flavor from the nut butter.
Try these variations to keep your snacks fresh and exciting!Enjoy your cooking!
Serving Suggestions
Presentation Ideas
You can make your granola bars look great. Wrap each bar in parchment paper. Tie them with twine for a charming look. This way, they are easy to grab for busy days. You can also serve them with yogurt or fresh fruit. This adds more flavors and makes a tasty snack or breakfast.
Meal Prep Ideas
Think about portioning the granola bars for the week. Cut them into squares and store them in bags. This makes it easy to grab a snack when you need one. You can also pack them in lunchboxes. They are a great treat for kids and adults alike.
Perfect Pairings
Pair your granola bars with the right drinks. Try a glass of milk, tea, or coffee. These drinks complement the flavors well. You can also enjoy the bars with other snacks. Fresh fruit or nuts make great sides. They add variety to your snack time and keep you satisfied.
FAQs
How do I make granola bars without nuts?
If you want nut-free granola bars, you can use seeds instead. Sunflower seeds and pumpkin seeds work well. You can also add extra oats or puffed rice for crunch. These swaps keep the texture nice and add flavor without nuts.
Can I customize ingredients in my homemade granola bars?
Yes! Customizing your granola bars is fun. You can change the sweeteners too. If you don’t like honey, use maple syrup or agave. Add dried fruits like cranberries or apricots. You can even mix in chocolate chips or coconut flakes for a twist.
How long do homemade granola bars last?
Homemade granola bars can last up to a week in an airtight container. Store them in a cool, dry place. If you want them to last longer, freeze them. They keep well for up to three months in the freezer. Just wrap them tightly.
Why are my granola bars too crumbly?
If your granola bars crumble, they might not have enough binding. Make sure to use enough honey or nut butter. Press the mixture firmly into the pan before baking. You can also try adding a bit of water or more nut butter if it seems dry.
You now have all the steps and tips to make great granola bars. Remember, starting with rolled oats and adding your favorite nuts and sweeteners sets the base. Mixing your dry and wet ingredients well is key. Don’t forget to press the mixture firmly for the best texture. You can easily swap ingredients to fit your taste or diet. Enjoy them as snacks or in lunchboxes. With practice, you’ll create bars you’ll love and share. Happy cooking!