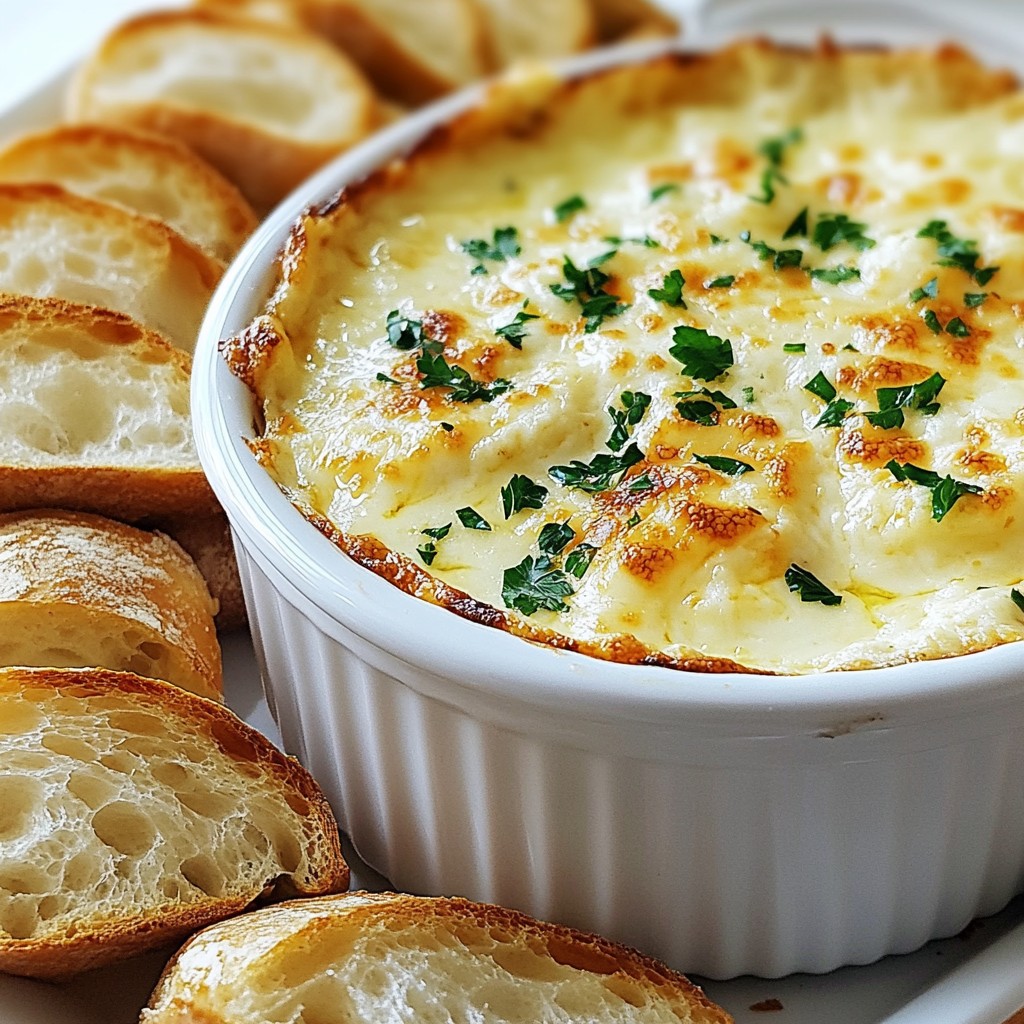
Are you ready to elevate your snack game? This Irresistible Garlic Bread Dip is a creamy, cheesy delight you won’t want to miss. With simple ingredients and easy steps, this dip is perfect for parties or a cozy night in. You’ll learn how to mix the perfect base, bake it to bubbly perfection, and even explore fun variations. Let’s dive into making this delicious dip that will keep everyone coming back for more!
Why I Love This Recipe
- Deliciously Creamy: This dip combines cream cheese, sour cream, and mayonnaise for a rich and velvety texture that’s irresistible.
- Garlic Goodness: With four cloves of garlic, this dip packs a flavorful punch that garlic lovers will adore.
- Cheesy Bliss: The blend of mozzarella and Parmesan cheeses creates a delightful gooeyness that melts in your mouth.
- Perfect for Sharing: Serve it warm with crusty bread, making it a great appetizer for parties and gatherings.
Ingredients
Main Ingredients for Garlic Bread Dip
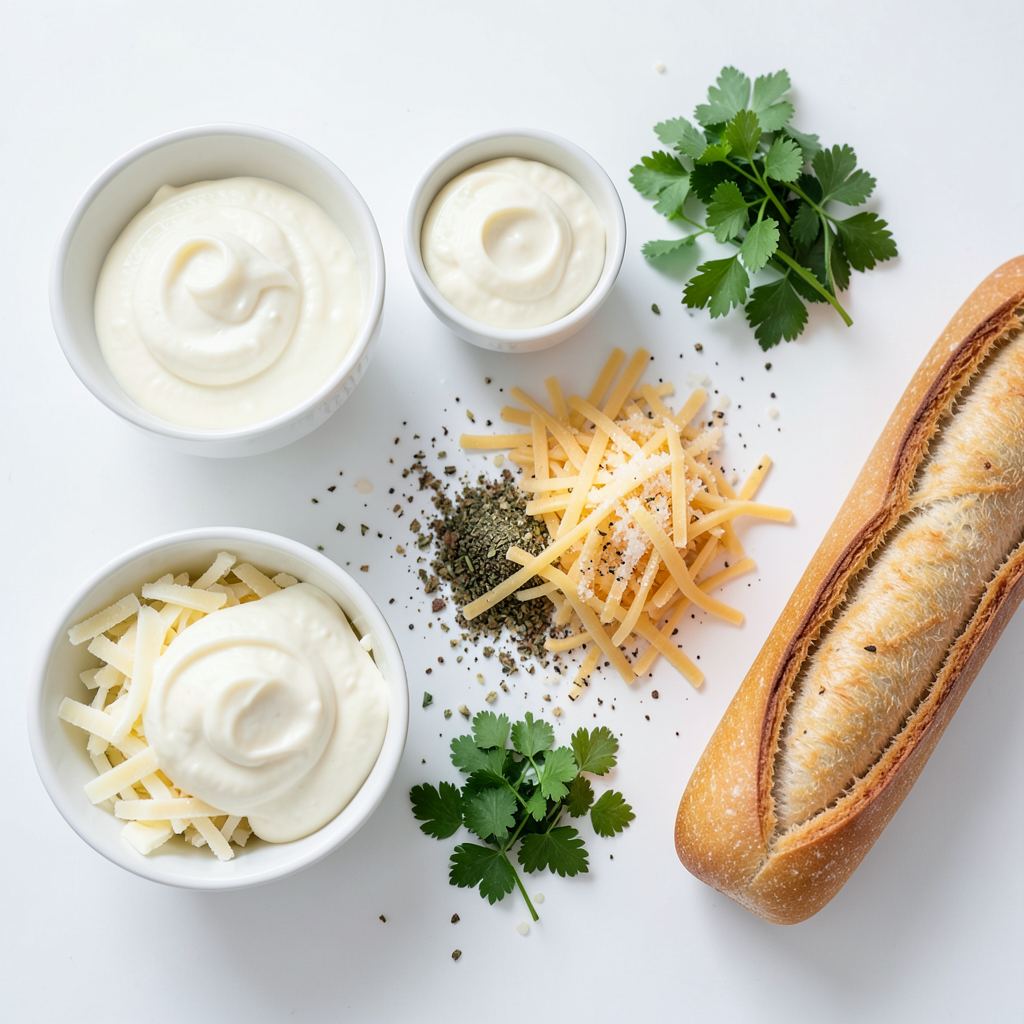
To make a delicious garlic bread dip, you need these main ingredients:
- 1 cup cream cheese, softened
- 1/2 cup sour cream
- 1/2 cup mayonnaise
- 1 cup shredded mozzarella cheese
- 1/2 cup grated Parmesan cheese
- 4 cloves of garlic, finely minced
- 1 teaspoon dried Italian herbs (thyme, oregano, basil)
- Salt and freshly cracked black pepper to taste
These ingredients combine to create a creamy and flavorful base. The cream cheese gives it a rich texture. The sour cream and mayo add tanginess. The garlic packs in flavor, while the cheeses offer that gooey goodness.
Optional Garnishes
You can add garnishes to make your dip look and taste even better. Here are some ideas:
- 2 tablespoons fresh parsley, chopped
Sprinkling chopped parsley on top makes the dip colorful and fresh. It also adds a slight herb taste that pairs well with the dip.
Tips for Choosing Ingredients
Choosing the right ingredients is key to a great dip. Here are some tips:
- Use full-fat cream cheese for a richer flavor.
- Opt for fresh garlic rather than garlic powder for a stronger taste.
- Look for high-quality cheeses for better melting and flavor.
- Choose fresh herbs if possible. They have a brighter taste than dried ones.
By using quality ingredients, you’ll enhance the overall taste of your garlic bread dip. Trust me, it makes a big difference!
Step-by-Step Instructions
Prepping the Oven and Baking Dish
First, you need to preheat your oven to 375°F (190°C). This step is key to getting that nice, bubbly dip. While the oven heats, grab a small baking dish. You want it to be just the right size; not too big, not too small. Make sure it's clean and dry for the dip.
Mixing the Cream Cheese Base
In a large bowl, place 1 cup of softened cream cheese. Add in 1/2 cup of sour cream and 1/2 cup of mayonnaise. Use a hand mixer to beat these together on medium speed. Mix until it turns smooth and creamy. Make sure there are no lumps left. This is your creamy base, and it sets the stage for all the flavors to come.
Incorporating Cheeses and Seasoning
Now, it’s time to add the fun stuff. Fold in 1 cup of shredded mozzarella cheese and 1/2 cup of grated Parmesan cheese into your creamy base. Next, toss in 4 cloves of finely minced garlic and 1 teaspoon of dried Italian herbs. Add salt and freshly cracked black pepper to taste. Use a spatula to mix everything well. Ensure all the flavors blend nicely. This mix should be rich and full of flavor, ready for baking.
Tips & Tricks
Baking Tips for Perfectly Bubbly Dip
To get that perfect bubbly dip, you need to watch the oven closely. Preheat your oven to 375°F (190°C) before mixing. This helps the dip cook evenly. Bake the dip for 25 to 30 minutes. Look for a golden top and bubbling edges. If it cooks too long, it can dry out. You want it creamy and warm.
Serving Suggestions for Best Presentation
Serve your dip in a nice baking dish. Arrange slices of baguette or garlic bread around it. This makes it easy for guests to grab their bread. For a pop of color, add a small bowl of chopped parsley next to the dip. It not only looks great but adds fresh flavor.
Storage and Reheating Tips
If you have leftover dip, store it in an airtight container. It will last in the fridge for about three days. To reheat, place it back in the oven at 350°F (175°C) for about 10-15 minutes. You can also microwave it in short bursts until warm. Just stir it well to make sure it heats evenly.
Pro Tips
- Use Fresh Garlic: For the best flavor, use fresh garlic cloves instead of pre-minced garlic. This will enhance the overall taste of the dip.
- Experiment with Cheeses: Feel free to mix and match different types of cheese. Adding a bit of sharp cheddar or creamy goat cheese can provide a unique twist!
- Serve with Variety: In addition to baguette slices, try serving the dip with fresh vegetables, crackers, or breadsticks for a fun and diverse dipping experience.
- Make Ahead: You can prepare the dip a day in advance and store it in the fridge. Just pop it in the oven when you're ready to serve!
Variations
Flavor Variations
You can change the dip's taste easily. Adding spinach gives it a fresh touch. Just chop a cup of fresh spinach and mix it in. Sun-dried tomatoes add a sweet and tangy flavor. Use about half a cup, chopped. Both options make this dip even better. Don't be afraid to play with flavors!
Cheese Substitutions
If you want to switch up the cheese, go ahead! Cream cheese works well, but you can try goat cheese for a tangy kick. For a creamier dip, add ricotta cheese instead. You can also use cheddar cheese for a sharper taste. Experiment with what you like best!
Gluten-Free Alternatives
For a gluten-free option, use gluten-free bread. Many brands make tasty gluten-free baguettes. You can also serve the dip with fresh veggies or gluten-free crackers. They work great for dipping. This way, everyone can enjoy the dip!
Storage Info
How to Store Leftover Dip
To store leftover dip, let it cool first. Then, place it in an airtight container. Keep it in the fridge for up to three days. Make sure the lid is tight to avoid drying out the dip. This keeps the flavors fresh for your next snack.
Freezing Instructions for Longer Storage
If you want to save the dip for longer, freezing is a great option. Scoop the dip into a freezer-safe container. Press plastic wrap against the dip to minimize air exposure. Seal the container tightly and label it with the date. You can freeze it for up to three months. Just remember to thaw it in the fridge overnight before using.
Best Practices for Reheating
When you’re ready to enjoy your dip again, reheating is easy. Preheat your oven to 350°F (175°C). Transfer the dip to an oven-safe dish if it’s not already. Cover it with foil to keep it from drying out. Heat for about 15-20 minutes. Check to see if it’s bubbly and warm throughout. You can also microwave it in short bursts, stirring in between. Enjoy your creamy and cheesy dip just like the first time!
FAQs
What bread is best for serving with garlic bread dip?
The best bread for garlic bread dip is a fresh baguette. Its crusty outside adds a nice crunch. You can also use toasted garlic bread for added flavor. Slices should be thick enough to hold the dip but not too thick to be hard to bite. Try toasting the bread lightly to make it even better.
Can I make garlic bread dip ahead of time?
Yes, you can make garlic bread dip ahead of time. Prepare the dip and store it in the fridge until you are ready to bake it. Cover the dish with plastic wrap to keep it fresh. Before baking, let it sit at room temperature for about 30 minutes. This helps it heat evenly.
How long can I store garlic bread dip in the refrigerator?
You can store garlic bread dip in the refrigerator for up to three days. Make sure to keep it in an airtight container. When you are ready to eat it, just reheat in the oven until it’s warm and bubbly. Enjoy it with your favorite bread again!
This garlic bread dip is easy and fun to make. You learned about the key ingredients, plus tips and tricks for a creamy, bubbly dip. I shared ways to mix it up with new flavors and ingredients. You can store and reheat any leftovers effectively. Enjoy this tasty dip with your favorite bread, or try it with new choices. I hope these tips help you create the perfect dip every time. Happy dipping!