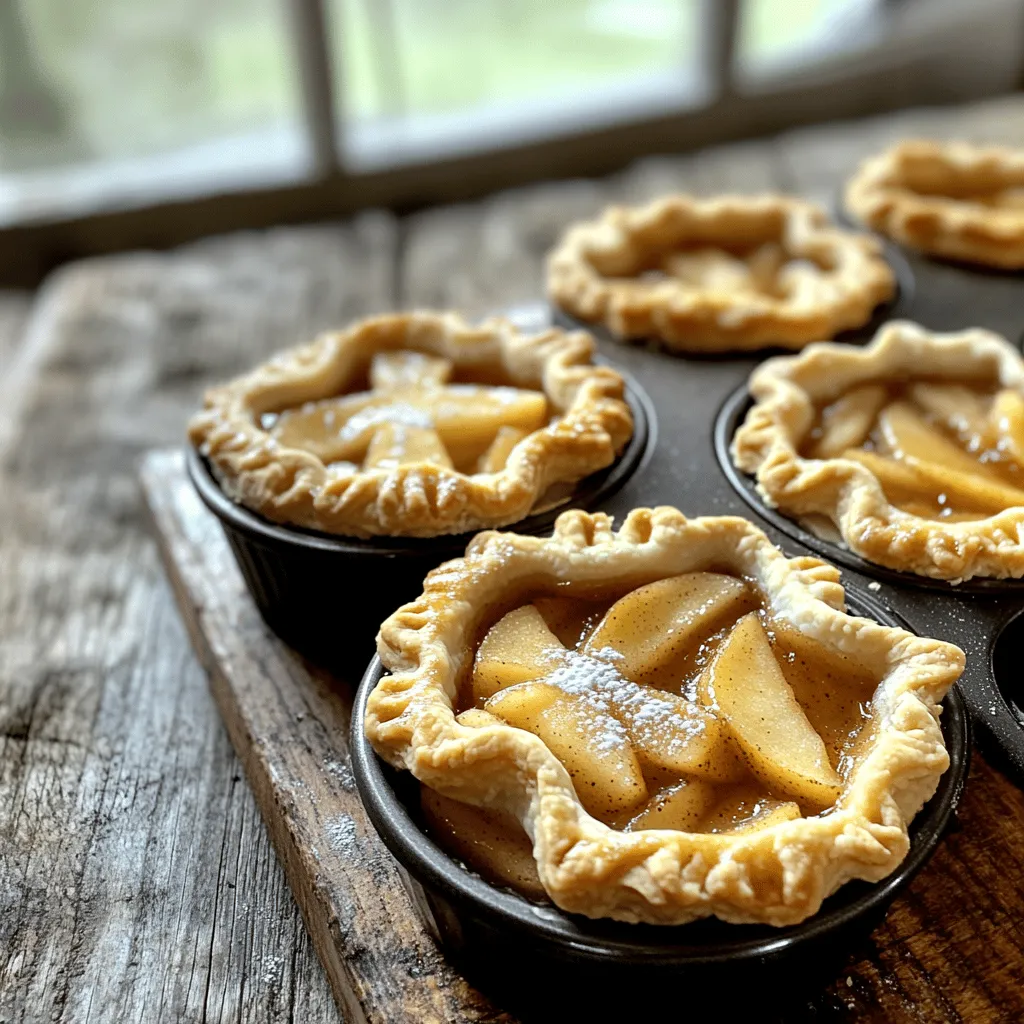
Muffin Tin Mini Apple Pies Delightful and Easy Treat

Looking for a fun and easy dessert? Muffin tin mini apple pies are your answer! These bite-sized treats combine sweet apples with warm spices, all wrapped in a flaky crust. I’ll guide you through the simple steps to make these delightful pies at home, plus share helpful tips and fun variations. Get ready to impress your family and friends with this tasty addition to your dessert menu!

Ingredients

Detailed List of Ingredients

Apples: I recommend using Granny Smith or Honeycrisp apples. These apples have the right balance of sweet and tart. Peel, core, and dice them into small pieces. This helps them cook evenly and fill your pies nicely.

Sweetener and spices: For sweetness, use 1/2 cup of brown sugar. It adds a rich flavor. You also need 1 teaspoon of ground cinnamon and 1/4 teaspoon of ground nutmeg. These spices bring warmth and depth to the filling. A tablespoon of lemon juice brightens the flavor and keeps the apples fresh. Cornstarch helps thicken the filling, so use 1 tablespoon.

Pie crust options: I suggest using pre-made pie crusts, which save time. A package usually contains two crusts. Roll them out a bit to make them easier to work with.

Egg wash and garnish details: For the egg wash, beat 1 egg until smooth. This gives your mini pies a shiny, golden top. You can sprinkle 1 tablespoon of granulated sugar on top for extra sweetness and crunch.

These ingredients come together to create a delightful treat that is both easy and fun to make. For the full recipe, be sure to follow along!

Step-by-Step Instructions

Preparation Steps

1. Preheat the Oven: First, set your oven to 375°F (190°C). This heat will help your pies bake perfectly.

2. Create the Apple Filling Mixture: In a bowl, mix diced apples with brown sugar, ground cinnamon, nutmeg, lemon juice, and cornstarch. Stir well to coat the apples. Let this sit for a few minutes. The flavors will blend and deepen.

3. Grease the Muffin Tin: Lightly coat your muffin tin with non-stick spray or softened butter. This step is key for easy removal later.

4. Rolling Out the Pie Crust: On a floured surface, roll out your pre-made pie crusts. Aim for an even thickness. Use a round cutter or a glass to cut out 12 circles from the dough, each about 4 inches wide.

5. Forming Pie Shells: Place each dough circle into a muffin cup. Press it gently against the bottom and sides. Make sure the edges rise a bit above the rim. This adds to the look and keeps the filling in.

Baking Process

1. Filling the Pie Shells: Spoon your apple filling into each pie shell. Fill them just to the brim. This helps prevent any overflow while baking.

2. Creating Decorative Topping: With leftover dough, cut out smaller shapes for a decorative lid. Think stars or hearts! You can also leave them open for a rustic feel.

3. Applying Egg Wash: Brush the tops with the beaten egg. This gives your pies a golden color. Sprinkle a bit of granulated sugar on top for a sweet crunch.

4. Baking Instructions: Place the muffin tin in the oven and bake for 20-25 minutes. Look for a golden brown crust and bubbling apple filling to know they are done.

5. Cool and Serve: Let the mini pies cool in the tin for about 10 minutes. Then, move them to a wire rack to cool fully. The smell will fill your kitchen and make everyone eager to try them.

For the complete recipe with all the ingredients and detailed steps, check out the Full Recipe.

Tips & Tricks

Making the Best Mini Apple Pies

Choosing the right apples is key. I love using Granny Smith or Honeycrisp apples. They provide a great mix of sweetness and tartness. Their firm texture holds up well during baking. Avoid soft apples as they can turn mushy.

For a flaky crust, here are my favorite techniques:

Keep Ingredients Cold: Use cold butter and ice water. This helps create layers.

Don’t Overwork the Dough: Mix just until combined. Overworking makes it tough.

Chill the Dough: Refrigerate the dough for at least 30 minutes before rolling. This helps the gluten relax.

Troubleshooting Common Issues

What do you do if your pies overflow? First, avoid overfilling them. Fill the shells just to the brim. If they do overflow, place a baking sheet under the muffin tin. This will catch any drips.

Adjusting baking time is also important. Ovens can vary in heat. Start checking your pies a few minutes early. Look for a golden crust and bubbling filling. If your oven runs hot, reduce the baking time slightly. If it runs cool, add a few extra minutes.

Variations

Flavor Alternatives

You can switch up the filling in your mini apple pies. Try using other fruits like pears or berries. Each fruit adds a unique taste. For a fun twist, mix fruits together. Imagine a berry and apple pie!

When it comes to crust, don’t be shy to explore. You can use gluten-free crusts if you want. Whole wheat crusts also offer a nutty flavor. Both options can still give you a nice, flaky texture.

Serving Suggestions

Pair your mini apple pies with ice cream or whipped cream. Adding a drizzle of caramel sauce makes them even more special. The warm pie contrasts beautifully with cold ice cream.

For special occasions, think about presentation. Arrange the pies on a nice platter. Garnish with fresh mint leaves. This makes your dessert look fancy and inviting.

For the full recipe, check out the details above.

Storage Info

How to Store Mini Apple Pies

To keep your muffin tin mini apple pies fresh, store them properly. The best way is to let them cool completely. Then, place them in an airtight container. If you put them in the fridge, they stay fresh for up to five days. Make sure to separate layers with parchment paper to avoid sticking.

If you want to keep them longer, freezing is a great option. Wrap each mini pie tightly in plastic wrap. Then, place the wrapped pies in a freezer-safe bag. They can last up to three months in the freezer. When you’re ready to eat them, you can thaw them in the fridge overnight.

Reheating Tips

To enjoy your mini apple pies warm, reheating is key. Preheat your oven to 350°F (175°C). Place the pies on a baking sheet. Heat them for about 10-15 minutes or until they are warm throughout. This method makes the crust crispy again. You can also use a microwave if you’re in a hurry. Just heat them for about 20-30 seconds. However, this may make the crust soft. For the best texture, use the oven method.

For the full recipe, check out the [Full Recipe].

FAQs

Common Questions about Muffin Tin Mini Apple Pies

Can I use fresh apples instead of canned?

Yes, you can use fresh apples. I recommend Granny Smith or Honeycrisp apples. They add a nice tartness and crunch. Just peel, core, and dice them before mixing with the sugar and spices. Fresh apples will give your mini pies a great flavor.

What is the best way to prevent a soggy crust?

To avoid a soggy crust, make sure your filling is not too wet. Drain any excess liquid from the apple mixture. Also, pre-baking the crust for a few minutes helps create a barrier. This way, your crust stays crisp and delicious.

How long do mini apple pies typically last?

Mini apple pies can last about 3-4 days in the fridge. Keep them in an airtight container to maintain freshness. If you want to store them longer, consider freezing them. They can stay good for up to 3 months in the freezer. Just thaw and reheat before serving.

For the complete details on making these delightful treats, refer to the Full Recipe.

In this post, you learned to make delicious mini apple pies using a muffin tin. We covered ingredients, preparation steps, and baking tips. You discovered ways to make them your own with flavor variations and serving suggestions. Proper storage and reheating methods ensure your pies stay fresh and tasty.

Now you can impress friends and family with your baking skills. Enjoy your mini apple pies, and don’t forget to share them with others!
- Apples: I recommend using Granny Smith or Honeycrisp apples. These apples have the right balance of sweet and tart. Peel, core, and dice them into small pieces. This helps them cook evenly and fill your pies nicely. - Sweetener and spices: For sweetness, use 1/2 cup of brown sugar. It adds a rich flavor. You also need 1 teaspoon of ground cinnamon and 1/4 teaspoon of ground nutmeg. These spices bring warmth and depth to the filling. A tablespoon of lemon juice brightens the flavor and keeps the apples fresh. Cornstarch helps thicken the filling, so use 1 tablespoon. - Pie crust options: I suggest using pre-made pie crusts, which save time. A package usually contains two crusts. Roll them out a bit to make them easier to work with. - Egg wash and garnish details: For the egg wash, beat 1 egg until smooth. This gives your mini pies a shiny, golden top. You can sprinkle 1 tablespoon of granulated sugar on top for extra sweetness and crunch. These ingredients come together to create a delightful treat that is both easy and fun to make. For the full recipe, be sure to follow along! 1. Preheat the Oven: First, set your oven to 375°F (190°C). This heat will help your pies bake perfectly. 2. Create the Apple Filling Mixture: In a bowl, mix diced apples with brown sugar, ground cinnamon, nutmeg, lemon juice, and cornstarch. Stir well to coat the apples. Let this sit for a few minutes. The flavors will blend and deepen. 3. Grease the Muffin Tin: Lightly coat your muffin tin with non-stick spray or softened butter. This step is key for easy removal later. 4. Rolling Out the Pie Crust: On a floured surface, roll out your pre-made pie crusts. Aim for an even thickness. Use a round cutter or a glass to cut out 12 circles from the dough, each about 4 inches wide. 5. Forming Pie Shells: Place each dough circle into a muffin cup. Press it gently against the bottom and sides. Make sure the edges rise a bit above the rim. This adds to the look and keeps the filling in. 1. Filling the Pie Shells: Spoon your apple filling into each pie shell. Fill them just to the brim. This helps prevent any overflow while baking. 2. Creating Decorative Topping: With leftover dough, cut out smaller shapes for a decorative lid. Think stars or hearts! You can also leave them open for a rustic feel. 3. Applying Egg Wash: Brush the tops with the beaten egg. This gives your pies a golden color. Sprinkle a bit of granulated sugar on top for a sweet crunch. 4. Baking Instructions: Place the muffin tin in the oven and bake for 20-25 minutes. Look for a golden brown crust and bubbling apple filling to know they are done. 5. Cool and Serve: Let the mini pies cool in the tin for about 10 minutes. Then, move them to a wire rack to cool fully. The smell will fill your kitchen and make everyone eager to try them. For the complete recipe with all the ingredients and detailed steps, check out the Full Recipe. Choosing the right apples is key. I love using Granny Smith or Honeycrisp apples. They provide a great mix of sweetness and tartness. Their firm texture holds up well during baking. Avoid soft apples as they can turn mushy. For a flaky crust, here are my favorite techniques: - Keep Ingredients Cold: Use cold butter and ice water. This helps create layers. - Don’t Overwork the Dough: Mix just until combined. Overworking makes it tough. - Chill the Dough: Refrigerate the dough for at least 30 minutes before rolling. This helps the gluten relax. What do you do if your pies overflow? First, avoid overfilling them. Fill the shells just to the brim. If they do overflow, place a baking sheet under the muffin tin. This will catch any drips. Adjusting baking time is also important. Ovens can vary in heat. Start checking your pies a few minutes early. Look for a golden crust and bubbling filling. If your oven runs hot, reduce the baking time slightly. If it runs cool, add a few extra minutes. {{image_4}} You can switch up the filling in your mini apple pies. Try using other fruits like pears or berries. Each fruit adds a unique taste. For a fun twist, mix fruits together. Imagine a berry and apple pie! When it comes to crust, don't be shy to explore. You can use gluten-free crusts if you want. Whole wheat crusts also offer a nutty flavor. Both options can still give you a nice, flaky texture. Pair your mini apple pies with ice cream or whipped cream. Adding a drizzle of caramel sauce makes them even more special. The warm pie contrasts beautifully with cold ice cream. For special occasions, think about presentation. Arrange the pies on a nice platter. Garnish with fresh mint leaves. This makes your dessert look fancy and inviting. For the full recipe, check out the details above. To keep your muffin tin mini apple pies fresh, store them properly. The best way is to let them cool completely. Then, place them in an airtight container. If you put them in the fridge, they stay fresh for up to five days. Make sure to separate layers with parchment paper to avoid sticking. If you want to keep them longer, freezing is a great option. Wrap each mini pie tightly in plastic wrap. Then, place the wrapped pies in a freezer-safe bag. They can last up to three months in the freezer. When you’re ready to eat them, you can thaw them in the fridge overnight. To enjoy your mini apple pies warm, reheating is key. Preheat your oven to 350°F (175°C). Place the pies on a baking sheet. Heat them for about 10-15 minutes or until they are warm throughout. This method makes the crust crispy again. You can also use a microwave if you’re in a hurry. Just heat them for about 20-30 seconds. However, this may make the crust soft. For the best texture, use the oven method. For the full recipe, check out the [Full Recipe]. Can I use fresh apples instead of canned? Yes, you can use fresh apples. I recommend Granny Smith or Honeycrisp apples. They add a nice tartness and crunch. Just peel, core, and dice them before mixing with the sugar and spices. Fresh apples will give your mini pies a great flavor. What is the best way to prevent a soggy crust? To avoid a soggy crust, make sure your filling is not too wet. Drain any excess liquid from the apple mixture. Also, pre-baking the crust for a few minutes helps create a barrier. This way, your crust stays crisp and delicious. How long do mini apple pies typically last? Mini apple pies can last about 3-4 days in the fridge. Keep them in an airtight container to maintain freshness. If you want to store them longer, consider freezing them. They can stay good for up to 3 months in the freezer. Just thaw and reheat before serving. For the complete details on making these delightful treats, refer to the Full Recipe. In this post, you learned to make delicious mini apple pies using a muffin tin. We covered ingredients, preparation steps, and baking tips. You discovered ways to make them your own with flavor variations and serving suggestions. Proper storage and reheating methods ensure your pies stay fresh and tasty. Now you can impress friends and family with your baking skills. Enjoy your mini apple pies, and don’t forget to share them with others!
Muffin Tin Mini Apple Pies

Indulge in the ultimate comfort dessert with these Muffin Tin Mini Apple Pies! Packed with sweet, spiced apples and a flaky crust, these charming bites are perfect for any occasion. With just a few simple ingredients and easy steps, you’ll have a delightful treat ready in no time. Click through to explore the full recipe and learn how to impress your family and friends with these delicious mini pies!

Ingredients
  

2 large apples, peeled, cored, and diced (Granny Smith or Honeycrisp recommended)

1/2 cup brown sugar

1 teaspoon ground cinnamon

1/4 teaspoon ground nutmeg

1 tablespoon lemon juice

1 tablespoon cornstarch

1 package of pre-made pie crusts (contains 2 crusts)

1 egg, beaten (for egg wash)

1 tablespoon granulated sugar (for garnish)

Instructions
 

Preheat the Oven: Set your oven temperature to 375°F (190°C) to preheat while you prepare the filling and pastry shells.

    Prepare the Apple Filling: In a medium mixing bowl, combine the diced apples with brown sugar, ground cinnamon, nutmeg, lemon juice, and cornstarch. Toss the mixture thoroughly until the apples are evenly coated. Let it rest for a few minutes to allow the flavors to blend beautifully.

      Grease the Muffin Tin: Lightly coat a muffin tin with non-stick cooking spray or softened butter to ensure easy removal of the mini pies later on.

        Roll Out Pie Crust: On a lightly floured surface, roll out the pre-made pie crusts to ensure they are flat and even. Using a round cutter or a glass (about 4 inches in diameter), cut out 12 circles from the dough. These will form the bases of your mini pies.

          Form the Pie Shells: Carefully place each dough circle into a muffin tin cup, pressing it gently against the bottom and sides to create a small pie shell. Make sure the edges are slightly above the rim of the cup for a better presentation.

            Fill the Shells: Evenly spoon your prepared apple filling into each mini pie shell, filling them just to the brim to prevent overflow during baking.

              Create Decorative Topping: With the remaining dough, cut out smaller circles or fun shapes like stars or hearts to create a decorative lid for your pies. Alternatively, you can choose to leave them open-faced for a rustic look.

                Apply Egg Wash: Brush the tops of your mini pies with the beaten egg to give them a beautiful golden sheen as they bake. Sprinkle a little granulated sugar over the top for added sweetness and a delightful crunchy texture.

                  Bake the Pies: Place the muffin tin in the preheated oven and bake for 20-25 minutes, or until the crust is a gorgeous golden brown and the apple filling is bubbling enticingly.

                    Cool and Serve: Allow the mini apple pies to cool in the muffin tin for about 10 minutes. Then, carefully transfer them to a wire rack to cool completely, allowing the aromas to waft through your kitchen.

                      Prep Time, Total Time, Servings: 20 mins | 45 mins | Serves 12

                        - Presentation Tips: Serve these delightful mini apple pies warm, accompanied by a scoop of creamy vanilla ice cream or a drizzle of rich caramel sauce. For an elegant touch, garnish each plate with a fresh mint sprig!

                          Leave a Comment

                          Recipe Rating