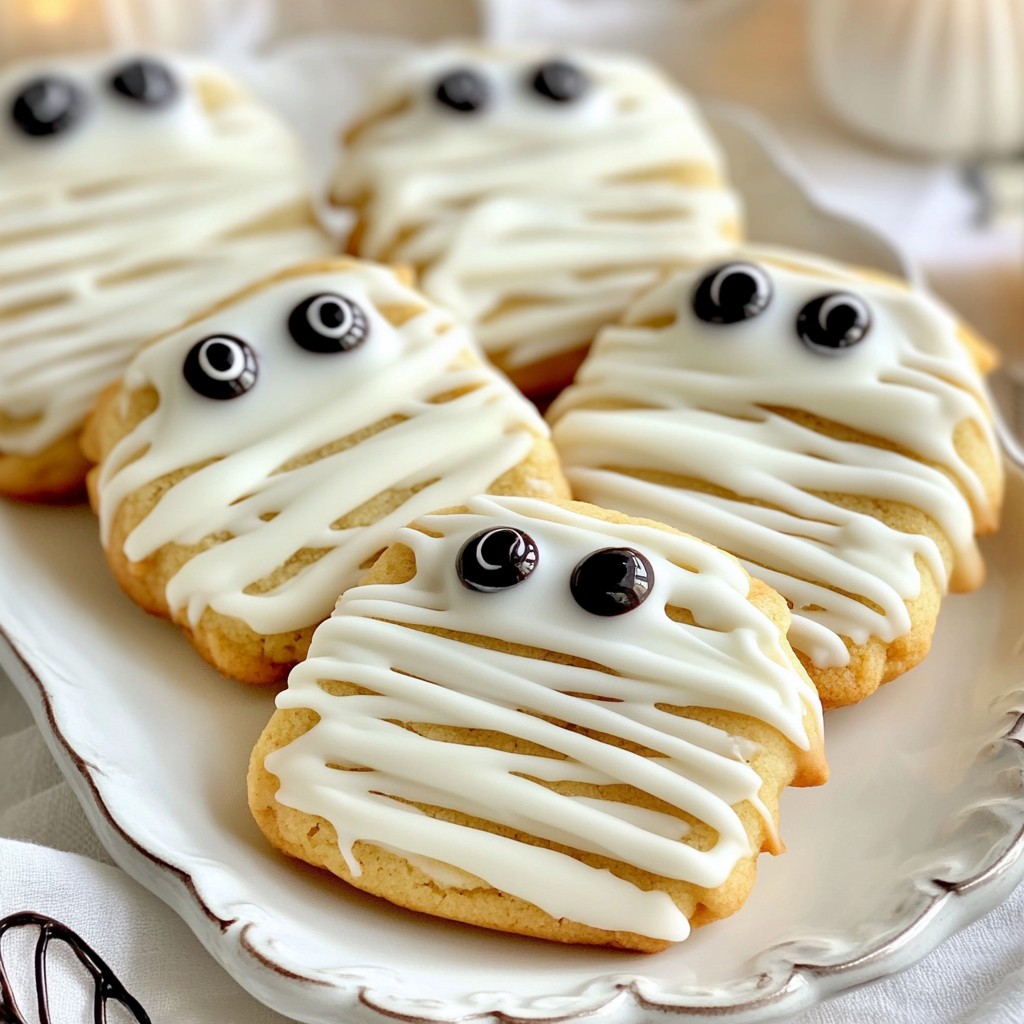
Get ready for a spooky baking adventure with Mummy Halloween Cookies! These fun treats are perfect for parties, classroom snacks, or simply to enjoy at home. I’ll guide you through easy steps, from gathering simple ingredients to creating adorable mummy-like designs. Whether you're a seasoned baker or new to the kitchen, you'll find no tricks—just delightful treats that will impress everyone! Let’s unwrap the fun in baking these spooky snacks!
Why I Love This Recipe
- Festive Fun: These mummy cookies are a playful and spooky treat that adds a festive touch to any Halloween celebration.
- Easy to Make: The simple ingredients and straightforward steps make this recipe accessible for bakers of all skill levels.
- Delicious Flavors: The combination of buttery cookies and creamy white chocolate creates a delightful flavor that everyone will enjoy.
- Great for Sharing: With a yield of 12 cookies, these treats are perfect for sharing with friends, family, or at parties.
Ingredients
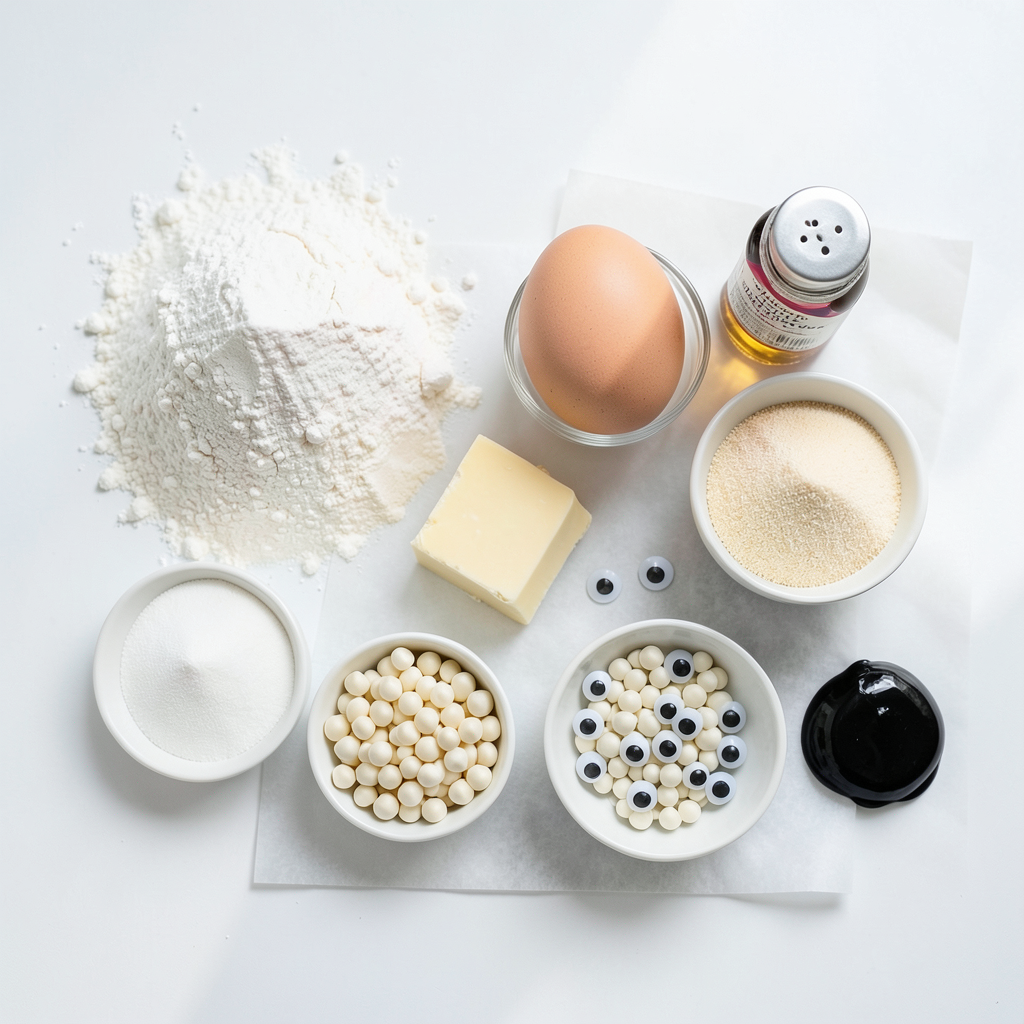
List of Essential Ingredients
- 2 cups all-purpose flour
- 1 teaspoon baking powder
- 1/2 teaspoon baking soda
- 1/2 teaspoon salt
- 3/4 cup unsalted butter, softened
- 1 cup granulated sugar
- 1 large egg, at room temperature
- 1 teaspoon pure vanilla extract
- 1 cup white chocolate chips
- 1/4 cup black decorating gel or melted chocolate (for eyes)
- Edible googly eyes (optional)
These ingredients make the Mummy Halloween Cookies fun and spooky. You need flour, baking powder, baking soda, and salt to build the cookie base. The butter, sugar, egg, and vanilla extract add flavor and texture. White chocolate chips give a sweet touch, while decorating elements add a playful twist. The black decorating gel or melted chocolate creates the eyes, and edible googly eyes provide extra fun if you choose to use them.
Recommended Tools
- Electric mixer
- Mixing bowls and baking sheets
- Parchment paper and piping bags
You will need an electric mixer to cream the butter and sugar easily. Mixing bowls help you combine the ingredients without mess. Baking sheets hold the cookies as they bake. Parchment paper prevents sticking and makes cleanup easy. Piping bags are great for decorating the cookies to look like mummies. These tools make the process smooth, letting you focus on the fun of baking!
Step-by-Step Instructions
Prepping the Oven and Baking Sheets
1. Preheat the oven: Set your oven to 350°F (175°C). This temperature helps the cookies bake evenly.
2. Line baking sheets: Use parchment paper to line your baking sheets. This step prevents cookies from sticking.
Mixing the Cookie Dough
1. Combine dry ingredients: In a medium bowl, mix 2 cups of all-purpose flour, 1 teaspoon baking powder, 1/2 teaspoon baking soda, and 1/2 teaspoon salt. Whisk them well to blend.
2. Cream butter and sugar: In a large bowl, use an electric mixer to beat 3/4 cup softened butter with 1 cup granulated sugar. Mix until it is light and fluffy, about 2-3 minutes.
Forming and Baking Cookies
1. Add egg and vanilla: Next, add 1 large egg and 1 teaspoon pure vanilla extract to the butter-sugar mix. Beat until smooth.
2. Combine mixtures: Gradually add the dry mix to the wet mix, using low speed. Mix until just combined.
3. Fold in chocolate chips: Gently fold 1 cup of white chocolate chips into the dough with a spatula.
4. Shape cookies: Use a tablespoon or scoop to place dough on the sheets, leaving 2 inches between each.
5. Shape like mummies: Flatten each dough ball slightly. Mold them into oval shapes, thicker at the bottom for the body and tapering at the top for the head.
6. Bake: Place in the oven and bake for 10-12 minutes until edges are golden. Let cool on sheets for 5 minutes before moving to a rack.
Tips & Tricks
Achieving Perfect Cookie Texture
To get the best cookie texture, avoid overmixing the dough. When you mix the flour into the wet ingredients, stop as soon as you see no dry flour. Overmixing makes cookies tough. You want them soft and chewy.
For shapes, mold the dough into ovals. Make the bottom thicker for the “body” and taper the top for the “head.” This gives you a great base for decorating.
Decorating Techniques
Drizzling melted white chocolate creates the look of mummy wrappings. Use a piping bag for precision. If you don’t have one, a fork works well too. Just drizzle it back and forth over the cookie.
For eyes, you can use edible googly eyes or black decorating gel. If using gel, simply squeeze out two small dots for eyes. Place them while the chocolate is still soft so they stick well. This adds fun and personality to your spooky treats!
Pro Tips
- Chill the Dough: For thicker cookies, chill the dough for about 30 minutes before baking. This helps maintain their shape and prevents spreading too much.
- Use Quality Chocolate: Opt for high-quality white chocolate chips for a creamier flavor. This will enhance the overall taste of your cookies.
- Experiment with Flavors: Add a teaspoon of almond extract or a pinch of cinnamon to the dough for a unique twist on the classic flavor.
- Store Properly: Keep the cookies in an airtight container at room temperature for up to a week to maintain their freshness.
Variations
Flavor Variations
You can change the flavor of your mummy cookies. One way is to use dark or milk chocolate instead of white chocolate. Dark chocolate gives a rich taste. Milk chocolate adds a sweet creaminess. Both options make the cookies unique.
Another fun idea is to add spices to the dough. You can mix in cinnamon or nutmeg for a warm flavor. These spices fit right in with the Halloween theme. You can try different flavors to find what you like best.
Dietary Adjustments
If you need a gluten-free version, you can use alternative flours. Almond flour or coconut flour works well. These flours give the cookies a different texture but still taste great.
For vegan adjustments, replace butter with coconut oil or vegan butter. You can also use a flax egg instead of the regular egg. Just mix one tablespoon of flaxseed meal with three tablespoons of water. Let it sit for a few minutes to thicken. These changes keep the cookies delicious while fitting your diet.
Storage Info
Best Practices for Storing Cookies
To keep your mummy cookies fresh, store them in an airtight container. This prevents air from making them dry. Line the bottom with parchment paper for extra protection. Place wax paper between layers if stacking cookies. This keeps them from sticking together. Always store your cookies at room temperature. Avoid storing them in the fridge, as it can change their texture.
Freezing Cookies for Future Use
Freezing cookies is a great way to enjoy them later. For unbaked dough, scoop it into balls and place them on a baking sheet. Freeze the dough balls for about an hour. Once firm, transfer them to a freezer bag. Seal tightly and label with the date. For baked cookies, let them cool completely first. Then, use the same method. Place cooled cookies in a freezer-safe container.
When you’re ready to eat your frozen cookies, thaw them in the fridge overnight. For a warm treat, reheat baked cookies in the oven at 350°F for about 5-10 minutes. Enjoy your spooky treats any time!
FAQs
Can I make these cookies ahead of time?
Yes, you can make these cookies ahead of time. Prepare the dough and shape it into balls. Then, wrap the dough tightly in plastic wrap and store it in the fridge for up to 3 days. You can also freeze the dough for up to 3 months. When ready to bake, just thaw the dough overnight in the fridge, then bake as usual.
How can I make the cookies softer?
To make these cookies softer, try these tips:
- Use room temperature butter. This helps create a nice, fluffy dough.
- Do not overmix the dough. Mix until just combined to keep them soft.
- Bake for a shorter time. Check the cookies a minute or two early. They should be lightly golden at the edges but soft in the center.
What can I substitute for the white chocolate chips?
If you don’t have white chocolate chips, you can use:
- Milk chocolate chips for a sweeter flavor.
- Dark chocolate chips for a richer taste.
- Butterscotch chips for a fun, different flavor.
These substitutes will change the taste, but they will still be delicious.
How long do these cookies last?
These cookies last about a week at room temperature. Store them in an airtight container to keep them fresh. If you want them to last longer, freeze them. They can stay good in the freezer for up to 3 months. Just thaw them at room temperature when you want to enjoy them.
This blog post covered all you need for delicious cookies. We explored key ingredients, essential tools, and easy step-by-step instructions. I shared tips for perfecting texture and fun decorating ideas. You can also try tasty variations or adjust for diet needs. Remember to store cookies right to keep them fresh. Enjoy baking and sharing these treats! With simple methods, you’ll create cookies everyone loves. Let your creativity shine and have fun with it!