No-Bake Orange Creamsicle Cheesecake Fresh Delight

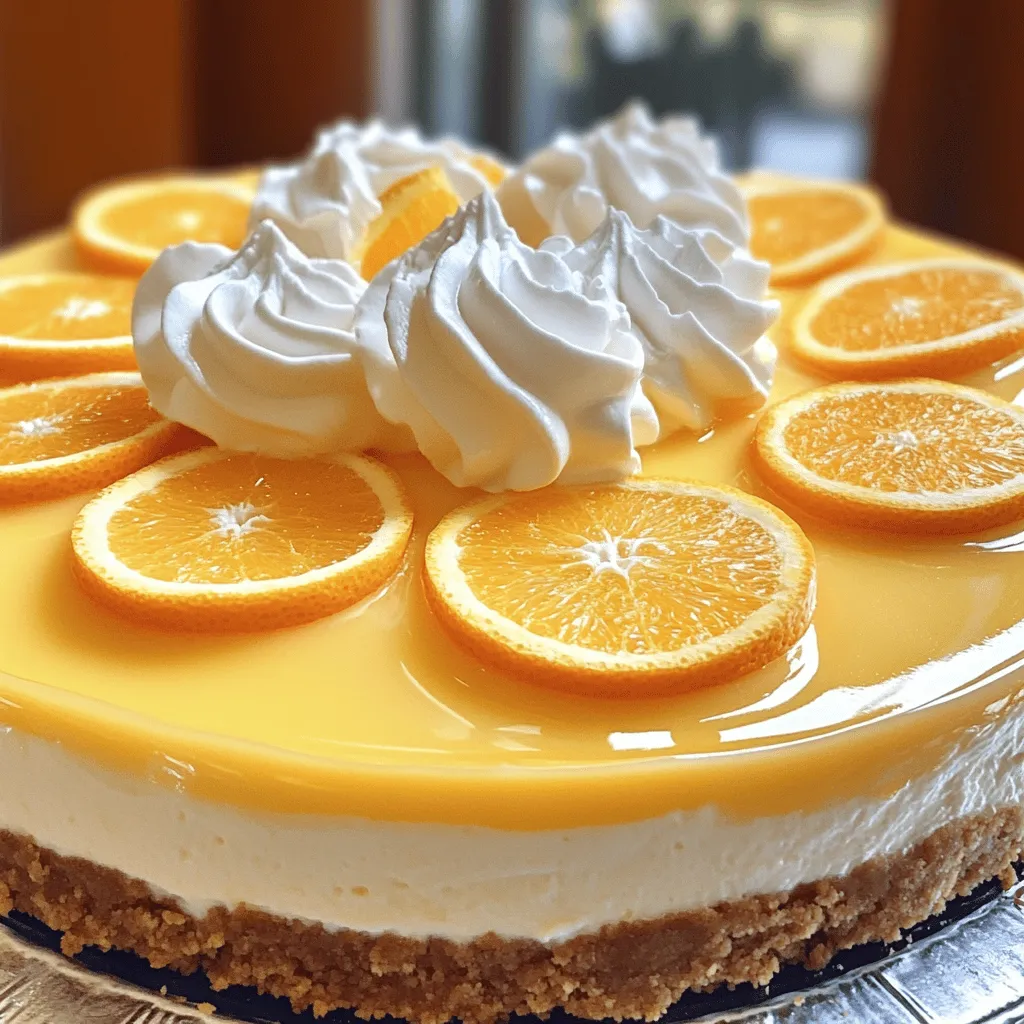
Craving a light, sweet treat? This No-Bake Orange Creamsicle Cheesecake offers a burst of creamy flavor that takes you back to summer days. With simple steps and common ingredients, this recipe is fun to make and even better to share. Join me as I guide you through a delicious journey that will impress your friends and family. Ready to whip up this fresh delight? Let’s get started!

Ingredients

Required Ingredients for No-Bake Orange Creamsicle Cheesecake

To make this delightful cheesecake, you need the following ingredients:

– 1.5 cups graham cracker crumbs

– 1/2 cup unsalted butter, melted

– 2 cups cream cheese, softened to room temperature

– 1 cup powdered sugar

– 1 cup heavy whipping cream

– 1/2 cup freshly squeezed orange juice (if available)

– Zest of 1 medium-sized orange

– 1 teaspoon pure vanilla extract

– Pinch of salt

These ingredients blend together to create a creamy and zesty cheesecake. The graham cracker crumbs make a perfect, crunchy crust that pairs well with the smooth filling.

Optional Garnishes

To make your cheesecake look and taste even better, consider these optional garnishes:

– Fresh orange slices

– Whipped cream

These add a nice touch and enhance the overall flavor. They make each slice pop with color and freshness.

Recommended Tools and Equipment

You will need a few tools to make the process easier:

– 9-inch springform pan

– Large mixing bowls

– Electric mixer

– Spatula

– Measuring cups and spoons

Using the right tools helps in mixing and pouring the ingredients smoothly. This setup ensures you create a beautiful No-Bake Orange Creamsicle Cheesecake that everyone will love. For the full recipe, be sure to check the detailed steps provided.

Step-by-Step Instructions

Preparing the Crust

To start, gather your graham cracker crumbs and melted butter. In a large bowl, mix them well using a fork. You want all the crumbs to get coated in butter. This step is key for a tasty crust. Next, press this mixture into a 9-inch springform pan. Use your hand or a measuring cup to pack it tightly. Once it looks even, pop it in the fridge for about 15 minutes. This chill time helps the crust hold its shape.

Making the Cheesecake Filling

Now, let’s focus on the filling. In a fresh bowl, beat your softened cream cheese and powdered sugar with an electric mixer. Mix until it is smooth and creamy. You shouldn’t see any lumps! Next, slowly add in the orange juice, zest, vanilla, and a pinch of salt. Keep blending until everything is well mixed. In a separate bowl, whip the heavy cream until it forms stiff peaks. Be careful here; you want it fluffy but not over-beaten. Now, gently fold the whipped cream into the orange mixture. Do this slowly so you keep that light texture.

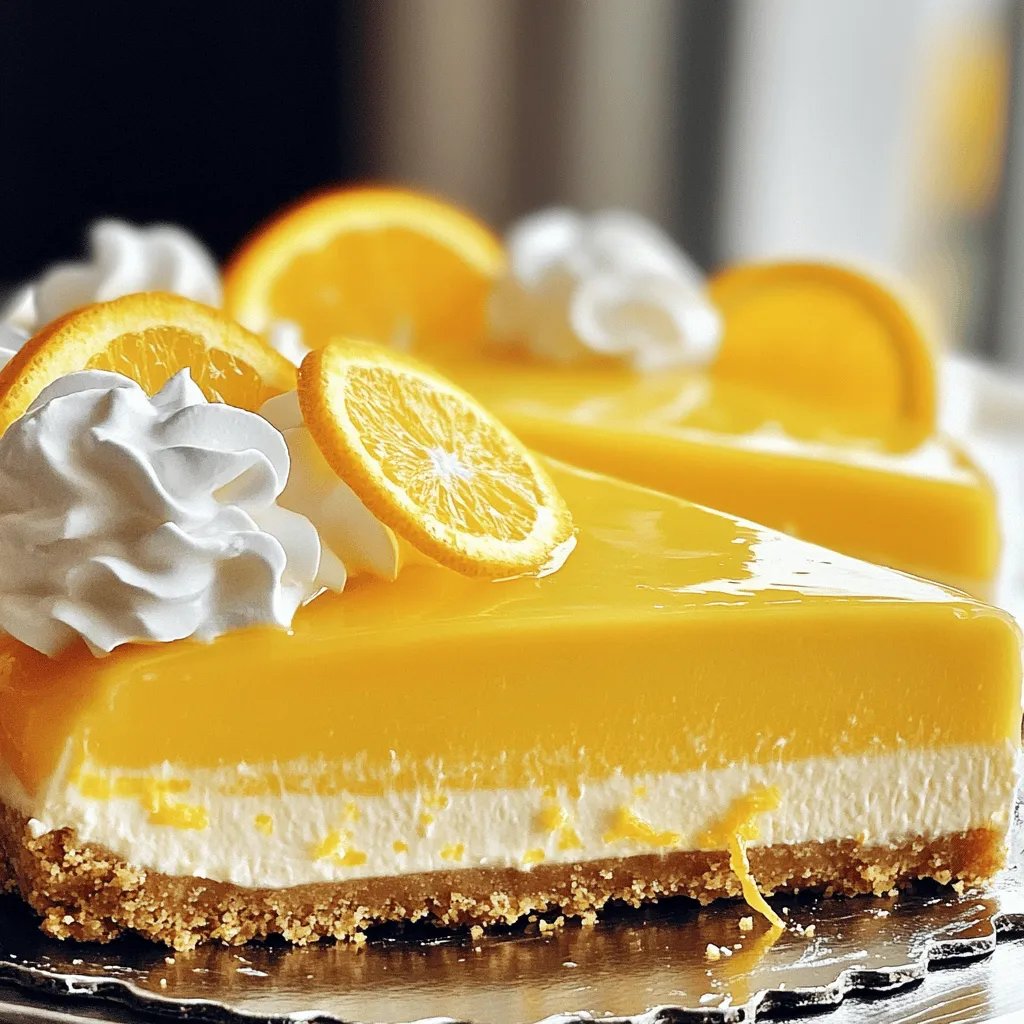
Chilling and Serving

Once your filling is ready, pour it into the chilled crust. Smooth the top with a spatula to make it look nice. Cover the cheesecake with plastic wrap and chill it in the fridge for at least 4 hours, or overnight if you can wait! When ready to serve, undo the springform clasp and remove the sides. Slice into pieces and add a dollop of whipped cream and a fresh orange slice on top. Enjoy this fresh delight! For the full recipe, check out the details provided.

Tips & Tricks

Best Practices for Cream Cheese Mixture

When making the cream cheese mixture, start with room temperature cream cheese. This helps it blend smoothly. Use an electric mixer on medium speed. Mix until it is silky and free of lumps. Gradually add the powdered sugar. This helps to keep everything mixed well. Don’t rush this step, as it is key to a creamy filling.

How to Achieve Perfectly Whipped Cream

To whip cream well, use a chilled bowl and beaters. This keeps the cream cold and helps it whip better. Start on low speed and then increase to medium-high. Stop mixing once you see stiff peaks form. Be careful not to over-whip; you want it fluffy, not grainy. Fold it gently into the cream cheese mixture to keep the air in.

Presentation Tips for Serving

For a beautiful presentation, slice the cheesecake carefully. Use a sharp knife dipped in hot water for clean cuts. Garnish each slice with a dollop of whipped cream and a slice of fresh orange. You can also drizzle chocolate or caramel sauce on top for extra flair. A sprinkle of orange zest adds color and a nice touch. For the full recipe, check back on the earlier sections.

Variations

Flavor Variations

You can play with flavors in this cheesecake. Here are some ideas:

Lemon Creamsicle: Swap orange juice with lemon juice for a tangy twist.

Berry Bliss: Use pureed berries like strawberries or raspberries in place of orange juice.

Chocolate Orange: Add cocoa powder to the filling for a chocolatey flavor.

Tropical Delight: Mix in coconut cream for a tropical flair.

Healthier Substitutes

Want a healthier cheesecake? Consider these swaps:

Greek Yogurt: Replace cream cheese with Greek yogurt for lower fat.

Honey or Maple Syrup: Use these instead of powdered sugar for natural sweetness.

Whole Wheat Crust: Swap graham cracker crumbs for whole wheat crumbs for more fiber.

Low-Fat Cream: Choose low-fat heavy cream to cut down on calories.

Other Serving Suggestions

Make your cheesecake shine with these ideas:

Fruit Toppings: Top with fresh fruit like berries or orange slices.

Chocolate Drizzle: Add a drizzle of chocolate or caramel sauce for richness.

Nut Crust: Use crushed nuts instead of graham crackers for a crunchy base.

Individual Portions: Serve in small cups for easy sharing.

For the complete step-by-step process, check out the Full Recipe.

Storage Info

Best Way to Store Leftover Cheesecake

To keep your cheesecake fresh, wrap it tightly. Use plastic wrap or foil. This helps to keep it moist and tasty. You can also place it in an airtight container. Make sure to store it in the fridge.

Freezing Instructions

If you want to save some for later, freezing is a great option. First, let the cheesecake cool completely. Then, wrap it tightly in plastic wrap. After that, place it in a freezer-safe container. It can stay in the freezer for up to three months. To enjoy, just take it out and let it thaw in the fridge overnight.

How Long It Will Last

In the fridge, your cheesecake will last about five days. If you freeze it, it can last up to three months. Always check for any off smells or changes in texture before eating. Keeping your cheesecake stored right will help it taste fresh and delicious! For the complete recipe, check the Full Recipe.

FAQs

Can I use different flavors instead of orange?

Yes, you can! Try lemon, lime, or even berry flavors. Just swap the orange juice and zest for the new fruit. For berries, use puree to keep the flavor strong. The process stays the same, and you can create a new favorite.

What if I don’t have a springform pan?

No problem at all! You can use any round cake pan. Just line it with parchment paper for easy removal. Once set, run a knife around the edge to help release the cheesecake. This way, you can still enjoy a tasty treat.

How can I make this recipe dairy-free?

You can substitute cream cheese with a dairy-free version made from nuts. Use coconut cream instead of heavy cream too. Make sure the powdered sugar is vegan, and you have a delicious dairy-free dessert. It’s that simple!

For the full recipe, check out the detailed steps to make this delightful dessert!

This blog post covered how to make a No-Bake Orange Creamsicle Cheesecake. We explored the key ingredients, tools, and step-by-step instructions needed for a smooth crust and rich filling. I shared tips for perfect whipped cream and eye-catching presentation. We also discussed flavor variations and storage tips.

In closing, this cheesecake is simple, fun, and sure to impress. Experiment with flavors and enjoy!

To make this delightful cheesecake, you need the following ingredients: - 1.5 cups graham cracker crumbs - 1/2 cup unsalted butter, melted - 2 cups cream cheese, softened to room temperature - 1 cup powdered sugar - 1 cup heavy whipping cream - 1/2 cup freshly squeezed orange juice (if available) - Zest of 1 medium-sized orange - 1 teaspoon pure vanilla extract - Pinch of salt These ingredients blend together to create a creamy and zesty cheesecake. The graham cracker crumbs make a perfect, crunchy crust that pairs well with the smooth filling. To make your cheesecake look and taste even better, consider these optional garnishes: - Fresh orange slices - Whipped cream These add a nice touch and enhance the overall flavor. They make each slice pop with color and freshness. You will need a few tools to make the process easier: - 9-inch springform pan - Large mixing bowls - Electric mixer - Spatula - Measuring cups and spoons Using the right tools helps in mixing and pouring the ingredients smoothly. This setup ensures you create a beautiful No-Bake Orange Creamsicle Cheesecake that everyone will love. For the full recipe, be sure to check the detailed steps provided. To start, gather your graham cracker crumbs and melted butter. In a large bowl, mix them well using a fork. You want all the crumbs to get coated in butter. This step is key for a tasty crust. Next, press this mixture into a 9-inch springform pan. Use your hand or a measuring cup to pack it tightly. Once it looks even, pop it in the fridge for about 15 minutes. This chill time helps the crust hold its shape. Now, let’s focus on the filling. In a fresh bowl, beat your softened cream cheese and powdered sugar with an electric mixer. Mix until it is smooth and creamy. You shouldn’t see any lumps! Next, slowly add in the orange juice, zest, vanilla, and a pinch of salt. Keep blending until everything is well mixed. In a separate bowl, whip the heavy cream until it forms stiff peaks. Be careful here; you want it fluffy but not over-beaten. Now, gently fold the whipped cream into the orange mixture. Do this slowly so you keep that light texture. Once your filling is ready, pour it into the chilled crust. Smooth the top with a spatula to make it look nice. Cover the cheesecake with plastic wrap and chill it in the fridge for at least 4 hours, or overnight if you can wait! When ready to serve, undo the springform clasp and remove the sides. Slice into pieces and add a dollop of whipped cream and a fresh orange slice on top. Enjoy this fresh delight! For the full recipe, check out the details provided. When making the cream cheese mixture, start with room temperature cream cheese. This helps it blend smoothly. Use an electric mixer on medium speed. Mix until it is silky and free of lumps. Gradually add the powdered sugar. This helps to keep everything mixed well. Don't rush this step, as it is key to a creamy filling. To whip cream well, use a chilled bowl and beaters. This keeps the cream cold and helps it whip better. Start on low speed and then increase to medium-high. Stop mixing once you see stiff peaks form. Be careful not to over-whip; you want it fluffy, not grainy. Fold it gently into the cream cheese mixture to keep the air in. For a beautiful presentation, slice the cheesecake carefully. Use a sharp knife dipped in hot water for clean cuts. Garnish each slice with a dollop of whipped cream and a slice of fresh orange. You can also drizzle chocolate or caramel sauce on top for extra flair. A sprinkle of orange zest adds color and a nice touch. For the full recipe, check back on the earlier sections. {{image_4}} You can play with flavors in this cheesecake. Here are some ideas: - Lemon Creamsicle: Swap orange juice with lemon juice for a tangy twist. - Berry Bliss: Use pureed berries like strawberries or raspberries in place of orange juice. - Chocolate Orange: Add cocoa powder to the filling for a chocolatey flavor. - Tropical Delight: Mix in coconut cream for a tropical flair. Want a healthier cheesecake? Consider these swaps: - Greek Yogurt: Replace cream cheese with Greek yogurt for lower fat. - Honey or Maple Syrup: Use these instead of powdered sugar for natural sweetness. - Whole Wheat Crust: Swap graham cracker crumbs for whole wheat crumbs for more fiber. - Low-Fat Cream: Choose low-fat heavy cream to cut down on calories. Make your cheesecake shine with these ideas: - Fruit Toppings: Top with fresh fruit like berries or orange slices. - Chocolate Drizzle: Add a drizzle of chocolate or caramel sauce for richness. - Nut Crust: Use crushed nuts instead of graham crackers for a crunchy base. - Individual Portions: Serve in small cups for easy sharing. For the complete step-by-step process, check out the Full Recipe. To keep your cheesecake fresh, wrap it tightly. Use plastic wrap or foil. This helps to keep it moist and tasty. You can also place it in an airtight container. Make sure to store it in the fridge. If you want to save some for later, freezing is a great option. First, let the cheesecake cool completely. Then, wrap it tightly in plastic wrap. After that, place it in a freezer-safe container. It can stay in the freezer for up to three months. To enjoy, just take it out and let it thaw in the fridge overnight. In the fridge, your cheesecake will last about five days. If you freeze it, it can last up to three months. Always check for any off smells or changes in texture before eating. Keeping your cheesecake stored right will help it taste fresh and delicious! For the complete recipe, check the Full Recipe. Yes, you can! Try lemon, lime, or even berry flavors. Just swap the orange juice and zest for the new fruit. For berries, use puree to keep the flavor strong. The process stays the same, and you can create a new favorite. No problem at all! You can use any round cake pan. Just line it with parchment paper for easy removal. Once set, run a knife around the edge to help release the cheesecake. This way, you can still enjoy a tasty treat. You can substitute cream cheese with a dairy-free version made from nuts. Use coconut cream instead of heavy cream too. Make sure the powdered sugar is vegan, and you have a delicious dairy-free dessert. It’s that simple! For the full recipe, check out the detailed steps to make this delightful dessert! This blog post covered how to make a No-Bake Orange Creamsicle Cheesecake. We explored the key ingredients, tools, and step-by-step instructions needed for a smooth crust and rich filling. I shared tips for perfect whipped cream and eye-catching presentation. We also discussed flavor variations and storage tips. In closing, this cheesecake is simple, fun, and sure to impress. Experiment with flavors and enjoy!

No-Bake Orange Creamsicle Cheesecake

Satisfy your sweet tooth with this easy No-Bake Orange Creamsicle Cheesecake! This refreshing dessert combines creamy cheesecake goodness with a burst of bright orange flavor. Made with simple ingredients like graham cracker crumbs, cream cheese, and fresh orange juice, this cheesecake is perfect for any occasion. Don’t wait—click through for the full recipe and impress your family and friends with this delightful treat!

Ingredients
  

1.5 cups graham cracker crumbs

1/2 cup unsalted butter, melted

2 cups cream cheese, softened to room temperature

1 cup powdered sugar

1 cup heavy whipping cream

1/2 cup freshly squeezed orange juice (if available)

Zest of 1 medium-sized orange

1 teaspoon pure vanilla extract

Pinch of salt

Fresh orange slices and whipped cream for garnish

Instructions
 

Prepare the Crust: In a large mixing bowl, combine graham cracker crumbs with melted butter. Use a fork to mix thoroughly until all crumbs are evenly coated with butter.

    Form the Crust: Evenly press the graham cracker mixture into the bottom of a 9-inch springform pan, using the back of a measuring cup or the palm of your hand to pack it tightly. Once evenly distributed, place the pan in the refrigerator to chill for about 15 minutes.

      Make the Cheesecake Filling: In a large mixing bowl, use an electric mixer to beat the softened cream cheese and powdered sugar together until you achieve a smooth and creamy texture, free of lumps.

        Add the Flavors: Gradually mix in the orange juice, grated orange zest, vanilla extract, and a pinch of salt. Continue to blend until all ingredients are well combined and the mixture is smooth.

          Whip the Cream: In a separate bowl, whip the heavy cream using an electric mixer until stiff peaks form. Be careful not to over-whip; you want the cream to be fluffy but still spreadable.

            Combine: Gently fold the whipped cream into the orange cream cheese mixture using a spatula. Incorporate the whipped cream in batches, ensuring not to deflate the mixture, until completely blended.

              Pour and Smooth: Carefully pour the cheesecake filling into the chilled graham cracker crust. Use a spatula to smooth the top evenly, ensuring it looks nice and presentable.

                Chill: Cover the cheesecake tightly with plastic wrap or aluminum foil and refrigerate for at least 4 hours, or ideally overnight, to allow it to set firmly.

                  Serve: Once the cheesecake has set, carefully undo the springform clasp and remove the sides of the pan. Slice the cheesecake into pieces, and garnish each slice with a dollop of whipped cream and a fresh orange slice on top.

                    Prep Time: 30 minutes | Total Time: 4 hours 30 minutes | Servings: 10-12

                      - Presentation Tips: For an extra touch, consider drizzling some chocolate or caramel sauce over the cheesecake just before serving, and sprinkle a bit of orange zest on top for added color and flavor.

                        Leave a Comment

                        Recipe Rating