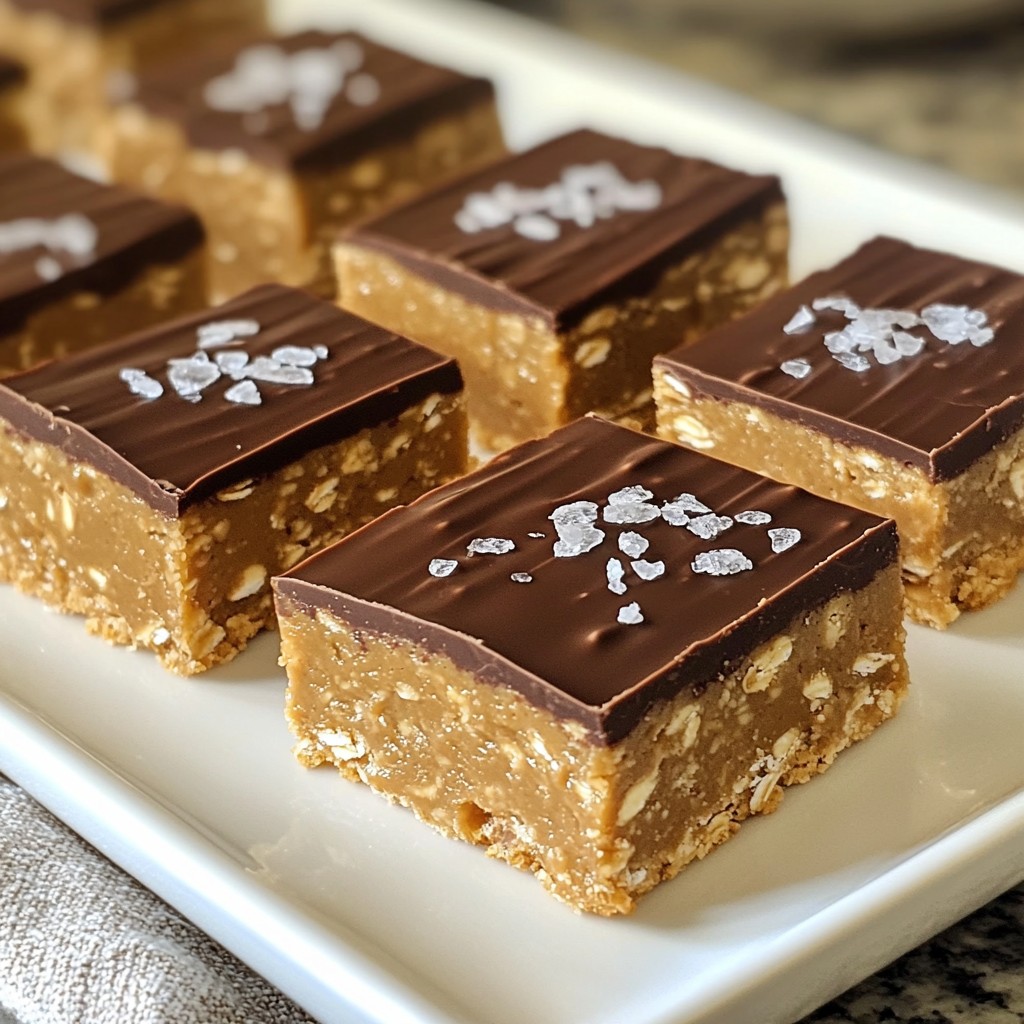
Looking for a quick, healthy snack? These No Bake Peanut Butter Bars are a game-changer! Easy to make and packed with wholesome ingredients, they offer a perfect blend of taste and nutrition. With just a few simple steps, you can enjoy a treat that’s both satisfying and energizing. Join me as we whip up these delicious bars that everyone will love—no baking required!
Why I Love This Recipe
- Easy to Prepare: No baking is required, making it a quick and simple treat to whip up in no time.
- Healthy Ingredients: Packed with natural peanut butter and oats, these bars provide a nutritious snack option.
- Customizable: You can easily modify the recipe by adding nuts, seeds, or swapping in different nut butters.
- Deliciously Rich: The combination of dark chocolate and cocoa powder creates a decadent flavor profile that satisfies sweet cravings.
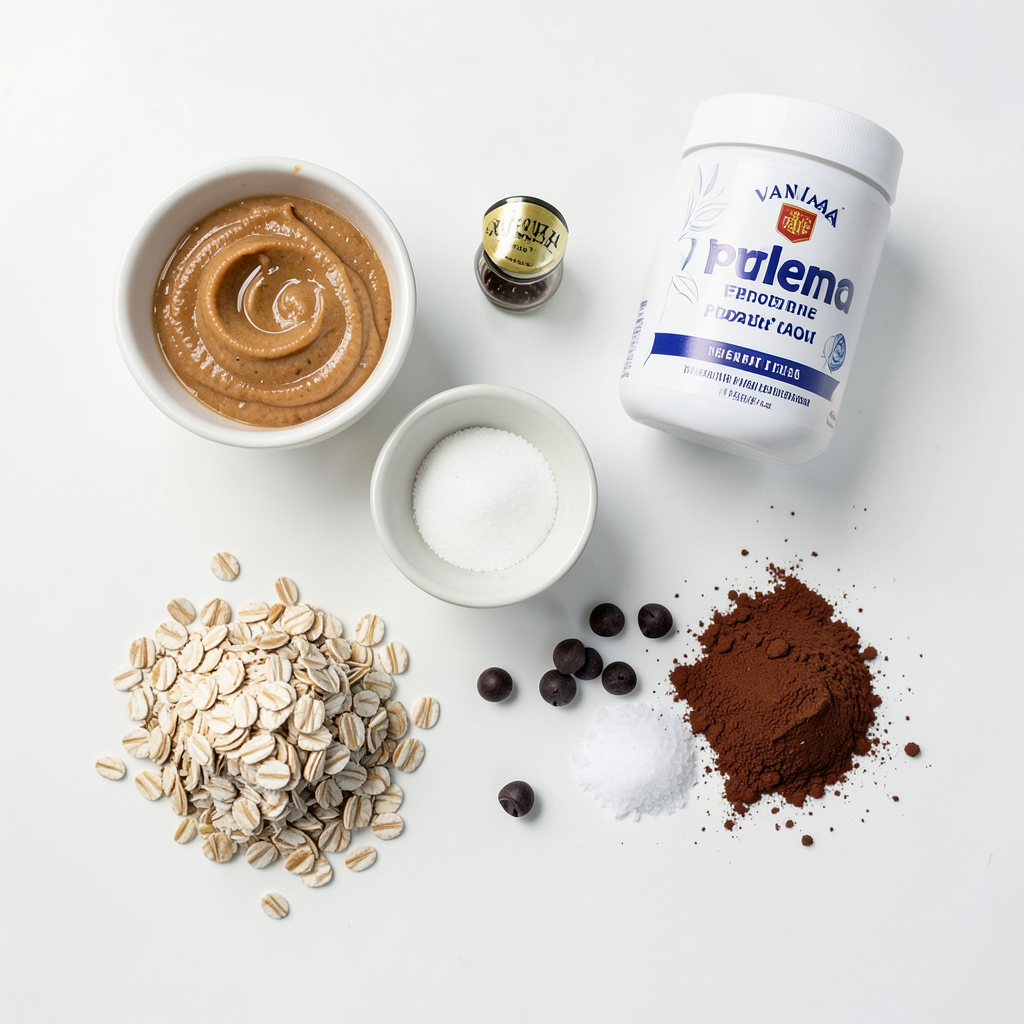
Ingredients
List of Ingredients
- 1 cup natural peanut butter (smooth or crunchy)
- 1/2 cup honey or maple syrup (vegan option)
- 2 cups rolled oats (old-fashioned)
- 1/2 cup vanilla protein powder (optional, for added nutrition)
- 1/2 cup dark chocolate chips (semi-sweet recommended)
- 1/4 cup unsweetened cocoa powder (for rich chocolate flavor)
- 1/4 teaspoon sea salt (to enhance flavors)
- 1/2 teaspoon vanilla extract (for aromatic sweetness)
To make these no-bake peanut butter bars, you need simple, wholesome ingredients. They are easy to find and full of flavor.
Using natural peanut butter is key. It gives the bars a creamy texture. You can choose smooth or crunchy based on your taste.
Honey or maple syrup adds sweetness. If you're vegan, opt for maple syrup. Both options work well to bind the bars.
Old-fashioned rolled oats are essential. They add fiber and a nice chew. Avoid quick oats, as they won't give the same texture.
You can add vanilla protein powder for a boost. This is optional but great for extra nutrition.
Dark chocolate chips make these bars a treat. Semi-sweet chocolate chips are best for a balanced flavor.
Cocoa powder adds a rich chocolate taste. It pairs well with the peanut butter.
A pinch of sea salt enhances all the flavors. It balances the sweetness and makes the bars even more delicious.
Lastly, vanilla extract brings a warm, sweet aroma. It ties all the flavors together beautifully.
Gather all these ingredients, and you are ready to make a tasty, healthy snack!
Step-by-Step Instructions
Mixing the Peanut Butter and Sweetener
First, you need to mix peanut butter with honey or maple syrup. In a large bowl, add 1 cup of natural peanut butter. Then, pour in 1/2 cup of honey or maple syrup. Stir until the mixture is smooth and well combined. This step is important because it makes the base for your bars.
Incorporating Dry Ingredients
Next, gradually add in the rolled oats, cocoa powder, and protein powder if you choose to use it. Start with 2 cups of rolled oats, then add 1/4 cup of unsweetened cocoa powder and 1/2 cup of vanilla protein powder. Mix everything thoroughly. You want to ensure that all dry ingredients are evenly distributed throughout the peanut butter mix.
Adding Chocolate Chips
Now it’s time for some fun! Gently fold in 1/2 cup of dark chocolate chips. Make sure to mix them in without breaking any chips. This step adds a lovely sweetness and texture to your bars.
Preparing the Baking Dish
For this step, grab an 8x8 inch baking dish. Line it with parchment paper. Make sure to leave some overhang on the sides. This will help you lift the bars out later, making it easier to cut them.
Pressing and Chilling
Pour your mixture into the lined baking dish. Use a spatula or the back of a measuring cup to press it down firmly. You want a smooth and even layer. After that, transfer the dish to the refrigerator. Chill it for about 2 hours until the bars are set and firm to the touch.
Slicing the Bars
Once chilled, use the parchment paper overhang to lift the bars out of the dish. Place them on a cutting board. Now, slice the bars into squares or rectangles, based on your preference. Enjoy your homemade no-bake peanut butter bars!
Tips & Tricks
Storing the Bars
To keep your no-bake peanut butter bars fresh, you have two main options: the refrigerator or the freezer.
- Refrigerator: Store the bars in an airtight container. They last about one week this way.
- Freezer: For longer storage, wrap bars in plastic wrap and then foil. They can last up to three months in the freezer.
Modifying Ingredients
Sometimes, you may need to adjust the recipe to fit your needs.
- Substitutions for nut allergies: If you can't have nuts, use sunflower seed butter or soy nut butter. These options work well in the recipe.
- Adjusting sweetness levels: If you want less sweetness, reduce the honey or maple syrup. You can also add unsweetened cocoa powder to balance flavors.
Presentation Ideas
Serving your bars in a fun way makes them even more appealing.
- Creative ways to serve or garnish: Use a slate board for a stylish look. Cut the bars into fun shapes for kids or parties.
- Drizzling chocolate and sprinkling sea salt: Melt dark chocolate and drizzle it over the bars. Finish with a sprinkle of flaky sea salt for a gourmet touch. This adds flavor and makes the bars look beautiful!
Pro Tips
- Choose Your Peanut Butter Wisely: For the best flavor and texture, opt for a natural peanut butter with minimal additives—just peanuts and salt!
- Experiment with Sweeteners: Feel free to adjust the sweetness by using more or less honey or maple syrup to suit your taste preferences.
- Chill for Optimal Texture: Make sure to chill the bars for at least 2 hours; this helps them firm up and makes them easier to cut.
- Customize Add-Ins: Add your favorite mix-ins like chopped nuts, dried fruits, or seeds for extra flavor and nutrition.
Variations
Flavor Additions
You can make your No Bake Peanut Butter Bars even more fun. Adding shredded coconut gives them a chewy texture and a tropical taste. You can also mix in nuts like almonds or walnuts for crunch. If you like dried fruits, try adding raisins or cranberries. They add sweetness and extra chewiness, making the bars even tastier.
Different Sweeteners
If you want to change up the sweetness, try using agave syrup. This option is lighter and has a mild flavor. You can also use other sweeteners like maple syrup. For a vegan treat, make sure to use maple syrup instead of honey. It works perfectly and keeps the bars plant-based.
Boosting Nutrition
To make these bars even healthier, consider adding seeds. Chia seeds and flax seeds are great choices. They boost fiber and healthy fats. You can also include superfood powders like spirulina or maca. Just a spoonful can add nutrients without changing the taste much. These small changes can make your snack even better for you.
Storage Info
Recommended Storage Techniques
To keep your no bake peanut butter bars fresh, use airtight containers. Glass or plastic containers work well. Avoid letting the bars sit out at room temperature for long. They can become too soft and lose their shape. Store them in the fridge for best results. This will keep them firm and tasty for up to a week.
Freezing Instructions
Want to save some bars for later? Freezing is a great option. Cut the bars into squares first. Then, wrap each piece in plastic wrap. Place the wrapped bars in a freezer-safe bag or container. They can last for up to three months in the freezer. When you’re ready to eat them, take out a bar and let it thaw in the fridge for a few hours or at room temperature for about 30 minutes.
Signs of Spoilage
Check your bars before eating. If they smell off or look discolored, it’s best to toss them. A change in texture can also be a sign. If they feel too sticky or slimy, they may have gone bad. To ensure longevity, always use clean utensils when cutting or serving. This helps keep bacteria away.
FAQs
Can I use different types of nut butter?
Yes, you can use other nut butters. Almond butter, cashew butter, and sun butter work well. Each type gives a unique flavor. Almond butter adds a nutty taste, while cashew butter is creamy and smooth. Sun butter is great for nut-free options.
How do I make these bars completely vegan?
To make these bars vegan, choose specific ingredients. Use maple syrup instead of honey. Ensure your protein powder is plant-based. Check for dairy-free chocolate chips. These small changes keep your bars delicious and 100% vegan.
Can I add protein powder to enhance nutrition?
Adding protein powder boosts nutrition. It helps keep you full longer. I recommend using vanilla protein powder for good taste. Plant-based options like pea protein also work well. Just mix it in with the dry ingredients for best results.
What is the best way to cut the bars?
Cutting the bars neatly is easy with a few tips. Use a sharp knife for clean cuts. Warm the knife slightly under hot water for smoother slicing. It helps prevent sticking. Always cut them straight from the fridge for best results.
In this post, we outlined how to make delicious peanut butter bars. We covered ingredients, step-by-step instructions, tips, variations, and storage methods. You learned simple ways to make these bars your own, whether you prefer them crunchy or soft.
Remember, these bars are not just a treat; they can fit your diet and personal taste. Enjoy making them fresh, and feel free to experiment with flavors that excite you!