Are you ready to impress your family and friends with homemade bread? This No-Knead Cheddar Dutch Oven Bread is simple, tasty, and requires almost no effort! In just a few steps, you’ll have warm, cheesy bread with a crispy crust. Perfect for beginners and seasoned bakers alike, this recipe offers the delight of fresh bread without the fuss. Let's dive into what you need to make this delicious loaf!
Why I Love This Recipe
- Easy Preparation: This no-knead bread recipe requires minimal effort, making it perfect for busy bakers or beginners.
- Delicious Flavor: The combination of sharp cheddar and fresh chives elevates the taste, creating a savory and aromatic loaf.
- Beautiful Crust: Baking in a Dutch oven ensures a crispy, golden crust that is hard to resist.
- Versatile Serving: This bread pairs wonderfully with soups, salads, or simply enjoyed with olive oil and butter.
Ingredients
List of Ingredients
- 3 cups all-purpose flour
- 1 ¾ teaspoons salt
- ½ teaspoon instant yeast
- 1 ¼ cups lukewarm water
- 1 cup sharp cheddar cheese
- ¼ cup fresh chives (optional)
- Extra flour for dusting
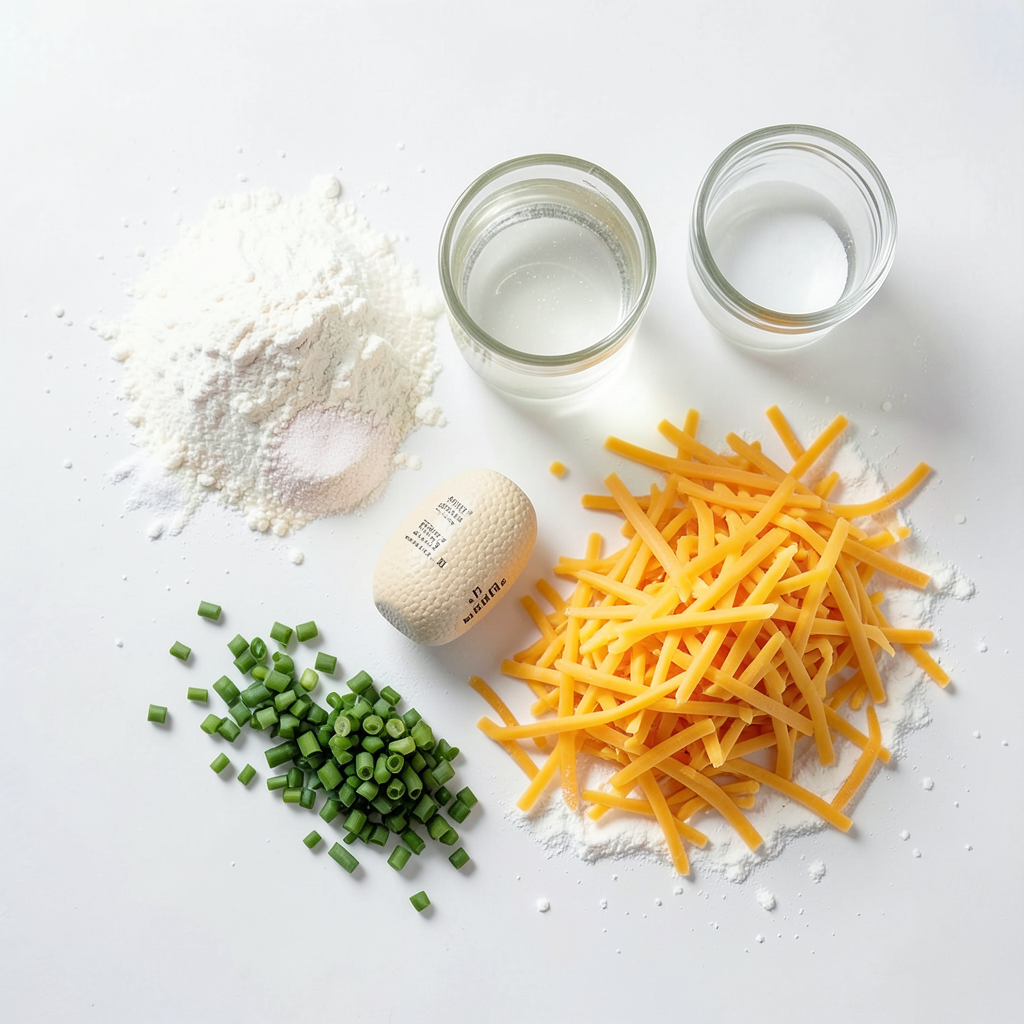
To make No-Knead Cheddar Dutch Oven Bread, gather these simple ingredients. Start with all-purpose flour. This gives the bread its structure. Salt adds flavor and helps with the rise. Instant yeast makes the dough rise without waiting. Use lukewarm water to activate the yeast.
Next, gather sharp cheddar cheese. Finely shred it for even melting. This cheese gives the bread a rich, tangy taste. If you like, add fresh chives for a burst of flavor. They are optional but add a nice touch.
Finally, keep some extra flour handy for dusting. This helps with shaping the dough and prevents sticking. Each ingredient plays a role in making tasty bread. You will love the smell and taste of this homemade delight!
Step-by-Step Instructions
Mixing the Ingredients
In a large bowl, combine the flour, salt, and yeast. Whisk them together until smooth. Next, gradually pour in the lukewarm water. Stir gently with a wooden spoon. You want a sticky, shaggy dough. Make sure there are no dry spots.
Forming the Dough
Now, it’s time to add flavor. Fold in the shredded cheddar cheese and chives if you like. Mix well until the cheese is evenly spread throughout the dough. You want every bite to be cheesy and tasty.
Rising the Dough
Cover the bowl tightly with plastic wrap or a kitchen towel. Let the dough rise at room temperature for 12 to 18 hours. You’ll know it’s ready when the surface looks bubbly and the dough has doubled in size. This long rise helps develop the best flavor.
Tips & Tricks
Achieving the Perfect Texture
To get the best bread, mix your ingredients well. This step is key. Combine the flour, salt, and yeast until they are lump-free. When you add water, stir slowly. The dough should be shaggy and sticky. Don't worry about it being perfect.
Next, fold in the cheese and herbs gently. This helps spread the flavors evenly. Be careful not to overwork the dough. You want pockets of cheese that melt and create a tasty surprise.
Baking in a Dutch Oven
Preheat your Dutch oven before baking. This makes a great crust. Place the empty pot in the oven while it heats up to 450°F. This step helps the bread rise quickly.
Bake covered for 30 minutes. This traps steam, creating a soft inside. After that, remove the lid. Bake uncovered for another 15 to 20 minutes. You want a golden crust that looks inviting.
Presentation Suggestions
Serving your bread can be fun. Warm bread on a wooden board looks nice. Pair it with olive oil or butter for spreading. This adds flavor and richness.
For a special touch, sprinkle extra chives on top. This will add color and a fresh taste. Enjoy your beautiful creation!
Pro Tips
- Use Fresh Ingredients: Always opt for fresh chives and high-quality cheddar cheese to enhance the flavor of your bread.
- Temperature Matters: Ensure your water is lukewarm (around 100°F) to properly activate the yeast for optimal rising.
- Let It Rest: Allow the dough to rest covered for the full rising time; this develops the flavor and texture of the bread.
- Cooling is Key: After baking, let the bread cool on a wire rack for at least 30 minutes to set the crumb before slicing.
Variations
Cheese Options
You can swap the sharp cheddar for other cheeses. Try using mozzarella for a milder taste. Gouda adds a nice, nutty flavor. For a bold kick, use pepper jack cheese. Mixing cheese can create unique flavors. You can even combine cheddar with a bit of blue cheese for a rich taste. Experiment with cheese blends to find your favorite.
Herb Add-ins
Herbs can boost the flavor of your bread. Fresh chives add a mild onion taste. You can use rosemary for a piney aroma. Thyme works well too, giving a warm flavor. Consider using parsley for a fresh touch. Try adding herbs based on the season. In spring, add fresh basil for a garden flavor. In winter, sage can warm the bread.
Gluten-Free Option
If you need a gluten-free bread, you can use gluten-free flour. Look for a blend that includes xanthan gum. This helps mimic the texture of regular flour. You may need to adjust the water amount. Gluten-free dough is often stickier, so add a little more flour as needed. Let it rise the same way as regular dough. The results will be a tasty gluten-free loaf!
Storage Info
Best Practices for Storing Bread
To keep your No-Knead Cheddar Dutch Oven Bread fresh, store it at room temperature. Place the bread in a paper bag or wrap it in a clean kitchen towel. This helps it breathe while keeping the crust crisp. Avoid plastic bags, as they trap moisture and make the crust soft.
If you want to store it for longer, refrigerating or freezing is a good option. To refrigerate, wrap the bread tightly in plastic wrap. This keeps it from drying out. For freezing, slice the bread first. Place the slices in a freezer bag, removing as much air as possible. This helps maintain freshness and makes it easy to grab a slice later.
Reheating Methods
To reheat your bread without losing texture, use an oven. Preheat your oven to 350°F (175°C). Place the bread on a baking sheet and warm it for about 10-15 minutes. This restores the crust's crispness.
If you want to keep it fresh while reheating, cover the bread loosely with aluminum foil. This prevents the crust from getting too hard. Enjoy your bread warm and flavorful, just like when it was fresh out of the oven.
FAQs
How do I know when the dough has risen enough?
You can tell the dough has risen enough by looking for a few signs. The surface will be bubbly, and the dough will have roughly doubled in size. If you gently poke it, the dough should spring back slowly. This means the yeast is active, and your dough is ready for the next step.
Can I make this bread in advance?
Yes, you can make this bread in advance. The dough needs to rise for 12 to 18 hours. You can mix it the night before, and it will be ready the next day. Just keep it covered at room temperature. This long rise develops great flavor and texture.
What should I do if my dough is too sticky?
If your dough is too sticky, don't worry! First, dust your hands and work surface with flour. Gently add a little more flour into the dough as you handle it. Avoid adding too much flour, or the bread may turn out dense. Remember, a slightly sticky dough is normal for no-knead bread.
Can I use a different type of oven for baking?
Yes, you can use other types of ovens for baking. If you don’t have a Dutch oven, you can use a regular baking sheet. Just place a pan with water in the bottom of the oven. This helps create steam, which gives the bread a nice crust. You can also try using a pizza stone for a crispy crust.
You learned how to make delicious cheddar bread step by step. We covered the key ingredients, mixing techniques, and rising tips. I shared tricks for getting the best texture and baking in a Dutch oven. You can customize your bread with different cheeses and herbs. Remember, proper storage keeps your bread fresh for longer. I hope you feel ready to bake this tasty bread. Enjoy your baking adventure and share your results!