Peanut Butter Bliss Balls Energizing Healthy Snack

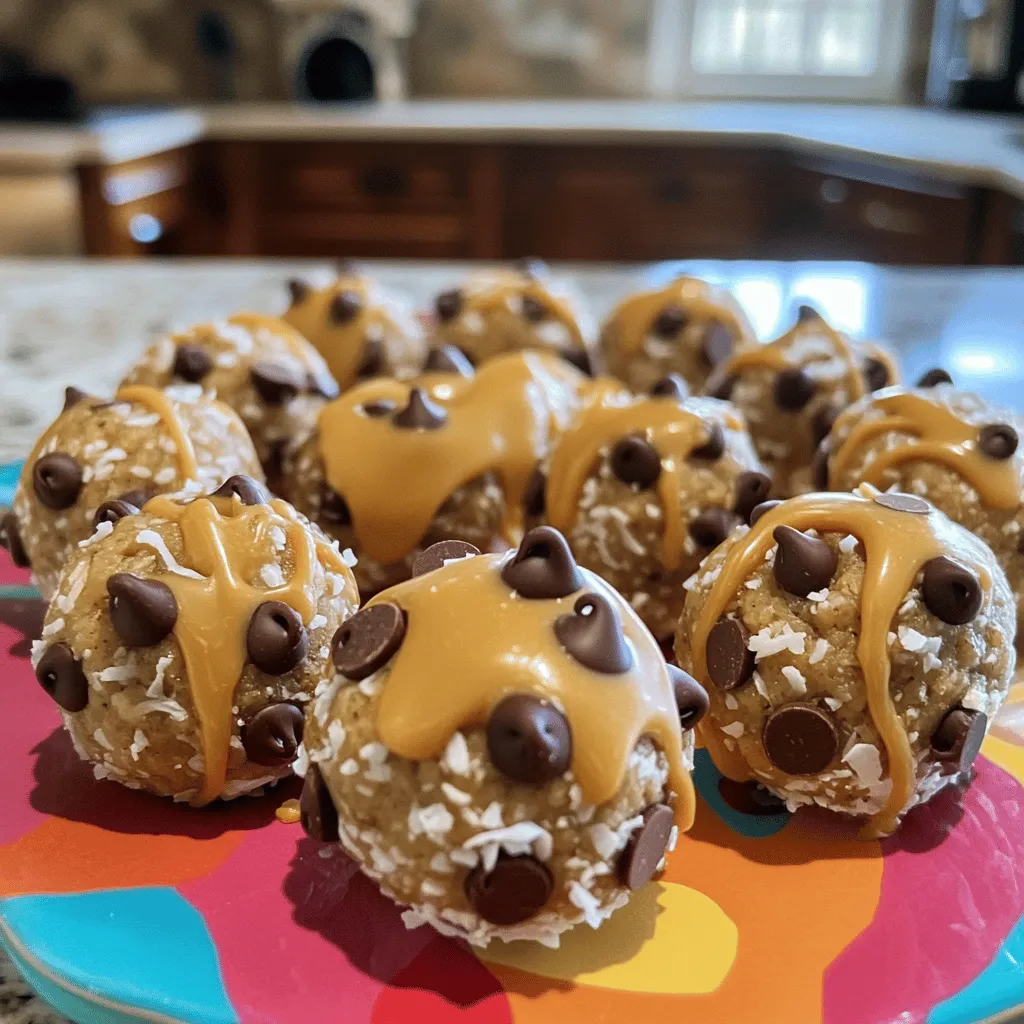
Looking for a quick snack that packs a tasty punch? Peanut Butter Bliss Balls are your answer! These simple treats are filled with wholesome ingredients like natural peanut butter, oats, and a touch of honey. They’re not only delicious, but also energizing and healthy. In this post, I’ll share easy steps to make them, including tips for customizing your bliss balls to fit your taste. Let’s dive in!

Ingredients

Complete List of Ingredients

– 1 cup natural peanut butter

– 1/2 cup rolled oats

– 1/4 cup honey or maple syrup

– 1/4 cup unsweetened shredded coconut

– 1/4 cup mini chocolate chips

– 1/4 cup ground flaxseed

– 1 teaspoon pure vanilla extract

– A pinch of fine sea salt

These ingredients work together to create a tasty and healthy snack. The natural peanut butter gives it a rich flavor and healthy fats. Rolled oats add fiber, making these bliss balls filling. Honey or maple syrup provides sweetness without refined sugar. Unsweetened shredded coconut adds texture and a hint of tropical flavor. Mini chocolate chips give a delightful surprise in each bite. Ground flaxseed is packed with nutrients and helps bind the mixture. Pure vanilla extract enhances the overall taste. Finally, fine sea salt balances the sweetness and boosts flavor.

Ingredient Substitutions

If you need alternatives, here are some ideas:

Peanut Butter Alternatives: You can use almond butter or sunflower seed butter if you’re allergic to peanuts.

Sweeteners: If you want a different sweet flavor, try agave nectar or date syrup.

Mix-Ins: Feel free to add dried fruits, nuts, or seeds for extra nutrition and taste.

These substitutions can help you make bliss balls that fit your diet and taste preferences.

Step-by-Step Instructions

Preparation Overview

To start, grab a medium mixing bowl. Add 1 cup of natural peanut butter, 1/4 cup of honey or maple syrup, and 1 teaspoon of pure vanilla extract. Use a spatula or whisk to mix until smooth. This step is key for a creamy texture. Next, stir in 1/2 cup of rolled oats, 1/4 cup of unsweetened shredded coconut, 1/4 cup of ground flaxseed, and a pinch of fine sea salt. Mix well, making sure all dry ingredients blend in. Finally, gently fold in 1/4 cup of mini chocolate chips.

Once mixed, cover the bowl with plastic wrap. Chill the mixture in the fridge for about 30 minutes. This makes it easier to handle.

Rolling and Firming Up

When the mixture is chilled, it’s time to roll. Wet your hands slightly to avoid sticking. Take small portions and roll them into balls about 1 inch in diameter. Aim for uniform sizes. This way, each bliss ball has the same great flavor. Place the rolled balls on parchment paper or a plate.

After rolling, put them back in the fridge for 15-20 minutes. This helps them firm up, making them even more enjoyable.

Serving Suggestions

For a fun presentation, arrange the bliss balls on a colorful platter. You can drizzle some extra peanut butter on top for flair. Pair these with a refreshing glass of almond milk or your favorite drink. This makes for a tasty treat that’s perfect for any time of day. You can find the Full Recipe to keep making these delightful snacks!

Tips & Tricks

Best Practices for Consistency

To make great Peanut Butter Bliss Balls, you need even mixing. Start by blending the peanut butter, honey, and vanilla extract until it’s smooth. Use a spatula or whisk to help with this. Next, add your dry ingredients. This includes oats, coconut, flaxseed, and salt. Mix until everything is well combined.

Chilling the mixture is also key. After mixing, cover the bowl and refrigerate for about 30 minutes. This step firms up the mixture, making it easier to roll into balls. A well-chilled mixture helps you achieve the perfect texture.

Customization Ideas

You can easily change these bliss balls to fit your taste. Want more protein? Add a scoop of protein powder or superfoods like chia seeds. If you want to make them nut-free, swap peanut butter for sun butter or seed butter. For a vegan option, just use maple syrup instead of honey.

Common Mistakes to Avoid

Watch out for overmixing the ingredients. Mixing too much can make the bliss balls dense. Just mix until everything is combined and no dry bits remain.

Also, don’t skip the chilling step. If you don’t chill the mixture long enough, your bliss balls will be too soft to roll. Make sure to chill for at least 30 minutes for best results.

Variations

Flavor Variations

You can make Peanut Butter Bliss Balls even more fun by adding flavors. Try mixing in cinnamon for warmth or cocoa powder for a chocolate twist. Both spices enhance the taste without adding extra sugar. You can also toss in dried fruits like raisins or cranberries for sweetness. Nuts can give a nice crunch, too. Almonds or walnuts work great!

Different Dietary Options

If you need gluten-free bliss balls, use certified gluten-free oats. They give the same texture and taste without the gluten. For a sugar-free treat, replace honey or maple syrup with stevia or erythritol. This keeps the bliss balls sweet while fitting your diet.

Themed Bliss Balls

Get creative with seasonal bliss balls! Add pumpkin spice in the fall for a cozy flavor. For holidays, you can roll the bliss balls in colored sprinkles or drizzle melted chocolate on top. These themed decorations make them perfect for parties or gifts.

You can find the Full Recipe above to start making these tasty treats today!

Storage Info

Short-Term Storage

To keep your Peanut Butter Bliss Balls fresh, store them in the fridge. Use an airtight container to prevent them from drying out. They will stay good for up to one week. When you need a quick snack, grab one from the container. Enjoy their rich flavor and energy boost!

Long-Term Storage Options

If you want to keep your bliss balls longer, freezing is a great option. Place them in a single layer on a baking sheet. Freeze until firm, then transfer them to a freezer-safe bag. These bliss balls can last up to three months in the freezer. When you’re ready to eat, just thaw at room temperature.

Signs of Spoilage

Check your bliss balls for changes. If they smell off or have mold, toss them out. A change in texture or color is also a sign they may not be good. Always trust your senses. When in doubt, it’s safer to discard them. Enjoy your bliss balls while they are fresh!

FAQs

How long do Peanut Butter Bliss Balls last?

Peanut butter bliss balls last about one week in the fridge. Store them in an airtight container. The cold keeps them firm and fresh. After a week, check for any off smells or changes in texture. If they seem okay, they are likely still good.

Can I use crunchy peanut butter instead of creamy?

Yes, you can use crunchy peanut butter! It adds a nice texture to the bliss balls. The crunchiness gives each bite a fun twist. Just make sure to mix it well with the other ingredients.

Are Peanut Butter Bliss Balls healthy?

Peanut butter bliss balls are quite healthy! They pack protein and healthy fats from the peanut butter. The oats offer fiber, while flaxseed adds omega-3s. When made with honey or maple syrup, they still provide natural sweetness without refined sugars. They make a great snack or energy boost.

Can I double the recipe?

Absolutely! Doubling the recipe is easy. Just use two cups of peanut butter and adjust the other ingredients accordingly. Make sure you have enough space in your fridge for the extra bliss balls. They are perfect for sharing or for meal prep!

What can I substitute for oats?

If you need a substitute for oats, try using ground almonds or almond flour. You can also use coconut flour, but use less since it absorbs more moisture. Another option is to use puffed rice for a lighter texture. Each of these options will change the taste a bit, so pick what you like best!

You now have a complete guide to making Peanut Butter Bliss Balls. We covered the key ingredients, substitutions, and step-by-step instructions. With tips for customization and storage, you can create these treats to fit any taste or dietary need. Remember to avoid common mistakes like overmixing or skipping the chill time. Enjoy experimenting with flavors and themes. Your delightful bliss balls are sure to impress!

- 1 cup natural peanut butter - 1/2 cup rolled oats - 1/4 cup honey or maple syrup - 1/4 cup unsweetened shredded coconut - 1/4 cup mini chocolate chips - 1/4 cup ground flaxseed - 1 teaspoon pure vanilla extract - A pinch of fine sea salt These ingredients work together to create a tasty and healthy snack. The natural peanut butter gives it a rich flavor and healthy fats. Rolled oats add fiber, making these bliss balls filling. Honey or maple syrup provides sweetness without refined sugar. Unsweetened shredded coconut adds texture and a hint of tropical flavor. Mini chocolate chips give a delightful surprise in each bite. Ground flaxseed is packed with nutrients and helps bind the mixture. Pure vanilla extract enhances the overall taste. Finally, fine sea salt balances the sweetness and boosts flavor. If you need alternatives, here are some ideas: - Peanut Butter Alternatives: You can use almond butter or sunflower seed butter if you're allergic to peanuts. - Sweeteners: If you want a different sweet flavor, try agave nectar or date syrup. - Mix-Ins: Feel free to add dried fruits, nuts, or seeds for extra nutrition and taste. These substitutions can help you make bliss balls that fit your diet and taste preferences. To start, grab a medium mixing bowl. Add 1 cup of natural peanut butter, 1/4 cup of honey or maple syrup, and 1 teaspoon of pure vanilla extract. Use a spatula or whisk to mix until smooth. This step is key for a creamy texture. Next, stir in 1/2 cup of rolled oats, 1/4 cup of unsweetened shredded coconut, 1/4 cup of ground flaxseed, and a pinch of fine sea salt. Mix well, making sure all dry ingredients blend in. Finally, gently fold in 1/4 cup of mini chocolate chips. Once mixed, cover the bowl with plastic wrap. Chill the mixture in the fridge for about 30 minutes. This makes it easier to handle. When the mixture is chilled, it's time to roll. Wet your hands slightly to avoid sticking. Take small portions and roll them into balls about 1 inch in diameter. Aim for uniform sizes. This way, each bliss ball has the same great flavor. Place the rolled balls on parchment paper or a plate. After rolling, put them back in the fridge for 15-20 minutes. This helps them firm up, making them even more enjoyable. For a fun presentation, arrange the bliss balls on a colorful platter. You can drizzle some extra peanut butter on top for flair. Pair these with a refreshing glass of almond milk or your favorite drink. This makes for a tasty treat that’s perfect for any time of day. You can find the Full Recipe to keep making these delightful snacks! To make great Peanut Butter Bliss Balls, you need even mixing. Start by blending the peanut butter, honey, and vanilla extract until it's smooth. Use a spatula or whisk to help with this. Next, add your dry ingredients. This includes oats, coconut, flaxseed, and salt. Mix until everything is well combined. Chilling the mixture is also key. After mixing, cover the bowl and refrigerate for about 30 minutes. This step firms up the mixture, making it easier to roll into balls. A well-chilled mixture helps you achieve the perfect texture. You can easily change these bliss balls to fit your taste. Want more protein? Add a scoop of protein powder or superfoods like chia seeds. If you want to make them nut-free, swap peanut butter for sun butter or seed butter. For a vegan option, just use maple syrup instead of honey. Watch out for overmixing the ingredients. Mixing too much can make the bliss balls dense. Just mix until everything is combined and no dry bits remain. Also, don’t skip the chilling step. If you don’t chill the mixture long enough, your bliss balls will be too soft to roll. Make sure to chill for at least 30 minutes for best results. {{image_4}} You can make Peanut Butter Bliss Balls even more fun by adding flavors. Try mixing in cinnamon for warmth or cocoa powder for a chocolate twist. Both spices enhance the taste without adding extra sugar. You can also toss in dried fruits like raisins or cranberries for sweetness. Nuts can give a nice crunch, too. Almonds or walnuts work great! If you need gluten-free bliss balls, use certified gluten-free oats. They give the same texture and taste without the gluten. For a sugar-free treat, replace honey or maple syrup with stevia or erythritol. This keeps the bliss balls sweet while fitting your diet. Get creative with seasonal bliss balls! Add pumpkin spice in the fall for a cozy flavor. For holidays, you can roll the bliss balls in colored sprinkles or drizzle melted chocolate on top. These themed decorations make them perfect for parties or gifts. You can find the Full Recipe above to start making these tasty treats today! To keep your Peanut Butter Bliss Balls fresh, store them in the fridge. Use an airtight container to prevent them from drying out. They will stay good for up to one week. When you need a quick snack, grab one from the container. Enjoy their rich flavor and energy boost! If you want to keep your bliss balls longer, freezing is a great option. Place them in a single layer on a baking sheet. Freeze until firm, then transfer them to a freezer-safe bag. These bliss balls can last up to three months in the freezer. When you're ready to eat, just thaw at room temperature. Check your bliss balls for changes. If they smell off or have mold, toss them out. A change in texture or color is also a sign they may not be good. Always trust your senses. When in doubt, it’s safer to discard them. Enjoy your bliss balls while they are fresh! Peanut butter bliss balls last about one week in the fridge. Store them in an airtight container. The cold keeps them firm and fresh. After a week, check for any off smells or changes in texture. If they seem okay, they are likely still good. Yes, you can use crunchy peanut butter! It adds a nice texture to the bliss balls. The crunchiness gives each bite a fun twist. Just make sure to mix it well with the other ingredients. Peanut butter bliss balls are quite healthy! They pack protein and healthy fats from the peanut butter. The oats offer fiber, while flaxseed adds omega-3s. When made with honey or maple syrup, they still provide natural sweetness without refined sugars. They make a great snack or energy boost. Absolutely! Doubling the recipe is easy. Just use two cups of peanut butter and adjust the other ingredients accordingly. Make sure you have enough space in your fridge for the extra bliss balls. They are perfect for sharing or for meal prep! If you need a substitute for oats, try using ground almonds or almond flour. You can also use coconut flour, but use less since it absorbs more moisture. Another option is to use puffed rice for a lighter texture. Each of these options will change the taste a bit, so pick what you like best! You now have a complete guide to making Peanut Butter Bliss Balls. We covered the key ingredients, substitutions, and step-by-step instructions. With tips for customization and storage, you can create these treats to fit any taste or dietary need. Remember to avoid common mistakes like overmixing or skipping the chill time. Enjoy experimenting with flavors and themes. Your delightful bliss balls are sure to impress!

Peanut Butter Bliss Balls

Discover the joy of making Peanut Butter Bliss Balls, the perfect energizing healthy snack for any time of day! These easy treats combine natural peanut butter, oats, and sweeteners like honey for a delicious yet nutritious bite. With customizable options and simple instructions, you’ll be rolling up these blissful snacks in no time. Click through to explore the full recipe and tips for variations to suit your taste!

Ingredients
  

1 cup natural peanut butter

1/2 cup rolled oats

1/4 cup honey or maple syrup

1/4 cup unsweetened shredded coconut

1/4 cup mini chocolate chips

1/4 cup ground flaxseed

1 teaspoon pure vanilla extract

A pinch of fine sea salt

Instructions
 

In a medium mixing bowl, combine the natural peanut butter, honey (or maple syrup), and pure vanilla extract. Use a spatula or whisk to stir the mixture until it is smooth and fully blended.

    Add the rolled oats, unsweetened shredded coconut, ground flaxseed, and a pinch of fine sea salt to the peanut butter mixture. Mix thoroughly with a wooden spoon or your hands until every dry ingredient is evenly incorporated.

      Gently fold in the mini chocolate chips, mixing just until they are uniformly dispersed throughout the mixture.

        Cover the bowl with plastic wrap and refrigerate the mixture for about 30 minutes. This chilling step will make the mixture easier to handle when rolling into balls.

          Once the mixture has chilled, wet your hands slightly to prevent sticking, and roll small portions of the mixture—roughly 1 inch in diameter—into balls. Aim for uniform sizes for even flavor in every bite.

            Place the bliss balls on a piece of parchment paper or a plate. Return them to the refrigerator for an additional 15-20 minutes to firm up.

              After the bliss balls are set, enjoy them right away or store them in an airtight container in the fridge for up to one week.

                Prep Time: 15 minutes | Total Time: 1 hour | Servings: Approximately 16 bliss balls

                  - Serving Suggestion: Arrange the bliss balls artfully on a colorful platter and drizzle a bit of extra peanut butter on top for a gourmet touch. Pair with a refreshing glass of almond milk or your favorite beverage for a delightful treat!

                    Leave a Comment

                    Recipe Rating