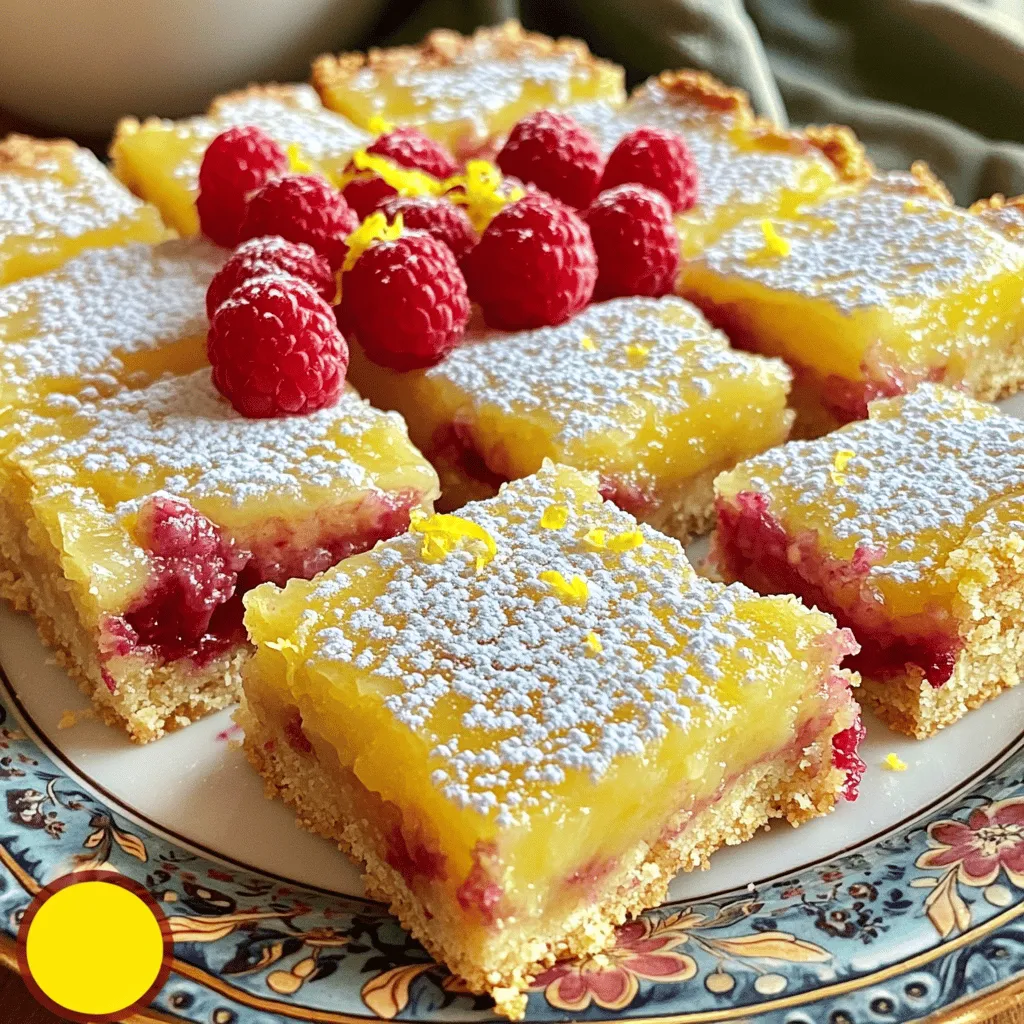
Are you ready to indulge in a treat that is both tangy and sweet? My Raspberry Lemon Bars are the perfect blend of bright flavors and a buttery crust. In this article, I’ll guide you through easy steps to create these delightful bars, along with tips to make them just right. Whether you’re planning a picnic or a cozy dessert night, these bars will impress every guest. Let’s get baking!
Ingredients
Complete List of Ingredients
To make these delicious raspberry lemon bars, you need the following ingredients:
– 1 cup all-purpose flour
– 1/2 cup powdered sugar, plus extra for dusting (optional)
– 1/4 teaspoon salt
– 1/2 cup unsalted butter, melted
– 2 large eggs
– 1 cup granulated sugar
– 1/4 cup freshly squeezed lemon juice (about 2 medium lemons)
– Zest of 1 lemon
– 1 cup fresh raspberries (or frozen raspberries, thawed and drained)
Special Notes on Ingredient Quality
Using high-quality ingredients makes a big difference. Choose fresh lemons for the best flavor. Their zest adds a bright note to the bars. Fresh raspberries are ideal, but frozen can work too. Just ensure they are thawed and drained well. For the crust, use unsalted butter for better control of salt levels. Opt for organic flour and sugar whenever possible.
Suggested Substitutions for Dietary Preferences
You can easily adapt this recipe to fit different diets:
– For a gluten-free option, use a 1:1 gluten-free flour blend.
– If you need a dairy-free version, replace unsalted butter with coconut oil or vegan butter.
– For a lower sugar version, consider using a sugar substitute like stevia or monk fruit.
– If you want to skip eggs, try a flaxseed or chia seed mixture as a binding agent.
By making these swaps, you can enjoy raspberry lemon bars that fit your needs.
Step-by-Step Instructions
Prepping the Crust
Start by preheating your oven to 350°F (175°C). Take an 8×8 inch baking dish. You can grease it lightly or line it with parchment paper. Leave some paper hanging over the edges. This makes it easy to lift out later.
In a medium bowl, mix together the flour, powdered sugar, and salt. Whisk these dry ingredients until they blend well. Next, pour in the melted butter. Use a fork or spatula to stir until it looks like wet sand.
Now, press the mixture evenly into the bottom of the dish. Make sure it covers the whole base. Bake this crust for about 15 minutes. You want it to be golden brown.
Making the Lemon and Raspberry Filling
While your crust bakes, it’s time to make the filling. In a large bowl, whisk the eggs, granulated sugar, lemon juice, and lemon zest. Keep whisking until it’s smooth and creamy.
Now, gently add the raspberries. Fold them in carefully. You don’t want to crush them. The berries give a nice pop of color and flavor.
Baking and Cooling Process
When the crust is ready, pour the lemon and raspberry filling on top. Spread it out evenly. Return the dish to the oven and bake for another 20-25 minutes. The filling should be set but still a bit jiggly in the middle.
Once done, take it out and let it cool on a wire rack. After it cools to room temperature, put it in the fridge for at least an hour. This helps the filling firm up.
When you’re ready to serve, dust the top with some powdered sugar. It adds a nice touch! Enjoy these tasty raspberry lemon bars.
Tips & Tricks
Common Baking Mistakes to Avoid
Baking can be tricky. Here are some mistakes to watch out for:
– Not measuring ingredients: Use measuring cups and spoons for accuracy.
– Overmixing the batter: Mix just until combined to keep bars light.
– Skipping the chill time: Refrigerating helps the bars set properly.
Techniques for Perfectly Layered Bars
Layering is key for these bars. Follow these tips:
– Press the crust firmly: Use your fingers or a flat bottomed glass to pack it.
– Pour filling gently: To keep layers separate, pour slowly over the crust.
– Use a toothpick: Check doneness by inserting a toothpick into the center. If it comes out clean, it’s ready.
Enhancing Flavor with Additions
Want more flavor? Try these ideas:
– Add zest: Use more lemon zest for a stronger citrus taste.
– Use herbs: A hint of fresh mint or basil can add depth.
– Drizzle sauce: Top with a berry sauce for extra sweetness and flair.Enjoy your baking!
Variations
Alternative Fruit Options
You can have fun with this recipe. Instead of raspberries, try using blueberries or strawberries. These fruits give a sweet taste. You can also use blackberries for a tart twist. If you want a tropical feel, use mango puree. Adjust the lemon juice based on the fruit’s sweetness. This keeps the balance of tangy and sweet.
Gluten-Free and Vegan Adaptations
You can make these bars gluten-free easily. Substitute all-purpose flour with almond or oat flour. For a vegan option, replace eggs with flax eggs. Mix one tablespoon of ground flaxseed with three tablespoons of water. Let it sit for a few minutes until it thickens. Use coconut oil instead of butter for a dairy-free version. These swaps keep the flavor rich and delicious.
Creative Serving Suggestions
Presentation matters! Cut the bars into fun shapes with cookie cutters. Serve them on a bright platter. Top each bar with whipped cream for extra delight. You can also pair them with a scoop of vanilla ice cream. Fresh mint leaves add a nice touch too. For a fancy twist, drizzle with a lemon glaze. You’ll impress everyone with these simple ideas.
Storage Info
How to Properly Store Raspberry Lemon Bars
To keep your raspberry lemon bars fresh, store them in the fridge. Place the bars in an airtight container. This will help them last up to one week. If you need to store them longer, freezing is a great option.
Freezing Instructions for Long-Term Storage
To freeze your raspberry lemon bars, first, let them cool completely. Then, cut them into squares. Wrap each square tightly in plastic wrap. After that, place the wrapped bars in a freezer-safe bag or container. They can stay fresh for up to three months in the freezer.
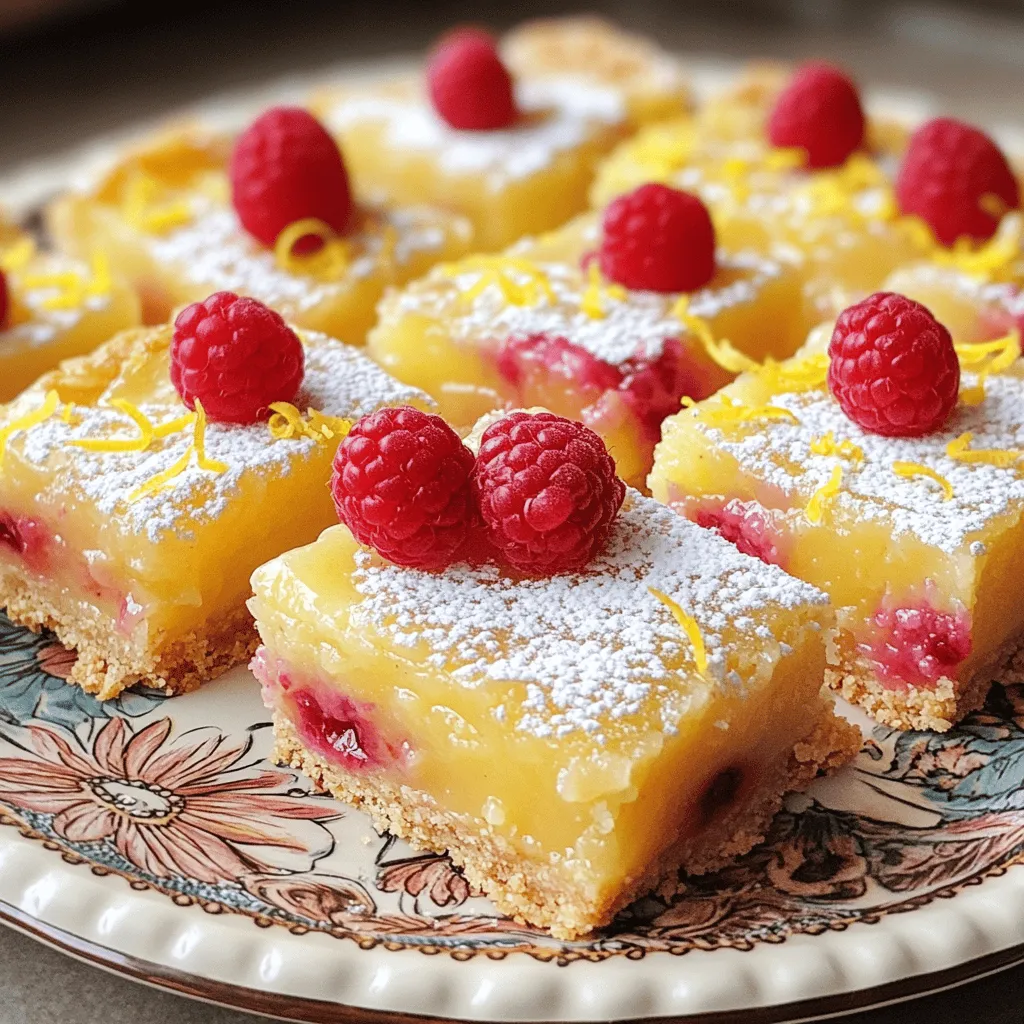
How to Refresh Bars Before Serving
If your bars were frozen, let them thaw in the fridge overnight. This keeps them cool and tasty. Before serving, dust them with powdered sugar for a sweet touch. You can also add fresh raspberries on top for a colorful look. Enjoying these bars fresh makes every bite a delight.
FAQs
What’s the best way to cut the bars?
To cut the bars, use a sharp knife. Make sure the bars are cold. This helps keep the filling intact. Start by slicing down the middle. Then, cut each half into equal pieces. If you want clean edges, wipe the knife between cuts. A little patience here makes a big difference.
Can I use frozen raspberries?
Yes, you can use frozen raspberries. Just make sure to thaw and drain them first. Frozen fruit tends to hold more water. This can make the filling too wet. Gently fold the thawed raspberries into the filling. Be careful not to crush them too much.
How far in advance can I make these bars?
You can make these bars up to two days in advance. Store them in the fridge. This allows the flavors to develop. If you want to keep them longer, consider freezing. Just wrap them well in plastic wrap. Then, place them in an airtight container.
In this post, we covered how to make delicious raspberry lemon bars. We went through the ingredients, from special notes on quality to substitutions. The step-by-step guide detailed prepping, filling, baking, and cooling. We shared tips for avoiding mistakes and creating perfect layers. You also learned about fun variations and how to store your treats correctly.
With these clear instructions, you can bake confidently. Enjoy your baking and make these bars shine!