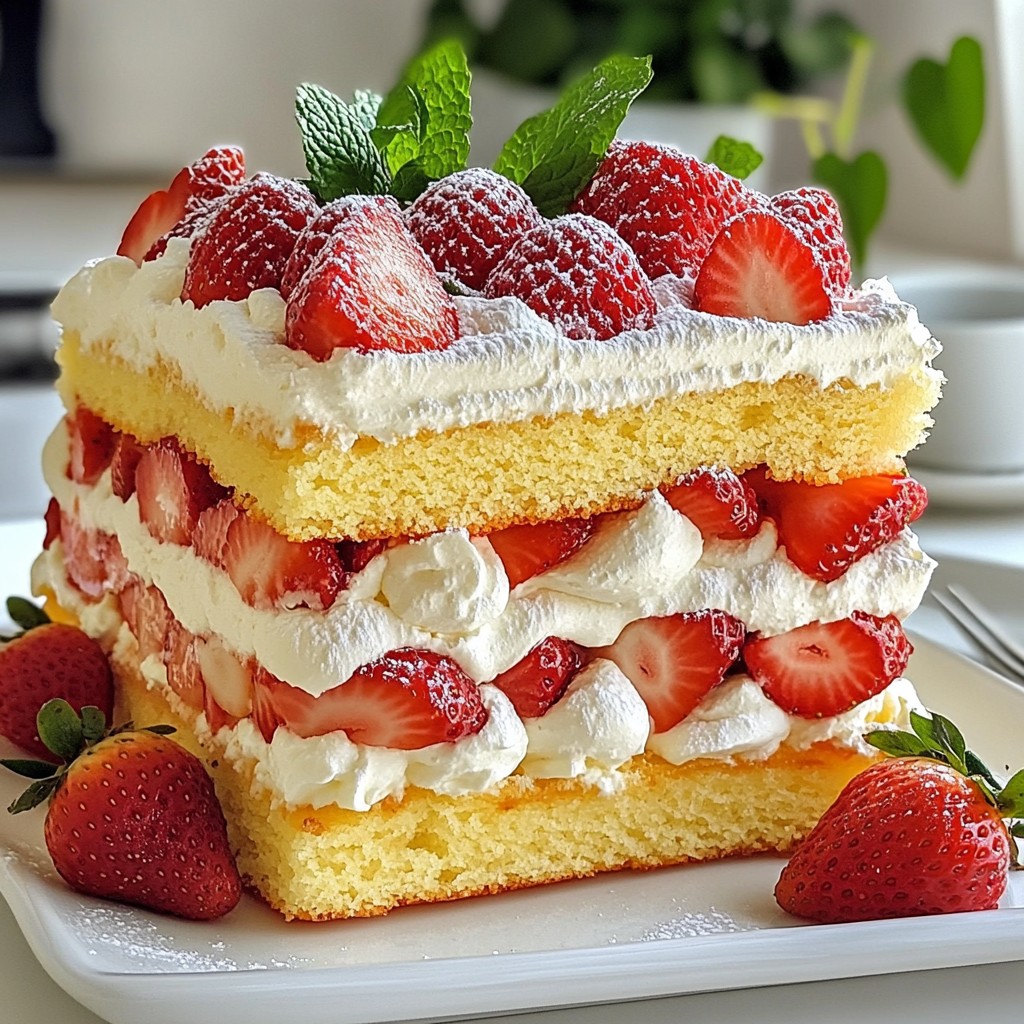
Dive into the sweetness of a Strawberries and Cream Sponge Cake! This delightful recipe transforms simple ingredients into a light, fluffy dessert. You’ll impress friends and family with layers of fresh strawberries and whipped cream nestled in a soft sponge. Follow my easy steps to create this showstopper for any occasion. Ready to bake something delicious? Let’s get started on your new favorite cake!
Why I Love This Recipe
- Light and Fluffy Texture: This sponge cake is incredibly light, making it a perfect base for the rich strawberries and whipped cream.
- Fresh Strawberry Flavor: The use of fresh strawberries not only adds a vibrant color but also a natural sweetness that elevates the dessert.
- Simple Ingredients: With just a few pantry staples, this recipe is easy to whip up, making it accessible for bakers of all levels.
- Beautiful Presentation: The final touch of fresh mint leaves and strawberries makes this cake not only delicious but also a stunning centerpiece for any occasion.
Ingredients
List of Ingredients
- 1 cup all-purpose flour
- 1 cup granulated sugar
- 4 large eggs
- 1/2 cup unsalted butter, melted
- 1 teaspoon vanilla extract
- 1/2 teaspoon baking powder
- Pinch of salt
- 2 cups fresh strawberries, hulled and sliced
- 1 cup heavy cream
- 2 tablespoons powdered sugar
- Fresh mint leaves for garnish
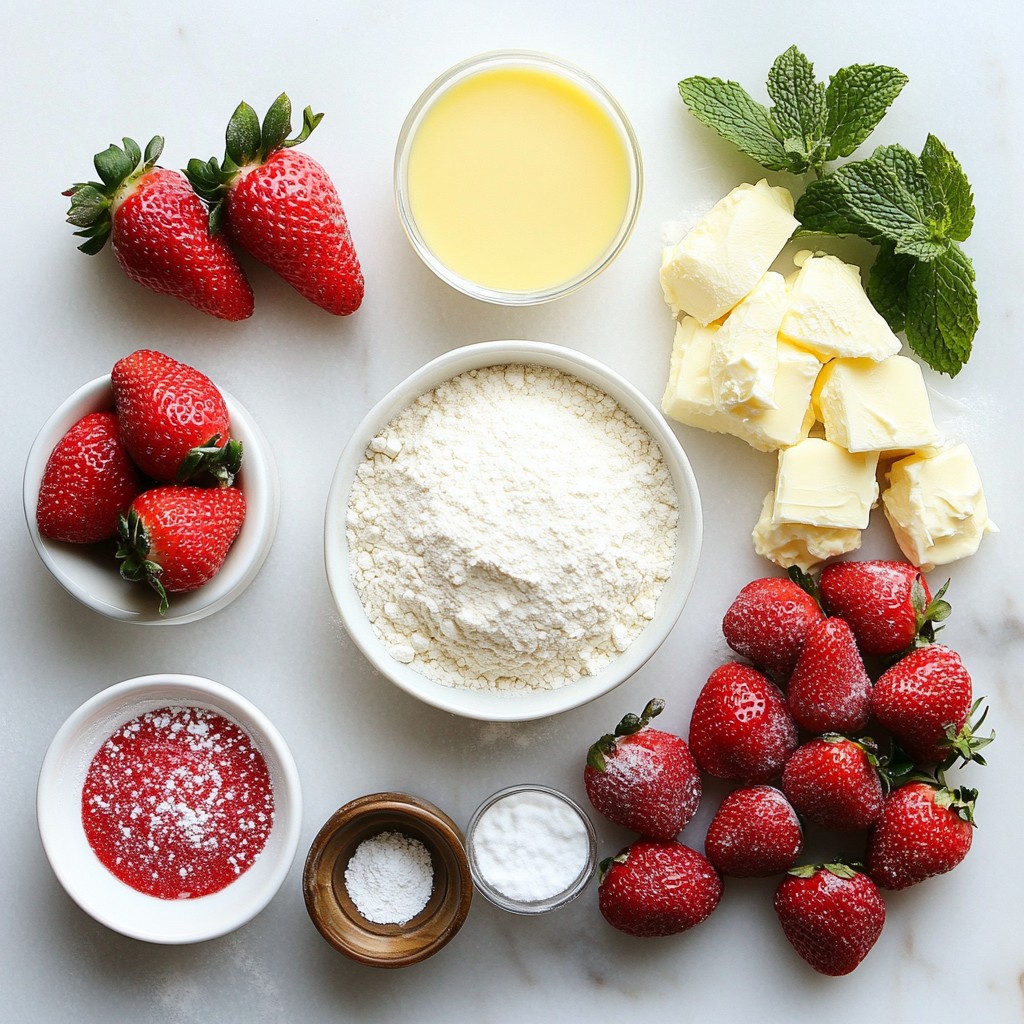
To make a perfect strawberries and cream sponge cake, you need simple yet high-quality ingredients. Each item plays a key role in the final taste and texture.
All-purpose flour is your base. It gives the cake structure. Granulated sugar sweetens your cake and helps it rise. Large eggs add moisture and richness. Unsalted butter, when melted, blends well for a tender crumb.
Vanilla extract brings warmth to the flavor. Baking powder ensures your cake rises nicely. A pinch of salt enhances sweetness and balances flavors. Fresh strawberries are the star, giving freshness and a pop of color.
Heavy cream is vital for a rich whipped topping. Powdered sugar sweetens the cream without adding grit. Lastly, fresh mint leaves add a lovely touch on top.
With these ingredients, you create a delightful dessert that impresses everyone.
Step-by-Step Instructions
Preparation Steps
Preheat the Oven and Prepare Cake Pans Start by preheating your oven to 350°F (175°C). Next, grease two 9-inch round cake pans with unsalted butter. Make sure to cover every corner. For easier removal, line the bottom with parchment paper.
Mix Wet Ingredients Thoroughly In a large bowl, whisk together 4 large eggs and 1 cup of granulated sugar. Keep whisking until the mix is thick and pale, about 5-7 minutes. Once it looks right, gently mix in 1/2 cup of melted butter and 1 teaspoon of vanilla extract.
Combining Ingredients
Sift and Mix Dry Ingredients Grab another bowl and sift together 1 cup of all-purpose flour, 1/2 teaspoon of baking powder, and a pinch of salt. Gradually add this dry mix to the egg mixture. Fold it in gently, and stop when you see it just combined. Avoid overmixing to keep the cake light.
Bake the Cakes Pour the batter evenly into your prepared cake pans. Place them in your preheated oven. Bake for 20-25 minutes. A toothpick should come out clean when inserted in the center.
Cooling and Whipping
Cool the Cakes Before Assembly After baking, let the cakes cool in the pans for about 10 minutes. Carefully transfer them to wire racks. Allow them to cool completely before moving on.
Whip the Heavy Cream While the cakes cool, prepare your whipped cream. In a clean mixing bowl, beat 1 cup of heavy cream with 2 tablespoons of powdered sugar. Use an electric mixer until stiff peaks form.
Assembling the Cake
Layering with Cream and Strawberries Once the cakes are cool, place one layer on a serving plate. Spread a generous layer of whipped cream over the top. Add half of the sliced strawberries.
Final Layer and Garnishing Gently place the second cake layer on top. Repeat the process by adding another layer of whipped cream and the remaining sliced strawberries. For the finishing touch, add fresh mint leaves on top for a pop of color.
Tips & Tricks
Baking Tips
- Ensuring the Right Cake Texture: To get a light and fluffy cake, mix the wet ingredients well. The eggs and sugar need to blend until thick and pale. This step is key for a soft sponge.
- Avoiding Overmixing: When adding dry ingredients, fold gently. Overmixing makes the cake dense. Stop mixing as soon as you see no dry flour. This keeps your sponge airy and delightful.
Cream Whipping Tips
- Perfectly Whipped Cream Instructions: Use a clean bowl for whipping cream. Cold heavy cream whips better. Beat the cream on medium speed for a few minutes. Add powdered sugar after it starts to thicken.
- Achieving Stiff Peaks: Watch closely as you whip. You want peaks that stand straight up. If they droop, keep whipping. This creates a stable base for your layers and adds a nice texture.
Presentation Tips
- Dusting and Decorating: After layering, dust the top with powdered sugar. This adds a sweet touch and looks nice. Use a fine sieve for an even sprinkle.
- Creative Serving Suggestions: Serve slices with whole strawberries beside them. Add fresh mint leaves for color. A drizzle of chocolate or berry sauce can also elevate the look and taste.
Pro Tips
- Use Room Temperature Eggs: For a fluffier sponge cake, ensure your eggs are at room temperature. This helps them incorporate better into the batter, resulting in a lighter texture.
- Don't Overmix the Batter: When combining the dry and wet ingredients, fold gently until just combined. Overmixing can lead to a dense cake, so be careful not to overdo it.
- Chill the Whipped Cream: For best results, refrigerate your mixing bowl and beaters before whipping the cream. This helps the cream whip up faster and achieve stiff peaks more easily.
- Layering Technique: When assembling the cake, spread the whipped cream and strawberries evenly to ensure each slice has the perfect balance of flavors and textures.
Variations
Flavor Variations
Adding Citrus Zest You can brighten your cake by adding citrus zest. Try adding the zest of one lemon or orange to your batter. This will give your sponge cake a fresh twist that pairs well with strawberries.
Incorporating Other Berries Feel free to mix in different berries. Blueberries, raspberries, or blackberries can add unique flavors. Just replace some strawberries with your favorite berry for a fun change.
Dietary Variations
Gluten-Free Options To make this cake gluten-free, swap all-purpose flour for a gluten-free flour blend. Look for blends that include xanthan gum, as it helps with texture. Your cake will still be light and fluffy.
Vegan Substitutes For a vegan version, replace eggs with flax eggs. Mix one tablespoon of ground flaxseed with three tablespoons of water for each egg. Use plant-based butter and a non-dairy milk for the best results.
Layering Variations
Alternate Filling Ideas You can change the filling to suit your taste. Consider using lemon curd or chocolate ganache as a filling. These options can add a rich flavor and take your cake to the next level.
Switching Up the Frosting While whipped cream is classic, you can try other frostings. Cream cheese frosting, whipped coconut cream, or even a chocolate frosting can add a new twist. Each option adds its own charm to the cake.
Storage Info
Storing Leftovers
- Best Practices for Refrigeration: After serving, cover the leftover cake with plastic wrap. This keeps it fresh and moist. Store it in the fridge for up to three days. If you want to keep it longer, consider freezing it.
- Freezing Instructions: To freeze the cake, wrap it tightly in plastic wrap, then in aluminum foil. This prevents freezer burn. You can freeze the whole cake or individual slices. It will last up to three months in the freezer.
Shelf Life
- How Long the Cake Lasts: This cake tastes best fresh, but it can last in the fridge for about three days. After that, you may notice changes in texture and flavor. If frozen, it maintains quality for three months.
Reheating Instructions
- Tips for Enjoying Leftover Cake: To enjoy leftover cake, let it sit at room temperature for about 30 minutes. This helps restore its texture. If you prefer it warm, gently heat it in the oven at 300°F for about 10 minutes. Avoid microwaving, as it can dry the cake out. Enjoy your cake with a dollop of whipped cream or fresh strawberries for added flavor!
FAQs
Common Questions
How do I know when the cake is done baking? You can tell the cake is done when a toothpick comes out clean. It should also look golden on the edges. If it springs back when you touch it, that’s a good sign too.
Can I make this cake ahead of time? Yes, you can make this cake a day ahead. Just store it in the fridge, covered. This helps the flavors blend more.
What can I use instead of heavy cream for whipping? You can use coconut cream or a dairy-free option like almond milk. Both can whip well, but may taste different.
Troubleshooting Tips
What to do if the cake is too dry? If the cake turns out dry, you can brush it with a simple syrup. Mix equal parts sugar and water. Heat until the sugar dissolves, then brush it on the cake.
How to fix whipped cream that won't thicken? If your whipped cream won’t thicken, try chilling the bowl and beaters. Sometimes, a little more sugar can help too. Just keep whipping until it reaches stiff peaks.
Serving Suggestions
What to serve with a strawberries and cream sponge cake? This cake pairs well with fresh fruits or a scoop of vanilla ice cream. You can also serve it with a berry sauce for extra flavor.
Can I serve this cake warm or should it be chilled? You can serve it chilled for a refreshing treat. Warm is fine too, but it may not hold its shape as well. Enjoy it how you like!
This cake combines simple ingredients like flour, sugar, and fresh strawberries. You learned how to prepare and bake it easily. We covered tips for achieving the right texture and whipping cream to perfection. You can also customize flavors and adapt for different diets. With proper storage, your leftovers will last. Enjoying this delicious cake, whether warm or chilled, will impress your guests. Now, it's time to bake and savor every bite of your creation!