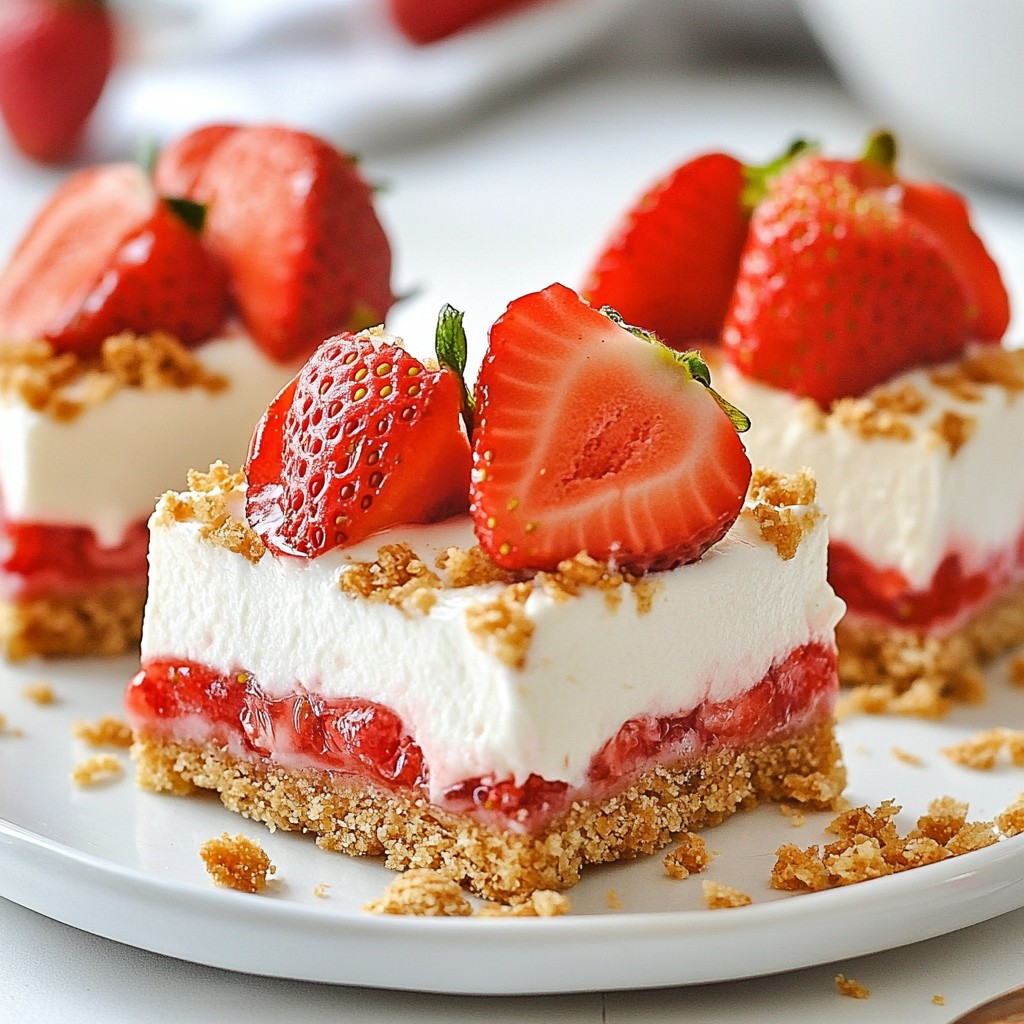
Craving a sweet treat that’s both fun and easy to make? Look no further! In this post, I’ll share my favorite recipe for Strawberry Crunch Cheesecake Chunks. These delicious bites combine creamy cheesecake with a crunchy topping. You can adjust the flavors to match your taste. Let’s dive into the ingredients and methods so you can enjoy these delightful treats today!
Why I Love This Recipe
- Deliciously Fruity: The combination of fresh strawberries and creamy cheesecake creates a mouthwatering experience that is both refreshing and indulgent.
- Easy to Make: This recipe is straightforward and requires minimal baking skills, making it perfect for both novice and experienced bakers.
- Perfect for Any Occasion: These cheesecake chunks are great for parties, picnics, or simply a sweet treat at home.
- Customizable: You can easily swap out strawberries for other fruits or add your favorite toppings to make it your own.
Ingredients
Essential Ingredients for Strawberry Crunch Cheesecake Chunks
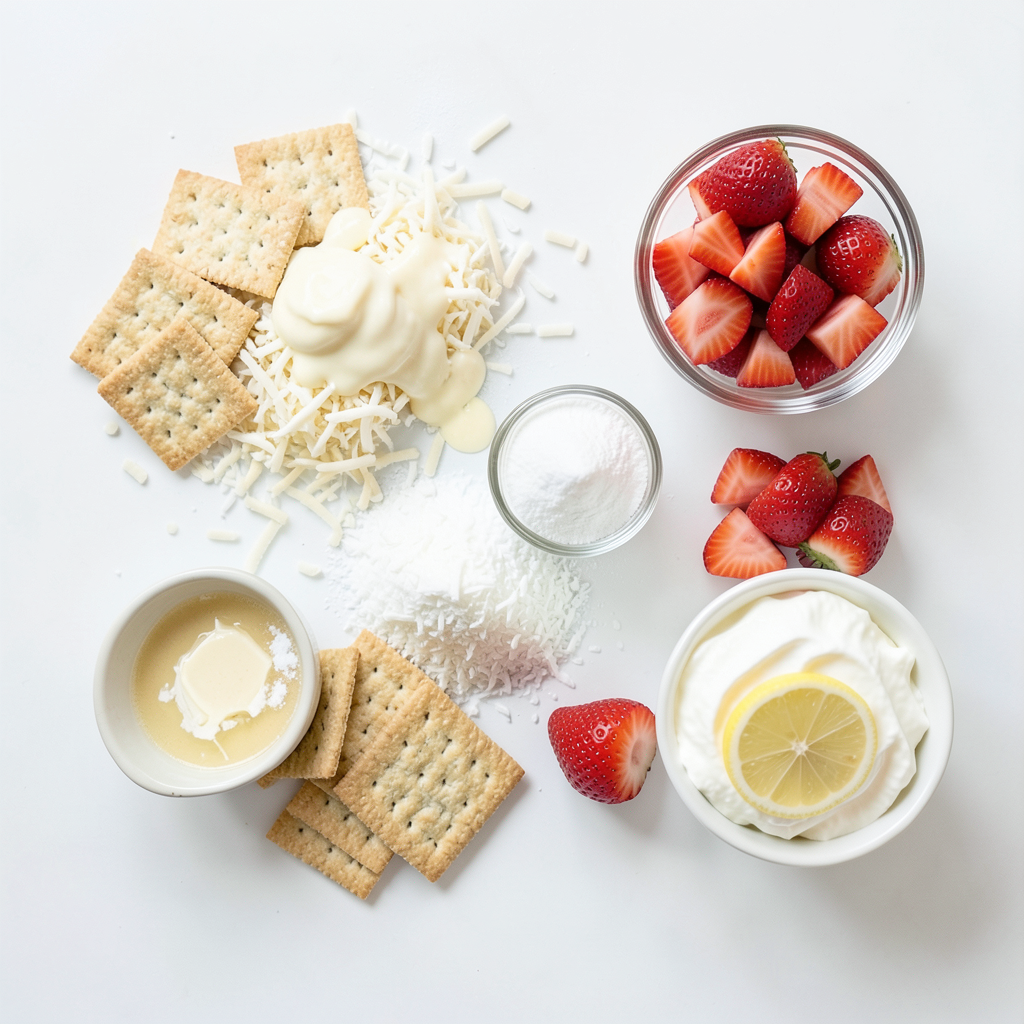
To make the Strawberry Crunch Cheesecake Chunks, you need simple yet delicious ingredients. Here’s what you’ll need:
- 1 cup crushed graham crackers
- 1/2 cup unsweetened shredded coconut
- 1/4 cup unsalted butter, melted
- 2 cups cream cheese, softened to room temperature
- 1 cup powdered sugar
- 1 teaspoon pure vanilla extract
- 1 cup fresh strawberries, diced into small pieces
- 1/2 teaspoon fresh lemon juice
- 1/4 cup whipped cream (for folding into the mixture)
These items work together to give you a creamy, fruity, and crunchy treat.
Optional Toppings for Serving
While the cheesecake chunks are tasty on their own, adding toppings makes them even better. Consider these options:
- Additional fresh strawberries
- A sprinkle of crushed graham crackers
- A drizzle of chocolate sauce
- A dollop of whipped cream
These toppings add flavor and make your dessert look lovely.
Ingredient Substitutions for Dietary Preferences
If you have dietary needs or preferences, you can still enjoy these chunks. Here are some substitutions:
- Use gluten-free graham crackers for a gluten-free option.
- Substitute coconut with crushed nuts for a different crunch.
- For a dairy-free version, try vegan cream cheese and whipped cream.
- Maple syrup can replace powdered sugar for a natural sweetener.
These swaps keep the spirit of the recipe while accommodating your needs.
Step-by-Step Instructions
Guide to Preparing the Crunch Base
To start, gather your ingredients. You need crushed graham crackers, shredded coconut, and melted butter. In a medium bowl, mix the crushed graham crackers and shredded coconut. Pour in the melted butter. Stir until it feels like wet sand. This helps hold the base together. Next, take a square 9x9 inch baking dish. Press the mixture firmly into the dish. Use your fingers or a measuring cup to smooth it out. Make sure it covers the bottom evenly. Place this dish in the fridge while you make the filling.
Making the Cheesecake Filling
Now, let’s create the cheesecake filling. In a large bowl, beat softened cream cheese with an electric mixer. Mix until it is smooth and creamy. This takes a minute or two. Gradually add powdered sugar to the cream cheese. Mix on low speed to avoid a sugar cloud. Once blended, add vanilla extract for taste. Next, gently fold in diced strawberries. Be careful not to mash them. Drizzle fresh lemon juice in the mix. This brightens the strawberry flavor. Finally, fold in whipped cream with a spatula. This keeps the mixture light and fluffy.
Assembling and Chilling the Dessert
It’s time to put it all together! Pour the cheesecake filling over the chilled graham cracker base. Use a spatula to spread it evenly. Smooth the top for a clean look. Cover the dish tightly with plastic wrap. Refrigerate for at least 4 hours. This helps the cheesecake set and firm up. After chilling, take the dish out. Use a sharp knife to cut the cheesecake into small squares. Arrange your delightful chunks on a serving platter. You can garnish with fresh strawberries or crushed graham crackers for extra crunch. Enjoy every bite!
Tips & Tricks
How to Achieve the Perfect Cheesecake Texture
To get a smooth cheesecake, use room temperature cream cheese. Cold cream cheese creates lumps. Beat the cream cheese slowly at first. This helps mix in the air. When you add powdered sugar, mix on low to avoid a sugar cloud. Fold in whipped cream gently. This keeps the filling light and airy.
Storing and Reheating Tips
Store your cheesecake chunks in an airtight container. Place them in the fridge to keep them fresh. They can last for about five days. If you want to freeze them, wrap each chunk in plastic wrap. Then, place them in a freezer bag. They stay good for up to three months. Thaw them in the fridge before serving.
Common Mistakes to Avoid
One common mistake is not chilling the cheesecake long enough. It needs at least four hours to set properly. Another mistake is overmixing after adding strawberries. This can make the filling too runny. Always remember to fold gently. Lastly, don’t skip the lemon juice. It brightens the flavor and makes a big difference!
Pro Tips
- Use Fresh Strawberries: For the best flavor and texture, opt for ripe, fresh strawberries. Frozen strawberries can lead to a watery mixture and affect the overall consistency.
- Chill the Cream Cheese: Ensure your cream cheese is at room temperature for easier blending. This will help you achieve a smooth, lump-free filling.
- Fold Gently: When incorporating whipped cream and strawberries into the cheesecake mixture, fold gently to maintain the light and airy texture of the filling.
- Let It Chill: Allow the cheesecake to chill for at least 4 hours, but overnight is even better. This extra time helps the flavors meld and the texture to set perfectly.
Variations
Alternate Fruit Choices for Flavor Profiles
You can switch up the strawberries for other fruits. Try fresh blueberries for a sweet twist. Raspberries add a tart flavor that pairs well with cream cheese. For a tropical vibe, use diced mango or pineapple. Each fruit brings its own taste and color. Mixing fruits can create layers of flavor that excite the palate. Just remember to adjust the lemon juice to match the fruit you choose.
Gluten-Free Options
Want to make this dessert gluten-free? Use gluten-free graham crackers to create the base. Many brands offer tasty options that work well. Always check the labels to ensure they are certified gluten-free. Your cheesecake will still taste rich and creamy without the gluten. It's a great way to include everyone in the fun!
Vegan Adaptations for the Recipe
Going vegan? Replace cream cheese with a cashew-based cream cheese. Blend soaked cashews, lemon juice, and a bit of coconut cream for creaminess. Use maple syrup instead of powdered sugar for sweetness. You can also swap the butter for coconut oil. These changes keep the cheesecake rich while making it plant-based. You won’t miss the dairy in this delicious treat!
Storage Info
Best Practices for Storing Leftovers
To keep your Strawberry Crunch Cheesecake Chunks fresh, use an airtight container. Make sure to layer parchment paper between the chunks. This way, they won’t stick together. Store the container in the fridge. This helps to maintain the smooth texture and bright flavor of the cheesecake.
Freezing Instructions for Longer Shelf Life
If you want to save some chunks for later, freezing is a great option. First, wrap each chunk in plastic wrap. Then, place them in a freezer-safe bag. Remove as much air as possible before sealing. They will stay fresh in the freezer for up to three months. When you’re ready to enjoy, let them thaw in the fridge overnight.
How Long They Last in the Fridge
In the fridge, your Strawberry Crunch Cheesecake Chunks will last for about 5 days. However, the longer they sit, the texture may change slightly. For the best taste, enjoy them within the first few days. Keep an eye on any signs of spoilage, such as off smells or changes in color.
FAQs
Can I make Strawberry Crunch Cheesecake Chunks in advance?
Yes, you can make these chunks ahead of time. I often prepare them the day before serving. This allows the flavors to blend well. Just store them in the fridge, covered tightly. They stay fresh for up to four days. This makes them a great option for parties or family gatherings.
How do I make this recipe without cream cheese?
You can use Greek yogurt instead of cream cheese. It will give you a nice, creamy texture. Just make sure to choose plain, full-fat yogurt for the best results. You can also try silken tofu for a dairy-free option. Blend it well until smooth to mimic the creaminess of cream cheese.
What are some fun serving ideas for these chunks?
Serving ideas can be fun and creative! Here are a few:
- Add a drizzle of chocolate sauce for a sweet touch.
- Top with fresh mint leaves for a pop of color.
- Serve with a scoop of vanilla ice cream for a treat.
- Arrange on a colorful plate with extra strawberries.
- Use cupcake liners for easy individual servings.
These ideas make your dessert look extra special!
In this post, we covered how to make Strawberry Crunch Cheesecake Chunks. We discussed key ingredients, preparation steps, and how to avoid common mistakes. I shared tips for texture and storing leftovers. You can even mix it up with different fruits and dietary needs.
Now, you can make this dessert your own. Enjoy every bite and share it with others!