Skip to content
DisclaimerTerms Of UseGDPR PolicyCookie Policy

lazychefmagic

  • Home
  • Drinks
  • Appetizers
  • Dinner
  • Dessert
  • About
  • Contact
  • Privacy Policy
DisclaimerTerms Of UseGDPR PolicyCookie Policy

NO-ING-IMG

- 3 medium potatoes, peeled and diced - 1 red bell pepper, diced - 1 yellow bell pepper, diced - 1 cup fresh spinach, chopped - 6 large eggs - 1/2 cup milk - 1/2 cup shredded cheese - 2 tablespoons olive oil - 1 teaspoon garlic powder - Salt and pepper to taste - Fresh parsley for garnish (optional) The ingredients for the Potato Pepper Spinach Frittata are simple yet flavorful. You start with three medium potatoes. Make sure to peel and dice them well. Next, you have one red bell pepper and one yellow bell pepper. Dicing these adds color and taste. You also need one cup of fresh spinach. This adds a nice green touch. Six large eggs are crucial for the frittata’s base. The eggs provide protein and richness. Half a cup of milk makes the eggs fluffy and creamy. Don't forget the cheese! Half a cup of your favorite shredded cheese adds a lovely melt. I like cheddar for its sharpness, but mozzarella is great too. You will need two tablespoons of olive oil for sautéing. Garlic powder adds a nice kick. A teaspoon is just enough. Salt and pepper help balance the flavors. Lastly, fresh parsley can brighten your dish. It’s optional but highly recommended. Gather these ingredients for a delightful meal that is easy to make! {{ingredient_image_2}} 1. Preheat your oven to 350°F (175°C). This step is key for baking the frittata. 2. In a large skillet, heat 2 tablespoons of olive oil over medium heat. Add 3 medium potatoes that you have peeled and diced. Stir them for about 8-10 minutes. You want them golden and soft. 3. Now, add 1 diced red bell pepper and 1 diced yellow bell pepper. Cook for another 5 minutes. Stir often until they are tender and smell great. 4. Next, add 1 cup of chopped spinach. Stir until it wilts, about 2 minutes. Then, sprinkle in 1 teaspoon of garlic powder, salt, and pepper to taste. Mix well to blend the flavors. 1. In a bowl, whisk together 6 large eggs and 1/2 cup of milk until smooth. 2. Pour this egg mixture evenly over the veggies in the skillet. Make sure it covers everything well. 3. Now, sprinkle 1/2 cup of shredded cheese on top. Let it cook on the stovetop for about 3-4 minutes. You will see the edges start to set, which is perfect. 4. Carefully move the skillet to your preheated oven. Bake for 15-20 minutes. It should puff up, and the center looks set. Check by inserting a knife in the center; it should come out clean. - How to achieve the perfect frittata texture: For a great texture, cook the frittata slowly. Start on the stovetop, then move to the oven. This method helps the eggs fluff up nicely. - Importance of evenly sautéed vegetables: Even cooking ensures all veggies are tender and tasty. Stir often when sautéing. This helps them cook evenly and blend their flavors well. - Monitoring cooking times for best results: Keep an eye on the clock. Overcooking makes the frittata dry. It should cook for about 15-20 minutes in the oven. Check for doneness with a knife. It should come out clean. - Best garnishes and accompaniments: Fresh parsley adds color and flavor. You can also try a dollop of sour cream or plain yogurt for creaminess. - Pairing options for a complete meal: Frittatas are great with a light salad. A mix of greens, tomatoes, and cucumbers pairs well. You can also serve it with crusty bread for a hearty meal. - Recommended side dishes to serve with the frittata: Consider serving fresh fruit or roasted veggies. These sides add color and balance to the meal. They make the dish more fun and tasty! Pro Tips Choose the Right Potatoes: Use waxy potatoes like Yukon Gold for a creamy texture or starchy potatoes like Russets for a fluffier frittata. Whisk Eggs Thoroughly: Ensure your eggs are well-whisked to create a light and airy frittata. Incorporating air into the eggs will help the frittata rise. Experiment with Vegetables: Feel free to mix in other vegetables such as mushrooms or zucchini for added flavor and nutrition. Cool Before Serving: Allow the frittata to cool slightly before slicing. This makes it easier to cut and helps the flavors meld together. {{image_4}} You can change the cheese in your frittata for more flavor. Cheddar gives a sharp taste, while mozzarella adds a creamy touch. Feel free to mix them too! Want to add more veggies? You can. Try mushrooms, zucchini, or even diced tomatoes. Each will give a new flavor and texture. If you need a dairy-free option, use almond or oat milk instead of regular milk. For cheese, try cashew cheese or a dairy-free cheese blend. These choices will still keep your frittata rich and tasty. If you're vegetarian, this frittata fits right in. You can keep all the veggies and skip any meat. It remains hearty and healthy. For gluten-free eaters, this frittata is great too! Just make sure all your ingredients, like cheese and spices, are gluten-free. Most are, so you can enjoy without worry. Want to cut carbs? You can replace some potatoes with extra spinach or other low-carb veggies. This keeps the frittata light and full of flavor while fitting your diet. To keep your Potato Pepper Spinach Frittata fresh, you must store it right. First, let the frittata cool down to room temperature. Next, place it in an airtight container. This will help keep it moist and tasty. You can keep it in the fridge for up to three days. If you want to save it for longer, freezing is a great option. Cut the frittata into wedges. Wrap each wedge tightly in plastic wrap. Then, place the wrapped slices in a freezer-safe bag. This way, you can enjoy it for up to two months. Reheating your frittata can be tricky. You don't want it to dry out. The best way is to use the oven. Preheat it to 350°F (175°C). Place the frittata on a baking sheet. Cover it with aluminum foil to lock in moisture. Heat for about 10-15 minutes, or until warm. If you're in a hurry, you can use the microwave. Just place a slice on a microwave-safe plate. Cover it with a damp paper towel. Heat it for 30 seconds to 1 minute. Check if it's hot enough, and enjoy! Yes, you can make it ahead of time. Cook the frittata and let it cool. Then, store it in the fridge. You can reheat it later for a quick meal. You can serve it with a light salad. Fresh fruit or toast also works well. For drinks, try a refreshing juice or coffee. A frittata lasts about 3 to 4 days in the fridge. Make sure to store it in an airtight container. This keeps it fresh and tasty. No, they are different. A frittata has more filling and is cooked slowly. An omelet is folded and often cooked quickly. Each dish has its own charm and flavor. In this blog post, I detailed how to make a delicious Potato Pepper Spinach Frittata. We covered all the ingredients you'll need, step-by-step cooking instructions, and tips for perfect results. You also learned about tasty variations and proper storage. This frittata is easy and fun to make. It’s flexible with ingredients, so you can create your version. Enjoy this dish for breakfast, lunch, or dinner. You can impress your family and friends. Happy cooking!

Potato Pepper Spinach Frittata Delightful and Simple

Are you ready to create a delicious and easy Potato Pepper Spinach Frittata? This simple dish bursts with fresh flavors

- 4 cups Rice Krispies cereal - 1 cup mini marshmallows - 1/2 cup unsweetened cocoa powder - 1/4 cup unsalted butter - 1 teaspoon vanilla extract - 1 cup white chocolate chips - 1/2 cup dried cranberries - 1/4 cup finely chopped pecans - Red and green sprinkles for decoration You can switch up the flavors and textures. Here are some fun ideas: - Use dark chocolate chips for a richer taste. - Swap dried cranberries for dried cherries or raisins. - Try different nuts like walnuts or almonds for crunch. - Add a pinch of sea salt for a sweet-salty mix. Want to make these treats a bit healthier? Here are some swaps: - Use brown rice cereal instead of Rice Krispies for added fiber. - Choose mini marshmallows made with natural sweeteners. - Replace butter with coconut oil for a dairy-free option. - Use Greek yogurt instead of white chocolate for a creamy topping. These ingredients make your Rice Krispie Christmas puddings festive and fun! Enjoy mixing and matching to suit your taste! {{ingredient_image_2}} To start, take a large saucepan and put it over low heat. Add 1/4 cup of unsalted butter. Stir it gently until it melts fully. This step is key; we don’t want the butter to brown. Once melted, add 1 cup of mini marshmallows to the pan. Stir constantly. The marshmallows will melt into a smooth and creamy mix. When the marshmallows are melted, remove the pan from the heat. Now, add 1 teaspoon of vanilla extract and 1/2 cup of unsweetened cocoa powder. Mix well until everything is combined. Make sure there are no lumps left. This chocolatey base adds rich flavor to your puddings. Next, it’s time to add the star of the show: 4 cups of Rice Krispies cereal. Use a spatula to gently fold the cereal into the marshmallow mixture. Do this slowly to ensure each Rice Krispie gets coated evenly. After mixing, let the mixture cool for about 5 minutes. Then, add 1/2 cup of dried cranberries and 1/4 cup of finely chopped pecans. Stir until fully combined. Now, lightly grease a muffin tin with cooking spray or butter. Firmly press the Rice Krispie mixture into each cup, shaping them into little pudding forms. Make sure they are compact to hold their shape. Let the puddings set for about 30 minutes at room temperature. While they set, melt 1 cup of white chocolate chips in a microwave-safe bowl. Microwave in 30-second intervals, stirring in between. Once melted, carefully remove the puddings from the muffin tin. Use a butter knife to help if needed. Drizzle the melted white chocolate over each pudding. Finally, sprinkle with red and green sprinkles for a festive touch. To get that perfect texture, start with melted butter and marshmallows. Keep the heat low while melting. Stir until smooth. This helps create a nice, gooey base. Adding cocoa powder gives a rich flavor. When you fold in the Rice Krispies, do it gently. This keeps the cereal crisp. Press the mixture firmly into the muffin tin. This helps the puddings hold their shape. Let them cool completely before serving. Using the right tools makes cooking fun! A large saucepan for melting is a must. A spatula helps with mixing and folding. Use a muffin tin for shaping. Lightly grease it for easy removal. A microwave-safe bowl is great for melting chocolate. You can also use parchment paper for easy cleanup. For the best taste, store your puddings in an airtight container. Keep them at room temperature for a few days. If you need to store them longer, pop them in the fridge. They can last up to a week this way. To keep them fresh, avoid stacking them. Place parchment paper between layers if you need to stack. Enjoy your festive treats! Pro Tips Use Fresh Ingredients: For the best flavor, ensure your marshmallows and Rice Krispies are fresh. Stale ingredients can affect the texture and taste of your puddings. Customize Your Mix-ins: Feel free to swap out cranberries and pecans for your favorite dried fruits or nuts. This allows you to tailor the recipe to your taste preferences. Chill for Better Texture: If you have time, chill the shaped puddings in the fridge for about 15 minutes after forming them. This can help them set firmer. Decorate with Care: When drizzling the white chocolate, use a fork or piping bag for a more controlled and artistic presentation. It adds an elegant touch to your festive treats. {{image_4}} You can change the flavor of your Rice Krispie puddings easily. Try adding peanut butter for a nutty twist. You could also use chocolate Rice Krispies for a richer taste. If you like fruity flavors, consider adding a splash of orange zest. It gives a bright and fresh note to each bite. Make your puddings look extra special with fun decorations. After drizzling white chocolate, add edible glitter or tiny candy canes. You can also use colored icing to create festive designs. Arrange them on a bright platter with holiday colors. This makes for a cheerful display that everyone will love. Adding seasonal treats makes your puddings even better. Dried fruits like apricots or figs can add sweetness. You can also sprinkle in some mini marshmallows for extra fluff. Nuts like almonds or hazelnuts give a crunchy texture. For a touch of fun, add holiday-themed candies, like chocolate-covered cherries or seasonal gummies. Each addition brings a new flavor and texture to your treats. When serving your Rice Krispie Christmas puddings, choose a bright platter. A red or green plate adds festive cheer. You can even use a Christmas-themed platter. Arrange the puddings neatly, leaving space between them. This helps guests see each treat. Consider placing some mini ornaments around the puddings. It creates a joyful scene that everyone will love. These puddings pair well with other holiday sweets. Try serving them with gingerbread cookies or peppermint bark. The mix of flavors makes for a fun dessert table. You can also add fruit like strawberries or raspberries. Their bright colors balance the creamy white chocolate. A hot cup of cocoa or spiced cider makes this even better! If you want to share these treats, think about gift packaging. Use clear cellophane bags tied with festive ribbon. You can also place them in small holiday boxes. Add a tag with a sweet note. This makes your gift feel extra special. Another idea is to create a dessert jar. Layer the puddings with some candies or nuts. It looks beautiful and is a tasty surprise! Yes, you can make Rice Krispie Christmas puddings a day or two in advance. Just store them in an airtight container at room temperature. This keeps them fresh and tasty. You can use other cereals like puffed rice, cornflakes, or even granola. Just make sure the cereal is crispy. This keeps the texture and fun in your puddings. These puddings last about 3 to 5 days if stored properly. Keep them in an airtight container. This helps them stay fresh and safe to eat. Yes, you can freeze these puddings. Wrap each one in plastic wrap and place them in a freezer bag. They can last up to 3 months in the freezer. Just thaw them in the fridge before serving. We covered how to make delicious Rice Krispie puddings with simple steps and options. You learned the right ingredients, key tips, and fun variations. Feel free to add your twist or alter flavors. With the right tools, this treat can brighten any time. Serve them with care for special moments, or gift them to others. Enjoy making these tasty puddings, and let your creativity shine in the kitchen!

Rice Krispie Christmas Puddings Festive and Fun Treat

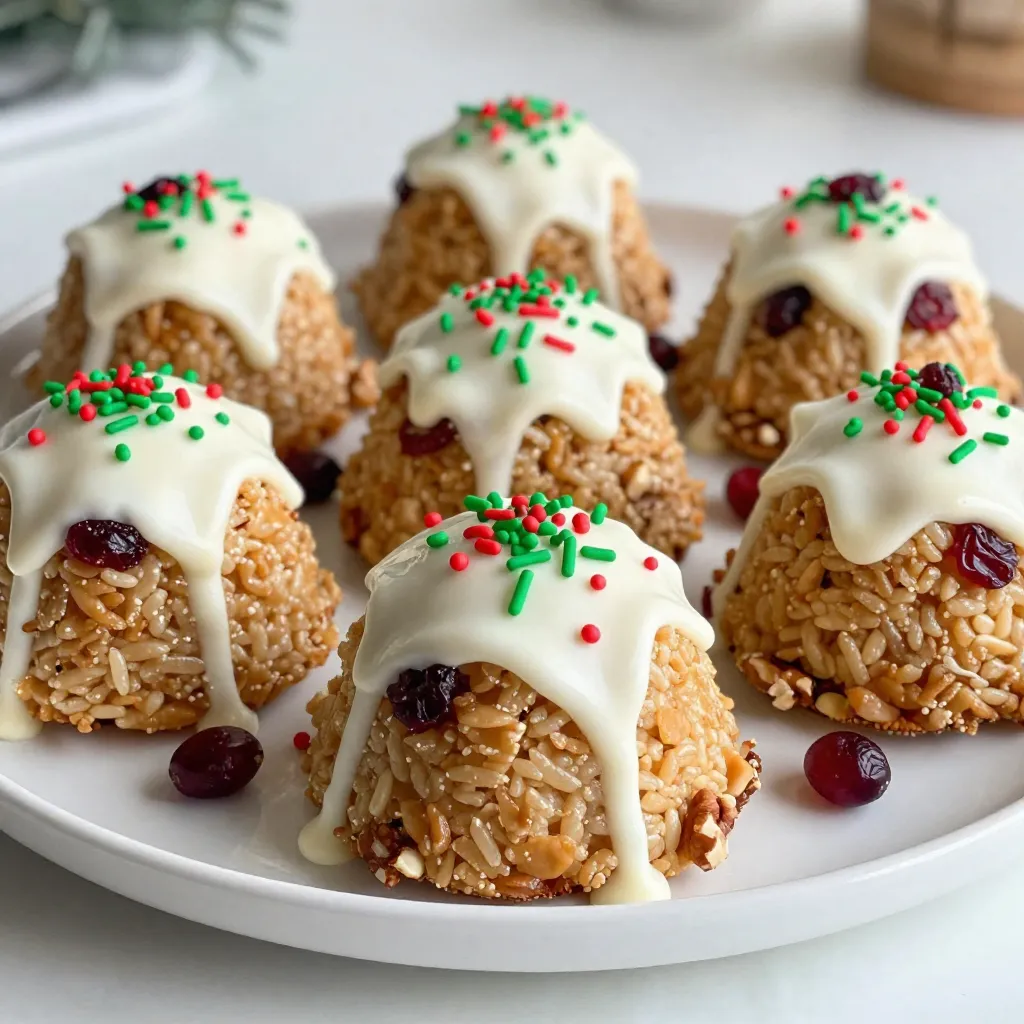
Get ready to add some fun to your holiday treats with Rice Krispie Christmas Puddings! These festive delights are easy

- Chicken Breast and Rice Essentials - 2 boneless chicken breasts, cut into bite-sized pieces - 1 cup jasmine rice - 1 cup chicken broth - Flavor Enhancers - 1 tablespoon soy sauce - 1 tablespoon sesame oil - 1 tablespoon honey - Salt and pepper, to taste - Fresh Produce Components - 1 cup pineapple chunks (either fresh or canned) - 1/2 cup bell peppers, diced (mix of red and yellow for color) - 1/2 cup green onions, finely chopped - 2 cloves garlic, minced - 1 tablespoon fresh ginger, grated Gathering these ingredients makes this dish stand out. The chicken and rice form a solid base. The pineapple adds sweetness and tang. The bell peppers bring crunch and color. Fresh garlic and ginger add warmth and depth. Soy sauce and honey tie all the flavors together. Using jasmine rice makes this meal fragrant and light. Combine all these elements for a delightful dinner! Don't forget the sesame seeds for garnish. They add a nice touch to the final dish. {{ingredient_image_2}} Heating the Pan and Adding Aromatics Start by heating a large skillet over medium heat. Add one tablespoon of sesame oil. Once it gets warm, toss in two cloves of minced garlic and one tablespoon of grated ginger. Sauté for one to two minutes. You want the kitchen to smell great, but don’t let the garlic burn. Cooking the Chicken Pieces Next, add two boneless chicken breasts, cut into bite-sized pieces. Season them with salt and pepper. Cook the chicken for about five to seven minutes. Stir occasionally to brown all sides. Make sure the chicken is cooked through before moving on. Sautéing the Bell Peppers Once the chicken is ready, add half a cup of diced bell peppers. I like to use a mix of red and yellow for color. Sauté everything together for another three minutes. You want the peppers to soften but still hold their shape. Adding Pineapple and Seasonings Now, it’s time to add one cup of pineapple chunks to the skillet. You can use fresh or canned, depending on what you have. Pour in one tablespoon of soy sauce and one tablespoon of honey. Stir everything well to combine. Cooking the Mixture Let the mixture cook for about two to three more minutes. This helps all the flavors blend together and heat through. You will notice the sweet and savory aroma filling your kitchen. Boiling and Simmering Process While your chicken mix simmers, take a separate pot. Combine one cup of jasmine rice with one cup of chicken broth. Bring this to a vigorous boil. Once boiling, reduce the heat to low. Cover the pot and let it simmer for about 15 minutes. Fluffing the Rice After 15 minutes, the rice should be tender. Remove the pot from heat and let it sit for a few minutes. Then, fluff it gently with a fork. This will help separate the grains, making it light and fluffy. Now you’re ready to serve your delicious pineapple chicken on a bed of rice! Tips for Seasoning Chicken To make your chicken shine, use salt and pepper. I like to season my chicken well. This brings out its natural taste. You can also add garlic or ginger for more flavor. Marinating the chicken in soy sauce for a bit will add depth. Choosing the Right Pineapple Fresh pineapple offers a bright, tangy flavor. If you use canned pineapple, choose one in juice, not syrup. This keeps the dish from being too sweet. Look for pineapple chunks that are vibrant and firm. Best Practices for Cooking Rice For perfect jasmine rice, use a 1:1 ratio of rice to chicken broth. Bring it to a boil, then reduce heat. Cover and simmer for about 15 minutes. This way, the rice becomes fluffy and absorbs all the flavor. Ensuring Chicken is Cooked Through Make sure your chicken pieces are cooked all the way. They should be golden and juicy. Use a meat thermometer to check. Chicken should reach an internal temperature of 165°F. This ensures it is safe to eat. Serving Suggestions Serve your dish in a big bowl for family-style dining. This makes it easy for guests to help themselves. I like to layer the rice first, then top it with the chicken. Garnishing Ideas Garnish with green onions for a pop of color. A sprinkle of sesame seeds adds a nice crunch. You can also add a slice of fresh pineapple or a sprig of cilantro to make it pretty. Pro Tips Use Fresh Pineapple: Fresh pineapple adds a vibrant flavor and texture to the dish, making it even more delightful compared to canned options. Marinate the Chicken: For extra flavor, marinate the chicken in soy sauce and ginger for at least 30 minutes before cooking. Fluff the Rice: Fluff the rice gently with a fork after cooking to keep it light and airy, ensuring a perfect base for your chicken. Garnish Creatively: Experiment with garnishes like cilantro or lime wedges to enhance not just the flavor but also the presentation of your dish. {{image_4}} Alternatives for Chicken If you want to switch up the protein, try using shrimp or tofu. Both pair well with the sweet pineapple. You can also use cooked rotisserie chicken for a faster option. Just add it at the end to warm it up. Using Different Rice Types While jasmine rice is great, you can use brown rice for extra fiber. Quinoa is a fun option too, giving a nutty taste. Just remember, cooking times may vary. Always check the package for guidance. Adding Heat with Spices If you like spice, add a pinch of red pepper flakes or chili powder. This will give your dish a nice kick. You can also use fresh jalapeños for a fresh touch. Incorporating Other Vegetables Don’t stop at bell peppers! You can add broccoli, snap peas, or carrots for more color and crunch. Just stir them in while cooking the chicken. They will add nutrition and flavor. - Store leftovers in an airtight container. - Keep the container in the fridge for up to three days. To reheat, place the chicken and rice in a microwave-safe dish. Add a splash of chicken broth or water to keep it moist. Cover it with a damp paper towel. Heat on high for 1-2 minutes, stirring halfway through. Check that it's hot all the way through before serving. - You can freeze this dish for up to three months. - Allow the meal to cool completely before freezing. To freeze, portion the chicken and rice into freezer-safe bags or containers. Squeeze out as much air as possible. When ready to eat, thaw the dish overnight in the fridge. To reheat, follow the same steps as above for the microwave or heat it in a skillet over low heat. Stir often, adding a bit of liquid if needed. Enjoy your meal as if it was just made! Can I use brown rice instead of jasmine rice? Yes, you can use brown rice. It adds a nutty flavor and is healthy. Just remember, brown rice takes longer to cook. You need about 40-45 minutes instead of 15 minutes. How can I make this recipe gluten-free? To make it gluten-free, switch the soy sauce for a gluten-free version. Look for tamari or coconut aminos. They both taste great and keep the dish yummy. What's the best way to serve pineapple chicken? Serve pineapple chicken over fluffy rice. You can use a large bowl so everyone can help themselves. Garnish with green onions and sesame seeds for a colorful touch. How long does this recipe take to prepare and cook? This recipe is quick! It takes about 10 minutes to prep and around 20 minutes to cook. In total, you can have a delicious dinner ready in about 30 minutes. Enjoy your meal! You now know how to make tasty pineapple chicken and rice. We covered the key ingredients, cooking steps, and handy tips for a perfect dish. Remember to keep your chicken juicy and your rice fluffy. Don’t forget the fun variations you can try! Lastly, store any leftovers safely to enjoy later. Cooking can be simple and enjoyable. With practice, you’ll impress everyone with your meals. Enjoy your cooking journey!

Pineapple Chicken and Rice Flavorful Dinner Delight

Looking for a tasty dinner that’s quick and easy? Pineapple Chicken and Rice delivers bold flavors in just one pot.

Crock Pot hot chocolate is a simple treat. You need just a few key ingredients to create this creamy delight. Here’s what you will need: - 4 cups whole milk - 1 cup heavy cream - 1 cup semi-sweet chocolate chips - 1/2 cup sweetened condensed milk - 1/4 cup unsweetened cocoa powder - 1 teaspoon vanilla extract - A pinch of sea salt - Garnishes (whipped cream and chocolate shavings) Each ingredient plays an important role. The whole milk and heavy cream give the drink its creamy texture. The semi-sweet chocolate chips add rich flavor and sweetness. Sweetened condensed milk brings extra creaminess and sweetness, while the cocoa powder deepens the chocolate flavor. The vanilla extract adds warmth, and sea salt enhances all the flavors. When you finish, don’t forget the garnishes! Whipped cream and chocolate shavings make the drink look fancy and taste even better. By using these ingredients, you will create a hot chocolate that is rich and satisfying. It’s perfect for cozy nights or gatherings with friends. {{ingredient_image_2}} 1. Start by pouring 4 cups of whole milk into your crock pot. 2. Next, add in 1 cup of heavy cream. 3. Now, toss in 1 cup of semi-sweet chocolate chips. 4. Add 1/2 cup of sweetened condensed milk for extra creaminess. 5. Stir in 1/4 cup of unsweetened cocoa powder and 1 teaspoon of vanilla extract. 6. Finally, sprinkle in a pinch of sea salt. Mix gently to combine all the ingredients. 7. Set your crock pot to low heat. Cover it with the lid. 8. Cook for about 2 to 3 hours. Stir occasionally to keep the chocolate from sticking. 1. Once the chocolate is melted, stir well to make it smooth. 2. Taste your hot chocolate. If it needs more sweetness, add more sweetened condensed milk or sugar. 3. When ready to serve, ladle hot chocolate into mugs. 4. Top each mug with fluffy whipped cream. 5. Add a sprinkle of chocolate shavings for a fun touch. This rich and creamy hot chocolate will warm your heart! To make the best Crock Pot hot chocolate, ensure even melting of the chocolate chips. Add all the chocolate chips at once. Stir them gently into the milk and cream mixture. This helps them melt evenly. Stirring during cooking is very important. Stir every 30 minutes while it cooks. This prevents the chocolate from sticking to the bottom and burning. It also keeps the mixture smooth. A quick stir helps blend the flavors well too. Get creative with your presentation! Use colorful mugs or fun cups for a festive touch. Drizzle chocolate syrup on top of the whipped cream for added flair. For a special treat, serve with sweet snacks. Cookies or marshmallows make great companions. You can even add a sprinkle of cinnamon or nutmeg on top for a warm spice kick. Enjoy every sip! Pro Tips Use Quality Chocolate: The better the chocolate, the richer your hot chocolate will be. Opt for high-quality semi-sweet chocolate chips for the best flavor. Adjust Sweetness: Taste your hot chocolate as it cooks! You can always add more sweetened condensed milk or sugar according to your taste preferences. Mix Up the Milk: For a lighter version, consider using 2% milk instead of whole milk. You can also try almond or oat milk for a dairy-free option. Garnish Creatively: Enhance presentation by adding flavored whipped cream or a sprinkle of cinnamon and nutmeg on top for an extra layer of flavor. {{image_4}} You can easily change the flavor of your hot chocolate. One fun way is to add peppermint extract. Just a teaspoon gives it a minty twist. This is perfect for winter nights or holiday gatherings. You can also try different types of chocolate. Swap semi-sweet chips for dark or white chocolate. Each option brings a unique taste. Dark chocolate is rich and bold, while white chocolate is sweet and creamy. If you want vegan hot chocolate, use plant-based milk. Almond, soy, or oat milk works great. Choose vegan chocolate chips to keep it dairy-free. For a sugar-free version, you can substitute sweetened condensed milk with a sugar-free alternative. Use a sugar substitute like stevia or monk fruit. These swaps make it easier for everyone to enjoy a warm cup of hot chocolate. After enjoying your Crock Pot hot chocolate, store any leftovers in the fridge. Use an airtight container for best results. Make sure the hot chocolate is cool before sealing it. It can stay fresh for 3 to 5 days. To reheat your hot chocolate, pour it into a pot over low heat. Stir gently as it warms up. This keeps the texture smooth and creamy. If it seems thick, add a splash of milk or cream while heating. You can freeze hot chocolate for later use. Pour cooled hot chocolate into freezer-safe containers. Leave some space at the top, as it will expand when frozen. It can last up to 3 months in the freezer. To thaw, place the container in the fridge overnight. When ready to enjoy, reheat it on the stove. Stir often to mix any separated ingredients. If needed, adjust the texture with a little extra milk or cream. How long can Crock Pot Hot Chocolate sit? Crock Pot Hot Chocolate can sit for about two hours on warm. This keeps it hot and ready to serve. If you need it to stay warm longer, you can keep it on low heat. Just remember to stir it occasionally to keep it smooth. Can I use non-dairy milk? Yes, you can use non-dairy milk! Almond, soy, or oat milk work well. Just make sure to pick a milk that has a nice flavor. Some non-dairy milks can be thinner, so keep that in mind. You may want to adjust the other ingredients to keep it creamy. What can I add for extra flavor? You can add many tasty things! A splash of peppermint extract gives a festive twist. You can also try adding a sprinkle of cinnamon or nutmeg. For a richer taste, use dark chocolate chips instead of semi-sweet. What to do if the hot chocolate is too thick? If your hot chocolate is too thick, you can add more milk or cream. Start with half a cup and stir well. Keep adding until you get the right texture. This helps to keep it creamy and drinkable. How to fix if it tastes too bland? If your hot chocolate tastes bland, try adding more sweetened condensed milk. You can also add a pinch of salt to enhance the flavors. If needed, a little vanilla extract can boost the taste even more. Taste as you go! This guide has covered all you need for the best Crock Pot hot chocolate. From ingredients to storage tips, you can now make a delicious treat. Remember to adjust flavors to fit your taste. Use creative ideas for serving and enjoy the process. You can even make it vegan or sugar-free. Keep experimenting with different toppings. Most of all, share this warm delight with friends and family. Enjoy cozy moments together!

Crock Pot Hot Chocolate Creamy and Rich Delight

Imagine sipping a cup of creamy hot chocolate on a chill evening. With my Crock Pot Hot Chocolate recipe, you

To make a Christmas Black Forest Trifle, you need simple, tasty ingredients. Here is the list: - 2 cups chocolate cake, cubed (can be store-bought or homemade) - 2 cups cherry pie filling (freshly prepared or canned) - 2 cups heavy whipping cream - 3 tablespoons powdered sugar - 1 teaspoon vanilla extract - 1 cup dark chocolate shavings (or chocolate curls) - 1/2 cup maraschino cherries, for garnishing - Fresh mint leaves, for garnish Each ingredient adds a unique flavor and texture. The cubed chocolate cake gives a rich base. The cherry pie filling brings sweetness and tartness. Heavy whipping cream adds creaminess. The powdered sugar sweetens the cream. Vanilla extract enhances the flavor. Dark chocolate shavings give a touch of elegance. Maraschino cherries add color and fun. Fresh mint leaves give a bright finish. Using high-quality ingredients makes a big difference. If you use homemade chocolate cake, it tastes even better. You can also swap in fresh cherries if you want. Each choice can change the flavor. This trifle is not just a dessert; it's a festive treat! When you gather these ingredients, you set the stage for a delightful dessert. Enjoy the process and have fun! {{ingredient_image_2}} To start, you need to make the whipped cream. Grab a large mixing bowl and pour in the heavy whipping cream. Beat it on medium speed. In about 3 to 5 minutes, you will see soft peaks form. This is key. Next, slowly add the powdered sugar and vanilla extract. Keep mixing until you reach stiff peaks. Be careful not to over-whip the cream. If you do, it may become grainy. Now it’s time to layer the trifle. Take a trifle dish or a large glass bowl. Place one-third of the cubed chocolate cake at the bottom. Make sure it covers the base evenly. Then, spoon one-third of the cherry pie filling over the cake. Spread it out to create an even layer. After that, dollop and spread half of the whipped cream over the cherry filling. Smooth it out for a nice finish. Continue the layering process. Add another one-third of the chocolate cake cubes. Next, add another one-third of the cherry pie filling. Then, top this with another layer of whipped cream, smoothing it out again. For the final layer, place the rest of the chocolate cake on top. Spoon the last of the cherry filling over the cake. Finally, finish with a generous layer of whipped cream, spreading it neatly. Chilling is very important for the trifle. Cover it with plastic wrap or a lid. Refrigerate for at least 2 hours. For the best flavor, chill it overnight. This allows all the flavors to mix and meld beautifully. Enjoy the wait! - Achieving perfect peaks: Start with cold heavy whipping cream. Use a clean bowl and beat on medium speed. Keep an eye on the cream. When it starts to thicken, you will see soft peaks forming. This takes about 3 to 5 minutes. - Avoiding over-whipping: Once you add powdered sugar and vanilla, continue beating. Stop when stiff peaks form. If you over-whip, the cream can turn grainy. It’s best to stop just before it gets too thick. - Ensuring even layers: Start by placing one-third of the chocolate cake cubes in your trifle dish. Spread them out evenly. This helps every bite have a mix of flavors. - Best practices for presentation: Use a clear glass dish. This way, everyone can see the beautiful layers. Smooth each layer with a spatula before adding the next. This makes your trifle look neat and tasty. - Ideas for individual servings: For a fun twist, serve the trifle in small glass cups. This allows guests to have their own portion. Plus, it looks great on a buffet table. - Pairing with festive beverages: This trifle pairs well with sweet drinks. Try serving it with mulled wine or sparkling cider. The flavors blend nicely and create a festive vibe. Pro Tips Make Your Own Cherry Filling: For a fresher taste, consider making your own cherry pie filling using fresh cherries, sugar, and a bit of cornstarch. This adds a homemade touch to your trifle! Whipped Cream Consistency: Monitor the whipped cream closely while mixing. Stop as soon as stiff peaks form to maintain a light and airy texture that perfectly complements the layers. Layering Technique: Use a spatula to spread each layer evenly for a more appealing presentation. This will also help each bite to have a balanced flavor of cake, cherries, and cream. Chill Time Matters: Allow the trifle to chill overnight if possible. This extra time helps the flavors meld together beautifully for a more delicious dessert. {{image_4}} You can make your trifle even more fun by swapping ingredients. - Using different cake types: Instead of chocolate cake, try vanilla or red velvet cake. Each cake adds a new taste and color to your trifle. - Alternative fruit fillings: Use strawberries, raspberries, or blueberries. Each fruit brings its unique flavor and adds variety to your dessert. Let’s talk about ways to boost the flavor of your trifle. - Adding liqueurs or extracts: A splash of cherry liqueur can deepen the cherry flavor. Almond extract can also add a lovely twist. Just a little goes a long way! - Including other toppings: Try toasted nuts or whipped cream cheese. These ingredients can add crunch or a creamy texture on top. I know many people have special diet needs. Here are some easy swaps. - Gluten-free options: For a gluten-free trifle, use gluten-free chocolate cake. Many brands offer delicious options that work well. - Vegan substitutions: You can make the whipped cream with coconut cream or a store-bought vegan option. Replace eggs with a flaxseed mix in cake recipes. With these variations, you can create a trifle that fits your tastes and needs. Enjoy customizing! - To store leftovers, cover the trifle tightly with plastic wrap. - You can also use an airtight container for best results. - The trifle lasts about 3-4 days in the fridge. - If you want to freeze it, note that whipped cream may separate. - It’s best to freeze only the cake and cherry layers. - Thaw in the fridge before serving. Yes, you can use store-bought ingredients. Here are the pros and cons: - Pros: - Saves time, especially during busy holidays. - Can be more consistent in taste. - Cons: - Less control over quality and flavor. - Homemade options often taste fresher. Using store-bought chocolate cake or cherry filling can speed up your prep. If you're short on time, don't hesitate to go this route. You can make this trifle a day ahead. Chilling it overnight helps the flavors mix well. - Recommended prep time: - Total time: 2 hours (plus chilling). - Chill time: At least 2 hours, but overnight is best. Making it in advance lets you enjoy your holiday stress-free! Absolutely! You can switch up the toppings to match your taste. Here are some ideas: - Use whipped cream with a sprinkle of cocoa powder. - Swap dark chocolate shavings for white chocolate. - Add fresh berries like raspberries or strawberries. - Try crushed nuts for added crunch. Feel free to get creative and make it your own! Serving a trifle can be both fun and elegant. Here are some ideas: - Individual cups: Use glass cups for single servings. This shows off the layers nicely. - Large bowl: Serve from a big trifle dish for a family-style dessert. - Garnish: Add a mint leaf on top of each serving for a pop of color. Presentation can elevate your trifle into a showstopper! This easy chocolate cherry trifle makes a delicious dessert for any gathering. You learned how to layer chocolate cake, cherry filling, and fluffy whipped cream. With tips for perfect peaks and beautiful layers, you can impress your guests. Remember, you can swap ingredients for your taste and store leftovers properly. Make it your own by trying different fruit or cake types. Enjoy the chill time; it enhances the flavors. Dive into this sweet treat, and let your creativity shine!

Christmas Black Forest Trifle Delightful Dessert Recipe

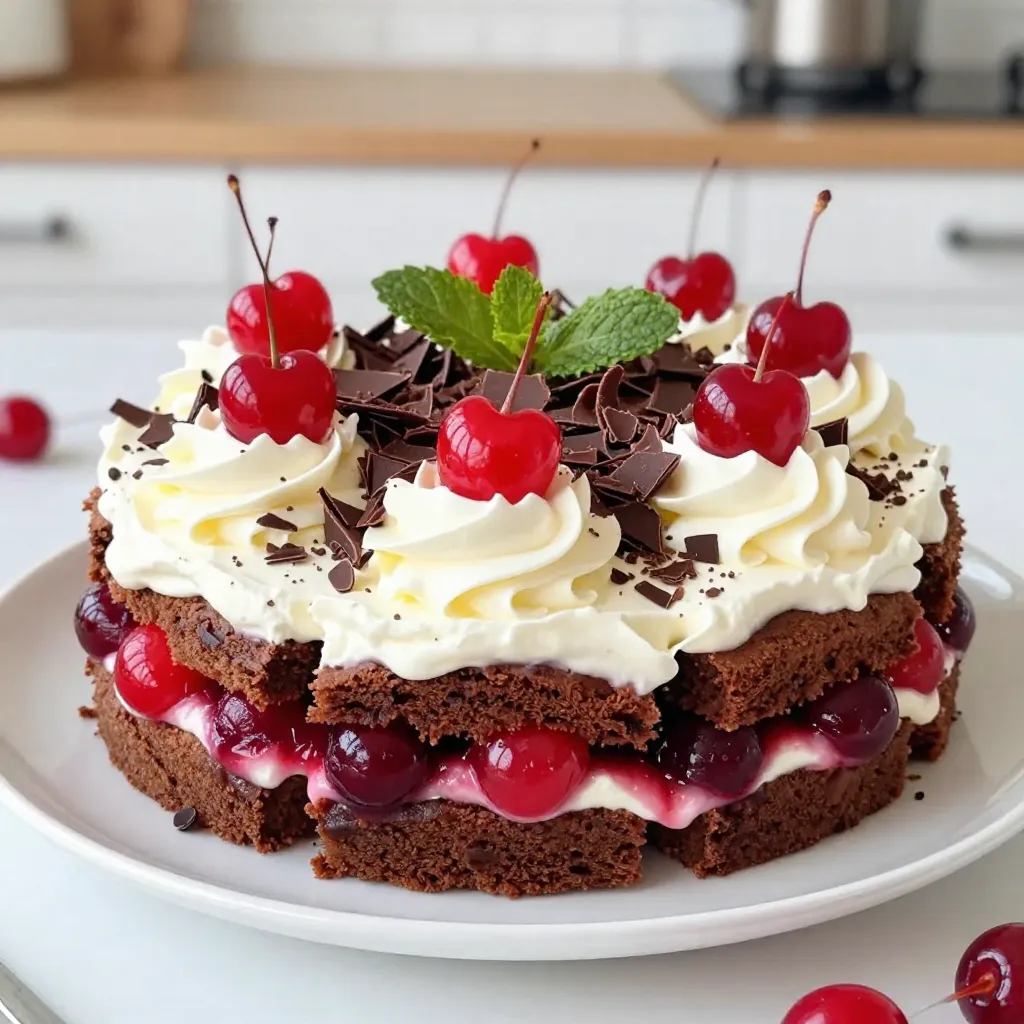
Christmas is the perfect time for a sweet treat, and this Black Forest Trifle will wow your loved ones! Layers

For this tasty dish, you'll need the following main ingredients: - 3 cups cooked chicken, shredded or diced - 8 ounces spaghetti or egg noodles - 1 cup mushrooms, sliced - 1 cup frozen peas - ½ cup onion, diced - 2 cloves garlic, minced - 3 cups chicken broth - 1 cup cream (or heavy cream alternative) - 1 cup shredded mozzarella cheese - 1 cup shredded Parmesan cheese - 4 tablespoons butter, divided - 4 tablespoons all-purpose flour - 1 teaspoon Italian seasoning - Salt and pepper to taste You can add these optional ingredients to boost the flavor: - Cooked bacon or ham for added protein - Fresh herbs like thyme or basil for a fresh twist - Red pepper flakes for some heat Garnishes can elevate your dish. Consider these: - Fresh parsley, chopped - Extra Parmesan cheese for a cheesy touch - Lemon zest for a bright finish {{ingredient_image_2}} First, cook the pasta. You can use spaghetti or egg noodles. Boil the water, add the pasta, and cook it until it's al dente. This means it should be firm but not hard. Drain the pasta and set it aside. Next, we sauté the vegetables. In a large skillet, melt two tablespoons of butter over medium heat. Add diced onion and sliced mushrooms. Cook these for about five minutes. The onions should become clear and the mushrooms soft. This step adds great flavor to the dish. Now, it’s time to make the sauce. Once the vegetables are ready, add minced garlic to the skillet. Cook this for about one minute. You want to smell the garlic but not burn it. Next, sprinkle in four tablespoons of flour. Mix it well with the veggies to make a roux. This will help thicken your sauce. Slowly pour in three cups of chicken broth and one cup of cream. Whisk it all together. Keep stirring until the sauce becomes smooth and thickens. This usually takes about four to five minutes. Now we combine everything. Add the shredded chicken and frozen peas to the skillet. Sprinkle in one teaspoon of Italian seasoning, salt, and pepper to taste. Mix all the ingredients until they are well combined and heated through. Preheat your oven to 350°F (175°C). In a large bowl, mix the cooked pasta with the chicken mixture. Stir in half of both cheeses, mozzarella and Parmesan. This helps to create a cheesy goodness throughout. Pour the full mixture into a greased 9x13 inch baking dish. Spread the rest of the cheeses on top. For extra flavor, dot the surface with the last two tablespoons of butter, cut into small pieces. Cover the dish with foil and bake it for 25 minutes. After that, remove the foil and bake for another 10 to 15 minutes. You want the cheese to bubble and turn golden brown. Once it’s ready, let it cool for a few minutes. This dish looks great served directly from the baking dish. You can add a sprinkle of parsley for a nice touch! - Always boil water before adding your pasta. - Use a large pot to prevent sticking. - Salt the water generously; it adds flavor. - Cook pasta until al dente, firm but not hard. - Drain the pasta, but don’t rinse it. This keeps the starch that helps sauces stick. Cooking pasta correctly is key to a great Chicken Tetrazzini. Al dente pasta holds its shape and texture better when mixed with the sauce. - Start with a roux by mixing flour and butter. - Gradually whisk in chicken broth and cream. - Stir constantly to prevent lumps. - Cook until the sauce thickens and is smooth. This method creates a rich sauce that coats the pasta perfectly. The cream balances the flavors and adds a comforting touch. - Use enough sauce to coat all ingredients well. - Don’t overbake; this can dry out your dish. - Cover with foil during the first half of baking. - Add extra cream or broth if it seems dry before baking. These steps ensure your Chicken Tetrazzini stays moist and delicious. A well-balanced dish is key to comfort food success. Pro Tips Use Leftover Chicken: This dish is a great way to use up any leftover roasted or rotisserie chicken to save time in preparation. Make it Ahead: Prepare the casserole a day in advance, cover it tightly, and store it in the refrigerator. Just bake it when you're ready! Customize the Veggies: Feel free to add or substitute your favorite vegetables like bell peppers or spinach for added nutrition and flavor. Cheese Variations: Experiment with different cheese blends, such as cheddar or gouda, for a unique twist on the traditional flavor. {{image_4}} You can switch up the protein in your chicken tetrazzini. Try turkey, ham, or even shrimp. Each choice adds a new twist to this dish. For turkey, use leftover roast turkey from the holidays. This makes it a great way to use up leftovers. If you want something lighter, choose shrimp. Just make sure to cook them until they are pink and firm. This way, they stay tender in your dish. If you prefer a meat-free option, I have you covered! Substitute the chicken with hearty veggies. Use ingredients like mushrooms, spinach, or roasted red peppers. These add great flavor and texture. You can also include chickpeas or lentils for a protein boost. Just follow the same steps as the original recipe. The creamy sauce and pasta will still shine through. Want to kick up the flavor? Add more herbs and spices. Fresh thyme or rosemary can really enhance the dish. For a spicy kick, try adding red pepper flakes. You can also mix in some sun-dried tomatoes for a rich flavor. To make it even creamier, swap half the broth with white wine. This gives a lovely depth. Don’t forget to taste as you go. Adjust the seasoning to fit your taste buds! After enjoying your Make-Ahead Chicken Tetrazzini, you will have leftovers. To store them, follow these steps: - Let the dish cool to room temperature. - Transfer any remaining Tetrazzini to an airtight container. - Store it in the fridge for up to three days. This method keeps your meal fresh and tasty for later. If you want to keep it longer, freezing is a great option. Freezing your Chicken Tetrazzini is simple and smart. Here’s how: - Allow the dish to cool completely. - Place it in a freezer-safe container or wrap it tightly in plastic wrap and aluminum foil. - Label it with the date and freeze for up to three months. This way, you can enjoy your tasty meal even later. Just remember to thaw it safely before reheating. Reheating your Chicken Tetrazzini correctly is key for flavor. Here are my tips: - For the oven: Preheat it to 350°F (175°C). Place the Tetrazzini in a baking dish. Cover it with foil to keep it moist. Bake for about 25 minutes or until hot. - For the microwave: Place a portion in a microwave-safe bowl. Heat on medium power for 2-3 minutes. Stir halfway to ensure even heating. Using these methods helps maintain the creamy texture and flavor of your dish. Enjoy your comfort food again! Yes, you can use different pasta types for Tetrazzini. Spaghetti and egg noodles work well. You can also try penne, fusilli, or even gluten-free pasta. Just make sure to cook the pasta al dente. This way, it won’t get too soft when you bake it. Yes, you can make this recipe gluten-free. Use gluten-free pasta and gluten-free flour. The rest of the ingredients are usually gluten-free. Just check labels to be sure. This way, everyone can enjoy the dish without worry. You can store leftovers in the fridge for up to four days. Place the dish in an airtight container. When you’re ready to eat, just reheat it in the oven or microwave. This keeps it tasty and safe to eat. In this blog post, I covered how to create a delicious make-ahead chicken tetrazzini. We explored the main and optional ingredients, plus garnishes for a tasty finish. I provided step-by-step instructions, including tips for cooking pasta and making a creamy sauce. We also looked at variations to meet different tastes and storage tips for leftovers. Remember, with the right ingredients and tips, you can make this dish your own. Enjoy sharing this comforting meal with family and friends!

Make-Ahead Chicken Tetrazzini Comforting Dinner Delight

Are you looking for a simple yet delicious dinner option? I’ve got the perfect solution for you: Make-Ahead Chicken Tetrazzini!

- 4 boneless, skinless chicken breasts - 1 can (28 oz) crushed tomatoes - 1 cup fresh basil leaves, finely chopped Chicken serves as the heart of this dish. I use boneless, skinless chicken breasts for their tenderness. They soak up flavors well and cook evenly in the slow cooker. The crushed tomatoes bring a rich, tangy taste. I prefer using San Marzano tomatoes for their sweetness and depth. Fresh basil adds a bright, herbal note. It transforms this meal into something special. - 1 small onion, finely diced - 3 cloves garlic, minced - 1 teaspoon Italian seasoning blend - 1 teaspoon sea salt - ½ teaspoon freshly ground black pepper Onion and garlic form a strong base for flavor. I sauté them until soft and fragrant. This step makes a huge difference. The Italian seasoning blend ties everything together, adding warmth and earthiness. I love the balance of salt and pepper. They enhance the dish without overpowering it. - 2 tablespoons extra virgin olive oil - 1 cup mozzarella cheese, shredded - Cooked pasta, such as fettuccine or penne, or fluffy rice Olive oil coats the chicken and helps the spices stick. It also adds a rich flavor. The mozzarella cheese melts beautifully, creating a creamy topping. I recommend serving this dish over pasta or rice. Both options soak up the sauce well. Enjoy each bite of this comforting meal! {{ingredient_image_2}} Start by rubbing olive oil on each chicken breast. This helps keep the chicken moist. Next, season both sides with sea salt, black pepper, and Italian seasoning. This adds great flavor to your dish. In a medium skillet, heat over medium flame. Add the finely diced onion and minced garlic. Cook until the onions are soft and clear, about 3-4 minutes. This step is key because it brings out the best flavors in your meal. Place the seasoned chicken breasts in the slow cooker in a single layer. Pour the crushed tomatoes over the chicken. Then, add the sautéed onions and garlic. Stir in the chopped basil, but save a few leaves for later. This layering helps the flavors mix well. Cover the slow cooker and cook on low for 6-8 hours or on high for 3-4 hours. Check that the chicken is fully cooked. It should be tender and easy to shred with a fork. This ensures a delicious meal. About 30 minutes before serving, use two forks to shred the chicken in the slow cooker. Stir it well to coat the chicken with the rich tomato sauce. This makes each bite flavorful and juicy. Sprinkle the shredded mozzarella cheese on top of the chicken mixture. Cover the slow cooker again. Let the cheese melt for the last 15 minutes. This creates a gooey, cheesy topping that everyone will love. Cooking time is key for tender chicken. For best results, cook on low for 6-8 hours. If you are short on time, the high setting works in 3-4 hours. Always check that the chicken reaches 165°F. This ensures it is safe to eat and very juicy. To shred the chicken, use two forks. Pull the chicken apart gently in the slow cooker. This way, the meat absorbs more sauce and stays moist. To enhance flavor, consider adding more spices. You might try red pepper flakes for heat. Fresh herbs, like parsley or thyme, can brighten the dish. Using fresh herbs like basil makes a big difference. Dried herbs are good too, but fresh gives a vibrant taste. If you use dried herbs, remember to cut the amount in half. For a great presentation, serve this dish in deep bowls. Twirl the pasta or rice for a nice look. A sprinkle of extra mozzarella adds charm and taste. Garnish with fresh basil leaves for color and aroma. This small touch makes your meal inviting and appealing. Pro Tips Choose Quality Tomatoes: Opt for San Marzano tomatoes for a richer flavor that elevates your dish significantly. Fresh Basil Matters: Use fresh basil instead of dried for a vibrant taste; add it at the end to maintain its aromatic qualities. Layering Flavors: Sautéing onions and garlic before adding them to the slow cooker intensifies the overall flavor of the dish. Cheese Addition Timing: Add cheese in the last 15 minutes of cooking to ensure it melts perfectly without becoming tough. {{image_4}} - Chicken alternatives: You can swap chicken breasts for thighs. They are juicier and add flavor. - Vegetarian options: Use tofu or beans instead of chicken. Tofu absorbs flavors well, while beans add protein. - Adding other herbs: Try oregano or thyme for a new taste. These herbs pair well with tomato and basil. - Spicing things up: If you like heat, add cayenne or red pepper flakes. These spices give your dish a kick. - Pasta types to try: Fettuccine or penne work great. They hold the sauce well and make each bite flavorful. - Alternative grains: Quinoa or couscous provide a nice twist. They are healthy and add a different texture to your meal. To keep your Slow Cooker Tomato Basil Chicken fresh, cool it down quickly. Place it in a shallow dish to speed up cooling. Store it in an airtight container. This dish stays fresh for about 3 to 4 days in the fridge. Always check for an off smell or color before eating. For longer storage, freeze your chicken. First, let it cool to room temperature. Then, place it in a freezer-safe container or bag. Be sure to remove as much air as possible to prevent freezer burn. It can stay frozen for up to 3 months. To enjoy again, thaw it in the fridge overnight. Reheat it on the stove or in the microwave until it is hot all the way through. You can prep this dish in advance for easy meals. Cook the chicken and sauce ahead of time, then store them separately. This method helps keep the chicken moist. Use any leftovers creatively! Try it in sandwiches, on salads, or in wraps for a quick lunch. You can also mix it with veggies and serve it over rice for a twist. You can store this dish in the fridge for 3 to 4 days. Make sure to keep it in a sealed container. This helps keep it fresh and safe to eat. Yes, you can use frozen chicken breasts. Just adjust the cooking time. Cook on high for 5 to 6 hours or low for 8 to 10 hours. This ensures the chicken cooks all the way through. This dish pairs well with many sides. Here are some great options: - Cooked fettuccine or penne pasta - Fluffy rice or quinoa - A fresh green salad These sides add balance to the meal. Yes, this recipe is gluten-free as written. Use gluten-free pasta if you want to serve it with pasta. Always check labels on ingredients to ensure they are gluten-free. You can use other cheeses if you like. Here are some good options: - Provolone for a sharper flavor - Fontina for a creamy texture - Parmesan for a salty kick Each cheese melts differently, so keep that in mind while cooking. This blog post covered how to make Slow Cooker Tomato Basil Chicken. You learned about the main ingredients like chicken, tomatoes, and basil. We explained how to prepare and cook everything step-by-step. I shared tips for tender chicken, flavor boosts, and serving ideas. You also found storage tips to keep your dish fresh. In summary, this recipe is simple and versatile. You can customize it to fit your taste. Enjoy cooking and sharing this delicious dish!

Slow Cooker Tomato Basil Chicken Flavorful Comfort Meal

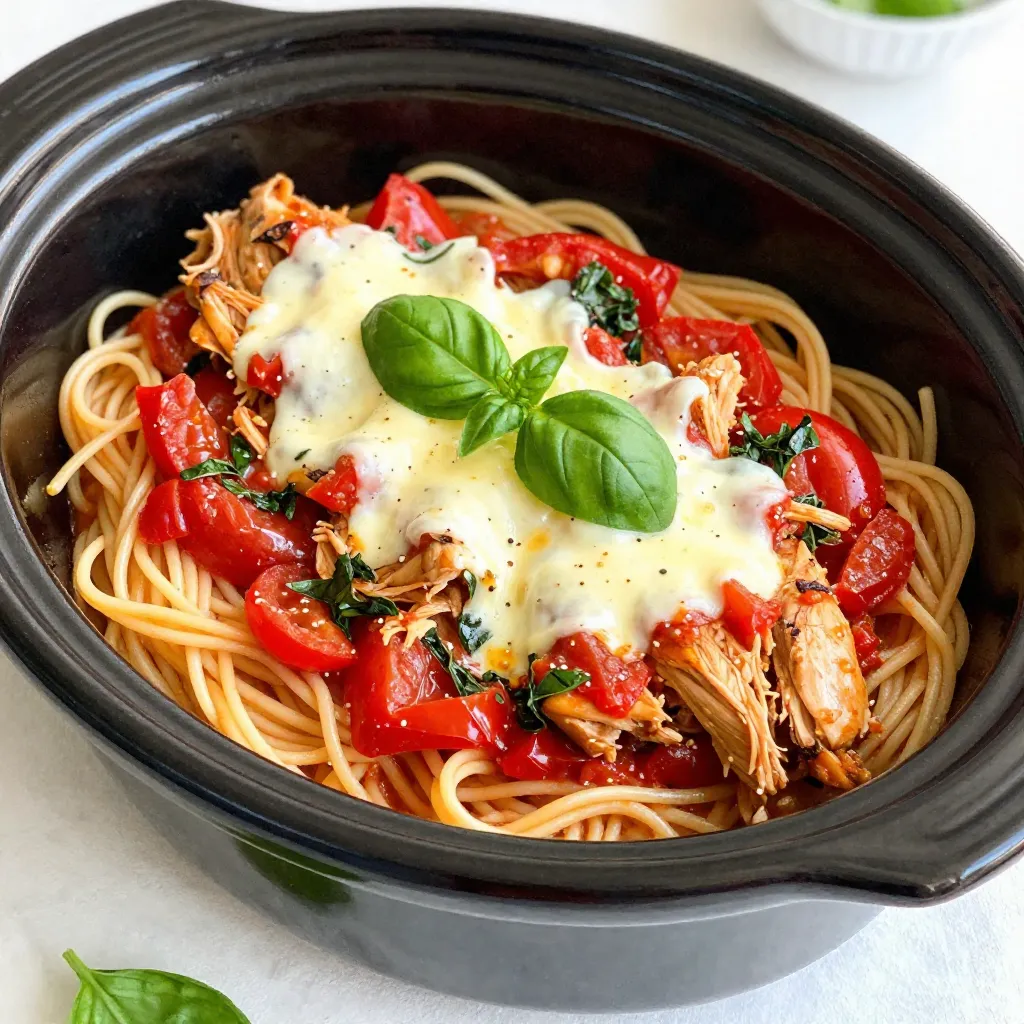
Are you ready for a tasty comfort meal that cooks itself? My Slow Cooker Tomato Basil Chicken is perfect for

For a tasty sesame ginger stir-fry, you need these main ingredients: - 2 tablespoons sesame oil - 1-inch piece of fresh ginger, finely grated - 3 cloves of garlic, minced - 1 red bell pepper, thinly sliced - 1 cup broccoli florets - 1 cup sugar snap peas (or snow peas) - 1 cup carrots, cut into matchsticks (julienned) - 1 cup mushrooms, sliced - 3 tablespoons low-sodium soy sauce - 1 tablespoon honey or maple syrup - 2 green onions, thinly sliced (for garnish) - 2 tablespoons sesame seeds (toasted, if desired) These ingredients provide a great mix of flavors and textures. The sesame oil gives a nutty taste, while the ginger and garlic add warmth. You can add more flavor with these optional ingredients: - Red pepper flakes for a spicy kick - Fresh cilantro for a bright finish - Lime juice for a zesty twist These extras can lift the dish. Try adding them based on your taste. Don't have an ingredient? No worries. Here are some swaps and tips: - Use olive oil instead of sesame oil if you need to. - You can replace sugar snap peas with green beans. - If you lack fresh ginger, ground ginger works too, but use less. These substitutions help you create a great dish, even if you're missing something. Just keep the balance of flavors in mind. {{ingredient_image_2}} Start by gathering all your ingredients. You’ll need sesame oil, ginger, garlic, and fresh veggies. Measure out the soy sauce and honey too. This makes cooking quick and easy. Prepare your vegetables by slicing and chopping. This way, they cook evenly. 1. Heat 2 tablespoons of sesame oil in a large wok or skillet over medium-high heat. Look for the oil to shimmer. 2. Add 1-inch grated ginger and 3 minced garlic cloves to the pan. Sauté them for about 30 seconds. They should smell great but not burn. 3. Toss in the sliced red bell pepper, 1 cup broccoli florets, 1 cup sugar snap peas, 1 cup julienned carrots, and 1 cup sliced mushrooms. Stir-fry for 5-7 minutes. Keep stirring until the veggies are bright and tender-crisp. 4. In a small bowl, mix 3 tablespoons of soy sauce and 1 tablespoon of honey (or maple syrup). Whisk until combined. 5. Pour this sauce over the veggies and toss everything. Make sure the vegetables are well coated. 6. Cook for an extra 2-3 minutes. This lets the sauce caramelize lightly, adding rich flavor. 7. Once done, take the wok off heat. Add 2 sliced green onions and 2 tablespoons of toasted sesame seeds before serving. For a great stir-fry, use high heat. This keeps the veggies crisp and colorful. Keep them moving in the pan to avoid burning. Use a wok if you have one; it’s perfect for stir-frying. If you don’t, a large skillet works too. Always cut your veggies small and uniform. This ensures they cook evenly. Remember to prep before you cook to save time! When making Sesame Ginger Stir-Fry, avoid overcooking your veggies. They should stay bright and firm. Cooking them too long turns them mushy. Also, don’t skip the ginger and garlic. They add key flavors. Lastly, remember to prep all your ingredients first. A quick stir-fry cooks fast! You need a good wok or a large skillet for this dish. A high heat source is important. Use a wooden spoon or spatula for stirring; it prevents scratches. A good knife is essential for cutting veggies thinly. Having measuring spoons handy helps with accuracy. To spice things up, add red pepper flakes or a dash of sriracha. You can also use spicy soy sauce for a kick. If you prefer it milder, skip the ginger or garlic. Adding more honey or maple syrup will also tone down the heat. Adjust to your taste! Pro Tips Prep Vegetables Ahead: For a quicker cooking time, chop all your vegetables in advance and store them in the fridge until you're ready to stir-fry. Use Fresh Ingredients: Fresh vegetables will provide the best flavor and texture. Look for vibrant colors and firm produce for optimal results. High Heat is Key: Ensure your wok or skillet is hot before adding ingredients. This helps to sear the vegetables quickly, preserving their crunch. Customize Your Sauce: Feel free to experiment with the sauce by adding chili paste for heat or sesame oil for a deeper flavor profile. {{image_4}} You can easily add protein to your sesame ginger stir-fry. Tofu is a great choice for a vegetarian dish. Use firm tofu for the best texture. Just press the tofu to remove excess water, then cut it into cubes. Sauté it before adding the veggies. Chicken adds a nice flavor too. Use boneless, skinless chicken breast. Cut it into thin strips for quick cooking. Cook it in the sesame oil until it’s golden brown. Then, add the vegetables and sauce. Shrimp is another tasty option. Choose raw, peeled shrimp. Add it to the pan after the veggies start to cook. It cooks fast, so keep an eye on it. Once it turns pink, you know it's done! Feel free to switch up the vegetables based on the season. In spring, add asparagus or snap peas for a fresh taste. In summer, zucchini or bell peppers shine bright. In fall, butternut squash or Brussels sprouts bring warmth. Winter is perfect for kale or hearty greens. Mixing different colors of veggies makes your dish pop. Try using purple cabbage or orange carrots. The more colors, the more nutrients your meal has! You can serve sesame ginger stir-fry over whole grains or noodles. Brown rice is a healthy option. It adds fiber and keeps you full longer. Quinoa is another great choice. It’s packed with protein and cooks fast. If you prefer noodles, go for whole grain or rice noodles. They soak up the flavor of the sauce well. Cook them according to package instructions. Then, toss them in the stir-fry just before serving. This adds a fun twist to your meal! To store your Sesame Ginger Stir-Fry, let it cool first. Place it in an airtight container. The stir-fry will stay fresh in the fridge for up to three days. Make sure you seal the container well to keep out air and moisture. This helps keep the flavors bright and the veggies crisp. When you're ready to enjoy the leftovers, reheat them on the stove. Use a non-stick pan over medium heat. Add a splash of water or a bit of sesame oil to keep it moist. Heat for about 5 minutes, stirring often. This way, the veggies stay tasty and warm without getting soggy. If you want to save some stir-fry for later, freezing is a great option. Let the stir-fry cool completely before you freeze it. Use freezer-safe bags or containers. Remove as much air as possible. Your stir-fry can last in the freezer for up to three months. When you're ready to eat, thaw it in the fridge overnight and reheat on the stove. The best oil for stir-frying is sesame oil. It has a great flavor and a high smoke point. This oil can handle the heat without burning. You can also use oils like canola or peanut oil. They work well too if you want a different taste. Yes, you can make Sesame Ginger Stir-Fry ahead of time. Cook it as usual, then let it cool. Store it in an airtight container in the fridge for up to three days. When you are ready to eat, just reheat it in a pan. To make this recipe gluten-free, simply use gluten-free soy sauce. There are many brands that offer great flavor. Also, make sure all other sauces and ingredients are gluten-free. This way, you can enjoy your stir-fry without worry! In this blog post, we explored making a tasty Sesame Ginger Stir-Fry. You learned about key ingredients, helpful preparation steps, and cooking tips. We covered options for proteins, veggies, and how to adjust spice levels. Plus, we shared storage tips to keep leftovers fresh. Now you have the tools to create a quick and delicious meal. Don’t hesitate to get creative with flavors and ingredients. Enjoy cooking and make it your own!

Sesame Ginger Stir-Fry Flavorful Quick Dinner Guide

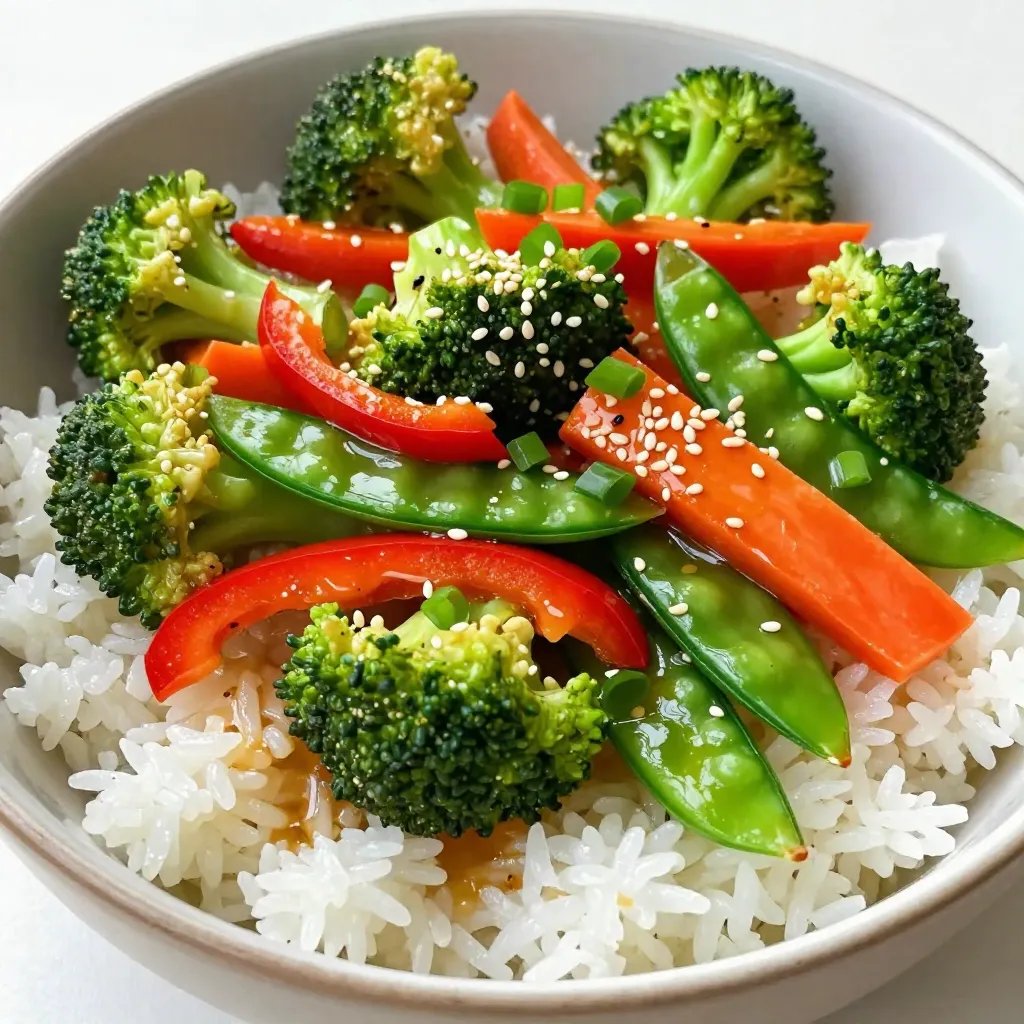
Ready for a quick and tasty dinner? My Sesame Ginger Stir-Fry is just what you need! This dish combines fresh

To make a delicious Cranberry Orange Breakfast Cake, you need the right ingredients. Here’s what you will need: - 2 cups all-purpose flour - 1 teaspoon baking powder - 1/2 teaspoon baking soda - 1/2 teaspoon salt - 1 teaspoon ground cinnamon - 1 cup granulated sugar - 1/2 cup unsalted butter, softened - 2 large eggs - 1 teaspoon vanilla extract - 1 cup buttermilk - Zest of 1 medium orange - 1 1/2 cups cranberries - Optional: powdered sugar and fresh orange juice for glaze Each ingredient plays a key role. The flour gives structure, while the baking powder and soda help it rise. Salt and cinnamon add flavor, making each bite burst with warmth. Granulated sugar provides sweetness, while butter gives a rich texture. Eggs bind all the elements together. The buttermilk brings moisture and a slight tang, which balances the sweetness. Orange zest brightens up the cake, adding a fresh citrus note. Lastly, cranberries add juicy pops of tartness. You can even glaze your cake with a mix of powdered sugar and orange juice for a lovely finish! {{ingredient_image_2}} - Preheat your oven to 350°F (175°C). - Prepare a 9-inch round cake pan. Grease it and flour it well or line the bottom with parchment paper. This helps the cake come out easily. - In a medium bowl, mix 2 cups of all-purpose flour, 1 teaspoon of baking powder, 1/2 teaspoon of baking soda, 1/2 teaspoon of salt, and 1 teaspoon of ground cinnamon. Whisk this until it's well blended. - In a large bowl, cream 1/2 cup of softened unsalted butter and 1 cup of granulated sugar. Use an electric mixer for about 3-4 minutes. This makes the mix light and fluffy. - Add 2 large eggs, one at a time. Beat well after each egg. Then mix in 1 teaspoon of vanilla extract and the zest of 1 medium orange until well combined. - Gradually mix the dry ingredients into the wet mix, alternating with 1 cup of buttermilk. Start and end with the flour mix. This keeps the batter from being tough. - Gently fold in 1 1/2 cups of cranberries. Be careful not to overmix so the berries stay whole. - Pour the batter into your prepared cake pan. Smooth the top with a spatula for an even surface. - Place the cake in the preheated oven. Bake for 35-40 minutes. Check if it's done by inserting a toothpick in the center. It should come out clean with just a few crumbs. - Let the cake cool in the pan for 10 minutes. Then move it to a wire rack to cool completely. - For an optional glaze, mix 1/4 cup of powdered sugar with 1 tablespoon of fresh orange juice. Drizzle this over the cooled cake for a lovely touch. 1. Ensure room temperature ingredients: Using room temperature butter, eggs, and buttermilk helps create a smooth and fluffy batter. Cold ingredients can lead to a dense cake. 2. Avoid overmixing the batter: Mix until just combined. Overmixing can cause the cake to be tough. Gently fold in the cranberries for best results. - Serving suggestions for a beautiful presentation: Serve the cake on a decorative platter. A beautiful plate makes every cake look special. - Optional garnishes to enhance appearance: Dust the top with powdered sugar. Add fresh cranberries and orange slices for a colorful touch that pops. - How to fix a dense cake: If your cake is dense, you may have overmixed the batter or used cold ingredients. Mix gently next time and use room temperature items. - Ways to avoid burning: Keep an eye on the cake while it bakes. If it browns too fast, cover it loosely with foil to prevent burning while it continues to bake. Pro Tips Room Temperature Ingredients: Ensure that your eggs and buttermilk are at room temperature before mixing. This helps create a smoother batter and a more tender cake. Don't Overmix: To achieve a fluffy texture, mix the batter until just combined. Overmixing can lead to a dense cake. Fresh Cranberries Tip: If using fresh cranberries, toss them in a bit of flour before folding them into the batter. This prevents them from sinking to the bottom. Glazing Tips: For a shiny glaze, let the cake cool completely before drizzling. This ensures the glaze sets nicely without pooling. {{image_4}} You can make this cake even better with a few twists. Adding nuts can give it a nice crunch. Walnuts and pecans work well. They add both taste and texture. You can also spice it up. Adding nutmeg or ginger gives a warm flavor. These spices blend well with orange and cranberry. Try a pinch to see what you think! If you want a healthier cake, there are easy swaps. You can use gluten-free flour. This makes the cake suitable for those with gluten issues. Many brands offer great gluten-free options. You can also reduce sugar. Try using natural sweeteners instead. Honey or maple syrup can be good choices. These keep the cake sweet but healthier. This recipe is great all year round. You can switch out cranberries for other fruits. Blueberries or apples can create a new flavor. They both pair well with orange too. You can also adapt the cake for holidays. For Christmas, add festive spices or nuts. For summer, fresh berries can make it light and bright. Have fun exploring these options! Store your cranberry orange breakfast cake at room temperature. Wrap it in plastic wrap or place it in an airtight container. This keeps it fresh and moist. It will last about 2 to 3 days on the counter. If you want it to stay longer, consider refrigerating it. You can freeze the cake for later use. First, let it cool completely. Then, wrap it tightly in plastic wrap and aluminum foil. This helps prevent freezer burn. It can stay in the freezer for up to 3 months. To enjoy, thaw it in the fridge overnight. Reheat slices in the microwave for about 15-20 seconds. The general shelf life of the cake is around 3 days at room temperature. If stored in the fridge, it can last up to a week. Watch for signs of spoilage, like an off smell or mold. If it becomes dry or hard, it’s time to toss it. Enjoy your cake while it’s fresh for the best taste! Can I use frozen cranberries? Yes, you can use frozen cranberries. Just add them directly to the batter without thawing. This keeps their tart flavor and bright color intact. Can I make this cake ahead of time? You can make this cake a day or two in advance. Store it in an airtight container at room temperature. It tastes great even after a day. What is the best way to transport a cake? To transport a cake, place it in a sturdy cake box or container. Use a non-slip mat underneath to prevent sliding. This keeps your cake safe during the trip. Is this recipe suitable for vegetarians? Yes, this recipe is perfect for vegetarians. It contains no meat or fish. Can I make it dairy-free? You can make this cake dairy-free. Use a dairy-free butter and substitute the buttermilk with almond milk mixed with vinegar. What can I substitute for buttermilk? You can use regular milk mixed with one tablespoon of vinegar or lemon juice. Let it sit for five minutes to curdle. How to replace eggs in the recipe? For eggs, use a flaxseed meal or chia seed gel. Mix one tablespoon of seeds with three tablespoons of water. Let it sit for a few minutes until it thickens. This blog post covers the key parts of making a delicious cranberry cake. You learned about the main ingredients, step-by-step instructions, and helpful tips to ensure success. I shared ways to customize the recipe to fit your taste and occasion. By storing your cake properly, it will stay fresh for longer. Enjoy making this cake and impressing your friends and family with your baking skills. Remember, practice makes perfect, so don't be afraid to try new things. Happy baking!

Cranberry Orange Breakfast Cake Delightful Morning Treat

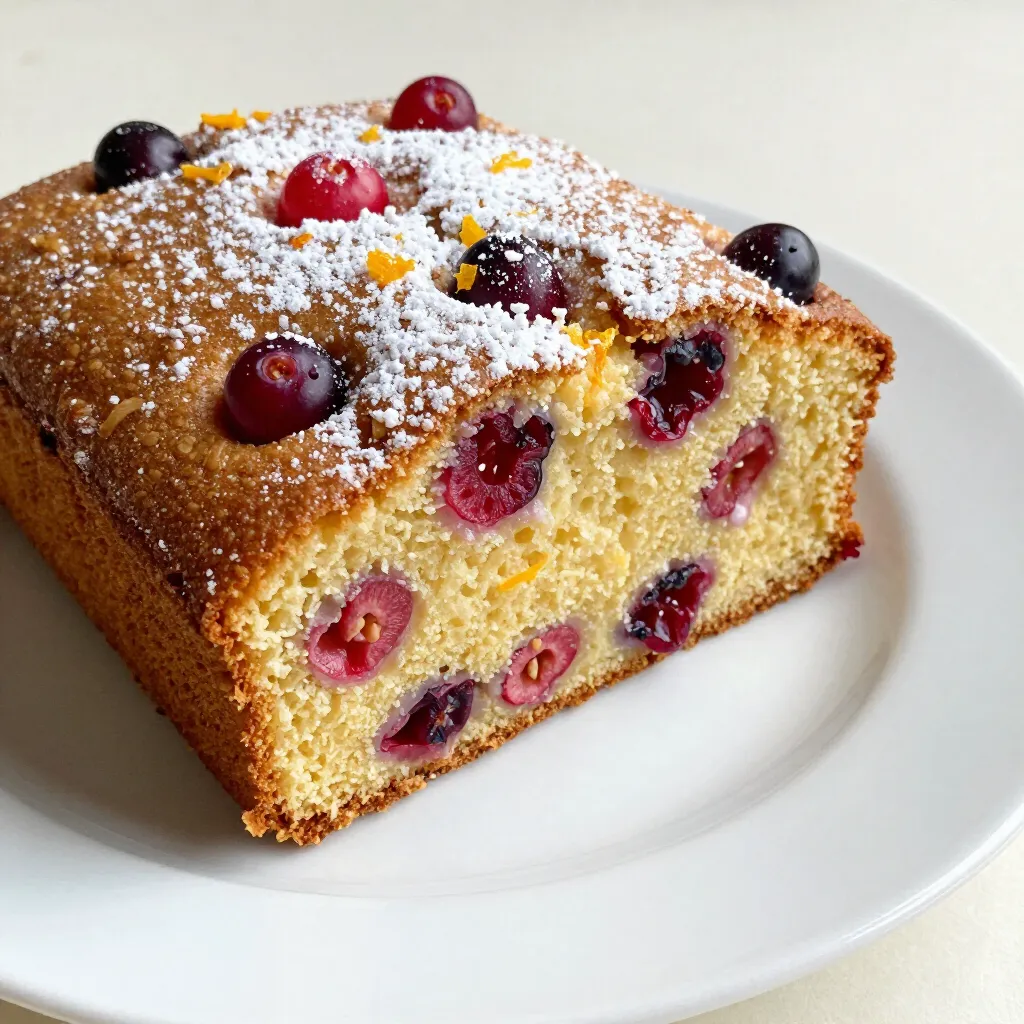
Start your morning with a burst of flavor! This Cranberry Orange Breakfast Cake invites you to enjoy a delightful blend

The key to making delicious Chocolate Raspberry Mousse Bites lies in using fresh, high-quality ingredients. Here’s what you need: - 1 cup dark chocolate chips (70% cocoa or higher) - 2 tablespoons unsalted butter - 1 cup heavy cream - 2 tablespoons powdered sugar - 1 teaspoon vanilla extract - 1 cup fresh raspberries (plus extra for garnish) - 1 tablespoon raspberry jam (optional) - A pinch of sea salt Each ingredient plays a vital role in creating the rich, smooth texture and the burst of raspberry flavor. Dark chocolate chips give a deep cocoa taste, while unsalted butter adds creaminess. Heavy cream is essential to create that light, airy mousse. Powdered sugar and vanilla extract sweeten and flavor the mixture. Fresh raspberries bring a juicy freshness to each bite. If you want to intensify the raspberry flavor, raspberry jam works great. Finally, a pinch of sea salt enhances all the flavors, making each bite even more delightful. {{ingredient_image_2}} To start, we need to melt the chocolate and butter. Fill a pot with a few inches of water and bring it to a gentle simmer. In a heatproof bowl, combine 1 cup of dark chocolate chips and 2 tablespoons of unsalted butter. Place the bowl over the simmering water. Stir the mixture until it melts and is smooth. Once melted, remove the bowl from heat and let it cool slightly. Next, we whip the cream. In a mixing bowl, pour in 1 cup of heavy cream. Add 2 tablespoons of powdered sugar and 1 teaspoon of vanilla extract. Use an electric mixer on medium speed to whip the cream. Beat until soft peaks form. Be careful not to over-whip; you want a light and airy texture. Now, let’s combine the mixtures. Carefully fold the melted chocolate into the whipped cream in three separate additions. Use a spatula to gently combine, ensuring you keep as much volume as possible. Then, take 1 cup of fresh raspberries and gently add them into the mousse. Fold them in with care to avoid breaking them too much. If you want more raspberry flavor, stir in 1 tablespoon of raspberry jam. Prepare your molds next. Spoon the mousse mixture into small silicone molds or mini muffin tins. Fill each about 3/4 full. For a nice touch, press a raspberry into the top of each mold for garnish. Finally, we chill the mousse bites. Place the filled molds in the refrigerator. Allow them to chill for at least 2 hours or until they are fully set. When ready, carefully remove the mousse bites from the molds. You can serve them chilled or drizzle with melted chocolate for extra flavor. To get that light and airy mousse, you need to whip the cream just right. Over-whipping can make the cream too thick. This can ruin the fluffy texture you want. Aim for soft peaks. This is where the cream holds its shape but is still smooth. When mixing, add the melted chocolate slowly. Fold it in three rounds. Use a spatula gently to keep air in the cream. This helps the mousse stay light. Raspberry jam can boost the flavor of your mousse. Add it when you fold in the raspberries. It gives a nice sweetness and fruitiness. If you don’t have jam, try fresh mint or a splash of orange juice. These can add a fresh twist to your mousse. Plating can make your mousse bites look stunning. Use a small plate and arrange them in a nice line. Add a few fresh raspberries around them for color. You can drizzle melted chocolate on top for a fancy touch. Pair these mousse bites with coffee or a fruity drink. A light tea also works well. The flavors of chocolate and raspberry shine when paired with the right drinks. Pro Tips Use High-Quality Chocolate: The flavor of your mousse depends greatly on the chocolate you use. Opt for a high-quality dark chocolate with at least 70% cocoa for a rich and deep flavor. Chill Your Mixing Bowl: For an extra fluffy whipped cream, chill your mixing bowl and beaters in the refrigerator for about 15 minutes before whipping the cream. This helps it whip faster and maintain its volume. Don’t Over-Whip the Cream: Aim for soft peaks when whipping the cream. Over-whipping can lead to a grainy texture, which is not ideal for a light mousse. Experiment with Flavors: Feel free to add other flavorings like orange zest or a splash of liqueur to the mousse for a unique twist. Just ensure they complement the raspberry and chocolate. {{image_4}} You can change the chocolate type for your mousse bites. Using milk chocolate gives a sweeter taste. White chocolate adds a creamy touch. For a richer flavor, try a dark chocolate-only version. This option enhances the cocoa notes and pairs well with raspberries. Get creative with fruit! You can add strawberries or blueberries for a twist. These fruits bring their own sweetness and color. Infusing mint or orange zest adds a refreshing touch. Mint gives a cool flavor, while orange zest adds brightness. Making this dessert dairy-free is easy. Use coconut cream instead of heavy cream. For a gluten-free option, check your chocolate. Most dark chocolates are gluten-free, but always read the label. These adjustments let everyone enjoy chocolate raspberry mousse bites! To keep your chocolate raspberry mousse bites fresh, store them in the fridge. Place the mousse bites in an airtight container. This helps prevent them from absorbing any strong smells in the fridge. You can also use a layer of plastic wrap over the bites before sealing the container. This extra step helps keep the bites moist and tasty. Using a small glass container is great for mousse bites. It allows you to see the layers. If you plan to eat them over several days, this helps you keep track. Remember, mousse bites can last up to three days in the fridge. If you want to store mousse bites longer, freezing is a smart option. First, let the mousse bites fully chill in the fridge. Once set, remove them from their molds. Place them on a baking sheet lined with parchment paper. This helps keep them from sticking together. Freeze the bites for about two hours. After freezing, transfer the mousse bites to an airtight container. You can also wrap them in plastic wrap. This helps protect them from freezer burn. For the best texture, thaw the mousse bites slowly. Move them to the fridge for a few hours before serving. This way, they regain their creamy texture. Enjoy your delicious mousse bites even after freezing! Yes, you can make these mousse bites a day or two in advance. Just store them in the fridge. This gives the flavors time to mix and deepen. You can use coconut cream or a dairy-free cream for a lighter option. This keeps the mousse rich and creamy. The mousse is set when it feels firm to the touch. It should hold its shape when removed from the molds. Yes, you can use mini muffin tins or even small cups. Just ensure you line them with plastic wrap for easy removal. These mousse bites last about 3 to 5 days in the fridge. Store them in an airtight container for best freshness. You now have a clear recipe for delicious chocolate raspberry mousse bites. We covered the ingredients, step-by-step instructions, useful tips, variations, and storage advice. Each step is simple, making it easy for anyone to enjoy this treat. Consider trying different chocolate types or fruit to make it your own. These mousse bites also store well, so you can enjoy them for days. Dive in and create a delightful dessert that impresses everyone! Enjoy your sweet creation!

Chocolate Raspberry Mousse Bites Divine Dessert Treat

Are you ready to treat yourself to a sweet delight? These Chocolate Raspberry Mousse Bites are a perfect blend of

Older posts
Newer posts
← Previous Page1 Page2 Page3 … Page86 Next →

dsad

© 2026 lazychefmagic • Built with GeneratePress

Our Policies

  • Copyright Policy
  • Cookie Policy
  • GDPR Policy
  • Privacy Policy
  • Disclaimer
  • Terms Of Use

More Information

  • Home
  • About
  • Contact
  • Appetizers
  • Dessert
  • Dinner
  • Drinks
©2026, lazychefmagic About Back To Top