Skip to content
DisclaimerTerms Of UseGDPR PolicyCookie Policy

lazychefmagic

  • Home
  • Drinks
  • Appetizers
  • Dinner
  • Dessert
  • About
  • Contact
  • Privacy Policy
DisclaimerTerms Of UseGDPR PolicyCookie Policy

NO-ING-IMG

- 4 medium zucchinis, sliced into thin rounds - 4 tablespoons unsalted butter - 4 cloves garlic, finely minced - 1 cup shredded mozzarella cheese - 1/2 cup grated Parmesan cheese I love using fresh zucchinis for this dish. They bring a lovely texture and taste. Unsalted butter is key as it lets the garlic shine. I always use fresh garlic because it makes everything pop. The blend of mozzarella and Parmesan adds creaminess and depth. - 1 teaspoon dried oregano - 1 teaspoon dried thyme - Salt and black pepper to taste Seasonings really enhance the flavors. Dried oregano and thyme work well with zucchini. A pinch of salt and some black pepper balance everything perfectly. - 1/2 cup panko breadcrumbs - Fresh parsley for garnish Panko breadcrumbs are my secret to a crunchy topping. They add a delightful texture. Fresh parsley not only looks great but also adds a fresh taste. For the full recipe, check the detailed instructions. - Step 1: Preheat the oven Preheat your oven to 375°F (190°C). This is key for the best bake. - Step 2: Sauté garlic in butter In a large skillet, melt 4 tablespoons of unsalted butter over medium heat. Once melted and bubbling, add 4 cloves of minced garlic. Stir for 1-2 minutes until fragrant. Watch closely to avoid burning the garlic. - Step 3: Add zucchini and seasonings Next, add 4 sliced zucchinis to the skillet. Season with salt, black pepper, 1 teaspoon of dried oregano, and 1 teaspoon of dried thyme. Cook for 5-7 minutes, stirring often. The zucchinis should be tender but still have some crunch. - Step 4: Cool the mixture Remove the skillet from heat and let the zucchini mix cool for 2-3 minutes. Cooling helps keep the cheese from melting too fast. - Step 5: Mix with cheeses In a big bowl, combine the zucchini mixture with 1 cup of shredded mozzarella cheese and 1/2 cup of grated Parmesan cheese. Stir well to mix everything evenly. - Step 6: Prepare the casserole Grease a 9x13-inch casserole dish with cooking spray or extra butter. Pour the zucchini mix into the dish and spread it out evenly. - Step 7: Add the topping In a small bowl, combine 1/2 cup of panko breadcrumbs with the remaining Parmesan cheese. Sprinkle this mix over the top for a crunchy finish. - Step 8: Bake and garnish Place the casserole in your preheated oven. Bake for 25-30 minutes until the top is golden and bubbly. After baking, let it rest for 5 minutes. Garnish with chopped parsley before serving. For the complete cooking steps, check the Full Recipe. Enjoy your garlic butter zucchini casserole! To make your Garlic Butter Zucchini Casserole shine, pay attention to a few key steps. First, avoid burnt garlic. When you sauté garlic, keep a close eye on it. Garlic cooks quickly. If it turns too brown, it can taste bitter. Aim for a light golden color for the best flavor. Next, ensure your zucchini retains its crunch. Cook the zucchini just enough to soften slightly. It should still have some bite. If you cook it too long, it becomes mushy. Remember, you want that nice mix of tender and crunchy in every bite. When serving your casserole, think about presentation. You can serve it warm right from the dish for a casual feel. For a fancier look, place individual portions on plates. Garnish each plate with more chopped parsley. A sprinkle of extra Parmesan cheese adds elegance too. Pair your casserole with side dishes. A fresh salad or crusty bread complements the flavors well. You might also enjoy it with grilled chicken or fish for a balanced meal. Want to boost the flavor of your casserole? Add spices or herbs. A pinch of red pepper flakes gives it a nice kick. You can also try fresh herbs like basil or chives for a burst of freshness. If you’re a cheese lover, consider alternative cheese options. Cheddar cheese adds a sharp flavor. Feta cheese can bring a nice tang. Experiment with different cheeses to find your favorite combination. You can even mix and match to create a unique twist on this classic dish. {{image_4}} You can switch the cheeses in this casserole for new tastes. Cheddar cheese adds a sharp flavor, making the dish rich and creamy. Feta cheese offers a tangy twist, giving a Mediterranean touch. If you prefer dairy-free options, vegan cheese substitutes work well. Look for vegan mozzarella or cheddar to keep the same texture. Boost the protein in your casserole by adding ground turkey or chicken. Cook the meat separately and mix it in with the zucchini. This addition makes the dish heartier. You can also use beans like black beans or chickpeas for a plant-based option. They add protein and fiber, making the meal more filling. Feel free to add other vegetables to your casserole. Bell peppers and onions can enhance the flavor and color. Just chop them up and sauté with the zucchini. You can also use summer squash for a similar texture. Mixing in different veggies makes the dish fun and colorful. You can find more ideas in the Full Recipe. To keep your Garlic Butter Zucchini Casserole fresh, store leftovers in the fridge. Place the casserole in an airtight container. This will help seal in moisture and flavor. If you do not have an airtight container, cover the dish tightly with plastic wrap. This will also work well. Consume the leftovers within three to four days for the best taste. If you want to save the casserole for later, freezing is a great option. Allow the casserole to cool completely before freezing. Transfer it to a freezer-safe container. You can also wrap the dish tightly in aluminum foil. It will keep well for up to three months. For reheating, first thaw it in the fridge overnight. Then, reheat it in the oven at 350°F (175°C) until heated through, about 20-25 minutes. In the fridge, the casserole lasts for about three to four days. After this time, it may not taste as good. Look for signs that it has gone bad, like a sour smell or mold. If you see any discoloration or an off smell, it’s best to throw it away. Enjoy your Garlic Butter Zucchini Casserole fresh for the best flavor! Yes, you can prepare this casserole ahead of time. To do this, follow these tips: - Prep the Zucchini: Slice the zucchinis and sauté them with garlic as the recipe states. - Cool the Mixture: Let the mixture cool down before mixing in the cheeses. - Assemble the Casserole: Place the mixture in your greased baking dish and cover it tightly with foil. - Refrigerate: Store it in the fridge for up to 24 hours. - Bake When Ready: When you want to bake it, remove it from the fridge, uncover, and bake as the recipe suggests. This method saves time and is perfect for busy days. Yes, it can be gluten-free! Here are some alternatives: - Use Gluten-Free Breadcrumbs: Instead of panko, choose gluten-free breadcrumbs for the topping. - Check Cheese Labels: Ensure that the cheeses you use are gluten-free, as some brands may add fillers. - Watch Seasonings: Most dried herbs and spices are gluten-free, but check for any added ingredients. These swaps make the casserole safe for gluten-free eaters. You can easily make this casserole more filling by adding: - Whole Grains: Mix in cooked quinoa or brown rice to add fiber and protein. - Proteins: Incorporate cooked chicken, turkey, or even beans for extra heartiness. - Nuts or Seeds: Sprinkle some toasted nuts or seeds for added texture and nutrition. These options will turn your dish into a more balanced meal. For the complete recipe, check out the Full Recipe. In this blog post, we explored how to make a delicious garlic butter zucchini casserole. We covered the main ingredients like zucchini, garlic, and cheese. You learned step-by-step instructions, tips for perfecting your dish, and exciting variations. This casserole is versatile, easy to store, and fun to share. You can customize it to fit your taste. Enjoy this simple yet tasty meal that everyone will love. Happy cooking!

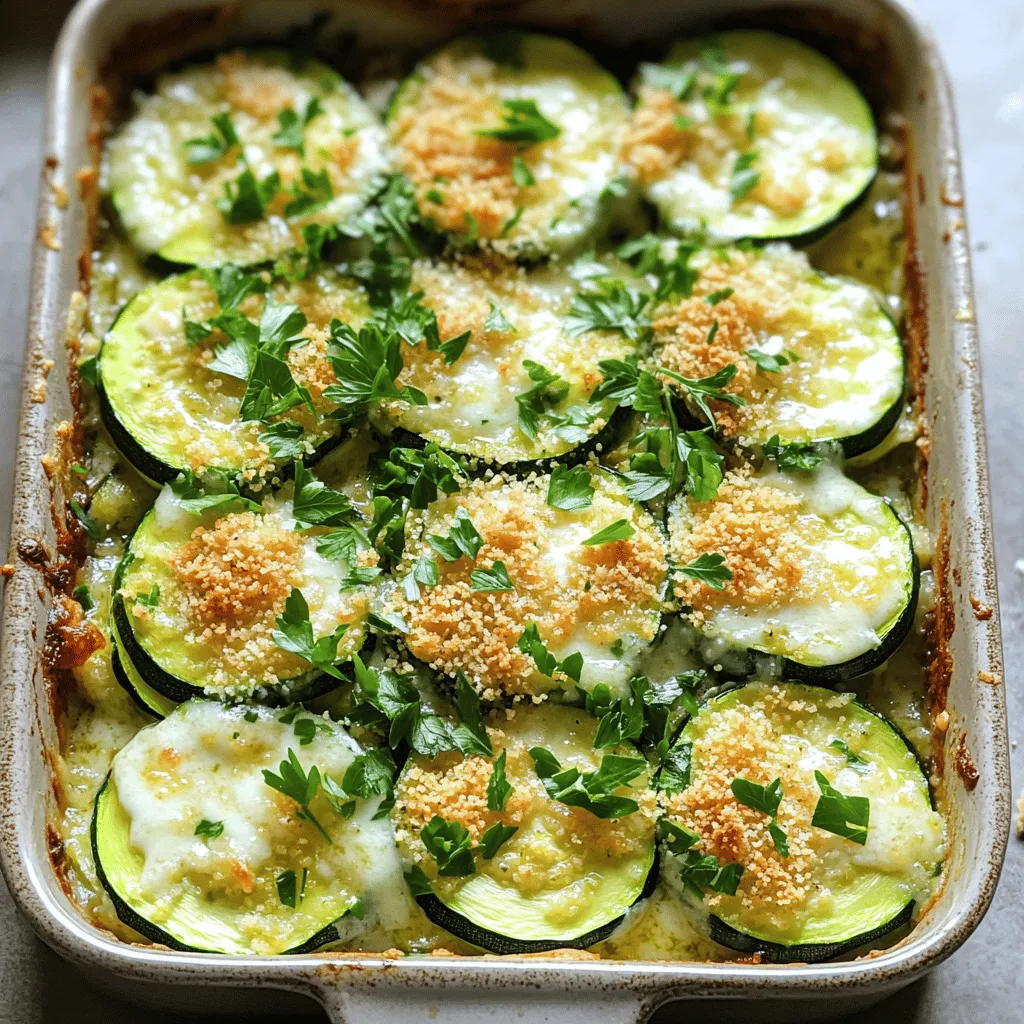
Garlic Butter Zucchini Casserole Flavorful and Easy Dish

Looking for a dish that’s both tasty and simple? You’ve found it! My Garlic Butter Zucchini Casserole is a delightful

- 1 cup grated zucchini - 1 cup granulated sugar - 1/2 cup extra virgin olive oil The grated zucchini gives the bread moisture and a light texture. Granulated sugar adds sweetness and balance to the tart lemon. The extra virgin olive oil keeps the bread soft and adds a healthy fat. - 2 large eggs - 1/4 cup freshly squeezed lemon juice - Zest of 1 large lemon Eggs provide structure and help bind the ingredients. Freshly squeezed lemon juice adds a bright flavor that complements the zucchini. Zest enhances the lemony taste, making it more vibrant. - 1 1/2 cups all-purpose flour - 1 teaspoon baking powder - 1/2 teaspoon baking soda - 1/2 teaspoon salt - 1/2 teaspoon ground cinnamon All-purpose flour gives the bread its base and helps it rise. Baking powder and baking soda work together for a fluffy texture. Salt enhances the flavors, and cinnamon adds warmth to every bite. For the complete recipe, check the Full Recipe. - Preheat the oven to 350°F (175°C). - Grease and flour a loaf pan. This step helps the bread come out easily. - In a large bowl, combine the grated zucchini and granulated sugar. - Mix until the sugar coats the zucchini well. - Now, whisk in the extra virgin olive oil, room temperature eggs, freshly squeezed lemon juice, and lemon zest. - Keep whisking until everything blends smoothly. - In a separate bowl, whisk together the all-purpose flour, baking powder, baking soda, salt, and ground cinnamon. - Gradually fold the dry mixture into the wet ingredients. - Be gentle; a few lumps are just fine. - Carefully pour the batter into the prepared pan. - Use a spatula to smooth out the top. - Bake in the preheated oven for 45-50 minutes. - Check for doneness by inserting a toothpick into the center. It should come out clean, or with a few moist crumbs. Follow these steps for a delicious Lemon Zucchini Bread Delight that everyone will love! For the complete details on ingredients, check the Full Recipe. To make your Lemon Zucchini Bread shine, avoid overmixing the batter. When you overmix, the bread can turn out dense. Mix just until the wet and dry ingredients come together. A few lumps are okay! Using room temperature eggs helps the batter mix evenly. Cold eggs can cool down the other ingredients. This can affect the rise and texture of your bread. Want to add a crunch? Toss in some nuts! Chopped walnuts or pecans work great. They add a nice texture and flavor. You can also play with spices. A pinch of nutmeg can give your bread a warm touch. Experiment to find your favorite mix! When it's time to serve, dust your bread with powdered sugar. It gives a sweet touch and looks lovely. Add a few lemon slices on the side. This not only brightens the plate but also enhances the lemon flavor. Enjoy the delightful Lemon Zucchini Bread with these tasty tips! {{image_4}} If you want a gluten-free Lemon Zucchini Bread, it's easy! Simply replace all-purpose flour with gluten-free flour. Many brands offer great blends that work well in baking. Make sure to check the package for the right measurement. This swap keeps the same yummy taste while making it safe for those with gluten allergies. Craving a vegan twist? You can replace the eggs with flaxseed meal or applesauce. To use flaxseed, mix 1 tablespoon of ground flaxseed with 2.5 tablespoons of water. Let it sit for a few minutes until it gets gooey. This acts like an egg! If you prefer applesauce, use 1/4 cup for each egg. Both options give you moist, tasty bread without any animal products. For a fun twist, try using lime instead of lemon. This adds a fresh, zesty kick to your bread. You can also fold in chocolate chips. These little bites of sweetness make the bread even more special. Each variation brings a new taste, so feel free to get creative. For the full recipe, check the Lemon Zucchini Delight section above! To keep your Lemon Zucchini Bread fresh, you have a couple of great options. - Room temperature storage: If you plan to eat it within three days, store it at room temperature. Place it in an airtight container or wrap it in plastic wrap. This keeps the bread moist and tasty. - Refrigerator storage for longer freshness: If you want to keep it longer, the fridge is a good choice. Just wrap it tightly in plastic wrap or foil. It can last up to one week this way. Freezing is a smart way to save your bread for later. - How to properly freeze and thaw: To freeze, wrap the bread tightly in plastic wrap, then in foil. This helps prevent freezer burn. When you’re ready to enjoy it, thaw it in the fridge overnight. - Best practices for maintaining flavor and texture: When thawing, do not use a microwave. This can make the bread dry. Instead, let it sit at room temperature for a few hours. This keeps the flavor fresh and the texture soft. Enjoy your Lemon Zucchini Delight anytime! Yes, but be sure to drain excess moisture. When you freeze zucchini, it loses water. This extra water can make your bread soggy. Simply thaw the zucchini, squeeze out the water, and then use it in the recipe. Use the toothpick test for doneness. Insert a toothpick into the center of the bread. If it comes out clean, your bread is ready. If you see wet batter, bake a few more minutes. Yes, but adjust baking time if using multiple pans. Doubling the recipe can make more bread to share. Just keep an eye on the baking time. Bread in smaller pans may bake faster. Pair with cream cheese or yogurt for a tasty spread. The creaminess adds a nice touch. You can also serve it with honey or lemon curd for extra flavor. Lemon zucchini bread is simple and rewarding to make. You start with fresh zucchini, oil, and lemon, mixing in key dry ingredients. Follow the step-by-step guide for perfect results every time. Don’t forget the tips to enhance flavor! You can try different versions, like gluten-free or vegan. Store it well to keep it tasty. This bread brings joy to any meal. Enjoy baking, sharing, and trying new flavors with this easy recipe. Let your kitchen be filled with the scent of fresh lemon and zucchini!

Lemon Zucchini Bread Delightful and Simple Recipe

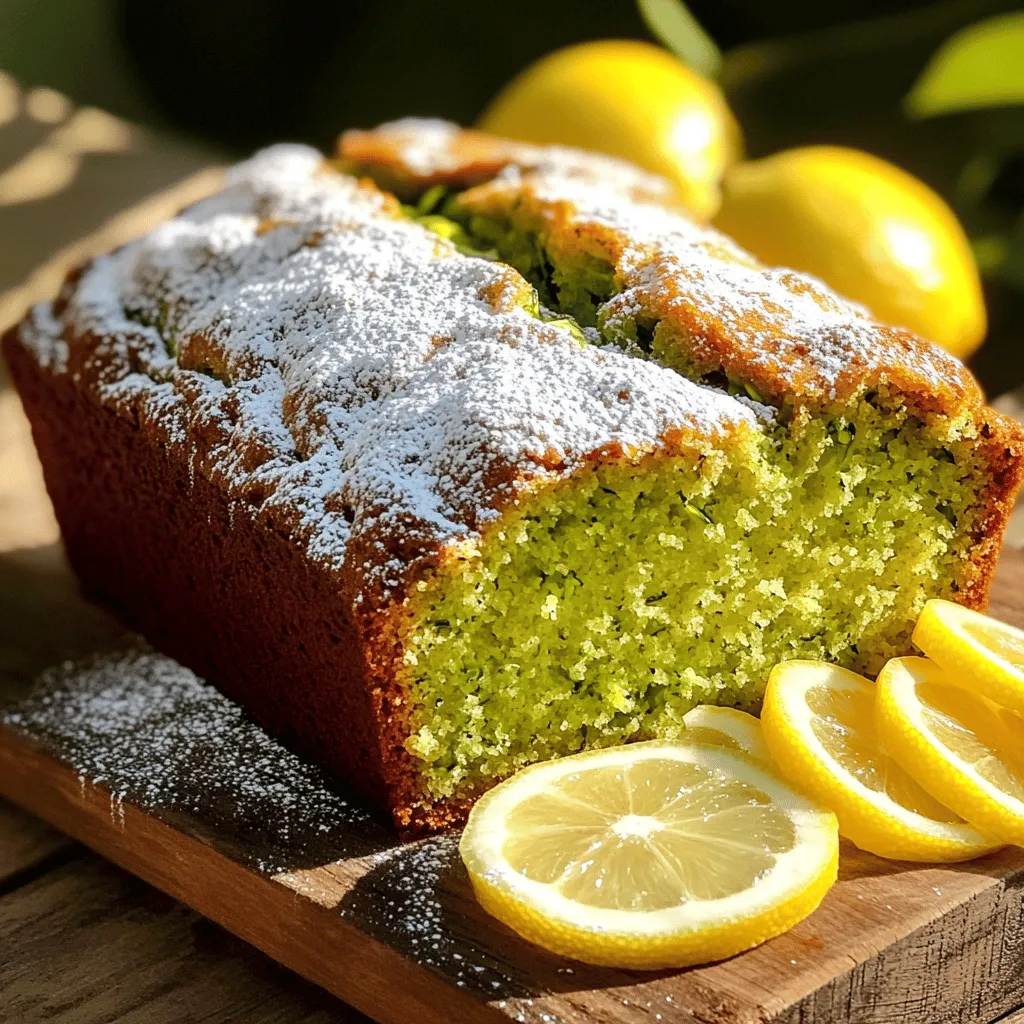
Are you ready to enjoy a tasty twist on classic bread? My Lemon Zucchini Bread recipe is both delightful and

To make No-Bake Orange Creamsicle Truffles, you'll need a few simple ingredients. Here’s the list: - 1 cup crushed graham crackers - 1 cup cream cheese, softened to room temperature - 1/2 cup powdered sugar - Zest of 1 medium orange (about 1 tablespoon) - 1/4 cup freshly squeezed orange juice - 1 teaspoon pure vanilla extract - 1 cup white chocolate chips - Orange sprinkles for garnish These ingredients work together to create a creamy, sweet treat with an orange twist. The crushed graham crackers give a nice crunch, while the cream cheese adds smoothness. The orange zest and juice provide that classic creamsicle flavor. You can easily find these items at your local grocery store. If you're looking for a fun treat to make with kids or friends, this recipe is perfect. The vibrant colors and flavors will surely brighten your day. For the full recipe, including steps to prepare these delightful truffles, check out the [Full Recipe]. To start, gather a large mixing bowl. Combine the following ingredients: - 1 cup crushed graham crackers - 1 cup cream cheese, softened - 1/2 cup powdered sugar - Zest of 1 medium orange - 1/4 cup freshly squeezed orange juice - 1 teaspoon pure vanilla extract Mix these ingredients well with a hand mixer or spatula. You want the mixture to be smooth and hold together like dough. If it feels too sticky, add a bit more graham cracker crumbs. If it’s too dry, add a splash of orange juice. Now it's time to shape the truffles. Use clean hands to scoop out a small portion of the dough. Roll it into a ball about 1 inch in diameter. Place each ball on a parchment-lined baking sheet. It helps to keep the truffles uniform, so consider using a small cookie scoop for even portions. Next, melt the white chocolate. Place 1 cup of white chocolate chips in a microwave-safe bowl. Heat in 30-second bursts, stirring each time. Stop when the chocolate is smooth. Be careful not to overheat it. Once melted, take the truffles from the fridge. Dip each one into the chocolate, making sure it’s fully coated. Return the coated truffles to the baking sheet. Before the chocolate sets, sprinkle orange sprinkles on top. Chill the truffles for 15 minutes to harden the chocolate. For the full recipe, follow the steps outlined above. Enjoy making these delightful No-Bake Orange Creamsicle Truffles! To make your No-Bake Orange Creamsicle Truffles just right, start with room temperature ingredients. When cream cheese warms up, it blends better. It gives a smooth texture that makes the truffles melt in your mouth. Adjusting sweetness is also key. Some like it sweeter, while others prefer a milder taste. If you want a less sweet truffle, add less powdered sugar. Taste your mixture as you go. This way, you can find the perfect balance for your palate. These truffles pair well with drinks. Try serving them with a cold glass of milk or orange soda. Both drinks enhance the orange flavor. You can also add a scoop of vanilla ice cream on the side for extra creaminess. For garnishes, you can use fresh mint leaves. They add a pop of color and a fresh taste. You can also sprinkle more orange zest on top for a fun touch. The bright colors will make your treat even more inviting. How you display your truffles can make a big difference. Arrange them on a bright and colorful platter. You can even place fresh orange slices around them for a festive look. This simple touch makes your dessert stand out. Another fun idea is to use mini cupcake liners. Place each truffle in a liner for individual servings. This makes it easy for guests to grab one. Plus, it looks cute and fun. For a special touch, you can even add a small tag with the name of the treat. Don't forget to check out the Full Recipe for all the steps! {{image_4}} You can change the flavor of your truffles easily. Instead of orange, try lemon, lime, or grapefruit. Each fruit gives a fresh twist. For a berry option, use raspberry or strawberry juice. This change keeps the recipe fun and new! If you want a different chocolate, swap white chocolate for milk or dark chocolate. This substitution adds richness and depth. Just remember, dark chocolate can be more bitter, so adjust sugar if needed. If you need vegan options, use dairy-free cream cheese. Many brands offer good choices. For sweetening, use agave syrup instead of powdered sugar. This keeps the truffles tasty without dairy. For gluten-free needs, choose gluten-free graham crackers. Many stores sell them now. This way, anyone can enjoy your tasty truffles! Adding nuts can give your truffles a nice crunch. Chopped walnuts or almonds work well. You can mix them into the dough or sprinkle them on top. You can also combine flavors with other desserts. Try mixing in some chocolate chips or cookie crumbs for a fun texture. It makes each truffle unique! Explore these ideas to create your own version of No-Bake Orange Creamsicle Truffles! For the base recipe, check the Full Recipe. Enjoy experimenting! To keep your leftover truffles fresh, store them in an airtight container. A glass or plastic container works well. Place a layer of parchment paper between layers of truffles to prevent sticking. Keep the container in the fridge. The cool air helps keep the truffles firm and tasty. If you want to save some truffles for later, freezing is a great option. First, place them in a single layer on a baking sheet. Freeze them for about two hours until they are solid. Then, transfer the truffles to a freezer-safe bag or container. Be sure to remove as much air as possible. When you're ready to enjoy them, thaw the truffles in the fridge overnight. It keeps them creamy and delicious when you serve them. These truffles can last for about one week in the fridge. If you freeze them, they can last for up to three months. Just remember to check for any changes in texture or flavor before serving. Always enjoy your No-Bake Orange Creamsicle Truffles at their best! To make these truffles, you start by mixing crushed graham crackers, cream cheese, powdered sugar, orange zest, orange juice, and vanilla in a bowl. Blend until smooth. Then, roll the mixture into small balls. Chill them for about 30 minutes. Melt white chocolate in a bowl, then dip each truffle to coat. Finally, sprinkle with orange sprinkles and chill again for 15 minutes. Enjoy this simple yet tasty treat! For the full recipe, check the details above. Yes, you can use regular chocolate. Keep in mind, it will change the taste. Dark chocolate has a rich flavor. It may overpower the orange zest. Milk chocolate is sweeter and will still taste good. The texture remains similar, but the color will be darker. Choose based on your preference and enjoy the unique twist! Serve the truffles chilled for the best taste. Place them on a colorful platter. You can add extra orange zest or fresh orange slices around them for a fun touch. Pair with a glass of milk or orange juice to enhance the flavors. This makes your dessert table look vibrant and inviting! Absolutely! You can make these truffles a day ahead. Store them in an airtight container in the fridge. This keeps them fresh and tasty. If you want to make them even earlier, freeze them. Just thaw them in the fridge before serving. Enjoy these truffles anytime! You’ve learned how to make delicious No-Bake Orange Creamsicle Truffles. From mixing ingredients to shaping and storing, each step builds fun and flavor. Remember to explore variations and presentation ideas for a personal touch. These truffles are not just treats; they can also impress at gatherings. Enjoy making and sharing them with friends and family. Your creation will surely bring smiles and sweetness all around!

No-Bake Orange Creamsicle Truffles Easy and Fun Treat

Looking for a fun and easy treat that brightens your day? Try my No-Bake Orange Creamsicle Truffles! With just a

For these tasty cookies, you need some key ingredients. Here’s what you will gather: - 1 cup cream cheese, softened to room temperature - 1/2 cup unsalted butter, softened - 3/4 cup granulated sugar - 1 large egg, at room temperature - 1 tablespoon fresh lemon zest - 2 tablespoons freshly squeezed lemon juice - 1 1/2 cups all-purpose flour - 1/2 teaspoon baking powder - 1/4 teaspoon baking soda - 1/4 teaspoon fine salt - 2 tablespoons poppy seeds - Powdered sugar, for dusting These ingredients blend well to create a creamy, zesty dough. The cream cheese gives a rich flavor, while lemon zest and juice add a bright kick. You can enhance the taste with a few optional ingredients. Some great choices include: - 1 teaspoon vanilla extract - A pinch of almond extract - Chopped nuts, like walnuts or pecans These extras can add depth and a unique twist to your cookies. Feel free to mix and match to find your favorite blend! To bake these cookies, you’ll need some basic kitchen tools: - Mixing bowls - Electric mixer - Measuring cups and spoons - Baking sheets - Parchment paper - Cooling rack Having these tools ready makes the baking process smooth and easy. It helps you focus on creating those delicious lemon poppy seed cheesecake cookies. For the full recipe, don't forget to check out the detailed steps later! Before we start, I want to make sure everything is ready. Gather your ingredients on the counter. You will need: - 1 cup cream cheese, softened to room temperature - 1/2 cup unsalted butter, softened - 3/4 cup granulated sugar - 1 large egg, at room temperature - 1 tablespoon fresh lemon zest - 2 tablespoons freshly squeezed lemon juice - 1 1/2 cups all-purpose flour - 1/2 teaspoon baking powder - 1/4 teaspoon baking soda - 1/4 teaspoon fine salt - 2 tablespoons poppy seeds - Powdered sugar, for dusting Now, preheat your oven to 350°F (175°C). Line two baking sheets with parchment paper. This makes for easy cleanup later. In a large bowl, mix the softened cream cheese and unsalted butter. Use an electric mixer on medium speed. Mix until the blend is smooth and creamy. This takes about 2 minutes. Next, slowly add the granulated sugar to the bowl. Keep mixing until the mixture gets light and fluffy. This should take another 2-3 minutes. Now, add the egg, lemon zest, and lemon juice. Mix everything until it is well combined. In a separate bowl, whisk together the all-purpose flour, baking powder, baking soda, and fine salt. Carefully add the dry mix to the wet mix. Stir gently until just combined. Be careful not to overmix. This keeps your cookies nice and tender. Finally, fold in the poppy seeds evenly. Using a tablespoon, scoop out portions of the dough. Place them on the prepared baking sheets. Leave about 2 inches between each cookie. This space allows them to spread while baking. Bake the cookies in your preheated oven for about 12-15 minutes. Look for lightly golden edges and set centers. When done, let them cool on the baking sheets for 5 minutes. Then, transfer them to a wire rack to cool completely. Once cooled, dust them lightly with powdered sugar for a beautiful finish. Enjoy the delicious lemon poppy seed flavor in every bite. For the full recipe, check out the detailed instructions. Baking can be tricky, but I have tips to help. First, always measure your ingredients properly. Use a kitchen scale or dry measuring cups for accuracy. Too much flour makes cookies dry. Another common mistake is overmixing the dough. Mix until just combined to keep cookies tender. Also, avoid skipping the chilling step if you do. Chilling dough helps cookies spread less during baking. To get the right texture, focus on your cream cheese and butter. They should be at room temperature. This helps them mix smoothly. Also, don't forget to fold in the poppy seeds gently. Overworking the dough makes cookies tough. Bake until the edges are lightly golden. This gives a crisp outside and a soft inside. Presentation matters! Arrange your cookies on a nice platter. Add lemon slices or zest curls for a pop of color. Dusting with powdered sugar gives a lovely finish. Serve them with a cup of tea for a cozy touch. For a fun twist, try pairing them with lemon curd. These details make your cookies shine at any gathering. For the complete recipe, check the Full Recipe. {{image_4}} You can change the flavor of your cookies easily. Try using orange zest and juice instead of lemon. This twist gives the cookies a sweet and fresh taste. Orange poppy seed cookies are a fun option for a change. Just replace the lemon juice and zest with orange. The rest of the recipe stays the same. If you need a gluten-free version, swap all-purpose flour for a gluten-free blend. Make sure it has a good mix of starches and flours. For dairy-free cookies, use vegan cream cheese and dairy-free butter. This way, you can enjoy the same great taste without the dairy. Let your creativity shine by adding extras. You can fold in chocolate chips for a rich flavor. Dark or white chocolate works great. Nuts like walnuts or pecans add a nice crunch. Just remember to chop them finely before mixing. These additions make each bite even more exciting. For the full recipe of Lemon Poppy Seed Cheesecake Cookies, check the section above. To keep your cookies fresh, store them in an airtight container. This ensures they stay soft and tasty. You can layer the cookies between sheets of parchment paper. This helps avoid sticking. Keep the container in a cool, dry place. If you want to enjoy them later, consider freezing. You can freeze these cookies to enjoy later. First, let the cookies cool completely. Then, place them in a single layer on a baking sheet. Freeze until firm, about one hour. After that, transfer the cookies to a freezer-safe bag or container. Make sure to label it with the date. They can stay frozen for up to three months. These cookies stay fresh for about one week at room temperature. If you store them properly, they will taste great. For the best flavor, eat them within the first few days. If you freeze them, let them thaw at room temperature. This keeps the texture nice and soft. Enjoy these delicious treats from the [Full Recipe]! Yes, you can use mascarpone or ricotta cheese. Both add creaminess and flavor. However, each cheese will change the cookie’s taste slightly. I recommend sticking with cream cheese for the best results. Look for golden edges and set centers. The cookies should not be too soft in the middle. They will firm up as they cool. If you see slight browning, they are ready to come out. You can use sesame seeds or chia seeds. Both will add a nice crunch. If you want, you could skip the seeds altogether for a smoother texture. I love the flavor and look of poppy seeds, but alternatives work well too. For the full recipe, check out the details above and start baking! You learned how to make delicious lemon poppy seed cheesecake cookies. We covered the main ingredients and tools you need. I guided you through the steps to bake them perfectly. I also shared tips to avoid common mistakes and improve texture. You can even try fun flavor changes or storage tips. Baking is easy and fun with the right knowledge. Enjoy your cookies fresh or stored. Happy baking!

Lemon Poppy Seed Cheesecake Cookies Irresistible Treat

If you love cookies that burst with flavor, you’re in for a treat! My Lemon Poppy Seed Cheesecake Cookies combine

For these skewers, you need simple, fresh ingredients. Here's what to gather: - 1 lb boneless, skinless chicken thighs, cut into 1-inch cubes - 1/2 cup unsalted butter, softened to room temperature - 2 tablespoons extra virgin olive oil - 4 cloves garlic, finely minced - 1 tablespoon fresh parsley, chopped - 1 tablespoon fresh chives, finely chopped - 2 teaspoons smoked paprika - 1 teaspoon onion powder - 1 teaspoon cayenne pepper (adjust according to desired heat level) - Salt and pepper to taste - Zest and juice of 1 lemon - Skewers (if wooden, soaked in water for 30 minutes) These ingredients create the base for your Cowboy Butter and chicken. The chicken thighs are juicy, and the butter adds rich flavor. Spices and seasonings make this dish special. Here are the key players: - Smoked paprika gives a nice smoky flavor. It adds depth and warmth to the dish. - Onion powder adds sweetness without the texture of fresh onions. - Cayenne pepper gives a kick. You can adjust it to make it milder or spicier. - Garlic is a must. It brings a robust flavor that pairs well with chicken. - Fresh herbs like parsley and chives brighten the dish. They add color and freshness. Using these spices enhances the chicken's taste and creates a flavorful Cowboy Butter that coats it perfectly. Want to take your skewers to the next level? Here are some optional additions: - Add lemon zest for extra brightness. It enhances the flavors in the butter. - Toss in some other herbs, like thyme or rosemary, for a unique twist. - Try adding vegetables like bell peppers or onions on the skewers. They grill nicely and add color. These additions can enhance the dish and make it more fun. Get creative and adjust the flavors to your liking! For the full recipe, check out the details above. To start, grab a large mixing bowl. You’ll need to mix the softened butter and olive oil. Add in the minced garlic, chopped parsley, chives, smoked paprika, onion powder, and cayenne pepper. Squeeze in the lemon juice and zest. Season with salt and pepper. Stir until you have a smooth and fragrant Cowboy Butter mixture. This step is key for flavor! Next, cut the chicken thighs into 1-inch cubes. Add these pieces to your Cowboy Butter mixture. Toss them well to coat each piece in the mix. For the best taste, cover the bowl with plastic wrap. Let it chill in the fridge for at least 30 minutes, or up to 2 hours if you can wait. This marinating time allows the flavors to sink in. Now, preheat your grill to medium-high heat. If you’re using a charcoal grill, wait until the coals are white ash covered. Once marinated, take your chicken cubes and thread them onto skewers. Leave a little space between each piece to cook evenly. Place the skewers on the hot grill. Cook them for about 12-15 minutes. Remember to turn them often for even cooking. Your chicken is done when it reaches an internal temperature of 165°F (75°C). After grilling, let the skewers rest for a few minutes. This helps keep the chicken juicy. For a tasty presentation, drizzle any extra Cowboy Butter over the skewers. Add fresh herbs for color. Enjoy your meal! For the full recipe, check out the section above. To grill chicken well, start with a clean grill. Heat it to medium-high. This helps the chicken cook evenly. Use a meat thermometer to check the temperature. Chicken should reach 165°F (75°C). For extra flavor, brush the chicken with Cowboy Butter while grilling. This adds a rich taste and helps with browning. To keep chicken juicy, marinate it first. The Cowboy Butter mix adds moisture and flavor. Let the chicken sit in the marinade for at least 30 minutes. If you can, go for two hours. When cooking, do not overcrowd the grill. Give each piece space to breathe. This helps them cook evenly and stay moist. After grilling, let the skewers rest for a few minutes. This allows the juices to settle. For a great meal, serve the skewers on a large platter. Drizzle leftover Cowboy Butter over the chicken for extra flavor. Garnish with fresh herbs like parsley and chives. This adds color and freshness. Pair the skewers with grilled veggies or garlic bread. A fresh salad also works well. These sides balance the rich flavors of the chicken. For the full recipe, check out the details provided earlier. {{image_4}} You can swap chicken for other proteins. Try shrimp, beef, or pork. Each protein brings unique flavors. Shrimp cooks fast and adds a sweet touch. Beef works well with the butter's richness. Pork absorbs flavors and stays juicy. Use the same marinade for these proteins to keep that Cowboy Butter taste. Vegetarians can enjoy skewers too! Use hearty vegetables for great flavor and texture. Bell peppers, zucchini, and mushrooms are perfect choices. Cut them into bite-sized pieces. Toss them in the Cowboy Butter mix. You can also add tofu for protein. Grill until tender and slightly charred for a tasty bite. Change the flavor by using different marinades. Try a spicy Asian marinade with soy sauce and ginger. For a Mediterranean twist, use lemon and herbs. You can even make a sweet marinade with honey and mustard. Each variation brings new joy to your skewers. The key is to let the proteins soak up those flavors before grilling. For the full recipe, check out the Grilled Cowboy Butter Chicken Skewers instructions. After enjoying your grilled cowboy butter chicken skewers, you may have some left. To keep them fresh, place the cooled skewers in an airtight container. You can store them in the fridge for up to three days. If you want to keep them longer, consider freezing instead. When you are ready to enjoy your leftovers, reheating is key. For the best taste, use an oven or grill. Preheat your oven to 350°F (175°C). Place the skewers on a baking tray and cover them with foil. Heat for about 10-15 minutes until warmed through. On the grill, cook on low heat for about 5-7 minutes, turning regularly to avoid drying out. Freezing your skewers is a great way to save time. Wrap each skewer tightly in plastic wrap or foil. Place them in a freezer-safe bag or container. Mark the date and use them within three months for the best taste. When ready to use, thaw in the fridge overnight before reheating. This way, you keep the flavors fresh and tasty for your next meal. For complete details on making these delicious skewers, check out the Full Recipe. Cowboy butter is a mix of butter and spices. It adds a rich, tasty flavor. You make it by blending softened butter with garlic, herbs, and spices. The mix gives grilled meats a bold taste. It is great for chicken, steak, or even veggies. You can adjust the spices to fit your taste. Use this simple recipe to whip up some Cowboy Butter for your skewers. Yes, you can use chicken breast. Chicken thighs are juicy and flavorful. But chicken breast works well too. Just keep in mind that breast meat can dry out faster. If you choose breast, marinate it for a bit longer. This helps keep it moist and tasty. Cut the chicken into 1-inch cubes for even cooking, just like with thighs. The best way to check chicken is with a meat thermometer. Insert it into the thickest part of the chicken. The chicken is done when it reaches 165°F (75°C). If you don’t have a thermometer, cut a piece open. The meat should be white, with no pink inside. Let the skewers rest for a few minutes after grilling. This keeps them juicy and delicious. Grilled Cowboy Butter Chicken Skewers are a tasty treat. We explored key ingredients, spices, and optional flavors to enhance your dish. I shared step-by-step tips for marinating and grilling chicken perfectly. You learned smart grilling techniques for juicy results and fun serving ideas. We even discussed variations, storage, and common questions about the recipe. This dish is great for any cook. Enjoy experimenting with flavors, and have fun grilling!

Grilled Cowboy Butter Chicken Skewers Quick and Tasty

Get ready to delight your taste buds with Grilled Cowboy Butter Chicken Skewers! This quick and tasty recipe is perfect

- 8 oz penne pasta - 1 cup feta cheese, crumbled - 1/2 cup dried cranberries - 1/4 cup red onion, finely chopped - 1/2 cup cucumber, diced - 1/2 cup cherry tomatoes, halved - 1/4 cup fresh parsley, chopped - 1/4 cup extra-virgin olive oil - 3 tablespoons freshly squeezed orange juice - 1 tablespoon freshly grated orange zest - 1 tablespoon apple cider vinegar - Salt and freshly cracked black pepper to taste I love how simple yet vibrant this feta cranberry penne salad is. You start with the main ingredients: penne pasta, feta cheese, and dried cranberries. Each element brings its own joy to the dish. The penne is hearty, the feta adds creaminess, and the cranberries give a sweet pop. Next, we add fresh veggies and herbs. The red onion adds a sharp bite, while the cucumber brings a refreshing crunch. Cherry tomatoes add color and sweetness. Finally, parsley ties it all together with a burst of freshness. The vinaigrette is where the magic happens. A mix of olive oil, orange juice, and zest creates a bright dressing. Apple cider vinegar adds a tangy touch, while salt and pepper enhance all the flavors. This vinaigrette is easy to whip up and makes this salad shine. You can find the full recipe for this delightful dish to enjoy. - Bringing water to a boil: Start by filling a large pot with water. Add a good pinch of salt. Place it on the stove and turn the heat to high. Wait for a rolling boil. - Cooking pasta to al dente: Once the water boils, add 8 oz of penne pasta. Cook for about 10-12 minutes, stirring occasionally. You want it firm, not mushy. - Rinsing and cooling the pasta: After cooking, drain the pasta in a colander. Rinse it under cold water. This stops cooking and cools it down quickly. Set it aside in the colander. - Mixing the dressing ingredients: In a small bowl, combine 1/4 cup extra-virgin olive oil, 3 tablespoons orange juice, 1 tablespoon orange zest, and 1 tablespoon apple cider vinegar. - Whisking for an emulsified texture: Use a whisk to mix everything well. Keep whisking until the dressing looks smooth and blended. This is key for a nice vinaigrette. - Combining cooled pasta with other ingredients: In a large bowl, add the cooled pasta. Then, gently fold in 1 cup crumbled feta cheese, 1/2 cup dried cranberries, 1/4 cup finely chopped red onion, 1/2 cup diced cucumber, and 1/2 cup halved cherry tomatoes. Add 1/4 cup chopped fresh parsley as well. - Tossing the salad with vinaigrette: Drizzle your orange vinaigrette over the pasta mixture. Use a large spoon to toss everything together. Be gentle to keep the feta intact. - Adjusting seasoning to taste: Taste the salad before serving. Add salt and black pepper as needed. This step enhances the overall flavor. - Importance of chilling before serving: Cover the salad with plastic wrap or a lid. Let it chill in the fridge for at least 30 minutes. This helps the flavors blend nicely. - Presentation tips for an appealing dish: For a beautiful display, use a clear glass bowl. This lets the colors shine. Garnish with extra parsley or a few whole cranberries. It adds a festive touch and makes it look inviting. To cook pasta without clumping, follow these steps: - Use a large pot with plenty of water. - Add a good amount of salt to the water. - Stir the pasta often in the first few minutes. Rinsing the pasta after cooking is very important. It stops the cooking process and cools it down quickly. This way, the pasta won’t stick together. While the orange vinaigrette shines, other dressings work too. Try a balsamic vinaigrette or a lemon dressing for a twist. You can customize the vinaigrette by adding herbs. Fresh thyme or basil gives a new flavor. Feta cranberry penne salad pairs well with grilled chicken or fish. It also complements a creamy soup for a full meal. This salad is ideal for picnics, potlucks, or summer gatherings. It's fresh, colorful, and easy to serve. For the full recipe, check the complete guide. {{image_4}} You can change up the cheese if you want. Goat cheese or mozzarella works great too. Both add a different flavor and texture. I love adding nuts for crunch. Walnuts or pecans add a nice bite. Just chop them roughly and mix them in. They pair well with the creamy feta and tart cranberries. The beauty of this salad lies in its flexibility. You can swap fruits or veggies based on what’s fresh. In spring, try adding fresh peas or asparagus. In fall, diced apples or roasted squash are perfect. These seasonal swaps enhance the taste and keep it exciting. Want to make it gluten-free? Use gluten-free penne pasta. It tastes just as good and holds up well. If you prefer a vegan option, switch the feta for a nut-based cheese. You can also use chickpeas for added protein. These swaps make the salad fit any diet. To refrigerate leftovers, place the salad in an airtight container. This helps keep it fresh. I recommend using glass containers. They do not absorb odors and are easy to clean. If you have a large batch, divide it into smaller portions. This way, you can enjoy it over several days. For longer shelf life, you can freeze the salad. However, some ingredients do not freeze well. To freeze, place the salad in a freezer-safe container. Leave some space at the top for expansion. When you are ready to eat, thaw it in the fridge overnight. This helps maintain the flavors and textures. You typically do not need to reheat this salad. It tastes great cold and stays fresh. If you prefer it warm, you can gently heat it in a pan. Just use low heat to avoid cooking the ingredients too much. Always remember, some people may like it cold, while others may enjoy it warm. It’s all about your taste! To make this salad, start with cooking the penne pasta. Bring a pot of salted water to a boil. Add the pasta and cook until it is al dente. Once cooked, drain it and rinse with cold water. This stops the cooking and cools the pasta. Next, prepare the orange vinaigrette. In a bowl, mix olive oil, orange juice, orange zest, apple cider vinegar, and some salt and pepper. Whisk until smooth. Then, combine the cooled pasta with feta, cranberries, red onion, cucumber, cherry tomatoes, and parsley in a large bowl. Drizzle the vinaigrette over the salad and toss gently. Chill the salad for about 30 minutes before serving. This helps the flavors come together. Yes, you can make this salad in advance. Chilling it in the fridge allows the flavors to meld. The longer it sits, the better it tastes. Just be sure to cover it well to keep it fresh. Absolutely! You can add proteins like grilled chicken, shrimp, or even beans. This will make the salad more filling. Just mix in your chosen protein after you combine the other ingredients. If you need an alternative to olive oil, you can use avocado oil or canola oil. Each oil brings a unique flavor. For a nutty taste, try sesame oil. Leftovers will stay fresh in the fridge for about three days. Store them in an airtight container to keep them tasty. If you notice any change in smell or color, it's best to discard them. For the full recipe, refer to the beginning of this article. This blog post shared a simple, tasty recipe for feta cranberry penne salad. I covered the key ingredients and how to mix them. You learned how to make a zesty vinaigrette and assemble the salad. I also shared tips for storage and serving. Enjoying this salad is easy. Customize it to fit your taste. You can add or swap ingredients based on what you have. With this recipe, fresh flavors await. It's perfect for gatherings or meal prep. Prepare your salad and enjoy every bite.

Feta Cranberry Penne Salad with Orange Vinaigrette Delight

Are you ready to elevate your picnic or dinner table? The Feta Cranberry Penne Salad with Orange Vinaigrette is a

- 2 ripe mangoes, peeled and diced - 2 cups fresh strawberries, hulled and halved - 1/2 cup honey or maple syrup - 1 tablespoon freshly squeezed lime juice - 1 cup coconut water - Fresh mint leaves for garnish - Additional fruits for layering - High-speed blender or food processor - Shallow dish or silicone ice cube tray - Fork for mixing during freezing The main ingredients form the heart of the Mango Strawberry Sorbet. You need ripe mangoes and fresh strawberries for the best flavor. The honey or maple syrup adds the right sweetness. Lime juice adds a nice tang that brightens the taste. Coconut water gives it a smooth, tropical feel. For extra flavor, you can add mint leaves. They add freshness and a nice color. You can also layer in other fruits like kiwi or banana if you want. Having the right tools makes the process easier. A high-speed blender or food processor helps you blend the fruit smoothly. A shallow dish or silicone ice cube tray is perfect for freezing the mixture. You’ll also need a fork to stir the sorbet while it freezes. This helps it stay creamy and smooth. Follow the Full Recipe for a step-by-step guide to making this delicious treat! First, gather your fruits. You need two ripe mangoes and two cups of fresh strawberries. Peel and dice the mangoes into small chunks. Hull and halve the strawberries. Next, take a high-speed blender and add the mangoes, strawberries, half a cup of honey or maple syrup, one tablespoon of lime juice, and one cup of coconut water. This mix gives your sorbet its fresh and sweet flavor. Blend the mixture until it is smooth and creamy. This step is key for a great sorbet. While blending, pause as needed to scrape down the sides. This helps ensure that everything mixes well. You want a silky texture, so blend thoroughly. Once blended, pour your mixture into a shallow dish or ice cube tray. This helps it freeze evenly. Place it in the freezer for about 4 to 6 hours. This long freeze is what makes your sorbet firm and scoopable. To make your sorbet even smoother, stir it with a fork every hour while it freezes. This breaks up any ice crystals that form. It takes a bit of effort but is worth it for a creamy finish. After your sorbet is fully frozen, scoop it into chilled bowls or cones. For the best experience, let it sit at room temperature for 5 to 10 minutes before serving. This softens it just enough to make scooping easier. Enjoy your homemade mango strawberry sorbet as a fun and refreshing treat. For the full recipe, check out the detailed steps to create this delicious dessert! To make your sorbet just right, adjust the sweetness to your taste. Start with half a cup of honey or maple syrup. Blend it in and taste. If you want it sweeter, add more syrup, a little at a time. This way, you control the flavor. Stirring during freezing is really important. Every hour, use a fork to mix the sorbet. This keeps ice crystals small. A smooth texture is key to a great sorbet. For a beautiful presentation, serve your sorbet in chilled bowls. You can add a slice of fresh lime and a mint sprig on top. This gives your dessert a pop of color and freshness. Pair your sorbet with simple snacks like cookies or fresh fruit. They enhance the sweet, fruity taste of the sorbet. This sorbet is light and refreshing. Each serving has about 100 calories, depending on the sweetener you use. The mangoes and strawberries offer vitamins and antioxidants. They help your body stay healthy. This treat fits well into a balanced diet. It’s a great dessert option when you want something sweet without heavy cream or added sugars. Enjoy it guilt-free! {{image_4}} You can mix up this sorbet with other fruits. Pineapples add a tropical twist. Bananas can make it creamier. Feel free to experiment! Use fruits that you love or have on hand. This way, you create your own special sorbet. You can also change the sweetener. Honey works great, but so does maple syrup. You could try agave syrup too. Each sweetener gives a different taste. Adjust the amount based on how sweet you want it. If you want a creamier sorbet without dairy, try coconut cream. It gives a rich texture. You can also use almond milk. This keeps the dessert light yet satisfying. Both options are easy to find. Coconut milk is another great choice. It adds a nice flavor while staying dairy-free. Mix and match these bases to find your favorite creaminess level. Adding herbs or spices can take your sorbet to the next level. Basil gives a fresh taste. Just a few leaves can change everything. You can also try adding ginger. It adds a nice zing and warmth. To add these, simply chop finely and mix them into your fruit blend. Start with a little, then taste. You can always add more if you want a stronger flavor. This is a fun way to make your sorbet unique! For the Full Recipe, click here and discover how to make this delightful dessert! To keep your mango strawberry sorbet fresh, store it in airtight containers. This helps keep out air and moisture. Make sure the containers seal tightly. If you don’t have one, use plastic wrap over the sorbet, pressing it down to remove air. This reduces the chance of freezer burn. Freezer burn can harm the taste and texture of your sorbet. For the best flavor and texture, enjoy your sorbet within one month. After this time, the taste may change. It might still be safe to eat, but the quality could decline. To ensure you eat it while it's fresh, label your containers with the date. This simple step helps you track how long it has been in the freezer. If your sorbet becomes too hard, don’t worry! Start by letting it sit at room temperature for about 10 minutes. This softens it just enough to scoop. If it still feels too hard, use a fork to break it up. Then, remix it gently to restore that creamy texture. You can also blend it again if you want to make it smoother. Enjoy your delicious mango strawberry sorbet just like new! Yes, you can use frozen fruits. Frozen mangoes and strawberries can save time. They are often picked at peak ripeness. This means they can be just as flavorful. However, fresh fruits give a better texture. If you use frozen fruits, let them thaw for a bit. This helps when you blend them. You can store sorbet in the freezer for about one month. After that, it may lose its flavor and texture. To keep it fresh, place it in an airtight container. This helps prevent freezer burn. Always try to consume it sooner for the best taste. Yes, this recipe is great for kids. It has natural sugars from the fruits. You can adjust the sweetness by using less honey or maple syrup. This makes it healthy and tasty. Plus, it is a fun way to get kids to enjoy fruit. If your sorbet is too icy, try these tips. First, stir the mixture every hour while freezing. This breaks up ice crystals. Second, if it is too hard, let it sit for a few minutes. This softens it for easier scooping. Lastly, blending in a bit of coconut milk can add creaminess. Making mango strawberry sorbet is fun and simple. You need ripe mangoes, strawberries, honey, lime juice, and coconut water. Blend them until smooth. After freezing, stir to avoid ice. You can add mint or other fruits for flavor. Adjust sweetness to fit your taste. This healthy treat is great for hot days and easy to store. Try different fruits or herbs to mix things up. Store in airtight containers for freshness. Enjoy your delicious sorbet!

Mango Strawberry Sorbet Fresh and Simple Dessert

Looking for a refreshing treat that bursts with flavor? This Mango Strawberry Sorbet is the perfect blend of sweet mangoes

To make a tasty watermelon sorbet, gather these items: - 4 cups ripe watermelon, cubed and seeds removed - 1/2 cup granulated sugar (or substitute with honey for a natural sweetness) - 2 tablespoons freshly squeezed lime juice - A pinch of salt - Fresh mint leaves for garnish (optional) These ingredients create a cold treat that is refreshing and sweet. The watermelon gives a light flavor, while lime adds a nice zing. You can change the sugar to fit your taste. Here are some choices: - Honey: This adds a natural sweetness and a hint of floral notes. - Agave syrup: It’s sweeter than sugar, so use less. - Maple syrup: This gives a richer flavor that pairs well with watermelon. To enhance flavor, consider adding: - Vanilla extract: This adds warmth and depth. - Coconut milk: This gives a creamy texture and tropical vibe. Choosing the right watermelon is key for the best sorbet. Look for: - Seedless watermelons: These are easier to prepare and have sweet flesh. - Farmers’ market options: Local watermelons often taste fresher and sweeter. - Heirloom varieties: These can have unique flavors that add interest to your sorbet. Using a ripe, sweet watermelon makes all the difference in your sorbet. The better the fruit, the better your treat will be. For the Full Recipe, check the instructions in the next section. First, pick a ripe watermelon. A good one feels heavy and sounds hollow when tapped. Next, cut it into cubes. Make sure to take out all the seeds. Spread the cubes on a baking sheet in a single layer. This step helps them freeze evenly. Place the baking sheet in the freezer for 2 to 3 hours. You want them to be rock solid before moving to the next step. Once your watermelon cubes are frozen, grab a high-powered blender or food processor. Add the frozen watermelon to the blender. Then, toss in half a cup of granulated sugar. You can also use honey if you want a natural sweetener. Next, add two tablespoons of fresh lime juice and a pinch of salt. Lime juice boosts the flavor. Blend everything on high speed until it is smooth and creamy. If the mixture gets stuck, stop and scrape down the sides. Taste it and adjust the sweetness or lime juice if needed. After blending, pour the mixture into a shallow, freezer-safe dish. Spread it out evenly. This helps it freeze faster. Return it to the freezer for another 1 to 2 hours. This final freeze will make it scoopable. When it's time to serve, use an ice cream scoop to dish it out. For a nice touch, add fresh mint leaves on top. They add color and a fresh taste. Enjoy your refreshing watermelon sorbet! You can find the Full Recipe above for all the details. To get a smooth sorbet, freeze your watermelon in small cubes. This helps it blend easily. When you blend, make sure to use a high-powered blender. Stop to scrape down the sides if needed. This step ensures a creamy texture. If the sorbet is too icy, blend a bit longer. One common mistake is not freezing the watermelon long enough. If it’s not frozen solid, you won’t get a smooth texture. Another mistake is adding too much sugar. Watermelon is sweet on its own. Start with less sugar and adjust as you taste. Lastly, don’t forget the pinch of salt. It brings out the flavors nicely. To boost flavor, try adding fresh herbs like mint or basil. These add a refreshing twist. You can also include a small amount of ginger for a little kick. Lime juice brightens the taste, so don’t skip it! Experiment with these ideas to make your sorbet unique. For more detailed guidance, check out the Full Recipe. {{image_4}} You can mix watermelon with other fruits for fun flavors. Try adding strawberries for a sweet twist. Blueberries add a nice touch, too. Pineapple will give your sorbet a tropical vibe. For a berry explosion, combine watermelon with raspberries. These mixes keep your sorbet exciting and fresh. Lime juice gives your sorbet a zesty kick. But you can also use lemon juice for a bright taste. Orange juice will add sweetness and a bit of tang. Grapefruit juice brings a more bitter flavor. Each citrus option changes the sorbet's character, so feel free to experiment. To make this sorbet vegan, just stick with fruit and sugar. Use agave syrup instead of granulated sugar for a low-calorie option. You can also swap in coconut water for a tropical flair. These changes keep your sorbet creamy while being lighter and healthier. Try them for a delicious treat that fits any diet. For the full recipe, check out [Full Recipe]. To keep your leftover watermelon sorbet fresh, store it in an airtight container. This will help prevent ice crystals from forming. If you have a freezer-safe dish with a lid, that works great too. Make sure to press plastic wrap against the surface of the sorbet before sealing to minimize air exposure. This way, the sorbet stays smooth and tasty. If you want your sorbet to last longer, freeze it well. After preparing the sorbet, pour it into a shallow container. A shallow dish allows it to freeze evenly and quickly. Label the container with the date you made the sorbet. This will help you keep track of how long it has been in the freezer. Homemade watermelon sorbet can last up to two weeks when stored this way. Sometimes, you may need to refreeze your sorbet. If the sorbet has softened, make sure to stir it well before refreezing. This helps keep the texture nice and creamy. Avoid letting it sit out too long before putting it back in the freezer. If you see ice crystals forming, blend the sorbet again after it thaws slightly. This will help restore its smooth texture. Enjoy your refreshing watermelon sorbet, knowing you’re storing it right! Homemade watermelon sorbet can last about one to two weeks in the freezer. After that, it may lose its texture and flavor. To keep it fresh, store it in an airtight container. This helps prevent ice crystals from forming. If you notice a change in texture, just blend it again before serving. Yes, you can make watermelon sorbet without an ice cream maker. Just freeze the watermelon cubes, blend the ingredients, and then freeze the mixture again. This method works well, and you still get a creamy texture. You can use a blender or food processor to mix everything. Just remember to scrape the sides often to mix well. You can serve watermelon sorbet with fresh fruit, cookie crumbles, or even yogurt. It pairs well with light desserts like cakes or tarts. You might also enjoy it with a splash of sparkling water for a refreshing drink. Mint leaves on top add a nice touch too. Watermelon sorbet is a healthier dessert option compared to many ice creams. Watermelon is low in calories and hydrates your body. It also has vitamins A and C, which are good for your health. If you use honey instead of sugar, it can be even healthier. Just watch your portion sizes to keep it light. If you want the full recipe, check out the details above. Making watermelon sorbet is simple and fun. We covered the best ingredients, like sweeteners and other fruit options. I shared how to prepare your watermelon and blend it for a creamy treat. You learned tips for perfect texture and common mistakes to avoid. Plus, we explored unique flavors and storage tips. Now you have all the tools to make delicious watermelon sorbet. Enjoy this tasty treat and share it with friends and family. It’s a refreshing way to beat the heat!

Watermelon Sorbet Refreshing and Simple Recipe

Looking for a cool treat that’s easy and full of flavor? Watermelon sorbet is your answer! This simple recipe packs

- 4 chicken thighs (skin-on, bone-in) - 1 large orange (for juice and zest) - 2 tablespoons high-quality olive oil - 3 cloves garlic, finely minced - 1 tablespoon fresh ginger, finely grated - 2 tablespoons honey (preferably raw) - 1 tablespoon soy sauce (or tamari for gluten-free) - 1 teaspoon smoked paprika - 1 teaspoon sea salt - ½ teaspoon freshly cracked black pepper - Fresh parsley - Orange slices for presentation The main ingredients form the heart of this dish. The chicken thighs give you rich flavor and tenderness. The orange juice and zest add a bright, citrusy kick. Olive oil helps the chicken crisp up nicely. Garlic and ginger introduce warmth. Honey balances flavors, while soy sauce adds depth. Smoked paprika brings a hint of smokiness. Salt and pepper enhance overall taste. For garnishes, fresh parsley adds color and freshness. Orange slices make your dish look inviting and tasty. Using these ingredients makes the roasted orange chicken a simple yet delicious meal. Don’t forget to check the Full Recipe for easy steps to follow! 1. Preheat your oven to 400°F (200°C). This step warms the oven for even cooking. 2. In a bowl, mix together the juice and zest of the orange. Add 2 tablespoons of olive oil, 3 minced garlic cloves, and 1 tablespoon of grated ginger. 3. Next, stir in 2 tablespoons of honey, 1 tablespoon of soy sauce, 1 teaspoon of smoked paprika, 1 teaspoon of sea salt, and ½ teaspoon of black pepper. Whisk until smooth. 1. Take 4 chicken thighs and place them in a large baking dish. 2. Pour the marinade over the chicken. Make sure each piece is well coated. 3. Let the chicken sit for at least 30 minutes at room temperature. For better flavor, refrigerate it for up to 2 hours. 1. After marinating, place the chicken skin-side up in the baking dish. Spread them out for even roasting. 2. Place the dish in the preheated oven. Roast the chicken for 35-40 minutes. 3. Use a meat thermometer to ensure the chicken reaches 165°F (75°C). This ensures it is safe to eat. 4. Once done, take the chicken out and let it rest for about 5 minutes. This helps keep the meat juicy. 5. Garnish with fresh parsley before serving. This adds color and freshness to your dish. For the full recipe, check the details above. For the best crispy skin, always place the chicken skin-side up. This allows the heat to circulate, crisping the skin perfectly. Make sure to space the chicken thighs well in the baking dish. If they are too close, they will steam instead of roast, and you’ll miss that amazing crunch. Marinating the chicken is key. I recommend marinating for at least 30 minutes. For even better flavor, let it sit in the fridge for up to 2 hours. After marinating, let the chicken rest for about 5 minutes before serving. This helps the juices settle, making every bite tender and juicy. A meat thermometer is your best friend. It helps ensure your chicken is cooked safely. The internal temperature should reach at least 165°F (75°C). This way, you avoid undercooked chicken and keep everyone safe. Plus, it helps you achieve that perfect doneness every time. {{image_4}} You can make roasted orange chicken using different cuts. Chicken breasts or drumsticks work well. If you use chicken breasts, they may cook faster. Keep an eye on them to avoid dryness. Drumsticks will give you juicy meat and crispy skin. Both options will soak up the orange flavor nicely. Want a kick? Add chili flakes or sriracha to the marinade. This heat pairs well with the sweet orange taste. Start with a pinch and add more if you like it spicy. This twist makes the dish exciting and fun for those who love heat. You can switch up the citrus fruits in this recipe. Try using lemon or lime instead of orange. They add a bright, zesty flavor. Lemon gives a fresh taste, while lime adds a tangy kick. Both options keep the recipe interesting and unique. To store leftover roasted orange chicken, let it cool first. Place the chicken in an airtight container. Store it in the fridge for up to three days. Make sure to keep the chicken away from strong-smelling foods. This helps to keep its flavor intact. Freezing is a great option if you want to save some chicken for later. First, let the chicken cool completely. Wrap each piece tightly in plastic wrap, then place in a freezer bag. Remove as much air as you can from the bag. You can freeze roasted orange chicken for up to three months. Label the bag with the date for easy tracking. When it’s time to enjoy your chicken again, reheating is key. The best method is to use the oven. Preheat your oven to 350°F (175°C). Place the chicken on a baking sheet and cover it with foil. Heat for about 15-20 minutes until warmed through. This keeps the chicken juicy and tasty. You can also use a microwave, but it may not keep the skin crispy. If you do use a microwave, heat in short bursts to avoid overcooking. Enjoy your delicious roasted orange chicken again! Roasted orange chicken takes about 50 minutes to cook. This includes 10 minutes of prep and 35-40 minutes of roasting. The size of the chicken thighs can change timing. Use a meat thermometer to check if the internal temperature hits 165°F (75°C). If the pieces are larger, they may need more time. Yes, you can use chicken breast. Chicken breasts cook faster than thighs. They can dry out if overcooked. For best results, reduce the cooking time to about 25-30 minutes. The flavor also differs; thighs are richer and juicier. Breasts are leaner, but they will still taste great in this dish. Several sides complement roasted orange chicken well. Here are some tasty options: - Steamed broccoli - Roasted sweet potatoes - Garlic mashed potatoes - A fresh green salad - Quinoa with herbs These sides enhance the meal and add vibrant colors to your plate. Enjoy experimenting with flavors! You learned how to make roasted orange chicken. We covered ingredients, step-by-step instructions, and tips. Crispy skin and rich flavor are key goals. Experiment with different chicken cuts or citrus fruits for variety. Don’t forget to store leftovers well for later enjoyment. Now, it’s your turn to try this recipe. Enjoy the bright flavor and take pride in your cooking!

Roasted Orange Chicken Simple and Delicious Recipe

Looking for a simple yet delicious way to elevate your dinner? This Roasted Orange Chicken recipe is just what you

For a delicious hibachi steak bowl, you will need: - 1 pound sirloin steak, cut into bite-sized pieces - 2 cups cooked jasmine rice - 1 tablespoon vegetable oil - 2 cloves garlic, minced - 1 teaspoon fresh ginger, grated - 1 cup broccoli florets - 1 medium carrot, julienned - 1 medium zucchini, sliced into half-moons - 2 tablespoons soy sauce - 1 tablespoon teriyaki sauce - 1 teaspoon sesame oil - 2 green onions, thinly sliced (for garnish) - Sesame seeds (for garnish) You can customize your hibachi steak bowl with these tasty add-ins: - Bell peppers, sliced - Mushrooms, chopped - Snap peas or sugar snap peas - Edamame, shelled - Baby corn or water chestnuts These ingredients add color and flavor to your dish. Feel free to mix and match! To enhance the flavor of your hibachi steak bowl, consider these sauces and seasonings: - Extra soy sauce for a salty kick - Spicy mayo for a creamy, zesty twist - Sriracha or chili oil for heat - Garlic powder or onion powder for depth Using these sauces and seasonings can make your bowl even more delicious. You can adjust them to your taste. Enjoy experimenting! For the full recipe, check out the complete guide. First, grab a mixing bowl. Take your bite-sized pieces of sirloin steak and add them to the bowl. Pour in the soy sauce, teriyaki sauce, and sesame oil. Mix everything well. This step helps the steak soak up all those great flavors. Let it marinate for at least 15 minutes. This adds taste while you prepare your veggies. Next, heat a large skillet or hibachi grill over medium-high heat. Add the vegetable oil and let it warm up. Once it’s hot, toss in the minced garlic and grated ginger. Sauté them for about 30 seconds until they smell amazing. Then, add the broccoli, julienned carrot, and sliced zucchini to the skillet. Stir-fry them for about 4-5 minutes. You want them bright and a bit tender. After they are cooked, remove them from the skillet and set them aside. Using the same skillet, add the marinated steak pieces. Spread them out evenly. Stir-fry for about 4-6 minutes. Keep an eye on them. You want them browned and cooked just right—juicy but firm. This step builds a savory base for your dish. Now, it’s time to bring everything together. Return the cooked vegetables to the skillet with the steak. Gently toss everything using a spatula. Cook for an additional 2 minutes. This allows all the flavors to blend and heat through. To serve, take a bowl and add a scoop of fluffy jasmine rice. On top of the rice, add a hearty portion of your hibachi steak and vegetable mixture. Make it colorful! For the final touch, sprinkle thinly sliced green onions and sesame seeds on top. This adds flavor and a nice crunch. Enjoy your beautiful bowl of hibachi steak! For the full recipe, please refer to the detailed instructions provided earlier. To get your steak just right, choose sirloin or ribeye. These cuts have good flavor and tenderness. Start by marinating the steak for at least 15 minutes. This adds flavor and keeps it juicy. When cooking, spread the pieces out evenly in the skillet. This helps them brown nicely. For medium doneness, cook for about 4-6 minutes. If you like it less cooked, aim for 3-4 minutes. Use a meat thermometer for best results. Aim for 130°F for medium-rare and 145°F for medium. For the best veggies, cut them into even pieces. This helps them cook evenly. Start with garlic and ginger in hot oil for a tasty base. Sauté them for about 30 seconds until fragrant. Then, add broccoli, carrots, and zucchini. Stir-fry for 4-5 minutes. You want them tender but still crisp. This keeps their bright colors and nutrients. Remove them from the skillet once cooked to avoid overcooking. The sauce is key to great flavor. For a simple hibachi sauce, mix soy sauce, teriyaki sauce, and sesame oil. This blend gives a savory and sweet taste. Drizzle the sauce over the cooked steak and veggies before serving. This adds a nice shine and extra flavor. If you want a kick, add a bit of chili paste or hot sauce. Adjust to your taste for the best experience. For the full recipe, check out the detailed instructions above. {{image_4}} You can make a tasty vegetarian version. Instead of steak, use hearty tofu. Press the tofu to remove excess water. Cut it into cubes and marinate it like the steak. Use soy sauce, teriyaki sauce, and sesame oil for flavor. Stir-fry the tofu until golden brown. Add the same colorful veggies: broccoli, carrots, and zucchini. Serve over jasmine rice for a filling meal. You’ll enjoy the mix of textures and flavors! Seafood adds a fresh twist to hibachi bowls. Try shrimp or scallops. Toss them in the same marinade as the steak. Stir-fry the seafood in the skillet until cooked through. It usually takes just a few minutes. Pair it with the same veggies for a vibrant dish. You can also add a squeeze of lemon for a bright finish. The seafood gives a light and zesty flavor to the bowl. For a carb-free option, skip the rice. Use cauliflower rice instead. Grate cauliflower until it resembles rice. Sauté it in the skillet for a few minutes until tender. This makes a great base for your hibachi mix. You can also add extra veggies or leafy greens. Zucchini noodles are another fun choice. They give a nice crunch and absorb the flavors well. Enjoy a delicious, low-carb meal that feels just as hearty! You can find the full recipe [here](#). To store your hibachi steak bowl leftovers, let them cool first. Place them in an airtight container. It’s best to separate the rice from the steak and veggies. This helps keep everything fresh. Leftovers will stay good in the fridge for about three days. When reheating, use the microwave for quick results. Heat your rice and steak separately for even warming. If you want a crispy texture, try using a skillet. Just add a splash of water to steam the veggies while warming the steak. Aim for a medium heat and stir often. If you want to freeze your hibachi steak bowls, start by cooling them completely. Place the rice, steak, and veggies in freezer-safe bags. Remove as much air as possible. You can freeze them for up to two months. To enjoy them later, thaw overnight in the fridge. Reheat as mentioned before for the best taste. For detailed cooking instructions, check the Full Recipe. The best cut for hibachi bowls is sirloin steak. Sirloin is tender and has great flavor. It cooks fast and stays juicy. You can also use ribeye or flank steak. Both cuts work well in this dish. To marinate steak, mix soy sauce, teriyaki sauce, and sesame oil. Pour this mix over the cut steak. Make sure each piece is coated well. Let it marinate for at least 15 minutes. This time helps the flavors soak in. If you have more time, marinate it for a few hours. Yes, hibachi steak bowls can be healthy. They include lean protein from the steak and plenty of veggies. The rice adds carbs for energy. You can control the sauces you use, too. This helps keep added sugars and fats low. Yes, you can use brown rice instead of jasmine rice. Brown rice is a whole grain and has more fiber. This switch makes the dish even healthier. Just make sure to cook the brown rice before adding it to the bowl. You can add many kinds of vegetables to your hibachi bowl. Broccoli, carrots, and zucchini are great choices. Other options include bell peppers, snap peas, and mushrooms. Feel free to mix and match based on your taste. This adds color and nutrients to your meal. For the full recipe, check out the instructions earlier in the article. In this guide, we covered hibachi steak bowls, from ingredients to cooking tips. You learned about key ingredients, optional add-ins, and great sauces to enhance flavor. The step-by-step instructions helped simplify the cooking process. Plus, the variations offer something for everyone, including vegetarian and seafood options. Remember, storing leftovers and reheating properly keeps your meals fresh. With the tips and FAQs provided, you are now ready to create delicious hibachi steak bowls at home. Happy cooking!

Hibachi Steak Bowls Flavorful and Filling Delight

Craving a meal that’s both tasty and filling? Look no further than hibachi steak bowls! I will guide you through

Older posts
Newer posts
← Previous Page1 … Page25 Page26 Page27 … Page86 Next →

dsad

© 2026 lazychefmagic • Built with GeneratePress

Our Policies

  • Copyright Policy
  • Cookie Policy
  • GDPR Policy
  • Privacy Policy
  • Disclaimer
  • Terms Of Use

More Information

  • Home
  • About
  • Contact
  • Appetizers
  • Dessert
  • Dinner
  • Drinks
©2026, lazychefmagic About Back To Top