Skip to content
DisclaimerTerms Of UseGDPR PolicyCookie Policy

lazychefmagic

  • Home
  • Drinks
  • Appetizers
  • Dinner
  • Dessert
  • About
  • Contact
  • Privacy Policy
DisclaimerTerms Of UseGDPR PolicyCookie Policy

NO-ING-IMG

This recipe makes a tasty, colorful salad that is quick to prepare. You will need: - 4 ounces Nacho Cheese Doritos, crushed - 1 pound ground beef (or substitute with ground turkey) - 1 packet taco seasoning mix - 1 cup shredded lettuce - 1 cup cherry tomatoes, halved - 1 cup black beans, rinsed and drained - 1 cup corn kernels (fresh or frozen) - 1 cup shredded cheddar cheese - ½ cup sour cream - ¼ cup salsa - 2 green onions, sliced thinly - Jalapeño slices for extra heat - Avocado for creaminess - Cilantro for freshness - Lime wedges for a zesty finish These ingredients bring great flavor and texture to your Doritos taco salad. Each item adds its own twist, making this dish fun and delicious. To make a Doritos taco salad, start by gathering your ingredients. You need a few fresh items and some pantry staples. The key steps are cooking the meat and mixing everything together. First, heat a medium skillet over medium heat. Add one pound of ground beef or turkey. Cook until the meat is browned, which takes about 7 to 10 minutes. Drain the extra fat to keep it light. Next, sprinkle on the taco seasoning. Pour in 2/3 cup of water and mix well. Let this simmer for about 5 minutes. The sauce will thicken and smell amazing! While the meat cooks, grab a large mixing bowl. Add 1 cup of shredded lettuce, 1 cup of halved cherry tomatoes, 1 cup of black beans, and 1 cup of corn. Toss these together gently until mixed. Now, let the cooked meat cool slightly. Then, fold it into the bowl with the veggies. Next, add the crushed Doritos, 1 cup of shredded cheddar cheese, and 2 sliced green onions. Toss carefully to keep the chips whole. Finally, drizzle ½ cup of sour cream and ¼ cup of salsa on top. Give it one last gentle toss. You can garnish with more green onions or jalapeño slices if you like. Serve your salad right away for the best crunch. For the full recipe, check out the previous section. To keep your Doritos crunchy, add them last. This way, they stay crispy. If you mix them in too early, they will get soggy. Serve the salad right away after you mix in the chips. If you plan to chill it, store the Doritos separately. Add them just before serving for that perfect crunch. You can boost the flavor of your salad easily. Try adding some spices like cumin or chili powder to the ground meat. You can also mix lime juice into the sour cream for a zesty twist. Fresh cilantro is a great addition too. A sprinkle of it on top can heighten all the flavors. For heat, add diced jalapeños or a dash of hot sauce. Serve your Doritos taco salad in a big bowl for sharing. Layer the ingredients for a colorful look. Place extra salsa and sour cream on the side for guests to enjoy. You can also use individual cups for a fun party treat. This makes serving easy and keeps everything neat. {{image_4}} You can easily make a vegetarian version of Doritos Taco Salad. Just swap the ground beef for a mix of sautéed vegetables or plant-based protein. I recommend using black beans or lentils for a hearty texture. You can also add diced bell peppers, corn, and zucchini to boost flavors and nutrients. This way, you keep the crunch while making it meat-free. If you have dietary restrictions, there are plenty of swaps you can make. For a gluten-free version, use gluten-free tortilla chips instead of Doritos. If you're dairy-free, try dairy-free cheese and sour cream alternatives. You can also use avocado instead of sour cream for a creamy texture. These swaps keep the essence of the dish while catering to your needs. The dressing can change the whole vibe of your salad. Instead of sour cream and salsa, try a zesty lime vinaigrette. Mix lime juice, olive oil, and a bit of honey for sweetness. You can also use ranch dressing or a spicy chipotle dressing for an exciting twist. Each option adds new layers of flavor to your taco salad. For a full recipe, check out the details above! To store leftovers, place the salad in an airtight container. Make sure to separate the Doritos from the salad. This keeps them crunchy longer. You can store the salad mix in the fridge for up to three days. You don’t really need to reheat this salad. It tastes best cold. If you want to warm it, heat just the meat. Place it in a pan over medium heat until hot. Do not reheat the whole salad, as it will make the Doritos soggy. The salad will stay fresh in the fridge for about three days. After that, the veggies may lose their crispness. Always check for any signs of spoilage before eating. If it smells off or looks strange, throw it away. Enjoy your Doritos taco salad while it’s fresh for the best taste! For the full recipe, check out the details above! Yes, you can prepare parts of the salad ahead. Cook the meat and mix it with the taco seasoning. Store it in the fridge for up to two days. Chop your veggies and keep them in separate containers. When you're ready to serve, combine everything. Add the Doritos just before serving to keep them crunchy. You can use ground turkey or chicken for a lighter option. If you want a vegetarian dish, try black beans or lentils. You can also use crumbled tofu or tempeh for a plant-based protein. Each option adds a different flavor and texture to the salad. To make this salad healthier, consider these tips: - Use lean ground turkey or chicken instead of beef. - Add more veggies like bell peppers or avocado. - Use Greek yogurt instead of sour cream. - Choose low-sodium taco seasoning to cut back on salt. - Serve it with a side of fresh fruit instead of chips. For the full recipe of Doritos Taco Salad, refer to the earlier sections. This blog post covered how to make a tasty Doritos Taco Salad. We explored the key ingredients, from essential items to fun toppings. I shared simple steps to prepare and cook. Plus, I included helpful tips to keep your Doritos crunchy. We even looked at variations, storage tips, and answers to common questions. In the end, this salad is easy, fun, and flexible. You can make it your own! Enjoy creating this dish for a crowd or a cozy night in.

Doritos Taco Salad Flavorful and Easy Recipe Guide

Looking for a quick, tasty meal? This Doritos Taco Salad is perfect for you! I’ll walk you through a simple

To make these fun cake pops, you will need: - 1 box vanilla cake mix (plus required ingredients per the package) - 1 cup creamy vanilla frosting - 1 cup white chocolate chips - 1 tablespoon coconut oil - Lollipop sticks or sturdy skewers These ingredients give you a sweet base and a smooth coating. The cake mix acts as the main part, while the frosting helps bind it all together. The white chocolate adds a nice touch on the outside. You can add some flair to your cake pops with these options: - Flavor extracts (like almond or lemon) to enhance the cake - Food coloring to match your theme - Different types of sprinkles for varied looks - Mini chocolate chips or nuts for added texture These optional additions let you customize your cake pops. You can match them to any party or holiday theme. To prepare these delightful treats, gather these tools: - Large mixing bowl - Parchment paper for easy cleanup - Baking sheet - Microwave-safe bowl for melting chocolate - Mixing spatula or your hands for mixing - Refrigerator to chill the cake balls Having the right tools makes the process smooth. It allows you to focus on creating tasty cake pops without any hassle. For the full recipe, check out the details above! To start, preheat your oven. Follow the temperature on the cake mix box. Grab a box of vanilla cake mix. Prepare it as the package says. Pour the batter into a greased 9x13 inch baking pan. Bake until golden. Stick a toothpick in the center. If it comes out clean, your cake is done. Let it cool completely on a wire rack. Once the cake is cool, move it to a large bowl. Use your hands to crumble the cake into small pieces. Aim for a texture like coarse crumbs. Next, add one cup of creamy vanilla frosting to the crumbs. Mix it well with your hands or a spatula. You want it to hold together, making it easy to shape into balls. Now, take small portions of the cake mix. Each piece should be about one inch in diameter. Roll them into smooth balls between your palms. Place the balls on a parchment-lined baking sheet. Make sure they do not touch each other. Put the tray in the refrigerator for about 30 minutes. Chilling helps the cake pops firm up, making coating easier. For the full recipe and more details, check the recipe section above. To melt chocolate smoothly, use a microwave-safe bowl. Start with white chocolate chips and add a tablespoon of coconut oil. The oil helps achieve a nice, glossy finish. Microwave in 30-second bursts. Stir after each burst to avoid burning. This method keeps the chocolate from seizing. The right cake pop texture is key. After mixing the cake crumbs with frosting, the mixture should hold its shape. If it's too dry, add a bit more frosting. If it’s too wet, mix in more cake crumbs. Roll the mixture into balls about one inch wide. Chill them for 30 minutes before coating. This step helps them stay firm. Get creative with your cake pops! Use colorful sprinkles for a festive look. You can also drizzle melted chocolate on top for added flair. For a fun twist, try crushed nuts or mini chocolate chips. Use themed decorations for holidays or birthdays. Let your imagination shine through! {{image_4}} You can switch up the cake flavor for fun. Instead of vanilla, try chocolate, red velvet, or lemon. Each flavor gives a new spin to your cake pops. Chocolate cake pops are rich and delicious. Red velvet adds a touch of color and flavor. Lemon gives a fresh twist, perfect for summer. While vanilla frosting is a classic, feel free to experiment. Cream cheese frosting pairs well with red velvet. Chocolate frosting adds a rich flavor to chocolate cake pops. If you want a fun twist, use strawberry or cookie dough frosting. These choices bring extra taste and excitement to your treats. Decorations can change with the seasons. For Christmas, use red and green sprinkles. In the fall, orange and yellow colors bring a harvest feel. For Halloween, add spooky designs like candy eyes. You can also use pastel colors for Easter. Seasonal decorations make your cake pops festive and fun for any occasion. To store uncoated cake balls, first, let them cool completely. Place them in a single layer in an airtight container. If you stack them, use parchment paper between layers. Keep the container in the fridge. This helps them stay fresh. They can last up to a week when stored this way. For coated cake pops, allow them to set first. Once the chocolate hardens, place them in an airtight container. You can store them at room temperature for a few days. If you want them to last longer, keep them in the fridge. Just make sure they are not touching each other. This prevents any damage to the decorations. Cake pops have a good shelf life. When properly stored, they last about one week in the fridge. You can also freeze them for up to three months. To freeze, place the cake pops on a baking sheet. Freeze them until solid, then transfer them to a freezer-safe bag. When you're ready to eat them, let them thaw in the fridge. For the full recipe, check out the main section of this article. Yes, you can use any flavor of cake mix. Think chocolate, red velvet, or lemon. Each will give your cake pops a unique taste. Just make sure to follow the instructions on the cake mix box. This way, you get the right texture and flavor. Experimenting with different mixes can lead to fun results. To prevent crumbling, ensure the cake is completely cooled before mixing. When you crumble the cake, aim for a fine texture. Mix in enough frosting, so the batter holds together. If it feels too dry, add a bit more frosting. Chilling the cake balls helps them firm up, making them easier to coat. If your chocolate isn’t smooth, try these tips. First, use a microwave-safe bowl and melt in short bursts, stirring often. If it’s too thick, add a little coconut oil. This will help it glide better. If it seizes up, you might have overheated it. Starting fresh with lower heat is best. You now know how to make Starbucks copycat birthday cake pops at home. We covered key ingredients, step-by-step instructions, and helpful tips. You can choose optional flavors and decorations to make them unique. Storage and shelf-life details ensure your pops stay fresh. Dive into making cake pops that impress everyone. Enjoy the process, and share your creations!

Starbucks Copycat Birthday Cake Pops Simple Delight

Craving Starbucks’ famous birthday cake pops? I’ve got you covered! In this simple guide, I’ll show you how to recreate

- 8 oz bow tie pasta - 1 cup cherry tomatoes, halved - 1 cup cucumbers, diced - 1/2 cup diced bell peppers (red, yellow, or orange) - 1/4 cup finely chopped red onion - 1/2 cup sliced black olives - 1/2 cup crumbled feta cheese - 1/4 cup chopped fresh basil - 1/4 cup olive oil - 2 tablespoons balsamic vinegar - 1 teaspoon garlic powder - Salt and pepper to taste - Extra fresh basil leaves - Additional feta cheese for serving This bow tie pasta salad is bright and fresh. It’s packed with colorful veggies. The main ingredients create a great mix of flavors and textures. The bow tie pasta gives it a fun shape. Cherry tomatoes add sweetness, while cucumbers bring a nice crunch. Bell peppers add color and a sweet bite. Red onion gives it a bit of zing, and black olives add depth. The feta cheese makes everything creamy and salty. Fresh basil ties it all together with a fragrant touch. This salad is not only tasty; it's also healthy. For the dressing, I use simple ingredients. Olive oil adds richness. Balsamic vinegar gives it a tangy kick. Garlic powder adds depth, while salt and pepper enhance the flavors. You can easily adjust the seasoning to your taste. Feel free to add some optional garnishes for extra flair. Fresh basil leaves can brighten up the look. A sprinkle of feta on top makes it even more appealing. This bow tie pasta salad is perfect for a picnic or a family dinner. For the full recipe, check the details above and enjoy making this delightful dish! - Bring salted water to a rolling boil. - Cook bow tie pasta according to package instructions. Start by boiling water in a large pot. Add salt to the water. This adds flavor to the pasta. Once the water bubbles, add the bow tie pasta. Follow the package instructions for the cooking time. I like to cook it until it's al dente. This means it should be firm but not hard. After cooking, drain the pasta and rinse it with cold water. This stops the cooking process and cools it down. - Combine chopped vegetables in a mixing bowl. - Gently mix to ensure an even distribution. While the pasta cools, chop your veggies. Use cherry tomatoes, cucumbers, bell peppers, red onion, and black olives. Place all the chopped vegetables in a big mixing bowl. After that, gently mix them together. This helps spread the flavors evenly. - Whisk olive oil, balsamic vinegar, garlic powder, salt, and pepper. In a small bowl, whisk together the olive oil and balsamic vinegar. Add garlic powder, salt, and pepper to taste. Mix well until everything combines smoothly. This dressing adds great flavor to the salad. - Toss cooled pasta with mixed vegetables and dressing. - Fold in crumbled feta cheese carefully. Once the pasta is cool, add it to the bowl with veggies. Drizzle the dressing over the top. Use a spatula to toss everything together. Be gentle so the pasta stays intact. After mixing, fold in the crumbled feta cheese. This adds a nice creaminess. - Cover and refrigerate for at least 30 minutes. After mixing, cover the bowl with plastic wrap or a lid. Place it in the fridge for at least 30 minutes. This chilling time helps the flavors blend together. - Present chilled salad, gently toss before serving. - Garnish with fresh basil and feta cheese. When ready to serve, take the salad out of the fridge. Give it a gentle toss to mix it again. Present it in a colorful bowl. You can garnish with more basil and feta cheese on top for a lovely look. Enjoy your fresh and flavorful bow tie pasta salad! For the complete steps, check out the Full Recipe. To cook bow tie pasta perfectly, start by boiling salted water. The salt helps flavor the pasta. Cook it until it is al dente, which means it is firm to the bite. This usually takes about 8 to 10 minutes. Be sure to stir it occasionally to prevent it from sticking. Once done, drain the pasta. Rinsing it with cold water stops the cooking process and cools it down. This step ensures your salad stays fresh. To enhance the flavor of your pasta salad, add fresh herbs like basil or parsley. These herbs brighten up the dish. You can also sprinkle in spices such as oregano or red pepper flakes for a kick. Experiment with different cheeses, too. Feta adds a salty bite, while mozzarella gives a creamy touch. Mixing in various cheeses can change the whole taste of the salad, making it more exciting. Serving your pasta salad in an appealing way makes it more inviting. Use a large, colorful bowl for a cheerful display. Garnish the top with extra basil leaves or a sprinkle of cheese for contrast. Choose a bright serving spoon to add flair. This small touch makes a big difference in how your dish looks. Remember, we eat with our eyes first! {{image_4}} You can change up the veggies in your bow tie pasta salad. Try adding seasonal favorites like zucchini or asparagus. If you prefer, throw in some spinach or arugula for a fresh twist. To make this dish heartier, consider adding protein. Grilled chicken or chickpeas work well. You can even toss in some black beans for extra fiber and taste. The dressing can make or break your salad. For a zesty kick, try a lemon vinaigrette. It's bright and refreshing! If you like creamy textures, use a yogurt-based dressing. This option gives a nice tang and pairs well with the veggies. You can mix and match to find your favorite flavor combinations. If you need a gluten-free option, swap the bow tie pasta for gluten-free pasta. Rice or quinoa can also work well. For a vegan twist, simply leave out the feta cheese or use a plant-based version. You can still enjoy all the flavors while sticking to your diet. Adapt the recipe to fit your needs and enjoy a delicious meal! For the full recipe, check out the Bow Tie Pasta Salad . Bow tie pasta salad lasts about 3 to 5 days in the fridge. To keep it fresh, store it in an airtight container. This helps prevent moisture loss and keeps flavors intact. Make sure to cover the salad tightly. If you notice any signs of spoilage, like off smells or mold, it's best to throw it away. You can freeze bow tie pasta salad, but it's not the best option. Freezing may change the texture of the pasta and veggies. If you choose to freeze it, do so before adding the dressing and cheese. This way, the pasta and veggies stay firmer. Use a freezer-safe container and label it with the date. Typically, you won't need to reheat bow tie pasta salad. It’s best served cold. However, if you prefer it warm, you can reheat it gently in a pan on low heat. Add a splash of olive oil to help with moisture. Stir frequently to avoid sticking and heat until just warm. Enjoy your salad fresh and flavorful! You can keep bow tie pasta salad in the fridge for about 3 to 5 days. Make sure to store it in an airtight container. If you see any mold or smell a sour odor, it's best to toss it out. Yes, you can add meat to your pasta salad! Grilled chicken, diced ham, or shrimp work well. These meats add flavor and protein, making the salad more satisfying. Bow tie pasta is usually not gluten-free. However, you can find gluten-free bow tie pasta made from rice or corn. These options work great for those on a gluten-free diet. To make the salad more filling, you can add protein like chickpeas or beans. You can also mix in avocado for healthy fats. Adding more veggies like spinach or kale boosts the nutrition too. This bow tie pasta salad combines fresh veggies, tasty feta, and a simple dressing. You learned how to make it step-by-step, including tips for flavor and presentation. Remember to chill the salad to enhance its taste. Feel free to customize it with your favorite vegetables or proteins. This dish is easy to store and still tastes great later. Enjoy making and sharing this healthy recipe!

Bow Tie Pasta Salad Fresh and Flavorful Recipe

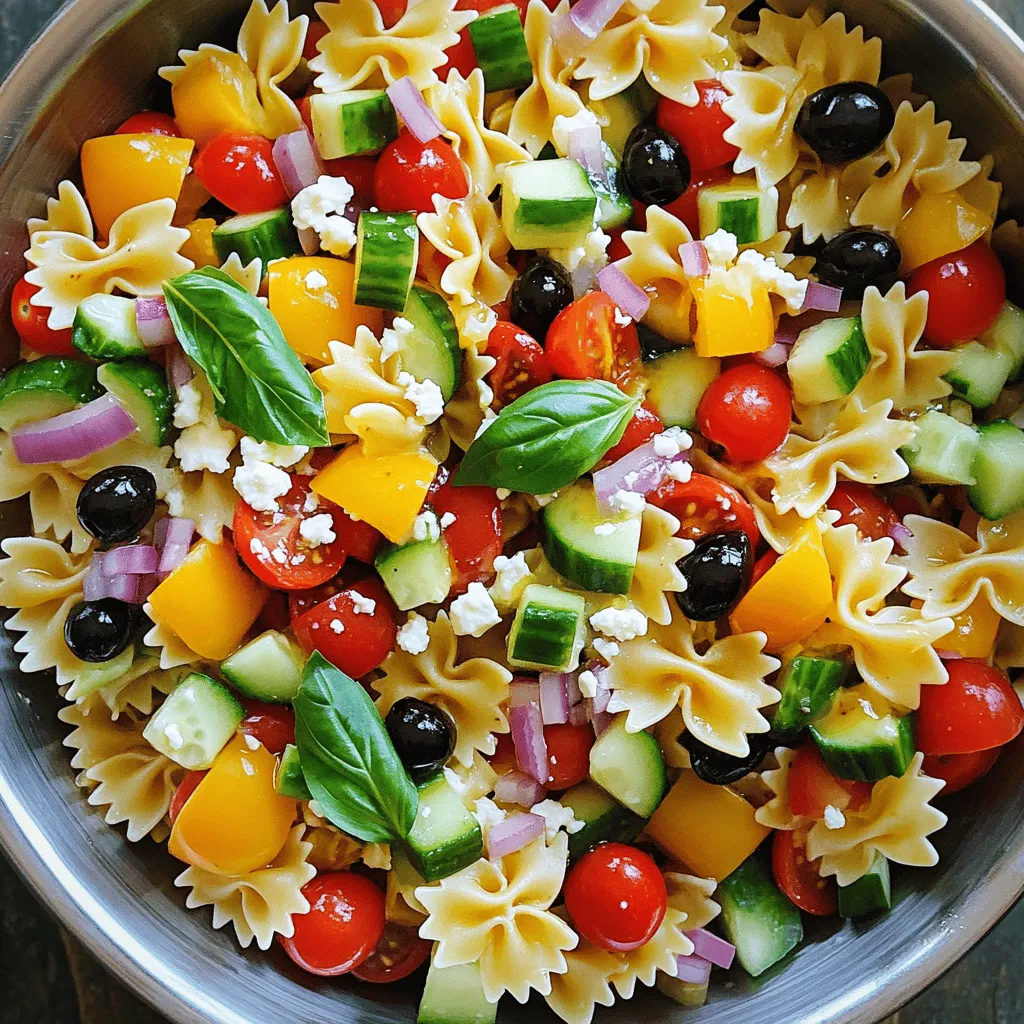
Looking to spice up your salad game? My Bow Tie Pasta Salad is fresh, colorful, and bursting with flavor! This

- 2 medium yellow squash, finely grated - 1 cup shredded sharp cheddar cheese - 1/4 cup freshly grated Parmesan cheese - 1/2 cup breadcrumbs (panko or regular) - 1 large egg - 1 teaspoon garlic powder - 1 teaspoon onion powder - Salt and freshly cracked black pepper to taste - 1/4 cup finely chopped green onions - Oil for frying (such as vegetable or canola oil) Yellow squash serves as the star of this dish. It adds moisture and a lovely, mild flavor. The cheeses give the tots a rich taste and a nice melt. Using breadcrumbs helps create that crispy exterior. The egg binds everything together, ensuring your tots hold their shape. Seasonings are key for flavor. Garlic powder and onion powder add depth. Don’t forget salt and black pepper to enhance all the flavors. If you want a bit more crunch, green onions provide a bright touch. You can fry the tots for a crispy bite or bake them for a lighter option. For the full recipe, check out the details above. Happy cooking! Start by grating the yellow squash. Use a box grater for even pieces. After grating, it's time to squeeze out excess moisture. Place the grated squash in a clean kitchen towel. Twist the towel tightly to remove water. This step helps the tots stay crispy. In a large bowl, combine the grated squash with the cheeses. Add sharp cheddar and Parmesan for great flavor. Next, crack in one egg. Then, mix in the breadcrumbs and seasonings. Use garlic powder, onion powder, salt, and black pepper. Stir everything together until well combined. Now it's time to form the mixture into tots. Scoop about one tablespoon of the mix and roll it into an oval shape. Place each tot on a prepared baking sheet, leaving space between them. This space helps them cook evenly. You can choose to bake or fry the tots. For baking, preheat your oven to 400°F (200°C). Bake the tots for 20-25 minutes. Flip them halfway through for even browning. If you prefer frying, heat oil in a deep pan over medium heat. Fry the tots in batches for 3-4 minutes on each side. They should turn golden brown and crispy. Use a slotted spoon to remove them and drain on paper towels. For the full recipe, check the comprehensive guide provided! To make your yellow squash tots crispy, start by removing the moisture. Grated squash holds a lot of water. Wrap it in a clean kitchen towel. Squeeze it hard to get rid of excess liquid. This step is key for a great texture. Next, control the frying temperature. Heat the oil to about 350°F (175°C). If the oil is too cool, the tots will soak up oil and become soggy. Fry them in batches to avoid crowding. This way, each tot gets even heat and crispiness. To boost the flavor, try adding spices like paprika or cayenne pepper. These spices add a nice kick to your tots. You can also mix in some Italian herbs for a different taste. Experimenting with cheese can enhance your dish. You might swap sharp cheddar for pepper jack or mozzarella. Each cheese gives a unique twist. This makes your tots exciting every time you make them. For dipping sauces, I suggest creamy ranch or zesty marinara. These sauces pair well with the crispy tots. You can also try a spicy aioli for something different. Pair your tots with side dishes like a fresh salad or vegetable sticks. This adds some crunch and freshness to your meal. Serve your yellow squash tots hot for the best taste! For the full recipe, check the recipe section above. {{image_4}} You can switch up the veggies in your yellow squash tots. Try adding zucchini or carrots. Zucchini brings a nice flavor, while carrots add a touch of sweetness. You can also add spinach for a green twist. Spinach adds color and boosts nutrition. Just be sure to chop it fine and remove excess moisture. If you need a gluten-free option, use alternative breadcrumbs. You can find gluten-free panko or make your own with gluten-free bread. For those who want a dairy-free version, substitute cheese with non-dairy options. Nutritional yeast can give a cheesy flavor without the dairy. If you’re hosting a party, you can easily scale the recipe. Double or triple the amount of ingredients to feed more guests. For presentation, serve the tots on a colorful platter. Add small bowls of dipping sauces like ranch or marinara. You can even garnish with chopped herbs. This makes your dish pop with color and flavor. For the full recipe, check out the detailed instructions earlier in the article. To store leftovers, let the tots cool completely. Place them in an airtight container. This keeps them fresh for future snacking. Use glass or plastic containers with tight lids for best results. You can freeze these delicious tots either baked or unbaked. To freeze unbaked tots, shape them and lay them on a baking sheet. Once frozen, transfer them to a freezer bag. For baked tots, let them cool, then place them in a container. When it’s time to enjoy, thaw unbaked tots in the fridge overnight. Bake at 400°F (200°C) for about 25-30 minutes. For baked tots, reheat in an oven at 350°F (175°C) for about 10-15 minutes. In the fridge, these tots last about 3-5 days. For the best taste, eat them within this time. To maintain freshness, always keep them sealed tight. Avoid leaving them out at room temperature for long periods. You can make Yellow Squash Tots without cheese by using plant-based options. For a vegan version, replace cheese with nutritional yeast. It gives a cheesy flavor without dairy. You can also use mashed avocado or silken tofu to help bind the mixture. Both options add creaminess and flavor. Yes, you can prepare these tots ahead of time. Form the tots and place them on a baking sheet. Cover with plastic wrap and store in the fridge for up to 24 hours. This makes it easy to cook them fresh later. You can also freeze the tots before cooking. Place them on a baking sheet and freeze until firm. Then transfer them to a freezer bag. They can last up to three months. Yellow Squash Tots pair well with many dips. Try serving them with ranch dressing or marinara sauce. You can also serve them alongside a fresh salad or veggie sticks. For a heartier meal, add grilled chicken or fish as a side. The options are endless! You'll know the tots are done when they turn golden brown. If you fry them, check for a crispy outer layer. For baked tots, look for a firm texture and a nice golden color. A toothpick can help check if the insides are cooked through. If it comes out clean, they are ready to eat! In this blog post, we explored how to make delicious Yellow Squash Tots. We discussed the main ingredients, seasonings, and optional additions that enhance flavor. I shared step-by-step instructions for preparing, mixing, shaping, and cooking your tots. Remember to try my tips for a crispy texture and experiment with different vegetables. You can also store leftovers or freeze them for later. These tots are not just tasty; they can fit into any meal or party. Enjoy making these healthy snacks and impress your family with your cooking!

Yellow Squash Tots Crispy and Flavorful Snack Delight

If you’re searching for a tasty snack that packs a punch, look no further! My crispy and flavorful Yellow Squash

- 2 medium summer squashes, spiralized into noodles - 8 oz whole wheat spaghetti or your preferred pasta - 4 cloves garlic, finely minced - 1 tablespoon extra-virgin olive oil - 1 teaspoon red pepper flakes - 1 medium zucchini, thinly sliced into half-moons - 1 cup cherry tomatoes, halved - 1/4 cup fresh basil leaves, coarsely chopped - Salt and freshly ground black pepper, to taste - Zest and juice of 1 lemon - Grated Parmesan cheese (optional, for garnish) When making this dish, you'll need fresh summer squashes. Spiralizing them gives a fun shape that looks great on the plate. Whole wheat spaghetti adds a healthy twist, but feel free to use any pasta you like. Garlic is key for flavor, so don't skip it. Red pepper flakes bring a bit of heat, but adjust them to your taste. The zucchini and cherry tomatoes add color and texture. Fresh basil gives a lovely aroma and taste. You will finish with lemon zest and juice for brightness. A sprinkle of Parmesan cheese can make it extra special, too. - Large pot for boiling pasta - Spacious skillet for making sauce - Spiralizer for summer squash - Measuring cups and spoons Having the right tools makes cooking easier. A large pot helps you boil the pasta just right. A spacious skillet allows you to mix everything without a mess. A spiralizer is fun to use and creates those lovely noodles. Lastly, measuring cups and spoons help ensure you get the right amounts of each ingredient. For the full recipe, refer to the section on cooking instructions. Enjoy the process and the delicious flavors that come together in this savory summer squash pasta with garlic sauce! First, grab a large pot and fill it with water. Add a pinch of salt and turn on the heat. Bring the water to a rolling boil. Once it’s bubbling, add 8 ounces of whole wheat spaghetti. Cook it according to the package directions until it is al dente, which usually takes about 8 to 10 minutes. Before you drain the pasta, make sure to reserve 1 cup of the starchy pasta water. This water will help create a delicious sauce later. After reserving the water, drain the pasta and set it aside. Next, take a spacious skillet and heat 1 tablespoon of extra-virgin olive oil over medium heat. Once the oil is warm, add 4 minced garlic cloves and 1 teaspoon of red pepper flakes. Sauté this mixture for about 1 to 2 minutes. You want the garlic to become fragrant and start turning golden. Be careful not to let it burn, as burnt garlic can ruin the taste. After that, add the sliced zucchini and halved cherry tomatoes to the skillet. Cook these for an additional 3 to 4 minutes, stirring occasionally. This will help the tomatoes soften and release their juicy goodness. Now it’s time to combine everything. Gently fold the spiralized summer squash noodles into the skillet with the garlic sauce. Stir well to mix all the ingredients. Gradually add the reserved pasta water, a little at a time. This helps create a light and flavorful sauce. Keep adding water until you reach your desired sauce consistency. Finally, stir in the lemon zest and juice. Toss in the coarsely chopped basil and season with salt and freshly ground black pepper to taste. Let it cook for an additional 2 to 3 minutes to ensure everything is heated through and the flavors meld together. To get the best texture, cook the pasta until it is al dente. This means it should have a slight bite when you chew it. Follow the package instructions, but start checking a minute or two before the time ends. To avoid burning garlic, heat the olive oil over medium heat. Add the minced garlic and red pepper flakes, stirring often. Cook for just 1-2 minutes. The goal is to make the garlic fragrant, not burnt. If it burns, it can ruin the sauce. You can add more flavor with spices and herbs. Consider adding a pinch of oregano or thyme. They bring out the taste of summer squash. If you want to try something new, use chopped parsley or cilantro instead of basil. They can add a fresh twist to your dish. For a beautiful presentation, serve your pasta in a bright bowl. Top it with halved cherry tomatoes and a light sprinkle of lemon zest. A few fresh basil leaves add a lovely pop of color. Lastly, drizzle some high-quality olive oil right before serving. This adds shine and flavor to your dish. For the full recipe, check out the details above. {{image_4}} You can change the pasta to fit your needs. If you want gluten-free, try brown rice or chickpea pasta. Both cook well and taste great. For a twist, use pasta shapes like fusilli or penne. They hold the sauce nicely and add fun to your dish. Feel free to mix in other veggies. Bell peppers, spinach, or even broccoli work well. You can also try seasonal veggies like asparagus in spring or butternut squash in fall. These additions add flavor and color to your plate. Get creative with what you have on hand! Want to add protein? Grilled chicken, shrimp, or chickpeas are great choices. Cook the chicken in the skillet before adding the garlic or toss in pre-cooked shrimp at the end. For chickpeas, just drain and rinse a can, then stir them in. This makes your dish more filling and satisfying. Check out the Full Recipe for all the details on how to make this dish shine! To store leftover pasta, let it cool first. Place it in an airtight container. This helps keep the pasta fresh. You can store it in the fridge for up to three days. If you want to keep it longer, freezing is a great option. You can freeze the cooked pasta and sauce separately. This keeps each part fresh and tasty. Use freezer-safe bags or containers. When you're ready to eat, thaw the pasta and sauce in the fridge overnight. For reheating, warm them in a skillet over low heat. Add a splash of water to help it heat evenly. In the fridge, the dish lasts about three days. If you freeze it, it can last up to three months. Look for any signs of spoilage. If you see mold or a bad smell, it’s time to toss it out. Always trust your senses when it comes to food safety. For more detailed steps, check out the Full Recipe. You can make this dish gluten-free by using gluten-free pasta. Look for options made from rice, quinoa, or lentils. These pastas cook well and hold their shape. They work nicely with the garlic sauce and summer squash. Always check the package for cooking times. Yes, you can use other squash types! Try zucchini or butternut squash for a new taste. Spaghetti squash is great too; just cook it until tender and scoop out the strands. Each squash adds a unique flavor and texture to your dish. You can pair this pasta with a simple green salad. A fresh cucumber and tomato salad works well, too. Grilled vegetables add a nice touch. For something warm, garlic bread is a tasty option. Choose sides that complement the light, bright flavors of the pasta. To change the spice level, you can add more or less red pepper flakes. For a milder sauce, use just a pinch. If you like heat, add an extra sprinkle. Taste as you go to find the right balance for you. This blog post provided a clear guide on making a delicious summer squash pasta dish. You learned about the ingredients, cooking equipment, and step-by-step instructions. Cooking tips and variations helped expand your options. By storing your dish correctly, you can enjoy it longer. Try adding your favorite veggies or proteins for extra flavor. With practice, this recipe can become a favorite in your kitchen. Enjoy the mix of textures and tastes in each delightful bite.

Savory Summer Squash Pasta with Garlic Sauce Delight

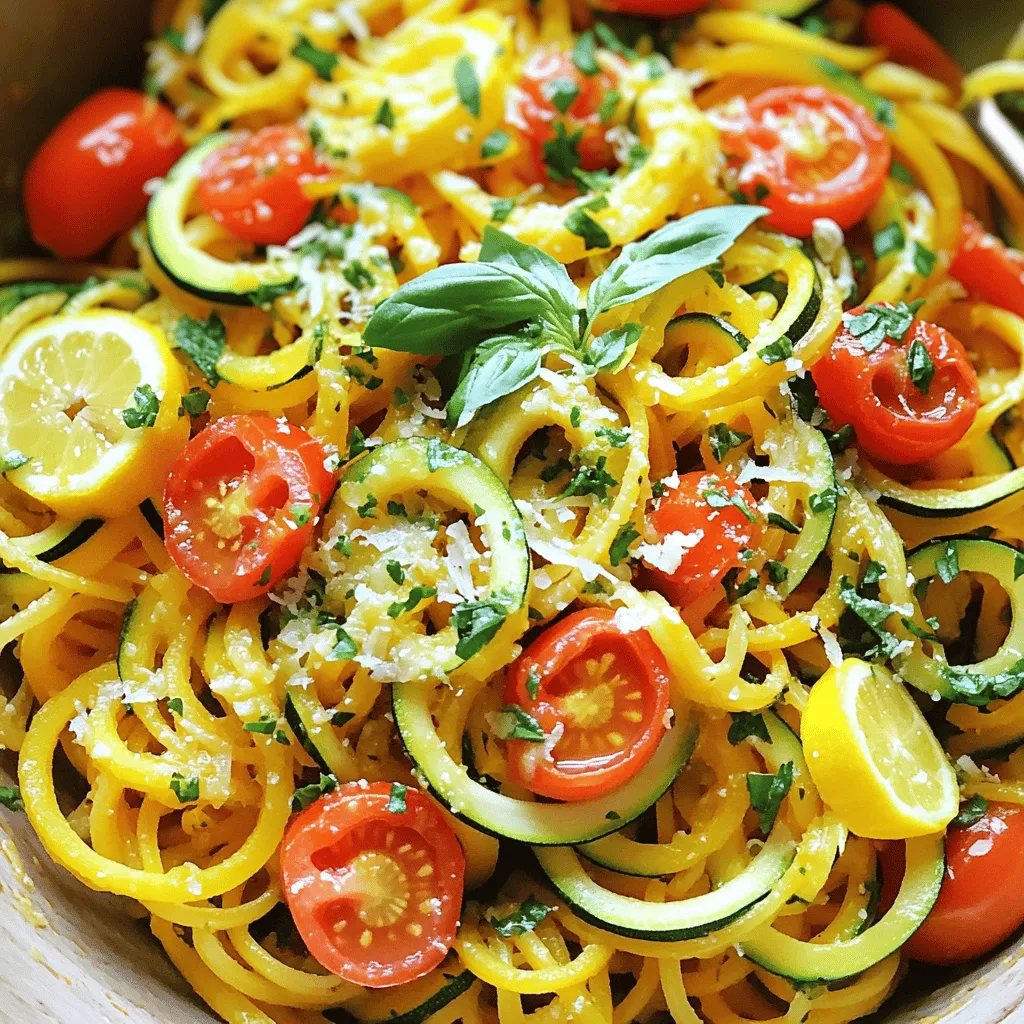
Looking for a fresh and tasty dish this summer? Try my Savory Summer Squash Pasta with Garlic Sauce! This vibrant

Gather the right ingredients for your Cheesy Tomato Pie. Here’s what you need: - 1 pre-made pie crust (9-inch) - 4 large ripe tomatoes, sliced into thin rounds - 1 cup shredded mozzarella cheese, divided - 1 cup creamy ricotta cheese - 1/2 cup finely grated Parmesan cheese - 1/4 cup fresh basil leaves, chopped - 2 cloves garlic, minced - 1 tablespoon extra virgin olive oil - 1 teaspoon dried oregano - Kosher salt and freshly ground black pepper, to taste - 1 egg, beaten (for egg wash) Each ingredient plays a role in the flavor and texture. The ripe tomatoes bring juiciness, while the cheeses add creaminess and depth. Fresh basil and garlic lift the dish with bright, aromatic notes. The pie crust holds everything together, providing a flaky base. You can get creative with your choices, too. Swap in different cheese or herbs to suit your taste. I love using a mix of mozzarella and ricotta for a creamy filling, but feel free to explore other options. For those who want to try a new twist, I suggest adding a sprinkle of red pepper flakes for some heat. This will make your dish even more fun to eat! To see the full recipe for making this delightful Cheesy Tomato Pie, check out the [Full Recipe]. 1. Preheating the oven: First, set your oven to 400°F (200°C). This step is key to getting the perfect crust. 2. Mixing the cheese filling: In a medium bowl, mix the ricotta, half of the mozzarella, and Parmesan. Add the chopped basil and garlic. Sprinkle in the oregano along with salt and pepper. Stir until smooth and creamy. 3. Arranging the tomatoes: Take the tomatoes and slice them into thin rounds. Layer them in the bottom of your pie crust. Overlap the slices a bit so every bite is tasty. 1. Layering the ingredients: Spread the cheese mixture evenly over the tomatoes. This will keep the tomatoes moist and add a cheesy layer. Top it off by sprinkling the rest of the mozzarella on top. 2. Brushing the crust with egg wash: Drizzle olive oil over the pie. Then, brush the edges of the pie crust with the beaten egg. This gives a golden finish when it bakes. 1. Optimal baking time and temperature: Place your pie in the oven. Bake for 30 to 35 minutes. Look for the cheese to bubble and the crust to turn golden brown. 2. Signs the pie is ready: When the pie is done, the cheese should be melted and bubbly. Let it cool for about 10 minutes before cutting. This helps the layers set for better slices. For the full recipe, check the [Full Recipe]. Enjoy your cooking! Using fresh ingredients is key to a great Cheesy Tomato Pie. Fresh tomatoes burst with flavor and moisture. Choose ripe, juicy tomatoes for the best taste. You can also try different types of cheese. For a twist, use sharp cheddar or creamy goat cheese. Each cheese will add unique flavors to your pie. When you serve your pie, slice it warm. This keeps the cheese melty and gooey. To make it look pretty, garnish with fresh basil leaves. A sprinkle of red pepper flakes adds a pop of color and spice. Place the pie on a colorful plate to catch eyes. If your crust turns soggy, try using a thicker layer of cheese filling. This keeps moisture away from the crust. You can also pre-bake the crust for a few minutes before adding toppings. To ensure even baking, rotate the pie halfway through cooking. This helps it bake evenly and avoids hot spots. {{image_4}} You can switch up the cheese in your pie for new tastes. If you want to replace mozzarella, consider using provolone or gouda. These cheeses melt well and add a rich flavor. For ricotta, cottage cheese works nicely. It has a similar texture and brings a light creaminess. If you crave a stronger cheese flavor, try adding sharp cheddar or crumbled feta. These options can give your pie a bold kick. Mixing cheeses can create layers of flavor that will surprise your taste buds. Pair your cheesy tomato pie with a fresh salad. A simple green salad with olive oil and lemon complements the pie’s richness. You can also serve it with a side of roasted veggies. This adds color and nutrition to your meal. If you have leftovers, transform them into new dishes. Slice the pie and use it as a filling for sandwiches. You can also cut it into smaller pieces and serve it as a snack. The flavors hold up well, making it perfect for lunchboxes or quick bites. For the full recipe, check out the details above. To keep your cheesy tomato pie fresh, store it in the fridge. Place leftover slices in an airtight container. This will help the pie stay moist and tasty. If you plan to eat it within a few days, the fridge is perfect. Just make sure to eat it within three days for the best flavor. When reheating, I suggest using an oven. Preheat your oven to 350°F (175°C). Place the slices on a baking sheet. Heat for about 15 minutes or until the cheese is bubbly. This keeps the crust crispy and the filling warm. You can also use a microwave, but the crust may not stay as crispy. If you want to save some pie for later, freezing is a great option. First, let the pie cool completely. Wrap it tightly in plastic wrap, then in aluminum foil. This keeps out air and prevents freezer burn. You can freeze it for up to three months. To reheat from frozen, take the pie out of the freezer. Remove the wraps, and place it in a baking dish. Preheat your oven to 375°F (190°C). Bake for about 45 minutes, or until it is hot all the way through. If the crust gets too dark, cover it with foil during baking. Enjoy your cheesy tomato pie anytime with these simple storage tips! Cheesy Tomato Pie can last up to five days in the fridge. To keep it fresh longer, store it in an airtight container. This helps prevent the pie from drying out. If you notice the crust getting soggy, try reheating it in the oven. This will restore its crispness. Yes, you can use a homemade pie crust. Making it from scratch lets you control the taste and texture. Homemade crusts often taste fresher and can have a flakier texture. Store-bought crusts save time, but they may not match the flavor of homemade. If you choose to make your own, use cold butter for a better result. Absolutely! Cheesy Tomato Pie is easy to make vegetarian. Simply skip any meat toppings and focus on fresh veggies. You can add more herbs or even spinach for extra flavor. This keeps the dish light and healthy. Enjoy the rich taste without meat! For a twist, try adding sliced bell peppers or zucchini. We covered how to make a delicious Cheesy Tomato Pie. You learned about the key ingredients, like ripe tomatoes and cheese. I shared step-by-step instructions for preparation and baking. The tips and tricks help you perfect your pie and troubleshoot common issues. You can also explore different cheese combinations and serving suggestions. Lastly, I provided advice on storage and reheating. Now, you have the tools to create a tasty dish that will impress anyone. Enjoy making your Cheesy Tomato Pie!

Cheesy Tomato Pie Irresistible Flavor for Dinner

Looking for a new dinner favorite? This Cheesy Tomato Pie brings mouthwatering flavors to your table! Imagine ripe tomatoes nestled

- 2 medium yellow squash, sliced into thin rounds (approximately 1/4 inch thick) - 1 medium zucchini, sliced into thin rounds (approximately 1/4 inch thick) - 1 cup all-purpose flour - 1 cup cornmeal - 1 teaspoon garlic powder - 1 teaspoon onion powder - 1 teaspoon paprika - 1/2 teaspoon cayenne pepper (optional for those who enjoy a kick) - Salt and black pepper to taste - 2 large eggs, beaten until well combined - Vegetable oil for frying (about 1 inch deep) - Fresh parsley, finely chopped (for garnish) Gathering the right ingredients is key to making crispy fried squash. The yellow squash and zucchini bring a mild taste and a nice crunch. The dry ingredients, like flour and cornmeal, create a crispy coating. Adding spices like garlic powder and paprika gives flavor. The eggs help the coating stick, while the oil is crucial for frying. Don't forget the fresh parsley for a pop of color! For the full recipe, check out the details above. Start by washing the yellow squash and zucchini under cool water. Use a clean cutting board and knife to slice both vegetables into thin rounds. Aim for about 1/4 inch thick slices. This thickness helps them cook evenly and become crispy. In a shallow bowl, mix the flour, garlic powder, onion powder, paprika, cayenne pepper, salt, and black pepper. Make sure to whisk it well. In another bowl, beat the eggs until smooth. This will be your egg wash. For the last step, place cornmeal in a separate bowl. Now, it’s time to coat the slices. Dip each squash and zucchini slice in the flour mixture first. Make sure to cover both sides. Then, dip it into the egg wash, letting the extra drip off. Finally, press the slice into the cornmeal to coat it well. This three-step coating gives you that crispy texture. Now, let’s heat the oil. In a large skillet, pour in enough vegetable oil to reach about 1 inch deep. Heat the oil over medium-high heat. You know it’s ready when it shimmers but doesn’t smoke. Carefully place the coated slices into the hot oil, but don’t overcrowd the pan. Fry each side for about 3-4 minutes until they turn golden brown. Once done, use a slotted spoon to move the fried slices onto a plate lined with paper towels. This will help drain any extra oil. Keep frying the remaining slices in batches, ensuring the oil stays hot for that perfect crispiness. To get the best crispiness, oil temperature is key. Heat the oil until it shimmers but does not smoke. Ideal frying temperature is about 350°F (175°C). Use a thermometer for accuracy if needed. Avoid overcrowding in the pan. Fry only a few slices at a time. This helps maintain the oil temperature. If you add too many slices, the oil cools down. This results in soggy squash instead of crispy bites. You can elevate the flavor with extra seasonings. Try adding Italian herbs or a sprinkle of cheese to the flour mix. A touch of lemon zest can add brightness. Pair your crispy squash with tasty dipping sauces. Ranch dressing works well. You might also enjoy a spicy mayo or tangy yogurt sauce. These options add another layer of flavor. For serving, arrange the crispy fried squash on a large platter. A simple parchment paper lining gives a rustic touch. Stack the squash high for a fun visual. Garnish with finely chopped fresh parsley. This adds a pop of color and freshness. For more flair, consider a drizzle of balsamic glaze. It looks beautiful and tastes great too. {{image_4}} You can switch up the texture of your crispy fried squash by using different coatings. - Panko breadcrumbs: This option adds an extra crunch. Just replace the cornmeal with panko. It gives a light and airy crisp that many love. - Gluten-free options: For those who need gluten-free dishes, use almond flour or chickpea flour. Both create a tasty and crispy coating for your fried squash. Adding more flavors to your fried squash can make it even better. Here are two ideas to consider: - Incorporating other vegetables: Try mixing in sliced carrots or bell peppers. They fry well and add color and taste. You can create a vibrant vegetable medley. - Adding cheese or herbs: Grated Parmesan or cheddar cheese adds a savory touch. Fresh herbs like basil or thyme can boost the flavor too. Mix them into your flour or cornmeal for a unique twist. Serving crispy fried squash is fun and varied. Here are some ideas to enhance your meal: - Accompanying side dishes: Pair it with a fresh salad or coleslaw. These sides add crunch and balance the meal nicely. You can also serve with roasted potatoes for a heartier option. - Serving with protein options: Crispy fried squash goes great with grilled chicken or fish. The crispy texture complements the proteins well. You can also serve it with a veggie burger for a tasty vegetarian meal. For the full recipe and more detailed cooking steps, check the Full Recipe. To store crispy fried squash, place it in an airtight container. This helps keep it fresh. The best temperature for refrigeration is below 40°F (4°C). If stored properly, it will last for about 2-3 days in the fridge. Use a container that is not too large. This way, the squash does not get squished or lose its crunch. You can reheat crispy fried squash in two ways: the oven or the microwave. I recommend using the oven for the best results. Preheat your oven to 400°F (200°C). Spread the squash on a baking sheet and heat for about 10 minutes. This method keeps it crispy. The microwave is quicker but makes the squash soft. If you use the microwave, heat it for 30 seconds. Check and heat more if needed. Can you freeze crispy fried squash? Yes, but it may lose some crispiness. To prepare for freezing, let the squash cool completely. Then, arrange the pieces in a single layer on a baking sheet. Freeze them for about an hour until firm. After that, transfer them to a freezer-safe bag. Remove as much air as possible. This way, you can enjoy them later, but they will not be as crispy as fresh. For the best taste, use them within 2-3 months. For more details, check the Full Recipe. To make crispy fried squash, start with fresh yellow squash and zucchini. Slice them into thin rounds, about 1/4 inch thick. In one bowl, mix all-purpose flour, garlic powder, onion powder, paprika, cayenne pepper, salt, and black pepper. In a second bowl, beat two eggs until well combined. Finally, place cornmeal in a third bowl for the last coating. Dip each slice first in the flour mix, then in the eggs, and lastly in the cornmeal. Heat vegetable oil in a pan until it shimmers. Fry the slices in small batches until golden brown and crispy, about 3-4 minutes each side. For the detailed steps, refer to the Full Recipe. Yes, you can fry many different vegetables. Try using eggplant, green beans, or mushrooms. Each vegetable adds unique flavor and texture to your dish. Just remember to slice them into uniform pieces for even cooking. You can also mix different vegetables for a colorful platter. The best oils for frying are those with high smoke points. Vegetable oil, canola oil, and peanut oil work great. These oils heat up well and help achieve that crispy texture without burning. Avoid oils like olive oil, as they can smoke at lower temperatures. To make crispy fried squash healthier, consider baking instead of frying. Coat the squash in the same flour and cornmeal mix, then spray lightly with oil. Place them on a baking sheet and bake at 425°F until crispy, about 20-25 minutes. You can also use whole wheat flour for added fiber, or try air frying for a healthier option. Frying squash and zucchini gives a tasty twist to these fresh veggies. You learned about the key ingredients and step-by-step instructions for making crispy fried squash. We discussed tips for perfecting texture and flavor, plus storage methods for leftovers. You can even try variations with different coatings and vegetables. Remember, cooking should be fun and allow for creativity. Enjoy your crispy fried dish, and don’t hesitate to experiment!

Crispy Fried Squash Simple and Flavorful Recipe

If you crave a tasty snack or side dish, my crispy fried squash recipe is for you! This simple dish

Here’s what you need for quick pickled okra. Each ingredient adds its own flavor and charm. - 1 pound fresh okra, stems trimmed - 1 cup distilled white vinegar - 1 cup water - 2 tablespoons granulated sugar - 2 tablespoons sea salt - 1 teaspoon mustard seeds - 1 teaspoon coriander seeds - 1 teaspoon whole black peppercorns - 2 cloves garlic, peeled and gently smashed - 1 teaspoon red pepper flakes (optional, for those who enjoy a spicy kick) - Fresh dill sprigs (for garnish) These ingredients come together to create a tangy, crunchy treat. The fresh okra gives a crisp bite, while the brine adds a zesty kick. The spices bring warmth and depth to the flavors. You can find all these items in most grocery stores. For the best taste, seek out fresh okra when it's in season. Ready to dive into the details? Check out the Full Recipe for step-by-step instructions. - Rinsing and Trimming the Okra Start by rinsing 1 pound of fresh okra under cool water. This removes dirt and debris. Next, trim the stems with a sharp knife. Be careful not to cut into the pods themselves. This helps the okra stay fresh and look nice in the jars. - Mixing Ingredients and Heating In a medium saucepan, add 1 cup of distilled white vinegar, 1 cup of water, 2 tablespoons of granulated sugar, and 2 tablespoons of sea salt. Mix well to combine. Set the heat to medium. Stir until the sugar and salt dissolve. Then, bring the mixture to a rolling boil. - Adding Spices and Simmering Once boiling, add 1 teaspoon of mustard seeds, 1 teaspoon of coriander seeds, 1 teaspoon of whole black peppercorns, 2 smashed garlic cloves, and 1 teaspoon of red pepper flakes (if you want spice). Lower the heat and let it simmer for 2-3 minutes. This step lets the spices add their flavor to the brine. - Layering Okra and Leaving Space Take clean, sterilized jars and layer the okra inside. You can pack them tightly, but leave space at the top of each jar. This space helps the brine cover the okra fully. - Pouring Hot Brine Over Okra Carefully pour the hot pickling brine over the okra in each jar. Make sure the brine covers all the okra. This is key for proper pickling. - Letting Jars Cool and Sealing Let the jars sit at room temperature until they cool. Once they are cool, seal each jar tightly with a lid. This keeps the flavor in and air out. - Storing for Flavor Development Place the sealed jars in the refrigerator. Let them sit for at least 24 hours. For the best flavor, wait a few days. This time allows the okra to absorb the brine and spices. Enjoy your zesty quick pickled okra! You can find the full recipe [here]. Submerging okra in the brine is key. This makes sure the flavors soak in well. If the okra sticks out, it may spoil. Use a weight or lid to keep them under the brine. This helps them pickle evenly. Give the okra time to infuse. The longer they sit, the better they taste. I recommend waiting at least 24 hours. For the best flavor, wait a few days. This allows all the spices to shine through. Fresh dill sprigs add a nice touch. They not only look great but also taste wonderful. When you serve the okra, add a few sprigs on top. It makes your dish pop visually. For more flavor, try adding other fresh herbs too. {{image_4}} To make spicy pickled okra, adjust the red pepper flakes. If you like heat, add more flakes. Start with one teaspoon, then taste the brine. You can always add more later. This way, you control the spice level. A little extra heat can really boost flavor. For sweet pickled okra, modify the sugar amounts. Increase the sugar to three tablespoons for a sweeter taste. You can also add a splash of honey for a unique flavor. Remember, sweetness balances the tart vinegar. Experiment to find your perfect sweetness level. You can create herb-infused variations by adding other fresh herbs. Dill is popular, but you might try thyme or rosemary. Add a few sprigs into the jar with the okra. This adds a fresh taste and aroma. It’s a fun way to customize your pickles! For the full recipe, check the [Full Recipe]. Store your quick pickled okra in the fridge. They stay fresh for about 1 month. Make sure the jars are sealed tightly. This keeps the flavors strong and tasty. Always check the brine level. If it drops, add more to cover the okra. Freezing pickled okra is possible, but not the best option. If you choose to freeze, use clean, dry jars. Fill them with okra and brine, leaving some space at the top. This helps prevent breakage. Label the jars with the date. Use within six months for the best flavor. Check your pickled okra for signs of spoilage. Look for a strange smell or color. If you see any mold, throw them away. If the brine is cloudy, that’s a bad sign too. Trust your senses. When in doubt, it’s safer to toss them out. Pickled okra can last about 1 to 2 months in the fridge. Store it in a sealed jar. Keep it cold to maintain freshness. Always check for signs of spoilage before eating. If it smells bad or looks off, throw it away. You can use frozen okra, but fresh is better. Frozen okra may lose its crunch. It often comes cut, which can change the texture. If you must use frozen, thaw it first and pat it dry. This helps keep the pickled okra tasty. Pickled okra is versatile and fun to use. Enjoy it as a snack or appetizer. It pairs well with sandwiches, burgers, and salads. You can also add it to cocktails like Bloody Marys for a zing. It adds flavor to any dish. To make pickled okra spicy, add more red pepper flakes. Start with 1 teaspoon and test the heat. You can also add sliced jalapeños or fresh chili peppers to the brine. This will give your pickled okra a nice kick. Adjust the spice to your taste! Pickling okra is simple and rewarding. You learned about the right ingredients, how to prepare them, and essential tips for success. Remember to let your jars cool and then refrigerate for the best flavor. Experiment with different variations to suit your taste. Always check for spoilage signs, too. Enjoy your homemade pickled okra as a snack, side dish, or topping. With these steps, you can take pickling to a new level. Dive in and savor your creations!

Quick Pickled Okra Simple and Flavorful Recipe

Looking for a quick and tasty way to enjoy okra? This simple recipe for quick pickled okra is full of

- 2 boneless, skinless chicken breasts - 2 medium summer squashes - 1 medium red bell pepper - 1 small onion - 3 cloves garlic - 1 teaspoon Italian seasoning blend - ½ teaspoon smoked paprika - Salt and black pepper to taste - 2 tablespoons extra-virgin olive oil When I prepare Chicken and Summer Squash Skillet, I always choose fresh, high-quality ingredients. The chicken breasts should be tender and juicy. I prefer medium summer squashes because they cook evenly and add a lovely color. The red bell pepper brings sweetness and crunch, while the onion adds depth. For seasoning, I love the Italian blend. It brings warmth and a hint of herbs that complements the chicken and squash. Smoked paprika adds a subtle smokiness, making every bite exciting. I keep salt and pepper handy to adjust flavors as needed. Using extra-virgin olive oil is key. It adds richness and helps cook the chicken perfectly. This is the foundation for creating a savory delight! If you want to dive deeper into how to make this dish, check the Full Recipe for details on preparation and cooking techniques. Start by dicing the chicken breasts into bite-sized pieces. This helps them cook evenly and quickly. Make sure each piece is similar in size. Next, season the chicken well. Use salt, black pepper, Italian seasoning, and smoked paprika. This mix adds great flavor and makes the chicken shine. In a large skillet, heat the olive oil over medium heat until it shimmers. Add the diced onion and red bell pepper. Sauté them for about 3-4 minutes. You want the onion to become soft and clear. Then, add minced garlic and sliced summer squash. Stir everything well and cook for another 5-7 minutes. The squash should be tender but still bright in color. Now it’s time to bring everything together. Return the cooked chicken to the skillet and gently stir to mix all the ingredients. Let them cook together for an extra 2-3 minutes. This allows the flavors to blend. Taste the dish and adjust the seasoning as needed. Finally, take the skillet off the heat and garnish with torn fresh basil leaves. The basil adds a fresh touch to the dish. For the full recipe, check out the details above. To get the perfect chicken texture, start with diced pieces. Make sure they are even in size. This helps them cook at the same rate. Use medium heat and let the chicken brown well. This adds flavor and keeps it juicy. For squash, cook it last. This way, it stays bright and crunchy. Slice the squash into half-moons to help it cook evenly. Stir it often, but don’t overcook it. You want it tender but not mushy. For plating, use warm bowls to hold the dish. The colors of the chicken and squash pop against the bowl. Top with torn basil leaves for a fresh look. Serve with crusty bread or fluffy quinoa. This adds a nice touch and makes it a full meal. If you want an alternative to chicken, try turkey or even diced tofu. These options work well and keep the dish tasty. For squash, zucchini is a great substitute. It cooks similarly and has a mild flavor. You can also use other summer veggies like bell peppers or snap peas for variety. For the full recipe, check out the Chicken and Summer Squash Skillet Delight. {{image_4}} You can easily switch up the protein in this dish. Turkey works great as a lean option. Just dice it into small pieces like chicken. Tofu is another fantastic choice for a plant-based meal. Use firm tofu and press it to remove extra moisture. Cut it into cubes and sauté until golden. Seafood variations also shine in this skillet. Shrimp or scallops cook quickly and add a lovely twist. Just be careful not to overcook them. They should be tender and juicy. Feel free to incorporate other vegetables based on the season. Zucchini, bell peppers, or even kale add vibrant colors. Chop them into similar sizes for even cooking. You can also toss in some cherry tomatoes for a burst of sweetness. Spices can transform your dish too. Try adding cumin for an earthy tone or chili flakes for a kick. Fresh herbs like parsley or cilantro also enhance the flavor. To add heat, use spices like cayenne or crushed red pepper. Just a pinch adds a nice zing without overpowering the dish. You can also introduce sweetness with seasonal fruits. Diced peaches or pineapple work wonders in summer. They bring a refreshing contrast to the savory chicken and squash. For the full recipe, check out Chicken and Summer Squash Skillet Delight. To store leftovers, let the dish cool down first. Place it in an airtight container. This keeps the chicken and squash fresh. You can store it in the fridge for up to three days. When you are ready to eat, reheat it in a skillet over medium heat. Stir gently until it is warm. You can also use a microwave. Heat in short bursts, stirring in between, to ensure even warming. If you want to freeze the dish, let it cool completely. Then, use a freezer-safe container or bag. Remove as much air as possible to avoid freezer burn. You can freeze it for up to three months. To thaw, move it to the fridge for several hours or overnight. Reheat in a skillet over low heat, stirring often. You can also use the microwave, but stir it frequently for even heating. Understanding spoilage is important for safety. If the dish smells off or changes color, do not eat it. Signs of spoilage include a slimy texture or odd odor. Always trust your senses. Proper storage helps keep the dish fresh longer. Remember, the fresher the ingredients, the better your Chicken and Summer Squash Skillet will taste. For the full recipe, check out [Full Recipe]. Yes, you can use other summer vegetables. Some great substitutes include zucchini, yellow squash, or corn. You can also add cherry tomatoes for a pop of color. Each vegetable brings a unique taste and texture. Feel free to mix and match based on what you have on hand. This makes your dish even more fun and tasty! The best way to reheat this dish is on the stove. Just place the skillet on medium heat. Stir the dish gently to warm it evenly. You can add a splash of water or broth to keep it moist. If you prefer, you can heat it in the microwave as well. Just cover it to avoid drying out the food. Heat in short bursts, stirring in between. You can make this recipe ahead of time easily. Just cook the chicken and veggies as directed. Allow the dish to cool completely before storing it in an airtight container. Keep it in the fridge for up to three days. When you're ready to eat, simply reheat it using the methods above. This makes meal prep a breeze and keeps your weeknight dinners stress-free. For the full recipe, check out the Chicken and Summer Squash Skillet Delight! This blog post covered an easy skillet recipe filled with vibrant ingredients like chicken, squash, and peppers. We discussed how to prepare, sauté, and combine these items for a tasty meal. Remember, tips for cooking and serving can elevate your dish. Try different proteins or seasonal veggies for a fresh twist. Follow the storage advice to keep leftovers tasty. Cooking can be fun and simple. Enjoy making this dish your own!

Chicken and Summer Squash Skillet Savory Delight

Are you ready to whip up a quick and tasty meal? This Chicken and Summer Squash Skillet is a perfect

- 4 medium yellow squash - 1 medium red bell pepper - 1 medium onion - 2 cloves garlic For a tasty sauté, you need some key ingredients. Start with four medium yellow squash. These are bright and full of flavor. Next, use one medium red bell pepper. It adds sweetness and color. You will also need one medium onion. This gives a nice savory taste. Finally, two cloves of garlic will boost the flavor even more. - Olive oil and butter - Dried oregano and chili flakes - Salt and pepper to taste To make your dish pop, use olive oil and butter. This mix gives a rich taste. Then, add dried oregano and chili flakes for extra flavor. The oregano adds a nice earthiness, while the chili flakes give a hint of heat. Don’t forget to season with salt and pepper to taste. This step helps to bring all the flavors together. - Fresh parsley - Suggestions for pairing dishes For a pretty touch, use fresh parsley as a garnish. It adds color and freshness. You can serve the sautéed yellow squash next to grilled chicken or fish. This pairing makes for a well-rounded meal. Try serving it in a bright bowl to make it more appealing. A nice presentation can make any dish look gourmet. If you want to check out the full recipe, visit the [Full Recipe]. To start, wash the yellow squash under cool water. Cut off both ends. Now, slice the squash into thin rounds. Each slice should be about a quarter-inch thick. This size helps them cook evenly. Next, grab your onion. Peel it and slice it thinly. You want the pieces to be similar in size to the squash. This way, they cook at the same rate. For the garlic, take two cloves and peel them. Use a knife to mince them finely. This brings out the rich flavor. Now, take your red bell pepper. Cut it in half, remove the seeds, and dice it into small pieces. Now it’s time to heat your skillet. Set it on medium heat. Add one tablespoon of olive oil and one tablespoon of butter. Let them melt together. You want them to shimmer, but not smoke. Once hot, toss in the sliced onions and minced garlic. Sauté these for about three to four minutes. You want the onions to turn soft and smell great. This builds a nice base flavor. Now, add in the diced bell pepper. Stir it around for two to three minutes. The goal is to soften it while keeping its bright color. Next, it’s time for the star of the dish: the yellow squash. Add those lovely rounds to the skillet. Sprinkle in a teaspoon of dried oregano and chili flakes for some heat. Season with salt and pepper to taste. Stir everything well so the squash is covered with seasonings. Cook this mixture for five to seven minutes. You want the squash to be tender but still have a little crunch. Taste it and adjust the seasoning if needed. Once done, feel free to garnish with fresh parsley for a pop of color. Enjoy your sautéed yellow squash as a tasty side. For the full recipe, check out the details provided above! - Maintaining the right heat: Start with medium heat. Too high can burn your squash. Keep an eye on it to ensure even cooking. - Achieving the perfect crunch: Cook the squash for about 5-7 minutes. You want it tender but still a bit firm. Stir occasionally for even cooking. - Adjusting spice levels with chili flakes: Start with a small pinch of chili flakes. You can add more if you like it spicy. Taste as you go to find your perfect level. - Balancing flavors with salt and pepper: Add salt and pepper at the end. This helps enhance all the flavors. Remember, a little goes a long way. - Serving suggestions for gatherings: Present the sautéed squash in a colorful bowl. It brightens up the table and invites guests to dig in. - Ideal serving dishes for aesthetics: Use a shallow dish or platter. This allows the colors to shine. Garnish with fresh parsley for a pop of green. {{image_4}} You can switch up the vegetables in this dish. Try using zucchini or carrots for a fresh twist. These veggies cook well and add flavor. You can also mix in some spinach or kale for extra greens. For herbs, consider using thyme or basil. They bring unique tastes to your sauté. This recipe fits many diets. It is naturally vegetarian and vegan. Just skip the butter or use a plant-based alternative. If you need gluten-free options, this dish is perfect. All the ingredients are gluten-free, so enjoy with confidence! If you want a different style, try roasting the squash. Toss the sliced squash with olive oil, salt, and your favorite spices. Roast at 400°F for about 20 minutes. You’ll get a lovely caramelized flavor. Grilling is another fun option. Place the squash on a grill for a smoky taste. Just brush it with olive oil and season it up. Grill for about 5-7 minutes on each side. This adds a nice char and enhances the flavor. For the full recipe, check out the details above. To store sautéed yellow squash, let it cool first. Place it in an airtight container. This keeps it fresh and tasty. You can refrigerate it for up to three days. For best quality, eat it within two days. When reheating, keep the squash’s texture in mind. The best way is to use a skillet over low heat. Stir it gently until warm. This method helps keep the squash crunchy. You can also use the microwave. Heat it in short bursts, stirring often. This way, you avoid overcooking. If you want to freeze sautéed yellow squash, make sure it is cool. Place it in a freezer-safe bag. Remove as much air as possible. It can last up to three months in the freezer. When using thawed squash, try adding it to soups or casseroles. It blends well and adds great flavor. To cut yellow squash well, use a sharp knife. First, wash the squash and trim the ends. Place it on a cutting board. Cut the squash in half lengthwise. Then, slice it into thin rounds. This shape cooks quickly and evenly. Always keep your fingers tucked in while cutting. This helps avoid slips and cuts. Yes, you can add other veggies! Some great options include bell peppers, zucchini, and mushrooms. They all pair well with yellow squash. For a colorful dish, try adding carrots or cherry tomatoes. Just make sure to cut them in similar sizes. This ensures even cooking and adds flavor. Yellow squash cooks fast. It usually takes about 5-7 minutes to become tender. You want it to be soft, but still have a slight crunch. Look for a bright yellow color and a slightly translucent look. Use a fork to test it. If it pierces easily, it’s done. Check often to avoid overcooking. Enjoy your sautéed yellow squash with confidence! For the complete recipe, see [Full Recipe]. Sautéed yellow squash is simple and tasty. We explored the essential ingredients, from squash to seasonings. I shared tips on preparing, cooking, and presenting your dish. You can even try variations to suit your tastes. Plus, I covered how to store leftovers for future meals. Embrace this easy recipe to impress friends and family. Enjoy your cooking and make every bite count!

Sautéed Yellow Squash Flavorful and Easy Recipe

Are you looking for a quick and tasty side dish? Sautéed yellow squash is not only simple to make but

Older posts
Newer posts
← Previous Page1 … Page37 Page38 Page39 … Page86 Next →

dsad

© 2026 lazychefmagic • Built with GeneratePress

Our Policies

  • Copyright Policy
  • Cookie Policy
  • GDPR Policy
  • Privacy Policy
  • Disclaimer
  • Terms Of Use

More Information

  • Home
  • About
  • Contact
  • Appetizers
  • Dessert
  • Dinner
  • Drinks
©2026, lazychefmagic About Back To Top