Skip to content
DisclaimerTerms Of UseGDPR PolicyCookie Policy

lazychefmagic

  • Home
  • Drinks
  • Appetizers
  • Dinner
  • Dessert
  • About
  • Contact
  • Privacy Policy
DisclaimerTerms Of UseGDPR PolicyCookie Policy

NO-ING-IMG

- 1 pound fresh okra - 2 cups distilled white vinegar - 1 cup fresh water - 3 tablespoons granulated sugar - 2 tablespoons kosher salt - 4 cloves garlic, thinly sliced - 2 teaspoons crushed red pepper flakes - 1 teaspoon mustard seeds - 1 teaspoon black peppercorns - 1 teaspoon dill seeds - Fresh dill, chopped - 2-4 fresh jalapeños, sliced into rings To make spicy refrigerator pickled okra, gather your ingredients first. The fresh okra is key. Choose vibrant pods; they should feel firm. You will also need distilled white vinegar and fresh water for the brine. These ingredients create a tangy base that complements the okra well. Next, you’ll need sugar and salt. They balance the acidity of the vinegar. Garlic adds depth to the flavor. You can also include crushed red pepper flakes for heat. The mustard seeds and black peppercorns give a nice crunch and extra flavor. Dill seeds add a fresh taste, while fresh jalapeños let you adjust the heat to your liking. If you want an extra touch, add chopped fresh dill. It brings an herbal note that enhances the dish. With these ingredients ready, you're set for a fun and flavorful cooking experience. For the full recipe, check out Zesty Refrigerator Pickled Okra 🥒. Enjoy making this delicious side dish! Start by washing the okra well under cold water. This step is key to getting rid of dirt and grit. Trim the tops carefully, but keep the pods whole. Maintaining the shape helps the okra stay firm and crunchy when you pickle them. Whole okra looks great in the jar and adds to the flavor, too. For the brine, gather these main ingredients: - 2 cups distilled white vinegar - 1 cup fresh water - 3 tablespoons granulated sugar - 2 tablespoons kosher salt In a medium saucepan, mix the vinegar, water, sugar, and salt. Heat the mixture over medium heat. Stir until the sugar and salt dissolve fully. This step is crucial because it creates a balanced flavor. Once the mixture is clear, remove it from the heat and let it cool slightly. Before packing, ensure your jars are clean and sterilized. This helps keep your pickles fresh. Begin layering the okra in each jar. Place a layer of okra at the bottom and then add the sliced jalapeños. If you like, sprinkle some fresh dill on top. Repeat the layers until the jars are full but not too tight. This method allows the brine to soak in well. After packing, carefully pour the cooled brine over the okra until they are fully submerged. Leave about half an inch of space at the top of each jar. This space is important for the brine to expand as it cools. For the complete process, refer to the Full Recipe. To get the heat just right, start with the jalapeños. You can use 2 to 4 sliced jalapeños. Fewer jalapeños will give you a milder taste. If you love heat, add more. You can also boost the spice using other ingredients. Try adding cayenne pepper or a pinch of chili powder. These spices blend well with the okra and give a nice kick. Store your pickled okra in clean, well-sealed jars. This keeps them fresh and tasty. Place them in the fridge right after sealing. Proper storage helps maintain flavor and crunch. You can enjoy your pickled okra for about two weeks. After that, they may lose some taste and texture. There are many fun ways to serve pickled okra. They taste great on their own as a quick snack. You can also add them to a charcuterie board for color and crunch. Try pairing them with sandwiches or burgers for a tangy twist. They also add a nice crunch to salads. Enjoy experimenting with different meals! {{image_4}} You can adjust the heat in your pickled okra. For a mild taste, use fewer jalapeños. Try only one or two sliced jalapeños. This way, you get flavor without too much heat. If you like spicy, add more jalapeños or even a chopped habanero. You can also play with crushed red pepper flakes. Use more for extra kick or less if you prefer mild. Adding herbs can boost the flavor of your pickled okra. Fresh thyme or basil works well. These herbs add a nice twist to the taste. You can also think about mixing in other veggies. Carrots, cauliflower, or even radishes can add color and crunch. Experiment with what you have on hand. This makes every batch unique and your own. Refrigerator pickling is quick and easy. It allows you to enjoy your okra faster. Traditional canning takes longer and needs more tools. With refrigerator pickling, just let the jars sit in the fridge. For quick pickling, try heating your brine. This helps the flavors blend faster. Pour it over the okra while still warm. You’ll get tasty pickled okra in no time! For the complete process, check the Full Recipe. For the best taste, use glass jars with tight-fitting lids. This keeps your spicy refrigerator pickled okra fresh. A quart-sized jar is perfect for this recipe. Store the jars in the fridge at a temperature below 40°F. This cool environment helps maintain the crunch and flavor of the okra. You can keep pickled okra in the fridge for about three weeks. After that, the taste may fade. Watch for signs of spoilage. If you see mold or feel a slimy texture, it’s best to toss it out. Always trust your senses; they guide you well in the kitchen. If you want to freeze your pickled okra, use freezer-safe containers. Leave some space at the top to allow for expansion. When you thaw it, the texture may change. It might lose some crunch, but the flavor will still be good. If you prefer a fresh crunch, enjoy it straight from the fridge. For the full recipe, check out Zesty Refrigerator Pickled Okra 🥒. You should wait at least 24 hours for the flavors to blend. The longer you wait, the more intense the flavor will be. I often let mine sit for two to three days. This extra time really enhances the taste. Using frozen okra is not ideal. It can change the taste and texture. Frozen okra often becomes mushy when thawed. This might not give you the crisp bite you want in pickled okra. Fresh okra is best for this recipe. Leftover brine is a treasure! You can use it to pickle other veggies like carrots or radishes. It also makes a great base for salad dressings. I love adding it to marinades for meats or seafood. The brine adds a nice zing! Absolutely! You can add sliced carrots, bell peppers, or even green beans. These add new flavors and colors to your pickles. Just keep in mind that different veggies have different pickling times. For the full recipe, check out Zesty Refrigerator Pickled Okra 🥒. In this post, we covered everything about making pickled okra. You learned about the main ingredients, spices, and optional items. I shared step-by-step instructions for brine, packing jars, and tips for spice levels. We also explored variations and storage best practices. Pickling okra is fun and simple. With practice, you can find your favorite mix of flavors. Enjoy your delicious pickled okra as a snack or side dish!

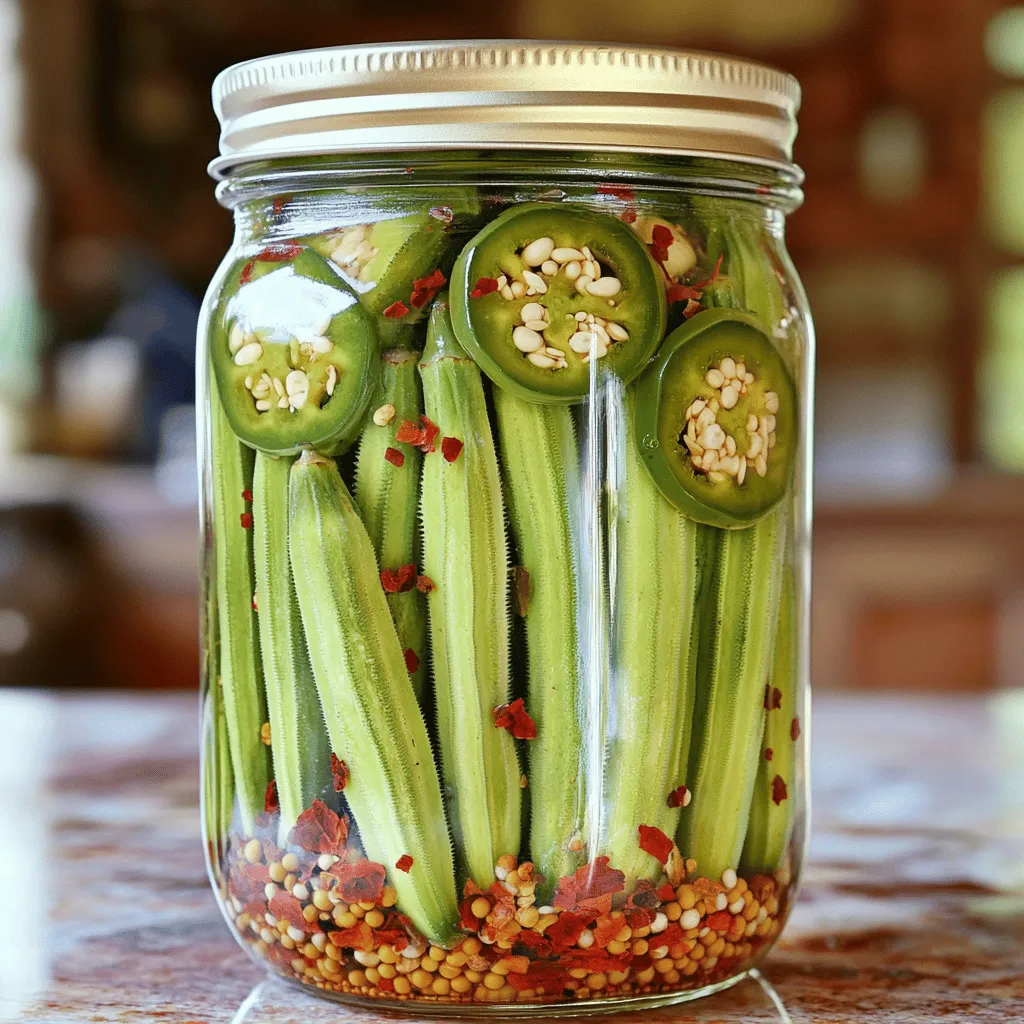
Spicy Refrigerator Pickled Okra Flavorful Side Dish

Are you craving a bright, zesty side dish? Look no further than spicy refrigerator pickled okra! This simple recipe adds

- 1 cup freshly grated zucchini - 1 cup all-purpose flour - 1/2 cup unsweetened cocoa powder - 1 cup granulated sugar - 1/2 cup packed brown sugar - 1/2 cup vegetable oil - 2 large eggs - 1 teaspoon vanilla extract - 1/2 teaspoon baking powder - 1/2 teaspoon baking soda - 1/4 teaspoon salt - 1/2 cup semi-sweet chocolate chips (optional) I love using fresh zucchini in these brownies. It adds moisture and a subtle flavor. Make sure to grate the zucchini finely. This helps it mix well into the batter. Gather all the ingredients before you start. This makes your cooking process smooth. - Baking pan (8x8 inches) - Mixing bowls - Whisk and spatula A good baking pan is key for even cooking. I like to use an 8x8-inch pan. It fits the recipe perfectly. Mixing bowls should be large enough to hold all your ingredients. The whisk helps combine everything smoothly. The spatula is great for folding in the zucchini and chocolate chips. Make sure your tools are ready. This will help you focus on making your brownies delicious. If you want the full recipe, check out the section above. - Preheat your oven to 350°F (175°C). - Grease an 8x8-inch baking pan and line it with parchment paper. - In a bowl, whisk together: - 1 cup all-purpose flour - 1/2 cup unsweetened cocoa powder - 1/2 teaspoon baking powder - 1/2 teaspoon baking soda - 1/4 teaspoon salt - In a larger bowl, mix: - 1 cup granulated sugar - 1/2 cup packed brown sugar - 1/2 cup vegetable oil - Whisk until smooth. - Add in 2 large eggs, one at a time. Mix well after each. - Finally, stir in 1 teaspoon of vanilla extract. - Gradually fold the dry mixture into the wet mixture until just combined. - Gently fold in: - 1 cup freshly grated zucchini - 1/2 cup semi-sweet chocolate chips, if desired. - Pour the batter into the prepared pan and spread it evenly. - Bake for 25-30 minutes. Check for doneness by inserting a toothpick into the center. It should have a few moist crumbs. - Let the brownies cool in the pan for 10 minutes. - Carefully lift them out using the parchment paper and transfer to a wire rack. - Slice into squares and enjoy your delicious brownies! For the full recipe, check the recipe section above. To keep your zucchini brownies moist, use freshly grated zucchini. The water content in the zucchini makes a big difference. Grate it right before mixing to avoid losing moisture. Remember, don’t overmix the batter. Mix just until the dry and wet ingredients come together. Overmixing can make your brownies dense and dry. Check your brownies for doneness using a toothpick. Insert it into the center; it should come out with a few moist crumbs. For a chewier texture, adjust the baking time slightly. If you like them fudgier, take them out a minute or two early. Every oven is different, so keep an eye on them. Dust your brownies with powdered sugar or cocoa powder for a nice touch. This simple step makes them look fancy. For an extra treat, serve them with a scoop of ice cream or a dollop of whipped cream. This pairing adds creaminess and takes your brownies to the next level. For the full recipe, check out the Moist Zucchini Brownies section above! {{image_4}} You can make your brownies healthier with a few easy swaps. First, replace granulated sugar with coconut sugar or a sugar substitute. This change keeps the sweetness but adds a hint of caramel flavor. Next, use whole wheat flour instead of all-purpose flour. Whole wheat flour boosts fiber and nutrients, making your brownies more filling and nutritious. Want to kick up the flavor? Try adding nuts like walnuts or pecans. They add a nice crunch and a rich taste. You can also mix in spices like cinnamon or espresso powder. Cinnamon gives warmth, while espresso deepens the chocolate flavor. Both will make your brownies even more delightful. If you want a vegan version, I have great tips for you. Replace eggs with flaxseed meal mixed with water. This mix binds the ingredients just like eggs do. For the oil, use a plant-based option like coconut or olive oil. These changes keep the brownies moist and delicious while being completely vegan. For the full recipe and more details, check the [Full Recipe]. Store your brownies in an airtight container. Keep them at room temperature. They stay fresh for up to 3 days. This way, you can enjoy them right after baking. If you want to keep them longer, refrigerate the brownies. They will last for up to a week. You can also freeze them. Wrap each brownie in plastic wrap, then place them in a freezer bag. They can stay frozen for up to 3 months. To enjoy your brownies warm, use the microwave. Heat them for a few seconds until they are warm. If they are frozen, let them thaw first. Allow them to come to room temperature before serving. This helps restore their delicious texture. Enjoy your brownies anytime! To make zucchini brownies less dense, adjust the ingredient ratios. Use less flour and sugar. This change will lighten the texture. You can also add a bit more zucchini. It adds moisture without adding weight. Start with a half cup of flour instead of a full cup. Also, ensure you don’t overmix the batter. Overmixing can create a denser brownie. Yes, you can replace zucchini with other vegetables. Carrots work well and add a nice flavor. Sweet potatoes also add moisture and a hint of sweetness. You can even use beets, which give a rich color and taste. Each vegetable will change the flavor a bit, but they bring moisture too. Just make sure to grate or puree them first. To check if your brownies are done, look for a few signs. The edges should pull away from the pan slightly. The top will look set and not shiny. Use a toothpick inserted in the center. It should come out with a few moist crumbs attached, but no wet batter. If you see wet batter, bake a few more minutes. If you don't have cocoa powder, you can use carob powder. Carob has a different taste but works well. You can also use Dutch-processed cocoa if you have it. Just remember, it will change the flavor a bit. You can also try unsweetened chocolate, melted down. Just adjust the sugar since it's sweeter. You can absolutely add mix-ins to your brownies! Consider nuts like walnuts or pecans for crunch. Chocolate chips add extra richness. Dried fruits like cranberries or cherries offer a pop of flavor. You can also sprinkle in some spices, like cinnamon or espresso powder. This adds depth and makes the brownies unique. For these moist zucchini brownies, gather the following ingredients: - 1 cup freshly grated zucchini (approximately 1 medium zucchini) - 1 cup all-purpose flour - 1/2 cup unsweetened cocoa powder - 1 cup granulated sugar - 1/2 cup packed brown sugar - 1/2 cup vegetable oil - 2 large eggs - 1 teaspoon vanilla extract - 1/2 teaspoon baking powder - 1/2 teaspoon baking soda - 1/4 teaspoon salt - 1/2 cup semi-sweet chocolate chips (optional) These ingredients work together to create the perfect brownie texture. The zucchini adds moisture without a strong flavor. You won’t even notice it’s there! To make your brownies, you will need: - Baking pan (8x8 inches) - Mixing bowls - Whisk and spatula Using the right tools helps you mix well and bake evenly. A good baking pan ensures your brownies cook just right. Start by preheating your oven to 350°F (175°C). While the oven heats, prepare your baking pan. Lightly grease it and line the bottom with parchment paper. This step makes it easy to remove your brownies later. In a medium mixing bowl, whisk together the flour, cocoa powder, baking powder, baking soda, and salt. This mix brings out the rich chocolate flavor in your brownies. Set this bowl aside for later use. In a larger mixing bowl, combine the granulated sugar, brown sugar, and vegetable oil. Whisk until smooth and shiny. Then, crack in the eggs one at a time. Make sure to whisk well after adding each egg. Finally, stir in the vanilla extract. This blend creates a sweet base for your brownies. Gradually add the dry ingredients to the wet mix. Use a spatula to fold them together gently. Be careful not to overmix; just combine them until you see no more dry flour. Next, fold in the freshly grated zucchini and optional chocolate chips. This adds a fun texture and chocolatey goodness. Pour the batter into the lined baking pan. Use the spatula to spread it evenly. Place the pan in the preheated oven and bake for 25-30 minutes. To check if they are done, insert a toothpick into the center. It should come out with a few moist crumbs, not wet batter. After baking, let the brownies cool in the pan for about 10 minutes. Then, lift them out using the parchment paper. Transfer them to a wire rack to cool completely. Once cooled, slice into squares for serving. For a sweet finish, dust the cooled brownies with powdered sugar or cocoa powder. Enjoy them plain or with a scoop of ice cream for an extra treat. Try this easy recipe and enjoy the rich taste of moist zucchini brownies! You can now whip up delicious zucchini brownies in no time. We covered the key ingredients, the right tools, and detailed steps to guide you. Plus, I shared tips for moisture and storage. Whether you want to switch up the recipe or add your favorite touches, the options are endless. Enjoy this tasty treat, and impress your friends and family with your baking skills! Happy baking!

Moist Zucchini Brownies Deliciously Easy Recipe

Are you ready to indulge in a guilt-free treat? My Moist Zucchini Brownies recipe combines rich chocolate flavor with the

To make your no-bake tiramisu truffles, gather these key ingredients: - 1 cup mascarpone cheese - 1 cup cream cheese, softened at room temperature - 1/2 cup powdered sugar - 1 cup ladyfinger cookies, finely crushed - 1/2 cup brewed coffee, cooled to room temperature - 1 tablespoon cocoa powder (for coating) To add extra flavor, consider these optional ingredients: - 1 tablespoon espresso powder (for a richer coffee flavor) - Dark chocolate shavings (for garnish) If you can't find mascarpone cheese, you can use cream cheese as a substitute. Use a mixture of cream cheese and sour cream for a creamy texture. If you want a lighter version, try Greek yogurt instead of cream cheese. For a gluten-free option, look for gluten-free ladyfinger cookies or use crushed gluten-free cookies. {{ingredient_image_2}} Start with a big bowl. Add 1 cup of mascarpone cheese and 1 cup of cream cheese. Make sure the cream cheese is soft. Next, add in 1/2 cup of powdered sugar. Use a hand mixer to beat this mix. Set your mixer on medium speed. Keep mixing until it is smooth and creamy. You want no lumps in this mix. Now, take 1 cup of ladyfinger cookies and crush them finely. Gradually add this to your creamy mix. Stir well to blend it in. Then, slowly drizzle in 1/2 cup of cooled brewed coffee. Mix as you pour. If you want a stronger coffee taste, add 1 tablespoon of espresso powder. Keep mixing until the dough is firm but a bit sticky. Once your mix is ready, it’s time to form the truffles. Wash your hands, then scoop out about 1 tablespoon of the mixture. Roll it gently into a smooth ball. Place each truffle on a baking sheet lined with parchment paper. Make sure to leave space between them. After forming all the truffles, put the baking sheet in the fridge. Let them chill for at least 30 minutes. This will help them firm up nicely. When the truffles are firm, take them out of the fridge. For a rich finish, roll each truffle in cocoa powder. Make sure they get a nice coating. This gives them that classic tiramisu flavor. For a special touch, sprinkle dark chocolate shavings on top. This adds a beautiful look and extra taste to your truffles. Enjoy making these delightful treats! To make perfect tiramisu truffles, start with room-temperature cheese. This helps them mix smoothly. Use a hand mixer for a creamy texture. Beat the mascarpone and cream cheese until they are smooth. Gradually add the crushed ladyfingers. This step gives the truffles their unique texture. When adding coffee, pour slowly to avoid a runny mix. The dough should be firm but slightly sticky. One common mistake is using cold cheese. Cold cheese makes it hard to mix. Another mistake is not chilling the truffles long enough. If they are too soft, they won't hold their shape. Also, avoid over-mixing; it can make the truffles dense. Lastly, don’t skip the cocoa powder coating. It adds flavor and a nice look. For a lovely presentation, arrange the truffles on a stylish plate. A circular pattern looks nice. Lightly dust the plate with cocoa powder for an elegant touch. You can also add dark chocolate shavings on top for a special finish. Serve with a side of brewed coffee to enhance the flavor. This makes a delightful pairing for your guests. Pro Tips Chill the Ingredients: To achieve a firmer texture for your truffles, consider chilling the mascarpone and cream cheese for about 10 minutes before mixing. This helps them combine more easily. Customize the Flavor: Feel free to experiment with flavored coffee or liqueurs such as Kahlúa or Amaretto for a unique twist on the traditional tiramisu taste. Use Quality Ingredients: The quality of the mascarpone and coffee significantly affects the flavor of these truffles. Opt for fresh, high-quality brands for the best results. Make Ahead: These truffles can be prepared a day in advance. Store them in an airtight container in the refrigerator, allowing the flavors to meld beautifully overnight. {{image_4}} You can enhance your tiramisu truffles by adding liqueurs. Try adding 1-2 tablespoons of coffee liqueur. This adds depth and richness. If you like a fruity twist, use orange liqueur instead. Both options brighten the flavor. Making these truffles vegan is easy. Swap the mascarpone and cream cheese for vegan cream cheese. Use a plant-based whipped cream instead of regular cream. For gluten-free, choose gluten-free ladyfinger cookies. Always check labels to ensure they fit your diet. You can make these truffles festive with seasonal twists. For winter holidays, add a pinch of nutmeg or cinnamon to the mix. In summer, try adding fresh fruit puree for a refreshing touch. Each season brings a new chance to create! Store your no-bake tiramisu truffles in an airtight container. Use parchment paper between layers to avoid sticking. Keep the container in the fridge for the best taste. This helps maintain their creamy texture and flavor. These truffles last about one week in the fridge. If you want to keep them longer, you can freeze them. In the freezer, they stay good for up to three months. Make sure to wrap them well in plastic wrap and then place them in a freezer-safe bag. To thaw frozen truffles, move them to the fridge for several hours or overnight. Avoid thawing them at room temperature. This keeps them from becoming too soft. Enjoy them cold for the best taste experience! Yes, you can use regular cream cheese. It will make the truffles a bit tangier. If you want a creamier texture, use half mascarpone and half cream cheese. This mix keeps the rich taste of tiramisu. These truffles will last about five days in the fridge. Store them in an airtight container. This keeps them fresh and tasty. Yes, you can make these truffles ahead of time. They taste even better after chilling overnight. Just keep them in the fridge until you're ready to serve. If you can't find ladyfinger cookies, use sponge cake or graham crackers. Crush them finely and mix them in. This keeps the texture light and airy. To enhance the coffee flavor, use strong brewed coffee. Adding espresso powder boosts the taste too. Make sure the coffee is cooled before mixing it in. This helps blend the flavors well. You now have all the tools to make delicious truffles. We covered ingredients, mixing steps, and tips for success. Remember, variations can make your truffles stand out. Store them properly to enjoy later. With practice, you’ll avoid common mistakes and impress everyone with your treats. I hope you feel ready to create your own tasty truffles. Enjoy the process and have fun!

No-Bake Tiramisu Truffles Delightful and Easy Treat

If you’re in the mood for something sweet but don’t want to bake, you’re in the right place! These No-Bake

To make a tasty savory tomato pie, you need simple, fresh ingredients. Here’s what you will need: - 2 cups fresh ripe tomatoes, thinly sliced - 1 cup mozzarella cheese, shredded - 1 cup ricotta cheese - 1/2 cup grated Parmesan cheese - 1/4 cup fresh basil, finely chopped - 1 garlic clove, finely minced - 1 teaspoon dried oregano - 1 teaspoon sea salt - 1/2 teaspoon freshly ground black pepper - 1 pre-made pie crust (store-bought or homemade) - 2 tablespoons extra virgin olive oil These ingredients come together to create layers of flavor. The tomatoes bring juiciness, while the cheeses add creaminess. Fresh herbs like basil give a bright taste. If you can't find fresh tomatoes, use canned tomatoes. Just drain them well. You can swap mozzarella for provolone or gouda for a twist. If you want a lighter option, try low-fat ricotta. For a vegan version, use plant-based cheeses and a vegan pie crust. When choosing tomatoes, look for ones that feel heavy and smell sweet. Farmers' markets often have the best options. For herbs, pick leaves that are bright green. Avoid yellow or brown spots. Buy cheese from local dairies or trusted brands for quality. Fresh ingredients make a big difference in taste! Start by preheating your oven to 375°F (190°C). This ensures that the pie bakes evenly. A hot oven helps the crust turn golden brown and crispy. In a large bowl, mix together the ricotta cheese, half of the mozzarella, and Parmesan cheese. Add chopped basil, minced garlic, oregano, sea salt, and black pepper. Stir until it's creamy and well-blended. This mix is the heart of your pie, adding rich flavor. Take your pre-made pie crust and place it in a 9-inch pie dish. Crimp the edges for a nice look. Layer half of the sliced tomatoes on the bottom. Spread the cheese mixture evenly over the tomatoes. Then, add the rest of the sliced tomatoes on top. Sprinkle the remaining mozzarella cheese over everything. Drizzle with olive oil for extra flavor. Put the pie in the oven and bake for 30-35 minutes. Look for bubbly, golden cheese and a nicely browned crust. When done, take it out and let it cool for about 10 minutes. This cooling time makes it easier to slice. For the full recipe, check the details above. Enjoy your delicious creation! To make a great pie crust, focus on cold ingredients. Use cold butter or shortening. This keeps the crust flaky. If you use a store-bought crust, check the package for tips. A bit of extra flour on your surface helps prevent sticking. Roll the dough evenly for a nice shape. If it cracks, just press it back together. Remember to crimp the edges for a beautiful look. Fresh herbs bring life to your savory tomato pie. Try using basil, thyme, or oregano. For a burst of freshness, add finely chopped herbs into the cheese mixture. You can also sprinkle herbs on top before baking. This will create a lovely aroma as it cooks. Don’t be afraid to experiment. Each herb adds a unique taste. Sometimes pies can be tricky. If your crust is soggy, try pre-baking it for a few minutes. This helps it cook better. If your cheese mixture is too runny, add a bit more ricotta or Parmesan. This thickens it up. If the top browns too fast, cover it with foil. This keeps the heat even. Always trust your instincts and adjust as needed. You want it to be just right. {{image_4}} You can boost your savory tomato pie with veggie goodness. Add spinach or kale for a healthy twist. These greens bring color and nutrients. You can also try zucchini or bell peppers. Slice them thinly and layer them with the tomatoes. This adds flavor and makes your pie more filling. If you need a gluten-free option, you can find great pre-made crusts. Many stores offer gluten-free pie crusts made from rice flour or almond flour. You can also make your own using gluten-free flour blends. Just follow a simple pie crust recipe. Be sure to press it into the dish well to hold the filling. Mixing flavors can make your savory pie even better. How about adding a bit of pesto? Spread a thin layer under the cheese. You can also try sun-dried tomatoes for extra tang. For a spicy kick, sprinkle in some red pepper flakes. These additions create a unique taste adventure. Feel free to get creative! To keep your savory tomato pie fresh, let it cool first. Cover the pie with plastic wrap or aluminum foil. This helps keep it moist. You can also store it in an airtight container. Place it in the fridge. Leftover pie will last for about three to four days. When you want to enjoy the pie again, reheat it well. Preheat your oven to 350°F (175°C). Place the pie on a baking sheet. Cover it loosely with foil to prevent the crust from burning. Heat for about 15 to 20 minutes. This method keeps the crust crispy and the filling warm. You can also use a microwave, but it may make the crust soft. If you have more pie than you can eat, freezing is great! Wrap each slice tightly in plastic wrap. Then, place the wrapped slices in a freezer bag. Be sure to remove as much air as possible. You can freeze the pie for up to three months. To reheat, thaw it in the fridge overnight. Then follow the reheating tips for the best taste. Enjoy your savory tomato pie anytime! For the full recipe, check out the earlier section. Yes, you can use canned tomatoes. They work well if fresh tomatoes are not in season. Just drain the liquid before using. This helps keep your pie from getting soggy. Canned tomatoes often have great flavor, too. However, fresh tomatoes give a better texture and taste. Savory Tomato Pie pairs well with many sides. A crisp green salad makes a nice balance. You can also serve it with roasted vegetables. For a heartier meal, try adding grilled chicken or a light soup. These options enhance the flavors of your pie. Baking the pie takes about 30 to 35 minutes. You'll know it's done when the cheese bubbles and turns golden. The crust should also look golden brown. Make sure to watch it closely in the last few minutes to avoid burning. You can prepare the pie a day before. Simply assemble it and cover it tight. Store it in the fridge until you're ready to bake. This makes dinner easy! Just add a few extra minutes to the baking time if it's cold from the fridge. Enjoy the flavors of your Savory Tomato Pie with ease. For the full recipe, please refer to the recipe section. Savory tomato pie combines fresh ingredients, simple steps, and clever tips for success. You learned about key ingredients, how to layer flavors, and methods for perfecting your crust. Remember to explore variations, like gluten-free options and added veggies. This dish can be a crowd-pleaser and a weeknight staple. Keep leftovers fresh, and enjoy them later. With a few tweaks, you can make this pie your own, full of flavor and joy. Make it, share it, and savor each bite.

Savory Tomato Pie Flavorful and Easy Recipe Guide

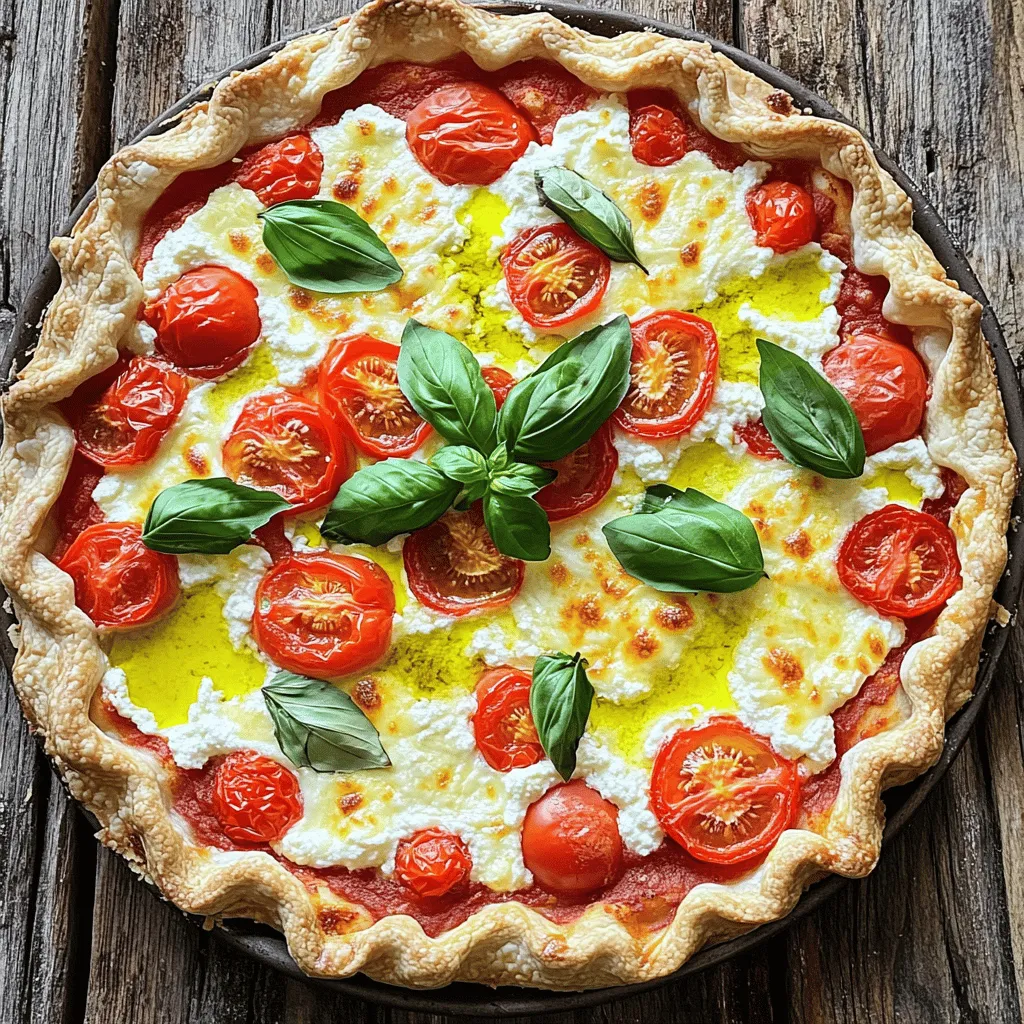
Welcome to your new favorite dish: Savory Tomato Pie! This recipe packs a delicious punch, perfect for any meal. I’ll

- 1 cup grated zucchini (approximately 1 medium zucchini) - 1/2 cup all-purpose flour - 1/2 cup unsweetened cocoa powder - 1/2 teaspoon baking powder - 1/4 teaspoon baking soda - 1/4 teaspoon salt - 1/2 cup granulated sugar - 1/4 cup packed brown sugar - 1/3 cup vegetable oil - 1 teaspoon vanilla extract - 1 large egg - 1/2 cup chocolate chips (optional) - 1/4 cup chopped walnuts (optional) Gather these items before you start. The zucchini gives the brownies moisture. This makes them rich and fudgy. Use fresh zucchini for the best flavor. The cocoa powder adds deep chocolate taste. Make sure it is unsweetened for balance. The sugars sweeten the brownies nicely. They also help create that chewy texture we love. Do not skip the baking powder and baking soda. They help the brownies rise. Salt enhances all the flavors, so don’t leave it out. You can add chocolate chips and nuts if you wish. They boost the flavor and add a nice crunch. Once you have everything ready, you can move on to making these tasty treats. Check out the Full Recipe to see how to combine these ingredients for the perfect brownie. 1. Preheat your oven to 350°F (175°C). 2. Line an 8x8 inch baking pan with parchment paper, leaving some overhang. This helps you lift the brownies out later. 3. In a medium bowl, mix 1 cup of grated zucchini with 1/2 cup of granulated sugar and 1/4 cup of brown sugar. Let it rest for 5 minutes. This step helps release moisture from the zucchini. 4. In another bowl, stir together 1/2 cup of all-purpose flour, 1/2 cup of unsweetened cocoa powder, 1/2 teaspoon of baking powder, 1/4 teaspoon of baking soda, and 1/4 teaspoon of salt. 1. To the zucchini mixture, add 1/3 cup of vegetable oil, 1 teaspoon of vanilla extract, and 1 large egg. Mix until smooth. 2. Gradually add the dry ingredients to the wet mixture. Stir gently until just combined. Be careful not to overmix. 3. If you like, fold in 1/2 cup of chocolate chips and 1/4 cup of chopped walnuts for extra texture. 1. Pour the batter into your prepared baking pan. Spread it evenly. 2. Bake for 25 to 30 minutes. Check for doneness by inserting a toothpick in the center. It should come out with a few moist crumbs. 3. Allow the brownies to cool in the pan for 10 minutes. Use the parchment paper to lift them out. Cool completely on a wire rack before cutting into squares. For the complete recipe details, refer to the Full Recipe section. Enjoy your rich and fudgy zucchini brownies! To make moist brownies, I focus on two key steps. First, I measure my ingredients carefully. If you use too much flour, your brownies can turn dry. Use a spoon to fluff the flour, then spoon it into the measuring cup. Level it off with a knife for accuracy. Second, I avoid overmixing the batter. Once you add dry ingredients, stir just until combined. Overmixing can add too much air and dry out the brownies. To make my brownies healthier, I often substitute oils or sweeteners. For oil, I may use applesauce or coconut oil. Both options can keep the brownies moist while reducing fat. For sweeteners, I like using honey or maple syrup instead of sugar. I also add extra veggies or nuts. Shredded carrots or beets blend well with the zucchini. Chopped nuts add a nice crunch and healthy fats. When serving, I love to get creative with toppings. A light dusting of powdered sugar adds a sweet touch. For a richer dessert, I serve the brownies warm with a scoop of vanilla ice cream. The melting ice cream pairs perfectly with the fudgy texture of the brownies. For the full recipe, check out the delicious Chocolate Zucchini Bliss Brownies. {{image_4}} You can make zucchini brownies even more exciting. Adding spices like cinnamon gives warmth. A bit of espresso powder adds depth to the chocolate flavor. If you want a different taste, swap cocoa powder for carob powder. Carob has a milder, sweeter flavor. It’s a great option if you want to avoid caffeine. You can easily change sweeteners in your brownies. Honey or maple syrup works well. These natural sweeteners add a unique taste. Remember, they add moisture, so adjust your other liquids. If you use honey, reduce the oil slightly. This way, you keep the right brownie texture. Want to try vegan zucchini brownies? You can replace eggs with flaxseed or chia seed eggs. Mix one tablespoon of flaxseed or chia seeds with three tablespoons of water. Let it sit for a few minutes until it thickens. For milk, use almond, soy, or oat milk. These swaps make your brownies plant-based and still delicious. For the full recipe, check out the Chocolate Zucchini Bliss Brownies section above! To keep your zucchini brownies fresh, store them in an airtight container. If you place them in the fridge, they stay moist for up to five days. Just wrap them tightly in plastic wrap first. This prevents them from drying out. For longer storage, freeze the brownies. Cut them into squares and wrap each piece in plastic wrap. Place the wrapped pieces in a freezer bag. They can last up to three months this way. When you're ready to enjoy a brownie, just take it out and let it thaw at room temperature. To reheat your brownies, use the microwave or the oven. If using the microwave, heat them for 10-15 seconds. Check to make sure they are warm, but not hot. This keeps the fudgy texture intact. For the oven, set it to 350°F (175°C). Place the brownies on a baking sheet. Warm them for about 5-10 minutes. This method helps maintain their rich flavor and texture. Homemade zucchini brownies can last for about five days in the fridge. If stored properly in the freezer, they can last for up to three months. Keep an eye on them to ensure they stay tasty. For the full recipe, check the section above. No, you cannot taste the zucchini in the brownies. The zucchini adds moisture and richness. It blends in well with the chocolate flavor. You get a fudgy texture without any veggie taste. This makes it a fun way to sneak in some veggies! To check if your brownies are done, look for a few signs. The edges will pull away from the pan. The center should not jiggle too much when you shake the pan. A toothpick inserted in the middle should come out with a few moist crumbs. This means they are perfectly baked! Yes, you can use other vegetables. Carrots or sweet potatoes work well. They will add their own flavor and sweetness. However, be mindful of how much moisture they bring. Too much moisture can change the texture of the brownies. For clean cuts, use a sharp knife. Wipe the knife with a wet cloth between cuts. This keeps the edges neat. You can also chill the brownies before slicing. Cold brownies hold their shape better and look great on a plate. Enjoy your beautifully presented brownies! For the full recipe, check out the Chocolate Zucchini Bliss Brownies. You can make delicious zucchini brownies with simple ingredients and steps. We covered everything you need, from preparing the batter to baking and storing the brownies. You learned tips to make them moist and ways to substitute healthier options. Feel free to explore fun variations to impress your friends. With all this knowledge, you can create tasty treats that everyone will enjoy. Now, it's time to bake and savor the joy of your homemade brownies!

Zucchini Brownies Rich and Fudgy Delight

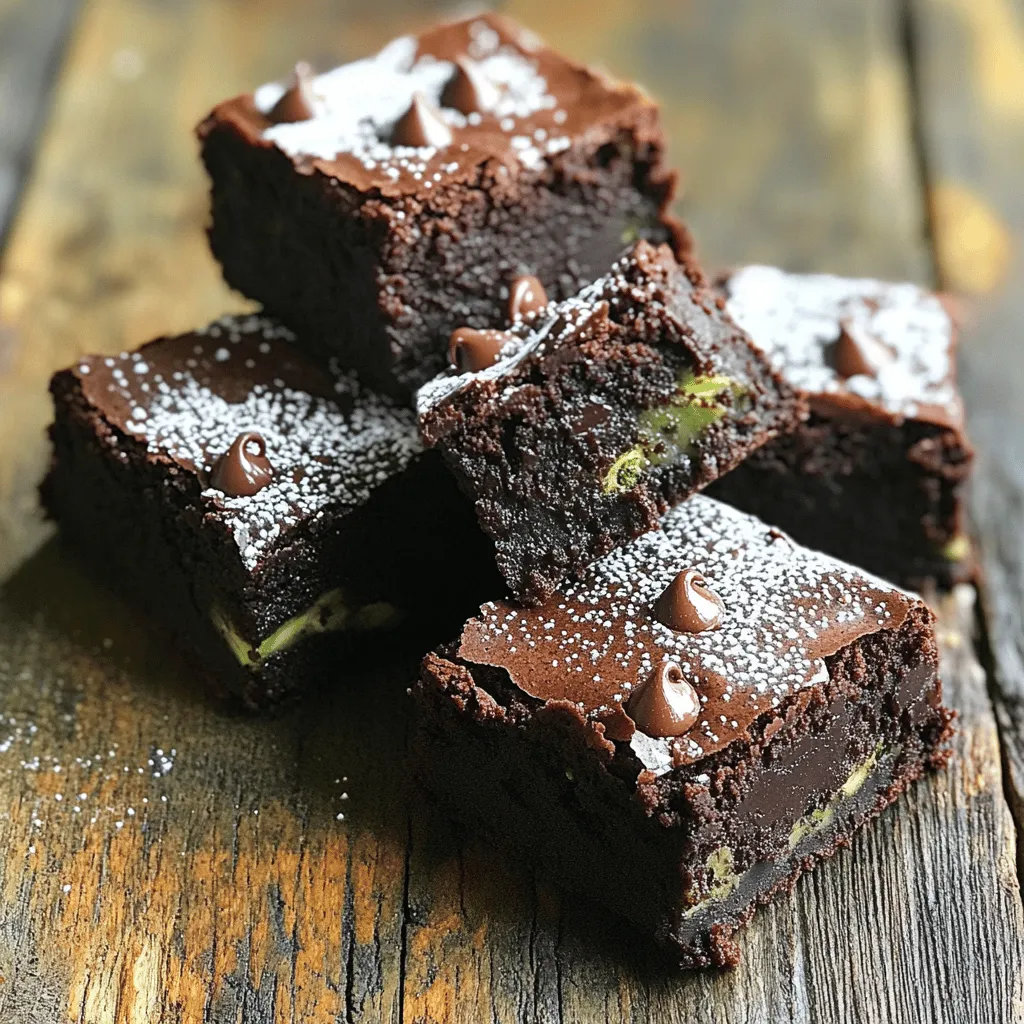
Do you crave brownies but want a healthier twist? Try my rich and fudgy zucchini brownies! Made with simple ingredients,

- 6 large eggs - 1 cup whole milk - 1 bell pepper (choose red or yellow), diced - 1 small zucchini, thinly sliced - 1 cup baby spinach, roughly chopped - 1/2 cup cherry tomatoes, halved - 1/2 cup onion, finely chopped - 1/2 cup shredded sharp cheddar cheese - 1 tablespoon extra virgin olive oil - Salt and freshly ground black pepper, to taste - Fresh basil or parsley for a fragrant garnish (optional) For the Easy Vegetable Frittata, focus on fresh and colorful ingredients. Eggs and whole milk form the base. They give the frittata a rich flavor and soft texture. You can choose a mix of vegetables that you enjoy. Bell peppers add a sweet crunch. Zucchini provides moisture and a mild taste. Spinach brings a touch of green and nutrients. Cherry tomatoes add bursts of juicy flavor. Onion gives depth to the dish. I love using sharp cheddar cheese for its bold taste. It melts well and makes the frittata creamy. Seasoning is simple: just salt and black pepper. Use good-quality olive oil for sautéing. It enhances the flavors of the veggies. If you want to make it even prettier, add fresh basil or parsley on top. This simple garnish brightens the dish and adds aroma. For the complete cooking process, check the Full Recipe to see how these ingredients come together in a delicious frittata. First, preheat your oven to 375°F (190°C). This step is key for baking. While the oven heats, grab a large mixing bowl. Crack 6 large eggs into the bowl. Pour in 1 cup of whole milk. Whisk them together until smooth. Add a pinch of salt and ground black pepper. Mix again to combine. Now, grab a large oven-safe skillet. Heat 1 tablespoon of olive oil over medium heat. Once hot, add 1/2 cup of finely chopped onions and 1 diced bell pepper. Sauté for 3-4 minutes. Stir occasionally until the onions look translucent. Next, add 1 small zucchini, thinly sliced, and 1/2 cup of halved cherry tomatoes. Cook for another 2-3 minutes. This softens the veggies nicely. Add 1 cup of roughly chopped baby spinach to the skillet. Stir until the spinach wilts, which takes about 1 minute. Carefully pour the egg mixture over the vegetables. Make sure it spreads evenly. Sprinkle 1/2 cup of shredded sharp cheddar cheese on top. Let the frittata cook on the stovetop for 2-3 minutes. Watch for the edges to set. Transfer the skillet to your preheated oven. Bake for 15-20 minutes. Keep an eye on it until the frittata puffs up and the center sets slightly. When done, take it out and let it cool for a few minutes. Cut it into wedges. You can garnish with fresh basil or parsley for a fragrant touch. Enjoy this colorful veggie frittata! For the Full Recipe, refer to the previous section. To get the best frittata, control your oven temperature. Preheat it to 375°F (190°C). This heat helps the frittata rise and cook evenly. When the frittata is done, it should be puffed up and barely jiggle in the middle. A good test is to insert a knife into the center. If it comes out clean, it's ready! One big mistake is overcooking the egg mixture. This can make the frittata dry and rubbery. Keep an eye on it while it bakes. Another common error is skipping the preheat step. If the oven isn’t hot enough, your frittata won’t cook right. Pair your frittata with a fresh salad or whole grain toast. These sides add color and balance to your meal. For a pretty presentation, slice the frittata into wedges. Garnish with fresh basil or parsley for a pop of green. This makes your dish look even more inviting. If you're looking for the Full Recipe to follow along, check out the details above! {{image_4}} You can change the veggies in your frittata. Swap zucchini with mushrooms or broccoli. Each swap gives a new taste. Seasonal veggies can also enhance flavor. Try asparagus in spring or butternut squash in fall. Each season brings fresh, tasty choices. Adding protein makes your frittata heartier. You can include cooked bacon, sausage, or ham. These meats add a savory punch. If you want a vegetarian option, use tofu. Just crumble it and mix it in. Tofu absorbs flavors well and adds great texture. Cheese brings creaminess to your frittata. Try using feta or mozzarella instead of cheddar. Feta gives a tangy kick, while mozzarella adds a mild flavor. For a plant-based frittata, look for vegan cheese options. These can melt well and still taste great. Check out the Full Recipe for more ideas on cheese choices! To keep your frittata fresh, store it in the fridge. Place it in an airtight container. This helps lock in moisture and flavor. You can also cover it tightly with plastic wrap. Make sure to eat it within three days for the best taste. When reheating, use the oven or microwave. For the oven, set it to 350°F (175°C). Heat for about 10-15 minutes. This method keeps the texture nice. If using the microwave, heat in short bursts of 30 seconds. Check it often to avoid drying out the frittata. Yes, you can freeze frittata! Cut it into slices before freezing. Wrap each slice in plastic wrap, then place them in a freezer bag. This way, you can take out one slice at a time. To thaw, move it to the fridge overnight before reheating. Enjoy your frittata later with ease! A frittata and an omelet are both egg dishes, but they differ in how you cook them. An omelet cooks quickly on the stovetop and is folded over filling. A frittata cooks slower and is baked in the oven. The frittata often has more ingredients mixed in, making it thicker. You can add many veggies and cheese to a frittata, while an omelet usually has a few fillings. Yes, you can make a frittata ahead of time. It is great for meal prep. Cook it and then let it cool. Store it in the fridge for up to three days. You can slice it into portions for easy grabbing. Reheat it in the oven or microwave when ready to eat. This makes for a quick breakfast or snack! You can easily customize your frittata to fit your diet. For a gluten-free frittata, just use gluten-free ingredients. You can skip cheese for a dairy-free version. If you want a vegetarian frittata, just add more veggies. Try spinach, mushrooms, or sweet potatoes. For a vegan option, replace eggs with tofu or chickpea flour. You can find the Full Recipe for the Colorful Veggie Frittata [here](#). This blog post covers how to make a tasty and easy vegetable frittata. You learned the key ingredients, like eggs, veggies, and cheese. We also discussed step-by-step instructions and tips for great texture. Remember to use fresh ingredients and avoid common mistakes. You can customize your frittata by adding proteins or trying different cheeses. Proper storage helps keep leftovers fresh. Now, with these insights, you can cook a perfect frittata every time. Enjoy your cooking and make it your own!

Easy Vegetable Frittata Simple and Healthy Recipe

Looking for a quick, healthy meal? An Easy Vegetable Frittata is your answer! Packed with fresh veggies and protein-rich eggs,

- 1 pound fresh okra, trimmed and sliced - 1 cup buttermilk - 1 cup cornmeal - 1/2 cup all-purpose flour - 1 teaspoon baking powder - 1 teaspoon cayenne pepper - 1 teaspoon garlic powder - 1 teaspoon onion powder - 1/2 teaspoon smoked paprika - Salt and black pepper, to taste - Vegetable oil for frying - Fresh cilantro for garnishing - Lime wedges for serving I love using fresh okra for this recipe. It gives a nice crunch and flavor. Start with one pound of fresh okra. Trim the ends and slice them into half-inch rounds. This size helps them cook evenly and makes them easy to eat. Next, I soak the sliced okra in buttermilk. This step is key! The buttermilk helps the coating stick and adds great flavor. Let the okra soak for about 30 minutes. For the coating, I mix one cup of cornmeal and half a cup of all-purpose flour. Adding a teaspoon of baking powder makes it light and crispy. Then, I spice things up with one teaspoon each of cayenne pepper, garlic powder, and onion powder. For a smoky taste, I add half a teaspoon of smoked paprika. Don’t forget to season with salt and black pepper to make everything pop! For frying, I use vegetable oil. It heats well and gives a nice golden color. Fresh cilantro adds a lovely touch as a garnish, and lime wedges brighten up the dish. This combination of fresh ingredients creates a tasty, crispy snack. For the full recipe, check out the details provided above. Enjoy cooking! Start with fresh okra. Slice it into 1/2-inch rounds. Place the okra in a large bowl. Soak the sliced okra in buttermilk. Let it soak for about 30 minutes. This step helps make the okra tender. It also helps the coating stick better. While the okra soaks, prepare the dry coating. In a separate bowl, combine the cornmeal and all-purpose flour. Add baking powder, cayenne pepper, garlic powder, onion powder, and smoked paprika. Don’t forget to sprinkle in salt and black pepper. Whisk the mixture well. This ensures all the spices mix evenly. In a large skillet, heat about 1 inch of vegetable oil. Aim for a temperature of around 350°F. To test the heat, drop a small amount of the coating into the oil. If it sizzles, you're ready to fry. Once the okra has soaked, take it out of the buttermilk. Let any extra liquid drip off. Dredge each piece in the cornmeal mixture. Make sure they are well-coated. Shake off any extra coating before frying. Carefully place the coated okra into the hot oil in batches. Avoid overcrowding the pan. Fry each batch for about 3-4 minutes. Look for a golden brown color and crispy texture. When done, use a slotted spoon to move the fried okra to a plate lined with paper towels. This will help drain any excess oil. For a burst of flavor, sprinkle salt on the hot okra right after frying. Repeat this process until all the okra is cooked and crispy. Enjoy them hot, garnished with fresh cilantro and lime wedges. For the full recipe, check out the details above. To get that perfect crunch, oil temperature matters a lot. Heat your vegetable oil to around 350°F. You can check it by dropping a small bit of the coating in. If it sizzles, you're good to go. Frying at the right temperature helps the okra cook quickly and evenly. Don’t overcrowd the pan. If you add too many pieces at once, the oil cools down. This can lead to soggy okra instead of crispy bites. Fry in small batches for the best results. Season your fried okra right after cooking. A light sprinkle of salt enhances the flavor. You can also try adding some cayenne for extra spice. Garnishing is fun! Fresh cilantro adds a nice touch. You can also serve with lime wedges. The citrus brightens the dish and balances the spices. One common mistake is a soggy coating. To avoid this, make sure to shake off any excess coating before frying. This helps keep the outer layer crispy. Soaking the okra is key, too. Let it sit in buttermilk for at least 30 minutes. This helps the coating stick and improves the texture. A proper soak makes all the difference in your Firecracker Fried Okra. For the full recipe, check it out! {{image_4}} To make your Firecracker Fried Okra even better, try adding different seasonings. Smoked paprika gives a nice depth of flavor. You can also use Cajun spices for a kick. These spices add fun twists that keep every bite exciting. Dipping sauces can also change the game. A tangy ranch or spicy aioli pairs well with the okra. You can also try a zesty lime sauce for freshness. Experimenting with flavors keeps your snack interesting. If you'd like a healthier version, consider baking the okra instead of frying it. Coat the okra as you normally would, then spread it on a baking sheet. Bake at 400°F for about 20-25 minutes. This method gives you a crispy texture with less oil. For those needing gluten-free options, substitute the all-purpose flour with almond flour or a gluten-free blend. This keeps the crunch while catering to dietary needs. You can customize the spice levels to match your taste. If you like it mild, reduce the cayenne pepper. For more heat, add a dash more. Using different types of peppers can also change the spice. Try jalapeños for a fresh taste or serrano peppers for more heat. Adjusting spice levels lets you craft the perfect snack for everyone. To keep your leftover Firecracker Fried Okra fresh, first cool it. Let it sit for about 15 minutes after frying. This cooling step prevents steam from making the okra soggy. Then, wrap the okra tightly in plastic wrap or foil. It helps keep air out. You can also use an airtight container for storage. Glass containers work well and keep odors away. When it’s time to enjoy your leftovers, reheating is key. I recommend using an oven to keep the okra crispy. Preheat your oven to 375°F. Spread the okra on a baking sheet in a single layer. Heat for about 10-15 minutes until hot. If you must use a microwave, do so with caution. Microwaving can make the okra soft. If you choose this method, use a microwave-safe dish and heat in short bursts. Yes, you can freeze fried okra! Start by cooling it completely. Once cool, place the okra in a single layer on a baking sheet. Freeze for about an hour to firm them up. Then, transfer the frozen pieces into a freezer bag. Make sure to squeeze out as much air as possible before sealing. To reheat, simply bake from frozen at 375°F for 15-20 minutes. This method helps keep the okra crispy. Firecracker Fried Okra is a delicious snack made with fresh okra. It has roots in Southern cooking and features a crunchy coating. The dish gets its kick from spices like cayenne pepper. This adds heat and flavor, making it a fun treat for parties or family gatherings. Yes, you can use frozen okra. However, fresh okra gives the best texture. If using frozen, thaw it first and pat it dry. This helps reduce excess moisture. This way, your coating will stick better and stay crispy. To make Firecracker Fried Okra more kid-friendly, cut back on the cayenne pepper. You can use just a pinch or skip it entirely. This will make the okra less spicy but still tasty. You can also serve it with a mild dipping sauce to make it more appealing. The best oil for frying okra is vegetable oil. It has a high smoke point, which is great for frying. You can also use canola oil or peanut oil. These oils help create a crispy texture without adding strong flavors. To keep the coating crispy, place the fried okra on a wire rack instead of paper towels. This allows air to circulate around the okra. If you need to store it, let it cool completely first. Use an airtight container, but eat within a few days for the best crunch. Reheat in the oven for a few minutes to restore crispiness. Firecracker Fried Okra is a fun, easy dish packed with flavor. You learned how to prepare fresh okra, create a crispy coating, and master frying techniques. With tips on enhancing flavor and avoiding common mistakes, you can achieve the perfect crunch. You also explored variations to suit your taste and learned storage tips to keep leftovers fresh. Enjoy making this dish and impressing others with your cooking skills. Dive in and savor your Firecracker Fried Okra!

Firecracker Fried Okra Crispy and Flavorful Snack

Are you ready to spice up your snack game? Firecracker Fried Okra is a crispy, flavorful treat that will make

- 6 large eggs - 1 cup fresh spinach, finely chopped - 1 cup mushrooms, sliced - 1/2 cup onion, diced - 1/2 cup bell pepper, diced - 1/4 cup grated Parmesan cheese - 1/4 cup milk - 2 tablespoons olive oil - Salt and pepper to taste - Fresh herbs for garnish The main ingredients for this frittata are simple yet packed with flavor. The eggs form a rich base. Spinach adds color and nutrients. Mushrooms give an earthy taste. Onions and bell peppers bring sweetness and crunch. Parmesan cheese enhances the dish with a salty kick. Olive oil helps cook the veggies. Salt and pepper are key for taste. Finally, fresh herbs brighten it all up. You can swap spinach for other greens. Kale or Swiss chard works great. Use feta or cheddar instead of Parmesan for different flavors. If you don’t have bell peppers, zucchini or tomatoes are good choices. These swaps let you tailor the frittata to your taste. Spinach is a superfood full of vitamins A, C, and K. It supports eye health and strong bones. Mushrooms are low in calories and high in fiber. They boost your immune system. Eggs are a great source of protein and energy. They keep you full longer. Fresh herbs not only add flavor but also bring antioxidants. Using these ingredients makes your frittata a healthy choice any time of the day. You can find the full recipe to get started on this delicious dish! First, you need to preheat your oven to 375°F (190°C). This step ensures that the frittata cooks evenly. Next, pick a good skillet. An oven-safe skillet works best. I like using cast iron or non-stick pans for easy release. Start by heating 2 tablespoons of olive oil in your skillet over medium heat. Add 1/2 cup of diced onion and 1/2 cup of diced bell pepper. Cook these for about 5 minutes until they are soft. Then, add 1 cup of sliced mushrooms to the mix. Stir them for 5 more minutes. You want them browned and flavorful. Finally, toss in 1 cup of finely chopped spinach. Cook for 2 minutes until it wilts. Season this veggie mix with salt and pepper to taste. In a bowl, crack 6 large eggs. Whisk them with 1/4 cup of milk and 1/4 cup of grated Parmesan cheese until smooth. Pour this egg mix over your cooked veggies in the skillet. Let it cook on the stovetop for 2-3 minutes until the edges set. Then, transfer the skillet to the oven. Bake for 12-15 minutes. The frittata should puff up and be set in the middle. Once done, let it cool a bit. This makes it easier to slice. You can find the full recipe to follow along. To achieve a fluffy frittata, use fresh eggs. They whip up better, giving more volume. Whisk the eggs well with milk and cheese. This adds air, which helps the frittata rise. Cook on medium heat to avoid burning. Start on the stovetop, then finish in the oven. This method helps cook it evenly. Pair your frittata with a light salad. A side of mixed greens adds freshness. For a fun twist, serve with fruit or toast. Presentation matters too! Slice the frittata into wedges. Place it on a colorful plate. Add a sprig of fresh herbs on top for a pop of color. This makes your dish look inviting and tasty. Avoid overcooking the frittata. It should be set but still moist in the center. Check it before the recommended time. Use an oven-safe skillet; this is key. If you don’t, you risk breaking the frittata or ruining the pan. Follow these tips, and your Mushroom Spinach Frittata will shine. For the full recipe, check the details above. {{image_4}} You can swap out the spinach for other greens. Zucchini adds a nice crunch. Asparagus gives a fresh taste. Using seasonal vegetables brings the best flavor. Try bell peppers or kale for variety. Want to make it heartier? Add bacon or sausage for a savory kick. These meats give a nice texture and flavor. For a vegetarian option, chickpeas are a great choice. They add protein and a bit of creaminess. Spices can take your frittata to the next level. Try paprika or garlic powder for a warm touch. Fresh herbs like thyme or dill can brighten the dish. You can also use different cheeses for varied taste. Feta, goat cheese, or cheddar can change the flavor profile. Each choice offers something unique and delicious. For the full recipe, check out the [Full Recipe](#). To keep your frittata fresh, store it in the fridge. Place it in an airtight container. Always let it cool to room temperature first. This step prevents moisture build-up. Use glass or plastic containers with tight lids for best results. They help keep the frittata moist without drying it out. When you’re ready to enjoy leftovers, reheat gently. Use a skillet over low heat for the best texture. This method warms it through without making it rubbery. You can also use the microwave. If you choose this route, cover the frittata with a damp paper towel. This keeps moisture in and helps it stay soft. Yes, you can make a Mushroom Spinach Frittata ahead of time. To do this, cook the frittata as per the full recipe. Let it cool completely before storing. Wrap it tightly in plastic wrap or place it in an airtight container. It will stay fresh in the fridge for about three days. If you want to reheat it later, just slice it and warm it in the oven or microwave. You can tell the frittata is done when it puffs up and the edges look firm. The center should not jiggle when you shake the skillet gently. A toothpick inserted in the middle should come out clean. If it’s still wet, give it a few more minutes in the oven. Yes, you can freeze the frittata. After it cools, slice it into portions. Wrap each slice in plastic wrap and then place them in a freezer-safe bag. This helps prevent freezer burn. When you’re ready to eat, let it thaw in the fridge overnight. Reheat it in the oven or microwave until warm. Herbs can greatly enhance your frittata's flavor. I love using fresh parsley, basil, and chives. Dill and thyme also add a nice touch. You can mix and match based on your taste. Just sprinkle them on top before serving for added freshness. Making a Mushroom Spinach Frittata is simple and rewarding. You need just a few key ingredients, such as eggs, spinach, and mushrooms. With the right steps, you can whip up a fluffy and delicious meal. Remember to choose fresh veggies and herbs for the best flavor. Avoid common mistakes, and you’ll enjoy a tasty dish. This frittata is versatile, making it easy to switch up ingredients. Whether you enjoy it for breakfast or brunch, this dish satisfies. Embrace your cooking skills and enjoy every bite!

Mushroom Spinach Frittata Simple and Flavorful Meal

Looking for a quick and tasty meal? This Mushroom Spinach Frittata is simple yet packed with flavor. It’s perfect for

- 1 pound fresh okra, trimmed and sliced into ½-inch rounds - Vegetable oil, for frying - 1 cup buttermilk - 1 cup cornmeal - ½ cup all-purpose flour - 1 teaspoon paprika - ½ teaspoon cayenne pepper - Salt and pepper, to taste - ½ cup mayonnaise - 1 tablespoon Dijon mustard - 1 tablespoon fresh lemon juice - 1 garlic clove, finely minced - 1 teaspoon hot sauce (or more, depending on your heat preference) I love using fresh okra for this recipe. It gives the best taste and crunch. First, you need to trim and slice the okra. Aim for ½-inch rounds. This size helps it fry evenly and cook through. For frying, you need vegetable oil. It’s important to have enough oil to submerge the okra. This helps it get crispy all around. Now, for the dry ingredients, start with buttermilk. Soaking the okra in buttermilk adds flavor and helps the coating stick. Combine cornmeal and all-purpose flour in a bowl. The cornmeal gives a nice crunch. Add paprika for a hint of smokiness and cayenne for heat. Adjust the salt and pepper to your taste. I always say, season to make it pop! Next, let’s focus on the spicy aioli. Mix mayonnaise with Dijon mustard for tang. Fresh lemon juice brightens the flavors. Mince one garlic clove for a punch of flavor. Add hot sauce to give it that kick. You can adjust the heat based on your preference. This combination of fresh ingredients and bold spices makes fried okra with spicy aioli a treat. For the full recipe, check out the detailed instructions to create this tasty snack. - Rinse and slice the fresh okra. Start by running cold water over the okra to clean it. Trim both ends and cut the okra into ½-inch rounds. Place the sliced okra in a bowl. - Soak the okra in buttermilk. Pour the buttermilk over the sliced okra. Make sure all pieces are coated. Let the okra soak for about 30 minutes. This makes it tender and flavorful. - Combine dry ingredients in a separate bowl. In another bowl, mix cornmeal, flour, paprika, cayenne pepper, and a pinch of salt and pepper. Whisk it well until everything is blended. - Coat the okra with the cornmeal mixture. After soaking, take the okra out of the buttermilk. Let extra buttermilk drip off. Dredge each piece in the cornmeal mix, covering it evenly. Place the coated okra on a plate. - Whisk together aioli ingredients in a small bowl. In a bowl, mix mayonnaise, Dijon mustard, lemon juice, minced garlic, and hot sauce. - Taste and adjust seasoning. Give the aioli a taste test. Add more salt, pepper, or hot sauce if needed. Set it aside for serving. - Heat oil to 350°F (175°C). In a large skillet, pour enough vegetable oil to reach about 1 inch deep. Heat the oil over medium-high heat until it is hot. - Fry okra in small batches until golden brown. Carefully add the coated okra to the hot oil. Fry for 3-4 minutes until golden and crispy. Use a slotted spoon to transfer the fried okra to a paper towel-lined plate to drain excess oil. For the full recipe, follow the detailed steps above for a perfect crunchy snack! To get the best fried okra, oil temperature is key. Keep your oil at 350°F (175°C). Use a thermometer for accuracy. If the oil is too cool, the okra will turn soggy. If it's too hot, the coating will burn. Do not overcrowd the pan while frying. Fry in small batches. This allows the okra to crisp up nicely. Overcrowding lowers the oil temperature. Your okra needs space to fry evenly. For a great presentation, serve the fried okra in a cone-shaped holder or a rustic bowl. This makes the dish fun and easy to eat. Add a small ramekin filled with spicy aioli for dipping. Pair the okra with a fresh salad or some crunchy veggies. The coolness of the salad balances the heat of the spicy aioli. You can also serve it as a side with grilled meats for a complete meal. Fresh herbs brighten up the dish. Use parsley or cilantro for a pop of color. Just sprinkle them over the fried okra for an appealing look. You can also add other toppings for flavor. Crumbled feta or shredded cheese gives a nice twist. A squeeze of lemon juice adds brightness and cuts through the richness. These small touches elevate your dish and make it even more tasty. {{image_4}} You can make your fried okra even tastier by adding spices. Try mixing in garlic powder or onion powder to the cornmeal. A dash of chili powder can give it a nice kick. You can also use different dipping sauces. Try ranch dressing or a sweet chili sauce for a twist. If you want a healthier option, you can bake the okra instead of frying it. Just coat it like you would for frying, then place it on a baking tray. Bake at 425°F for about 20 minutes. For gluten-free options, use almond flour or a gluten-free flour blend in place of all-purpose flour. Fried okra is great as an appetizer or side dish. Serve it in small bowls or on skewers for fun finger food. You can also toss it into salads for a crunchy texture. Adding fried okra to a Southern-style salad can really make it pop. For the full recipe, refer to the main article. To keep your leftover fried okra fresh, store it in an airtight container. Place a paper towel at the bottom to absorb moisture. This helps maintain the crunch. Refrigerate the container and enjoy within three days for the best taste. To reheat, use an oven set to 375°F (190°C). Spread the okra on a baking sheet in a single layer. Bake for about 10 minutes or until it’s hot and crispy again. This method keeps the okra crunchy, unlike microwaving, which can make it soggy. Homemade spicy aioli can last about one week in the fridge. Store it in a clean, airtight container. Ensure you keep it sealed to avoid any off-flavors. Always check for freshness before using. If it smells or looks odd, toss it out. If you want to save some for later, you can freeze the aioli. Use a freezer-safe container and leave space at the top for expansion. It will keep well for about three months. When you’re ready to use it, thaw it in the fridge overnight. Stir well before serving to regain its creamy texture. For the complete recipe, check out the Full Recipe section. To make fried okra crispy, start by soaking it in buttermilk. This step adds moisture and flavor. Then, coat the okra in a mix of cornmeal and flour. The cornmeal gives that crunchy texture. Make sure your oil is hot, around 350°F (175°C), when frying. Frying in small batches keeps the temperature steady and helps achieve that perfect crunch. Yes, you can prepare the okra in advance. You can slice and soak the okra in buttermilk. Store it in the fridge for up to 2 hours before frying. You can also make the spicy aioli ahead of time. Just mix and chill it in the fridge. This way, your snack is ready to fry when you are. Fried okra pairs well with many side dishes. You can serve it with coleslaw for a nice crunch. A fresh salad adds brightness to the meal. Serve it with a bowl of spicy aioli for dipping. You can also enjoy it alongside grilled meats or fish for a complete meal. Yes, you can easily make fried okra spicy. Add cayenne pepper to the cornmeal mix for heat. You can also adjust the amount of hot sauce in the aioli. If you like it really spicy, add more hot sauce or even diced jalapeños to the okra before frying. If you can't find okra, try using green beans or zucchini. Both will fry nicely and give a similar texture. For a different flavor, consider using mushrooms. They won't be as crunchy but will soak up the spices well. Just adjust cooking times to ensure they fry properly. In this blog post, I shared how to make tasty fried okra with a spicy aioli. We covered fresh and dry ingredients, step-by-step cooking instructions, and useful tips for perfect frying. I also provided variations and storage tips to help you enjoy this dish longer. Remember, the key to great fried okra is fresh ingredients and proper frying techniques. Experiment with flavors to make this dish your own. Enjoy your cooking adventure!

Fried Okra with Spicy Aioli Tasty Crunchy Snack

Do you want a snack that’s both tasty and crunchy? Fried okra with spicy aioli might be just what you

This zucchini bread recipe combines simple, fresh ingredients for a moist and tasty treat. The key is to use ripe zucchini and balance the sweetness. - 2 cups all-purpose flour - 2 cups grated zucchini - 3/4 cup granulated sugar - 1/4 cup brown sugar - 1/2 cup chopped nuts - 1/2 cup chocolate chips Using all-purpose flour gives the bread a nice texture. Grated zucchini adds moisture and flavor. The mix of granulated and brown sugars creates a rich sweetness. For extra crunch, consider adding chopped nuts like walnuts or pecans. If you love chocolate, throw in chocolate chips for a sweet surprise. Both add-ins enhance the flavor and make each slice special. Feel free to experiment with these ingredients. Your zucchini bread can reflect your taste and style. This recipe is flexible, so enjoy making it your own! For the full details on how to create this delicious zucchini bread, check the Full Recipe. - Prepping the loaf pan Start by preheating your oven to 350°F (175°C). Grease a 9x5-inch loaf pan with cooking spray or butter. You can also line it with parchment paper. This helps with easy removal later. - Mixing dry ingredients In a large mixing bowl, combine the dry ingredients. Whisk together 2 cups of all-purpose flour, 1 teaspoon of baking soda, 1/2 teaspoon of baking powder, 1 teaspoon of ground cinnamon, 1/2 teaspoon of nutmeg (if you like), and 1/2 teaspoon of salt. Make sure everything is mixed well and free of lumps. - Steps to mix sugars, oil, and eggs In a separate bowl, mix your wet ingredients. Combine 3/4 cup of granulated sugar, 1/4 cup of brown sugar, and 1/2 cup of vegetable oil. Add in 3 large eggs and 1 teaspoon of vanilla extract. Whisk until the mixture is smooth and creamy. - Folding in zucchini and dry ingredients Gently fold 2 cups of grated zucchini into the wet mixture. Then, gradually add the dry ingredients to the wet mixture. Use a spatula or wooden spoon and mix just until combined. A few small lumps are fine; overmixing makes the bread dense. - Baking time and tips If you want, you can fold in 1/2 cup of chopped walnuts or chocolate chips now. Pour the batter into your prepared loaf pan. Smooth the top with a spatula. Bake in the preheated oven for 50-60 minutes. Check for doneness by inserting a toothpick in the center. It should come out clean or with a few moist crumbs. After baking, let the zucchini bread cool in the pan for about 10 minutes. Then, transfer it to a wire rack to cool completely. You can find the Full Recipe for more details. To make the best zucchini bread, avoid overmixing. When you mix the wet and dry ingredients, do it gently. Overmixing can make the bread dense and tough. Aim for a few small lumps in the batter. This will help keep your zucchini bread light and fluffy. You can easily adjust the spices for more flavor. Consider adding more cinnamon or nutmeg if you like a warm taste. If you want a unique twist, try adding a pinch of ginger or allspice. These spices can elevate your bread and make it even more delicious. To test for doneness, use a toothpick. Insert it into the center of the bread. If it comes out clean or with just a few crumbs, the bread is ready. If it has wet batter on it, bake a little longer. This simple test can prevent a soggy loaf and ensure a perfect zucchini bread every time. For the full recipe, check the Ultimate Zucchini Bread 🥒. {{image_4}} You can make zucchini bread healthier with some simple swaps. Whole wheat flour adds fiber and nutrients. It gives a nutty flavor too. You can also reduce the sugar. Using less granulated sugar or brown sugar makes the bread less sweet. Try cutting the sugar by a third. It still tastes great! Adding spices can change the flavor of your zucchini bread. Nutmeg gives it a warm, cozy taste. A splash of vanilla makes it smell amazing. You can experiment with different spices. Just remember, a little goes a long way! Mix-ins can make your zucchini bread unique. Chopped nuts like walnuts or pecans add a nice crunch. Dried fruits, such as raisins or cranberries, add sweetness and chewiness. You can also toss in chocolate chips for a fun treat. Each mix-in brings its own special flavor. Choose your favorites and have fun! For the complete recipe, check out the Full Recipe. To keep your zucchini bread fresh, I recommend storing it in an airtight container. This method prevents moisture loss and keeps the bread soft. You can refrigerate it for up to a week. If you want to store it longer, wrap it tightly in plastic wrap and place it in a freezer bag. This way, it can last for about three months in the freezer. Zucchini bread has a good shelf life if stored correctly. In the fridge, it lasts about 5 to 7 days. When frozen, it stays fresh for up to three months. Just remember to label your containers with the date. This helps you know when to enjoy it. When you want to enjoy your zucchini bread again, there are easy ways to warm it up. You can use a toaster oven or a regular oven. Preheat the oven to 350°F (175°C). Place the slices on a baking sheet and heat for about 10 minutes. This method keeps the bread soft and enhances its flavor. If you’re in a hurry, you can also microwave it for 15 to 20 seconds. Just be careful not to overheat, as it may dry out. Enjoy your delicious zucchini bread warm! Yes, you can use frozen zucchini. Just thaw it first and drain excess water. Frozen zucchini works well in this recipe. It saves time and keeps the flavor rich. Make sure to measure it after draining. This helps keep your bread from getting too wet. This recipe is the best for several reasons. First, it has a perfect mix of spices. The cinnamon and nutmeg add warmth and depth. Second, the blend of sugars gives a nice sweetness. You can also add nuts or chocolate chips for extra crunch. The zucchini keeps the bread moist and soft. With all these flavors, it’s hard to resist a slice. To check if the bread is done, insert a toothpick into the center. If it comes out clean or with a few crumbs, it’s ready! The top should be golden brown and spring back when you touch it. If the toothpick comes out wet, bake for a few more minutes. It’s best to check often to avoid overbaking. This blog post covered the essential ingredients and clear steps for making delicious zucchini bread. From mixing wet and dry ingredients to helpful baking tips, you are now ready to create your own loaf. Remember, don’t overmix to keep it fluffy, and feel free to try different add-ins for extra flavor. Store it right for lasting freshness. With this guidance, you can enjoy baking zucchini bread, savor unique flavors, and share with others. Enjoy your baking adventure!

Best Zucchini Bread Recipe for Delicious Flavor

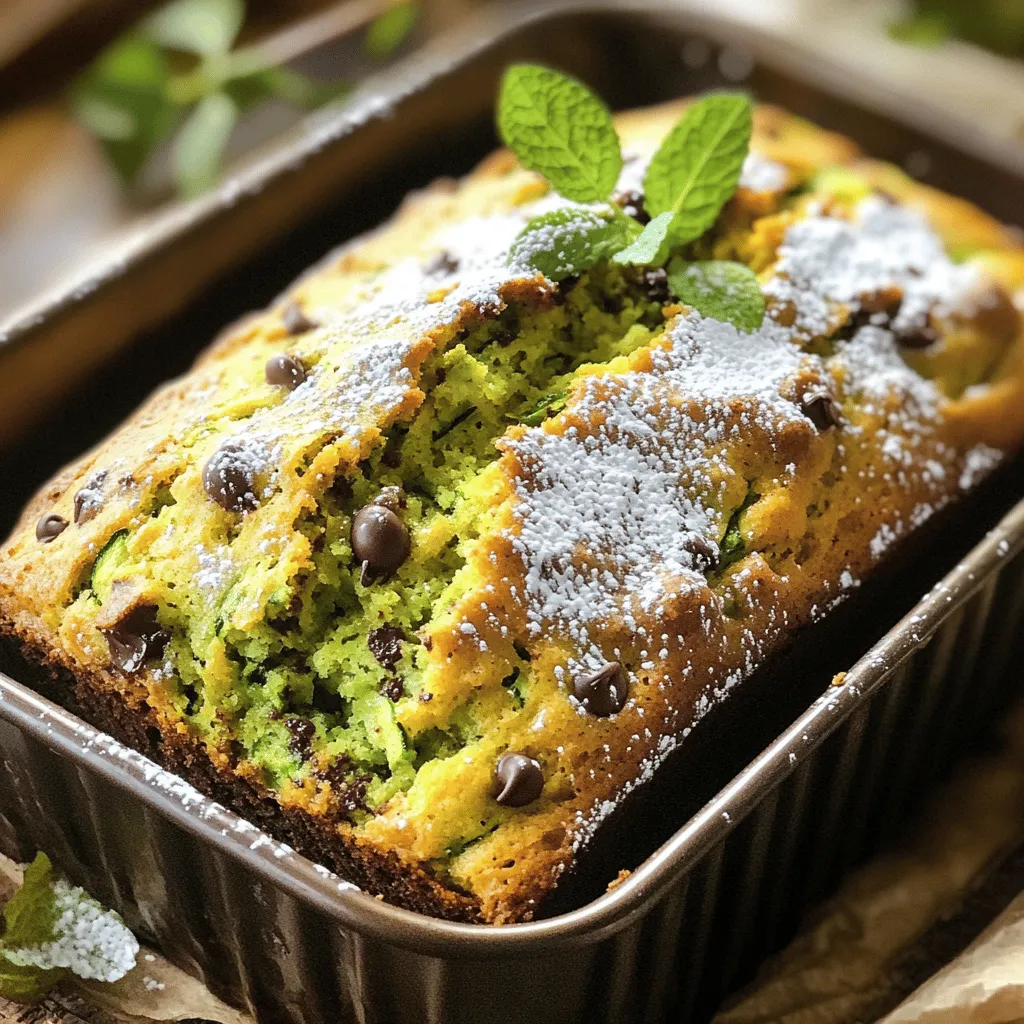
Zucchini bread can be a game-changer for your kitchen. With its moist texture and sweet flavor, it’s the perfect treat

Older posts
Newer posts
← Previous Page1 … Page40 Page41 Page42 … Page86 Next →

dsad

© 2026 lazychefmagic • Built with GeneratePress

Our Policies

  • Copyright Policy
  • Cookie Policy
  • GDPR Policy
  • Privacy Policy
  • Disclaimer
  • Terms Of Use

More Information

  • Home
  • About
  • Contact
  • Appetizers
  • Dessert
  • Dinner
  • Drinks
©2026, lazychefmagic About Back To Top