Skip to content
DisclaimerTerms Of UseGDPR PolicyCookie Policy

lazychefmagic

  • Home
  • Drinks
  • Appetizers
  • Dinner
  • Dessert
  • About
  • Contact
  • Privacy Policy
DisclaimerTerms Of UseGDPR PolicyCookie Policy

NO-ING-IMG

- 4 ripe peaches, peeled and sliced - 1 cup fresh blueberries - 1/2 cup granulated sugar - 1 tablespoon freshly squeezed lemon juice - 1 teaspoon pure vanilla extract - 1 teaspoon ground cinnamon - 1 cup all-purpose flour - 1 tablespoon baking powder - 1/2 teaspoon fine sea salt - 1/3 cup unsalted butter, melted - 3/4 cup whole milk - 1/2 cup packed brown sugar for topping - 1 teaspoon ground nutmeg What can you use instead of peaches and blueberries? You can swap peaches for nectarines or plums. You can use blackberries or strawberries in place of blueberries. What about sugar? If you want a healthier option, you can try using honey or maple syrup. These give a nice flavor too. Need dairy-free options? You can use almond milk or coconut milk instead of whole milk. For butter, try coconut oil or vegan butter. These swaps keep your cobbler tasty! For the full recipe, check out the details above. 1. Preheat your oven to 350°F (175°C). This helps bake the cobbler evenly. 2. In a large bowl, combine the sliced peaches, blueberries, granulated sugar, lemon juice, vanilla extract, and cinnamon. Toss gently until the fruit gets coated. 3. In another bowl, mix the flour, baking powder, and salt. This ensures even distribution of the dry ingredients. 1. Add the melted butter and milk to the dry mix. Stir gently until just combined. Remember, it is okay if the batter is a bit lumpy. This keeps your cobbler tender. 1. Grease an 8x8 inch baking dish. Pour the batter evenly into the dish. 2. Spoon the fruit mixture over the batter. Make sure some of it sinks in, and some stays on top for a nice look. 3. In a small bowl, mix the brown sugar and nutmeg. Sprinkle this over the fruit for a sweet crunch. 4. Bake in the oven for about 45-50 minutes. Look for a golden top and use a toothpick to check if it comes out clean. Now, you’re ready to enjoy your delicious Bourbon Peach Cobbler! For the full recipe, check out the details above. To ensure even baking, use a square baking dish. This helps the heat distribute well. Always preheat your oven to 350°F (175°C) before placing your cobbler inside. This step is key to achieving that golden crust. To check for doneness, use the toothpick method. Insert a toothpick into the center of the cobbler. If it comes out clean, your cobbler is ready. If there's batter on the toothpick, bake it a little longer. Serving your cobbler with ice cream is a great idea. The cold ice cream pairs well with the warm cobbler. For a special touch, add whipped cream on top. It adds a nice creaminess. Drizzling caramel over your cobbler can enhance its flavor. The rich sweetness of caramel contrasts well with the fruit. It makes your dessert feel more indulgent. One common mistake is overmixing the batter. This can make your cobbler tough. Mix just until the ingredients are combined for a tender result. Another mistake is cutting into the cobbler too soon. Let it cool for a few minutes before serving. This allows the juices to settle and makes for a better texture. For the full recipe, check out the details above. {{image_4}} You can make this bourbon peach cobbler even more fun. Try adding other fruits too. Strawberries and raspberries can blend well with peaches. They add a nice tartness and bright color. You might also want to experiment with spices. Ginger gives a warm kick, while cloves add a deep flavor. Use these in small amounts to find what you like best. Mixing flavors can change the whole dish and make it special. If you want a gluten-free version, swap all-purpose flour for a gluten-free blend. Many brands work well and will keep your cobbler soft. For a vegan-friendly cobbler, replace the butter with coconut oil or vegan butter. Use almond or oat milk instead of whole milk. These changes keep the taste great and are perfect for those with dietary needs. Using seasonal fruits can change the flavor of your cobbler. In spring, try cherries or apricots. In fall, apples or pears work well. Each season brings new tastes and fun options. You might also adapt the recipe for holidays. For Thanksgiving, add a sprinkle of nutmeg or cinnamon. During summer, serve it with fresh mint. These small tweaks keep the dish fresh and exciting. Check out the Full Recipe for more ways to enjoy bourbon peach cobbler! Let your cobbler cool for about 30 minutes before you store it. This helps keep the crust nice. Use a glass or plastic container with a tight lid. These containers keep the cobbler fresh longer. Avoid metal containers as they can change the taste. To reheat your cobbler, use an oven or microwave. For the oven, set it to 350°F (175°C). Place the cobbler in a dish and cover it with foil. Heat for about 15-20 minutes until warm. In the microwave, heat in 30-second bursts until it's hot. If you want to freeze it, wrap it tightly in plastic wrap. Thaw in the fridge overnight before reheating. You can keep your cobbler in the fridge for about 3-4 days. Look for signs of spoilage like mold or an off smell. If the cobbler looks dry or hard, it’s best to toss it. Enjoy your Bourbon Peach Cobbler fresh for the best taste! For the full recipe, check out the complete guide. You can tell your cobbler is done when it has a golden brown top. A toothpick test works well, too. Insert a toothpick into the center. If it comes out clean, the cobbler is ready. The edges should pull away slightly from the dish. This shows it has baked through evenly. Yes, you can prepare the cobbler a few hours in advance. Just mix the fruit and batter, then store them separately. Keep them in the fridge until you're ready to bake. This helps the flavors blend. When you’re ready, layer them in your baking dish and bake as usual. Serve your cobbler warm for the best taste. A scoop of vanilla ice cream on top adds creaminess. You can even drizzle caramel sauce over the cobbler for a sweet touch. Fresh mint leaves make a lovely garnish, too. This makes it look and taste amazing for gatherings. Bourbon is not a must, but it adds a special touch. It enhances the flavors of the peaches. If you want a non-alcoholic version, you can skip it. Try using extra vanilla extract or a splash of apple juice instead. This keeps your cobbler tasty and rich. For the full recipe, check the link. This blog covers how to create a delicious cobbler. You learned about the key ingredients, their substitutes, and how to mix and bake them. I also shared tips to perfect your dish and variations to try. Remember, let your cobbler cool before serving for the best taste. Enjoy it warm with ice cream or explore creative flavors. Your baking adventure is just beginning, and I’m excited for you to try it!

Savory Bourbon Peach Cobbler Easy and Delicious Recipe

Ready for a sweet twist on a classic? This Savory Bourbon Peach Cobbler blends juicy peaches, fresh blueberries, and a

- 4 cups of fresh pickling cucumbers, sliced into rounds - 1 cup granulated sugar - 1 cup apple cider vinegar - 1 teaspoon pickling salt - 1 teaspoon mustard seeds - 1 teaspoon celery seeds - ½ teaspoon turmeric powder - 1 small red onion, thinly sliced - 2 cloves garlic, crushed - ½ teaspoon black peppercorns Each ingredient plays a key role in making great refrigerator sweet pickles. Fresh pickling cucumbers give a nice crunch. Granulated sugar adds sweetness, while apple cider vinegar brings the tang. Pickling salt helps keep the crunch and flavors in check. Mustard seeds and celery seeds add unique taste. Turmeric gives a lovely color. Red onion adds a sweet bite, and garlic enhances the overall flavor. Finally, black peppercorns add a hint of spice. For the best refrigerator pickles, use fresh pickling cucumbers, like Kirby or Persian cucumbers. These types are crisp and have fewer seeds. They hold up well when pickled. Avoid using slicing cucumbers, as they can be watery and soft. Choose firm cucumbers for the best results. Now that you know the ingredients, you can create your own delightful batch of refrigerator sweet pickles. For the complete recipe, check out the Full Recipe. Start by washing your cucumbers well. Use fresh pickling cucumbers for the best crunch. Slice them into thin rounds. Next, take your red onion and slice it thin too. In a large mixing bowl, add the sliced cucumbers and onion. Sprinkle the pickling salt over them. Toss the vegetables gently to mix. Let them sit for 30 minutes. This step helps pull out extra water from the cucumbers. While the cucumbers rest, it’s time to make the brine. In a medium saucepan, mix the sugar, apple cider vinegar, mustard seeds, celery seeds, turmeric, crushed garlic, and black peppercorns. Heat the mixture over medium heat. Stir it until the sugar melts completely. Once it simmers, take it off the heat. Let it cool for about 10 minutes. Cooling helps the flavors blend well without losing any taste. Now, pour the cooled brine over the cucumber and onion mix. Make sure all the slices are covered. This is key for flavor. Next, pack this mixture into clean jars. Use a spoon if needed to fit everything. Leave a little space at the top for brine. Seal the jars tightly. Place them in the fridge. For the best taste, let them sit for at least 24 hours. They taste even better after a week. Enjoy these with sandwiches or as a snack. Check out the Full Recipe for more details! To make crunchy pickles, start with fresh cucumbers. Look for pickling cucumbers; they are shorter and firmer. Always wash them well before slicing. Slice them into rounds or spears, depending on your preference. I find that soaking them in salt for 30 minutes helps. This draws out excess water and keeps them crisp. After you soak them, rinse off the salt. Pat them dry with a clean towel. This step is key for crunch. When you pack the cucumbers into jars, do not overcrowd them. Leave some space for the brine to flow around each piece. You can boost the flavor of your pickles with spices. Adding a bay leaf gives a nice touch. Try black peppercorns for a little heat. Whole cloves can add a warm, sweet note. I enjoy using dill seeds or fresh dill for an herbal flavor. You can also add red pepper flakes for a spicy kick. Experiment with spices you like. Each spice adds a unique twist to your pickles. One common mistake is not using enough salt. The right amount of salt helps with crunch and flavor. Another mistake is not letting the brine cool before pouring it on cucumbers. Hot brine can cook the cucumbers and make them soggy. Make sure jars are clean before filling them. This prevents spoilage. Always seal jars tightly and store them in the fridge. Lastly, be patient! Letting them sit for at least 24 hours lets the flavors blend beautifully. For the complete recipe, check out the Full Recipe section. {{image_4}} To make spicy refrigerator sweet pickles, add heat to your brine. Start with the full recipe, then include sliced jalapeños or crushed red pepper flakes. You can adjust the spice to your taste. The heat balances well with the sweetness of the sugar. Let the pickles sit for at least two days. This allows the flavors to meld beautifully. Herbs can elevate your sweet pickles. After you make the brine from the full recipe, toss in fresh herbs like dill, thyme, or rosemary. Start with a few sprigs and adjust based on your preference. This adds a fresh taste that complements the pickles. Let the mixture sit for about a week for the best flavor. If you want a healthier twist, try different sweeteners. Instead of sugar, you can use honey or agave syrup. Both add sweetness but with unique flavors. For a low-calorie option, consider using stevia or erythritol. These substitutes can still give your pickles a tasty kick while keeping them healthier. Adjust the amount based on your sweetness level. Refrigerator sweet pickles will stay fresh for about 2 to 3 months. You can enjoy their crunch and flavor during this time. Storing them properly helps maintain their taste and texture. Always keep them sealed in airtight jars in the fridge. To keep your sweet pickles fresh, follow these tips: - Use clean, dry jars to avoid contamination. - Make sure the pickles are fully submerged in brine. - Store them in the coldest part of your fridge, away from the door. - Label jars with the date you made them. This way, you can track how long they have been stored. It's essential to check your pickles for spoilage. Look for these signs: - A change in color or texture, like mushiness. - Any off or sour smell that differs from the fresh scent. - Presence of mold on the surface or inside the jar. If you notice any of these signs, it’s best to discard the pickles. Enjoy your crispy refrigerator sweet pickles while they are fresh! Yes, you can use different vinegars. Each type of vinegar adds a unique taste. You might try white vinegar for a sharper flavor. Rice vinegar gives a milder, sweeter note. Balsamic vinegar adds a deep, rich taste. Always keep the ratio of vinegar to sugar similar. This helps balance the flavors. To make sweet pickles less sweet, reduce the sugar. Start by cutting the sugar amount by half. You can also add more vinegar for a tangy kick. Another option is to add a pinch of salt. Salt can balance sweetness and enhance the flavor. Experiment with your recipe until you find your perfect mix. Refrigerator pickles are quick and easy. You don't need to process them in a canner. They stay crunchy and fresh in the fridge. Traditional canned pickles are sealed for long storage. They undergo heat processing, which changes texture and flavor. Refrigerator pickles have a bright, fresh taste. Canned pickles tend to be softer and more intense. Refrigerator sweet pickles are easy to make and great to eat. We reviewed key ingredients, their roles, and the best cucumbers. I shared step-by-step instructions that ensure success. You learned tips for crunchier pickles and how to enhance flavor. We also explored tasty variations and proper storage methods. Pickles can add zest to your meals. With careful preparation and attention to detail, you can craft delicious, homemade pickles. Enjoy your pickling journey and make your dishes shine!

Refrigerator Sweet Pickles His Flavorful Crunchy Treat

Are you ready to enjoy a crunchy, sweet treat right from your fridge? In this guide, I’ll show you how

- 3 medium yellow squashes, thinly sliced into rounds - 1 tablespoon extra virgin olive oil - 1 small red onion, finely sliced - 2 cloves garlic, minced - 1 bell pepper (choose red, yellow, or orange), diced into small pieces - 1 teaspoon fresh thyme leaves (or ½ teaspoon dried thyme) - 1 teaspoon freshly grated lemon zest - Sea salt and freshly cracked black pepper to taste - Optional: ¼ cup creamy feta cheese, crumbled Sautéed yellow squash shines with fresh ingredients. The squash gives a bright color and sweet taste. I love using young squashes for their tender skin. The red onion adds a little sweetness. Garlic brings depth with its strong aroma. Choose a bell pepper that you like. It adds crunch and flavor. Herbs elevate the dish. Fresh thyme gives a lovely earthiness. Lemon zest adds a citrusy kick that brightens each bite. Season with salt and pepper for balance. If you want a creamy finish, crumble feta on top. It melts slightly and adds richness. This dish is a quick side. You can prepare it in about 15 minutes. For the full recipe, check the section below. Enjoy the fresh taste of sautéed yellow squash! To make sautéed yellow squash, you need to prep your veggies first. Start by slicing the yellow squash into thin rounds. The thinner, the better! Next, take a small red onion and slice it finely. Mincing the garlic is next; two cloves will add great flavor. Lastly, pick a bell pepper—red, yellow, or orange—and dice it into small pieces. This colorful mix will make your dish pop! Now it’s time to cook! Heat one tablespoon of extra virgin olive oil in a large skillet over medium heat until it shimmers. Add the sliced red onion and sauté for about 2-3 minutes. You want the onion to be soft and translucent. Then, mix in the minced garlic and diced bell pepper. Sauté for another 2 minutes. The garlic should smell amazing! Next, add the sliced yellow squash to the skillet. Sprinkle in one teaspoon of fresh thyme leaves and one teaspoon of lemon zest. Season with sea salt and freshly cracked black pepper to taste. Sauté everything together for about 5-7 minutes. You want the yellow squash to be tender but still a bit crisp. Once done, grab some crumbled feta cheese. Sprinkle it on top of the sautéed squash just before serving. This adds a creamy touch! Serve the dish warm on a vibrant platter. For an extra touch, garnish it with fresh thyme sprigs and a sprinkle of lemon zest. This dish not only tastes good but looks great too. For the full recipe, check out the [Full Recipe]. Sautéing yellow squash is simple, but a few tips help. First, slice the squash evenly. This ensures they cook at the same rate. Heat your skillet over medium heat before adding oil. Once the oil is hot, add onions first. This step builds a tasty base. Stir often to prevent sticking. When adding garlic, keep a close eye. Garlic burns quickly, so remove it as soon as it smells fragrant. Finally, add the squash and seasonings all at once. Stir everything together. This method locks in flavors and keeps the squash tender yet crisp. To elevate your sautéed yellow squash, think beyond basic seasonings. Fresh herbs add a burst of flavor. Try basil, parsley, or dill for a fresh twist. You can also mix in spices like cumin or paprika for warmth. A pinch of chili flakes gives it a kick. For a tangy touch, add a splash of balsamic vinegar or a squeeze of lemon juice. These small changes make a big difference. Experiment with flavors until you find your favorite combination. Serving sautéed yellow squash can be fun and creative. Use a colorful platter to make the dish pop. For a special touch, add fresh herbs on top. Thyme or parsley looks great and adds freshness. A sprinkle of lemon zest also brightens the dish. If using feta, crumble it on just before serving. This adds creamy richness. Finally, consider serving it alongside a colorful salad or grain. This makes the meal more appealing and balanced. For the full recipe, check out the Sautéed Yellow Squash Delight! {{image_4}} You can change the taste of sautéed yellow squash by swapping in different veggies or spices. Try adding zucchini or bell peppers for extra color and crunch. You can even use mushrooms for a hearty touch. For spices, consider red pepper flakes for heat or smoked paprika for a deeper flavor. Each choice adds a unique twist, making your dish fun and exciting. If you need gluten-free or vegan options, this dish is easy to adapt. Skip the feta cheese to keep it vegan. You can also use vegetable broth instead of oil for a lighter flavor. Just make sure to check labels on pre-packaged items to ensure they are gluten-free. This way, everyone can enjoy the meal. Using seasonal produce keeps your dish fresh and exciting. In summer, add fresh corn or cherry tomatoes for sweetness. In fall, include diced butternut squash or kale. This not only enhances flavor but also supports local farmers. Each season brings new tastes to explore, keeping your sautéed yellow squash vibrant all year long. To store sautéed yellow squash, let it cool first. Place it in an airtight container. Keep the container in the fridge. It will stay fresh for about 3 days. Make sure to avoid moisture in the container. This helps keep your squash crisp. If you want to save space, use flat containers. Reheat sautéed yellow squash gently. The best method is using a skillet. Warm it over medium heat for about 3-5 minutes. Stir often to heat evenly. You can also use a microwave. Heat it in short bursts of 30 seconds. Stir in between until warm. Avoid high heat, as it can make the squash soggy. You can freeze sautéed yellow squash. First, let it cool completely. Spread it on a baking sheet in a single layer. Freeze for 1-2 hours until firm. Then, transfer it to a freezer-safe bag. Remove as much air as possible. It will last for about 2-3 months in the freezer. When you are ready to use it, thaw overnight in the fridge. Reheat as mentioned above for the best results. Enjoy your sautéed yellow squash later with the full recipe! Sautéed yellow squash can last for about 3 to 5 days in the fridge. Store it in an airtight container. Make sure it cools down before sealing. This keeps it fresh and tasty. Yes, you can make sautéed yellow squash ahead of time. Cook it, let it cool, then store it in the fridge. Reheat it on the stove or microwave before serving. This saves time and adds ease to your meal prep. Sautéed yellow squash pairs well with many dishes. Try serving it alongside grilled chicken or fish for protein. It also goes great with quinoa or rice. Add a fresh salad for a colorful plate. You can find my full recipe to guide your cooking! In this blog post, we covered how to prepare sautéed yellow squash. We looked at key ingredients, from fresh squashes to tasty seasonings. I shared step-by-step instructions to help you cook with ease. Tips for enhancing flavors and presenting the dish made it even better. Remember, you can make variations to match your taste, store extras, and reheat them well. Enjoy a dish that's both delicious and simple, perfect for any meal. Happy cooking!

Sautéed Yellow Squash Flavorful Quick Side Dish

Looking for a quick and tasty side dish? Sautéed yellow squash is your answer! This vibrant recipe combines fresh yellow

To make Chicken Scarpariello, you need some key ingredients. Here’s what you’ll need: - 4 chicken thighs, bone-in and skin-on - 2 chicken breasts, boneless and skinless - 1 teaspoon salt - 1 teaspoon black pepper - 1 tablespoon olive oil - 1 red bell pepper, sliced into strips - 1 yellow bell pepper, sliced into strips - 1 medium onion, finely chopped - 4 cloves garlic, minced - 1 teaspoon red pepper flakes (adjust to taste) - 1 cup chicken broth - 1 tablespoon capers, rinsed and drained - 1 tablespoon fresh lemon juice - Fresh parsley, finely chopped (for garnish) Each ingredient plays a role. The chicken gives protein and flavor. The bell peppers add sweetness and color. Garlic and onion build a great base for taste. Seasoning is crucial for Chicken Scarpariello. The salt and black pepper bring out the chicken's natural taste. Red pepper flakes add heat. You can adjust them based on your spice level. The capers provide a briny punch, while fresh lemon juice adds brightness. To prepare Chicken Scarpariello, you need a few tools: - Large skillet or frying pan - Spatula or tongs - Cutting board - Sharp knife - Measuring spoons - Ladle for serving These tools help you cook and serve the dish with ease. A large skillet allows you to sear the chicken and cook the veggies all in one place. This method saves time and keeps flavors together. {{ingredient_image_2}} Start by drying the chicken thighs and breasts with paper towels. This step is key for crispy skin. Next, season both sides with salt and black pepper. Make sure to coat evenly for great flavor. Heat olive oil in a large skillet over medium-high heat. When the oil is shimmering, add the chicken pieces, skin-side down. Sear them for 5 to 7 minutes until golden brown. Flip the chicken and cook the other side for the same time. Once done, place the chicken on a plate and set it aside. Lower the heat to medium and add the sliced red and yellow bell peppers, chopped onion, and minced garlic to the same skillet. Sauté the veggies for about 5 minutes until they soften and smell great. Sprinkle in the red pepper flakes to add some heat. Next, return the seared chicken to the skillet. Pour in the chicken broth until the chicken is slightly submerged. Bring this mixture to a gentle simmer. Stir in the capers and fresh lemon juice. Cover the skillet and let it cook for 20 to 25 minutes. Make sure the chicken reaches an internal temperature of 165°F (75°C). In the last 5 minutes, take off the lid to let the sauce reduce and thicken. Taste the sauce and adjust seasoning if needed. Finally, remove the skillet from the heat and garnish with fresh parsley before serving. To get that delicious crispy skin on your chicken, start by drying the pieces well with paper towels. Moisture is the enemy of crispiness. Season the chicken with salt and black pepper generously on both sides. When you cook it, heat olive oil until it shimmers in the pan. Sear the chicken skin-side down for about 5-7 minutes. This browns the skin and locks in flavor. Don't rush this step! After searing, let the chicken rest on a plate before adding it back to the pan. If you love heat, add more red pepper flakes. Start with 1 teaspoon, and taste the sauce as it cooks. You can always add more, but you can’t take it out! If you prefer a milder dish, reduce the red pepper flakes or skip them altogether. Remember, the flavors will deepen during cooking, so take it slow. Balance is key! Pair spicy chicken with creamy sides to cool the heat. For Chicken Scarpariello, use bone-in, skin-on thighs for juicy flavor and texture. These cuts stay moist during cooking. You can also use boneless chicken breasts, but they might dry out if overcooked. Mixing cuts can create a more dynamic dish. If you want more variety, try using chicken drumsticks or wings. Each cut brings a unique flavor and texture, making your meal even more enjoyable. Pro Tips Pat Dry for Crispiness: Always pat your chicken dry with paper towels before seasoning. This helps the skin become crispy when searing. Layer Flavors: When sautéing your vegetables, take your time to allow them to caramelize slightly, which will enhance the overall flavor of the dish. Adjust the Heat: The amount of red pepper flakes can be adjusted according to your spice preference. Start with less and add more if desired. Finish with Freshness: Always garnish your dish with fresh herbs at the end to maintain their vibrant color and flavor, enhancing the overall presentation. {{image_4}} You can swap in different veggies for Chicken Scarpariello. Try adding zucchini, mushrooms, or asparagus. Carrots or snap peas also work well. Each choice adds a new flavor and texture. You can even mix in some spinach or kale for extra greens. The key is to keep the balance of taste and color vibrant. Chicken is classic, but other proteins shine in this dish. Consider using pork, turkey, or even shrimp. You can use boneless cuts for quick cooking. For something different, try tofu for a vegetarian option. Just be mindful of cooking time, as it varies with each protein. Adjust your cooking method to ensure it remains juicy and flavorful. Want to amp up the flavor? Add olives or sun-dried tomatoes for a Mediterranean touch. A splash of white wine can boost the sauce's depth. Fresh herbs like basil or thyme add a fragrant note. You might also try a hint of smoked paprika for warmth. Each addition gives your Chicken Scarpariello a unique twist. Adjust according to your taste and enjoy! When you have leftover Chicken Scarpariello, store it right. First, let it cool down to room temperature. Then, place it in an airtight container. This helps keep your dish fresh. Make sure to separate the chicken from the sauce if possible. It helps prevent the chicken from getting soggy. You can keep it in the fridge for up to three days. If you want to keep it longer, freezing is a great option. To reheat your Chicken Scarpariello, use the stovetop or the microwave. If using the stovetop, place the chicken and sauce in a pan. Heat it over low to medium heat. Stir often to avoid burning. This helps keep the flavors intact. If you use a microwave, put the chicken in a microwave-safe dish. Cover it to keep moisture in, and heat in short bursts. Check every minute until it's hot. This keeps the chicken juicy and tasty. Freezing Chicken Scarpariello is easy. After cooling, place it in a freezer-safe container. Make sure to remove as much air as possible. Label it with the date. You can freeze it for up to three months. When ready to eat, thaw it in the fridge overnight. Reheat it on the stove for the best flavor. Avoid reheating in the microwave if possible, as it can dry out the chicken. Chicken Scarpariello is a delicious Italian dish. It features tender chicken cooked with sweet and spicy peppers. The chicken simmers in a flavorful broth, giving it a rich taste. This dish often uses capers for a salty kick. It’s a one-pan meal, making cleanup easy. You’ll love the mix of textures and flavors in every bite. Yes, you can make Chicken Scarpariello in a slow cooker. Start by searing the chicken in a pan for added flavor. Then, transfer the chicken to the slow cooker. Add the veggies, chicken broth, and seasonings. Cook on low for 6-8 hours or high for 3-4 hours. This method makes the chicken very tender. You can serve Chicken Scarpariello with crusty bread. It soaks up the tasty sauce. A simple salad pairs well too, adding freshness. You might also enjoy it with pasta or rice for a fuller meal. Roasted vegetables make a great side, adding more color and taste. In this blog post, we explored Chicken Scarpariello, from key ingredients to cooking techniques. You learned how to prepare delicious chicken, sear it perfectly, and enhance flavors with spices and tools. We discussed tips for crispy skin and suggested unique variations for your dish. Lastly, we covered storage tips to keep leftovers tasty. Now, you're ready to create your own Chicken Scarpariello masterpiece. Enjoy cooking and experimenting with this enjoyable meal!

Chicken Scarpariello Flavorful One-Pan Meal Recipe

Are you ready to impress your family with a mouthwatering meal? Chicken Scarpariello is a rich and flavorful dish that

To make sweet yellow squash pickles, you need simple, fresh ingredients. This recipe creates crunchy and tasty pickles. You can enjoy them as a snack or a topping. - 3 medium yellow squash: The star of the dish. Their sweet flavor shines through. - 1 cup granulated sugar: This adds sweetness to balance the tangy vinegar. - 1 cup apple cider vinegar: The acid helps preserve the squash and adds a zing. - 1/2 cup water: Balances the brine for a milder taste. - 1 tablespoon kosher salt: This draws out moisture and enhances flavor. - 1 teaspoon mustard seeds: They add a subtle warmth and crunch. - 1 teaspoon whole black peppercorns: Gives a hint of spice and depth. - 1 teaspoon turmeric powder: Adds a warm color and earthy taste. - 1 teaspoon crushed red pepper flakes: Adjust for spice; it gives a kick. - 1 teaspoon garlic powder: Infuses a savory note to the pickles. - 1 small onion: Adds sweetness and texture to the pickles. If you want more flavor, you can add herbs or spices. For example, dill can give a fresh taste. You can also try adding ginger for a zesty twist. Experimenting with different flavors can make your pickles unique. Enjoy creating your own version! Start by slicing the yellow squash into thin rounds. You need about three medium squash for this recipe. Place the squash in a large bowl and sprinkle it with kosher salt. Let it sit for one hour. This step removes extra moisture, keeping the squash crisp. After an hour, rinse the slices well under cold water. Drain them in a colander to remove any excess salt. In a medium saucepan, mix together the following for the brine: - 1 cup granulated sugar - 1 cup apple cider vinegar - 1/2 cup water - 1 teaspoon mustard seeds - 1 teaspoon whole black peppercorns - 1 teaspoon turmeric powder - 1 teaspoon crushed red pepper flakes - 1 teaspoon garlic powder Heat the mixture on medium. Stir gently until the sugar dissolves. Let it boil lightly, then reduce the heat to low. Add the thinly sliced onion and stir. Let it simmer for five minutes. This melds the flavors together nicely. Carefully add the drained squash slices to the hot brine. Stir gently so each piece gets coated. Now, pack the squash and onion into clean, sterilized jars. Be sure to include some of the spices and onions for added flavor. Pour the hot brine over the packed squash, covering them fully. Leave about 1/2 inch of space at the top for the brine to expand. Seal the jars tightly with their lids. Allow them to cool to room temperature. Finally, refrigerate the jars. For the best taste, let the pickles marinate for at least 24 hours. This resting time is key for the flavors to develop. To keep your sweet yellow squash pickles crunchy, follow a few steps. First, slice the squash thinly. Thin slices absorb flavors well and stay crisp. Next, sprinkle salt on the squash. Let it sit for an hour to draw out moisture. Rinse and drain the squash well. This step is key to their crunch. Always use fresh ingredients for the best taste. You can easily change the sweetness and spice levels in your pickles. If you want them sweeter, add more sugar to the brine. Start with a tablespoon more and taste it. For spice, add more crushed red pepper flakes. Remember to adjust slowly. You can always add more, but it’s hard to take it out. Balance is essential for a great flavor. For storing your sweet yellow squash pickles, use clean, sterilized jars. Seal the jars tightly, then store them in the fridge. They can last for up to two weeks. For longer storage, consider canning them. Proper canning can keep them fresh for months. Always check for signs of spoilage, like off smells or bubbles. Enjoy your pickles all season long! {{image_4}} Adding garlic and herbs can make your sweet yellow squash pickles even better. I love using fresh garlic for a strong flavor. You can also add herbs like dill or thyme. These herbs add a nice touch to your pickles. Just a few sprigs can change the taste. Start with one or two garlic cloves and a small handful of herbs. Mix them into your brine before adding the squash. Let the flavors blend for a tasty twist. The type of vinegar can change the flavor of your pickles. While apple cider vinegar is a classic choice, you can try others. White vinegar gives a sharper taste. Rice vinegar offers a milder flavor. You might even use balsamic vinegar for a sweet touch. Each vinegar type brings its unique taste. Experiment with what you have on hand. Just keep the ratio of vinegar to water the same for the best results. Don't stop at yellow squash! Other vegetables can make great pickles too. Carrots, cucumbers, and bell peppers add color and crunch. Slice them thinly, like the squash, for even pickling. You can mix and match your favorites. Just remember, each veggie has its own pickling time. Some may take longer to marinate. Try using a mix for a colorful jar of deliciousness. You can find the full recipe for this in the Sweet Yellow Squash Pickles section. Sweet yellow squash pickles shine when paired with rich dishes. They balance flavors and add crunch. Try them with grilled meats like chicken or pork. They also pair well with sandwiches. Use them as a zesty topping for burgers or hot dogs. Their bright taste enhances salads, too. Add them to a garden salad for an extra kick. You can even serve them as a snack with cheese and crackers. Sweet yellow squash pickles are more than a side dish. They bring flavor to many meals. Chop them up and mix them into potato salad. They can also brighten pasta dishes or grain bowls. Try them in a tart or savory pie for surprise flavor. You can even blend them into a dressing for salads. Their sweet and tangy taste will elevate any dish. Bring your pickles to parties for a tasty treat. Serve them in a decorative jar for a fun touch. Use small bowls for guests to enjoy as snacks. Create a pickle platter with different types of pickles, cheeses, and meats. This gives a variety of flavors for everyone. You can also add them to charcuterie boards for a colorful look. Sweet yellow squash pickles will be a hit at any gathering. For the full recipe, check out the Sweet Yellow Squash Pickles section above. Enjoy your tasty treats! Homemade pickles can last about 2 to 3 months in the fridge. After that, they may lose their crunch and flavor. Always check for signs of spoilage, like an off smell or mold. To keep them fresh, store your jars in the coldest part of the fridge. Yes, you can use other types of squash! Zucchini works well too. Just slice it thinly like yellow squash. The pickling process and flavors will still shine through. Feel free to experiment with your favorite squash varieties for tasty results. If your pickles aren't sweet enough, don't worry! You can add more sugar to the brine. Start with one tablespoon at a time until you reach your desired sweetness. Mix well and let the pickles sit for a few more hours to absorb the new flavor. In this blog post, we explored how to make tasty sweet yellow squash pickles. We covered the key ingredients, the step-by-step process, and helpful tips for the best results. You can also try fun variations and find perfect ways to serve them. Remember, homemade pickles can last long if stored right. By following this guide, you’ll bring joy to your meals. Enjoy your time in the kitchen and savor the flavors!

Sweet Yellow Squash Pickles Crunchy and Tasty Treat

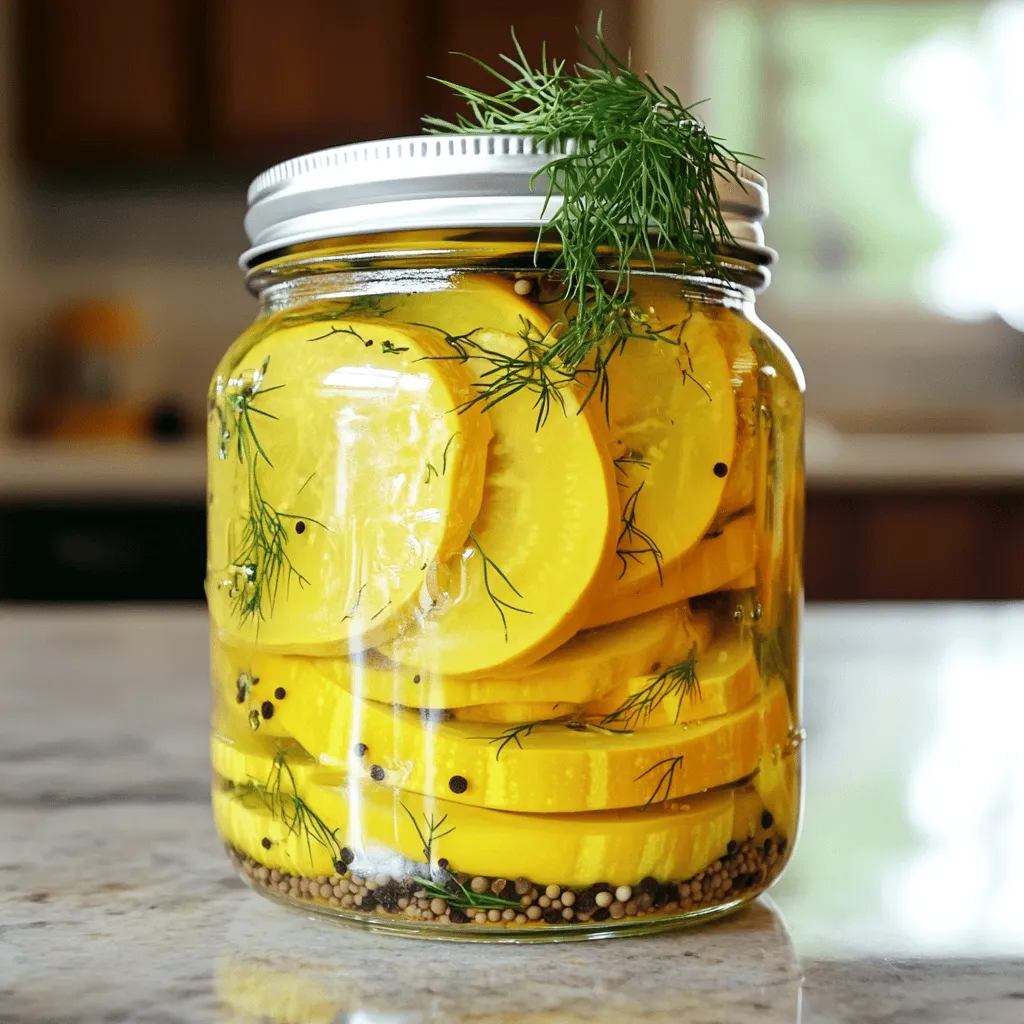
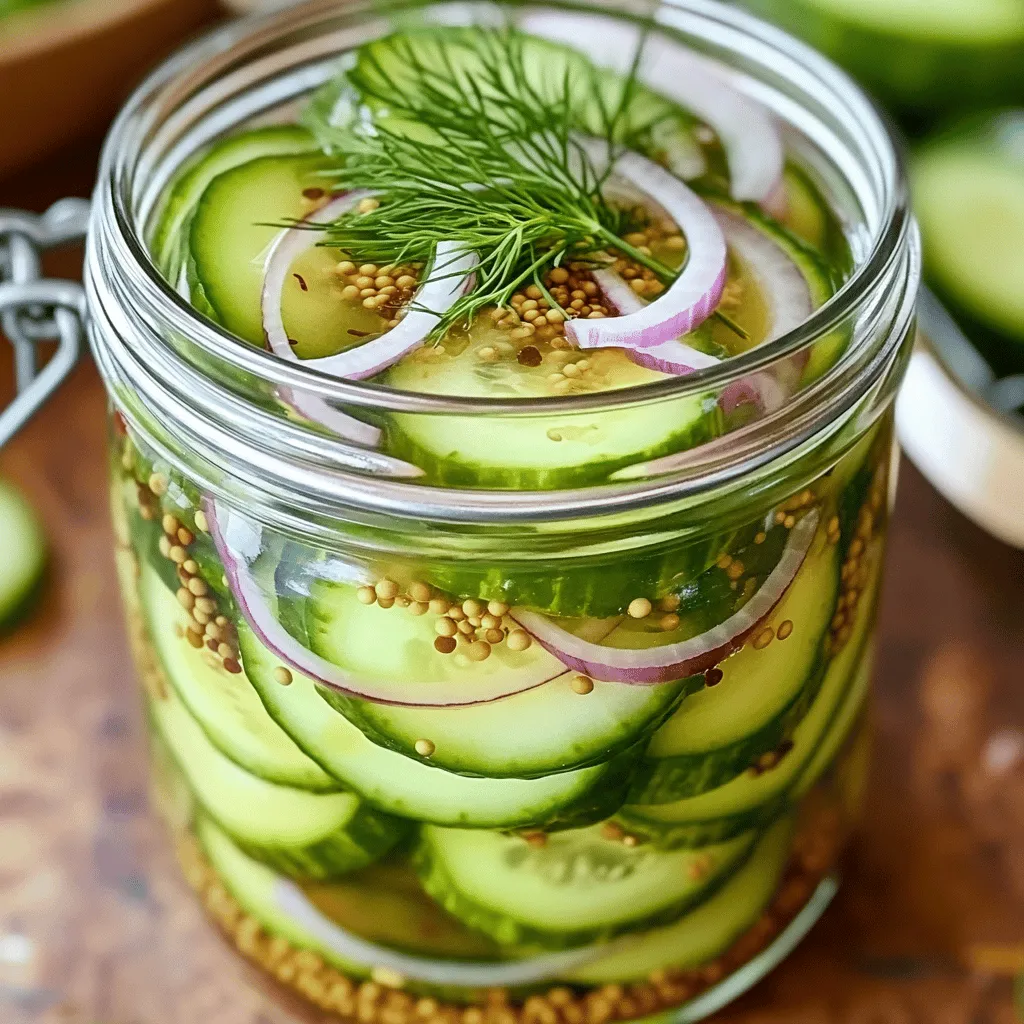
Looking to spice up your snack game? Sweet Yellow Squash Pickles are a delightfully crunchy treat! In this blog post,

- 2 cups carrots, julienned - 2 cups cucumbers, sliced - 1 cup radishes, thinly sliced - 1 cup red bell pepper, sliced These fresh vegetables bring color and crunch. They create a great base for your tangy pickled veggies. Choose crisp, firm vegetables for the best results. - 1 cup white vinegar - 1 cup water - 3 tablespoons sugar - 1 tablespoon salt - 1 teaspoon mustard seeds - 1 teaspoon coriander seeds - 1 teaspoon black peppercorns - 2 cloves garlic, minced These ingredients give your pickles their signature tang. The vinegar adds acidity, while sugar balances it. Salt helps preserve your veggies and enhances flavor. - Fresh dill sprigs (for garnish) While not necessary, dill adds a nice herbal touch. You can also try adding red pepper flakes for heat. Experiment with your favorites to make the recipe unique. For the full recipe, see the section above. Start by making the pickling brine. In a medium pot, mix white vinegar, water, sugar, salt, mustard seeds, coriander seeds, and black peppercorns. Set the heat to medium and stir until the sugar and salt dissolve. Bring the mix to a boil. Once boiling, remove it from the heat and let it cool for about 10 minutes. While your brine cools, chop your veggies. Julienned carrots, sliced cucumbers, thinly sliced radishes, and red bell peppers work well. Aim for uniform sizes. This helps them pickle evenly. Set the chopped vegetables aside for the next step. Grab a clean jar or multiple jars if you want individual servings. Layer the chopped vegetables inside the jar. Add minced garlic between the layers for extra flavor. This makes each bite taste great. Once your brine has cooled a bit, pour it over the veggies in the jar. Ensure the vegetables are fully submerged. If needed, press them down gently to remove air bubbles. Seal the jars with a lid and let them cool to room temperature. Then, place them in the fridge for at least 24 hours. This waiting time helps the flavors develop. After a day, your tangy pickled vegetables are ready to enjoy! You can store them in the fridge for up to 2 weeks. To create tangy pickled vegetables, you need balance. The key is in the brine. Use equal parts water and vinegar. This mix gives a sharp kick, but the sugar softens it. If you want more heat, add chili flakes. For extra depth, mix in herbs like dill or thyme. Taste your brine before pouring it over the veggies. Adjust the salt or sugar if needed. Remember, the best pickles come from your palate. Many people make simple mistakes. One common error is not cutting the veggies evenly. This can lead to uneven pickling. Always slice them to a similar size. Another mistake is skipping the cooling step for the brine. Pouring hot brine over cold veggies can cook them. Lastly, don’t rush the pickling time. Let them chill in the fridge for at least 24 hours. This wait is key for the flavors to blend. Clean jars keep your pickles safe. Start by washing jars in hot, soapy water. Rinse them well. Next, place the jars in a pot of boiling water for 10 minutes. This kills germs and bacteria. You can also run them through a dishwasher on high heat. Once the jars are clean, let them cool upside down on a clean towel. Avoid touching the inside of the jars after they are sterilized. This step ensures your tangy pickled vegetables stay fresh and tasty. For the complete recipe, check the Full Recipe section. {{image_4}} You can mix and match many vegetables when making pickled veggies. Some great choices include: - Zucchini - Cauliflower - Green beans - Red onions - Jalapeños These options add fun colors and tastes. Each veggie gives its own twist on the flavor. Feel free to experiment! If you love heat, try adding spicy elements. You can mix in: - Fresh chili peppers - Red pepper flakes - Sriracha sauce These will kick up the spice level. Start with a little, then adjust to your taste. The extra heat pairs well with the tangy brine. For a sweet and sour taste, consider adding: - Extra sugar - Pineapple chunks - Honey These ingredients balance the sour vinegar. You will enjoy a complex flavor profile. This variation works well with carrots and cucumbers from the full recipe. To keep your tangy pickled vegetables fresh, store them in the fridge. Make sure to use clean, airtight jars. This helps lock in flavor and keep bacteria out. Always let the pickled veggies cool completely before sealing the jars. Once sealed, place them in the fridge immediately. Your pickled vegetables can last up to two weeks in the fridge. After 24 hours of chilling, they will be ready to eat. The flavors will deepen over time, making them even tastier. However, for the best taste, try to enjoy them within the first week. Check for any unusual smells or colors. If the vegetables look slimy or discolored, it’s best to throw them out. Bubbles forming in the jar can also mean spoilage. If you see any mold, discard the batch right away. Keeping an eye on these signs will ensure you enjoy your pickles safely. Tangy pickled vegetables last up to two weeks in the fridge. After that, they may lose flavor. To keep them fresh, store them in an airtight jar. A good tip is to label the jar with the date. This helps you remember how long they have been stored. Yes, you can use many kinds of vegetables for pickling. Try using green beans, cauliflower, or even onions. Just cut them into similar sizes for even pickling. Experimenting with different veggies adds fun and new flavors to your pickles. Pickled vegetables offer several health benefits. They are low in calories and high in fiber. This makes them a great snack. They also contain probiotics, which help gut health. Additionally, pickled veggies provide vitamins and minerals that support overall health. You can find high-quality pickled vegetables at local farmers' markets or specialty stores. Many stores offer homemade options, which often taste better. You may also find good brands online. Look for products with few ingredients for the best flavor. If you want freshness, making your own is a great choice! For a simple recipe, check out the Full Recipe section. You now know how to make pickled vegetables from fresh ingredients. Start with the right veggies and brine. Choose flavor enhancers to make your pickles special. Follow the steps for prep, assembly, and storage. Avoid mistakes with the tips provided. Lastly, explore fun variations to keep things exciting. Remember, pickling lets you customize flavors while preserving freshness. Enjoy your homemade pickles; they're tasty and healthy!

Tangy Pickled Vegetables Simple and Flavorful Recipe

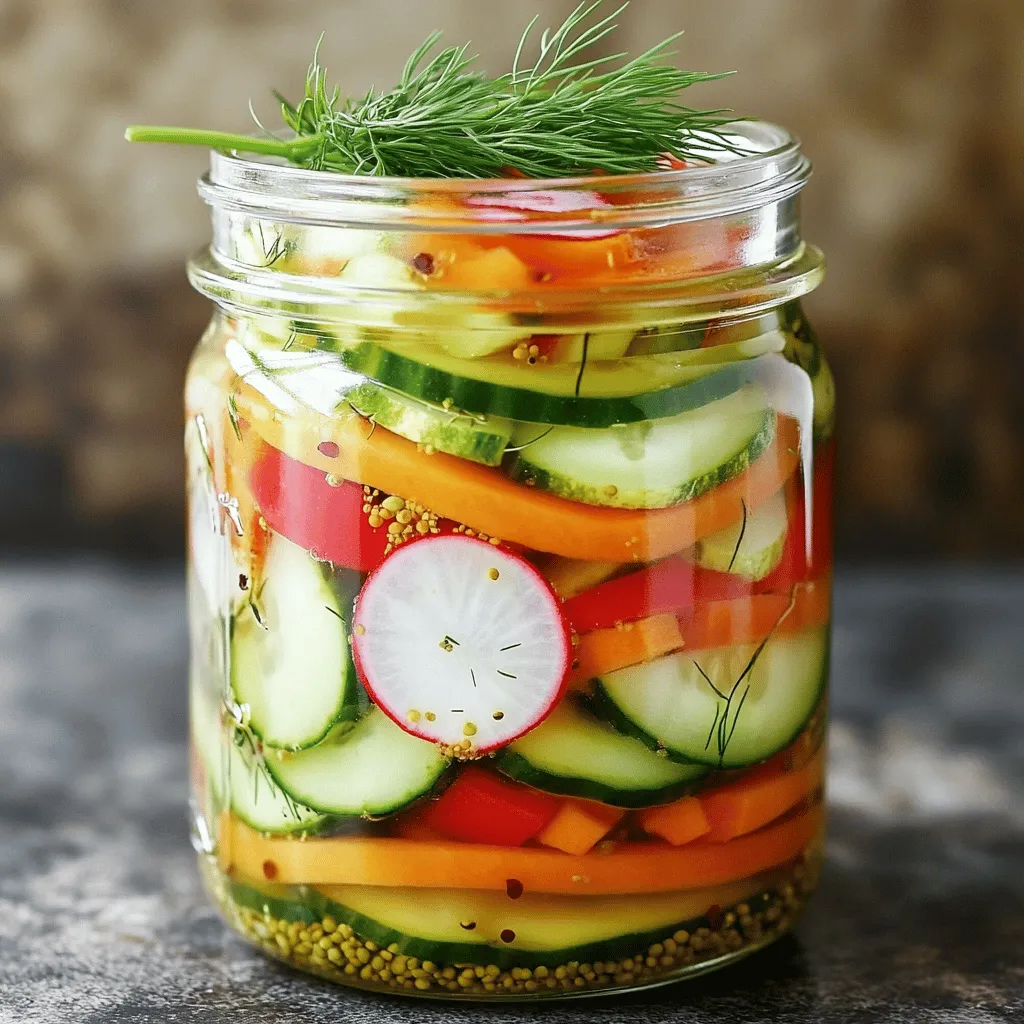
Are you ready to add zing to your meals? In my guide to tangy pickled vegetables, I share an easy

To make a Peach Upside Down Cake, gather these items: - 3 ripe peaches, pitted and sliced into wedges - 1/2 cup unsalted butter, divided - 3/4 cup packed brown sugar - 1 cup all-purpose flour - 1 teaspoon baking powder - 1/2 teaspoon baking soda - 1/4 teaspoon salt - 1/2 teaspoon ground cinnamon - 1/2 cup granulated sugar - 2 large eggs, room temperature - 1 teaspoon pure vanilla extract - 1/2 cup buttermilk, room temperature Quality matters. Use ripe peaches for the best flavor. If you can't find fresh peaches, canned or frozen peaches work too. Just make sure to drain canned peaches well. Use real vanilla extract, not imitation, for a richer taste. When baking, measuring accurately is key. For dry ingredients, use a spoon to fill your measuring cup, then level it off with a knife. For wet ingredients, use a liquid measuring cup for easy pouring. Room temperature ingredients mix better. Set your eggs and buttermilk out for about 30 minutes before you start. This makes your cake light and fluffy. Start by greasing your cake pan well. Use 1/4 cup of unsalted butter to coat the bottom and sides. This will help the cake release easily. For a bit of flair, sprinkle some brown sugar on the bottom after greasing. This gives a nice caramel layer. Next, slice your three ripe peaches. Arrange the peach slices in a circle, starting from the outside and moving to the center. Make it pretty! This design will show when you flip the cake later. In a mixing bowl, take the dry ingredients: flour, baking powder, baking soda, salt, and cinnamon. Whisk them together to mix well. In another large bowl, cream 1/4 cup of butter and granulated sugar until light. Add in the eggs one at a time. Mix well after each egg. Then, stir in the vanilla. Now, alternate adding the dry ingredients and the buttermilk into the butter mixture. Start with the dry, then the buttermilk, and end with dry. Mix just until blended. Avoid overmixing, as this can make the cake dense. Preheat your oven to 350°F (175°C) before baking. Pour the cake batter over the arranged peaches in the pan. Smooth the top with a spatula. Bake for 35-40 minutes. To check if it's done, insert a toothpick into the center. If it comes out clean, your cake is ready. Once baked, cool for 10 minutes in the pan. Then, carefully invert it onto a plate to show off the beautiful peaches on top. Enjoy this Peach Upside Down Cake Delightful and Simple Treat! For the complete recipe, check the Full Recipe. To make a light and fluffy cake, use room temperature ingredients. This means your eggs and buttermilk should be warm. They mix better and help the cake rise. Cream the butter and sugar well for about three to five minutes. This adds air to the batter. When mixing dry and wet ingredients, do it gently. Overmixing makes the cake dense. For leftover cake, store it in an airtight container. Keep it at room temperature for up to two days. You can also refrigerate it for about a week. If you want to keep it longer, freeze it. Wrap each slice in plastic wrap, then place in a freezer bag. It stays fresh for up to three months. Some common mistakes include using cold ingredients. This can lead to a dense cake. Another mistake is overmixing the batter. This makes the cake tough and chewy. Always check your oven temperature. An oven that’s too hot can burn the cake, while one that’s too cool leads to sinking. If your cake sinks in the middle, it may need more baking time. Make sure to test with a toothpick. It should come out clean when done. Also, avoid opening the oven door too often. This lets heat escape and can cause sinking. For more details on making this cake, check the full recipe. {{image_4}} You can easily boost the flavor of your peach upside-down cake. Adding spices can work wonders. Try mixing in a pinch of nutmeg or cardamom for warmth. You can also add a bit of lemon or orange zest. This addition brightens the cake and complements the peaches. If you want to swap out peaches, consider other fruits. Pineapples are a classic choice. You can also use plums, cherries, or even apples. Each fruit offers a unique taste, making your cake special every time. If you need a gluten-free version, use a 1:1 gluten-free flour blend. This swap keeps the cake soft and moist. To make it vegan, replace the eggs with flax eggs. Mix one tablespoon of ground flaxseed with three tablespoons of water. Let it sit for five minutes to thicken. For butter, use coconut oil or vegan butter. These swaps keep the texture smooth without losing flavor. Enjoy your peach upside-down cake, tailored to fit your needs! For the full recipe and detailed instructions, check out the Peach Paradise Upside Down Cake. To keep your peach upside-down cake fresh, store it properly. First, let the cake cool completely. Then, wrap it tightly in plastic wrap. Place it in an airtight container. This method keeps the cake moist and tasty for about three days at room temperature. If you want to save it longer, freezing is a great option. Cut the cake into slices, wrap each slice in plastic wrap, and then place them in a freezer bag. It can last up to three months in the freezer. When you're ready to enjoy your leftover cake, reheating is key. Preheat your oven to 350°F (175°C). Place a slice of cake on a baking sheet. Heat it in the oven for about 10 minutes. This warms the cake without drying it out. You can also use the microwave. Heat a slice for about 20 seconds, but be careful not to overdo it. For serving, a scoop of vanilla ice cream pairs well with the warm cake. You can also dust it with powdered sugar for an added touch of sweetness. For the full recipe, check out Peach Paradise Upside Down Cake. Your cake is done when it is golden brown and springs back when touched. Insert a toothpick into the center. If it comes out clean, the cake is ready. You can also look for a slight pull away from the sides of the pan. These signs show that the cake has baked well. Yes, you can make this cake in advance. Prepare the cake up to the baking step. Cover it tightly and place it in the fridge for up to one day. When ready, bake it fresh. You can also bake it a day before and store it. Just make sure to let it cool completely before wrapping it. You can use many fruits for an upside-down cake. Here are some great options: - Pineapple - Apples - Pears - Plums - Cherries Seasonal variations can make it fun! Try using strawberries in spring or cranberries in fall. Each fruit offers a unique taste and pairs well with the caramel base. This blog post outlined all you need for a Peach Upside Down Cake. We went through the key ingredients, measurement tips, and step-by-step instructions. You learned how to prepare your pan, mix the batter, and bake it perfectly. We shared tips for texture and common mistakes to avoid. There were also fun variations and storage advice. Remember, baking is about experimenting. Feel free to try new fruits and flavors. Enjoy each slice and share your cake with friends and family!

Peach Upside Down Cake Delightful and Simple Treat

Craving a dessert that is both delightful and easy to make? Look no further than this Peach Upside Down Cake!

To make this Cheesy Zucchini Casserole, you need: - 4 medium zucchinis, thinly sliced - 1 large onion, finely chopped - 2 cups shredded mozzarella cheese, divided - 1 cup grated Parmesan cheese, divided - 3 large eggs, at room temperature - 1/2 cup milk, preferably whole - 1/2 cup seasoned breadcrumbs - 1 teaspoon garlic powder - 1 teaspoon Italian seasoning - Salt and pepper, to taste - 2 tablespoons extra virgin olive oil - Fresh parsley, chopped, for garnish These ingredients work together to create a creamy and cheesy delight. The blend of mozzarella and Parmesan provides a rich taste that pairs nicely with the zucchini. You can customize your casserole with these optional ingredients: - Chopped bell peppers for added color and crunch - Spinach for a healthy twist - Cooked sausage or ground turkey for protein - Different cheese types like cheddar or feta for unique flavors Feel free to mix and match! Your additions can make this dish your own. Fresh zucchini is key to this recipe. It keeps the dish light and flavorful. When you use fresh zucchini, it adds moisture and a nice texture. It also helps balance the rich cheese. Look for firm zucchinis with shiny skin. Avoid ones that are soft or have blemishes. Fresh zucchini enhances the overall taste of your casserole. Trust me, it makes a big difference! For the full recipe, check out our detailed guide to get started on this tasty dish. Start by preheating your oven to 375°F (190°C). This ensures your casserole bakes evenly. While the oven heats, gather all your ingredients. You’ll need zucchinis, onions, cheeses, eggs, milk, and seasonings. Having everything ready makes the cooking process smooth and fun. 1. Sauté the Onions: Heat 2 tablespoons of olive oil in a large skillet over medium heat. Add the chopped onion and cook for about 5 minutes. You want them soft and fragrant. 2. Cook the Zucchini: Toss in your sliced zucchinis. Stir them occasionally for 5-7 minutes. They should be tender but not mushy. Season with garlic powder, Italian seasoning, salt, and pepper. This adds tons of flavor. 3. Prepare the Egg Mixture: In a bowl, whisk together the eggs and milk until frothy. Then, mix in half of the mozzarella and half of the Parmesan cheese. This helps bind the casserole. 4. Combine Ingredients: Add the sautéed zucchini mix to the egg and cheese blend. Stir gently to coat the zucchini evenly. This step is key for a tasty casserole. 5. Transfer to Casserole Dish: Grease a 9x13 inch casserole dish lightly with oil. Pour the mixture into the dish and spread it evenly. This helps it cook uniformly. 1. Make the Topping: In a small bowl, mix the reserved breadcrumbs with the rest of the mozzarella and Parmesan. This crunchy topping adds texture. 2. Sprinkle and Bake: Spread the cheesy breadcrumb mix over the zucchini mixture in the dish. Bake in the preheated oven for 30-35 minutes. Look for a golden brown, bubbly top as your cue. 3. Cool and Garnish: Let it cool for about 5 minutes after baking. Just before serving, sprinkle chopped parsley on top. This adds a lovely touch and freshness. These steps make it easy to create a cheesy zucchini casserole that everyone will love. For more details, check the Full Recipe. To get the best texture in your Cheesy Zucchini Casserole, follow these steps: - Slice Zucchini Thinly: Keep the slices about 1/4 inch thick. This helps them cook evenly. - Sauté Properly: Cook the zucchini with the onions until just tender. Avoid overcooking, as this makes them mushy. - Use Room Temperature Eggs: Room temperature eggs mix better, providing a fluffier texture. Many people make some simple mistakes when cooking this dish. Watch for these: - Using Too Much Liquid: Avoid adding too much milk or not draining the zucchini well. This can lead to a watery casserole. - Skipping Seasoning: Don't forget to season your mixture with salt and pepper. It makes a big difference in flavor. - Neglecting the Topping: The breadcrumb topping adds crunch. Don’t skip it! Want to take your casserole up a notch? Here are some ideas: - Add Fresh Herbs: Basil or thyme can brighten the dish. Just chop and mix them in. - Incorporate Spices: A pinch of red pepper flakes can give it a nice kick. - Mix in Other Veggies: Bell peppers or spinach can add color and taste. Just sauté them with the onions. For the complete recipe, check out the Full Recipe section! {{image_4}} You can swap out the cheeses in this recipe. If you don't have mozzarella, try using cheddar or gouda. These cheeses melt well and add a nice flavor. For a lighter option, consider using cottage cheese. It gives a creamy texture without all the fat. You can mix and match to find your favorite taste. Feel free to add other veggies to your casserole. Spinach or kale works great for extra greens. Bell peppers add a sweet crunch. You can also toss in mushrooms for an earthy flavor. Just make sure to sauté them lightly first. This way, they won’t release too much water into the dish. To make this casserole gluten-free, simply swap the breadcrumbs. Use gluten-free breadcrumbs or crushed cornflakes. Both options give a nice crunch on top. You can also use almond flour mixed with some herbs for flavor. Just remember to check your cheese labels to ensure they are gluten-free as well. To keep your cheesy zucchini casserole fresh, let it cool first. Once cooled, cover it tightly with plastic wrap or foil. You can also transfer it to an airtight container. Store it in the fridge for up to four days. Make sure it is sealed well to avoid drying out. When you are ready to enjoy the leftovers, preheat your oven to 350°F (175°C). Place the casserole in an oven-safe dish. Cover it with foil to keep moisture in, and heat for about 20 minutes. You can also use a microwave for quick reheating. Place a portion in a microwave-safe dish, cover with a paper towel, and heat for 1-2 minutes. Check that it is hot all the way through. If you want to save some for later, freezing is a great option. Cut the casserole into portions, and let them cool completely. Wrap each piece in plastic wrap, then place them in a freezer-safe bag or container. You can freeze it for up to three months. To reheat, thaw overnight in the fridge and bake as described above. Enjoy the deliciousness whenever you want! For the full recipe, refer to the earlier sections. Yes, you can make Cheesy Zucchini Casserole ahead of time. Prepare the casserole as per the recipe. Once you mix the ingredients, cover it. Store it in the fridge for up to 24 hours. When you're ready to bake, just pop it in the oven. You may need to add a few extra minutes to the baking time. This method saves time on busy days and keeps the flavors fresh. This casserole pairs well with many sides. I suggest serving it with a crisp green salad. The fresh veggies add crunch and balance the cheesy dish. Roasted chicken also makes a great choice. The savory chicken complements the flavors of zucchini and cheese. For a light meal, consider serving it with steamed broccoli or green beans. These options create a well-rounded plate. You can tell when the casserole is done by checking the top. It should be golden brown and bubbly. Insert a knife into the center; it should come out clean. If you see some wet mix on the knife, bake it a bit longer. Keep an eye on it during the last few minutes to avoid burning. Once it's done, let it cool for a few minutes before serving. Enjoy your delicious creation! This blog post covered how to make Cheesy Zucchini Casserole. We explored key ingredients and why fresh zucchini is vital. I shared step-by-step instructions, tips for perfect texture, and how to avoid common mistakes. We also discussed tasty variations and storage tips to keep leftovers fresh. In the end, this dish is simple and delicious. It’s perfect for gatherings or weeknight dinners. Enjoy making it your own for family and friends!

Cheesy Zucchini Casserole Flavorful and Simple Dish

If you’re looking for a simple, tasty dish that highlights fresh zucchini, you’ve come to the right place! In this

To make a tasty peach iced tea, gather these simple ingredients: - Fresh or frozen peaches - Black tea bags or loose tea - Sweeteners (honey, sugar, or alternatives) - Optional garnishes (mint, lemon) Exact measurements help you create the best flavor. For a standard recipe, use: - 4 cups of water - 4 black tea bags or 4 teaspoons of loose black tea - 2 ripe peaches, pitted and thinly sliced - 1/4 cup honey (adjust sweetness as desired) - 1 tablespoon fresh lemon juice You can change these amounts based on your taste. If you like it sweeter, add more honey. If you want a stronger tea, steep it longer. For the best flavor, choose the right peaches. Look for ripe, juicy peaches. They should feel slightly soft and smell sweet. When selecting tea, black tea works best for iced tea. Choose high-quality loose leaf or bags for a richer taste. Avoid tea with added flavors; they can mask the peach's natural sweetness. By picking the best ingredients, you ensure a delightful drink. For the full recipe, check out the Peach Paradise Iced Tea . Start by boiling 4 cups of water in a medium saucepan. Use medium-high heat for this step. Once the water boils, remove it from heat. Add 4 black tea bags or 4 teaspoons of loose black tea. Let it steep for 5 to 7 minutes. If you like strong tea, steep it longer. For lighter tea, steep it shorter. While your tea steeps, prepare the peach puree. Take 2 ripe peaches, remove the pits, and slice them thin. Put the peach slices in a blender. Add 1/4 cup honey to the blender. Blend on high until smooth. You want it to look like a thick sauce. If it’s too thick, add a splash of water to help blend. After steeping, take out the tea bags. Pour the peach puree into the warm tea. Stir it well until mixed. To brighten the flavors, add 1 tablespoon of fresh lemon juice. Stir again until everything is combined. Now, let the tea cool to room temperature. Then, put it in the fridge for at least 1 to 2 hours. This makes the tea cold and refreshing. For the complete recipe, check out the [Full Recipe]. To make your peach iced tea even better, try adding spices. A pinch of cinnamon gives warmth. Fresh ginger adds a nice zing. You can also mix in other fruits. Berries like raspberries or strawberries work well. They add color and taste. When sweetening your tea, honey is a great choice. It blends well with peaches. Start with a little, then taste. If you like it sweeter, add more. You can also use sugar or agave syrup. For a unique twist, try maple syrup. For a lovely presentation, use clear glassware. This shows off the bright color of the tea. You can add a slice of lemon on the rim for fun. It looks nice and adds flavor. Garnishing is key. Use fresh mint leaves for a pop of green. Add extra peach slices for a beautiful touch. You can even freeze peach slices for ice cubes. They keep your drink cold without watering it down. If you want a sugar-free option, try stevia or monk fruit. These sweeteners can replace honey without adding calories. For a vegan version, just use plant-based sweeteners. If you need a caffeine-free drink, use herbal tea. Rooibos tea is a great choice. It has a sweet flavor that pairs nicely with peach. Just follow the same steps, and you’ll have a tasty drink! {{image_4}} Peach iced tea is more than just one drink. You can change it up in many fun ways. Here are some tasty ideas to try. Sparkling Peach Iced Tea To make a sparkling peach iced tea, use soda water. After blending the peaches, mix the puree with brewed tea. Pour in soda water for a fizzy touch. This drink is perfect for hot days. Peach Raspberry Iced Tea This recipe adds a twist. Blend fresh or frozen raspberries with the peach puree. Mix it into the tea for a sweet and tart flavor. It’s a great way to enjoy two fruits at once. Using Seasonal Fruits In summer, add strawberries for a bright flavor. In fall, use apples or pears for a cozy taste. Each season brings new fruits to try. Get creative with what you have on hand. Ideal Flavor Combinations for Each Season Match your fruits with herbs. In spring, mix peaches with basil. In winter, try peaches with cinnamon. These flavors make your iced tea even more exciting. Peach Iced Tea Cocktails Want to make your drink a bit stronger? Add vodka or gin to your peach iced tea. This twist makes a fun cocktail for parties. It can turn a simple drink into a festive treat. Blending with Spirits for a Refreshing Twist You can also try bourbon or rum. These spirits add depth and warmth. Mix them with your peach iced tea for a smooth finish. Enjoy a drink that feels both refreshing and special. For a full recipe, check out Peach Paradise Iced Tea . It’s a great way to start your peach iced tea adventure! To keep your peach iced tea fresh, use airtight containers. Glass jars work best. They do not hold odors and keep flavors intact. You can also use plastic pitchers with tight lids. Avoid using metal containers, as they can change the taste. To prevent flavor loss, ensure the tea is cooled before sealing. Store it in the fridge. This keeps your drink cold and refreshing for longer. How long does peach iced tea last? When stored correctly, it can last 3 to 5 days in the fridge. Always check for signs of spoilage. What are the signs of spoilage? If the tea smells off or appears cloudy, it’s best to discard it. Also, if you see any mold, throw it out right away. Do you have leftover peach iced tea? There are fun ways to use it! You can pour it into ice cube trays. Once frozen, you can use these cubes in other drinks. Another idea is to make peach iced tea popsicles. Just mix the tea with a bit of fruit puree or yogurt, pour into molds, and freeze. This creates a cool treat, perfect for hot days! Yes, you can use different types of tea! Green tea offers a lighter taste. Herbal tea adds unique flavors and can be caffeine-free. White tea is also a good choice for a subtle flavor. Feel free to experiment. Each tea brings its own charm to Peach Iced Tea. To cut down on sweetness, use less honey or sugar. You can also swap honey for agave syrup or stevia. Another option is to add more lemon juice. This will balance the flavors and reduce sweetness. Always taste as you go to find the right balance for you. Yes! You can prepare Peach Iced Tea a day ahead. Just follow the steps and chill it in the fridge. This allows the flavors to blend well. When you are ready to serve, pour it over ice. Garnish with mint and peach slices for a fresh look. If fresh peaches are not available, peach juice works great! You can also use peach nectar for a sweet touch. Simply blend it with the tea. This will still give you that lovely peach flavor. Adjust sweetness as needed to match your taste. Yes, frozen peaches are a great option! Just let them thaw slightly before blending. They will blend well into a smooth puree. Keep in mind that frozen peaches may be less sweet. You might want to add a touch more honey to balance that out. Peach iced tea is a delightful drink made with fresh or frozen peaches and quality tea. We discussed key ingredients, precise measurements, and how to enhance the flavor. I shared tips on serving and storage to help you enjoy it longer. Remember, you can customize this drink for different tastes and seasons. Whether you choose to make it alcoholic or keep it simple, peach iced tea can refresh any occasion. Experiment with flavors and enjoy your homemade treat!

Ingredient Peach Iced Tea Refreshing and Flavorful Drink

Craving a cool drink on a hot day? Look no further! My Ingredient Peach Iced Tea is the perfect blend

To make Old Fashioned Peaches and Cream, you need these simple ingredients: - 4 ripe peaches, halved and pitted - 2 tablespoons brown sugar - 1 teaspoon ground cinnamon - 1 tablespoon fresh lemon juice - 1 cup heavy cream - 2 tablespoons powdered sugar - 1 teaspoon pure vanilla extract - Fresh mint leaves for garnish I recommend using ripe, juicy peaches for the best flavor. Look for peaches that are slightly soft when you press them gently. They should smell sweet and fragrant. Varieties like Freestone or Clingstone peaches work well. Freestone peaches are easier to pit and have a great taste. Choose peaches with a golden color to ensure they are ripe and ready to eat. If you want a lighter option, you can try different creams. Half-and-half is a popular choice. It has less fat but still creates a nice texture. Another option is coconut cream, which adds a unique flavor. For a dairy-free choice, consider almond or oat milk whipped cream. These alternatives can give you a creamy texture without the heaviness of heavy cream. To start, heat your grill or grill pan to medium heat. You want a nice, hot grill. This heat helps caramelize the peaches and gives them those lovely grill marks. Keep an eye on it; you want it hot but not too hot. Next, grab a small mixing bowl. Combine 2 tablespoons of brown sugar, 1 teaspoon of ground cinnamon, and 1 tablespoon of fresh lemon juice. Mix them well. This glaze adds a sweet and tangy flavor to the peaches. It really makes each bite special! Now, brush the peach halves with your glaze. Make sure every piece is coated. Once you finish, place the peaches cut-side down on the grill. Grill them for about 4-5 minutes. You want them to look caramelized and have nice grill marks. They should smell amazing! While the peaches are grilling, it’s time to make the whipped cream. In a medium bowl, mix 1 cup of heavy cream, 2 tablespoons of powdered sugar, and 1 teaspoon of pure vanilla extract. Use a mixer or whisk to beat the cream until it forms soft peaks. Don’t overwhip; you want it light and fluffy! Once your peaches are grilled, take them off the heat and cool them for a minute. In a serving bowl, place two grilled peach halves. Spoon the whipped cream generously over each peach. If you saved any glaze, drizzle it on top to add sweetness. Finally, add fresh mint leaves as a garnish. It adds a nice color and taste! For the full recipe, check out the section above. Enjoy this delightful dessert! When picking peaches, look for a few key signs. They should feel slightly soft when you press gently. The skin should have a warm color, often yellow or golden. If the peach smells sweet, it’s likely ripe. Avoid peaches with green spots or hard areas. These signs help you choose the best fruit for your dish. To make great whipped cream, start with cold heavy cream. Use a chilled bowl and beaters for best results. Whip the cream on medium speed until soft peaks form. Stop as soon as you see peaks. If you whip too long, it can turn into butter. The goal is light and airy, perfect for topping your peaches. For a beautiful presentation, serve grilled peaches in clear bowls. This way, the golden color shines through. Add a generous dollop of whipped cream on top. A sprig of fresh mint adds a pop of green. You can also sprinkle a little cinnamon for extra color and flavor. These small touches make your dessert look special. Spices can bring out the best in your peaches. A dash of cinnamon adds warmth and depth. Try adding a pinch of nutmeg for a unique twist. If you like a bit of heat, consider a touch of cayenne or black pepper. These spices can elevate the sweetness and make your dessert even more delightful. {{image_4}} You can switch out peaches for other fruits. Try ripe nectarines for a similar taste. Plums also work well, adding a tangy twist. Cherries are another fun option, giving you a sweet and tart flavor. You can also use pineapple if you want a tropical vibe. Just remember to adjust the cooking time for firmer fruits. The idea is to keep the fruit juicy and warm. If you want to change the sweetness, you have options. Honey is a great natural choice. Maple syrup adds a rich flavor, too. For a lighter option, consider agave nectar. You can also add spices like nutmeg or ginger to mix up the flavor profile. They can make the dish more exciting and different each time you make it! To make a vegan version, swap the heavy cream for coconut cream. It whips up nicely and has a lovely flavor. Use a plant-based sweetener, like agave, to keep it vegan. You can also choose non-dairy yogurt for a creamier texture. The key is to keep the sweetness balanced while using fresh, ripe fruit. Enjoy these variations to create your own unique dessert! For the full recipe, check out the detailed steps. To store leftover grilled peaches, let them cool first. Place them in an airtight container. They stay fresh in the fridge for up to three days. If you want to keep them longer, freeze them. Wrap each peach half in plastic wrap, then place them in a freezer bag. Frozen peaches can last for up to three months. Whipped cream is best fresh, but you can store it. Keep any leftover whipped cream in a clean, airtight container. It can last in the fridge for up to two days. If you see it start to separate, gently re-whip it. Avoid freezing whipped cream, as it may change texture. Grilled peaches are best served warm. If you stored them in the fridge, just reheat them briefly in the microwave. Heat them in 15-second bursts until warm. Serve the peaches with fresh whipped cream on top. You can also drizzle more glaze for extra flavor. For a fun twist, try adding a scoop of vanilla ice cream alongside. Enjoy your delicious treat! Peaches and cream is a classic dessert. It started in the United States in the 1800s. This dish showcases the sweet taste of peaches with rich cream. It became popular in summer when peaches are ripe. Many families enjoy it during picnics and gatherings. The simple mix of flavors makes it a timeless treat. Yes, you can use canned peaches. They are a quick and easy option. Look for peaches packed in juice or water. Avoid those in syrup, as they are too sweet. Drain them before use. Canned peaches may not have the same texture as fresh peaches. Still, they can work well in a pinch. To make this dessert dairy-free, use coconut cream instead of heavy cream. Chill a can of coconut milk overnight. Scoop out the thick cream and whip it. You can also use almond milk or oat milk. Add a bit of cornstarch to thicken it up. This way, you still enjoy a creamy dessert without dairy. You can add many tasty toppings to enhance your dish. Here are some ideas: - Chopped nuts for crunch - Granola for texture - Fresh berries for a fruity kick - Chocolate shavings for a sweet twist - A drizzle of honey or maple syrup for extra sweetness Feel free to mix and match these options for fun! Don't forget to check out the Full Recipe for more tips. Old Fashioned Peaches and Cream is a delicious, easy dessert. We covered the best ingredients and tips for selecting ripe peaches. You learned how to grill peaches and make a tasty glaze. Plus, we discussed various alternatives for cream and sweeteners. Remember, you can personalize this dessert with fruits and spices. Keep experimenting and enjoy the new flavors. Whether you serve it at a gathering or savor it alone, this treat is a winner. Happy grilling!

Old Fashioned Peaches and Cream Simple Dessert Delight

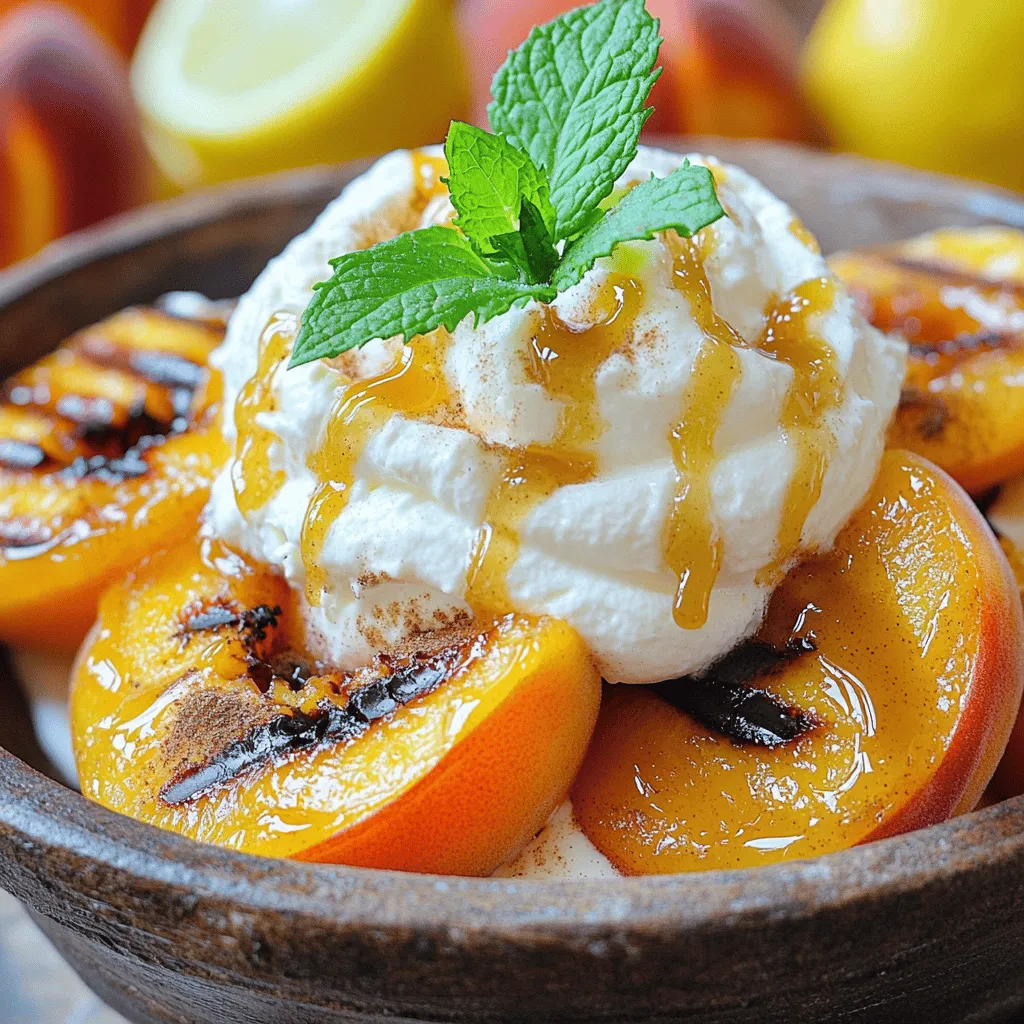
Craving a simple yet delightful dessert that celebrates summer? Look no further than Old Fashioned Peaches and Cream! This classic

Older posts
Newer posts
← Previous Page1 … Page41 Page42 Page43 … Page86 Next →

dsad

© 2026 lazychefmagic • Built with GeneratePress

Our Policies

  • Copyright Policy
  • Cookie Policy
  • GDPR Policy
  • Privacy Policy
  • Disclaimer
  • Terms Of Use

More Information

  • Home
  • About
  • Contact
  • Appetizers
  • Dessert
  • Dinner
  • Drinks
©2026, lazychefmagic About Back To Top