Skip to content
DisclaimerTerms Of UseGDPR PolicyCookie Policy

lazychefmagic

  • Home
  • Drinks
  • Appetizers
  • Dinner
  • Dessert
  • About
  • Contact
  • Privacy Policy
DisclaimerTerms Of UseGDPR PolicyCookie Policy

NO-ING-IMG

To make Southern Tomato Pie, gather these ingredients: - 1 pre-made pie crust - 4 large ripe tomatoes, sliced - 1 teaspoon salt - 1/2 teaspoon black pepper - 1 cup shredded sharp cheddar cheese - 1 cup mayonnaise - 1 tablespoon Dijon mustard - 3 green onions, finely chopped (include green tops) - 1/4 cup fresh basil, finely chopped - 1/2 teaspoon garlic powder - 1/4 teaspoon cayenne pepper (optional for added heat) You can enhance the pie’s taste with: - Crumbled bacon for a smoky kick - A splash of hot sauce for extra heat - Sliced olives for a briny touch - Fresh herbs like thyme or oregano Select the best tomatoes for your pie by: - Picking firm, ripe tomatoes with a deep color - Smelling them; they should smell sweet and earthy - Avoiding any that are bruised or have soft spots - Choosing heirloom varieties for unique flavors First, gather your tomatoes. I like to use four ripe ones. Slice each tomato evenly. Place the slices on a clean kitchen towel. Sprinkle one teaspoon of salt over the slices. Let them sit for 10-15 minutes. This helps remove extra moisture. After that, pat the slices dry with another towel. This step keeps your pie from getting soggy. Now, grab a medium bowl. Mix together one cup of mayonnaise, one tablespoon of Dijon mustard, half a teaspoon of garlic powder, and cayenne pepper if you want some heat. Whisk until smooth. In your pre-made pie crust, layer half of the tomato slices. Add half of the chopped green onions and basil on top. Spread half of the mayonnaise mixture next. Finally, sprinkle half a cup of cheddar cheese over it. Repeat this layering. Top with the remaining cheese. Preheat your oven to 375°F (190°C). Place your pie in the oven. Bake for 30-35 minutes. Look for a bubbly pie with a golden top. When it's done, take it out and let it cool for 10 minutes. This makes cutting easier and lets the flavors mix. Enjoy your Southern Tomato Pie! When making Southern Tomato Pie, avoid using unripe tomatoes. They won’t give you that sweet flavor. Don’t skip salting the tomatoes. This step pulls out moisture and keeps your pie from being soggy. Also, be careful not to overmix your mayonnaise mixture. This can make it too runny. Lastly, let your pie cool before cutting. This helps it hold its shape. To enhance the taste, use fresh herbs like basil. They add a bright note that pairs well with tomatoes. Try different cheeses, such as mozzarella or pepper jack, for a twist. If you like heat, add more cayenne pepper. A dash of hot sauce can also elevate flavors. Remember, balance is key. You want to enjoy the rich, creamy taste without one flavor overpowering another. Look for a golden brown top when your pie is ready. The cheese should be bubbly and slightly crispy. If the edges of your crust look too dark, cover them with foil. This will help prevent burning while the rest cooks. After baking, let it sit for about 10 minutes. This cooling time helps the pie set up. You’ll see the layers stay together better when you slice it. {{image_4}} You can switch up the cheese in your Southern Tomato Pie. Instead of sharp cheddar, try mozzarella for a milder flavor. Goat cheese adds a creamy texture and tanginess that pairs well with tomatoes. For a stronger taste, use Gruyère or feta cheese. Mixing cheeses can also create a more complex flavor profile. Experiment and find what you love most! Add-ins can take your pie to the next level. Consider mixing in cooked bacon or crumbled sausage for a savory kick. Spinach or kale can add extra nutrients and color. You might also try roasted red peppers or sun-dried tomatoes for added depth. Just remember to balance moisture levels so the pie doesn’t get soggy. To make a vegan version, swap cheese and mayo for plant-based alternatives. Use cashew cheese or nutritional yeast for flavor. A gluten-free crust works well for those avoiding gluten. Just check your ingredients for hidden gluten. These adaptations keep the essence of the dish while catering to different diets. Enjoy experimenting with your own twists! To keep your Southern Tomato Pie fresh, let it cool first. Cover it tightly with plastic wrap or aluminum foil. You can also use an airtight container. Store it in the fridge for up to three days. This keeps the pie moist and tasty. When you’re ready to enjoy your leftovers, preheat your oven to 350°F (175°C). Place the pie on a baking sheet to catch any drips. Heat it for about 15 to 20 minutes. This method warms the pie evenly and keeps the crust crisp. If you want to save your pie for later, freezing works well. Wrap the cooled pie tightly in plastic wrap and then in foil. It can stay in the freezer for up to three months. When you’re ready to eat, thaw it overnight in the fridge before reheating it in the oven. This way, you can enjoy a slice of Southern delight any time! Southern Tomato Pie comes from the Southern United States. It reflects local ingredients and traditions. This dish celebrates summer tomatoes and is often served in family gatherings. People love how it captures the essence of Southern cooking. Yes, you can use many types of crust for your pie. A store-bought crust works well for ease. You can also try a homemade crust for a special touch. Some people enjoy using a biscuit, cornbread, or even a gluten-free crust. Just make sure it can hold the filling. To reduce the water in your pie, use ripe tomatoes but not overripe ones. Sprinkle salt on the sliced tomatoes and let them sit for 10-15 minutes. This step helps draw out moisture. Pat them dry before adding to the pie. Also, avoid overloading the filling. Southern Tomato Pie pairs well with a fresh salad. A light green salad with a vinaigrette is a great choice. You can also serve it with grilled vegetables or a side of coleslaw. For a heartier meal, consider some fried chicken or a side of baked beans. For the complete recipe, check out the section above. Follow the steps closely for a delicious Southern Tomato Pie! You now know how to make a great Southern Tomato Pie. We covered the best ingredients and tips for using fresh tomatoes. You learned step-by-step instructions for preparation and baking. Plus, we explored flavor variations and storage tips. Take these ideas and make this pie your own. Experiment with flavors and enjoy each bite. With practice, you’ll perfect your Southern Tomato Pie recipe. Happy cooking!

Southern Tomato Pie Flavorful and Simple Delight

Welcome to a taste of the South with my recipe for Southern Tomato Pie! This dish is a simple delight,

- Cucumbers: Choose small, firm cucumbers. Pickling cucumbers work best. Look for bright, shiny skins. Avoid ones with soft spots or wrinkles. - Vinegar and spice options for pickling: White vinegar is classic, but apple cider vinegar adds flavor. You can use rice vinegar for a milder taste. For spices, try black peppercorns, mustard seeds, or coriander seeds. Each spice brings a unique taste to your pickles. - Optional add-ins for flavor enhancement: Add sliced jalapeños for heat or a few bay leaves for depth. You can also toss in carrots, onions, or radishes for extra crunch. Fresh herbs like dill or thyme give a fresh touch. These add-ins make your pickles more exciting and personal. For the full recipe, check out the details shared earlier. Start with a clean jar. Sterilizing your jar keeps your pickles fresh. You can boil the jar or rinse it with hot water. Choose a jar that is about one liter. This size holds the ingredients well without overflow. Slice your cucumbers thinly. Use a sharp knife for even cuts. You can cut them into rounds or spears. Rounds look fun, while spears are great for dipping. Make sure to use fresh cucumbers for the best crunch. In a medium pot, mix vinegar, water, sugar, and salt. Heat the mixture on medium. Stir until the sugar and salt dissolve. Do not let it boil. This step is key to a balanced taste. Pour the hot brine over the cucumbers in the jar. Ensure all the cucumbers are fully submerged. This keeps them flavorful and crisp. Leave a little space at the top for the brine to expand. Let the jar cool to room temperature before sealing. This step helps the pickles stay crunchy. Place the jar in the fridge for at least four hours. For the best flavor, let them sit overnight. Enjoy your quick refrigerator pickles as a tasty snack or side dish! For the full recipe, check the details above. To make your quick refrigerator pickles truly yours, think about spices. You can add: - Mustard seeds for a tangy kick - Coriander seeds for a warm, citrusy flavor - Bay leaves for a subtle depth Using different sweeteners can also change the taste. Try: - Honey for a floral note - Maple syrup for a unique sweetness - Agave nectar for a low-glycemic option Quick refrigerator pickles shine in many dishes. Use them as: - A crunchy topping for burgers or sandwiches - A zesty side for grilled meats - An ingredient in salads for added crunch Pair them with: - Cheese and charcuterie boards - Tacos for a fresh bite - Rice or grain bowls for extra flavor Watch for signs of spoilage. If you see: - Mold on the surface - Off smells or colors It’s best to toss them. To avoid spoilage, always use clean utensils. If your pickles taste too salty, try these tips: - Add more water to dilute the brine - Slice cucumbers thicker next time to balance flavors For pickles that are too sweet, a splash of vinegar can help. Adjust next time by using less sugar. For the full recipe, check out the recipe section above! {{image_4}} You can pickle more than just cucumbers. Try carrots, radishes, or green beans. Each vegetable adds its own flavor and crunch. To pickle these veggies, slice them thin or into spears. Pack them tightly in a jar. Use the same brine from the quick refrigerator pickles recipe. Adjust time based on the vegetable's size. For example, carrots need about 24 hours for best taste. Want something sweet and spicy? Add honey or chili flakes to your brine. This gives your pickles a kick. For herb-infused flavors, toss in fresh dill, thyme, or rosemary. These herbs make your pickles taste fresh and vibrant. You can also experiment with garlic or onion slices for a punchy twist. Each flavor adds depth, making your pickles unique and fun. Quick refrigerator pickles differ from traditional canning methods. Canning requires longer cooking times and special jars. It can also be a bit tricky. Quick pickles are easy and ready in hours. They stay fresh in the fridge for about two weeks. Always check for signs of spoilage before eating. Both methods preserve flavors well but use different techniques. Quick pickles are great for busy cooks. Enjoy the ease and taste! To keep your quick refrigerator pickles fresh, store them in a clean jar. Use a jar with a tight-fitting lid. Place the jar in the coldest part of your fridge. This helps maintain their crunch and flavor. Pickles last about 2 to 4 weeks in the fridge. Always check for signs of spoilage, like off smells or mold. If they look and smell good, they are still safe to eat. You can reuse the brine for new batches of pickles. This saves time and adds flavor. Just remember to strain the brine to remove old spices and bits. You can add fresh spices to boost the taste. Adjust the brine if needed. If it tastes too salty, add a bit of water. If it’s not tangy enough, add more vinegar. This way, you can customize the flavor for each batch. Can you freeze refrigerator pickles? Yes, but it’s not ideal. Freezing changes the texture, making them softer. If you still want to freeze them, use a freezer-safe jar. Leave space at the top for the brine to expand. Thaw frozen pickles in the fridge before serving. They won’t be as crunchy, but they’ll still taste good. For the best flavor and texture, I recommend enjoying them fresh from the fridge. You can find the full recipe for making these quick refrigerator pickles in the earlier sections. Quick refrigerator pickles need at least 4 hours to sit in the fridge. This time allows the flavors to blend well. For the best taste, let them sit overnight. You will enjoy a richer flavor if you wait! Yes, you can use different types of vinegar for pickling. Each vinegar brings a unique taste. White vinegar gives a sharp, clean flavor. Apple cider vinegar adds a fruity note. Rice vinegar offers a milder taste. Experiment to find your favorite! If your pickles turn out soggy, don’t worry! You can fix this. First, use fresh cucumbers next time. Look for firm, crispy ones. Second, try adding a bit more salt. Salt helps keep pickles crunchy. Lastly, let them sit for less time in the brine. Yes, quick refrigerator pickles are safe to eat. They stay fresh in the fridge. The vinegar and salt help preserve them. Just ensure you keep them sealed and refrigerated. Always check for any signs of spoilage before eating. Enjoy your pickles with confidence! Making quick refrigerator pickles is fun and easy. You learned about choosing the right cucumbers, preparing jars, and making brine. Remember the slicing techniques for cucumbers, and how to store them for the best taste. Explore different spices and alternative veggies to customize your pickles. This method keeps your pickles fresh and tasty in the fridge. Experiment and enjoy your creations, knowing each jar reflects your unique flavor. Happy pickling!

Quick Refrigerator Pickles Easy and Flavorful Recipe

Looking for a simple way to turn fresh cucumbers into a tasty snack? In this post, I’ll share my easy

- 4 ripe peaches, thinly sliced - 4 cups arugula (or a mix of your favorite greens) - 100g feta cheese, crumbled - 2 tablespoons extra virgin olive oil - 1 tablespoon balsamic vinegar - 1 teaspoon honey - Salt and freshly ground black pepper, to taste - 1/4 cup walnuts, toasted and roughly chopped - Fresh mint leaves for garnish To create this Peach Feta Salad, you need fresh ingredients. The peaches should be ripe for the best taste. Look for peaches that yield slightly to your touch. Arugula adds a nice peppery flavor. You can also mix it with your favorite greens if you wish. The feta cheese must be crumbled, adding creaminess to the salad. For the dressing, extra virgin olive oil is key. It brings a rich flavor. Balsamic vinegar adds tanginess, while honey gives a touch of sweetness. Salt and pepper enhance all the flavors. If you like some crunch, add walnuts. Toasting them brings out their nuttiness. Fresh mint leaves are optional but give a burst of freshness. Feel free to explore the Full Recipe for complete steps and tips. - Start by slicing four ripe peaches into thin pieces. - In a large bowl, layer the peaches and four cups of arugula. - The bright colors make a great base for your salad. - Next, add 100 grams of crumbled feta cheese. - Toss in a quarter cup of toasted walnuts for crunch. - These ingredients mix creamy and crunchy flavors perfectly. - Use a small bowl to combine two tablespoons of olive oil. - Add one tablespoon of balsamic vinegar to the bowl. - Mix in one teaspoon of honey for sweetness. - Season this blend with a pinch of salt and black pepper. - Whisk everything until it’s well blended and smooth. - Drizzle the dressing over your salad mix. - Gently toss the salad with tongs or a spoon. - Make sure every piece gets a taste of the dressing. - Take a moment to taste your salad. - Adjust the seasoning by adding more salt or pepper if needed. - Serve the salad on a pretty platter or in bowls. - Garnish with fresh mint leaves for extra freshness. - Enjoy this Peach Feta Salad fresh and flavorful! For the full recipe, check out the full details above. To make your Peach Feta Salad shine, focus on seasoning. Start with salt and pepper. A pinch of salt can bring out the sweetness of the peaches. If you want more zing, add a splash of lemon juice. This enhances the flavors without overpowering them. Next, play with ingredient ratios. If you prefer a creamier salad, add more feta. If you like a crunch, increase the walnuts. These small changes can transform your salad. For a beautiful display, arrange your salad on a large platter. Layer the peaches, arugula, and feta in sections. This creates an eye-catching look. You can also scatter extra walnuts and mint leaves on top. This adds color and invites your guests to dig in. For garnishing, fresh mint leaves work wonders. They not only look great but also add freshness. A few sprigs of mint on top will make your salad pop. Serve it right away to enjoy all the flavors and textures in their best form. You can find the complete recipe in the [Full Recipe]. {{image_4}} If you want to change up the flavors, try swapping feta cheese. You can use goat cheese or ricotta. Both add creaminess and a different taste. You might also consider vegan feta if you prefer a plant-based option. For greens, arugula is fantastic, but other options work too. Spinach, kale, or mixed greens can provide a new twist. You can also add in herbs like basil or parsley for extra flavor. Nuts are great for crunch. If you don’t have walnuts, use almonds or pecans instead. You can play with seasonal fruits for your salad. In summer, swap peaches for berries or citrus fruits. Strawberries or oranges can give a bright, fresh taste. They add a nice sweet and tangy balance. In the fall, try adding roasted vegetables. Roasted sweet potatoes or beets can bring warmth and depth. They pair well with feta and make the salad heartier. These changes keep the salad exciting and fresh all year long. For the full recipe, check out the Peach Feta Bliss Salad. To keep your Peach Feta Salad fresh for a few hours, store it in the fridge. Use an airtight container to stop air from getting in. This will help the salad stay crisp and tasty. If you plan to eat it later, keep the dressing separate. This way, the greens won’t get soggy. Just toss everything together when you're ready to enjoy it. For long-term storage, it's best to keep the salad components separate. Store the peaches, feta, and greens in different containers. This keeps each ingredient fresh and flavorful. Use the peaches within three days for the best taste. Feta cheese can last about a week in the fridge. Arugula should be eaten within a few days to enjoy its crunch. Walnuts can stay fresh for weeks if stored in a cool, dry place. When ready to eat, simply combine everything again. Drizzle on the dressing and savor the delightful flavors of your Peach Feta Salad. For the complete recipe, check the [Full Recipe]. Yes, you can make this salad ahead of time. However, keep the dressing separate. This helps the salad stay fresh. Prepare the salad base with peaches, arugula, feta, and walnuts. Store it in the fridge for up to four hours. - Tips for preparing ahead: - Slice the peaches just before serving to keep them fresh. - Mix the salad ingredients without the dressing. - Store the dressing in a jar and shake it right before use. If you don't have feta cheese, you have options. You can try goat cheese for a similar creamy taste. Another choice is ricotta salata, which is mild and crumbly. For a vegan option, use tofu or a plant-based feta. - List of cheese alternatives: - Goat cheese - Ricotta salata - Tofu - Plant-based feta To prevent peaches from browning, you can use a few easy tricks. Lemon juice works well; it slows the browning process. Simply coat the peach slices with lemon juice. Alternatively, you can soak them briefly in a mix of water and lemon juice for better results. - Techniques for preserving freshness: - Coat slices with lemon juice. - Soak peach slices in water and lemon juice mixture. - Use an airtight container to store fresh slices. This blog post gave you a tasty salad recipe, full of fresh ingredients and easy steps. You learned how to layer peaches, arugula, and feta, while making a simple dressing. The tips on flavor and presentation will help you impress anyone. Remember, you can swap ingredients for your favorite tastes. Whether served fresh or stored, this salad is a winner. Enjoy trying it out and making it your own!

Peach Feta Salad Fresh and Flavorful Delight

If you’re looking for a bright and tasty dish, this Peach Feta Salad is it! With juicy peaches, crisp arugula,

- 3 cups cooked chicken, shredded - 8 oz egg noodles - 1 cup frozen mixed vegetables (carrots, peas, corn) - 1 can (10.5 oz) cream of mushroom soup - 1 cup chicken broth - 1 cup shredded cheddar cheese - 1/2 cup sour cream - 1 small onion, finely diced - 2 cloves garlic, minced - 1 teaspoon dried thyme - 1 teaspoon paprika - Salt and pepper to taste - 1/2 cup breadcrumbs You need these main ingredients to create a tasty chicken noodle casserole. Each item adds flavor and texture. The shredded chicken serves as the protein, while egg noodles bring heartiness. The cream of mushroom soup adds a nice creaminess. Mixed vegetables give color and nutrients, and cheese makes it gooey and delightful. - Fresh herbs (like parsley or thyme) - Additional veggies (such as broccoli or bell peppers) - Different cheese types (like mozzarella or gouda) - Spices (like garlic powder or onion powder) You can swap in optional ingredients to suit your taste. Fresh herbs can brighten the dish. Using different vegetables can add a new twist. Changing cheese types changes the flavor profile. You can even add extra spices for a kick. - Large pot for boiling noodles - Large skillet for sautéing - Mixing bowl for combining ingredients - 9x13 inch casserole dish - Oven for baking Gather these cooking essentials before you start. A large pot helps cook the noodles. A skillet is great for softening onions and garlic. A mixing bowl is needed for combining everything. Finally, use a casserole dish for baking the meal. {{ingredient_image_2}} Start by gathering all your ingredients. You need: - 3 cups cooked chicken, shredded - 8 oz egg noodles - 1 cup frozen mixed vegetables (a blend of carrots, peas, and corn) - 1 can (10.5 oz) cream of mushroom soup - 1 cup chicken broth - 1 cup shredded cheddar cheese - 1/2 cup sour cream - 1 small onion, finely diced - 2 cloves garlic, minced - 1 teaspoon dried thyme - 1 teaspoon paprika - Salt and pepper to taste - 1/2 cup breadcrumbs Preheat your oven to 350°F (175°C). This step is key to getting a nice, golden top. Next, boil a pot of salted water. Add the egg noodles and cook them according to the package directions. Aim for al dente, as they will cook more in the oven. Once done, drain the noodles well and set them aside. In a large skillet, heat a splash of oil over medium heat. Add the diced onion and minced garlic. Sauté for about 3-4 minutes until they soften and smell great. In a big mixing bowl, combine the shredded chicken, cooked noodles, frozen veggies, cream of mushroom soup, chicken broth, sour cream, dried thyme, and paprika. Mix well and season with salt and pepper. Transfer this mixture into a greased 9x13 inch casserole dish. Spread it out evenly. Sprinkle the shredded cheddar cheese over the top, covering it well. Then, in a small bowl, mix the breadcrumbs with a drizzle of olive oil for extra crunch. Sprinkle this mixture over the cheese. Now it’s time to bake! Place the casserole in your preheated oven and bake for 30-35 minutes. Look for a golden brown top and bubbly edges. Once it’s done, let it rest for a few minutes before serving. This helps the casserole firm up a bit. Enjoy your warm, hearty chicken noodle casserole! For a creamy casserole, mix well. The key is to use the right amount of sauce. I blend the cream of mushroom soup and chicken broth. This mix keeps the dish moist but not watery. You want your noodles to soak up some sauce without drowning. Using al dente noodles helps them hold their shape and texture in the oven. Seasoning makes all the difference. I love using thyme and paprika for warmth. They bring out the chicken's taste and add depth. Don't forget salt and pepper to balance flavors. For an extra kick, try adding a dash of garlic powder or a hint of cayenne. Fresh herbs can also elevate the dish. A sprinkle of parsley before serving adds freshness. Achieving a golden top is easy with a few tricks. First, use shredded cheese evenly across the top. Then, mix breadcrumbs with a bit of oil for crunch. This combo gives a nice texture contrast. Bake at 350°F until golden brown. Keep an eye on it to avoid burning. If the top browns too fast, cover it with foil for the last few minutes. Pro Tips Use Rotisserie Chicken: For a quicker preparation, consider using store-bought rotisserie chicken. It saves time and adds a delicious flavor. Customize the Vegetables: Feel free to swap out the frozen mixed vegetables for your favorites like broccoli, green beans, or bell peppers for a personalized touch. Make It Ahead: This casserole can be assembled a day in advance and stored in the refrigerator. Just add a few extra minutes to the baking time if baking from cold. Cheese Variations: Experiment with different types of cheese such as mozzarella or pepper jack for a unique flavor profile. Mixing cheeses can also enhance the dish. {{image_4}} You can make this casserole healthier with a few swaps. Use whole wheat egg noodles instead of regular. They add fiber and nutrients. You can also replace cream of mushroom soup with a low-fat version or make your own. Use Greek yogurt instead of sour cream for a protein boost. Adding more veggies can also help. Try spinach, zucchini, or bell peppers for extra color and taste. To make a vegetarian casserole, skip the chicken and use plant-based protein. You can use chickpeas or tofu for added texture and protein. For the soup, choose a vegetable cream soup or a homemade blend of vegetable broth and cashews. Use almond milk or soy yogurt as a sour cream alternative. This way, you can enjoy a hearty meal without meat. Cheese can really change the taste of your casserole. While cheddar is classic, try mozzarella for a milder flavor. Parmesan adds a nice salty kick. For a tangy touch, use goat cheese. Mixing different cheeses can also create a unique flavor. Just remember to keep the total amount of cheese the same for best results. To store leftover chicken noodle casserole, let it cool first. Then, place it in an airtight container. Keep it in the fridge for up to three days. When you want to eat it again, just take it out and enjoy! For the best taste when reheating, use your oven. Preheat it to 350°F (175°C). Place the casserole in a baking dish and cover it with foil. Heat for about 20-25 minutes. This keeps it moist and warm. You can also use a microwave. Heat individual portions for 1-2 minutes. Stir in between to heat evenly. You can freeze chicken noodle casserole, too! First, let it cool completely. Then, wrap it tightly in plastic wrap and foil. Label it with the date. You can freeze it for up to three months. To use, thaw it overnight in the fridge, then reheat as explained above. This saves time for busy nights! Yes, you can use fresh vegetables. They add great flavor and color. Just chop them into small pieces. You can use carrots, peas, and corn, or any of your favorites. Cook them lightly before adding to the mix. This keeps them tender and tasty in your casserole. Making this dish ahead is easy. Prepare the casserole as usual but skip the baking step. Cover the dish and store it in the fridge. You can keep it for up to two days. When ready, just bake it straight from the fridge. You may need to add a few extra minutes to the baking time. A fresh salad is a great side. You can also serve steamed broccoli or green beans. These add crunch and a nice color to your meal. For a heartier option, garlic bread works well too. The warm bread complements the creamy casserole. Absolutely! You can swap egg noodles for other pasta types. Penne or rotini are great choices. Just remember to adjust the cooking time. Cook them until they are al dente, so they hold up well in the casserole. This keeps the texture delightful and enjoyable. You learned about making a tasty Chicken Noodle Casserole. We covered the main ingredients and how to customize your dish. I shared steps to prep, cook, and bake your casserole perfectly. You also found tips to improve flavor and texture. Plus, we explored healthy options and storage methods. Enjoying this comforting meal can be fun and creative. Now, you can make it your way! Happy cooking!

Savory Chicken Noodle Casserole Easy Family Meal

If you’re looking for an easy, delicious family meal, try my Savory Chicken Noodle Casserole. This dish is creamy, comforting,

To make these tasty brownies, gather these main ingredients: - 1 large zucchini (about 1 cup, grated) - 3/4 cup almond flour - 1/4 cup unsweetened cocoa powder - 1/2 teaspoon baking soda - 1/4 teaspoon sea salt - 1/2 cup honey or pure maple syrup - 1/4 cup unsweetened applesauce - 2 large eggs - 1 teaspoon pure vanilla extract - 1/2 cup dark chocolate chips (optional) Zucchini adds moisture and nutrients but has a mild taste. Almond flour is gluten-free and gives a nice texture. Cocoa powder brings rich chocolate flavor. Honey or maple syrup sweetens the brownies naturally. You can add dark chocolate chips for extra sweetness and flavor, which melt beautifully. If you're looking for alternatives, try coconut flour or oat flour instead of almond flour. Quality matters. Use fresh, organic zucchini when possible. Choose high-quality cocoa powder and pure maple syrup for the best taste. Enjoy making these Healthy Zucchini Brownies! They are simple and delicious, perfect for any time of the day. For the complete steps, check the Full Recipe. 1. Preparing the zucchini: Start by grating one large zucchini. Use a box grater or a food processor. After grating, place the zucchini in a clean kitchen towel. Twist the towel to squeeze out excess moisture. This step helps prevent soggy brownies. Set the drained zucchini aside. 2. Mixing dry ingredients: In a mixing bowl, combine 3/4 cup almond flour, 1/4 cup unsweetened cocoa powder, 1/2 teaspoon baking soda, and 1/4 teaspoon sea salt. Use a whisk to mix until there are no lumps. This ensures even flavor throughout. 3. Combining wet ingredients: In another bowl, mix 1/2 cup honey or pure maple syrup, 1/4 cup unsweetened applesauce, 2 large eggs, and 1 teaspoon pure vanilla extract. Whisk until the mixture is smooth and well combined. 4. Incorporating dry ingredients: Gently fold the grated zucchini into the wet mixture. Make sure it is evenly distributed. Next, gradually add the dry ingredients to this mixture. Stir gently until just combined. Be careful not to overmix, as this can make the brownies tough. 1. Preheating the oven: Preheat your oven to 350°F (175°C). Prepare an 8x8 inch baking pan by lining it with parchment paper. This helps with easy removal after baking. 2. Pouring and smoothing the batter: Pour the brownie batter into the prepared pan. Use a spatula to smooth the top evenly. This step helps with even baking. 3. Checking for doneness: Bake the brownies for 25-30 minutes. To check if they are done, insert a toothpick into the center. It should come out clean or with a few moist crumbs. After baking, allow the brownies to cool in the pan for about 10 minutes. Then, lift them out using the parchment paper and place them on a wire rack to cool completely before slicing. Now you have a simple and tasty treat that is also healthy! For the full recipe, be sure to refer back to the beginning of the article. To make the best healthy zucchini brownies, start with fresh zucchini. Use a large zucchini, about one cup when grated. Grating the zucchini properly is key. Squeeze out excess moisture. This step helps keep your brownies from becoming too soggy. Mix dry ingredients well. Combine almond flour, cocoa powder, baking soda, and salt until there are no clumps. This ensures even flavor and texture. When you mix wet and dry ingredients, do it gently. Overmixing can make brownies tough. Stop mixing as soon as you see no dry flour. Cut the brownies into neat squares for a great look. Use a sharp knife for clean edges. Arrange them on a rustic wooden board for a homey feel. For garnish, dust the tops with cocoa powder or powdered sugar. This adds a touch of elegance. You can also serve the brownies with fresh mixed berries. They add color and a fresh flavor that pairs well with the rich brownies. For a fun twist, try serving them warm with a scoop of vanilla ice cream on top. This mix of hot and cold is always a hit! Remember, a little creativity goes a long way in making your brownies look and taste great. For the full recipe, check out the details above. {{image_4}} You can make these brownies fit many diets. To make them gluten-free, swap almond flour with a gluten-free blend. This works well as it keeps the texture nice and chewy. You can also use coconut flour, but be careful; it absorbs moisture. Start with less and add more if needed. If you want a vegan version, replace the eggs with flax eggs. To make one, mix one tablespoon of ground flaxseed with three tablespoons of water. Let it sit for five minutes until it thickens. You can also use a plant-based sweetener instead of honey or maple syrup. Agave syrup works great here. Get creative with flavors! You can add nuts like walnuts or pecans to give a nice crunch. Spices like cinnamon or nutmeg can also elevate the taste. If you love chocolate, try different types of chocolate chips. Milk chocolate or white chocolate can add a fun twist. Looking for a sweeter option? Use stevia or agave syrup in place of honey. These sweeteners can cut down on calories while keeping the taste great. Always check the sweetness level, as some are sweeter than others. For the full recipe, check the recipe section above! To keep your healthy zucchini brownies fresh, store them in an airtight container. This way, they stay soft and tasty. Keep them at room temperature if you plan to eat them within a few days. If you want them to last longer, refrigerate them. They can stay fresh for about a week in the fridge. For long-term storage, freezing is a great option. Wrap the brownies tightly in plastic wrap. Then, place them in a freezer-safe bag. They can be stored for up to three months. Just remember to label the bag with the date. When you're ready to enjoy your brownies, reheating is easy. Simply take a brownie out of the fridge or freezer. If it's frozen, let it thaw for about 30 minutes at room temperature. To rewarm, place the brownie on a microwave-safe plate. Heat it for about 15 to 20 seconds in the microwave. This method keeps it moist and soft. If you prefer, you can reheat brownies in the oven. Preheat the oven to 350°F (175°C). Place the brownies on a baking sheet and warm for about 5 to 10 minutes. This method gives them a nice, fresh texture. Enjoy your delicious brownies! Can I taste the zucchini in these brownies? No, you won’t taste the zucchini. It adds moisture and helps keep the brownies soft. The cocoa powder and chocolate chips cover any hint of zucchini flavor. How do I know when my brownies are done baking? Check your brownies at 25 minutes. Insert a toothpick in the center. If it comes out clean or has a few moist crumbs, they are done. If it’s wet, give them a few more minutes. Can I use a different flour besides almond flour? Yes, you can use whole wheat flour or oat flour. Just know that this may change the texture. Almond flour gives a nice moist feel, but other flours work too. What is the nutritional value of these brownies? These brownies are packed with nutrients! They have healthy fats from almond flour and fiber from zucchini. One brownie has about 150 calories, with protein and healthy carbs. How can I make these brownies even healthier? You can reduce the sweetener or use mashed bananas instead of applesauce. Adding nuts or seeds boosts nutrition too. For a low-calorie option, try using a sugar substitute. For all the details on how to make these brownies, check out the Full Recipe. In this blog post, we explored how to create healthy zucchini brownies. We covered essential ingredients, preparation steps, and baking techniques. We shared tips for the best texture and serving ideas. You learned about variations for dietary needs and how to store your brownies. Embrace these methods for a tasty treat that fits your healthy lifestyle. Enjoy baking and savor every bite!

Healthy Zucchini Brownies Simple and Tasty Recipe

Are you craving something sweet but want to stay healthy? You’re in the right place! This Healthy Zucchini Brownies Simple

- 4 ripe peaches - 1 cup strawberries - 1 cup fresh blueberries - 8 oz cream cheese - 1/2 cup Greek yogurt - 1/4 cup powdered sugar - 1 teaspoon pure vanilla extract - 1 teaspoon ground cinnamon - 1 cup granola for topping - Fresh mint leaves for garnish When I create a Peach Cobbler Cheesecake Fruit Salad, I focus on fresh fruit. Ripe peaches make the dish sweet and juicy. Strawberries bring a bright color and tartness. Blueberries add bursts of flavor and nutrients. For the cheesecake mixture, I use softened cream cheese. It gives a rich and creamy base. Greek yogurt adds tanginess and a lighter texture. I sweeten it with powdered sugar and a splash of vanilla. This mixture makes each bite feel indulgent. To finish, I sprinkle ground cinnamon for warmth. It pairs well with the fruit. Granola adds a crunchy texture on top, making it fun to eat. Fresh mint leaves give a pop of color and freshness. All these ingredients come together to create a delightful treat. You can find the complete list and instructions in the Full Recipe. Start by dicing your peaches into small, bite-sized pieces. They should be ripe to ensure a sweet flavor. Next, hull the strawberries and slice them in half. This helps mix them well with the other fruits. In a large mixing bowl, gently combine the diced peaches, halved strawberries, and fresh blueberries. Use a folding motion to mix the fruits. This way, you won't mash them. The colors will look bright and inviting. Now, let’s make the cheesecake mixture. First, soften the cream cheese. Leave it at room temperature for about 15 minutes. This helps it mix better. In a separate bowl, beat the softened cream cheese with an electric mixer until creamy. Add in the Greek yogurt, powdered sugar, and vanilla extract. Mix until the blend is smooth and creamy. This mixture adds a rich taste to the fruit salad. Next, it's time to combine everything. Carefully fold the cheesecake mixture into the bowl of mixed fruit. Make sure each piece of fruit is coated with the cheesecake goodness. This step is key for flavor. Then, evenly sprinkle the ground cinnamon over the fruit salad. Gently fold it in to spread the warm flavor throughout. Now, cover the mixing bowl with plastic wrap and refrigerate for about 30 minutes. Chilling allows the flavors to blend nicely. For the full recipe, check the instructions in the earlier section. When you are ready to serve, spoon the vibrant fruit salad into bowls. Or, present it beautifully in a large glass dish. Don’t forget to add granola on top for crunch. Garnish with fresh mint leaves for a lovely touch! Using ripe fruits gives the best taste. Choose peaches that are soft but not mushy. Strawberries should be bright red and firm. If you want, you can swap Greek yogurt with sour cream. This change adds a rich, tangy flavor to the cheesecake mixture. Serve your fruit salad in clear glass dishes. This way, guests can see the colorful layers. You can also sprinkle granola on top for some crunch. Garnish with fresh mint leaves. They add a lovely green touch and a fresh scent. Make the salad ahead of time. Chilling it for about 30 minutes helps the flavors mix. Store any leftovers in a tight container. This keeps the fruit fresh and tasty for a few days. Enjoy this delightful treat from the Full Recipe! {{image_4}} You can switch up the fruits in your salad. Use seasonal fruits for a fresh twist. Try ripe nectarines, plums, or even cherries. Each fruit brings its unique flavor. You can also experiment with berries. Blackberries and raspberries add a deep, rich taste. Mixed berries provide color and texture, making the dish pop. A bit of citrus zest can elevate your salad. Lemon or orange zest adds brightness and zing. If you prefer a sweeter touch, try honey or agave. These natural sweeteners complement the fruit and cheesecake well. Adjust the sweetness to your taste, making each bite delightful. If you need gluten-free options, choose gluten-free granola. Many brands offer tasty choices that fit this diet. For vegan variations, swap the cream cheese with cashew cream. Blend soaked cashews with a bit of lemon juice for creaminess. This keeps the flavor and texture rich while fitting your dietary needs. You can find the Full Recipe for Peach Cobbler Cheesecake Fruit Salad to explore these variations. Store your Peach Cobbler Cheesecake Fruit Salad in an airtight container. This keeps it fresh and tasty. It will last for about three days in the fridge. After that, the fruit may get mushy. Always check for any off smells or changes in texture before eating. Yes, you can freeze this fruit salad! However, the texture of the fruit may change after thawing. To freeze, place the salad in a freezer-safe container. Leave some space at the top, as it may expand. When you're ready to enjoy it, move the salad to the fridge to thaw overnight. Serve chilled for the best taste. Leftover Peach Cobbler Cheesecake Fruit Salad makes a great breakfast or snack. Try mixing it into your morning yogurt or oatmeal. You can also top pancakes or waffles with it for a sweet twist. Get creative! Peach Cobbler Cheesecake Fruit Salad lasts about 3 to 5 days in the fridge. Store it in a sealed container. Always check for signs of spoilage. If you see any mold or notice an off smell, it's best to toss it. Yes, you can use canned peaches. They save time and are easy to find. Make sure to drain them well. Canned peaches may be sweeter than fresh ones. Adjust the sugar in your recipe if needed. To make Peach Cobbler Cheesecake Fruit Salad gluten-free, use gluten-free granola. Check labels on all ingredients. Most fruits and dairy are naturally gluten-free, so you’re already set there. This way, everyone can enjoy this delicious treat. For more ideas, you can explore recipes that use almond flour or gluten-free oats. This blog post covered how to create a delicious Peach Cobbler Cheesecake Fruit Salad. We talked about fresh fruits, making the cheesecake mixture, and combining the ingredients. I shared tips for flavor, serving, and storing. Remember, using ripe fruits makes a huge difference. Feel free to try different fruits or make it gluten-free. This recipe can easily adapt to your taste. Enjoy making this treat and share it with friends!

Peach Cobbler Cheesecake Fruit Salad Delightful Treat

Get ready for a twist on your favorite summer treats! The Peach Cobbler Cheesecake Fruit Salad combines fresh peaches, juicy

To make garlic dill refrigerator pickles, gather these key ingredients: - 4 medium cucumbers, sliced into spears or rounds - 4 cloves garlic, smashed - 2 tablespoons fresh dill, finely chopped (or 1 tablespoon dried dill) - 2 cups water - 1 cup apple cider vinegar - 1 tablespoon sea salt - 1 tablespoon sugar These ingredients form the base of your pickles. The cucumbers give that fresh crunch. Garlic adds a nice punch, while dill gives a lovely herb flavor. The water, vinegar, salt, and sugar create the brine that makes the pickles tangy and sweet. You can customize your pickles with some optional ingredients: - 1 teaspoon red pepper flakes (for a spicy kick) - Other herbs like thyme or coriander - Whole mustard seeds for extra texture Adding red pepper flakes can bring heat to your pickles. You can also experiment with other herbs that you love. Just remember to keep the balance of flavors in mind. To make this recipe easier, have these tools ready: - A large mixing bowl - A whisk or spoon - A clean quart-sized jar or container with a lid - A measuring cup and spoons These tools help you mix and store your pickles safely. A clean jar is key to keeping your pickles fresh. You can find the full recipe and details in the [Full Recipe]. To make the brine, you need to mix a few simple ingredients. Start with a large bowl and add: - 2 cups water - 1 cup apple cider vinegar - 1 tablespoon sea salt - 1 tablespoon sugar Stir the mix with a whisk or spoon. Keep stirring until the salt and sugar fully dissolve. This step is key for flavor. Next, take your cucumbers. You can slice them into spears or rounds. I like to use about 4 medium cucumbers. Place them snugly in a clean quart-sized jar. Make sure they fit well, as this helps with brining. Now, add the flavor! Toss in: - 4 cloves garlic, smashed - 2 tablespoons fresh dill, finely chopped (or 1 tablespoon dried dill) - 1 teaspoon red pepper flakes (optional) After packing the jar, it’s time for the brine. Carefully pour the brine over the cucumbers. Ensure they are fully submerged. If not, add a bit more water. Once the cucumbers are covered, seal the jar with a lid. Give it a gentle shake to mix the garlic and dill evenly. Now, place the jar in the fridge. Let the pickles sit for at least 24 hours. For the best flavor, wait 3 to 5 days. You can find the full recipe [here](#). To keep your pickles crisp, start with fresh cucumbers. Look for firm ones with no soft spots. Use smaller cucumbers, as they tend to stay crunchier. You can also add a few grape leaves or a pinch of calcium chloride to the jar. These help maintain that satisfying crunch. Make sure to slice your cucumbers evenly, so they pickle uniformly. Store your pickles in a clean glass jar. Use an airtight lid to keep moisture out. Place them in the fridge right after preparing. The cold temperature helps the pickles stay fresh longer. Avoid putting them near foods with strong odors, as they can absorb those smells. Always use a clean utensil when taking pickles from the jar to avoid contamination. Your pickles will be tasty after 24 hours in the fridge. However, for the best flavor, let them sit for 3 to 5 days. This allows the garlic and dill to meld with the cucumbers. The longer they sit, the more flavorful they become. Just remember, they will keep getting better the longer they marinate! Check them every day to see how the flavor develops. Enjoy your homemade pickles as a snack or a side dish! {{image_4}} To make spicy garlic dill pickles, add red pepper flakes. This gives each bite a nice kick. You can control the heat by adjusting the amount of flakes. Start with one teaspoon. If you want it hotter, add more. You might also add a sliced jalapeño for extra spice. The heat blends well with the garlic and dill. For sweet and spicy dill pickles, mix in some sugar. Use two tablespoons instead of one. This adds a sweet touch that balances the vinegar's tang. A sprinkle of crushed red pepper also works here for heat. The sweet flavor makes these pickles a hit at parties. You can enjoy them on sandwiches or burgers. Herb-infused pickles are fun to create. Add fresh herbs like thyme, basil, or oregano to the brine. Each herb gives a unique flavor. You can mix and match to find your favorite. Try adding a few sprigs of rosemary for a bold taste. The herbs will infuse into the pickles as they sit. This creates a fresh and vibrant flavor profile. By trying these variations, you can customize your garlic dill refrigerator pickles. Explore the full recipe for more ideas! The best way to store your garlic dill refrigerator pickles is in the fridge. Place them in a clean jar with a tight lid. Make sure to keep them submerged in the brine. This brine helps keep the pickles crisp and flavorful. Always store them upright to avoid spills. You can also use a glass container if you prefer. Garlic dill pickles can last for up to two months in the fridge. After a week, they taste even better as they soak up the flavors. Just check for any signs of spoilage like off smells or changes in color. If you see any of these signs, it’s best to discard them. If your pickles start to wilt, don’t worry! You can revive them. First, soak them in cold water for a few hours. This helps them regain their crunch. You can also add a bit of extra salt to the brine. This will help enhance their texture and flavor. Just give them a day or two to soak. Enjoy your crisp and tasty pickles again! Garlic dill refrigerator pickles can last up to two months in the fridge. Their flavor improves over time, but they may lose some crunch. Always check for any signs of spoilage before eating. Store them sealed tight to keep them fresh. Yes, you can use different types of cucumbers. Kirby cucumbers are best for pickling due to their firm texture. However, you can also use English or Persian cucumbers. Just keep in mind their size and texture may affect the final crunchiness. If your pickles aren't crunchy, there are a few things to try. First, make sure you use fresh cucumbers. Old cucumbers often turn soft. Also, consider adding a few grape leaves or a pinch of calcium chloride to the brine. These help keep pickles crisp. If they still lack crunch, you can enjoy them in salads or sandwiches instead. Check out the Full Recipe for more tips and tricks! You learned about making tasty garlic dill refrigerator pickles. We covered essential and optional ingredients, tools, and step-by-step instructions. I shared tips for crispness and storage. You also explored fun variations and found answers to common questions. Now, it’s your turn to try this easy recipe. Enjoy the fresh flavors and get creative. Homemade pickles add a fun twist to any meal!

Garlic Dill Refrigerator Pickles Simple and Crisp

If you’re craving a snack that’s both zesty and crisp, garlic dill refrigerator pickles are your answer! In this simple

- 1 cup finely grated zucchini - 1/2 cup coconut oil (or unsalted butter) - 1 cup packed brown sugar - 1/2 cup granulated sugar The main ingredients create a rich and moist brownie. The zucchini adds moisture, while the sugars give sweetness. Coconut oil or butter provides a nice fat that helps with texture and flavor. - 1/2 cup semi-sweet chocolate chips - 1/4 cup chopped walnuts You can enhance your brownies with these add-ins for extra taste. The chocolate chips add richness. Walnuts give a nice crunch and flavor. Feel free to mix and match or skip them if you prefer. - 1 cup all-purpose flour - 1/2 cup unsweetened cocoa powder - 1/2 teaspoon baking soda - 1/4 teaspoon baking powder - 1/4 teaspoon sea salt The dry ingredients are key for structure. Flour provides the base, while cocoa powder gives that deep chocolate flavor. Baking soda and powder help the brownies rise. Sea salt balances out the sweetness, making each bite delicious. Remember to check out the Full Recipe for all the details on how to put these ingredients together! - Preheat oven to 350°F (175°C). - Grease or line an 8x8 inch baking pan. - Combine melted coconut oil with sugars. - Whisk in eggs and vanilla extract. - Fold in grated zucchini. - Sift and mix dry ingredients, then combine with wet mixture. - Pour batter into prepared pan. - Bake for 25-30 minutes and check doneness. To prepare these rich and moist zucchini brownies, start by preheating your oven to 350°F (175°C). Greasing the pan or using parchment paper helps with easy removal. Next, in a bowl, mix melted coconut oil with both sugars until smooth. This creates a nice base for your brownies. Add two eggs and a teaspoon of pure vanilla extract. Whisk these ingredients until they blend well. This step is key for a rich flavor. Then, gently fold in one cup of finely grated zucchini. This adds moisture without altering the taste too much. In a separate bowl, sift and mix the dry ingredients: one cup of all-purpose flour, half a cup of cocoa powder, half a teaspoon of baking soda, a quarter teaspoon of baking powder, and a quarter teaspoon of sea salt. Gradually mix this dry mixture with the wet ingredients. Be careful not to overmix, as this can make the brownies tough. Finally, pour your batter into the prepared pan. Bake for 25-30 minutes. To check if they're done, insert a toothpick into the center. It should come out with a few moist crumbs but no wet batter. Enjoy making your delicious zucchini brownies! For the full recipe, see above. To get the best texture, avoid overmixing your batter. Mix just until the dry and wet ingredients come together. This keeps your brownies fudgy and rich. Using fresh zucchini is key for moisture. Grate it finely and add it straight to the mix. This helps your brownies stay soft and flavorful. For a lovely finish, dust your brownies with powdered sugar before serving. This adds a nice touch and makes them look fancy. Pairing the brownies with ice cream turns them into an indulgent treat. The cold ice cream contrasts beautifully with the warm, rich brownies. If you want a smoother batter, use a blender. This makes mixing easier and gives a nice, creamy texture. Don’t be afraid to experiment with different types of cocoa powder. Each type can change the flavor a bit, so find your favorite! For the full recipe, check the details above and enjoy your baking adventure! {{image_4}} You can easily make your zucchini brownies healthier. Replace brown sugar with coconut sugar. This switch lowers the glycemic index and adds a light caramel flavor. Another great option is to use unsweetened applesauce instead of oil. This change reduces fat and adds natural sweetness. You’ll still get that rich taste without the extra calories. To make your brownies richer, add a teaspoon of espresso powder. This small addition boosts the chocolate flavor without tasting like coffee. You can also incorporate spices like cinnamon or nutmeg. These spices add warmth and depth to the brownies. A hint of cinnamon can make a big difference in taste. If you need gluten-free brownies, use almond flour or oat flour instead of regular flour. Both options give a great texture and taste. For vegan brownies, you can use flax eggs or chia seeds. Mix one tablespoon of flaxseed meal or chia seeds with three tablespoons of water. Let it sit for a few minutes to thicken before adding it to your batter. This way, everyone can enjoy these delicious zucchini brownies! Let your brownies cool completely before storing. This step is key. If you store them warm, they can become soggy. Place them in an airtight container at room temperature. This keeps them fresh and moist. Enjoy them for up to a week, but they rarely last that long! Want to save some for later? Wrap individual servings in plastic wrap. This helps keep them from freezer burn. Then, store the wrapped brownies in freezer-safe bags. They can last for up to three months. When you're ready to eat them, just take out what you need! To warm up your brownies, use a microwave. Heat them for just a few seconds. This brings back their soft texture. If you prefer, you can also heat them in a low oven. Just keep an eye on them to prevent overcooking. Enjoy your delicious zucchini brownies any day! Using fresh zucchini adds moisture. Avoid overbaking to keep them soft. If you bake them too long, they can dry out quickly. The zucchini adds moisture but has a mild flavor. Most people cannot taste it at all, which makes these brownies a sneaky way to add veggies to dessert. Use a box grater or a food processor for fine shreds. After grating, wring the zucchini in a clean towel. This helps remove excess moisture, keeping your brownies from becoming soggy. Yes, you can use frozen zucchini. Just thaw it first and drain any excess water. This makes it easy to blend into your batter. To make these brownies gluten-free, substitute all-purpose flour with a gluten-free blend or almond flour. Both work well and still keep the texture nice. If you want a vegan option, use flax eggs or applesauce. To make a flax egg, mix one tablespoon of flaxseed meal with two and a half tablespoons of water. Let it sit for a few minutes until it thickens. For detailed instructions on preparing "Zucchini Brownies Delight 🥒", check the Full Recipe section. These zucchini brownies mix simple ingredients for a delightful treat. You learned about key ingredients like zucchini, sugar, and cocoa powder. The steps are clear: prepare, mix, bake, and enjoy. Remember to avoid overmixing for fudgy goodness. You can personalize your brownies with add-ins or healthier swaps. Store them right, and they’ll stay fresh for days. Now go ahead, gather your ingredients, and make a batch. It’s easy, fun, and oh so rewarding! Enjoy your baking journey!

Zucchini Brownies Rich and Moist Dessert Recipe

Looking for a dessert that combines rich flavor and hidden veggies? You’re in the right place! My Zucchini Brownies recipe

To make this cool dish, gather these ingredients: - 2 large cucumbers, peeled and roughly chopped - 1 green bell pepper, seeded and roughly chopped - 1 ripe tomato, diced - 1 small red onion, finely chopped - 2 cloves garlic, minced - 2 cups vegetable broth (preferably chilled) - 2 tablespoons extra virgin olive oil - 2 tablespoons apple cider vinegar - Salt and freshly cracked black pepper, to taste - Fresh basil leaves, torn, for garnish Garnishes can add a nice touch to your gazpacho. Try these options: - Fresh herbs like cilantro or parsley - A drizzle of olive oil - Sliced radishes for crunch - Diced avocado for creaminess Choosing fresh ingredients is key for great flavor. Here are some tips: - Cucumbers: Look for firm cucumbers with smooth skin. Avoid those with soft spots. - Tomatoes: Choose ripe tomatoes that feel heavy for their size. - Bell Peppers: Pick bright green peppers without wrinkles. They should feel firm. - Onions and Garlic: Select firm onions and garlic bulbs that are dry and free of sprouting. Fresh ingredients make your Quick Cucumber Gazpacho taste bright and lively. Use the Full Recipe to create a refreshing summer treat that everyone will love! Start with fresh, ripe vegetables. Choose cucumbers that are firm and green. Peel and chop the cucumbers into rough pieces. Next, take a green bell pepper, seed it, and chop it up. Use a ripe tomato for sweetness and dice it. Finely chop a small red onion and mince two cloves of garlic. This mix gives your gazpacho a fresh taste. Now, it’s time to blend! Grab a high-speed blender. Add your chopped cucumbers, green bell pepper, diced tomato, chopped onion, and minced garlic. Pour in two cups of chilled vegetable broth, two tablespoons of extra virgin olive oil, and two tablespoons of apple cider vinegar. Blend on high speed until the mixture is smooth and creamy. If needed, pause to scrape down the sides. This ensures an even blend. Taste your gazpacho and season it. Sprinkle in salt and black pepper to suit your taste. After seasoning, it’s chilling time! Transfer the gazpacho to a bowl or an airtight container. Refrigerate it for at least 30 minutes. This cooling step helps the flavors meld together. Serve it chilled for a refreshing summer treat. For the full recipe, check the details above. Enjoy your delicious cucumber gazpacho! Fresh herbs make a big difference in flavor. Use basil, mint, or dill. Add them to the blender with your veggies. These herbs bring a bright taste. You can also try adding a pinch of cumin or paprika. These spices give a warm, earthy feel. Always taste your gazpacho before serving and adjust as needed. Presentation is key. Pour your gazpacho into clear bowls or glasses. This shows off its vibrant color. For a fun touch, add a swirl of olive oil on top. You can use a sprig of basil as a garnish. Serve with crusty bread or crostini for added texture. This makes the dish look inviting and delicious. Avoid these common mistakes to get the best results. First, do not skip chilling the soup. It needs time to blend flavors. Next, don’t over-blend it. You want a smooth texture, but not too watery. Lastly, be careful with salt. Start with a little, then taste as you go. This helps you achieve the right balance. Remember, the goal is a refreshing summer delight. For the full recipe, check out the ingredients and steps provided. {{image_4}} You can spice up your gazpacho easily. Add a pinch of cayenne pepper for heat. You might also try smoked paprika for a rich, deep flavor. If you enjoy heat, chopped jalapeños will add a fresh kick. Just remember to taste as you go. A little spice can make a big difference! Switching ingredients can change your gazpacho's taste. Try using a yellow bell pepper instead of green. This change will give the soup a sweeter flavor. You can also add diced mango for a tropical twist. If tomatoes aren’t in season, use roasted red peppers instead. Each option creates a new and exciting taste. This gazpacho is already mostly vegan! To keep it vegan, use vegetable broth. You can replace olive oil with avocado for creaminess. If you want more texture, blend in some chickpeas. These small swaps keep the dish plant-based while adding flavor and nutrition. Enjoy exploring these variations to make it your own! For the full recipe, check out the detailed instructions above. To keep your cucumber gazpacho fresh, store it in the fridge. Use an airtight container. This helps keep the flavors bright and the texture smooth. Always chill it before serving. It tastes great cold. Avoid letting it sit out at room temperature. Gazpacho is best served cold. Reheating can change its taste and texture. If you prefer a warm soup, try a different recipe. Cold gazpacho is refreshing on hot days. It's a perfect summer meal. Your gazpacho lasts about 3 to 4 days in the fridge. Check for changes in smell or color. If it smells sour or looks off, toss it. Always trust your senses. Fresh is best for flavor. For the full recipe, refer back to the earlier section. A traditional gazpacho comes from Spain. It uses ripe tomatoes, green peppers, cucumbers, garlic, onion, and bread. These ingredients blend together with olive oil, vinegar, and salt. The result is a smooth, chilled soup that bursts with flavor. Each region in Spain has its own version. You can find variations using different herbs and spices. Yes, you can use frozen cucumbers, but fresh ones are best. Frozen cucumbers may lose some crunch. They can also add extra water when thawed. If you use frozen, drain any excess liquid before blending. This helps keep your gazpacho thick and tasty. To add spice, consider these options: - Jalapeños: Add one or two chopped jalapeños to the blend. - Hot Sauce: Mix in your favorite hot sauce to taste. - Cayenne Pepper: A pinch of cayenne can pack a punch. - Black Pepper: Increase the amount of freshly cracked black pepper for heat. Feel free to experiment with these ideas. Adjust the spice level to fit your taste. Enjoy your gazpacho with a kick! You can find the full recipe in the earlier sections. In this article, we explored how to make Quick Cucumber Gazpacho. We covered ingredients, step-by-step instructions, tips, variations, and storage information. Fresh ingredients are key for flavor, and blending is simple. Remember to avoid common mistakes for the best result. Gazpacho is tasty cold, and you can easily adapt the recipe to your taste. Enjoy your refreshing dish and impress others with your skills!

Quick Cucumber Gazpacho Refreshing Summer Delight

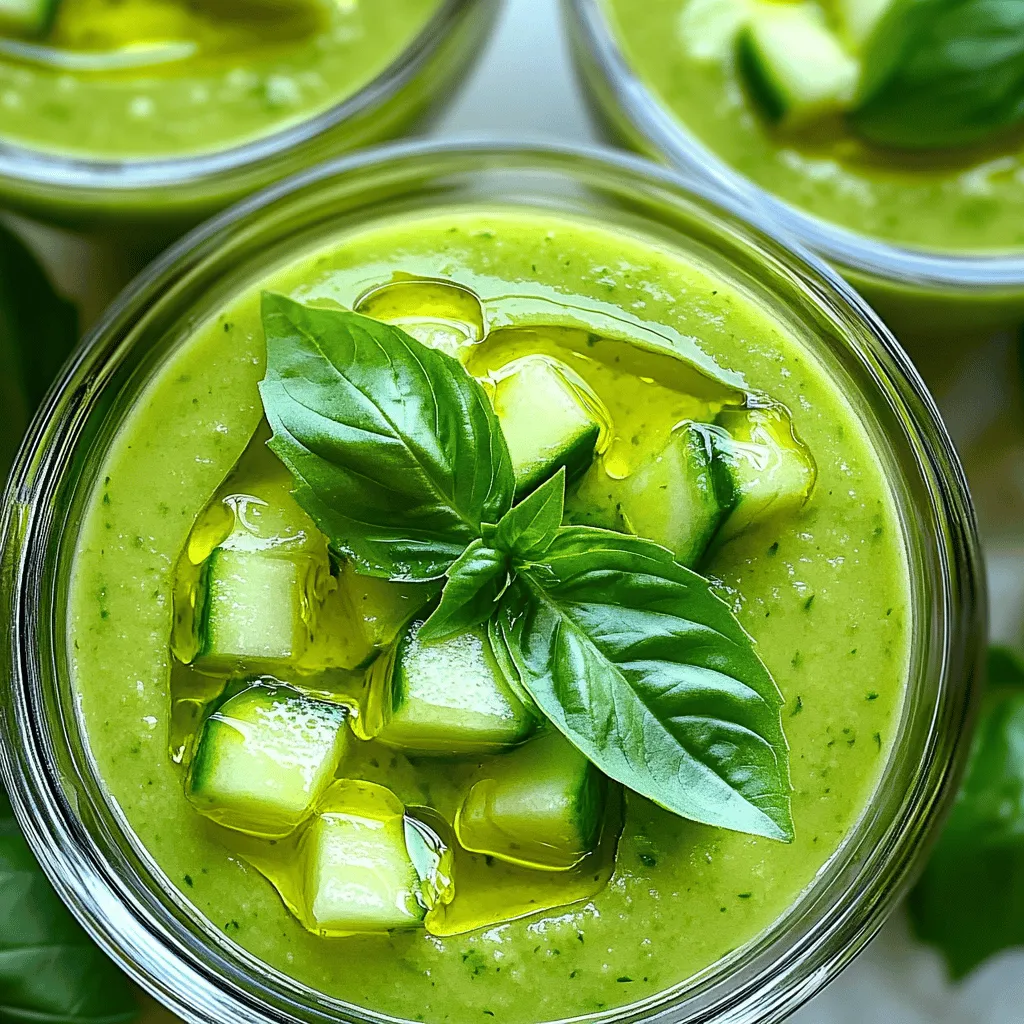
Looking for a cool treat to beat the heat this summer? You’ve found it! This Quick Cucumber Gazpacho is not

To make Healthy 87 Calorie Brownies, you need some simple, wholesome ingredients. Here’s what you will need: - 1 cup black beans, rinsed and drained - 2 tablespoons unsweetened cocoa powder - 3 tablespoons honey or maple syrup - 1 teaspoon pure vanilla extract - 1/4 teaspoon baking powder - A pinch of salt - 2 tablespoons unsweetened applesauce - 1/4 cup dark chocolate chips (optional) These ingredients work together to create a rich and fudgy brownie. Black beans give the brownies moisture and a boost of protein. Cocoa powder adds that deep chocolate flavor we all love. Sweeteners like honey or maple syrup help balance the taste, while vanilla extract enhances the overall flavor. If you want to take your brownies a step further, consider adding some optional ingredients. Here are a few ideas: - 1/4 cup chopped nuts (like walnuts or pecans) - 1/2 teaspoon instant coffee or espresso powder - A sprinkle of sea salt on top Nuts can add a nice crunch, while coffee enhances the chocolate flavor. A sprinkle of sea salt at the end can also deepen the taste. If you have specific dietary needs, don’t worry! There are easy substitutions you can make: - For a vegan option, use maple syrup instead of honey. - If you cannot use black beans, try canned chickpeas instead. - For a gluten-free version, ensure your cocoa powder and other ingredients are gluten-free. These swaps keep the brownies delicious while meeting your dietary needs. For the full recipe, check out the complete instructions to enjoy these guilt-free treats! To start, gather your ingredients. You need black beans, cocoa powder, honey or maple syrup, vanilla extract, baking powder, salt, applesauce, and optional chocolate chips. Rinse and drain the black beans well. This step is key to removing any extra liquid and making the brownies smooth. Next, preheat your oven to 350°F (175°C). While it warms up, grease an 8x8 inch baking dish or line it with parchment paper. This makes it easier to lift your brownies out later. Now, place the black beans, cocoa powder, honey or maple syrup, vanilla extract, baking powder, salt, and applesauce into a food processor. Blend until the mixture is completely smooth. Take your time and scrape down the sides as needed. This ensures all ingredients mix well. If you want a richer taste, add dark chocolate chips to the batter. Gently fold them in until mixed evenly. Pour the brownie batter into your prepared baking dish. Use a spatula to spread it out evenly. This helps with even baking. Put the dish in the preheated oven. Bake for 20 to 25 minutes. To check if they are ready, insert a toothpick in the center. If it comes out clean or has a few moist crumbs, they are done. Once baked, take the brownies out of the oven. Let them cool for about 10 minutes in the pan. This cooling time helps set the texture. After that, cut them into squares and enjoy! For the best texture, make sure to blend the batter until it is very smooth. This helps create a fudgy brownie. Watch the baking time closely. Overbaking can lead to dry brownies. Using unsweetened applesauce adds moisture without extra calories. It also keeps your brownies soft and chewy. If you like a little crunch, add nuts. Just fold them in after blending the batter. Using these steps, you will create delicious, healthy brownies that everyone will love. For more details, check out the Full Recipe. To boost health, you can use less sweetener. Try reducing honey or maple syrup by half. You can also swap in nut butter for a unique flavor twist. This adds protein and healthy fats. Using black beans helps keep your brownies moist and rich. You can even add ground flaxseeds for extra fiber. Simply mix one tablespoon of flaxseed with three tablespoons of water. Let it sit until it gels, then stir it into your batter. One common mistake is overmixing the batter. This can make the brownies tough. Blend just until smooth. Another mistake is not measuring the cocoa powder correctly. Too much cocoa can make brownies too dry. Make sure to use unsweetened cocoa powder for the best taste. Lastly, don't skip the cooling time. Cutting the brownies too soon can lead to a crumbly mess. For a special touch, serve your brownies warm. Add a dollop of Greek yogurt on top. This adds creaminess and protein. You can also pair them with dairy-free ice cream for a vegan option. A drizzle of honey or a sprinkle of cocoa enhances the look and taste. You might consider adding fresh berries on the side for a pop of color and flavor. Try these tips to take your healthy brownies to the next level. Enjoy your guilt-free treat! {{image_4}} You can easily make these brownies vegan and gluten-free. Use maple syrup in place of honey. Since the main ingredient is black beans, they are naturally gluten-free. Make sure your cocoa powder is also gluten-free. This recipe gives you a rich treat without any animal products or gluten. Want to add a fun twist? Try mixing in peppermint extract for a fresh flavor. You can also use nut butter, like almond or peanut butter. Swirl it into the batter for a creamy texture. Another idea is to add a touch of coffee for a deeper taste. Each twist makes the brownies unique! Fruits like mashed bananas or pureed pumpkin can add moisture and flavor. Nuts, like walnuts or pecans, add crunch and healthy fats. You can also toss in some berries for a burst of freshness. These additions not only boost nutrition but also make the brownies even tastier. Check out the Full Recipe for more tips! To keep your healthy 87 calorie brownies fresh, store them in an airtight container. Place a piece of parchment paper between layers to prevent sticking. Keep the container in a cool dry place, like a pantry. This method helps them last about four days. If you want to enjoy them longer, refrigeration is a great option. Just ensure they are well wrapped to avoid drying out. Freezing brownies is simple and effective. First, let the brownies cool completely. Then, cut them into squares. Wrap each square tightly in plastic wrap. Place the wrapped brownies in a freezer bag or airtight container. They can last up to three months in the freezer. When you're ready to eat, simply thaw them in the fridge overnight. To enjoy your brownies warm, preheat your oven to 350°F (175°C). Place the brownies on a baking sheet. Heat them for about 5-10 minutes. You can also use a microwave. Just warm them for 15-20 seconds on a microwave-safe plate. Enjoy them with a dollop of Greek yogurt or a scoop of dairy-free ice cream for an extra treat! Each healthy brownie has only 87 calories. This low-calorie count makes them perfect for guilt-free treats. You can enjoy them without worrying about your diet. These brownies are rich in flavor and texture. They are made with wholesome ingredients, so you get a tasty dessert without the extra calories. Yes, you can use different sweeteners. Honey and maple syrup are great options. If you want a lower-calorie choice, try stevia or monk fruit. Just remember to adjust the amount since these sweeteners are often sweeter than regular sugar. This flexibility lets you make brownies that fit your taste and diet. The best way to check if brownies are done is using a toothpick. Insert it into the center of the brownies. If it comes out clean or with a few moist crumbs, they are ready. If the toothpick has wet batter, bake them for a few more minutes. This method ensures you get the perfect texture every time. For the full recipe, follow the steps carefully and enjoy your brownies! These healthy 87 calorie brownies are simple and tasty. You learned about essential and optional ingredients, plus substitutions for diets. The step-by-step guide helps you bake with ease and get the right texture. I shared tips to make them healthier and avoid common mistakes. Don't forget the fun variations that add flavor and nutrition. Storing and reheating them properly ensures you enjoy their goodness longer. Now, get in the kitchen and create a batch full of joy and health!

Healthy 87 Calorie Brownies Perfect for Guilt-Free Indulgence

If you crave something sweet but worry about calories, these Healthy 87 Calorie Brownies are your answer! With just the

Older posts
Newer posts
← Previous Page1 … Page42 Page43 Page44 … Page86 Next →

dsad

© 2026 lazychefmagic • Built with GeneratePress

Our Policies

  • Copyright Policy
  • Cookie Policy
  • GDPR Policy
  • Privacy Policy
  • Disclaimer
  • Terms Of Use

More Information

  • Home
  • About
  • Contact
  • Appetizers
  • Dessert
  • Dinner
  • Drinks
©2026, lazychefmagic About Back To Top