Skip to content
DisclaimerTerms Of UseGDPR PolicyCookie Policy

lazychefmagic

  • Home
  • Drinks
  • Appetizers
  • Dinner
  • Dessert
  • About
  • Contact
  • Privacy Policy
DisclaimerTerms Of UseGDPR PolicyCookie Policy

NO-ING-IMG

For this dish, you need: - 4 salmon fillets (about 6 oz each) Fresh salmon fillets are key. They should be bright and firm. Look for skin-on or skinless, based on your preference. The marinade gives the salmon flavor. You will need: - 4 cloves garlic, finely minced - 2 lemons (one sliced into rounds, and one juiced) - 3 tablespoons extra virgin olive oil - 1 tablespoon fresh parsley, finely chopped - 1 teaspoon dried oregano - Salt and freshly ground black pepper, to taste Mixing these ingredients creates a balance of flavor. The garlic adds depth, while the lemon brings brightness. Olive oil keeps the fish moist. For an extra touch, consider: - Lemon wedges, for serving Lemon wedges add fresh flavor. They let you customize the dish at the table. You can add more zest as you like. This Lemon Garlic Roasted Salmon is easy to make and delicious. Check the Full Recipe for all the steps! First, preheat your oven to 400°F (200°C). This step is key to cooking the salmon evenly. Line a baking sheet with parchment paper. This helps prevent sticking and makes cleanup easier. Next, let’s make the marinade. In a small bowl, mix together the minced garlic and lemon juice. Add the olive oil, chopped parsley, and dried oregano. Season with salt and pepper. Whisk everything together until it smells amazing. This marinade will give your salmon a burst of flavor. Now it’s time to marinate the salmon. Place the fillets on the prepared baking sheet, skin-side down. Pour half of the marinade over the salmon. Make sure each piece gets coated well. Set the other half aside for later. Let the salmon marinate for about 15 minutes while your oven heats. This lets the flavors soak in. While the salmon marinates, take one lemon and slice it into thin rounds. These slices will add brightness to your dish. Once the salmon is ready, place one lemon slice on top of each fillet. This adds a nice citrus touch while cooking. Place the baking sheet in the hot oven. Bake the salmon for 12 to 15 minutes. Cooking time may vary based on the thickness of the fillets. The salmon is done when it flakes easily with a fork and reaches 145°F (63°C) inside. In the last 2 minutes of baking, drizzle the reserved marinade over the salmon. This creates a tasty glaze that enhances the flavors. It’s a simple step that makes a big difference. Enjoy your Lemon Garlic Roasted Salmon with a side salad or your favorite steamed veggies. For the complete guide, check the Full Recipe! Choosing fresh salmon is easy if you know what to look for. First, check for bright, clear eyes. They should not look cloudy. Next, the skin should be shiny and moist. Look for vibrant color, ranging from deep pink to bright orange. Fresh salmon should smell like the ocean, not fishy. If it has a strong odor, skip it. Always ask your fishmonger about the catch date. To make the best marinade, keep it simple yet flavorful. Use fresh garlic and lemons for brightness. The olive oil adds richness. Mix in parsley and oregano for a fresh twist. If you want a bit more kick, try adding a pinch of red pepper flakes. Let the salmon marinate for at least 15 minutes. This allows the flavors to soak in deeply. Feel free to use the remaining marinade as a glaze at the end for extra taste. You can cook salmon in many ways. Baking is great for a hands-off approach. Grilling adds a nice smoky flavor. Pan-searing gives a crispy texture on the outside. If you like a quick meal, try broiling. Just keep an eye on it, as it cooks fast. Each method brings out different flavors and textures. For a fun twist, try poaching salmon in broth or wine to keep it moist. Find the method that suits your taste! For the full recipe, check out the details above. {{image_4}} For a delightful twist, try the lemon garlic herb crusted salmon. You can add a crunchy topping to your salmon. Mix fresh herbs like parsley, dill, and basil with breadcrumbs and a bit of olive oil. Spread this mixture over your marinated salmon before baking. The crust adds texture and a burst of flavor. It makes the dish even more special. If you enjoy heat, spicy lemon garlic salmon is for you. Add red pepper flakes or cayenne pepper to your marinade. This simple change gives the dish a nice kick. Balance the spice with a drizzle of honey or maple syrup. It creates a sweet and spicy contrast that elevates the dish. You can choose between grilling or oven-baking salmon. Grilling gives a smoky, charred flavor. It creates beautiful grill marks and keeps the fish juicy. Oven-baking is easier and great for meal prep. It ensures even cooking and keeps the salmon moist. Both methods work well with this recipe. Enjoy experimenting to find your favorite! After making Lemon Garlic Roasted Salmon, let it cool. Cooling helps keep the salmon fresh. Place the salmon on a plate or a cutting board. Do not cover it while it cools. This step prevents steam from building up, which can make the fish soggy. Store leftover salmon in an airtight container. This keeps the salmon safe and tasty. You can also wrap it tightly with plastic wrap. Be sure to refrigerate it within two hours of cooking. Leftover salmon can stay fresh for up to three days. If you want to keep it longer, consider freezing it. Just remember to wrap it well to avoid freezer burn. When reheating salmon, do it gently. Use the oven or microwave for the best results. For the oven, preheat it to 275°F (135°C). Place the salmon on a baking sheet and cover it with foil. Heat for about 15 minutes. If you use a microwave, cover the salmon with a damp paper towel. Heat it in short bursts, checking often. This will help keep it moist and tasty. Enjoy your Lemon Garlic Roasted Salmon even after the first meal! Yes, you can use frozen salmon fillets. Just thaw them first. Place them in the fridge overnight or run them under cold water. This makes them easy to cook. Remember to pat them dry before marinating. This helps the marinade stick better. Lemon Garlic Roasted Salmon pairs well with many sides. Here are some tasty options: - A fresh green salad - Steamed vegetables like broccoli or asparagus - Quinoa or rice for a healthy carb - Roasted potatoes for a hearty side These sides balance the flavors and make your meal more complete. Check the salmon after 12 minutes of baking. The fish should flake easily with a fork. Use a food thermometer for the best results. The internal temperature should reach 145°F (63°C). If it hasn’t reached this, put it back in the oven for a few more minutes. You can prepare the salmon ahead of time. Marinate the salmon up to 2 hours before baking. This helps the flavors soak in. Just keep it in the fridge until you’re ready to cook. Baking it fresh gives you the best taste. Salmon is a great choice for health. It is rich in omega-3 fatty acids. These fats help your heart and brain. Salmon also has high-quality protein. It gives you energy and helps your muscles. Additionally, it contains vitamins like B12 and D. Eating salmon supports overall health. This post covered how to make delicious lemon garlic roasted salmon. You learned about key ingredients, quick steps, and helpful tips for cooking and storing. Remember to choose fresh salmon and try different marinades for flavor. You can also switch up cooking methods, like grilling or baking. Enjoy experimenting with this recipe to find your favorite version. With these insights, you’ll impress everyone at your next meal.

Lemon Garlic Roasted Salmon Flavorful and Healthy Dish

If you’re looking for a dish that’s as healthy as it is delicious, you’ll love this Lemon Garlic Roasted Salmon!

- 4 boneless, skinless chicken breasts - 1 cup grated Parmesan cheese - 1 cup breadcrumbs (preferably panko) - 2 large eggs - 1 teaspoon garlic powder - 1 teaspoon onion powder - 1 teaspoon dried Italian herbs - Salt and freshly ground black pepper - ½ cup all-purpose flour - Cooking spray or extra virgin olive oil This Crispy Parmesan Crusted Chicken recipe needs simple and fresh ingredients. The chicken breasts are the star. They are juicy and tender. The Parmesan cheese gives a rich flavor. Breadcrumbs add a crunchy texture. I love using panko because it makes the crust extra crispy. You will also need eggs to help the breadcrumbs stick. Garlic and onion powders add depth to the flavor. Italian herbs bring a taste of the Mediterranean. Don't forget salt and pepper. They help to enhance all the flavors. Lastly, all-purpose flour helps create a great base for the crust. Use cooking spray or olive oil to keep everything from sticking. This mix of ingredients makes for a delicious dinner. You will enjoy every bite. For the full recipe, check out the detailed steps. - Preheat oven to 400°F (200°C). - Line baking sheet with parchment paper and grease. Start by getting your oven ready. Preheating ensures even cooking. Next, take a baking sheet and line it with parchment paper. This helps with easy cleanup and prevents sticking. Just a light spray of cooking oil or a drizzle of olive oil will help the chicken crisp up nicely. - Mix flour with salt and pepper. - Whisk eggs until well beaten. - Combine Parmesan, breadcrumbs, garlic powder, onion powder, and Italian herbs. Now, let’s set up your dredging stations. In a shallow bowl, mix the flour with salt and pepper. This adds flavor to the chicken. In another bowl, whisk your eggs until they look smooth and well mixed. Lastly, in a third bowl, combine the grated Parmesan, breadcrumbs, garlic powder, onion powder, and Italian herbs. This mixture creates a tasty crust. - Pat chicken breasts dry. - Dredge in seasoned flour, then dip in eggs, and finally coat with breadcrumb mixture. - Transfer coated chicken to prepared baking sheet. It’s time to coat your chicken! First, pat the chicken breasts dry with a paper towel. This helps the coating stick better. Next, dredge each piece of chicken in the flour mixture. Shake off any extra flour. Dip the floured chicken into the eggs, ensuring it is fully coated. Finally, press the chicken into the breadcrumb mixture, covering both sides. Place the coated chicken on your prepared baking sheet. - Bake for 25-30 minutes and check internal temperature. - Use broiler for extra crunch if desired. Place the baking sheet in the oven. Bake for 25 to 30 minutes. You want the chicken to be golden brown and cooked through. Check the internal temperature; it should reach 165°F (75°C). If you want extra crunch, turn on the broiler for the last few minutes. Keep a close watch so it doesn’t burn. Enjoy the crispy Parmesan crust! You can find the full recipe in the article. For the best crust, use panko breadcrumbs. Panko gives a light, crunchy texture. Regular breadcrumbs work too, but they won't be as crisp. Before you coat the chicken, make sure to dry each breast well. This step helps the coating stick better and keeps the chicken juicy. Want to boost the flavor? Try adding paprika or cayenne pepper for a spice kick. You can also mix in fresh herbs like thyme or parsley. Taste as you go. Adjust the salt and pepper to your liking. Cooking should be fun and tailored to your taste! You can cook Crispy Parmesan Crusted Chicken in different ways. Air frying is a great option for a healthier twist. It gives you a crisp crust with less oil. If you prefer pan-searing, use a hot skillet with olive oil. Just remember to adjust the cook time. Thicker chicken breasts need a bit longer to cook through. Always check for an internal temperature of 165°F (75°C) to ensure it's safe to eat. For the full recipe, check out the section above. {{image_4}} You can easily change up the flavor of your crispy Parmesan crusted chicken. Adding fresh herbs like parsley or rosemary gives it a nice touch. You can also try mixing in different cheeses. Cheddar or mozzarella can add a unique taste. Experimenting with flavors can keep your meals exciting! Pair your chicken with great sides. A fresh salad or roasted vegetables works well. You might also enjoy grains like rice or quinoa. For a dip, try aioli or marinara sauce. These add extra flavor and make your meal more fun! If you need gluten-free options, use gluten-free breadcrumbs. They still provide crunch and flavor. You can also swap out the all-purpose flour for a gluten-free blend. This way, everyone can enjoy this tasty dish! For the complete details on how to make this dish, check out the Full Recipe. To keep your leftover Crispy Parmesan Crusted Chicken tasty, refrigerate it quickly. Place the chicken in an airtight container. Make sure to wrap it tightly with plastic wrap or foil if you don’t have a container. This helps keep moisture in and prevents the chicken from drying out. Store it in the fridge for up to three days. When it's time to eat your leftovers, you want them crispy again. The best way is to use the oven. Preheat your oven to 375°F (190°C). Place the chicken on a baking sheet. Bake for about 15-20 minutes until it's hot and crispy. If you want to save time, you can use an air fryer. Cook it at 350°F (175°C) for about 8-10 minutes. This method helps keep that crunchy texture. Yes, you can freeze Crispy Parmesan Crusted Chicken! To do this, let the chicken cool completely. Wrap each piece in plastic wrap, then place them in a freezer-safe bag. Squeeze out all the air to avoid freezer burn. You can freeze it for up to three months. When you're ready to eat it, thaw the chicken in the fridge overnight. Reheat it in the oven to bring back the crunch. Enjoy your delicious meal later! For the full recipe, check out the earlier section. To keep your crust crispy, bake the chicken on a rack. This allows hot air to circulate around the chicken. You can also avoid covering the chicken while it bakes. If you have leftovers, store them in a container without a lid. This prevents moisture buildup. Yes, you can use frozen chicken breasts. Thaw them in the fridge overnight for best results. If you’re short on time, use the microwave’s defrost setting. Just make sure the chicken is fully thawed before coating it. Adjust cooking time as needed, adding a few extra minutes for thicker pieces. This chicken pairs well with many sides. Try a fresh garden salad with a light vinaigrette. Roasted vegetables add color and flavor. Mashed potatoes or risotto are comforting choices too. You can also serve it with pasta and a simple marinara sauce for a heartier meal. Check the internal temperature with a meat thermometer. The chicken should reach 165°F (75°C) to be safe. Look for clear juices when you cut into it. The meat should also be firm and no longer pink inside. You can mix up the flavors easily. Try adding smoked paprika for a smoky taste. Cayenne pepper gives a nice kick. Fresh herbs like rosemary or thyme can also add a lovely aroma. Feel free to experiment with spices to find your favorite blend. Yes! This recipe is simple to scale. If you need fewer servings, just halve the ingredients. For more, double everything. Keep in mind that cooking time may vary with thicker or thinner pieces of chicken. Always check the internal temperature to ensure it's fully cooked. This blog post walked you through making crispy Parmesan crusted chicken, from ingredients to cooking methods. You learned how to coat the chicken for that perfect crunch. We also discussed ways to enhance flavors and storage tips for leftovers. Remember, you can customize the recipe to fit your taste. Try different cheeses or herbs for a fun twist. Enjoy your cooking, and share your results!

Crispy Parmesan Crusted Chicken Delicious Dinner Option

Looking for a dinner that’s both crispy and cheesy? You’ll love this Crispy Parmesan Crusted Chicken! With a golden crust

- 200g (7 oz) pasta (choose either penne or fusilli for the best texture) - 200g (7 oz) block of feta cheese - 400g (14 oz) cherry tomatoes, halved - 4 cloves garlic, minced Baked feta pasta is simple yet packed with flavor. The key is using good ingredients. I love penne or fusilli. They hold the sauce well and make every bite tasty. The creamy feta cheese adds a rich taste that blends perfectly with the tomatoes. Fresh cherry tomatoes burst with sweetness as they roast. Minced garlic gives the dish a wonderful aroma. - 1 teaspoon dried oregano - 1/2 teaspoon red pepper flakes (optional for heat) - 1/4 cup extra virgin olive oil - Salt and freshly ground black pepper to taste - Fresh basil leaves, for garnish - Zest of 1 lemon Seasonings are crucial to make the pasta shine. Dried oregano adds an earthy flavor. If you like some heat, red pepper flakes are a great choice. Extra virgin olive oil brings richness and depth to the dish. Don’t forget salt and pepper; they enhance all the flavors. Fresh basil leaves brighten the meal, while lemon zest gives it a refreshing twist. For the full recipe, be sure to check the details! First, preheat your oven to 400°F (200°C). This heat will roast the tomatoes and feta. While the oven warms, gather your ingredients. In a large baking dish, combine: - 400g (14 oz) cherry tomatoes, halved - 4 cloves garlic, minced - 1 teaspoon dried oregano - 1/2 teaspoon red pepper flakes (optional) - 1/4 cup extra virgin olive oil - Salt and freshly ground black pepper to taste Gently toss these ingredients until the tomatoes are well coated with oil and spices. Next, place the block of feta cheese in the center of the dish. Surround it with the colorful tomatoes. Drizzle a little extra olive oil over the feta and sprinkle a pinch of salt on top. Now, transfer your dish to the preheated oven. Bake for about 30 minutes. You will know it’s done when the tomatoes blister and the feta turns golden and slightly bubbly. While the feta and tomatoes bake, cook your pasta. Use either penne or fusilli for the best texture. Follow the package instructions until it reaches an al dente texture. Before draining, remember to reserve 1/2 cup of the pasta cooking water. This water is key for adjusting your sauce later. After baking, mix the feta and tomatoes to create a creamy sauce. Add the drained pasta and combine everything well. If the sauce is too thick, gradually mix in some reserved pasta water until it’s just right. Finish with fresh lemon zest for brightness, and adjust the seasoning with salt and pepper. Serve hot, garnished with fresh basil leaves for a lovely touch. Enjoy your delightful meal! For more details, check out the Full Recipe. To create the best sauce for Baked Feta Pasta, use pasta water. This water has starch, which helps thicken your sauce. When you mix the pasta with the tomato-feta blend, you may find it too thick. Just add a little pasta water until it feels right. The sauce should be creamy but not runny. Next, taste your sauce. If it needs more flavor, adjust the seasonings. A pinch of salt or a sprinkle of black pepper can make a big difference. You can also add more lemon zest for a fresh kick. This way, you can make the dish truly your own. Baked Feta Pasta is great on its own, but you can make it even better. Try adding vegetables like spinach or zucchini. These add color and extra nutrients. You can also add protein. Grilled chicken or shrimp works wonderfully. Just mix them in after you bake the feta and tomatoes. For serving, think about garnishes. Fresh basil leaves look nice and add flavor. You can also sprinkle some grated cheese on top. Serve it alongside a simple salad or some crusty bread for a complete meal. This dish is all about making it fun and personal. {{image_4}} You can use different pasta types in baked feta pasta. My favorites are penne and fusilli. They hold sauce well and add a nice texture. If you want a gluten-free option, try brown rice or chickpea pasta. These options taste great and keep the dish light. Whole wheat pasta is another healthy choice. It adds fiber and nutrients without losing flavor. Don't worry if you can't find feta cheese. You can swap it with goat cheese. It gives a tangy flavor. For a dairy-free choice, try almond or coconut-based feta. If you want to change the tomatoes, use diced canned tomatoes. They work well and save time. You can also add bell peppers or zucchini for extra veggies. For seasonings, mix in fresh herbs like thyme or rosemary. They add a lovely aroma and flavor. After enjoying your baked feta pasta, store any leftovers right away. Place it in an airtight container. This keeps the flavors fresh and prevents drying out. You can refrigerate it for up to three days. If you want to save it longer, freeze it. In the freezer, it lasts for about two months. Just remember to label the container with the date. This way, you’ll know when to use it by. Reheat your pasta with care to keep it tasty. The best way is to use the stove. Put it in a pan over low heat. Add a splash of water or olive oil to keep it moist. Stir it often until it’s warm. If you prefer the microwave, use a microwave-safe bowl. Cover it with a damp paper towel to help keep moisture in. Heat it in short bursts, stirring in between. This method helps avoid soggy pasta. Enjoy your delicious meal again just like the first time! Baked Feta Pasta is a simple, creamy dish made with baked feta cheese and tomatoes. It became popular on social media for its ease and taste. You roast the cheese and tomatoes together, then mix them with pasta. This dish is vibrant and full of flavor. The creamy feta melts into the tomatoes, creating a delicious sauce. The result is a comforting meal that many people love. Yes, you can prepare Baked Feta Pasta ahead of time. Cook the pasta and store it separately. Roast the feta and tomatoes, then let them cool. Place them in the fridge for later use. When you are ready to eat, combine the two and heat them together. This method saves time and helps with meal planning. Just remember to adjust the sauce with some pasta water when you mix them. Yes, Baked Feta Pasta is a great choice for vegetarians. It uses feta cheese, which is made from milk and does not contain meat. You can also add extra veggies like spinach or bell peppers for more flavor. If you want to make it vegan, you could swap the feta with a plant-based cheese. This way, you can enjoy a delicious meal while meeting your dietary needs. Baked Feta Pasta combines simple ingredients for rich flavor. We explored the main components, preparation steps, and helpful tips. You learned how to make the dish your own with substitutions and variations. Storing leftovers and reheating methods keep your meal fresh. This dish is easy and versatile. Enjoy experimenting with new flavors and textures. It’s perfect for any meal, satisfying both taste and creativity. Dive in and enjoy the delicious twist on classic pasta!

Baked Feta Pasta Flavorful and Simple Dish

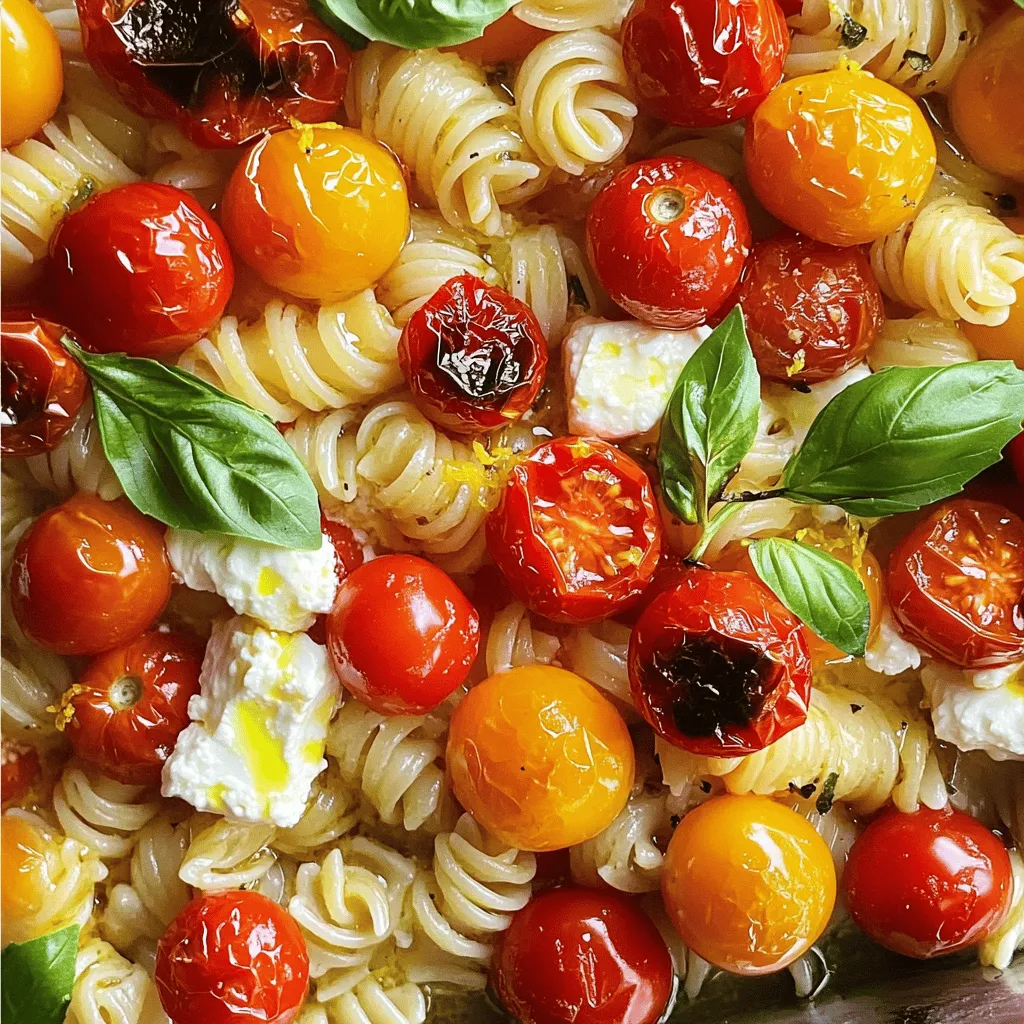
Baked Feta Pasta is delicious and easy to make! You only need a few simple ingredients, like feta cheese, cherry

- 1 pound boneless, skinless chicken breasts, sliced - Bell pepper (red or green), sliced - 1 large onion, sliced - 3 cloves garlic, minced - 2 tablespoons olive oil - 2 teaspoons chili powder - 1 teaspoon ground cumin - 1 teaspoon smoked paprika - Salt and pepper to taste - 8 small flour or corn tortillas - Optional toppings: sour cream, guacamole, shredded cheese, cilantro For my easy chicken fajitas, I start with fresh ingredients. I choose 1 pound of boneless, skinless chicken breasts. Slicing them into thin strips helps them cook quickly. I like to use colorful bell peppers, either red or green, for a pop of color and flavor. Slicing a large onion adds sweetness and depth to the dish. Next, minced garlic packs a punch of flavor. I always use fresh garlic for the best taste. Olive oil is essential for cooking. It keeps the chicken moist and helps brown the veggies. For spices, I use chili powder, ground cumin, and smoked paprika. These spices create a warm, smoky flavor. I add salt and pepper to enhance all the tastes. Finally, I warm small flour or corn tortillas. They are perfect for wrapping around the delicious filling. For extra flavor, I love optional toppings like sour cream, creamy guacamole, shredded cheese, or fresh cilantro. You can find the full recipe [here](#). With these ingredients, you will create a tasty and colorful dish that everyone will enjoy! Start by mixing the chicken in a large bowl. Add minced garlic, chili powder, cumin, smoked paprika, salt, and pepper. Use your hands or a spatula to coat the chicken. Let it sit for a bit so the flavors soak in. Next, grab a skillet and heat one tablespoon of olive oil over medium-high heat. When the oil shimmers, add the marinated chicken. Cook it for about 5-7 minutes. Stir occasionally until the chicken turns golden and is no longer pink. Once done, transfer the chicken to a plate. In the same skillet, pour in the remaining tablespoon of olive oil. Add the sliced bell pepper and onion. Sauté for 4-5 minutes. Stir until the vegetables soften and caramelize a bit. This step adds a sweet flavor. Now, return the cooked chicken to the skillet with the sautéed veggies. Stir everything together. Let it cook for another 2-3 minutes. This helps the chicken and vegetables share their flavors. While the chicken and vegetables meld, warm the tortillas. You can use a skillet over medium heat for 20-30 seconds on each side. Alternatively, wrap them in a damp paper towel and microwave for 20-30 seconds until soft. Take a warm tortilla and scoop a generous amount of the chicken and veggie mix into the center. You can add toppings like sour cream, guacamole, shredded cheese, and fresh cilantro. These will add flavor and color to your dish. - Use fresh chicken for best results - Avoid overcooking to retain moisture To get tender chicken, always start with fresh chicken. When you buy chicken, check the date. Fresh chicken cooks evenly and tastes better. Overcooking chicken makes it dry. Cook it until it’s just done. A meat thermometer helps here. Aim for 165°F for safe eating. Let it rest for a few minutes before slicing. This keeps the juices inside. - Experiment with different spices - Adjust spice levels to preference Seasoning is key for great fajitas. Start with chili powder, cumin, and smoked paprika. These spices add warmth and depth. You can try other spices too. Consider adding oregano or cayenne for more heat. Taste your mix before cooking. If you want more heat, add more chili powder. If you prefer milder, cut back. Don’t be afraid to play with flavors. - Utilize a cast iron skillet for even cooking - Opt for high heat for better caramelization of veggies A cast iron skillet is your best friend for fajitas. It heats evenly and gives a nice sear. Start with high heat when cooking. This helps to caramelize the veggies. Caramelization adds a sweet flavor. Make sure to not crowd the pan. Cook in batches if needed. This way, everything gets that lovely char you want. Follow these tips, and your fajitas will shine. For the full recipe, check out the main section. {{image_4}} You can easily make these fajitas meat-free. Substitute chicken with mushrooms or tofu. Both options absorb flavors well. For mushrooms, use portobello or button varieties. Slice them thinly and sauté until tender. If you choose tofu, press it to remove excess water. Cut it into cubes and season it like chicken. This option is great for plant-based diets. Want a twist on the classic? Serve the chicken and veggies over rice. This method is lighter and just as tasty. Start with a base of fluffy white or brown rice. Then, add your chicken and veggie mix on top. You can layer on toppings like avocado or salsa for extra flavor. It’s a fun and filling meal. Feel free to switch up the protein. Beef or shrimp work great in fajitas too. For beef, use flank steak or skirt steak, sliced thinly. Cook it the same way as chicken for best results. Shrimp cooks quickly, so add it last in the skillet. Just a few minutes will give you juicy, flavorful shrimp. These options add variety to your meals. You can find the full recipe for Easy Chicken Fajitas above. Enjoy experimenting with these variations! After making your delicious chicken fajitas, store the extras in an airtight container. This keeps them fresh and tasty. The fajitas are best if you eat them within three days. You can heat them up in a skillet or microwave for a quick meal. To freeze chicken fajitas, let them cool first. Then, place them in a freezer-safe bag or container. Be sure to remove as much air as you can. This helps prevent freezer burn. When you are ready to eat them, take them out and thaw them in the fridge overnight. For reheating, a skillet works best to bring back the flavors. Just heat until hot, and enjoy! Yes, you can prep your fajitas early. Here are some tips: - Meal Prepping: Cut your chicken and veggies the night before. Store them in separate containers. This keeps them fresh and ready to cook. - Storing Components: Keep your cooked chicken and veggies in the fridge for up to three days. Place them in airtight containers. It makes reheating a breeze! Toppings add fun to fajitas. Here are some great ideas: - Sour cream adds creaminess. - Guacamole gives a rich, buttery taste. - Shredded cheese brings a nice melt. - Fresh cilantro adds a pop of color and flavor. - Serve with lime wedges for a zesty kick! Customizing fajitas is easy and fun! Here are some tips: - Add More Spice: Try jalapeños for heat. - Different Proteins: Use shrimp or beef instead of chicken. - Extra Veggies: Toss in zucchini or mushrooms. - Herbs and Spices: Add fresh oregano or a dash of cayenne for more flavor. Sides can enhance your meal. Here are some great choices: - Mexican rice adds a hearty touch. - Refried beans make a filling side. - Corn on the cob is sweet and crunchy. - A fresh salad with lime dressing keeps it light. These sides balance the flavors of your fajitas perfectly! Easy chicken fajitas are simple and fun to make. You mix chicken, spices, and veggies for tasty meals. Remember to marinate the chicken for a great flavor. Cook it well and don't skip the warm tortillas. Try different ingredients to fit your taste, like mushrooms or shrimp. Store leftovers properly to enjoy later. With these tips, you can create delicious fajitas everyone will love. Cooking can be a joy, so keep experimenting!

Easy Chicken Fajitas Quick and Flavorful Recipe

If you’re craving a quick and tasty meal, you’ve come to the right place! This Easy Chicken Fajitas recipe packs

To make the perfect Cheesy Jalapeno Popper Dip, you need to gather some key ingredients. Here’s what you’ll need: - 2 cups cream cheese, softened to room temperature - 1 cup sour cream - 1 cup sharp cheddar cheese, freshly shredded - 1/2 cup mozzarella cheese, freshly shredded - 1 cup jalapenos, diced (fresh or pickled) - 1/2 cup green onions, finely chopped - 1 teaspoon garlic powder - 1 teaspoon onion powder - Salt and freshly ground black pepper, to taste - 1/2 cup breadcrumbs (optional, for crispy topping) - 2 tablespoons olive oil (for breadcrumbs) These ingredients create a rich and creamy dip that bursts with flavor. The cream cheese and sour cream form a smooth base, while the cheeses add depth. Jalapenos bring the heat, and green onions add a fresh crunch. If you want a crispy topping, use breadcrumbs mixed with olive oil. You can find the full recipe to guide you through the cooking process. 1. Preheat the oven to 350°F (175°C). This gets the oven ready for baking. 2. In a large bowl, mix the cream cheese and sour cream until smooth. Use a hand mixer or a spoon. 3. Stir in the shredded sharp cheddar and mozzarella cheeses. Make sure they are well combined. 4. Add the diced jalapenos and chopped green onions. Mix well for even flavor. 5. Sprinkle in garlic powder, onion powder, salt, and black pepper. Mix until everything is combined. 1. Carefully transfer the mixture into a baking dish. Spread it out evenly with a spatula. 2. If you want a crispy topping, combine breadcrumbs with olive oil in a small bowl. Sprinkle them over the dip. 3. Place the baking dish in the oven and bake for 25-30 minutes. Look for it to be bubbly and golden brown. 1. After baking, let the dip cool for about 5 minutes. This helps avoid burns. 2. Serve the warm dip in the baking dish. Offer tortilla chips, pita bread, or fresh veggies for dipping. Add chopped green onions or paprika on top for a nice look. You can find the full recipe for Cheesy Jalapeno Popper Dip above. Enjoy making this tasty dish! - Use room temperature cream cheese for smoother mixing. This helps create a creamy texture. - Adjust the jalapeno amount for your desired spice level. More jalapenos mean more heat! - Experiment with cheese varieties for different flavors. Try pepper jack or gouda for a twist. - Best served warm with tortilla chips or fresh veggies. The crunch pairs well with the dip. - Enhance presentation with garnish options. Chopped green onions or a sprinkle of paprika look great. - Recommended beverage pairings include cold beer or a light white wine. They complement the flavors well. For more details, check the Full Recipe. {{image_4}} You can easily switch some ingredients in your dip. Here are some ideas: - Cream Cheese: Try Greek yogurt instead. It makes the dip lighter. - Cheese Variety: Use pepper jack or gouda for a different taste. - Veggies: Roasted red peppers add a nice sweet flavor. These swaps help you create a dip that suits your taste. You might find a favorite combo! Want to boost the flavor? Here are some great options: - Bacon Bits: Add crispy bacon for a savory twist. - Hot Sauce: A splash of hot sauce adds heat and kick. - Fresh Herbs: Mix in cilantro or parsley for a fresh touch. These additions can take your cheesy jalapeno popper dip to the next level. You can get creative and make it your own! To store leftover cheesy jalapeno popper dip, let it cool down. Place it in an airtight container. This keeps the dip fresh and tasty. You can use glass or plastic containers. Just make sure they seal well. Store it in the fridge for up to three days. When it's time to eat again, you can reheat the dip. The best way is in the oven. Preheat your oven to 350°F (175°C). Place the dip in an oven-safe dish. Heat for about 15-20 minutes until it’s warm and bubbly. This method keeps the texture nice. If you prefer the microwave, you can do that too. Just heat it in short bursts. Start with 30 seconds, then stir. Repeat until it’s warm. Be careful not to overcook it, as it may get watery. For the best results, always cover the dish. This helps keep moisture in while reheating. Enjoy your dip warm with chips or veggies. For the full recipe, check out the complete section above! How long can I store Cheesy Jalapeno Popper Dip in the fridge? You can store Cheesy Jalapeno Popper Dip in the fridge for up to four days. Make sure to keep it in an airtight container to maintain its freshness. Can I make this dip ahead of time? Yes, you can make this dip ahead of time. Prepare it a day before and store it in the fridge. Bake it when you are ready to serve. Is it possible to freeze Cheesy Jalapeno Popper Dip? Yes, you can freeze this dip. Place it in a freezer-safe container for up to three months. Thaw it in the fridge before baking. Can I use low-fat cream cheese instead? Yes, you can use low-fat cream cheese. It will still taste great, but the dip might be less creamy. What can I substitute for the jalapenos? You can substitute jalapenos with diced bell peppers for a milder flavor. Green chilies also work well if you want some spice. How do I adjust this recipe for different serving sizes? To adjust this recipe, simply halve or double the ingredients. For smaller gatherings, use half the amounts. For larger groups, double them to ensure everyone enjoys! This Cheesy Jalapeno Popper Dip combines cream cheese, jalapenos, and savory spices. You learned how to mix ingredients, bake, and serve it. You can customize the dip by changing the cheese or spices to fit your taste. Remember, using fresh ingredients makes a big difference. Serve it warm with chips or veggies for a fun snack. Enjoy making it and impress your friends and family with your cooking skills!

Cheesy Jalapeno Popper Dip Tasty and Simple Recipe

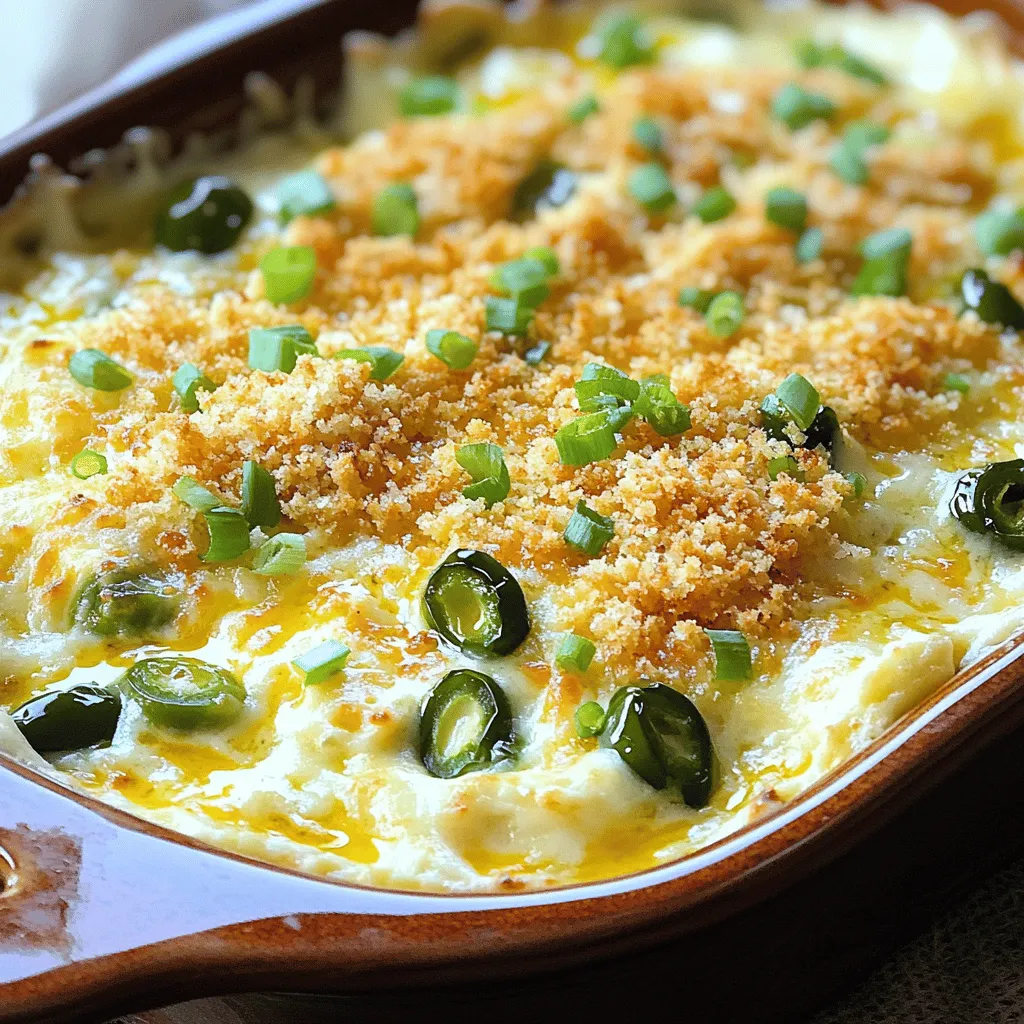
If you’re craving a creamy, spicy treat, you can’t go wrong with Cheesy Jalapeno Popper Dip. This tasty dip blends

- 4 salmon fillets - 1/4 cup teriyaki sauce - 1 tablespoon honey - 2 teaspoons sesame oil For this dish, salmon fillets are the star. They bring rich flavor and healthy fats. Teriyaki sauce adds a sweet and savory taste. Honey enhances this sweetness. Sesame oil gives a nice nutty finish. - 2 cups broccoli florets - 1 red bell pepper, sliced into strips - 1 cup carrots, sliced into thin rounds Adding vegetables makes this meal colorful and healthy. Broccoli florets add crunch and nutrients. Red bell pepper adds sweetness and color. Carrots bring a crisp texture and natural sweetness. - 1 tablespoon olive oil - 1 tablespoon sesame seeds, toasted - 3 green onions, finely chopped - Salt and pepper to taste Seasoning is key to enhancing flavor. Olive oil helps the veggies roast nicely. Toasted sesame seeds add a delightful crunch. Green onions bring freshness and brightness. Salt and pepper are essential for balance. This One Pan Baked Teriyaki Salmon recipe combines all these ingredients beautifully. For the full recipe, check out the steps to create this tasty dish. 1. Preheat your oven to 400°F (200°C). This helps cook the salmon evenly. 2. In a small bowl, mix the teriyaki sauce, honey, and sesame oil. Whisk it well. This marinade packs great flavor. 1. Place the salmon fillets in the center of a large baking sheet. Season them with salt and pepper. This enhances the taste of the fish. 2. Pour half of the teriyaki marinade over the salmon. Make sure they are well coated. Set aside the other half for later. 3. In another bowl, add the broccoli, red bell pepper, and carrot rounds. Drizzle with olive oil and season with salt and pepper. Toss the veggies to coat them. This mix adds color and nutrition. 4. Arrange the vegetable mix around the salmon on the baking sheet. This makes the dish look appealing. 1. Bake the salmon and vegetables for 15-18 minutes. The salmon should flake easily when done. Keep an eye on the time. 2. In the last 5 minutes, take out the baking sheet. Brush the remaining marinade over the salmon and veggies. This adds an extra burst of flavor. 3. Once the time is up, remove the sheet from the oven. Let it cool a bit. Garnish with sesame seeds and green onions. This adds a nice crunch and makes it look pretty. Serve the teriyaki salmon over jasmine rice for a tasty meal. For the full recipe, check the details above! Marinating your salmon is key for rich flavor. I suggest letting it soak for at least 30 minutes. This allows the teriyaki sauce to work its magic. The right marinating time helps the fish absorb all those tasty flavors. When cooking, look for the salmon to flake easily. It should be tender but not dry. Use a fork to check; if it breaks apart, it's ready! Choosing vegetables is simple. I love using broccoli, red bell peppers, and carrots. They add color and crunch to your dish. Make sure to cut the vegetables into similar sizes. This helps them cook evenly on the pan. Larger pieces take longer to cook, while smaller ones can burn. Aim for uniform pieces for the best results. Plating your dish well makes it more inviting. Start by placing the salmon in the center. Arrange the colorful veggies around it for a bright look. For a finishing touch, sprinkle toasted sesame seeds on top. You can also add finely chopped green onions for extra flavor. This not only enhances taste but also adds a wonderful pop of color. {{image_4}} You can change your teriyaki sauce to fit your taste. Using a homemade teriyaki sauce gives you control over flavors. Mix soy sauce, brown sugar, ginger, and garlic for a fresh taste. You can also try different marinades like honey mustard or spicy garlic. These will add new flavors to your salmon dish. Switching up your veggies can make this dish even more fun. Try seasonal vegetables like zucchini, asparagus, or snap peas. You can also mix in proteins. Chicken works well and cooks nicely with the same method. Just adjust the cooking time to ensure everything is tender and juicy. If you want to skip rice, serve the teriyaki salmon with a fresh salad or steamed veggies. This lightens the meal and adds crunch. You can also add sides like edamame or pickled vegetables for extra flavor. These options let you enjoy the salmon in different ways. Explore variations to keep your meals exciting! After you enjoy your One Pan Baked Teriyaki Salmon, store leftovers promptly. Place the salmon in an airtight container. Make sure to include any leftover veggies. Keep the container in the fridge for best taste. To reheat, use a microwave or oven. If using a microwave, cover the dish to keep it moist. Heat for about 1-2 minutes. For the oven, set it to 350°F (175°C) and warm for 10 minutes. This keeps the salmon juicy. You can freeze baked teriyaki salmon for later meals. First, let the salmon cool completely. Wrap each piece tightly in plastic wrap, then place in a freezer-safe bag. Be sure to remove as much air as possible. This helps prevent freezer burn. When you’re ready to eat, thaw the salmon overnight in the fridge. You can also use the microwave on defrost setting. Reheat carefully to avoid drying it out. In the fridge, your salmon will last for about 3 days. If you freeze it, it can stay fresh for up to 3 months. Always check for signs of spoilage. Look for any odd smell or discoloration. If you notice these, it’s best to throw it away. Enjoy your meal safely! To make this dish, start by gathering your ingredients. Preheat your oven to 400°F (200°C). Mix teriyaki sauce, honey, and sesame oil in a bowl. Place salmon fillets on a baking sheet and season them with salt and pepper. Pour half of the marinade over the salmon. Next, prepare your veggies. Toss broccoli, red bell pepper, and carrots with olive oil, salt, and pepper. Arrange the veggies around the salmon on the baking sheet. Bake everything for 15-18 minutes until the salmon is cooked through. Brush the remaining marinade on the salmon and veggies in the last five minutes. Once done, sprinkle sesame seeds and green onions on top. This dish is simple and packed with flavor. Yes, you can use frozen salmon. Just remember to thaw it first. Place the frozen salmon in the fridge overnight to defrost. If you need it faster, submerge it in cold water for about an hour. After thawing, pat the salmon dry with a paper towel. This helps the marinade stick better. Then follow the same steps in the Full Recipe to bake your salmon perfectly. You can serve baked teriyaki salmon with a variety of side dishes. Here are some great options: - Steamed jasmine rice - Quinoa for a healthy twist - A fresh green salad - Roasted sweet potatoes - Sautéed asparagus or green beans These sides complement the flavors of the salmon well. Choose what you like best! In this article, we explored how to make a delicious baked teriyaki salmon. We covered the essential ingredients, preparation steps, and baking process. I shared tips for perfecting your dish and offered variations to keep it exciting. Remember to store leftovers properly to maintain freshness. Enjoying this meal can be simple and tasty! With these techniques, you can create a delightful dinner that everyone will love. So, gather your ingredients and give it a try! You’ll make a dish worth sharing.

One Pan Baked Teriyaki Salmon Simple and Tasty Dish

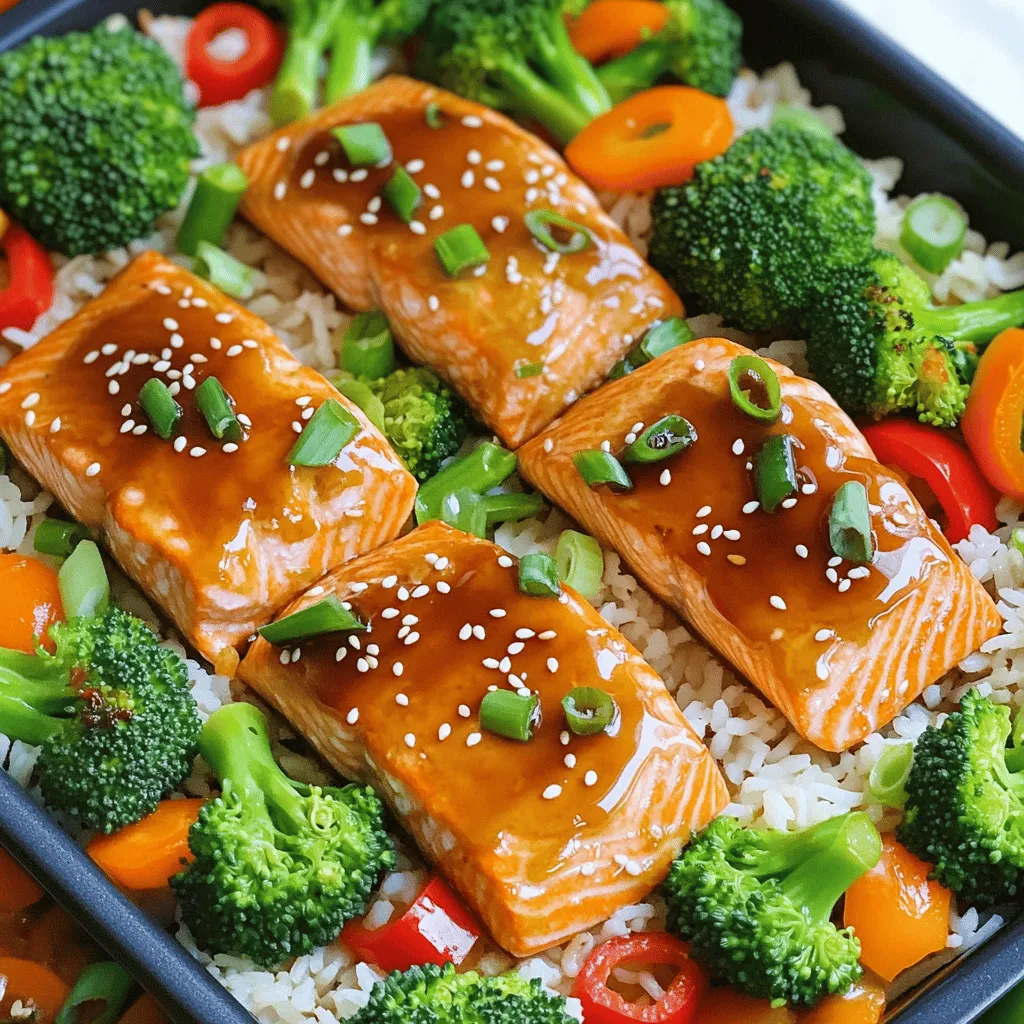
If you’re looking for a quick, tasty dinner, One Pan Baked Teriyaki Salmon is perfect. This dish takes just minutes

- 1 pound chicken tenderloins - 1 cup buttermilk - 1 cup all-purpose flour - 1 cup panko breadcrumbs - 1 teaspoon garlic powder - 1 teaspoon onion powder - 1 teaspoon smoky paprika - 1 teaspoon salt - ½ teaspoon freshly ground black pepper - ½ teaspoon cayenne pepper (optional for an extra kick) - Cooking spray for crisping To make crispy air fryer chicken tenders, gather these tools: - Large bowl for marinating - Shallow dishes for breading - Air fryer - Cooking spray - Tongs for handling chicken - Meat thermometer for checking doneness When choosing chicken tenderloins, look for these signs: - Bright pink color without dark spots - No foul smell; fresh chicken should smell clean - Firm texture; it should not feel slimy - Check the sell-by date to ensure freshness Buying from a trusted source can also help. Aim for organic or pasture-raised options if possible. This way, you can enjoy better flavor and nutrition in your meal. For the full recipe, check out the details above. To start, I take one pound of chicken tenderloins. I place them in a large bowl. Next, I pour one cup of buttermilk over the chicken. I make sure every piece is covered. I cover the bowl and put it in the fridge. I let the chicken marinate for at least 30 minutes. This step helps make the chicken juicy and flavorful. While the chicken marinates, I prepare my breading station. In a shallow dish, I mix one cup of all-purpose flour with one teaspoon of garlic powder, one teaspoon of onion powder, one teaspoon of smoky paprika, one teaspoon of salt, ½ teaspoon of black pepper, and ½ teaspoon of cayenne pepper for some heat. In another shallow dish, I add one cup of panko breadcrumbs. This setup makes it easy to coat the chicken. Once the chicken is marinated, I take each piece out of the buttermilk. I let any extra liquid drip off. I then dredge the chicken in the flour mixture, making sure it's well coated. After that, I dip it back into the buttermilk quickly. Finally, I roll it in the panko breadcrumbs. I press gently to help the crumbs stick well. This step is key for those crispy edges. Now, it’s time to preheat the air fryer. I turn it on and set it to 400°F (200°C). I let it heat for about 5 minutes. Preheating ensures that the chicken cooks evenly and gets nice and crispy. After preheating, I arrange the breaded chicken tenders in a single layer in the basket. To help them crisp up, I lightly spray the tops with cooking spray. I cook the tenders for about 10-12 minutes. Halfway through, I flip them to ensure even cooking. They should turn golden brown and reach an internal temperature of 165°F. Once the chicken is done, I carefully take them out of the air fryer. I let them rest for a few minutes. This helps keep the juices inside. For serving, I like to plate the crispy chicken tenders on a nice platter. I often garnish with fresh parsley for color. I serve them with tasty dipping sauces like honey mustard or BBQ. You can find the full recipe in the earlier section. To get that perfect crunch, start by marinating your chicken tenderloins in buttermilk. This helps keep them juicy. After marinating, make sure to coat them well. Use a mix of flour and panko breadcrumbs. Panko gives a light and airy crunch. Lightly spray the tenders with cooking spray before air frying. This small step makes a big difference in crispiness. Feel free to play with flavors! You can add different spices to the flour mix. For a kick, try adding chili powder or Italian herbs. If you love garlic, increase the garlic powder in your mix. You can even experiment with lemon zest for a fresh twist. Adjust the seasoning to fit your taste. This makes each batch unique! One common mistake is overcrowding the air fryer basket. Make sure to arrange the tenders in a single layer. This helps them cook evenly. Another mistake is skipping the preheating step. Preheating helps achieve that golden brown color. Lastly, avoid flipping the tenders too early. Wait until they have a good crust before turning them over. Following these tips will make your chicken tenders a hit! {{image_4}} To make spicy air fryer chicken tenders, add more heat! Use extra cayenne pepper or try a spicy seasoning blend. You can also add hot sauce to the buttermilk marinade. This will give your chicken a bold kick. Be sure to taste the mixture before marinating the chicken. Adjust the spice level to your liking. The result will be flavorful, crispy tenders that pack a punch. For a gluten-free option, swap out the all-purpose flour. Use almond flour or gluten-free breadcrumbs instead. This keeps the crunch while ensuring it’s safe for gluten-sensitive eaters. You can also try crushed cornflakes or rice cereal for a fun texture. Just make sure to read labels on all ingredients to avoid gluten. This variation means everyone can enjoy crispy chicken tenders. If you prefer a baked option, you can still use your air fryer. Follow the same steps for marinating and coating. Instead of cooking at 400°F, try 375°F for a longer cook time. This helps them cook through without burning. Check the internal temperature to ensure it reaches 165°F. Baked air fryer chicken tenders can still be crispy and delicious! For the full recipe, just check the earlier section. To keep your crispy air fryer chicken tenders fresh, store them in an airtight container. Let them cool to room temperature first. This step prevents condensation, which can make them soggy. You can keep them in the fridge for up to 3 days. For the best flavor and texture, eat them sooner rather than later. When you want to enjoy the chicken tenders again, reheating them properly is key. Preheat your air fryer to 350°F (175°C). Place the chicken tenders in the basket, ensuring they don’t touch. Heat for about 5-7 minutes. This method helps to keep them crispy. You can also use an oven for reheating. Just place them on a baking sheet and heat at 350°F (175°C) for 10-12 minutes. If you want to save some chicken tenders for later, freezing is a great option. First, let them cool completely. Then, place them in a single layer on a baking sheet and freeze for about an hour. Once frozen, transfer them to a freezer-safe bag or container. They can last for up to 3 months in the freezer. When you’re ready to eat, reheat from frozen in your air fryer at 350°F (175°C) for about 10-12 minutes. Enjoy them fresh, even after freezing! You should marinate the chicken for at least 30 minutes. For best results, I recommend going up to 2 hours. This time allows the chicken to soak up the buttermilk, making it tender and flavorful. Yes, you can use frozen chicken tenderloins. However, you must thaw them first. Thawing ensures they cook evenly. I suggest placing them in the fridge overnight or using the microwave for quick thawing, but don’t cook them straight from frozen. Several sauces taste amazing with air fryer chicken tenders. You can try: - Honey mustard - Smoky BBQ sauce - Creamy ranch dressing - Spicy ketchup These sauces add a fun twist to every bite! Yes, preheating the air fryer is important. It helps the tenders cook evenly and get that crispy texture we love. Preheat your air fryer to 400°F (200°C) for about 5 minutes before adding the chicken. You can check if the chicken is cooked through by using a meat thermometer. The internal temperature should reach 165°F (75°C). If you don’t have a thermometer, check that the juices run clear when you cut into the chicken. No pink should be showing. You learned how to make delicious air fryer chicken tenders. We discussed the right ingredients, tools, and tips to choose fresh chicken. I walked you through each step, from marinating to serving. Remember to explore different flavors and avoid common mistakes. Proper storage will keep your tenders tasty for later. Try new ideas like spicy or gluten-free versions. Enjoy your cooking journey!

Crispy Air Fryer Chicken Tenders Easy and Quick Recipe

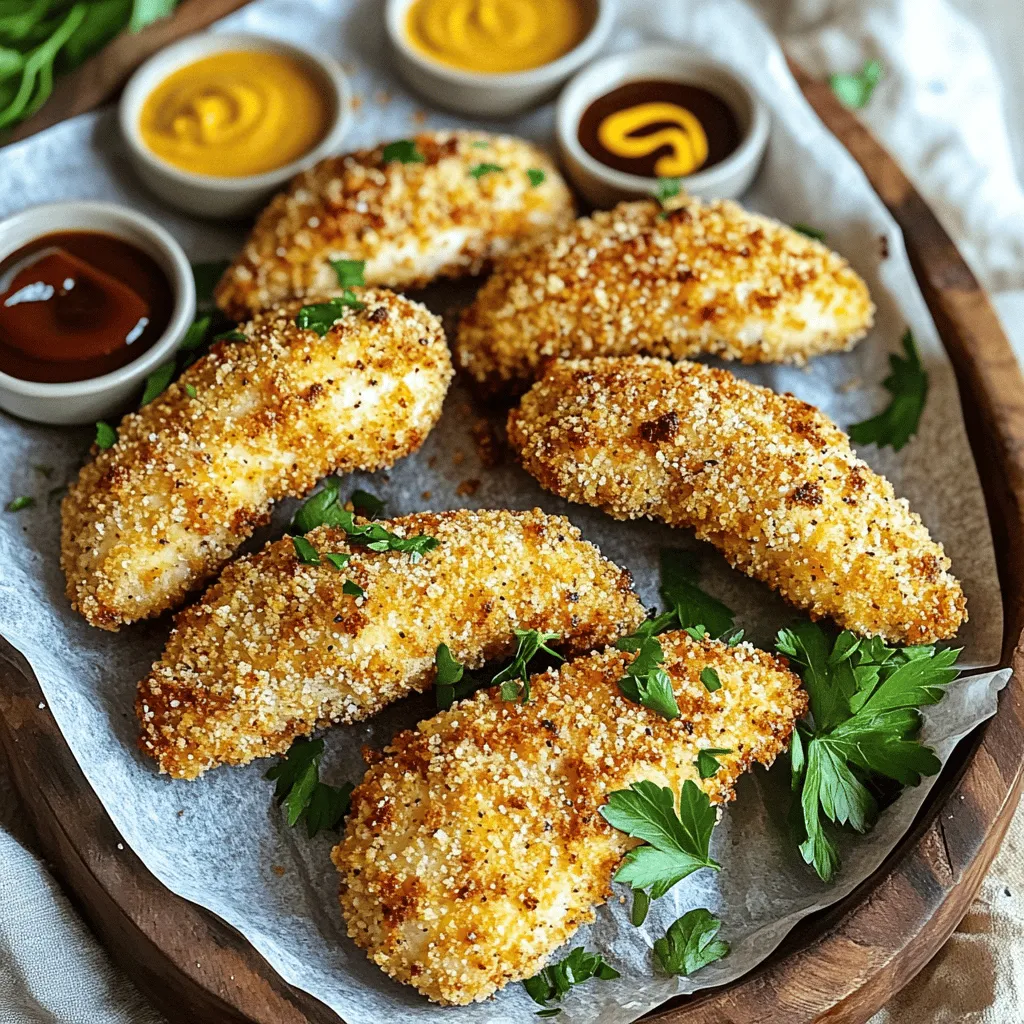
Are you craving crispy chicken tenders but want a healthier way to make them? Let me show you how to

To make the irresistible ultimate chocolate chip cookies, you need these simple ingredients: - 2 ½ cups all-purpose flour - 1 teaspoon baking soda - ½ teaspoon salt - 1 cup unsalted butter, softened to room temperature - ¾ cup brown sugar, firmly packed - ¾ cup granulated sugar - 1 teaspoon pure vanilla extract - 2 large eggs, at room temperature - 2 cups semi-sweet chocolate chips - 1 cup chopped nuts (optional; walnuts or pecans work well) - ½ teaspoon flaky sea salt for topping These ingredients work together to create a soft, chewy cookie. Each plays a key role in the final taste and texture. The flour gives structure, while the butter adds richness and moisture. The sugars not only sweeten but also help with the browning process. Using room-temperature butter and eggs is vital. This helps the dough mix better and rise nicely. The chocolate chips are the star of the show. They melt slightly, creating gooey pockets of chocolate. If you love nuts, they add crunch and flavor. I recommend using high-quality chocolate chips for the best taste. The flaky sea salt on top adds a perfect finish. It enhances the sweetness and balances the flavors well. For the complete recipe, check out the Full Recipe section. Now, gather these ingredients to start your cookie adventure! - Preheat the oven to 375°F (190°C). - Line a baking sheet with parchment paper. Start by warming up your oven, so it’s ready when you are. Lining the baking sheet helps cookies come off easily. You don’t want them to stick! - Whisk together flour, baking soda, and salt. In a medium bowl, grab a whisk and mix the flour, baking soda, and salt. This step helps to evenly distribute the baking soda and salt. Set this bowl aside for later. - Beat together softened butter, brown sugar, and granulated sugar until creamy. In a large bowl, beat the softened butter with the brown sugar and granulated sugar. Use an electric mixer on medium speed. Mix for about 2-3 minutes. You want it to be creamy and smooth. This step adds air, making your cookies light. - Incorporate vanilla extract and eggs one at a time. Next, pour in the vanilla extract. Then add the eggs one at a time, mixing well after each addition. This ensures everything combines nicely. - Fold dry ingredients into wet ingredients until just combined. Now, take the bowl with your dry ingredients. Gradually fold it into the wet mixture. Be gentle! Overmixing can make your cookies tough. Stop when you see no more dry flour. - Fold in chocolate chips and nuts. - Drop cookie dough onto prepared baking sheet. Using a spatula, fold in the chocolate chips and any nuts you like. Then, scoop rounded mounds of dough onto your baking sheet. Space them about 2 inches apart. This allows room for spreading. - Bake for 10-12 minutes. - Cool on the baking sheet before transferring to wire rack. Place the baking sheet in the oven and bake for 10-12 minutes. Look for lightly golden edges while the centers stay soft. Once done, take them out and let them cool on the sheet for about 5 minutes. Then, move them to a wire rack to cool completely. By following these steps, you'll have warm, gooey, and delicious cookies that everyone will love. For the full recipe, check the details above! - Do not overmix when combining ingredients. Overmixing can lead to tough cookies. - Use room temperature ingredients. They mix better and help the dough rise nicely. - Rotate the baking sheet halfway through. This helps cookies bake evenly all around. - Watch for golden edges and soft centers. This means your cookies are just right! - Serve the cookies with a glass of milk or a scoop of vanilla ice cream. This makes for a delightful treat! Enjoy your Ultimate Chocolate Chip Cookies with these simple tips for the best results. For the complete recipe, check the Full Recipe section above. {{image_4}} You can switch the chocolate chips in the recipe. Try using milk chocolate chips for a sweeter taste. Dark chocolate chips bring a rich flavor and more cocoa. You can even mix both types for a perfect balance. This way, each bite is a delicious surprise. If you like nuts, walnuts and pecans work great. But some people prefer cookies without nuts. You can easily leave them out. If you want to try new nuts, use almonds or hazelnuts. Just chop them finely before adding. This gives your cookies a fun crunch. Want to make your cookies even more special? Add coconut flakes for a tropical twist. Toffee bits bring a fun chewiness. You can also mix in some espresso powder for a coffee kick. These small changes can turn your cookies into a unique treat. Check out the Full Recipe for ideas on how to include these enhancements! Store your cookies in an airtight container at room temperature. They will stay fresh for up to 1 week. This keeps them soft and chewy. If you want them to last longer, consider these other options. For long-term storage, freeze the cookies. Place them in a single layer on a baking sheet first. This prevents them from sticking together. After they freeze for a few hours, transfer them to a freezer-safe container. You can freeze them for up to 3 months. To enjoy soft cookies again, reheat them. You can use the microwave or the oven. If using the microwave, heat for about 10-15 seconds. If using the oven, set it to 350°F (175°C) and warm for 5-7 minutes. This restores their original texture and flavor. For the best taste, eat them warm right after reheating. Remember, these tips help you savor every bite of your ultimate chocolate chip cookies. Don't forget to check the Full Recipe for more details! The texture of your cookies depends on a few key ingredients and the baking time. If you want chewy cookies, use more brown sugar than white sugar. Brown sugar has more moisture, which helps keep cookies soft. On the other hand, using more white sugar can lead to crispy cookies. Also, if you bake them longer, they will be crunchier. So, watch the time closely! Yes, you can make the dough ahead of time! You can chill the dough in the fridge for up to 3 days. Just wrap it tightly in plastic wrap. If you want to freeze it, scoop the dough into balls and freeze them on a baking sheet. After they are frozen, place them in a freezer bag. They will last for about 3 months. To tell if your cookies are done, look for a few signs. The edges should be lightly golden, but the middle might look soft. That’s okay! They will continue to bake on the tray. You can also gently press the center with a finger. If it springs back, they are ready! Yes, you can make gluten-free cookies! Instead of all-purpose flour, use gluten-free flour blends. Look for blends that have xanthan gum, which helps with texture. You may also try almond flour or coconut flour, but these will change the taste and texture a bit. Adding dried fruit is easy and fun! Use about 1 cup of dried fruit per batch. Make sure to chop larger pieces into smaller bits. Mix them into the dough gently, so they spread evenly throughout your cookies. You can also add nuts or seeds for extra crunch! You can use margarine, but it may change the taste a bit. Butter gives cookies a rich flavor and helps them spread nicely. Margarine has more water, which can make cookies puffier. If you do use margarine, choose one that has at least 80% fat for the best results. For the full recipe, check the Ultimate Chocolate Chip Cookies recipe above. This blog post covered key ingredients, steps, tips, and variations for perfect cookies. Remember, the right mix makes all the difference. Pay attention to texture, baking time, and ingredient quality. You can explore flavors by trying different chocolates or add-ins. Store them well for the best taste. With these tips, you will bake cookies that everyone will love. Enjoy sharing your delicious treats with family and friends!

Irresistible Ultimate Chocolate Chip Cookies Recipe

Do you crave the perfect chocolate chip cookie? Look no further! In this guide, I’ll share my Irresistible Ultimate Chocolate

- 1 pound ground beef or turkey - 1 packet taco seasoning - 1 can (15 oz) black beans, rinsed and drained - 1 can (15 oz) corn, drained - 1 can (10 oz) diced tomatoes with green chilies - 2 cups tortilla chips, lightly crushed - 2 cups shredded cheddar cheese The heart of my taco casserole lies in these key ingredients. Ground beef or turkey brings rich flavor and protein. I love using taco seasoning for a quick burst of spice. The black beans and corn add great texture and fiber to the dish. Diced tomatoes with green chilies give a nice kick and moisture. Tortilla chips serve as the perfect crunchy base, while shredded cheddar cheese melts beautifully on top. - 1 cup sour cream - 1/4 cup sliced green onions - 1/4 cup fresh cilantro, chopped - Additional toppings: avocado, jalapeños Garnishing makes this dish shine! A dollop of sour cream adds creaminess. Sliced green onions and fresh cilantro brighten every bite. For extra flavor, consider avocado slices or jalapeños. These toppings let you customize each serving. It’s all about making it your own! Check out the Full Recipe for step-by-step instructions. Set the temperature to 350°F (175°C). This ensures your casserole cooks evenly. In a large skillet, add 1 pound of ground beef or turkey. Cook it over medium heat. Stir often until the meat turns brown and is fully cooked. After that, drain any excess fat to keep it light and fresh. Now, sprinkle 1 packet of taco seasoning over the meat. Add in 1 can of rinsed black beans, 1 can of drained corn, and 1 can of diced tomatoes with green chilies. Stir well to combine, and let it simmer for 5 minutes. This step allows the flavors to blend nicely. Take a 9x13 inch baking dish. Spread a layer of 2 cups of lightly crushed tortilla chips across the bottom. Spoon the meat mixture over the chips, spreading it evenly. Then sprinkle half of the 2 cups of shredded cheddar cheese on top. Next, add 1 cup of sour cream and finish with the remaining cheese. Place the dish in the oven and bake for 20-25 minutes. Look for the cheese to be fully melted and bubbly, with golden edges. This means your casserole is ready to serve. For the full recipe, refer to the detailed instructions provided earlier. To get a crispy top layer, use less sour cream. Spread it thinly. When you add cheese, make sure to cover the meat mixture fully. This helps it melt and turn golden. For even heating, let the dish sit at room temperature for a bit before baking. This way, the heat spreads out better. Also, check your oven's temperature with a thermometer. Sometimes, ovens can be off, and this can affect cooking. If you want a healthy alternative for ground meat, try using lentils or mushrooms. Both add great flavor and texture. You can also use lean meats like chicken or turkey. For dairy-free options, use vegan cheese and sour cream. There are many tasty brands available. You can even make your own sour cream using cashews and lemon juice for a fresh twist. To enhance flavor, serve the casserole with fresh avocado slices. Spicy jalapeños add a nice kick too. You can also add salsa for a refreshing touch. Recommended side dishes include a simple green salad or some Mexican rice. These pair well and add balance to the meal. For a fun twist, serve extra tortilla chips for crunch. For the full recipe, check out the section above! {{image_4}} For a vegetarian option, you can swap meat for lentils or mushrooms. Lentils add protein and fiber. They cook quickly and soak up flavors well. Mushrooms bring a meaty texture. Use diced portobellos or button mushrooms for the best results. This swap keeps the dish hearty and satisfying without meat. Want more heat? Add hot sauce or jalapeños to your meat mixture. This adds a kick that spice lovers will enjoy. You can also spice up the meat by blending in chili powder or cayenne pepper. Adjust the amount based on your heat tolerance. Just remember, a little goes a long way! To give your casserole a Tex-Mex twist, toss in extra ingredients like bell peppers or olives. Bell peppers add sweetness and crunch. Olives bring a salty bite that pairs well with the other flavors. You can also try adding corn salsa or black olives for unique flavor twists. Each addition makes the dish even more fun and tasty. Remember to check out the Full Recipe for more details! After you make your taco casserole, let it cool. Cover it with plastic wrap or foil. This keeps it fresh. In the fridge, it will last about 3 to 4 days. Just make sure it’s well-covered to prevent drying out. To freeze your taco casserole, let it cool completely. Transfer it to an airtight container. You can also freeze it in slices. This makes it easy to reheat later. When you want to eat it, just take it out and let it thaw overnight in the fridge. For the best flavor, reheat your taco casserole in the oven. Preheat the oven to 350°F (175°C). Place the casserole in an oven-safe dish, cover it with foil, and heat for about 20 minutes. This keeps it moist and tasty. You can also microwave it, but the oven gives a better texture. Always check it is heated through before serving. Enjoy your delicious meal! It takes about 10 minutes to prep the ingredients. The cooking time is around 25 minutes. So, in total, you will spend about 35 minutes from start to finish. This timing makes it a quick meal for busy days. Yes, you can make Taco Casserole ahead of time! Just follow these steps: - Prepare the casserole as directed. - Cover it tightly with plastic wrap or foil. - Store it in the fridge for up to 24 hours before baking. When ready, just pop it in the oven without thawing. It may need a few extra minutes to bake. You can serve Taco Casserole with many tasty sides. Here are some ideas: - Extra tortilla chips for crunch. - A fresh green salad to balance the meal. - Sliced avocado for creaminess. - Spicy jalapeños for those who like heat. Absolutely! Here are some easy swaps: - For gluten-free, use corn chips instead of regular tortilla chips. - To make it vegan, replace the meat with lentils or beans. You can also use dairy-free cheese and sour cream. These options allow everyone to enjoy this dish! In this blog post, I shared how to make a tasty taco casserole. We covered main ingredients like beef, taco seasoning, and toppings to suit your taste. I provided easy steps from preheating the oven to baking your dish. Tips include making it crispy and healthy swaps for ingredients. You can even try variations like vegetarian or spicy casseroles. With proper storage and reheating methods, this dish stays delicious. Enjoy creating this meal, and remember, you can customize it to fit your needs!

Super Easy Taco Casserole Simple One-Pan Delight

Looking for a dinner idea that’s quick, tasty, and easy? You’ve hit the jackpot with this Super Easy Taco Casserole!

- 12 ounces spaghetti or linguine - 1 pound large shrimp, peeled and deveined - 4 cloves garlic, minced - 1 tablespoon olive oil - 1 tablespoon unsalted butter - 1 lemon, zested and juiced - 3 cups vegetable or chicken broth - 1 teaspoon red pepper flakes (adjust to taste) - Salt and pepper to taste - 1/2 cup freshly grated Parmesan cheese (optional) - Fresh parsley, chopped for garnish To make the One Pot Lemon Garlic Shrimp Pasta, you need fresh and simple ingredients. First, choose your pasta. Spaghetti or linguine works great. Use large shrimp for a juicy bite that bursts with flavor. Fresh garlic adds a warm aroma and rich taste. You'll also need olive oil and unsalted butter. These fats make the dish creamy and rich. Don’t forget the lemon! Its zest and juice brighten the pasta and shrimp. For seasoning, have some vegetable or chicken broth ready. This is what cooks the pasta. Red pepper flakes add a nice kick, so adjust them to your liking. Salt and pepper enhance all the flavors. If you want a creamier dish, consider adding Parmesan cheese. Lastly, fresh parsley brings color and freshness. It's a perfect touch for garnishing your beautiful dish. For the complete cooking steps and tips, check out the Full Recipe. First, heat the olive oil and butter in a large pot over medium heat. Once melted, add minced garlic and red pepper flakes. Sauté for about one minute until the garlic smells great. Be careful not to burn it! Next, add the peeled and deveined shrimp to the pot. Stir gently to coat them in the garlic mix. Sprinkle with salt and pepper to taste. Cook the shrimp for 2-3 minutes on each side. They should turn pink and opaque. Once done, take the shrimp out and set them aside on a plate. In the same pot, add uncooked spaghetti or linguine. Pour in the vegetable or chicken broth, then add lemon zest and lemon juice. Stir well to coat the pasta. Bring the broth to a gentle simmer. Cover the pot and lower the heat to medium-low. Let the pasta cook for 10-12 minutes. Check it often to avoid sticking. You want it to be al dente, which means it should still have a little bite. After the pasta is cooked, return the sautéed shrimp to the pot. Toss everything together gently. This will warm up the shrimp again. Let it heat for another 2 minutes. If you like, stir in freshly grated Parmesan cheese. Mix until it melts into the pasta. Taste and adjust seasoning as needed. A bit more lemon juice can really brighten the dish! You can find the full recipe [here]. To cook shrimp just right, avoid overcooking them. Shrimp cook quickly. Here are some tips: - Cook Time: Keep cooking to 2-3 minutes per side. - Watch Color: Look for a pink and opaque color. Perfectly cooked shrimp should be firm but not tough. They should curl into a C shape, not an O shape. This shows they are ready to eat. To boost the flavor of One Pot Lemon Garlic Shrimp Pasta, try these options: - Spices and Herbs: Add fresh basil or parsley for a pop. Use thyme or oregano for a warm touch. - Mixing: After cooking, mix well. This helps all the flavors blend together nicely. A little extra seasoning can really elevate your dish. Don’t be shy to experiment! Serving your dish with style makes it more fun. Here are some suggestions: - Serving Style: Use shallow bowls for a neat look. - Garnishes: Sprinkle fresh parsley on top. Add a lemon wedge for color and zest. A pretty plate makes your meal feel special. Enjoy the smiles around the table! {{image_4}} You can switch up the pasta you use in this dish. While spaghetti or linguine works great, you can try penne or fettuccine. These shapes hold sauce well and add a nice twist. For seafood options, shrimp is a star, but you can use scallops or even crab. Both give a sweet touch and work well with lemon and garlic. If you need a gluten-free dish, swap regular pasta for gluten-free options. Many brands offer great pasta made from rice or corn. They cook similarly, so you won’t miss out. For a vegetarian version, leave out the shrimp. Instead, add chickpeas or sautéed mushrooms. Both options bring protein and a hearty texture to your meal. Want to boost nutrition? Toss in some veggies like spinach or cherry tomatoes. They cook quickly and add color to your dish. You can also play with citrus. Try lime or orange juice instead of lemon. Each brings a unique taste that brightens the meal. For the full recipe, check the link provided. To keep your One Pot Lemon Garlic Shrimp Pasta fresh, store it in an airtight container. Place it in the fridge for up to three days. If you want to save it longer, consider freezing it. To freeze, use freezer-safe bags or containers. Make sure to remove as much air as possible. This way, it can last for up to two months in the freezer. When it's time to enjoy your leftovers, reheat carefully. You can use a microwave or a stovetop. For the microwave, place your pasta in a bowl. Add a splash of water to keep it moist. Heat in short bursts, stirring in between. If you're using the stovetop, add a bit of broth or water in a pan. Heat it over low heat, stirring gently. This helps keep the flavor and texture. Enjoy your meal as if it were fresh! One Pot Lemon Garlic Shrimp Pasta lasts about three to four days in the fridge. Store it in an airtight container to keep it fresh. The flavors will deepen as it sits, making it even more delicious the next day! Yes, you can prepare this dish in advance. Cook the shrimp and pasta, then store them separately. Combine them just before serving to keep everything fresh. This way, you can save time on busy days. You can serve this pasta with a light salad or garlic bread. A simple arugula salad with lemon dressing pairs nicely. You might also add some roasted vegetables for extra color and flavor. Absolutely! Just skip the Parmesan cheese. You can add a splash of olive oil or some nutritional yeast for a similar flavor. This keeps the dish creamy without using any dairy. To make it spicier, you can add more red pepper flakes. Start by adding an extra teaspoon, then adjust to your taste. You can also mix in some hot sauce for an added kick. You can find the full recipe for One Pot Lemon Garlic Shrimp Pasta in the recipe section above. It includes all the steps and tips to make this dish perfect! This blog post covered an easy one-pot lemon garlic shrimp pasta recipe. You learned about the main ingredients, such as shrimp, garlic, and lemon. I shared step-by-step instructions that ensure perfect shrimp and al dente pasta. You also discovered tips for enhancing flavor and elegant presentation. Plus, I highlighted variations for dietary needs. In closing, this dish is quick, tasty, and allows creativity. Try it and enjoy every bite!

One Pot Lemon Garlic Shrimp Pasta Simple and Fresh Dish

Looking for a simple, fresh dish that bursts with flavor? You’ve found it! This One Pot Lemon Garlic Shrimp Pasta

Older posts
Newer posts
← Previous Page1 … Page46 Page47 Page48 … Page86 Next →

dsad

© 2026 lazychefmagic • Built with GeneratePress

Our Policies

  • Copyright Policy
  • Cookie Policy
  • GDPR Policy
  • Privacy Policy
  • Disclaimer
  • Terms Of Use

More Information

  • Home
  • About
  • Contact
  • Appetizers
  • Dessert
  • Dinner
  • Drinks
©2026, lazychefmagic About Back To Top