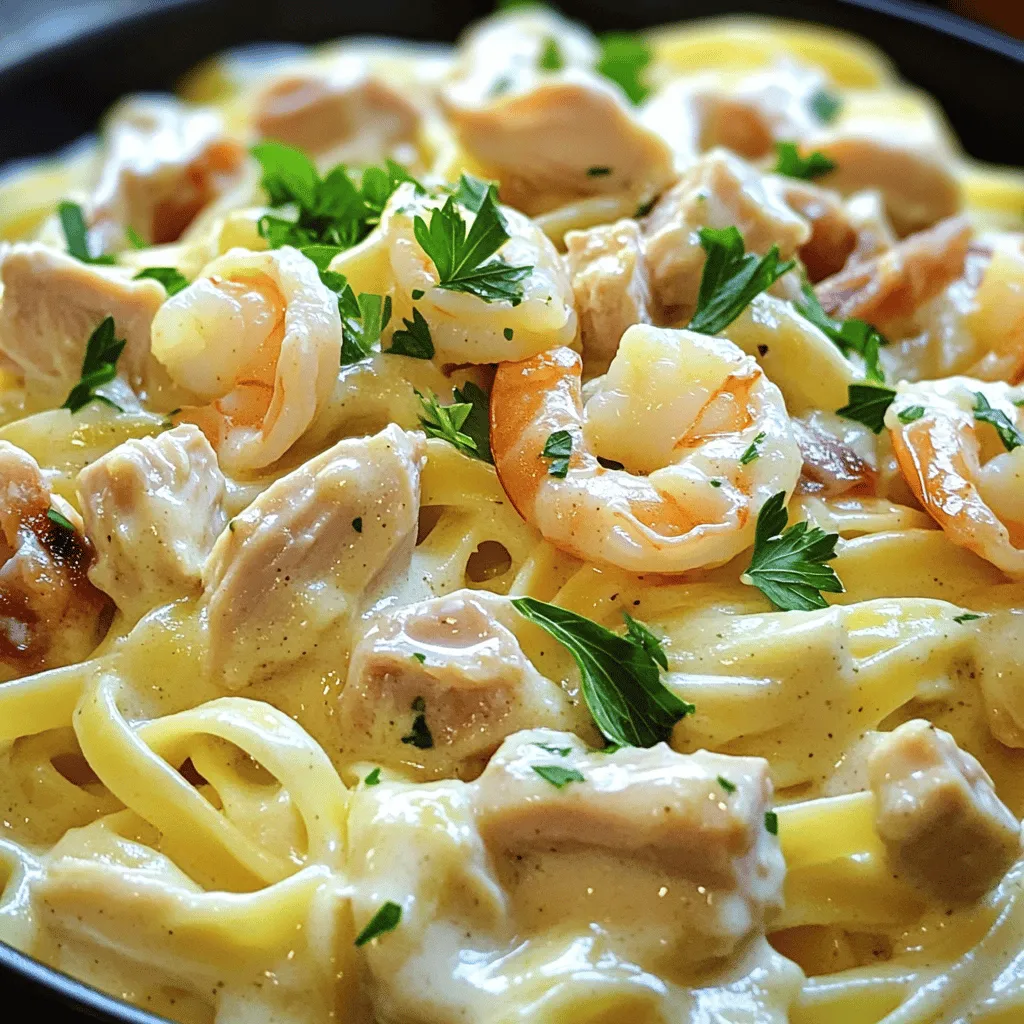
Olive Garden Chicken and Shrimp Carbonara Delight
Are you ready to whip up a creamy, dreamy dish that captures Olive Garden’s magic? My Chicken and Shrimp Carbonara
Are you ready to whip up a creamy, dreamy dish that captures Olive Garden’s magic? My Chicken and Shrimp Carbonara
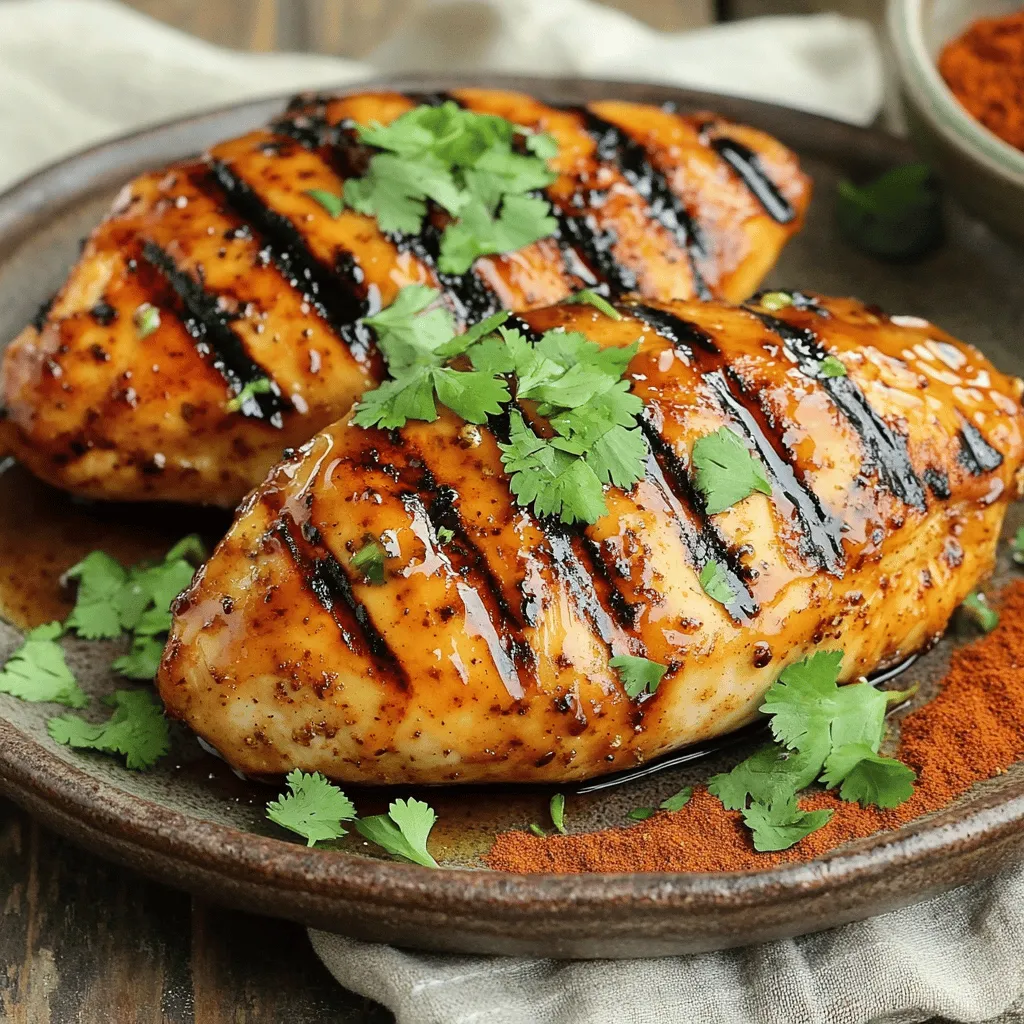
If you crave a tasty meal that’s easy to make, Chipotle Honey Chicken is for you! This dish packs bold
![To make an Old Fashioned Strawberry Cake, you will need these simple ingredients: - 2 cups all-purpose flour - 1 ½ cups granulated sugar - ½ cup unsalted butter, softened - 1 cup milk - 3 large eggs - 1 tablespoon baking powder - 1 teaspoon pure vanilla extract - ½ teaspoon salt - 1 cup fresh strawberries, hulled and diced - 1 cup powdered sugar - 2 tablespoons cream cheese - 2 tablespoons heavy cream - Additional fresh strawberries for garnish Each ingredient plays a key role in creating a moist and flavorful cake. The flour gives structure, while the sugar adds sweetness. The butter brings richness and moisture. Milk helps to bind all the ingredients together, and the eggs add fluffiness. The baking powder makes the cake rise and become light. Using fresh strawberries is vital for great flavor. Diced strawberries add bursts of sweetness in every bite. Cream cheese and heavy cream create a smooth frosting that complements the cake perfectly. You can find the Full Recipe with detailed steps to create this delightful cake! 1. Preheating the Oven Preheat your oven to 350°F (175°C). This step is key for even baking. 2. Preparing Cake Pans Grease two 9-inch round cake pans with butter. Dust them with flour to stop sticking. This easy step helps your cake come out cleanly. 1. Creaming Butter and Sugar In a large bowl, mix the softened butter and granulated sugar. Use an electric mixer on medium speed. Beat until it becomes light and fluffy, about 3-5 minutes. 2. Combining Dry and Wet Ingredients In a separate bowl, whisk together flour, baking powder, and salt. This ensures the dry mix is even. Next, add eggs one at a time to the butter-sugar mix. Mix well after each egg. Stir in vanilla extract. 3. Adding Strawberries and Baking Gradually add the dry mix to the wet mix, alternating with milk. Start and end with the flour. Mix on low speed until just combined. Then, gently fold in diced strawberries with a spatula. Divide the batter between the prepared pans. Bake for 25-30 minutes until golden. 1. Cooling the Cakes Allow the cakes to cool in their pans for 10 minutes. Then, move them to a wire rack to cool completely. This step keeps the cake light. 2. Making the Cream Cheese Frosting In a small bowl, beat cream cheese, powdered sugar, and heavy cream until smooth. Use a hand mixer or whisk for the best texture. 3. Assembling the Cake Layers Place one cake layer on a plate. Spread a thick layer of frosting on top. Gently add the second layer. Use the remaining frosting to cover the top and sides of the cake. Decorate with fresh strawberries on top for a beautiful finish. For the full recipe, refer to the [Full Recipe]. - Ensuring Even Bake To bake your cake evenly, use room temperature ingredients. Cold ingredients can cause uneven mixing. I recommend rotating your cake pans halfway through baking. This helps them cook evenly. - Testing for Doneness Use a toothpick to check if the cake is done. Insert it into the center of the cake. If it comes out clean, your cake is ready. If it has wet batter, bake a bit longer. - Choosing Ripe Strawberries Look for bright red strawberries with a fresh green top. They should be firm and smell sweet. Avoid any that have bruises or dull spots. Ripe strawberries will add great flavor to your cake. - Proper Washing and Hulling Rinse strawberries under cool water to remove dirt. Use your fingers or a small knife to hull them. This means removing the green leafy top and the white core. Clean strawberries will taste better in your cake. - Creating Smooth Finishes To get a smooth frosting layer, use room temperature cream cheese. Beat it well with powdered sugar and heavy cream. Keep mixing until it’s creamy and smooth. This helps it spread easily on the cake. - Decorating with Fresh Strawberries After frosting your cake, add fresh strawberries on top. Arrange them in a pattern you like. This not only looks pretty but adds extra flavor. Enjoy the vibrant colors and tasty bites! {{image_4}} Adding lemon zest brings a fresh, bright taste to your cake. Just mix in a tablespoon of fresh zest with the butter and sugar. This adds a lovely citrus note that pairs well with strawberries. You can also use different berries for unique flavors. Try blueberries, raspberries, or blackberries. Each berry gives the cake a different taste and color. Just make sure you chop them up like the strawberries. For a gluten-free cake, swap all-purpose flour for a gluten-free blend. Look for one that works well in baking. This keeps the texture light and fluffy. If you need a dairy-free option, use almond milk instead of regular milk. You can also use dairy-free butter and cream cheese. These swaps keep the cake rich and tasty. Pairing the cake with ice cream makes a delightful treat. Vanilla or strawberry ice cream works great. It adds a cool, creamy touch to the cake. Serving with fresh whipped cream is another tasty idea. It adds a light and airy texture to each slice. Just whip heavy cream with a bit of sugar until it’s fluffy. Try these variations to make your Old Fashioned Strawberry Cake even more enjoyable! For the complete recipe, check out the Full Recipe section. To keep your Old Fashioned Strawberry Cake fresh, store it in the refrigerator. Wrap the cake in plastic wrap to avoid drying out. You can also place it in an airtight container. This keeps the cake moist and tasty for up to five days. If you want to enjoy the cake later, freezing is a great option. Slice the cake into portions for easy serving. Wrap each piece in plastic wrap, then place them in a freezer bag. The cake can last up to three months in the freezer. Thawing is simple. Just take the desired slice out and leave it in the fridge overnight. For a quicker method, let it sit at room temperature for about an hour. Using the right container is key. Airtight containers are great for keeping moisture in. Cake domes also work well, giving your cake room to breathe. To prevent your cake from drying out, avoid storing it in a regular cake box. Those boxes can let air in and dry the cake out fast. Always check the seals on your containers to ensure they are tight. The Old Fashioned Strawberry Cake is truly delightful, and proper storage helps you enjoy it longer. For the full recipe, check out the details above! To stop your cake from sticking, grease your pans well. Use butter to coat the inside. Then, dust the pans with flour before adding the batter. This method creates a non-stick surface. You can also line the bottom with parchment paper for extra safety. You can use frozen strawberries, but there are some tips. Thaw them first and drain excess liquid. This keeps the batter from becoming too wet. Fresh strawberries taste best, but frozen ones work in a pinch. Start with a cooled cake. Place the first layer on a plate. Spread frosting on the top, then add the second layer. Frost the top and sides evenly. Use a spatula for smooth edges. For a fun look, create swirls or peaks. The cake stays fresh for about three days at room temperature. If you store it in the fridge, it can last up to a week. Make sure to cover it well to avoid drying out. Yes, you can bake the cake ahead. Let it cool completely before wrapping it. Store it in the fridge for a few days. You can frost it on the day you plan to serve. This keeps it fresh and tasty. For the Full Recipe, check the main section. This blog post covered how to make an old-fashioned strawberry cake from scratch. We explored the key ingredients, detailed instructions, and helpful tips to ensure success. Remember to choose ripe strawberries and follow the baking steps for the best results. With these easy methods, you can create a delicious cake that impresses anyone. Don’t forget to try variations and serve with whipped cream or ice cream for an extra treat. Enjoy the process and share your cake with others. Happy baking!](https://lazychefmagic.com/wp-content/uploads/2025/06/7eb2042e-eb47-41f8-81ad-8abf66a47019.webp)
Are you ready to sweeten your day with a delightful treat? This Old Fashioned Strawberry Cake is not just a
![- 2 cups all-purpose flour - 1 ½ teaspoons baking powder - ½ teaspoon baking soda - ½ teaspoon salt - 1 cup unsalted butter, softened - 2 cups granulated sugar - 4 large eggs, at room temperature - 1 teaspoon vanilla extract - 1 teaspoon almond extract - 1 cup sour cream The main ingredients create a rich flavor and soft texture. All-purpose flour forms the base. Baking powder, baking soda, and salt help the cake rise. Butter adds richness, while sugar gives sweetness. Eggs bind everything together. Extracts add unique flavors, and sour cream keeps the cake moist. - ½ cup packed brown sugar - 1 teaspoon ground cinnamon - 1 cup pecans or walnuts, chopped (optional) - Powdered sugar for dusting (optional) Optional ingredients bring extra flavor. Brown sugar and cinnamon create a lovely swirl. Chopped nuts add crunch and depth. A dusting of powdered sugar makes the cake look beautiful. - For a healthier option, use whole wheat flour. - Applesauce can replace butter for fewer calories. - Greek yogurt can stand in for sour cream. - For gluten-free, try almond flour or a gluten-free blend. - Use dairy-free butter and coconut yogurt for dairy-free needs. These substitutions help you tailor the recipe to fit your diet. Each option may change the cake’s taste and texture a bit. Experimenting can lead to new favorites. Always remember, cooking is about personalizing your dishes! For the complete recipe, check [Full Recipe]. 1. Preheat your oven to 350°F (175°C). This ensures even baking. 2. Grease a 10-inch Bundt pan with butter. Dust it with flour to prevent sticking. 3. In a medium bowl, sift together the all-purpose flour, baking powder, baking soda, and salt. Set this aside for later use. 4. In a large bowl, cream the softened butter and granulated sugar. Use an electric mixer at medium speed for about 3-4 minutes. This makes the mixture light and fluffy. 5. Add the eggs one at a time. Mix well after each egg. Stir in the vanilla and almond extracts until well blended. 6. Gradually add the reserved dry ingredients to the wet mixture. Alternate with spoonfuls of sour cream. Start and end with the flour mixture. Mix just until smooth. 7. In a small bowl, mix the packed brown sugar, ground cinnamon, and chopped nuts if you choose to use them. This will be your cinnamon-sugar mixture. 8. Pour half of the cake batter into the prepared Bundt pan. Spread it evenly. 9. Sprinkle the cinnamon-sugar mixture over this layer. Then, gently spoon the remaining batter on top. Smooth the surface. 10. Bake in the preheated oven for 50-60 minutes. Check for doneness by inserting a toothpick into the center. It should come out clean or with a few moist crumbs. Follow these steps for a delicious Sock It To Me Cake. For the full recipe and detailed instructions, check the [Full Recipe]. To make a great Sock It To Me Cake, avoid common baking mistakes. One mistake is not measuring flour correctly. Always spoon flour into the measuring cup, then level it off. This ensures you don’t use too much. Another error is overmixing the batter. Mix just until the ingredients combine to keep the cake light. To achieve a perfect texture, use room temperature ingredients. Cold butter or eggs can lead to a dense cake. Also, check your oven's temperature with a thermometer. Ovens can vary, and baking at the wrong temperature can ruin your cake. For extra flavor, try adding lemon or orange zest. A little citrus can brighten the cake. You can also swap the almond extract with coconut for a tropical twist. If you enjoy spices, add nutmeg or clove to the cinnamon-sugar mix. These flavors add a warm touch. Sour cream is key for moisture. Use full-fat sour cream for the best results. It makes the cake rich and tender. If you can't find sour cream, plain yogurt works too. This keeps the same creamy texture. Slice your cake with a sharp knife. This helps keep the layers neat. Serve each slice on a colorful plate to make it pop. You can dust the top with powdered sugar for a sweet finish. For a creative presentation, add fresh berries on the side. They add color and a fresh taste. You can also serve the cake with whipped cream or a scoop of vanilla ice cream. This makes each bite even more delightful. Want the full recipe? Check out the [Full Recipe] for all the details! {{image_4}} You can change the flavor of your Sock It To Me Cake easily. Adding different extracts can give it a new twist. Try using lemon or orange extract for a fresh taste. You can also add chocolate or fruit to the batter. Chopped apples or cranberries add a nice surprise. These small changes can make your cake exciting and unique. If you want a vegan Sock It To Me Cake, you can swap the eggs. Use flaxseed meal or applesauce instead. Replace the butter with coconut oil or vegan butter. For those watching sugar, use a low-sugar sweetener instead of granulated sugar. This way, you can enjoy a tasty cake that fits your diet. You can adapt your Sock It To Me Cake for the seasons. In winter, add spices like nutmeg or ginger for a warm flavor. For holidays, use festive colors and toppings. You can drizzle a glaze made with powdered sugar and eggnog on top for a holiday look. These seasonal touches can make your cake perfect for any occasion. For more details, check out the Full Recipe. After baking your Sock It To Me Cake, cooling it properly is key. Let the cake rest in the pan for about 15 minutes. This helps it hold its shape. Then, turn it out onto a wire rack to cool completely. Cooling evenly keeps the cake moist. For storage, use an airtight container. This keeps the cake fresh longer. Your cake stays fresh at room temperature for about 3 to 4 days. If you want to keep it longer, freezing is a great option. Wrap the cooled cake tightly in plastic wrap. Place it in a freezer-safe bag or container. To thaw, move it to the fridge overnight. This keeps the texture nice. You can also thaw it at room temperature for a few hours. If you have leftovers, reheating can bring back some joy. The best method is to use the oven. Preheat it to 350°F (175°C). Place slices on a baking sheet and warm for about 10 minutes. This helps to keep the cake soft. Avoid using the microwave, as it can dry out the cake. Enjoy your warm slice with a cup of coffee or tea! To keep your cake from sticking, greasing and flouring the pan well is key. Use unsalted butter to coat the pan. Make sure to cover every part, especially the center and edges. After greasing, sprinkle flour into the pan. Tap it around so the flour sticks. This creates a barrier between the cake and the pan. If you use a Bundt pan, be extra careful in the crevices. Yes, you can make this cake ahead of time. Bake the cake and let it cool completely. Once cool, wrap it tightly in plastic wrap. Store it at room temperature for up to three days. If you want to keep it longer, freeze it. Just make sure to wrap it well to avoid freezer burn. When ready to serve, thaw it in the fridge overnight. If you don’t have sour cream, you can use plain yogurt. It gives a similar tangy flavor and keeps the cake moist. Another option is buttermilk. Use the same amount as the sour cream in the recipe. Cream cheese can work too, but it may make the cake denser. Each of these choices will change the texture slightly, but they will still taste great. Sock It To Me Cake has roots in the 1970s. It became popular during the era of fun and flashy desserts. Some say the name comes from the phrase "sock it to me," which was a popular catchphrase at the time. This cake reflects a time when home baking was a way to show love. Its mix of flavors and textures makes it a classic treat at gatherings. To make a gluten-free Sock It To Me Cake, use a gluten-free flour blend. Look for one that says it can replace all-purpose flour. Brands like Bob's Red Mill or King Arthur Flour offer good options. You can also make your own blend. Combine equal parts almond flour, coconut flour, and tapioca flour. This mix gives a great texture while keeping the cake moist and delicious. In this article, we explored the essentials of making a perfect Sock It To Me Cake. We covered the main and optional ingredients, along with substitutions for health-conscious bakers. You learned the step-by-step instructions for preparation, mixing, and baking. I shared tips to improve flavor and texture, plus variations for different tastes and diets. Remember to store it right for the best shelf life. Now, you're ready to bake a delicious Sock It To Me Cake that delights everyone! Enjoy sharing it with family and friends.](https://lazychefmagic.com/wp-content/uploads/2025/06/66ee16fd-0f30-41c3-9265-7b5fc4670c5d.webp)
Are you ready to treat your taste buds? The Sock It To Me Cake is a delightful blend of flavors

Are you ready to take your burger game to the next level? This Easy Cheeseburger Sliders recipe will wow your
![- 1 pound chicken breast, cut into strips - 1 cup buttermilk (or substitute with milk mixed with 1 tablespoon vinegar) - 1 cup all-purpose flour - 1 teaspoon garlic powder - 1 teaspoon onion powder - 1 teaspoon smoked paprika - 1/2 teaspoon cayenne pepper (adjust to your spice preference) - Salt and pepper, to taste - Cooking spray (or brush with a little olive oil) When it comes to making tasty air fryer chicken tenders, using the right ingredients is key. I always start with fresh chicken breast. Cutting it into strips helps the chicken cook evenly and gives you that perfect bite. Next, I soak the chicken in buttermilk. This is my secret to juicy tenders. If you don’t have buttermilk, mix regular milk with a spoon of vinegar. This trick works just as well. For the breading, I mix flour with spices. Garlic powder, onion powder, smoked paprika, and cayenne pepper bring out amazing flavors. Adjust the cayenne to fit your spice level. I like to add a good pinch of salt and pepper too. Lastly, don’t skip the cooking spray! It helps the tenders crisp up nicely. With these ingredients, you set yourself up for an air fryer treat that is both crispy and delicious! For the full recipe, check out the detailed steps. Soaking chicken strips in buttermilk is key. It makes the chicken tender and juicy. Use a big bowl to hold the chicken and buttermilk. Ensure the chicken is fully submerged. Let it marinate for at least 1 hour. For best results, soak it overnight in the fridge. This step is simple but makes a big difference in taste. Next, it’s time to prepare the breading. Grab a large bowl and combine all-purpose flour with your seasonings. You will need garlic powder, onion powder, smoked paprika, cayenne pepper, salt, and pepper. Mix it well to spread the flavors evenly. This mixture is crucial for that tasty crunch. Now, let’s coat the chicken. Take the marinated strips out of the buttermilk. Let the extra liquid drip off. Dredge each strip in the flour mix, coating it well. For extra crunch, dip the strips back into the buttermilk, then coat them in the flour again. Preheat your air fryer to 400°F (200°C) for about 5 minutes. Lightly spray the basket with cooking spray to stop sticking. Arrange the chicken in a single layer. Cook them for 10-12 minutes. Flip them halfway for even cooking. When done, they should be golden brown with an internal temp of 165°F (75°C). Enjoy your crispy air fryer chicken tenders! Check the [Full Recipe] for more details. To get that perfect crunch, I always coat the chicken twice. First, dip it in the buttermilk. Then, cover it with the seasoned flour. After that, dip it back in the buttermilk and coat it again in the flour mixture. This double layer gives the chicken tenders an extra crunch. Spacing is also key. Make sure you lay the chicken strips in the air fryer without crowding them. If they touch, they won’t crisp up as well. Cook in batches if needed. This way, each piece gets hot air all around it. To ensure your chicken is safe to eat, check its internal temperature. Use a meat thermometer for this. The chicken should reach 165°F (75°C) inside. This step is vital for both safety and taste. Perfectly cooked chicken tends to be juicy and tender. After cooking, let the tenders rest for a few minutes. This helps keep the juices inside. Then, serve them on a nice platter. I love to pair these chicken tenders with dipping sauces. Honey mustard and ranch are my go-to choices. You can also try BBQ sauce for a fun twist. These sauces not only add flavor but also make the meal more enjoyable. For the full recipe, check out the section above! {{image_4}} You can make your chicken tenders more fun with different coatings. I love using panko breadcrumbs. They add a great crunch and texture. You can also try Italian seasoning or BBQ seasoning. Each adds a unique flavor twist. If you want a healthier option, use whole wheat flour. It has more nutrients than all-purpose flour. You can also use gluten-free flour if you need to avoid gluten. These choices keep your meal tasty and healthy. Do you like spicy food? Add hot sauce to the buttermilk. This simple step gives your chicken tenders a nice kick. You can adjust the amount based on your spice level. So, feel free to experiment! For the full recipe of Air Fryer Chicken Tenders, check the earlier section. Store cooked chicken tenders in an airtight container for up to 3 days. This keeps them fresh and safe to eat. When stored properly, the chicken stays moist and tasty. Ensure the container is sealed well to prevent any odors from other foods. You can freeze cooked tenders for up to 2 months. Just place them in a freezer-safe bag or container. When you want to enjoy them again, reheat in the air fryer for the best results. This method keeps them crispy and flavorful. To reheat, use the air fryer for 5-7 minutes at 350°F (175°C). This method revives their crunch and warm center. Avoid using a microwave, as it may make them soggy. Enjoy your crispy chicken tenders just like when they were first made! You can serve many tasty sides with chicken tenders. Here are some ideas: - French fries: Crispy fries are a classic pairing. - Coleslaw: This adds crunch and creaminess. - Salad: A fresh salad can balance the meal. - Macaroni and cheese: A comforting choice for all ages. - Vegetable sticks: Carrots and celery with dip are great for kids. These options make your meal fun and filling! To get your chicken tenders crispy, follow these tips: - Double coat: After marinating, coat the chicken in seasoned flour, dip it back in buttermilk, then coat it again in flour. This gives more crunch. - Preheat your air fryer: Always preheat to 400°F (200°C) for even cooking. - Don’t overcrowd: Place tenders in a single layer. This helps them crisp up nicely. - Flip halfway: Turn the tenders halfway through cooking. This ensures both sides get golden and crunchy. These steps will help you achieve that perfect crispy texture! Yes, marinating chicken too long can change its texture. Here are key points: - Optimal time: Marinate for at least 1 hour, up to overnight. This gives the best flavor and tenderness. - Over-marination: If you marinate longer than 24 hours, the chicken can become mushy. The acid in buttermilk breaks down the meat too much. Stick to the recommended time for juicy and tasty chicken tenders! This blog showed you how to make tasty air fryer chicken tenders. You learned about the ingredients, from marinating the chicken to the right spices. We walked through the cooking steps to ensure crispy, flavorful results. You also found tips on serving and storing leftover tenders. Remember, you can mix it up with different flavors and coatings. Enjoy your cooking and share your tasty creations with others!](https://lazychefmagic.com/wp-content/uploads/2025/06/073dec2f-1cae-440e-9c17-97bea6ab0db7.webp)
Are you ready to enjoy crispy, juicy chicken tenders without the guilt? In this blog post, I’ll guide you through
![The ingredients for Homemade Margherita Pizza are simple yet essential. Each one adds to the flavor and texture. Here’s what you need: - 2 cups all-purpose flour - 1 teaspoon instant yeast - 1 teaspoon sugar - 3/4 cup warm water (110°F) - 1 teaspoon salt - 1 tablespoon olive oil - 1 cup crushed canned San Marzano tomatoes - 1 cup fresh mozzarella cheese, sliced or torn - Fresh basil leaves, for garnish - Extra virgin olive oil, for drizzling - Salt and freshly cracked black pepper, to taste These ingredients create a perfect Margherita pizza. The flour gives a strong base. Instant yeast helps the dough rise. Sugar feeds the yeast for better growth. Warm water activates the yeast. Salt adds flavor, while olive oil gives richness. San Marzano tomatoes provide a sweet and rich sauce. Fresh mozzarella melts beautifully, creating that gooey texture. Basil leaves add freshness. Finally, drizzling a bit of extra virgin olive oil enhances the taste. For a burst of flavor, add salt and pepper to your liking. For the complete recipe, check the [Full Recipe]. - Combine 2 cups all-purpose flour, 1 teaspoon instant yeast, 1 teaspoon sugar, and 1 teaspoon salt in a bowl. - Gradually add 3/4 cup warm water and 1 tablespoon olive oil. - Stir until a shaggy dough forms. - Transfer the dough to a floured surface and knead for 8-10 minutes until smooth. - Place the kneaded dough in a lightly oiled bowl. - Cover it with a damp towel. - Allow the dough to rise in a warm place for 1-2 hours until doubled in size. - In a small bowl, season 1 cup of crushed canned San Marzano tomatoes with salt and freshly cracked black pepper. - Stir well and set aside to let the flavors meld. - Preheat your oven to its highest setting, usually 475°F to 500°F. - If you have a pizza stone, place it in the oven to heat. - Once the dough has risen, punch it down gently to release the air. - Transfer it to a floured surface and divide it into two equal pieces. - Shape each piece into a smooth ball and let rest for 5-10 minutes. - Stretch each ball into a 12-inch circle with your hands or a rolling pin. - Place the stretched dough on a floured pizza peel or an inverted baking sheet. - Spread a thin layer of the seasoned tomato sauce over the dough, leaving a 1/2-inch border. - Evenly distribute slices or torn pieces of fresh mozzarella over the sauce. - Garnish with fresh basil leaves. - Slide the pizza onto the preheated pizza stone or baking sheet. - Bake for 8-12 minutes until the crust is golden and the cheese is bubbling. For the complete process, check out the Full Recipe. Kneading is key to great dough. It helps develop gluten, which gives your pizza structure. Knead the dough for about 8-10 minutes until it feels smooth. Let your dough rise in a warm spot. A warm kitchen helps it grow faster and fluffier. Cover it with a damp towel. This keeps it moist as it rises. Fresh ingredients make the best sauce. Use canned San Marzano tomatoes for rich taste. Just season them with salt and black pepper. You can also add garlic or fresh herbs for extra flavor. A pinch of sugar can balance acidity too. This simple sauce enhances the pizza's taste. Your oven needs to be very hot. Preheat it to 475°F or 500°F. A high temperature cooks the crust quickly. If you have a pizza stone, use it. It absorbs heat well and gives a crispy base. If not, a baking sheet will work too. Just remember to preheat it with the oven. {{image_4}} You can make your Margherita pizza even better with toppings. - Classic variations: Add pepperoni, mushrooms, or olives. These give a nice twist while keeping the classic taste. - Creative combinations: Try goat cheese with figs or arugula with prosciutto. These add fun flavors, making your pizza unique. Switching up the sauce can change your pizza's taste. - Pesto or white sauce options: Use pesto for a fresh herb taste. White sauce can add creaminess if you want something rich. - Spicy tomato sauce alternative: Mix in red pepper flakes or hot sauce. This adds heat and a kick to your pizza. You can enjoy pizza even with dietary needs. - Gluten-free flour alternatives: Use almond flour or a gluten-free blend. These work well to make a tasty crust without gluten. - Vegan cheese suggestions: Choose nut-based cheese or soy cheese. These melt nicely and keep your pizza delicious without dairy. For the full recipe, be sure to check out the Classic Margherita Pizza section. To keep your leftover pizza fresh, pack it properly. Use an airtight container to seal in moisture. You can also wrap each slice in plastic wrap for extra protection. This helps keep the pizza tasty longer. Store it in the fridge, where it can last for about 3 days. When it comes to reheating, I recommend using the oven. Preheat it to 375°F. Place your pizza slices on a baking sheet. Heat for about 10-15 minutes. This method keeps the crust crispy and the cheese melty. Avoid the microwave, as this makes the crust soggy. If you want to freeze assembled pizzas, wrap them tightly. Use plastic wrap first, then aluminum foil. This prevents freezer burn. You can freeze them for up to 2 months. When you're ready to bake, take the pizza out and let it thaw in the fridge overnight. Preheat your oven and bake as usual. Enjoy a delicious homemade Margherita pizza anytime! The dough needs to rise for 1 to 2 hours. This time allows the yeast to work. It helps the dough double in size. A warm spot is best for rising. Yes, you can make the dough ahead of time. You can store it in the fridge. Just cover the bowl with plastic wrap. Let it rise slowly overnight for better flavor. This method saves time on pizza day. A wood-fired oven is best for pizza. It reaches high temperatures quickly. This helps create a crispy crust. However, a conventional oven works well too. Preheat it to the highest setting for the best results. To make a thicker crust, use more dough. When shaping, leave more dough around the edges. Avoid pressing too hard when rolling. You can also let the dough rise longer for more air bubbles. Margherita pizza has fresh, simple ingredients. The tomatoes are high in vitamins. Fresh mozzarella provides calcium and protein. Basil adds flavor and has antioxidants. This pizza is a tasty way to enjoy healthy ingredients. For a detailed recipe, check out the Full Recipe. Homemade Margherita pizza is simple and fun to make. You learned about key ingredients and easy methods for creating the dough and sauce. I shared tips for a perfect crust and suggested tasty topping options. You can also explore gluten-free and vegan choices to suit your taste. Now, gather your ingredients and enjoy making this classic dish. Cooking should be joyful and delicious! Your homemade pizza adventure awaits. Enjoy every bite!](https://lazychefmagic.com/wp-content/uploads/2025/06/0dc8057a-cf99-4bb5-a339-89a84dc9072a.webp)
Are you ready to make the perfect Homemade Margherita Pizza? This simple and delicious recipe brings the taste of Italy

If you’re craving a creamy and savory dip that’s perfect for game day or any gathering, you’ve hit the jackpot!
![- 2 cups cooked brown rice - 2 cups fresh broccoli florets, steamed until tender - 1 cup sharp cheddar cheese, grated (divided) - 1 cup cream of mushroom soup (store-bought or homemade) - ½ cup milk - 1 cup onion, finely chopped - 2 cloves garlic, minced - ½ teaspoon paprika - ½ teaspoon garlic powder - Salt and pepper to taste - ½ cup breadcrumbs (for topping) - 2 tablespoons olive oil - Fresh parsley, finely chopped (for garnish) When I make Cheesy Broccoli Rice Casserole, I love to gather fresh ingredients. Fresh broccoli gives the dish a bright color and crunch. Using cooked brown rice adds fiber and a nutty flavor. I often use sharp cheddar cheese because it melts well and packs a punch. Cream of mushroom soup makes the casserole creamy and rich, while milk helps blend everything together. I also like to add sautéed onions and garlic for a warm aroma. Paprika adds a hint of smokiness. Breadcrumbs on top create a nice crunch. I finish with fresh parsley to make it look pretty. Each ingredient plays a key role in making this dish tasty and enjoyable. - Calories: 320 - Protein: 12g - Fat: 15g - Carbohydrates: 38g This casserole is not just good for the taste but also provides decent nutrition. Each serving has a good mix of protein, fat, and carbs. It can be a great meal for family dinners or potlucks. You can find the full recipe to make this delightful dish and enjoy its cheesy goodness! 1. Preheat your oven to 350°F (175°C). This helps the casserole bake evenly. 2. Grease a 9x13 inch baking dish with olive oil. This keeps the casserole from sticking. 3. In a skillet, heat more olive oil over medium heat. 4. Add chopped onion and sauté for about 5 minutes. The onions should be soft and clear. 5. Mix in minced garlic and cook for 1 more minute, just until you smell it. 1. In a large bowl, combine the cooked brown rice and steamed broccoli. 2. Add the sautéed onion and garlic mix into the bowl. 3. Stir in the cream of mushroom soup and milk. 4. Season with paprika, garlic powder, salt, and pepper. Mix well until everything is coated. 5. Gently fold in half of the grated cheddar cheese. Save the rest for later. 6. Pour the mixture into your greased baking dish. Spread it out evenly. 7. Top with the remaining cheddar cheese and breadcrumbs for a crunchy finish. 1. Bake the casserole for 25-30 minutes. Look for a golden top and bubbling edges. 2. When done, take it out and let it cool for 5 minutes. 3. Before serving, sprinkle chopped parsley on top for freshness. 4. Enjoy this creamy, cheesy delight that everyone will love! For the full recipe, check out the detailed instructions above. To get that cheese melted just right, layer it well. Start by mixing half into the casserole. This ensures that every bite has cheese. Then, sprinkle the rest on top before baking. This creates that gooey, bubbly top we all love. Cooking broccoli can be tricky. You want it tender, not mushy. Steam it until it’s bright green. This usually takes about 3-5 minutes. After steaming, run it under cold water. This stops the cooking process and keeps the bright color. Pair this casserole with a simple salad. A green salad with a tangy vinaigrette works well. It adds a fresh crunch that balances the creamy dish. You can also serve it with crusty bread to soak up any cheesy goodness. For presentation, use a nice baking dish. You can serve straight from the dish for a cozy feel. For a fancy touch, scoop servings onto warm plates. Add a lemon wedge on the side for a zesty burst. This makes the dish pop and look inviting. For the full recipe, check out the details above. Enjoy making your Cheesy Broccoli Rice Casserole! {{image_4}} You can switch ingredients to make this dish your own. For grains, try quinoa or white rice instead of brown rice. Both options give a nice twist. Quinoa adds a nutty flavor and more protein. White rice keeps things light and fluffy. Cheese plays a big role in flavor. You can use mozzarella for a milder taste. Gouda brings a rich, smoky flavor. Feel free to mix cheeses. This creates a unique taste for your casserole. If you want a gluten-free dish, use a gluten-free cream of mushroom soup. Many brands offer this option. You can also make your own with gluten-free flour. For a vegan version, swap the cheese for a plant-based alternative. Nutritional yeast can add a cheesy flavor too. Instead of cream of mushroom soup, use coconut milk with sautéed mushrooms. This gives a creamy texture and keeps it dairy-free. You can find the full recipe for Cheesy Broccoli Rice Casserole to see how easy these swaps can be. To store your leftover Cheesy Broccoli Rice Casserole, let it cool first. Then, place it in an airtight container. It will last about 3 to 4 days in the fridge. If you notice any off odor or mold, toss it out. For freezing, use a freezer-safe container. Portion out the casserole for easy reheating. You can also wrap it tightly in plastic wrap and then foil. This helps to keep it fresh. It lasts about 2 to 3 months in the freezer. When you are ready to enjoy the casserole again, thaw it in the fridge overnight. Reheat in the oven or microwave until it is hot. You may want to add a splash of milk before reheating to keep it creamy. For more details, check out the Full Recipe. What can I substitute for cream of mushroom soup? You can use cream of chicken soup or a homemade white sauce. For a lighter option, try pureed cauliflower with cream. These swaps keep the dish creamy and rich. Can I use frozen broccoli instead of fresh? Yes, frozen broccoli works well! Just thaw and drain it before adding to the mix. Frozen broccoli is often pre-steamed, so it saves time. How can I make this recipe ahead of time? Prepare the casserole up to the baking step. Cover it well and store it in the fridge. When ready, just pop it in the oven. This makes meal prep easy and stress-free. Check the baking time, as it might need a few extra minutes. For the [Full Recipe], refer to the earlier section. This blog post covered a delicious cheesy broccoli rice casserole. I shared its ingredients, step-by-step instructions, tips, variations, and storage info. You learned how to prepare it perfectly and make it your own. Try different cheeses or grains for fun twists. Keep leftovers fresh in the fridge or freeze portions for later. Cooking is all about creativity. Enjoy your next meal with this comforting dish!](https://lazychefmagic.com/wp-content/uploads/2025/06/92b51264-1e6f-4270-a404-14937f36efdb.webp)
Are you craving a quick, healthy meal that’s bursting with flavor? Look no further than my Cheesy Broccoli Rice Casserole!
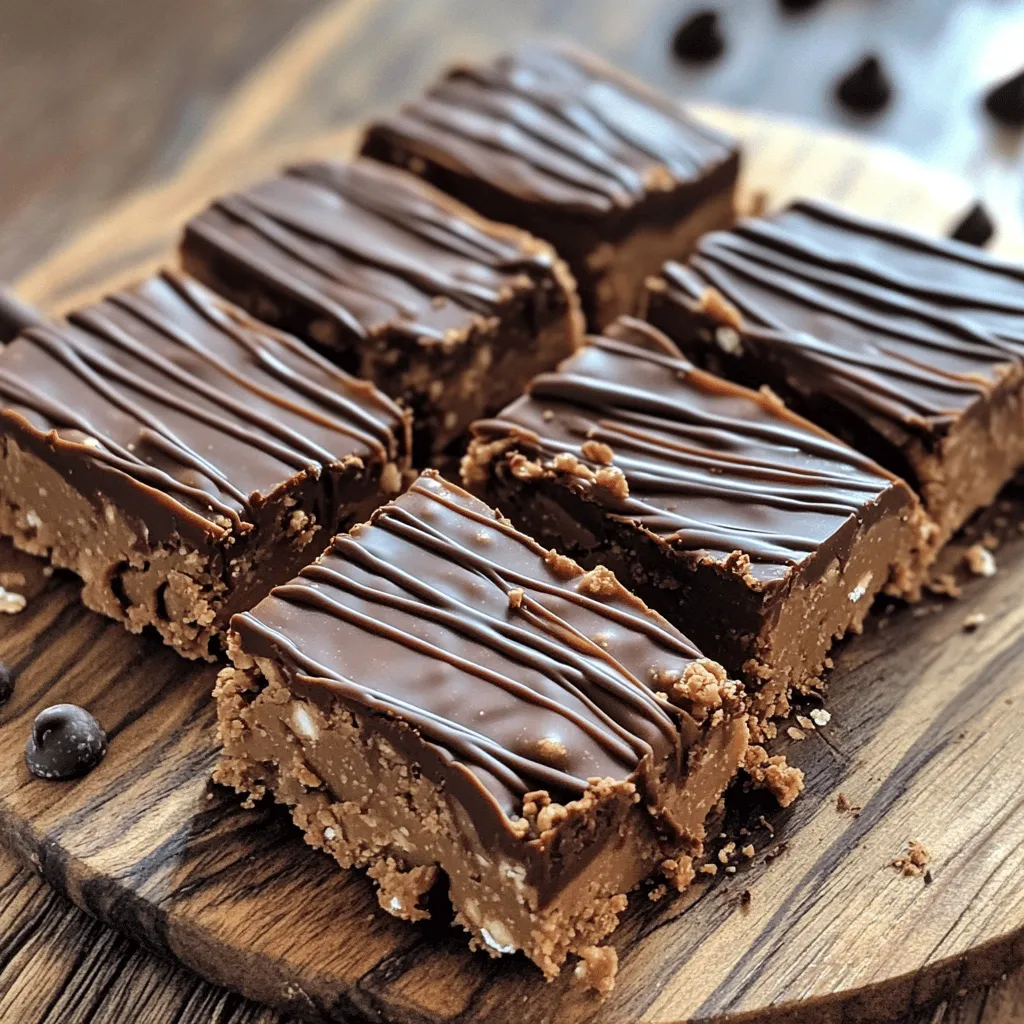
If you’re craving a sweet treat that’s easy to make, you’ve found it! My No-Bake Peanut Butter Bars are simple,
