Skip to content
DisclaimerTerms Of UseGDPR PolicyCookie Policy

lazychefmagic

  • Home
  • Drinks
  • Appetizers
  • Dinner
  • Dessert
  • About
  • Contact
  • Privacy Policy
DisclaimerTerms Of UseGDPR PolicyCookie Policy

NO-ING-IMG

To make this easy and tasty dish, gather these ingredients: - 2 cups elbow macaroni - 4 cups chicken or vegetable broth - 1 teaspoon garlic powder - 1 teaspoon onion powder - 1 teaspoon mustard powder - 2 tablespoons unsalted butter - 2 cups shredded sharp cheddar cheese - 1 cup shredded creamy mozzarella cheese - ½ cup softened cream cheese - Salt and freshly cracked pepper to taste - Freshly chopped chives for garnish (optional) Each ingredient plays an important role in the flavor and texture of the mac and cheese. The elbow macaroni serves as the base, giving it that classic shape. Broth adds depth, while garlic and onion powders give it a savory kick. Mustard powder adds a hint of tanginess. The butter makes it rich, and the mix of cheddar and mozzarella gives it that gooey, cheesy goodness. Cream cheese adds extra creaminess, making every bite smooth. When shopping, I recommend using quality brands for the best taste. For pasta, Barilla is a great choice. Swanson offers flavorful broth that works well. For cheese, Kraft's shredded cheddar and mozzarella are reliable options. Philadelphia cream cheese is a go-to for that perfect texture. Using trusted brands makes a big difference in your dish! Start with 2 cups of elbow macaroni. Place them in the inner pot of your Instant Pot. Then, pour in 4 cups of broth. You can use chicken or vegetable broth based on your choice. Next, add 1 teaspoon each of garlic powder, onion powder, and mustard powder. These spices add great flavor. Stir everything gently to mix the seasonings well. This step ensures that every bite is tasty. Now, it’s time to cook! Secure the lid on the Instant Pot. Make sure the steam release valve is set to sealing. Select the Manual or Pressure Cook setting. Adjust the timer to 4 minutes. When the timer goes off, do a quick release of the pressure. Turn the valve to venting carefully. Be cautious of the hot steam! Once the steam is gone, open the lid. Give the macaroni a good stir. It may look watery, but that’s okay. The liquid will thicken with cheese. Now comes the best part—adding cheese! Add 2 tablespoons of unsalted butter first. Next, mix in 2 cups of shredded sharp cheddar cheese and 1 cup of shredded mozzarella cheese. Then, include ½ cup of softened cream cheese. Stir vigorously until all the cheese melts and combines with the pasta. Taste your mac and cheese and season with salt and cracked pepper. If it seems thick, add a splash more broth or milk. Serve hot and garnish with chopped chives for color. Enjoy your creamy dish straight from the pot! You can find the Full Recipe here for more details. To make your mac and cheese super creamy, use a mix of cheeses. Sharp cheddar gives a nice tang, while mozzarella adds a smooth texture. Cream cheese is key too; it acts like a magic cream-maker. If you want it even creamier, stir in a splash of milk or more broth after cooking. This simple trick keeps your dish luscious and rich. One common mistake is overcooking the pasta. Cooking it for just four minutes is perfect. If you cook it too long, it turns mushy. Another mistake is not releasing the steam correctly. Always do a quick release after cooking. This helps the pasta keep its shape and texture. Finally, don’t skip tasting before serving. Adjust the salt and pepper to fit your taste. For a fun twist, serve your mac and cheese in cute bowls. You can top it with extra cheese or crunchy breadcrumbs. Adding a sprinkle of fresh herbs like chives really brightens the dish. If you want to make it a meal, serve it with a side salad or grilled veggies. These pair nicely with the creamy flavors of the mac and cheese. {{image_4}} You can mix up the cheese in your mac and cheese. Cheddar is great, but try these: - Gouda adds a nice smokiness. - Pepper jack gives a spicy kick. - Fontina melts beautifully and is creamy. - Parmesan adds a sharp, salty taste. Feel free to blend two or more types for a unique flavor! If you want to make healthier choices, consider these swaps: - Use whole grain macaroni for added fiber. - Swap low-fat cheese for regular cheese to cut calories. - Replace butter with olive oil for a heart-healthy fat. - Choose unsweetened almond milk instead of cream for a lighter option. These changes can boost nutrition while keeping your dish tasty. Boost the taste of your mac and cheese with fun extras. Here are some ideas: - Add cooked bacon or ham for a savory touch. - Toss in steamed broccoli or spinach for color and nutrients. - Stir in salsa for a zesty kick. - Sprinkle smoked paprika or cayenne for a bit of heat. These simple enhancements can turn your dish into something special. To store your leftover mac and cheese, let it cool first. Then, place it in an airtight container. You can keep it in the fridge for up to three days. It’s best to eat it fresh, but you can save some for later. When you are ready to enjoy your leftovers, use the microwave or the stove. If using a microwave, heat in short bursts. Stir in between to heat evenly. If you use the stove, warm it on low heat. Add a splash of milk or broth to make it creamy again. You can freeze mac and cheese for future meals. Just make sure it cools completely. Transfer it to a freezer-safe container. It will last for up to three months. When ready to eat, thaw it in the fridge overnight before reheating. Enjoy your delicious meal anytime! It takes about 20 minutes to make Instant Pot Mac and Cheese. This includes 10 minutes for prep and 4 minutes of cook time. The rest is for pressure building and quick release. It’s super fast and easy! Yes, you can use gluten-free pasta. Just remember to adjust the cook time. Gluten-free pasta usually cooks faster. Check the package for specific timing to avoid mushy pasta. You can add many tasty things! Here are some great options: - Cooked bacon or pancetta for a smoky flavor. - Diced tomatoes for freshness. - Jalapeños for some heat. - Spinach for added nutrients. - A sprinkle of paprika for depth. Feel free to get creative with your mix-ins! Each addition can make your mac and cheese unique and fun. Check the Full Recipe for the base you’ll need to start. This post covered how to make Instant Pot Mac and Cheese from start to finish. We explored key ingredients and suggested brands that make cooking easier. I shared step-by-step instructions for prepping, cooking, and mixing in cheeses. You can perfect your dish with tips on creaminess and common mistakes to avoid. We also looked at tasty variations, storage info, and answered common questions. Now, you can enjoy this simple, comforting meal any time!

Instant Pot Mac and Cheese Quick and Simple Recipe

Are you ready for a quick and easy weeknight meal? This Instant Pot Mac and Cheese recipe is your answer.

For a tasty Loaded Nacho Casserole, you need these main ingredients: - 1 lb ground beef or turkey - 1 packet taco seasoning - 1 can (15 oz) black beans, drained and rinsed - 1 can (10 oz) diced tomatoes with green chilies - 3 cups tortilla chips, crushed - 2 cups shredded cheddar cheese - 1 cup shredded Monterey Jack cheese - 1 cup corn (fresh or frozen) These ingredients create a solid base for our dish. The ground meat gives it protein. Taco seasoning adds spice and flavor. Black beans and corn bring in texture and sweetness. You can add these optional items for more flavor: - 1 jalapeño, sliced (for heat) - Salt and pepper to taste Adding jalapeño gives a nice kick. Adjust salt and pepper to fit your taste. These small changes make a big impact. When serving, consider these toppings: - 1 cup sour cream - ½ cup green onions, chopped - Fresh cilantro for garnish (optional) Sour cream cools the heat. Green onions add crunch and color. Cilantro gives a fresh touch. These toppings bring the dish to life, making it visually stunning and delicious. For the full recipe, check out the detailed instructions provided. To start, gather all your ingredients. You need ground beef or turkey, taco seasoning, black beans, diced tomatoes, tortilla chips, cheese, corn, jalapeño, sour cream, green onions, and cilantro. Preheat your oven to 350°F (175°C). This ensures the oven is hot when you're ready to bake. Next, heat a skillet over medium heat. Add the ground meat and break it up as it cooks. Cook until it’s brown and no pink remains. Drain any excess fat if needed. Add taco seasoning and ¼ cup of water. Stir well and simmer for 5 minutes. This helps the flavors mix and thicken. In a large bowl, mix the cooked meat with black beans, diced tomatoes, corn, and jalapeño if you want heat. Stir everything together and taste. Season with salt and pepper to your liking. Grab a baking dish. Spread half of the crushed tortilla chips in the bottom. This layer gives your casserole a crunchy base. Next, add half of the meat mixture on top of the chips. Now, sprinkle half of the shredded cheddar and Monterey Jack cheeses over the meat. This creates a delicious cheesy layer. Repeat with the remaining tortilla chips, meat mixture, and cheeses. Cover your baking dish with aluminum foil. This helps keep the cheese from burning while it cooks. Place it in the preheated oven and bake for 20 minutes. After that, remove the foil and bake for another 10-15 minutes. You want the cheese to bubble and turn golden. Once it’s done, take it out and let it cool for a few minutes. Serve with sour cream, green onions, and cilantro. This Loaded Nacho Casserole is truly a tasty comfort meal! For the complete recipe, check out the [Full Recipe]. To make your casserole truly shine, follow these tips: - Cook the meat well. Brown it fully before adding other ingredients. This adds more flavor. - Layer ingredients evenly. Distribute meat, beans, and cheese uniformly for a balanced taste. - Don’t skip the foil. Covering the dish while baking keeps the cheese from burning. - Adjust seasoning. Taste as you go. Add salt, pepper, or more seasoning to suit your liking. You can easily prepare your Loaded Nacho Casserole in advance. Here’s how: - Prep the filling. Cook and mix the meat, beans, and spices. Store in the fridge for up to 2 days. - Assemble the casserole. Layer everything in the baking dish. Cover tightly with foil or plastic wrap. - Bake later. When ready, bake straight from the fridge. You may need to add extra time for baking. When it comes to serving, think about these ideas: - Serve hot. This dish is best enjoyed warm, right out of the oven. - Add sides. Pair with a fresh salad or extra tortilla chips for crunch. - Garnish well. Top with sour cream, green onions, and cilantro for a fresh touch. - Drink options. Enjoy with a cold soda, beer, or a refreshing iced tea. For more delicious ideas, check out the Full Recipe! {{image_4}} You can easily make a vegetarian version of this loaded nacho casserole. Swap the ground beef or turkey for a mix of mushrooms and lentils. You can use black beans, chickpeas, or any beans you like. Replace the cheese with vegan cheese or skip it altogether for a lighter dish. Use plant-based sour cream for a creamy touch. This version still packs big flavor and keeps that comfort food feel. Want more heat? Add sliced jalapeños or a dash of hot sauce to the meat mix. You can also use spicy taco seasoning. Try adding crushed red pepper flakes for an extra kick. If you prefer a milder flavor, leave out the jalapeños and go easy on the spices. Adjust the heat to suit your taste buds, and have fun experimenting! Cheese is key in this casserole. While cheddar and Monterey Jack are classic choices, you can mix it up. Try pepper jack for a spicy kick or gouda for a smoky flavor. For a richer taste, consider using cream cheese mixed into the meat layer. Each cheese brings a new taste, making the casserole fun and unique each time you make it. Check the Full Recipe for more ideas! After enjoying your Loaded Nacho Casserole, store leftovers right away. Let it cool slightly, then cover it tightly with plastic wrap or foil. You can also use an airtight container. This keeps the flavors fresh. It’s best to eat leftovers within 3 to 4 days for the best taste. If you want to save some for later, freezing is a great option. First, let the casserole cool completely. Then, cut it into portions. Wrap each piece in plastic wrap and place it in a freezer bag. Squeeze out the air before sealing. You can freeze it for up to 3 months. Just remember to label the bags so you know what’s inside! When you are ready to enjoy your frozen casserole, let it thaw overnight in the fridge. For reheating, preheat your oven to 350°F (175°C). Place the casserole in an oven-safe dish. Cover it with foil to keep it moist. Bake for about 20 to 25 minutes, or until it’s heated through. You can remove the foil for the last few minutes to get that cheese bubbly again. If you want a quick option, use the microwave. Heat it in short bursts, stirring in between, until hot. Enjoy your tasty comfort meal anytime! You can use many options instead of ground beef or turkey. Try black beans or lentils for a veggie twist. Crumbled tofu or tempeh works well too. For a meaty taste, use chicken or pork. Ground sausage adds flavor if you want a kick. Each option brings a unique taste to the casserole. Loaded Nacho Casserole lasts about 3 to 4 days in the fridge. Store it in an airtight container for best results. Make sure it cools down before sealing. If you want to keep it longer, consider freezing it instead. Just remember to thaw it in the fridge before reheating. Yes, you can make Loaded Nacho Casserole ahead of time. Prepare the layers and store them separately in the fridge. When you’re ready, assemble and bake it. You can also bake it fully and reheat it later. Just cover it well to keep it fresh. You can find the full recipe [here](#). In this blog post, we explored how to make a loaded nacho casserole. We covered key ingredients, preparation steps, and baking methods. You learned tips for perfecting your dish and how to store leftovers properly. Remember, you can easily customize this casserole with extras like veggies or different cheeses. Whether you enjoy mild or spicy flavors, this dish can be for everyone. Keep experimenting and create your own tasty version. Enjoy your cooking adventure!

Loaded Nacho Casserole Tasty and Easy Comfort Meal

Craving a warm, cheesy hug in a dish? You’re in the right place! This Loaded Nacho Casserole is the perfect

To make One-Pot Creamy Tuscan Pasta, gather these ingredients: - 12 oz penne or fusilli pasta - 2 cups vegetable broth - 1 cup heavy cream - 1 cup cherry tomatoes, halved - 2 cups fresh spinach, packed - 4 cloves garlic, finely minced - 1 teaspoon dried basil - 1 teaspoon dried oregano - 1/2 teaspoon red pepper flakes (optional for a spicy kick) - 1/2 cup freshly grated Parmesan cheese - 2 tablespoons extra virgin olive oil - Salt and freshly ground black pepper to taste You can switch some ingredients if needed. Here are a few ideas: - Pasta: Use gluten-free pasta for a gluten-free option. - Cream: Substitute heavy cream with coconut cream for a dairy-free dish. - Spinach: Kale or arugula can replace spinach for a different flavor. - Cheese: Nutritional yeast works well for a vegan alternative to Parmesan. - Broth: Use chicken broth if you want a richer taste. To make this dish, you'll need a few basic tools: - A large pot for cooking the pasta - A wooden spoon for stirring - A sharp knife for chopping - A cutting board for prepping ingredients - Measuring cups and spoons for accuracy With these ingredients and tools, you will create a tasty meal that impresses! To make One-Pot Creamy Tuscan Pasta, follow these steps. First, gather your ingredients: pasta, broth, cream, tomatoes, spinach, garlic, herbs, cheese, and olive oil. 1. Start by heating the olive oil over medium heat in a large pot. 2. Add the minced garlic. Sauté it for about 1 minute. The garlic should smell nice and golden. 3. Next, toss in the cherry tomatoes. Cook them for about 3-4 minutes. Stir them so they soften and release juices. 4. Pour in the vegetable broth. Bring this mix to a boil while stirring gently. 5. Add the pasta along with dried basil, oregano, and red pepper flakes if you want spice. 6. Lower the heat to medium-low. Cover the pot and let it simmer for about 10-12 minutes. Stir it often to stop sticking. Cook until the pasta is al dente. 7. Once the pasta is ready, stir in the heavy cream and fresh spinach. Cook for 2-3 more minutes until the spinach wilts. 8. Remove the pot from heat and mix in the grated Parmesan cheese. It should melt smoothly into the sauce. 9. Taste the dish. Add salt and freshly ground black pepper to suit your taste. 10. Let the pasta sit for a couple of minutes. This helps the sauce get thicker before serving. To really shine in making this dish, keep these tips in mind: - Use fresh ingredients. Fresh spinach and tomatoes enhance flavor. - Stir often. This prevents the pasta from sticking to the pot. - Adjust heat carefully. If it bubbles too much, lower the heat to prevent burning. - Taste as you go. This ensures the flavors balance well. Timing and temperature are key for this creamy pasta: - Prep time is about 10 minutes. - Cooking time takes around 20 minutes. - Keep the heat medium to medium-low. This helps cook evenly without burning. - The whole dish should take about 30 minutes from start to finish. Feel free to explore the Full Recipe for more details! One common mistake is overcooking the pasta. This can make it mushy. Cook it just until it's al dente. Stirring is key to prevent sticking. If you forget to stir, the pasta can clump together. Also, don't skip the resting time. Letting it sit helps the sauce thicken. To boost flavor, try adding fresh herbs. Basil and parsley add a bright taste. You can also mix in sun-dried tomatoes. They add a sweet, tangy kick. For a protein boost, toss in cooked chicken or shrimp. These add heartiness to your meal. For a creamy sauce, always add cream slowly. This helps it blend well. Stir constantly to avoid lumps. Grated cheese should be added off the heat. This keeps it from clumping. Taste as you go. Adjust the seasoning with salt and pepper for balance. For the full recipe, check out the details above. Enjoy this flavorful dinner delight! {{image_4}} You can easily boost the protein in your One-Pot Creamy Tuscan Pasta. Adding chicken or shrimp makes it heartier. For chicken, use boneless, skinless breasts. Cook them in the pot first, then set aside. After sautéing the garlic and tomatoes, add the cooked chicken back in. For shrimp, add them when the pasta is almost done. They only need a few minutes to cook. This step gives you a rich flavor and adds texture. If you need a gluten-free dish, swap the pasta for gluten-free penne or fusilli. Many brands offer great options that taste just as good. To keep it vegetarian, replace the vegetable broth with vegetable stock. This keeps the dish light while still packing flavor. You can also add more veggies like bell peppers or zucchini for extra nutrients. Change the ingredients based on the season to keep things fresh. In spring, add asparagus or peas for a burst of green. Summer calls for fresh basil and zucchini. In fall, try butternut squash or kale for warmth. For winter, add hearty greens like Swiss chard. These swaps not only change the taste but also highlight what’s in season. For more details on making this dish, check out the Full Recipe. To keep your One-Pot Creamy Tuscan Pasta fresh, place any leftovers in an airtight container. Make sure the pasta cools down first. Store it in the fridge for up to three days. This way, it stays tasty and safe to eat. When you're ready to enjoy your pasta again, reheat it on the stove. Add a splash of water or broth to keep it creamy. Heat it over low to medium heat, stirring often. You can also microwave it in short bursts. Stir between each burst until it is hot. If you want to save your pasta for later, you can freeze it. Place the cooled pasta in a freezer-safe container. It can last for up to three months in the freezer. When you're ready to eat, thaw it in the fridge overnight. Reheat it as mentioned above. This helps keep the flavor and texture just right. For the best taste, try to eat it fresh rather than frozen. Yes, you can use many types of pasta. Penne and fusilli work well. You might try spaghetti, farfalle, or even gluten-free pasta. Just keep an eye on cooking times. Different shapes can change how the sauce clings to the pasta. To spice things up, add more red pepper flakes. Start with 1 teaspoon for a good kick. You could also mix in sliced jalapeños or a dash of hot sauce. Adjust to fit your taste. Spice levels can change based on your mood. Yes, you can make this dish dairy-free. Swap heavy cream for coconut cream or a nut-based cream. Use nutritional yeast instead of Parmesan cheese for a cheesy flavor. Check labels to ensure your ingredients are dairy-free. Enjoy the same creamy taste without dairy! You can find the full recipe for One-Pot Creamy Tuscan Pasta in the previous section. In this blog post, we explored how to make a delicious one-pot creamy Tuscan pasta. We discussed the key ingredients, helpful cooking steps, and ways to avoid common mistakes. You can try various proteins or seasonings to make it your own. Storing leftovers is easy, with simple reheating tips provided. Final thoughts: this dish is tasty and versatile, making it a great meal for any occasion. Enjoy cooking, and have fun creating your unique version!

One-Pot Creamy Tuscan Pasta Flavorful Dinner Delight

Are you ready to whip up a delicious meal that makes cleanup a breeze? This One-Pot Creamy Tuscan Pasta is

When making Coconut Curry Lentil Soup, you need some key ingredients. These items come together to create a hearty and flavorful dish. Here’s a list of what you will need: - 1 cup dried red lentils, thoroughly rinsed - 1 can (13.5 oz) full-fat coconut milk - 1 medium onion, diced finely - 2 cloves garlic, minced - 1 tablespoon fresh ginger, grated - 1 tablespoon red curry paste (adjust according to your spice preference) - 1 teaspoon turmeric powder - 1 teaspoon ground coriander - 1/2 teaspoon ground cumin - 4 cups vegetable broth (homemade or store-bought) - 1 cup diced tomatoes (fresh or canned) - 1 cup fresh spinach, chopped coarsely - 2 tablespoons fresh lime juice - Sea salt and freshly ground black pepper to taste - Fresh cilantro leaves, for garnish Each of these ingredients plays a role in building flavor. The dried red lentils add protein and texture. Full-fat coconut milk gives the soup a rich, creamy base. The onion, garlic, and ginger bring depth and warmth. Finally, the spices and seasoning add a lovely kick. For a complete guide, check out the Full Recipe to see how to combine these ingredients into a delicious meal. 1. Sautéing aromatics: Start by heating a splash of oil in a large pot over medium heat. Once the oil is hot, add the diced onion. Cook the onion for about 5 minutes until it is soft and translucent. This step helps build a tasty base for your soup. 2. Toasting spices: Next, add the minced garlic and grated ginger to the pot. Stir it for about a minute until you smell their lovely aroma. Then, mix in the red curry paste, turmeric, ground coriander, and cumin. Toast these spices for 2-3 minutes. This step makes the flavors pop and adds warmth to the soup. 3. Cooking lentils and tomatoes: Pour in the vegetable broth, followed by the rinsed lentils and diced tomatoes. Raise the heat to bring this mixture to a boil. Once it starts boiling, lower the heat, cover the pot, and let it simmer for about 20 minutes. You want the lentils to be tender and fully cooked. 1. Adding coconut milk and spinach: When the lentils are done, stir in the full-fat coconut milk and chopped spinach. Let this cook for another 5 minutes. The spinach will wilt and blend beautifully with the soup. 2. Adjusting seasoning: Finally, take the pot off the heat. Stir in fresh lime juice and season with sea salt and black pepper. Taste and adjust the seasoning as needed. This is where you personalize the soup to your liking. Follow these steps for a Coconut Curry Lentil Soup that is hearty and full of flavor. For the complete recipe, check out the Full Recipe section. - Adjusting spice levels: You can change the spice in this soup by adding more or less red curry paste. Start with one tablespoon, then taste. If you want more heat, add another half tablespoon. For a milder soup, use less paste. - Best types of lentils to use: I prefer red lentils for this recipe. They cook fast and get soft, making the soup creamy. You can also use green or brown lentils, but they take longer to cook and will stay firmer. - Enhancing flavor with lime and cilantro: Fresh lime juice brightens up the soup. Add it right before serving for the best taste. Cilantro adds freshness and color. Toss it in as a garnish to make the soup pop. - Essential utensils for preparation: You will need a large pot for cooking. A wooden spoon helps to stir the soup well. A sharp knife and cutting board are key for chopping your veggies. - Recommended pots for cooking: I like using a heavy-bottomed pot. It helps to cook the soup evenly and prevents sticking. A Dutch oven works great if you have one. It holds heat well and is perfect for simmering. {{image_4}} You can switch up some ingredients to fit your taste. - Alternative milks and proteins: If you want a lighter soup, try using almond milk or oat milk instead of coconut milk. For added protein, you can mix in chickpeas or tofu. - Seasonal vegetable options: Feel free to add seasonal veggies. Carrots, sweet potatoes, and zucchini work well. They add flavor and nutrition to your soup. Adding different spices can change the flavor of your soup. - Adding heat with peppers: If you like some spice, add diced jalapeños or Thai bird chilies. They can make the soup exciting and bold. - Experimenting with different curry pastes: Try different curry pastes to change the taste. Green curry paste gives a fresh kick, while Massaman curry paste adds a sweet, nutty flavor. You can mix and match to find your favorite combo. Explore these variations to make the Coconut Curry Lentil Soup your own! For the full recipe, check out the Full Recipe section. After you make Coconut Curry Lentil Soup, you might have some leftovers. To store them, cool the soup to room temperature. Then, transfer it to an airtight container. This will keep the flavors fresh. You can store the soup in the fridge for up to 3 days. If you want to save some for later, you can freeze Coconut Curry Lentil Soup. Pour it into freezer-safe bags or containers. Leave some space at the top for expansion. The soup lasts in the freezer for about 3 months. When you're ready to eat it, thaw it in the fridge overnight. To reheat, pour the soup into a pot. Warm it over low heat, stirring often. You can add a splash of vegetable broth if it seems too thick. Enjoy your hearty soup again! Yes, Coconut Curry Lentil Soup is vegan. It uses plant-based ingredients like lentils and coconut milk. This makes it a great choice for those who follow a vegan diet. You can enjoy this soup without worrying about animal products. Absolutely! Making Coconut Curry Lentil Soup in a slow cooker is easy. Just follow these steps: 1. Sauté the onion, garlic, and ginger in a pan. 2. Add them to the slow cooker with the other ingredients. 3. Cook on low for 6-8 hours or on high for 3-4 hours. This method allows the flavors to blend beautifully over time. You can serve many things with Coconut Curry Lentil Soup. Here are some ideas: - Crusty bread: Perfect for dipping into the soup. - Rice: A nice bed for the soup adds more texture. - Salad: A fresh green salad complements the warm soup well. For the full recipe, be sure to check out the details on how to make this delightful dish! This post covered how to make a hearty Coconut Curry Lentil Soup. You learned about key ingredients like lentils, coconut milk, and spices. I shared steps to prepare the soup, along with tips to improve its flavor. You also discovered variations to customize your dish and storage tips for leftovers. In my view, this soup is easy to make and great for any meal. Try it out, and enjoy the warm, rich flavors!

Coconut Curry Lentil Soup Hearty and Flavorful Delight

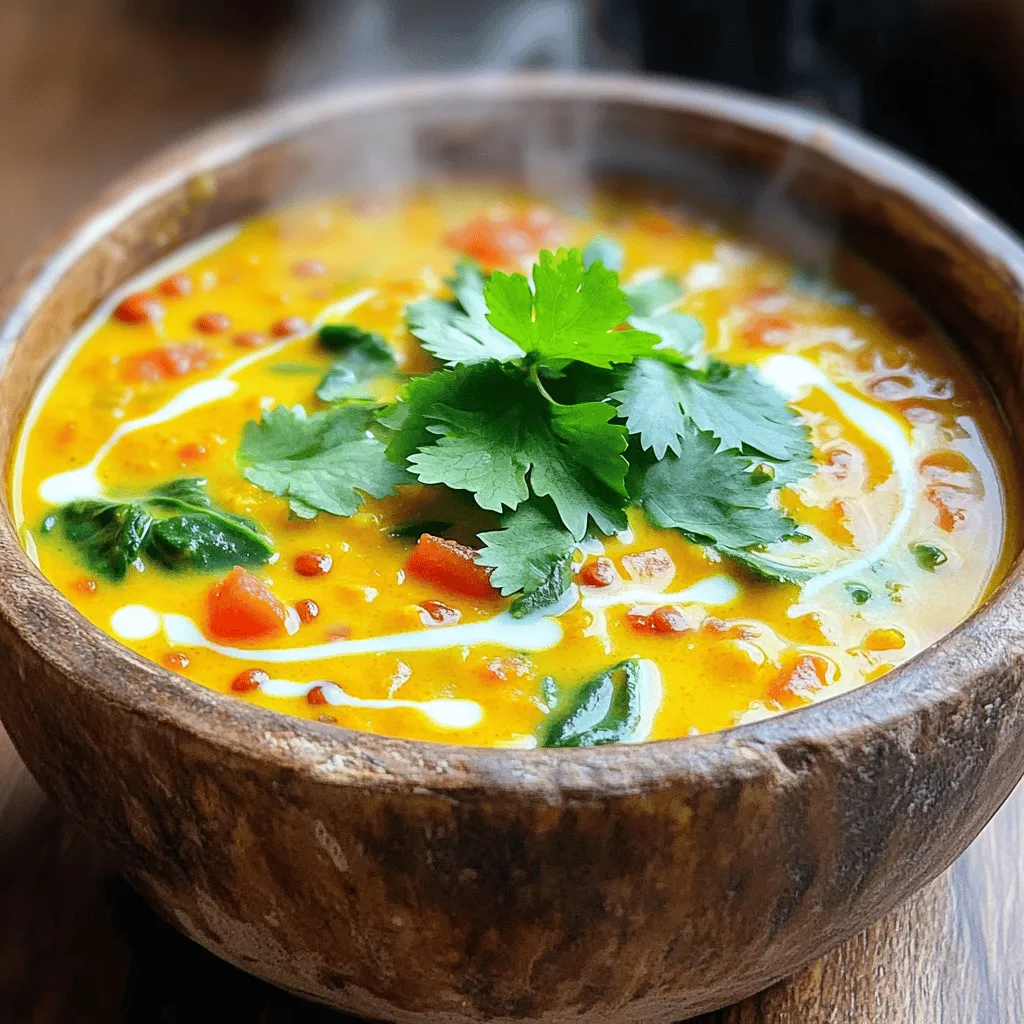
Looking for a comforting bowl of goodness? Coconut Curry Lentil Soup is your answer! Packed with flavor, it combines creamy

- 1 cup ricotta cheese - 1 cup all-purpose flour - 2 tablespoons granulated sugar - 2 teaspoons baking powder - 1/4 teaspoon fine salt - 1 cup whole milk - 3 large eggs - 1 teaspoon pure vanilla extract - 2 tablespoons unsalted butter, melted (and slightly cooled) - Butter or oil for cooking pancakes Fluffy ricotta pancakes are a treat everyone loves. The ricotta cheese adds a creamy texture and rich flavor. You’ll want to gather the main ingredients first. Ricotta cheese is key for that fluffiness. Next, we have all-purpose flour and sugar. The flour gives structure, while sugar adds sweetness. Baking powder helps the pancakes rise. Don’t forget the salt, as it brings out the flavors. Now, let’s move to the wet ingredients. Whole milk keeps the batter moist. Eggs add richness and help bind everything. Vanilla extract provides a lovely aroma. Finally, melted butter adds flavor and moisture. For cooking, you will need butter or oil. This ensures the pancakes won’t stick to the pan. These ingredients combine to make delicious pancakes. You can find the full recipe to see how they all come together. Enjoy making this delightful dish! - In a large bowl, mix the ricotta cheese, milk, eggs, and vanilla extract. Use a whisk to blend until smooth. - In another bowl, sift together the all-purpose flour, sugar, baking powder, baking soda, and salt. This helps mix the dry ingredients evenly. - Gradually fold the dry mix into the ricotta blend. Use a spatula and stir gently until combined. Small lumps are okay; don’t overmix. - Now, add the melted butter to the batter. Fold it in gently until mixed well. - Preheat a non-stick skillet over medium-low heat. Lightly grease it with butter or oil. - Pour 1/4 cup of batter for each pancake onto the skillet. Cook until bubbles form on the surface, about 2-3 minutes. - Carefully flip the pancakes and cook for 2 more minutes until golden brown. - Keep cooking the rest of the batter. Adjust heat as needed to avoid burning. Add more grease if necessary. - Serve warm with maple syrup, fresh fruits, or powdered sugar. Enjoy your fluffy ricotta pancakes! To get fluffy pancakes, do not overmix the batter. Mixing too much makes them dense. Gently fold the dry ingredients into the wet ones. Small lumps are okay; they help keep the texture light. Adjust the skillet temperature for even cooking. A medium-low heat works best. If the heat is too high, the outside cooks too fast. You want golden brown pancakes, not burnt ones. I love topping my pancakes with pure maple syrup. Fresh fruits like berries or bananas add color and taste. You can also sprinkle powdered sugar on top for a sweet touch. For a great presentation, stack the pancakes high on a plate. Drizzle syrup generously over the top. Add a dollop of whipped cream for a lovely look. You can add spices like cinnamon or nutmeg for extra flavor. A pinch goes a long way, so use just a little. Incorporating chocolate chips or blueberries makes a fun twist. These can add sweetness and texture. Just fold them in gently with the batter before cooking. Try these ideas to make your fluffy ricotta pancakes even more special. For the full recipe, check back in the recipe section! {{image_4}} To keep your fluffy ricotta pancakes fresh, store them in the fridge. Place them in an airtight container. This helps maintain their soft texture. They will last up to three days in the fridge. When you're ready to eat, you can reheat them. For reheating, I suggest two methods: - Microwave: Place pancakes on a plate and cover with a damp paper towel. Heat for 30 seconds or until warm. - Skillet: Heat a little butter in a skillet over low heat. Add pancakes and warm them for 1-2 minutes on each side. Freezing is a great way to save pancakes for later. First, let them cool completely on a wire rack. Then, stack them with parchment paper in between. Place the stack in a freezer-safe bag or container. This method prevents them from sticking together. They can last up to two months in the freezer. To thaw, simply take out a pancake and leave it at room temperature for a few minutes. For reheating, use the microwave or skillet method mentioned above. If you microwave, add a splash of water to keep them moist. You can prepare pancake batter ahead of time. Just mix all the wet ingredients and dry ingredients separately, then combine them right before cooking. This saves time in the morning. If you want a quick breakfast, use leftover pancakes creatively. You can make a pancake sandwich with fresh fruit and yogurt. Or, cut them into strips and serve with syrup for dipping. Enjoy the fun and versatility of fluffy ricotta pancakes! - 1 cup ricotta cheese - 1 cup all-purpose flour - 2 tablespoons granulated sugar - 2 teaspoons baking powder - 1/2 teaspoon baking soda - 1/4 teaspoon fine salt - 1 cup whole milk - 3 large eggs - 1 teaspoon pure vanilla extract - 2 tablespoons unsalted butter, melted and slightly cooled - Extra butter or oil for cooking 1. In a bowl, mix the ricotta cheese, milk, eggs, and vanilla. Whisk until smooth. 2. In another bowl, sift the flour, sugar, baking powder, baking soda, and salt. 3. Slowly fold the dry mix into the wet mix with a spatula. Some lumps are fine. 4. Gently fold the melted butter into the batter. 5. Preheat a skillet on medium-low heat. Grease it lightly with butter or oil. 6. Pour 1/4 cup of batter for each pancake. Cook until bubbles form, about 2-3 minutes. 7. Flip pancakes and cook until golden brown, about 2 minutes more. 8. Serve warm with maple syrup, fresh fruit, or powdered sugar. To make your pancakes look amazing, stack them high on a plate. Drizzle warm maple syrup all over the top. Add a mix of fresh berries like strawberries, blueberries, and raspberries. A dollop of whipped cream on top makes it even better! This not only tastes good but also looks like a treat. Yes, you can use low-fat ricotta cheese. However, the pancakes may turn out less fluffy. Low-fat ricotta has less moisture and fat. This change affects the texture and flavor. The pancakes might be denser and not as rich. If you want fluffier pancakes, stick with whole milk ricotta. To know when your pancakes are done, look for bubbles. Bubbles should form on the surface as they cook. Once you see bubbles, it's time to flip them. After flipping, cook until both sides are golden brown. The pancakes should feel firm to the touch. You can make the batter ahead of time, but use it soon. Store it in the fridge for up to 24 hours. Before cooking, gently mix the batter again. It may thicken while in the fridge. Fresh batter gives the best texture and taste for your pancakes. For the full recipe, check the main section. In this post, we explored how to make fluffy ricotta pancakes. We covered the key ingredients, detailed step-by-step instructions, and shared valuable tips for the best results. Fluffy pancakes are easy with the right techniques. Remember to avoid overmixing for that perfect texture. Fresh pancakes, topped with syrup or fruit, make a delightful meal. Whether you store them, freeze them, or prep ahead, you can enjoy this dish anytime. With practice, your pancakes will impress everyone. Enjoy making and sharing them!

Fluffy Ricotta Pancakes Delightful and Easy Recipe

Do you want pancakes that are light, fluffy, and easy to make? Look no further than my Fluffy Ricotta Pancakes.

To make tasty stuffed peppers, gather these key ingredients: - 4 large bell peppers (red, yellow, orange, or green) - 1 cup of cooked quinoa - 1 can (15 oz) black beans, drained and rinsed - 1 cup of corn kernels - 1 cup of diced tomatoes - 1 small onion, finely chopped - 2 cloves of garlic, minced - 1 teaspoon ground cumin - 1 teaspoon smoked paprika - 1 teaspoon chili powder - Salt and pepper to taste - 1 cup of shredded cheese (cheddar or Monterey Jack) - Fresh cilantro for garnish - 1 tablespoon of olive oil These ingredients create a well-balanced flavor profile. The bell peppers are sweet and colorful. Quinoa, beans, and corn add texture and nutrition. Spices like cumin and paprika give a warm, smoky taste. You will need some basic kitchen tools to prepare the dish: - A large skillet for cooking the filling - A baking dish to hold the stuffed peppers - A knife for chopping - A spoon for mixing and filling - Aluminum foil for baking These tools make the cooking process easy and efficient. You can customize your stuffed peppers with different ingredients: - Use brown rice or couscous instead of quinoa. - Try different beans, like kidney or pinto beans. - Add cooked ground meat for extra protein. - Use different cheeses, like feta or mozzarella, for different flavors. - Mix in vegetables like zucchini or spinach for added nutrition. These variations keep the recipe exciting and allow you to use what you have on hand. For the full recipe, refer to the earlier sections. Start by preheating your oven to 375°F (190°C). Take four large bell peppers and slice off their tops. Be careful not to cut too deep. Remove the seeds and membranes. If they wobble, trim a bit from the bottom so they stand straight. Rinse them under cool water to ensure they are clean. This step is key for a neat and tasty dish. In a large skillet, heat one tablespoon of olive oil over medium heat. Add one small chopped onion and two minced garlic cloves. Sauté for about 3-4 minutes until they’re soft and clear. Next, mix in one cup of cooked quinoa, one can of black beans (rinsed), and one cup of corn. Add one cup of diced tomatoes along with one teaspoon each of cumin, smoked paprika, and chili powder. Season with salt and pepper. Cook this mixture for about 5 minutes. Remove it from the heat and stir in half of one cup of shredded cheese. This filling is packed with flavor and nutrition. Now, fill each pepper with the savory mixture. Press it down gently to pack it in well. Place the stuffed peppers upright in a baking dish. Top each pepper with the remaining cheese. Cover the dish with aluminum foil to keep the cheese from burning. Bake for 25 minutes. Then, remove the foil and bake for another 10-15 minutes. You want the peppers to be soft and the cheese to look golden and melted. Once done, let them cool for a few minutes. Garnish with fresh cilantro before serving. For a great presentation, arrange them on a colorful platter. For the complete recipe, you can refer to the Full Recipe section. To make savory stuffed peppers, follow these steps closely. Start by preheating your oven to 375°F (190°C). This ensures even cooking. When slicing the tops off the peppers, be careful not to cut too deep. You want the bottom to stay intact for holding the filling. If the peppers tip over, trim a bit off the bottom. This keeps them stable. When cooking the filling, heat the olive oil first. This helps the onion and garlic soften quickly. Cook them until they turn soft, about 3-4 minutes. Stir in the other ingredients and let them heat for just 5 minutes. This keeps the flavors fresh and vibrant. Spices make a big difference in flavor. If you want more heat, add extra chili powder. You can also try a pinch of cayenne pepper for a kick. For a smoky flavor, increase the smoked paprika. Taste your filling as you mix it. This lets you adjust the spices to your liking. Keep in mind that some spices can be stronger than others. Start small and add more as needed. Presentation adds fun to your meal. Arrange the savory stuffed peppers on a colorful platter. Use fresh cilantro sprigs for a nice touch. You can also add lime wedges around the peppers. This gives a bright splash of color and flavor. Before serving, make sure the cheese is melted and bubbly. This shows that the dish is ready to enjoy. For the full recipe, check the recipe section above. {{image_4}} You can change the filling to suit your taste. Here are some ideas: - Ground beef or turkey for a hearty option. - Lentils for a plant-based choice. - Rice or couscous instead of quinoa. - Mixed vegetables like zucchini or mushrooms add color and crunch. - For a Mediterranean twist, use feta cheese and olives. You can make these peppers fit any diet. Consider these swaps: - Use cauliflower rice for a low-carb meal. - Swap black beans for chickpeas if you prefer. - Choose dairy-free cheese or skip cheese for a vegan option. - Make it gluten-free by using certified gluten-free grains. Explore global tastes by changing spices and ingredients. Try these combos: - For a Mexican vibe, add taco seasoning and top with avocado. - Go Italian by using basil, oregano, and marinara sauce. - For a Middle Eastern twist, mix in spices like cumin and coriander. - Asian flavors can shine with soy sauce and sesame oil. Each variation allows you to create fun, tasty meals. Don’t forget to check the Full Recipe for the original stuffed pepper goodness! To store leftover stuffed peppers, let them cool first. Place them in an airtight container. You can keep them in the fridge for up to three days. If you want to enjoy them later, freezing is a great option. When you’re ready to eat the leftovers, reheating is simple. Preheat your oven to 350°F (175°C). Place the stuffed peppers in a baking dish. Cover them with foil to keep them moist. Heat for about 15-20 minutes, or until warm. You can also use a microwave for a quick option. Just place a pepper on a microwave-safe plate and heat for 2-3 minutes. To freeze your savory stuffed peppers, wrap each one in plastic wrap. Place them in a freezer-safe bag or container. They can last up to three months in the freezer. When you’re ready to enjoy them, thaw in the fridge overnight. Then, reheat them as mentioned above. For the full recipe, check out the details in the previous sections. Yes, you can prepare stuffed peppers ahead of time. Fill the peppers with the mixture and store them in the fridge. Cover them well to keep them fresh. You can bake them the next day or even a couple of days later. This makes it easy when you have a busy day ahead. Savory stuffed peppers are great on their own, but you can add sides. Consider serving them with: - A fresh salad with mixed greens - Rice or quinoa for a hearty meal - A side of guacamole or salsa for extra flavor - Cornbread for a nice contrast in texture These sides enhance the meal and provide a balanced plate. Cooked stuffed peppers can last in the fridge for about 3 to 5 days. Make sure to store them in an airtight container. If you want to keep them longer, consider freezing them. They can last up to 3 months in the freezer. Just remember to thaw them in the fridge before reheating. You learned about key ingredients for savory stuffed peppers and how to cook them. I shared tips to enhance flavor and presented serving ideas. Different variations can fit any diet or taste. You can store leftovers and reheat them easily. Use the steps and ideas in this guide for fun cooking. Stuffed peppers can be a tasty dish that brings joy to your table. Try your own twist and enjoy!

Savory Stuffed Peppers Flavorful and Simple Recipe

Welcome to a journey of flavor with my simple recipe for savory stuffed peppers! This dish combines fresh bell peppers

- 2 pounds boneless, skinless chicken thighs - 1 cup jasmine rice, thoroughly rinsed - 2 cups low-sodium chicken broth - 1 medium onion, finely diced - 4 cloves garlic, minced - 1 teaspoon dried thyme - 1 teaspoon dried oregano - ½ teaspoon smoked paprika - Juice and zest from 1 large lemon - Salt and black pepper, to taste - 2 tablespoons extra virgin olive oil - 1 cup frozen peas - Fresh parsley, chopped (for garnish) When I cook this dish, I focus on fresh, high-quality ingredients. The chicken thighs provide great flavor and tenderness. Jasmine rice cooks beautifully and has a lovely aroma. Aromatics like onion and garlic build a rich base for the dish. Seasoning is key; herbs and spices bring everything to life. For garnish, I love using fresh parsley and peas. They add color and texture, making the meal more appealing. You can find the Full Recipe with detailed instructions to help you create this delicious meal. Enjoy! Sautéing Aromatics First, I select the Sauté mode on my Instant Pot. I let it heat up and add 2 tablespoons of extra virgin olive oil. Next, I toss in 1 medium onion, finely diced. I sauté the onion for about 3-4 minutes until it turns soft and clear. Then, I add 4 cloves of minced garlic. I cook this for another minute until it smells amazing. Seasoning and Browning Chicken Now, I take 2 pounds of boneless, skinless chicken thighs. I sprinkle them with salt, black pepper, 1 teaspoon of dried thyme, 1 teaspoon of dried oregano, and ½ teaspoon of smoked paprika. I place the chicken in the pot, browning it for 3 minutes on each side. This step gives it great flavor. Stirring in Rice and Broth I rinse 1 cup of jasmine rice until the water runs clear. I then gently stir the rice into the pot, mixing it with the onions and chicken. After that, I pour in 2 cups of low-sodium chicken broth. I also add the juice and zest from 1 large lemon. It's important to scrape the bottom of the pot. This helps get all the tasty bits. Pressure Cooking Setup Next, I secure the lid on the Instant Pot. I make sure the steam release valve is set to Sealing. I set the Instant Pot to Pressure Cook on high for 8 minutes. Natural Pressure Release When the cooking time ends, I let the pressure release naturally for 10 minutes. After that, I switch the valve to Venting to let out any steam left. Adding Frozen Peas Now, the moment is here! I carefully open the lid. I add 1 cup of frozen peas to the pot. With a spatula, I gently mix everything together. The heat warms the peas up quickly. Serving Suggestions I spoon the chicken and rice into bowls. I like to sprinkle fresh chopped parsley on top for color. You can serve it with lemon wedges on the side. This adds a fresh touch. For the full recipe, check [Full Recipe]. Best Practices for Instant Pot Cooking To make the best chicken and rice, follow these tips: - Always rinse jasmine rice well. This helps remove excess starch. It leads to fluffier rice. - Use enough liquid. For this recipe, 2 cups of broth keeps the rice moist and tender. - Avoid filling the pot too full. Keep it below the max fill line to prevent spills. Adjusting Cook Times Cooking times can vary. If you use larger chicken pieces, increase the time by a few minutes. For smaller cuts, decrease it slightly. Always use a meat thermometer. Chicken should reach 165°F for safety. Additional Seasoning Options For a twist, try adding: - A splash of soy sauce for umami. - A teaspoon of curry powder for warmth. - Fresh herbs like cilantro or basil for a bright finish. These small changes can boost flavor and make your dish unique. Suggestions for Adding More Vegetables Boost nutrition and color by adding veggies. Consider these options: - Chopped carrots for sweetness. - Bell peppers for crunch. - Spinach for a pop of green. Add them in during the pressure cooking stage. This keeps them tender but not mushy. {{image_4}} Swapping Proteins You can easily change the protein in this dish. If you prefer chicken breast, use it instead of thighs. Chicken breast is leaner but can dry out more easily. For a twist, try using turkey or even pork. Each option offers a different taste and texture. Alternate Grains If you want to swap jasmine rice, try brown rice. Brown rice takes longer to cook, so adjust the time to 22 minutes. Quinoa is another great choice. It cooks quickly and adds a nutty flavor. Different Herb & Spice Combinations You can create unique flavors by changing herbs and spices. For a Mediterranean touch, add rosemary and basil. If you enjoy a kick, use cumin and chili powder. Each mix brings a new twist to the dish. Regional Flavor Influences Think about flavors from around the world. For a Mexican vibe, add cilantro and lime. For an Asian flair, use ginger and sesame oil. These adjustments can take your meal to the next level. The world of flavors is at your fingertips! Refrigeration Tips To keep your Instant Pot Chicken and Rice fresh, store leftovers in an airtight container. Make sure to let it cool first before sealing. Place it in the fridge, where it will last for about 3 to 4 days. If you want to keep it longer, freezing is a great option. Freezer Storage Guidelines For longer storage, use a freezer-safe container. Leave some space at the top for the food to expand as it freezes. Label the container with the date, so you know when you made it. This meal can last in the freezer for up to 3 months. Best Methods for Keeping Quality When reheating, use the microwave or a stovetop. If using a microwave, place the chicken and rice in a bowl with a splash of water. Cover it to keep the moisture in. Heat it in short bursts, stirring in between. On the stovetop, add a little water or broth in a pan over low heat. Stir gently until heated through. Safety Tips for Reheating Always ensure that you reheat leftovers to at least 165°F (74°C) before serving. This kills any harmful bacteria. If you see any signs of spoilage, like an off smell or change in color, throw it away. Food safety is key to enjoying your meal! For full details, check the Full Recipe. How long does it take to cook chicken and rice in an Instant Pot? Cooking chicken and rice in an Instant Pot takes about 40 minutes. This includes 15 minutes for prep and 25 minutes for cooking. The pressure cooking itself only lasts 8 minutes. You also need to account for the time it takes to naturally release pressure. Can I use brown rice instead of jasmine rice? Yes, you can use brown rice instead of jasmine rice. However, you need to adjust the cooking time. Brown rice takes longer to cook, so set the Instant Pot for 22 minutes on high pressure. What can I serve with Instant Pot Chicken and Rice? You can serve many sides with this dish. Here are a few ideas: - Steamed broccoli - Roasted carrots - A fresh green salad - Garlic bread What to do if the rice is undercooked? If the rice is undercooked, simply add a splash of broth or water. Close the lid and set the Instant Pot to cook for an additional 2-3 minutes. Use the quick release method after cooking. How to prevent the chicken from drying out? To keep the chicken moist, avoid overcooking. Use the recommended cooking times, and always let the pressure release naturally for at least 10 minutes. This helps keep the chicken juicy and tender. This post covered everything you need for making chicken and rice in an Instant Pot. We explored the key ingredients, step-by-step instructions, and helpful tips for perfect results. I shared variations and ways to store leftovers to keep your meals fresh. Remember, cooking should be fun, so don’t hesitate to experiment with flavors and ingredients. With practice, you’ll master this dish and impress others with your skills. Enjoy your cooking journey and the delicious meals ahead!

Instant Pot Chicken and Rice Quick Dinner Recipe

Looking for a fast and tasty meal? This Instant Pot Chicken and Rice recipe has you covered! With just a

- 2 cups rolled oats - 1 cup almond butter (or peanut butter alternative) - 1/2 cup honey or maple syrup These main ingredients form the backbone of the no-bake chocolate oat bars. Rolled oats give the bars a chewy texture. Almond butter adds creaminess and healthy fats. Honey or maple syrup provides sweetness and binds everything together. - 1/4 cup unsweetened cocoa powder - 1 teaspoon pure vanilla extract - 1/4 teaspoon sea salt Cocoa powder adds rich chocolate flavor. The vanilla extract brings warmth and depth. A pinch of sea salt balances the sweetness and enhances all the flavors. - 1/2 cup dark chocolate chips (dairy-free if preferred) - Optional toppings: shredded coconut, chopped nuts, additional chocolate chips Dark chocolate chips add a melty, indulgent touch. You can also customize your bars with toppings. Shredded coconut, nuts, or extra chocolate chips offer fun textures and flavors. For the full recipe, check out the details above. To start, gather your ingredients. In a large bowl, mix these items: - 2 cups rolled oats - 1 cup almond butter (or substitute with peanut butter) - 1/2 cup honey or maple syrup - 1/4 cup unsweetened cocoa powder - 1 teaspoon pure vanilla extract - 1/4 teaspoon sea salt Stir the mixture well. You want it to be slightly sticky. This sticky texture helps the bars hold together. Next, gently fold in the dark chocolate chips. This step adds a rich chocolate flavor. Mix until the chips are evenly spread. Now, prepare your baking dish. Use an 8x8 inch square dish and line it with parchment paper. Let the paper hang over the sides. This makes it easy to lift out the bars later. With a spatula or your hands, press the mixture into the dish. Make sure to compact it firmly. This helps form a solid base for your bars. For extra flavor, you can add toppings. Sprinkle your choice of shredded coconut, chopped nuts, or more chocolate chips on top. Now, refrigerate the dish. Let it set for at least 2 hours. This time allows the bars to firm up. Once the bars are set, lift them out using the parchment paper. Cut them into squares or rectangles, based on your preferred size. Store the bars in an airtight container in the refrigerator. They will stay fresh for up to a week. For more details, check the Full Recipe. To make the best no-bake chocolate oat bars, you need a sticky mix. This helps the bars hold together well. If the mixture is too dry, your bars will crumble. When you mix the ingredients, ensure they are combined well. After mixing, compress the mixture firmly in the dish. Use your hands or a spatula to press it down. The firmer you press, the better the bars will hold their shape. You can change up the flavor by swapping ingredients. For example, try using peanut butter instead of almond butter. You can also mix in different sweeteners. Honey works great, but maple syrup gives a unique taste. If you want less sugar, think about using agave or date syrup. Each change adds a fun twist to your bars. These bars are great on their own, but they shine when paired with other treats. Serve them with fresh fruit or a scoop of yogurt. For special events, cut the bars into fun shapes. You can even drizzle melted chocolate on top for added flair. This makes each bite even more enjoyable. Try these ideas to impress your friends and family! For the full recipe, check out the details above. {{image_4}} You can switch out almond butter for different nut butters. Peanut butter works great too! If you want to cut down on sugar, use agave or date syrup instead of honey. These swaps keep the bars tasty while being a bit healthier. To add a new twist, sprinkle in some spices like cinnamon or nutmeg. These spices give the bars warmth and depth. You can also experiment with dried fruits like raisins or cranberries. They add natural sweetness and chewiness, making these bars even better. For those who follow a vegan diet, just use maple syrup and dairy-free chocolate chips. This keeps the bars plant-based while still being rich in flavor. If you need them gluten-free, make sure to choose certified gluten-free oats. This way, everyone can enjoy these delicious treats. For the full recipe, be sure to check out the entire article! To keep your no-bake chocolate oat bars fresh, use an airtight container. This prevents moisture and keeps them tasty. Make sure to layer parchment paper between bars to avoid sticking. Store them in the refrigerator for the best results. They will stay fresh for up to one week. If you want to enjoy your bars later, freezing works great! Cut the bars into pieces first. Place them in a single layer on a baking sheet. Freeze for about an hour. Once frozen, transfer the bars to a freezer-safe bag or container. Remove as much air as you can to avoid freezer burn. For thawing, take them out and let them sit at room temperature for about 30 minutes. These bars are best when eaten fresh, but they have a good shelf life. In the fridge, they last about a week. In the freezer, they can last for up to three months. Look out for any signs of spoilage, like an off smell or a change in texture. If they feel too dry or crumbly, it’s time to toss them. Enjoy the deliciousness while it lasts! You can use quick oats, but they change the texture. Quick oats are finer and absorb liquid faster. This can make your bars softer and less chewy. Rolled oats give a nice, hearty bite. I recommend using rolled oats for the best result. If you need a substitute for almond butter, try peanut butter or sunflower seed butter. Both options work well in this recipe. Peanut butter adds a rich flavor, while sunflower seed butter is great for nut-free needs. Choose what you like best. These bars stay fresh for up to one week in the fridge. Store them in an airtight container to keep them nice. If you want to keep them longer, you can freeze them. Just pack them well, and they can last for months. Yes, you can make these bars nut-free! Use sunflower seed butter or soy nut butter instead of almond butter. Both options keep the creamy texture. They also add a nice taste. Just be sure to check for allergies if serving to others. You now have a great recipe for no-bake chocolate oat bars. We explored ingredients, preparation steps, and storage tips. Remember, you can customize these bars to fit your taste. Use different nut butters or add spices for fun flavors. Keep them fresh by storing in airtight containers. Enjoy these bars as snacks or treats for gatherings. With simple ingredients and easy steps, you'll make delicious bars every time. Try making your own unique version today!

No-Bake Chocolate Oat Bars Easy and Delicious Treat

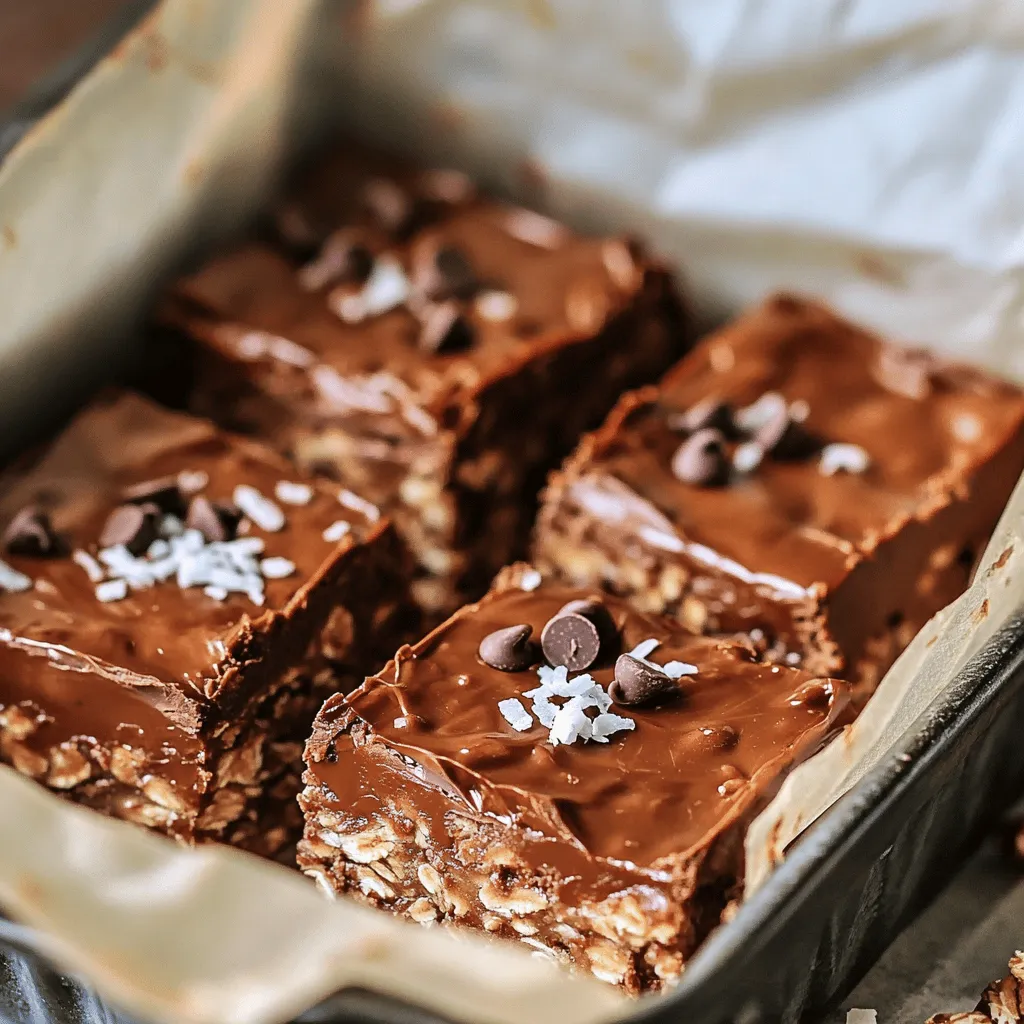
Craving a sweet treat that’s easy to make? Look no further! These No-Bake Chocolate Oat Bars are perfect for satisfying

- Large shrimp (1 pound, peeled and deveined) - Spices (chili powder, ground cumin, smoked paprika, cayenne pepper) - Fresh ingredients (red cabbage, avocado, cilantro, lime) - Olive oil (2 tablespoons) - Salt and pepper - Corn tortillas (8 small) - Mayonnaise (¼ cup) - Sriracha sauce (1 teaspoon) Gathering fresh, quality ingredients is key to making these spicy shrimp tacos shine. Start with large shrimp, peeled and deveined. The size gives a satisfying bite. For spices, mix chili powder, cumin, smoked paprika, and cayenne pepper. These add warmth and depth, making your tacos pop. You also need fresh ingredients. Red cabbage adds a nice crunch. Avocado provides creaminess. Cilantro brightens the flavors, and lime adds zest. This combo makes every bite refreshing. For the base, you'll use corn tortillas. They should be small to hold all the goodness without falling apart. Keep them warm while you cook the shrimp to enhance their flavor. Don't forget the spicy mayo! It’s simple but powerful. Mix mayonnaise with sriracha for heat. This sauce ties everything together, making each taco a delightful treat. For the full recipe, check out the detailed instructions to create these delicious tacos. To start, marinate the shrimp with spices and olive oil. In a bowl, mix the shrimp with olive oil, chili powder, ground cumin, smoked paprika, cayenne pepper, salt, and black pepper. Toss them well until they are fully coated. This step is key for flavor. Next, heat a skillet over medium-high heat. When it’s hot, add the shrimp in a single layer. Let them sear for 2-3 minutes without touching them. This helps develop a nice crust. Flip the shrimp and cook for another 2-3 minutes until they turn pink and opaque. Once done, remove them from the heat and set aside. While the shrimp cooks, we need to warm the corn tortillas. Take another skillet and place it over medium heat. Warm each tortilla for about 30 seconds on each side. They should be soft and flexible. To keep the tortillas warm, stack them and wrap them in a clean towel or place them in a tortilla warmer. Now it’s time to assemble the tacos. Lay a generous amount of finely shredded red cabbage on each warm tortilla. Next, add a good scoop of the spicy shrimp on top. Then, place a few slices of creamy avocado and a sprinkle of fresh cilantro. This mix creates a beautiful color and fresh taste. Finally, drizzle a spoonful of spicy mayo over the tacos. Squeeze fresh lime juice on top for extra brightness. Serve your zesty shrimp tacos right away. You can find the full recipe [Full Recipe]. Enjoy! To know when shrimp are done cooking, watch for their color. They turn pink and opaque. This usually takes about 2-3 minutes per side. Overcooked shrimp turn rubbery and tough. To avoid this, cook shrimp just until they are pink. Remove them from heat right away. Choosing the right type of tortilla is key. Corn tortillas are best for shrimp tacos. They add a nice flavor and texture. To keep tortillas soft, warm them in a skillet. Heat each side for about 30 seconds. Wrap them in a towel to keep warm while you cook the shrimp. Consider adding extra toppings for more flavor. Sliced radishes, fresh lime juice, and jalapeños work well. These can balance the spice levels. If you want less heat, go easy on the cayenne pepper. Add creamy avocado or cooling sour cream to tame the spice. {{image_4}} Grilling shrimp gives it a smoky flavor. This method is quick and healthy. The shrimp cooks evenly and stays juicy. You can add a hint of char, which is nice. On the other hand, frying shrimp gives it a crunchy texture. It makes the outside crispy while keeping the inside tender. Frying is great for those who love a bit of crunch in their tacos. You can swap shrimp with fish or chicken. White fish like tilapia works well. Chicken breast can also be seasoned and cooked like shrimp. For a vegan option, use jackfruit or tofu. Both can soak up flavors well. You can prepare them with the same spices to keep that tasty kick. To change up the taste, try different spices. A dash of garlic powder or lime zest can make a big difference. You can also use different marinades, like teriyaki or lemon herb. For sauces, think outside the spicy mayo. Avocado sauce or a tangy yogurt sauce can add freshness. You can mix things up and create a new favorite! Check out the Full Recipe for more ideas. To keep cooked shrimp fresh, store it in an airtight container. Place it in the fridge. Use it within two days for best taste. For assembled tacos, it’s best to store each part separately. Store shrimp, tortillas, and toppings in different containers. This keeps everything fresh and tasty. When reheating shrimp, use a skillet on low heat. This warms the shrimp without drying it out. Stir gently as you heat. For tortillas, heat them in a dry skillet for about 30 seconds on each side. This keeps them soft and warm. Avoid the microwave, as it makes them chewy. Yes, you can freeze spicy shrimp tacos! First, cool the shrimp completely. Then, place it in a freezer-safe bag. Seal tightly and label the bag. For tortillas, wrap them in foil and freeze. To reheat, thaw everything overnight in the fridge. Heat the shrimp in a skillet and warm the tortillas before assembling. Enjoy your delicious meal with the [Full Recipe]. To make your shrimp tacos spicy, start with cayenne pepper. Use half a teaspoon. If you like more heat, add more. You can also try hot sauce or a spicy marinade. Mixing chili powder with other spices boosts the flavor too. - Use additional chili powder - Add hot sauce to the mix - Marinate shrimp in a spicy blend These tips will give your tacos a nice kick. Remember, balance is key. You want heat but not too much that it overpowers the shrimp. Spicy shrimp tacos pair well with many sides and drinks. Here are some tasty ideas: - Mexican rice - Black beans - Grilled corn on the cob - Fresh salsa - Chips and guacamole - A light salad with lime dressing For drinks, try a cold beer or a fruity margarita. These sides add flavor and make your meal more fun. To keep shrimp tender, avoid overcooking them. Cook them for just 2-3 minutes on each side. They should turn pink and opaque. - Use medium-high heat - Don’t crowd the skillet - Remove shrimp from heat as soon as they’re done These methods help maintain their juicy texture. Enjoy your perfectly cooked shrimp in every bite! We covered everything you need for perfect spicy shrimp tacos. You learned what ingredients to use, from shrimp to spices. I shared step-by-step instructions for the best cooking methods. Tips on keeping your shrimp tender and tortillas soft were also included. Remember, you can vary flavors and ingredients to fit your taste. Enjoy customizing your dish and impressing your friends. With this guide, you’ll cook delicious tacos that everyone will love. Happy cooking!

Spicy Shrimp Tacos Flavorful and Easy Meal Idea

Are you ready to spice up your dinner routine? These Spicy Shrimp Tacos are not only flavorful but also incredibly

- 2 tablespoons extra-virgin olive oil - 1 medium onion, finely chopped - 3 cloves garlic, minced - 2 cans (14 oz each) diced tomatoes, undrained - 2 cups vegetable broth (low-sodium recommended) - 1 teaspoon granulated sugar - 1 teaspoon dried oregano - Sea salt and freshly ground black pepper, to taste - 1 cup heavy cream (or coconut cream for a dairy-free option) - 1 cup fresh basil leaves, tightly packed - Grated Parmesan cheese, for serving (optional) Gathering these ingredients is easy. You can find most of them in your kitchen or local store. The extra-virgin olive oil gives the soup flavor and richness. The onion and garlic add a sweet and savory depth. Using canned tomatoes makes it quick and simple. The vegetable broth adds a warm base, while sugar balances the acidity. Don't forget the basil! It brightens the soup. Heavy cream makes it creamy, but you can use coconut cream for a lighter option. Enjoy experimenting with the Parmesan cheese for extra flavor! For the complete recipe, check the Full Recipe section. First, grab a large pot. Pour in 2 tablespoons of extra-virgin olive oil and heat it over medium. Add 1 medium onion, finely chopped. Sauté this for about 5 minutes. You want the onion to be soft and see-through. Next, add 3 cloves of minced garlic. Cook this for 1 more minute, stirring often. You’ll know it’s ready when the garlic smells great but isn’t browned. Now, it’s time for the tomatoes! Pour in 2 cans of diced tomatoes, undrained. Then, add 2 cups of vegetable broth. Stir in 1 teaspoon of granulated sugar and 1 teaspoon of dried oregano. Season with sea salt and freshly ground black pepper to your taste. Turn the heat up a bit. Let the soup mixture come to a gentle simmer. This will help all the flavors mix well. Cook it for 15 minutes. You’ll notice the lovely scent filling your kitchen. It’s a great time to think about how this soup will warm you up. After simmering, remove the pot from heat. Now, you need to puree the soup. If you have an immersion blender, use it for a smooth texture. If not, carefully transfer the hot soup in small batches to a countertop blender. Hold the lid with a towel to avoid splatters. Once it’s smooth, return the soup to the pot over low heat. Stir in 1 cup of heavy cream or coconut cream if you prefer a dairy-free option. Don’t forget to add 1 cup of fresh basil leaves. Warm it for about 5 minutes, stirring often. Taste the soup and adjust the seasoning if needed. Now you’re ready to serve your creamy tomato basil soup. Enjoy it hot, maybe with some grated Parmesan cheese on top, and a few extra basil leaves for that beautiful touch. This recipe is simple, yet it brings so much comfort. For the full details, check out the Full Recipe. To boost the flavor of your creamy tomato basil soup, try adding spices like paprika or red pepper flakes. These spices add warmth without overpowering the dish. Fresh herbs are also a great choice. You can mix in a bit of thyme or parsley for extra depth. Adjusting the salt and pepper helps too. Taste your soup as you go to find the right balance. Using fresh ingredients makes a big difference in your soup’s taste. Fresh tomatoes can give a brighter flavor. If you use canned tomatoes, choose high-quality brands for the best results. An immersion blender is a handy tool for this recipe. It blends the soup right in the pot, saving you time and mess. If you don’t have one, a regular blender works too. Just remember to let the soup cool a bit before blending. Serve your soup in colorful bowls for a fun look. Drizzle some extra olive oil on top for shine and flavor. Adding a sprinkle of Parmesan cheese can make it more inviting. For a complete meal, consider serving it with crusty bread or a fresh salad on the side. This adds texture and flavor, making your meal feel more complete. For more details, check the Full Recipe to get all the steps right! {{image_4}} To make creamy tomato basil soup vegan, swap heavy cream for coconut cream. This gives you the same smooth texture without dairy. Coconut cream also adds a hint of sweetness. For thickening, you can use pureed white beans or cashews. Soak cashews for a few hours, then blend them until smooth. This method keeps your soup creamy and rich without any dairy. You can add other vegetables to boost flavor. Carrots and bell peppers blend well in this soup. Just chop them finely and sauté them with the onions. Spices can enhance the taste too. Try adding red pepper flakes for heat or smoked paprika for depth. You can also customize garnishes. Use croutons, pumpkin seeds, or a drizzle of olive oil to add crunch and flavor. Tomato soup has many historical variations worldwide. For instance, in Italy, they often add basil and olive oil. In Spain, you might find a version with garlic and spices. You can explore local ingredients to give your soup a twist. Fresh herbs, like cilantro or dill, can change the flavor profile. Use seasonal veggies that are local to your area. This not only enhances taste but also supports local farmers. For the full recipe, check out the creamy tomato basil bliss section. To keep your creamy tomato basil soup fresh, store it in an airtight container. Make sure it cools down before sealing it. This step helps prevent condensation inside the container. In the fridge, your soup stays fresh for about 3 to 5 days. Always check for any off smells or changes in texture before eating. You can freeze creamy tomato basil soup for longer storage. First, let it cool completely. Then, pour it into freezer-safe bags or containers. Leave some space at the top for expansion. Label the bags with the date. The soup can stay frozen for up to 3 months. For the best results, thaw it overnight in the fridge before reheating. When it’s time to enjoy your soup again, heat it gently on the stove. Use low heat to avoid burning. Stir it often to keep the texture smooth. If you see separation, whisk the soup while it heats. You can also add a splash of broth or cream to help bring it back together. Enjoy your creamy tomato basil bliss! You can use coconut cream instead of heavy cream. It gives a rich texture and taste. If you want a lighter option, use cashew cream. To make it, blend soaked cashews with water until smooth. Use about 1 cup of cashew cream in your soup. This keeps it creamy and adds a nice nutty flavor. Yes, fresh tomatoes work great! Use about 2 pounds of ripe tomatoes. Blanch them in boiling water for 30 seconds, then cool them in ice water. Peel the skins, remove seeds, and chop them. They will add a fresh taste to your soup. Just remember to simmer them longer to soften. This soup pairs well with many sides. Try a grilled cheese sandwich for a classic combo. Crusty bread also works well for dipping. A fresh salad can balance the meal too. You might want to add a sprinkle of Parmesan on top for extra flavor. Tomatoes are rich in vitamins C and K. They also have antioxidants that help your body. Basil adds vitamins A and K. It can boost your immune system and improve digestion. This soup is not just tasty; it’s good for you too! This blog post covered how to make creamy tomato basil soup from scratch. We looked at the ingredients needed, from fresh basil to olive oil. I shared step-by-step instructions, tips for flavor, and different variations. You can customize this soup to fit your tastes. In conclusion, enjoy this delicious soup anytime. It's easy to make and very satisfying. Try the tips and variations to make it your own. Cooking should be fun and tasty!

Creamy Tomato Basil Soup Comforting and Simple Recipe

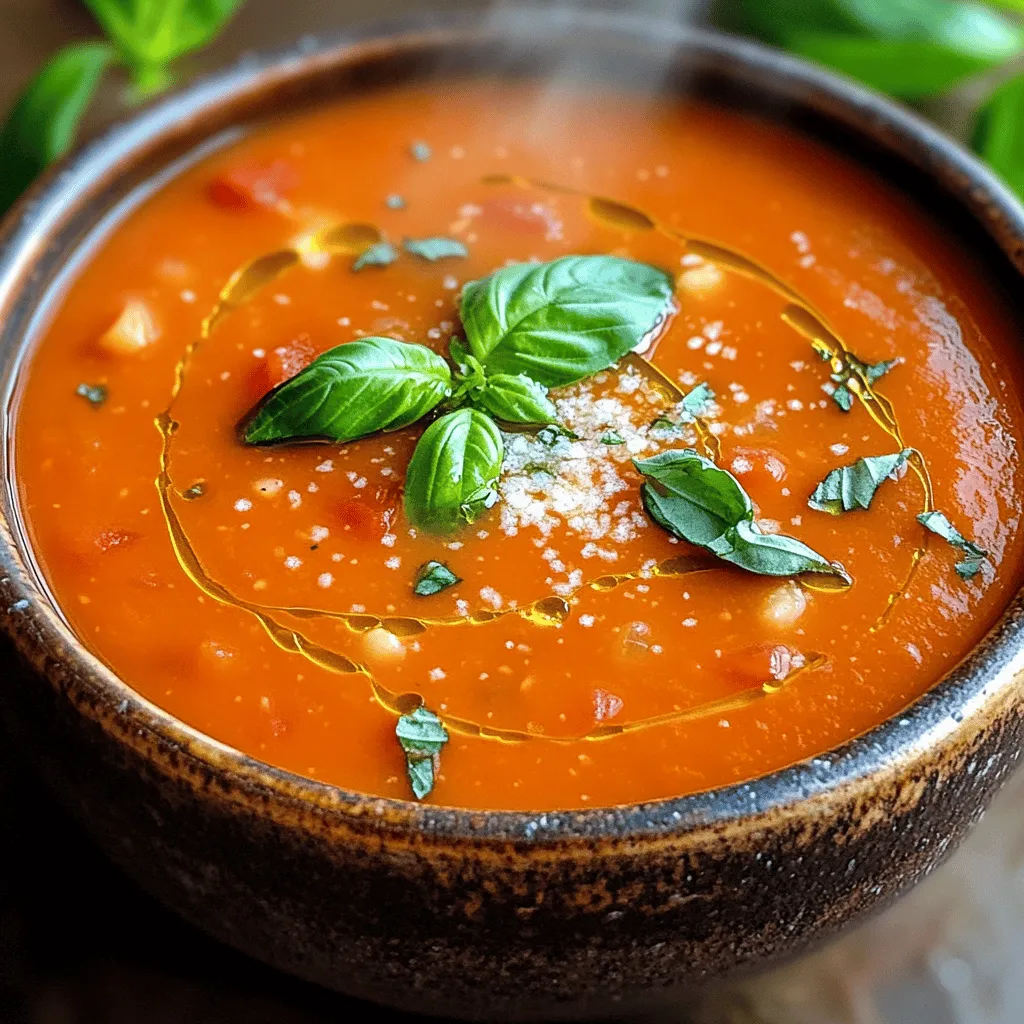
If you crave a warm, comforting meal, this creamy tomato basil soup is perfect for you. With just a few

Older posts
Newer posts
← Previous Page1 … Page50 Page51 Page52 … Page86 Next →

dsad

© 2026 lazychefmagic • Built with GeneratePress

Our Policies

  • Copyright Policy
  • Cookie Policy
  • GDPR Policy
  • Privacy Policy
  • Disclaimer
  • Terms Of Use

More Information

  • Home
  • About
  • Contact
  • Appetizers
  • Dessert
  • Dinner
  • Drinks
©2026, lazychefmagic About Back To Top