![When making lemon blueberry muffins, gather the following items. Each ingredient plays a key role in taste and texture. - 1½ cups all-purpose flour - ½ cup granulated sugar - ¼ cup packed brown sugar - 2 teaspoons baking powder - ½ teaspoon baking soda - ½ teaspoon salt - 1 tablespoon freshly grated lemon zest - ½ cup buttermilk - ⅓ cup unsalted butter - 2 large eggs - 1 teaspoon pure vanilla extract - 1½ cups fresh blueberries - 2 tablespoons freshly squeezed lemon juice - Optional: 1 tablespoon coarse sugar for topping Using quality ingredients makes a big difference. Fresh blueberries burst with flavor. Grated lemon zest adds a nice zing. Buttermilk gives a tender crumb. Each item combines for a delicious muffin. For the full recipe, follow the steps outlined in the next sections. Enjoy baking these delightful treats! To start, preheat your oven to 375°F (190°C). This step is key for even baking. While the oven heats, you need to prepare your muffin tin. You can line it with paper liners or grease each cup lightly with cooking spray. Both methods help the muffins release easily after baking. Next, it's time to make the batter. In a large bowl, combine the dry ingredients. Use 1½ cups of all-purpose flour, ½ cup granulated sugar, ¼ cup packed brown sugar, 2 teaspoons baking powder, ½ teaspoon baking soda, ½ teaspoon salt, and 1 tablespoon of freshly grated lemon zest. Whisk these together until they blend well. In another bowl, mix the wet ingredients. Whisk together ½ cup buttermilk, ⅓ cup melted and cooled unsalted butter, 2 large eggs, 1 teaspoon pure vanilla extract, and 2 tablespoons of freshly squeezed lemon juice. Make sure this mixture is smooth. Now, pour the wet mixture into the bowl with the dry ingredients. Gently stir with a spatula until just combined. It’s okay if there are some streaks of flour left. Avoid overmixing, as this keeps the muffins soft. Now comes the fun part—folding in the blueberries! Carefully add 1½ cups of fresh blueberries to the batter. Stir gently to ensure they are evenly distributed without breaking. Spoon the batter into the prepared muffin cups, filling each about ¾ full. If you want a sweet crunch on top, sprinkle some coarse sugar over the batter before baking. Bake your muffins for 18 to 20 minutes. Check for doneness by inserting a toothpick into the center of a muffin. If it comes out clean, they are ready! After baking, let the muffins cool in the tin for about 5 minutes. Then, transfer them to a wire rack to cool completely. For the complete recipe, check the [Full Recipe]. To make the best lemon blueberry muffins, avoid overmixing your batter. Overmixing can make your muffins tough. Mix until the flour just disappears, and that’s it! You can leave some lumps; they will bake away. For even baking, fill your muffin cups about three-quarters full. This helps the muffins rise properly. It’s also wise to rotate the muffin tin halfway through baking. This ensures all muffins get equal heat. When choosing blueberries, I recommend fresh blueberries for the best taste. They burst with juice and flavor. Frozen blueberries work too, but thaw and drain them first. This avoids extra moisture in your batter. Add more lemon zest for a stronger lemon flavor. It brightens each bite. A little zest goes a long way, so start with one tablespoon. You can always add more if you want it zestier. Serve your muffins warm for the best experience. Dust them with powdered sugar for a sweet touch. A sprinkle of extra lemon zest adds color and charm. For an elegant display, arrange the muffins on a serving platter. Scatter fresh blueberries around them. This not only looks nice but also highlights the flavor. For the full recipe, check the main section. Enjoy your baking! {{image_4}} For those needing dietary changes, try these options: - Gluten-free alternative: Use a gluten-free flour blend in place of all-purpose flour. Look for blends that include xanthan gum to help with texture. - Dairy-free substitutions: Swap buttermilk for almond milk or coconut milk. Use a dairy-free butter for the melted butter. These changes will keep the muffins tasty and enjoyable for everyone. You can easily tweak the flavors of your muffins: - Adding nuts or seeds: Chopped walnuts or almonds add crunch. Sunflower seeds or pumpkin seeds also work well. - Incorporating other fruits: Try adding raspberries or strawberries for a fruity twist. You can mix in these fruits along with blueberries for a burst of flavor. Experimenting with these options keeps your muffins fresh and exciting. Muffins come in all sizes, and you can choose what suits you: - Mini muffins vs. standard size: Mini muffins are great for snacks or parties. Standard muffins work well for breakfast or brunch. - Baking time differences: Mini muffins bake faster, about 12 to 15 minutes. Standard muffins usually take 18 to 20 minutes. Keep an eye on them to avoid overbaking. Adjusting the size can change how you enjoy these lemon blueberry muffins. To keep your lemon blueberry muffins fresh, store them at room temperature. Place them in an airtight container or wrap them in plastic wrap. This helps maintain their moisture and flavor. Make sure to keep them away from direct sunlight or heat sources. Enjoy them within three days for the best taste. For longer storage, freezing is the best option. Wrap each muffin in plastic wrap, then place them in a freezer bag. Make sure to remove as much air as possible to prevent freezer burn. When you’re ready to enjoy a muffin, remove it from the freezer. Let it thaw at room temperature or microwave it for a few seconds. This restores the soft texture and flavor. These muffins will last about three days at room temperature. If stored in the fridge, they can stay fresh for up to a week. In the freezer, they can last for about three months. Always check for any signs of spoilage before eating. Keeping track of storage times helps you enjoy these tasty treats at their best. Can I use frozen blueberries in this recipe? Yes, you can use frozen blueberries. Just thaw and drain them before adding. This keeps the batter from turning blue. Fresh blueberries are great, but frozen work well too. How can I make these muffins less sweet? To reduce sweetness, cut back on the granulated sugar. You can use ¼ cup instead of ½ cup. You may also choose to leave out the brown sugar. This will still give you tasty muffins. What can I substitute for buttermilk? If you don’t have buttermilk, mix ½ cup milk with 1 tablespoon lemon juice or vinegar. Let it sit for five minutes. This gives you a great alternative with a similar taste. How do I know when the muffins are done baking? Check the muffins with a toothpick. Insert it into the center of a muffin. If it comes out clean, the muffins are ready. They should be lightly golden on top. - Check out these related recipes for more baking ideas: - Blueberry Banana Bread - Lemon Poppy Seed Muffins - Watch this video tutorial to see the process step-by-step. I would love to hear about your muffin experiences! Did you try the recipe? What did you change? Share your thoughts and tips in the comments. Your feedback helps us all learn more about baking. You’ve learned how to make lemon blueberry muffins, from ingredients to baking tips. Remember to avoid overmixing and check for doneness to ensure perfect results. Don’t hesitate to make variations or experiment with flavors that suit your taste. Storing leftovers properly will keep them fresh longer. Enjoy sharing your muffins and experiences with others! Happy baking and enjoy each delicious bite.](https://lazychefmagic.com/wp-content/uploads/2025/06/cae0f6da-c0bc-41a2-8b78-f0278604c7fb.webp)
Lemon Blueberry Muffins Fresh and Flavorful Treat
Craving a delightful treat? Look no further than my Lemon Blueberry Muffins! Bursting with fresh flavor, these muffins are easy
Craving a delightful treat? Look no further than my Lemon Blueberry Muffins! Bursting with fresh flavor, these muffins are easy
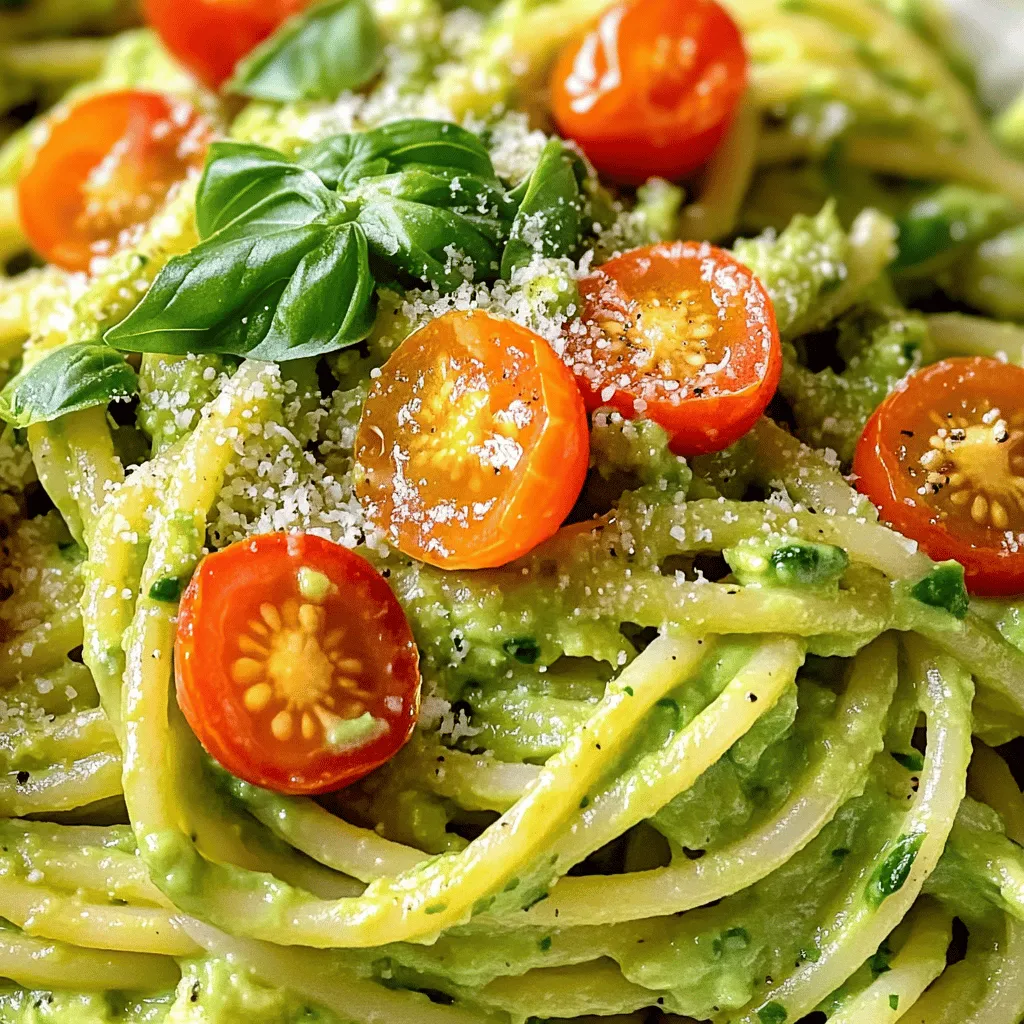
![To make my zesty zucchini noodles with avocado pesto, gather these fresh ingredients: - 4 medium zucchinis - 1 ripe avocado - 1 cup fresh basil leaves (packed) - 1/4 cup pine nuts (or walnuts) - 2 tablespoons freshly squeezed lemon juice - 2 tablespoons extra virgin olive oil - 1 garlic clove, finely minced - Sea salt and freshly cracked black pepper to taste - Handful of cherry tomatoes, halved (for garnish) - Optional: Grated Parmesan cheese for serving These ingredients come together to create a dish that is both fresh and tasty. Zucchini noodles offer a light base for the rich and creamy avocado pesto. You can easily find these ingredients at your local grocery store or farmer's market. The vibrant colors and flavors will make your meal a delight. I love how simple yet satisfying this recipe is. You can enjoy it as a quick lunch or a light dinner. Don't forget to check out the Full Recipe for complete details! To make zucchini noodles, start by using a spiralizer. It’s simple and quick. Just hold the zucchini and twist it against the blade. You can create long strands that look like spaghetti. No spiralizer? Don’t fret! A vegetable peeler works too. Just peel thin strips from the zucchini. You can cut them into noodle-like shapes with a knife. Next, you need to cook the noodles. Fill a large pot with water. Bring it to a boil. Add a pinch of salt to the water. Then, gently add the zucchini noodles. Blanch them for about 1-2 minutes. You want them tender but still crunchy. Drain the noodles right away and let them cool. This helps keep their texture. Now it’s time for the avocado pesto. Gather your ingredients: - 1 ripe avocado - 1 cup fresh basil leaves - 1/4 cup pine nuts (or walnuts) - 2 tablespoons lemon juice - 2 tablespoons olive oil - 1 garlic clove, minced - Sea salt and black pepper Add all these into a food processor. Blend on high until smooth. This should take about 30 seconds. Taste and adjust the seasoning if you like. In a large bowl, toss the cooled zucchini noodles with the avocado pesto. Make sure every strand gets coated. For even coating, use tongs or your hands. Serve the noodles right away. Garnish with halved cherry tomatoes for color. If you want, add some grated Parmesan cheese on top. Enjoy your zesty zucchini noodles with avocado pesto! For the complete recipe, check [Full Recipe]. To avoid mushy zucchini noodles, follow these tips: - Blanch briefly: Cook them for just 1-2 minutes. This keeps them firm. - Cool quickly: Drain and cool them right away to stop cooking. For flavor enhancement, consider these ideas: - Season the water: Add salt when blanching the noodles for extra taste. - Try garlic powder: Sprinkle some onto the noodles for a savory kick. To add depth of flavor to your avocado pesto, try these additions: - Lemon zest: This brightens the taste and adds freshness. - Nutritional yeast: This gives a cheesy flavor without the dairy. Adjusting the creaminess levels is simple: - Add water: If you want a thinner pesto, blend in a little water. - More avocado: For a richer texture, add another ripe avocado. For a creative presentation, try these ideas: - Nest shapes: Twirl the noodles into nests on the plate. - Colorful garnishes: Use halved cherry tomatoes and basil leaves for pops of color. For pairing options, consider these dishes: - Grilled chicken: The protein complements the lightness of the zucchini. - Crusty bread: Serve with a side of bread for a complete meal. For the full recipe, check out the section on ingredients and instructions. {{image_4}} You can change the nuts in your pesto. Pine nuts work well, but walnuts give a nice twist. Try using cashews for a creamier texture. You can also explore using different greens. Spinach offers a mild taste, while arugula adds a peppery kick. Kale is another great option for added nutrients. Mixing zucchini noodles with other vegetables brightens your dish. Consider adding bell peppers for crunch or carrots for sweetness. You can also use broccoli for a hearty touch. Adding protein makes the meal filling. Grilled chicken or shrimp pairs perfectly with the pesto. For a plant-based option, toss in chickpeas or tofu. This recipe shines for many diets. It is naturally gluten-free and vegan if you skip the cheese. For low-carb lovers, zucchini noodles keep the carbs down while being tasty. You can enjoy a great meal without feeling heavy. Adjustments make this meal fit your needs. Follow the [Full Recipe] for guidance on these variations. To keep zucchini noodles fresh, store them in a sealed container. Place a paper towel inside to absorb moisture. This helps prevent sogginess. Use them within 2-3 days for the best taste. For pesto, transfer it to an airtight container. Smooth the top and drizzle a bit of olive oil on it. This keeps the color vibrant and the flavor fresh. Store it in the fridge for up to one week. Can you freeze zucchini noodles? Yes, but they lose some texture. Blanch them first for 1-2 minutes, then cool and drain. Place them in a freezer-safe bag, removing as much air as possible. They can last for about 2-3 months in the freezer. For reheating, avoid the microwave if possible. Instead, warm them in a pan over low heat. Add a splash of olive oil to keep them from drying out. Heat gently until warmed through, not mushy. How long do prepared ingredients last? Zucchini noodles last about 3 days in the fridge. Pesto can last up to a week if stored correctly. Signs of spoilage include a sour smell or discoloration. If the noodles feel slimy or the pesto has dark patches, it’s best to discard them. Always trust your senses! Zucchini noodles, or "zoodles," are thin strips made from zucchini. They are a great low-carb substitute for pasta. Zoodles are rich in vitamins and minerals, such as vitamin C and potassium. They also provide fiber, which aids digestion. Using zucchini noodles in your meals helps cut carbs and adds nutrients. You can enjoy them raw or cooked, making them very versatile. Yes, you can! A vegetable peeler is a simple tool for this. Just peel long strips off the zucchini to create flat noodles. You can also use a box grater to create thin strands. If you want a different shape, try a knife to cut the zucchini into thin strips. These methods work well and do not require special tools. To store avocado pesto, place it in an airtight container. Cover the surface with plastic wrap to prevent air exposure. This helps keep the vibrant green color and fresh taste. You can store it in the fridge for up to three days. If you want to keep it longer, consider freezing it in ice cube trays. Just thaw it later when you are ready to use it. Serve zucchini noodles in a large bowl or plate. Toss them with the creamy avocado pesto until they are well coated. For a nice touch, add halved cherry tomatoes on top for color and taste. You can also sprinkle grated Parmesan cheese for extra flavor. For a fun presentation, try to shape the noodles into nests on the plate. Yes, zucchini noodles are low in carbs. A cup of cooked zoodles has about 2 grams of carbs. In contrast, a cup of regular pasta has around 40 grams of carbs. This makes zucchini noodles a smart choice for low-carb diets. They can help you enjoy your favorite pasta dishes without the extra carbs. You now have all the tools to make delicious zucchini noodles with avocado pesto. Start by spiralizing your zucchinis and creating that creamy pesto. Combine them for a tasty dish that’s healthy and fun to eat. Experiment with different nuts, greens, and add-ins to suit your taste. Remember, you can store leftovers properly to enjoy later. Keep exploring new variations to keep your meals exciting. Enjoy your cooking!](https://lazychefmagic.com/wp-content/uploads/2025/06/ed18dbaf-892a-42be-9f92-daa85584e9a5.webp)
If you’re looking for a quick, tasty meal, zucchini noodles with pesto is the answer! This dish is healthy, fresh,
Looking for a quick and easy meal? Creamy avocado pasta is the perfect choice! This vibrant dish combines ripe avocados,
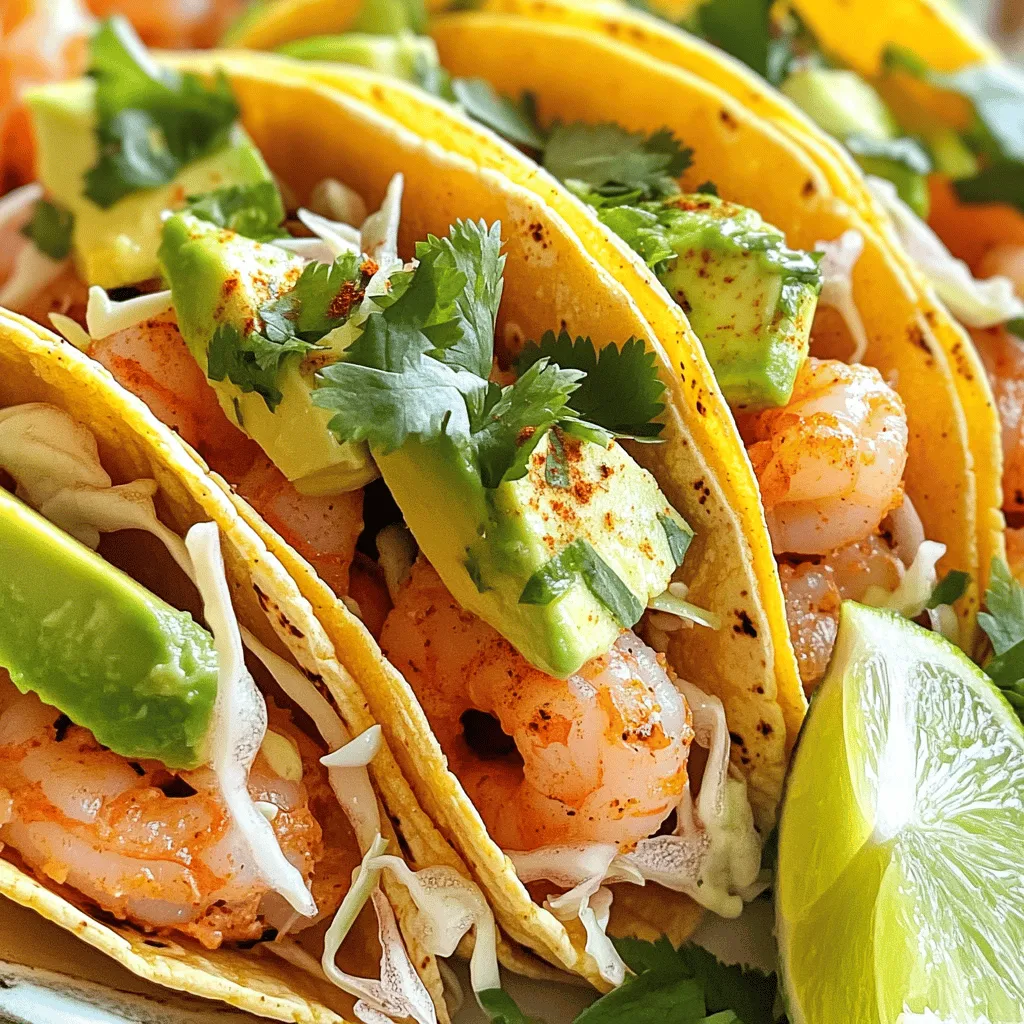
Are you ready to spice up your dinner routine? These Spicy Garlic Shrimp Tacos are not just full of bold
![To make vegan chocolate chip cookies, you need some simple and delicious ingredients. Here’s what you will need: - 1 cup almond butter - 1/2 cup coconut sugar - 1/4 cup pure maple syrup - 1/4 cup unsweetened applesauce - 1 teaspoon pure vanilla extract - 1 teaspoon baking soda - 1/2 teaspoon sea salt - 1 1/2 cups all-purpose flour - 1/2 cup vegan chocolate chips - 1/4 cup chopped walnuts (optional) These ingredients work together to create a soft and chewy cookie. They provide great flavor and texture. If you don’t have almond butter, you can use peanut butter or sunflower seed butter. Coconut sugar can be swapped with brown sugar if needed. Maple syrup adds sweetness, but you can use agave nectar in its place. Unsweetened applesauce is great for moisture, but you can also use mashed banana for a twist. - Almond Butter: Packed with healthy fats and protein, almond butter helps keep you full. - Coconut Sugar: This sugar has a lower glycemic index than regular sugar, which is better for blood sugar levels. - Maple Syrup: A natural sweetener, maple syrup contains minerals like manganese and zinc. - Unsweetened Applesauce: Low in calories, it adds moisture without extra fat. - Vegan Chocolate Chips: These provide antioxidants and a delicious, sweet touch. - Chopped Walnuts: They add healthy omega-3 fatty acids and a nice crunch. These ingredients not only taste great, but they also offer health benefits. This is what makes vegan chocolate chip cookies a smart treat. For the complete recipe, check out the Full Recipe. Start by preheating your oven to 350°F (175°C). This step is important. It ensures your cookies bake evenly. Next, prepare a baking sheet. Line it with parchment paper. This helps prevent the cookies from sticking. In a large mixing bowl, add the almond butter. Then, pour in the coconut sugar and pure maple syrup. Next, add the unsweetened applesauce and vanilla extract. Stir these ingredients together until the mixture is smooth. You want a creamy texture for the best flavor. Now, sprinkle the baking soda and sea salt into the bowl. Mix these dry ingredients into the wet mixture. This step is key for proper rising. Once combined, gradually add the all-purpose flour. Mix gently until a dough forms. The dough should be soft but not sticky. Use a tablespoon to scoop the dough. Roll each portion into a ball. Place these balls on the prepared baking sheet. Make sure to leave space between each cookie. This allows them to spread while baking. Bake your cookies for 10 to 12 minutes. Look for golden edges and soft centers. After baking, remove the sheet from the oven. Let the cookies cool on the baking sheet for 5 minutes. This helps them set. Then, transfer them to a wire rack. Cooling completely on the rack gives the best texture. Enjoy your homemade cookies! When making vegan chocolate chip cookies, avoid common errors. First, don’t skip the baking soda; it helps the cookies rise. Next, measure your flour correctly. Too much flour can make cookies dry. Also, don’t overmix the dough after adding the flour; this can lead to tough cookies. Lastly, remember to cool the cookies on a wire rack. This helps them keep their soft texture. To get the best texture, use almond butter that is smooth and creamy. This helps create a soft dough. Also, leave the cookies slightly underbaked. The centers will continue to cook as they cool. For a chewier cookie, let the dough rest for at least 30 minutes before baking. This allows the flavors to meld and improves the texture. You can enhance flavor and texture easily. Add a pinch of cinnamon for warmth. Substituting half of the almond butter with peanut butter adds a unique taste. For extra crunch, mix in chopped walnuts or pecans. If you like a sweeter cookie, try adding a bit more maple syrup. For a fun twist, add a splash of almond extract along with vanilla. Follow the [Full Recipe] for more details on making these delicious cookies! {{image_4}} You have many choices for vegan chocolate chips. You can use dark, semi-sweet, or even dairy-free white chocolate chips. Each type brings a unique flavor to your cookies. Dark chocolate chips add rich, deep notes. Semi-sweet gives a balanced taste. Dairy-free white chocolate chips offer a sweet, creamy touch to the mix. You can even experiment with flavored chips, like mint or orange, for fun twists. Want to spice up your cookies? Here are some great add-ins: - Nuts: Chopped walnuts or pecans add crunch and taste. - Dried fruits: Raisins, cranberries, or cherries give sweetness and chewiness. - Seeds: Chia seeds or flaxseeds boost nutrition and texture. - Spices: Cinnamon or nutmeg can add warmth and depth. - Coconut: Shredded coconut gives a tropical hint. Feel free to mix and match. Each add-in can change the cookie's texture and flavor, making each batch special. If you need a gluten-free option, it’s simple! Replace all-purpose flour with gluten-free flour blends. Look for blends that include rice flour, almond flour, or coconut flour. These alternatives work well and keep your cookies soft. Just remember to check your chocolate chips too. Some brands may contain gluten. For a gluten-free version, the Full Recipe remains the same, just swap the flour. This way, you can enjoy delicious vegan chocolate chip cookies without worry! To keep your vegan chocolate chip cookies fresh, store them in an airtight container. This helps prevent them from drying out. Place a piece of parchment paper between layers to keep them soft. Store them at room temperature for up to one week. You can freeze these cookies for longer storage. First, let them cool completely. Then, place them in a single layer on a baking sheet. Freeze until solid, about one hour. After that, transfer them to a freezer-safe bag. They will stay good for up to three months. When you're ready to eat, just thaw them at room temperature. These cookies can last for up to one week at room temperature. If you freeze them, they can last three months. However, the best taste is within the first few days. For the freshest flavor, enjoy them soon after baking. For more on this recipe, check out the Full Recipe. Yes, you can use other nut butters. Peanut butter or cashew butter works well. They add their own flavor, so choose one you like. Make sure it’s smooth and creamy. This will help keep the cookies soft and chewy. These cookies are vegan because they don't use any animal products. Instead of butter, we use almond butter. We replace eggs with applesauce. Coconut sugar and maple syrup are great sweeteners. This makes the cookies both tasty and plant-based. Watch the edges of the cookies. They should turn golden brown. The centers will look soft but set. If they seem too shiny, give them a minute more. Remember, they firm up as they cool. Absolutely! You can use agave syrup or brown sugar. Just make sure the amount is similar to what the recipe calls for. Each sweetener may change the cookie's taste and texture a bit, but they will still be yummy. These cookies are a healthier choice than regular cookies. They have less refined sugar and use almond butter, which is full of good fats. While they are still a treat, they can fit into a balanced diet. Enjoy them in moderation! You learned how to make tasty vegan cookies using simple steps. We covered key ingredients, their benefits, and easy substitutions. I shared tips to avoid mistakes and enhance flavor. You also discovered variations for different tastes and how to store your cookies properly. In the end, vegan cookies can taste great and be good for you. Enjoy baking and sharing your creations!](https://lazychefmagic.com/wp-content/uploads/2025/06/ed25a3af-d0b4-41c9-b803-f565bfe3b9dd.webp)
Craving something sweet yet vegan? You’re in the right place! I’m excited to share my easy and delicious recipe for
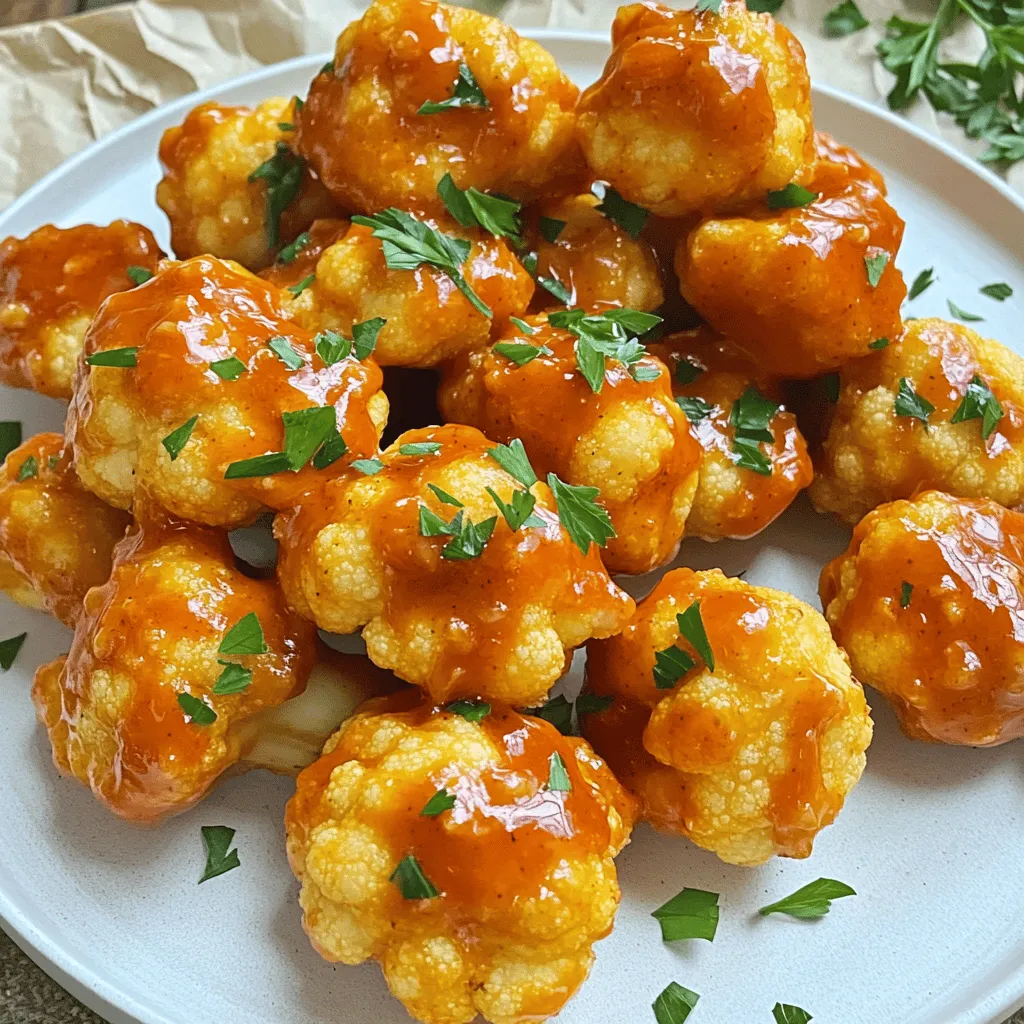
Are you ready to spice up your snack game? Buffalo Cauliflower Bites deliver crispy texture and bold flavor, making them
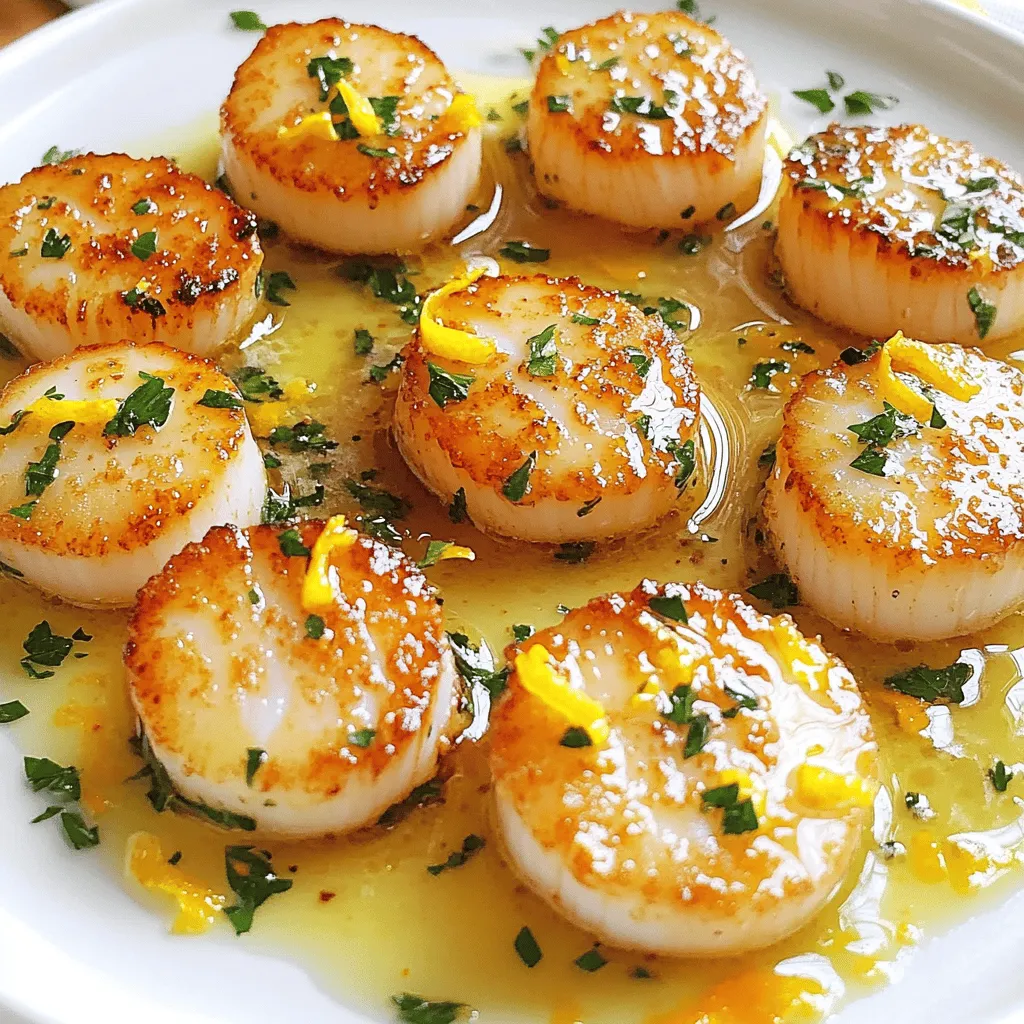
Are you ready to impress your family and friends with a delicious seafood dish? This pan-seared scallops recipe is a
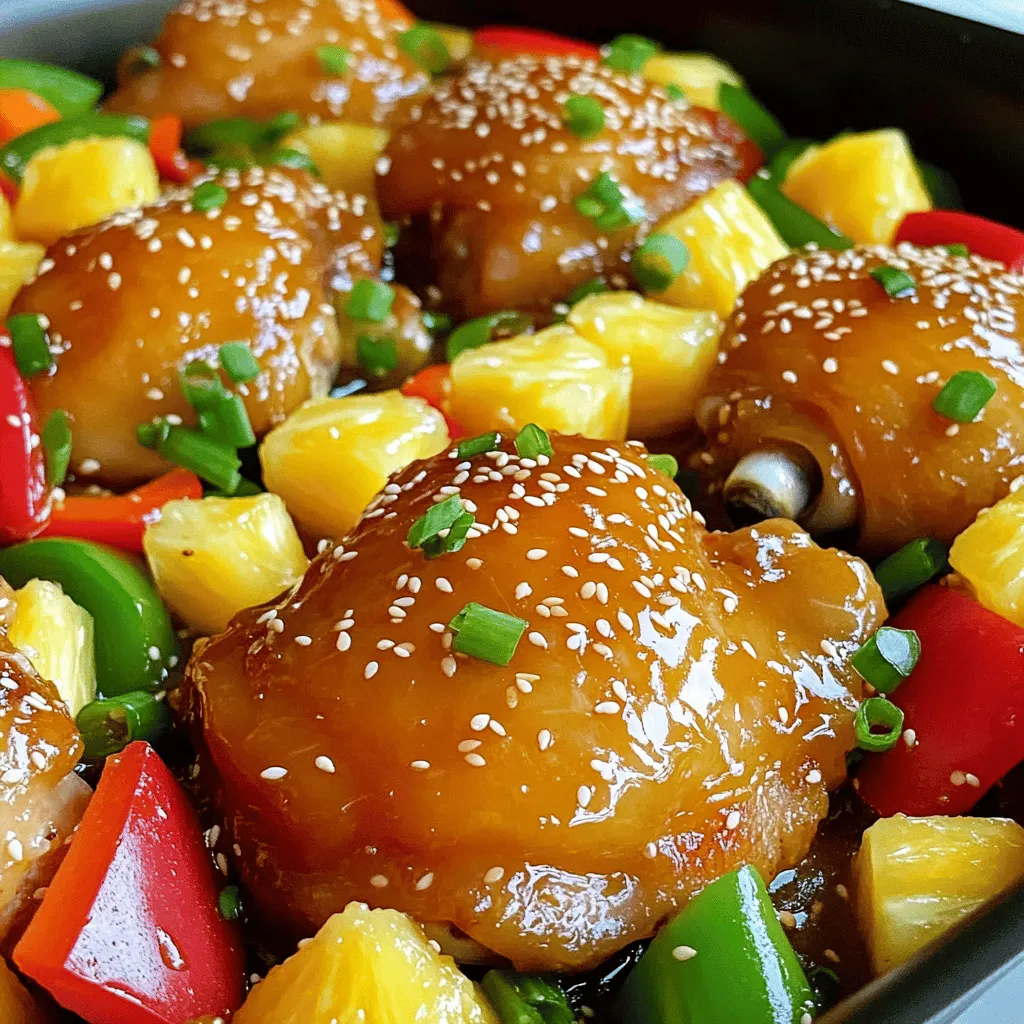
Looking for a quick, tasty dinner that brings tropical vibes to your table? Try my One-Pan Honey Pineapple Chicken! This
![- Cream Cheese and Sweeteners Cream cheese gives mini cheesecakes their rich and creamy texture. It’s key to use softened cream cheese for easy mixing. I like to add powdered sugar for sweetness. It blends well and adds a nice smoothness. - Crust Components: Graham Crackers and Sugar The crust is vital for a great mini cheesecake. Combine graham cracker crumbs with granulated sugar. Melted butter binds these together, creating a tasty base. This mix should feel like damp sand when ready. It provides a nice crunch. - Eggs and Dairy Elements Eggs are crucial for the cheesecake’s structure. They help it set while baking. I always use large eggs at room temperature for the best results. Adding sour cream gives a creamy flavor and keeps the texture smooth. - Fresh Berries and Fruit Compote Fresh berries like strawberries or blueberries make great toppings. They add color and freshness to the mini cheesecakes. You can also use fruit compote for a sweet sauce that enhances the taste. - Whipped Cream and Nuts A dollop of whipped cream adds a light and fluffy touch. Chopped nuts bring crunch and flavor. Think pecans or walnuts for a nice twist. - Chocolate Sauce Drizzling chocolate sauce on top makes the cheesecakes even more delicious. It adds a rich flavor that pairs well with the creamy filling. For the full details on making these delightful mini cheesecakes, check out the Full Recipe. Mixing and Pressing the Crust Mixture Start by mixing your crust. In a medium bowl, combine: - 1 cup graham cracker crumbs - 1/4 cup granulated sugar - 1/2 cup unsalted butter, melted Use a fork to mix until it looks like damp sand. This helps the crust hold together. Next, take about 1 tablespoon of this mixture. Press it firmly into the bottom of each muffin liner. This creates a solid base for your mini cheesecakes. Baking the Crust to Perfection Now, bake the crusts. Preheat your oven to 325°F (160°C). Place the muffin tin in the oven. Bake for about 5-7 minutes. You want the crust to turn slightly golden and smell yummy. After baking, let them cool completely before adding the batter. Creaming the Cheese and Adding Ingredients Let’s make the cheesecake batter. In a large bowl, beat 16 ounces of softened cream cheese. Use an electric mixer on medium speed. Mix for about 2-3 minutes until it’s smooth and creamy. Next, add: - 1 cup powdered sugar - 1 teaspoon pure vanilla extract Continue mixing until everything is fluffy and well blended. Folding in the Sour Cream Add 2 large eggs one at a time. Mix on low speed after each egg, just until it’s combined. Be careful not to overmix. This can cause cracks later. Finally, gently fold in 1/4 cup of sour cream until the batter is smooth and even. Filling the Liners and Baking Process Now it’s time to fill the liners. Carefully pour the cheesecake batter over the crusts. Fill each liner about 3/4 full. This allows them to rise without spilling over. Bake the cheesecakes for 15-18 minutes. The centers should be set but still slightly jiggly. Cooling Methods to Prevent Cracks After baking, turn off the oven. Crack the door open about 1 inch. This helps the cheesecakes cool slowly, which prevents cracks. Let them cool in the oven for 1 hour. After that, transfer them to a wire rack to cool to room temperature. Finally, refrigerate for at least 2 hours, or until they are firm and chilled. For the full recipe and detailed steps, refer to the [Full Recipe]. Avoiding Overmixing To make the best mini cheesecakes, be careful not to overmix. Overmixing adds too much air into the batter. This extra air can cause cracks during baking. Mix just until smooth after adding each ingredient. This helps keep your cheesecakes creamy and rich. Baking Tips for Even Cooking Baking mini cheesecakes at the right temperature is key. Set your oven to 325°F (160°C) for even cooking. Use a muffin tin lined with paper liners. This prevents sticking and helps with even baking. Place the muffin tin on the middle rack. This allows hot air to circulate around each cheesecake, cooking them evenly. Presentation Ideas for Mini Cheesecakes Make your mini cheesecakes look great on a platter. Arrange them in a circle or a fun pattern. Top each cheesecake with fresh berries or a drizzle of fruit compote. Add a sprig of mint for a pop of color. This not only makes them look pretty but also adds a fresh taste. Pairing with Desserts or Beverages Mini cheesecakes pair well with many treats. Consider serving them with a scoop of vanilla ice cream. A cup of coffee or a sweet dessert wine also works nicely. You can even add a side of chocolate sauce or caramel for extra fun. These options will make your mini cheesecakes even more delightful. For the complete recipe, check out Mini Cheesecake Delights. {{image_4}} You can mix up mini cheesecakes with fun flavors. Seasonal flavors make them special. Try pumpkin for fall, peppermint for winter, and lemon for spring. Each flavor brings a unique taste, making your desserts shine. Chocolate and coffee are also great choices. A rich chocolate cheesecake is perfect for any chocolate lover. You can add espresso or coffee to your batter for a delightful twist. This will give a nice, bold flavor that pairs well with chocolate. If you want an easier version, try no-bake mini cheesecakes. You can skip the oven and still enjoy creamy, delicious treats. Just adjust the ingredients. Use more cream cheese and skip the eggs. This keeps the texture smooth and tasty. For chilling, pour the batter into the crusts and place them in the fridge. Let them chill for at least 4 hours or overnight. This will help them set up nicely. When ready to serve, add your favorite toppings, and enjoy! Check out the Full Recipe for all the details. To keep your mini cheesecakes fresh, store them in the fridge. Place them in an airtight container. If they are still in their muffin liners, cover them with plastic wrap. This keeps moisture out and prevents them from drying. For longer storage, you can freeze them. Wrap each cheesecake in plastic wrap. Then, place them in a freezer bag or container. This helps avoid freezer burn. When you want to enjoy one, thaw it in the fridge overnight. Mini cheesecakes last about 5 days in the fridge. After this time, they may lose taste and texture. To check if your mini cheesecakes are spoiled, look for a few signs. If there are any mold spots, discard them. A sour smell or off flavor means they are not safe to eat. Always trust your senses! For the full recipe, check out the detailed section earlier in the article. To prevent cracks, follow a few simple steps. First, mix your batter on low speed. This helps keep air out. Second, bake at a lower temperature. This ensures even cooking. Lastly, cool them slowly in the oven. Crack the oven door open after baking to let the heat out. Yes, you can make mini cheesecakes ahead of time! They store well in the fridge for up to five days. Just cover them with plastic wrap or foil. You can also freeze them, but be sure to wrap them tightly. They can last in the freezer for about two months. Mini cheesecakes are done when the edges are set, but the center is still a bit jiggly. They will firm up as they cool. It’s better to take them out a bit early than to overbake. Overbaking can lead to a dry texture. If you need a cream cheese alternative, try using Greek yogurt or mascarpone cheese. Both options give a creamy texture. For a non-dairy option, look for vegan cream cheese. Just keep in mind that this may alter the flavor slightly. Absolutely! You can use gluten-free graham crackers or almond flour for your crust. Simply mix them with sugar and melted butter as usual. This way, you can enjoy delicious mini cheesecakes without gluten. Mini cheesecakes combine rich flavors and easy steps. We explored key ingredients, like cream cheese and graham crackers. You learned how to make the crust and perfect your cheesecake batter. With tips for texture and serving ideas, your dessert will shine. Don't forget the fun variations, like no-bake options or seasonal flavors. Store them right for lasting freshness. Now, you're ready to create delicious mini cheesecakes that impress! Enjoy every perfect bite and share your creations with friends and family.](https://lazychefmagic.com/wp-content/uploads/2025/06/1e44564d-928a-4748-b43d-824086fc6d9b.webp)
Are you craving a sweet treat that’s easy to make and simply delicious? Mini cheesecake desserts are the perfect solution!
![To make a true Louisiana gumbo, you need key ingredients. These create the base of rich flavors and textures. Here’s what you need: - 1/2 cup vegetable oil - 1/2 cup all-purpose flour - 1 large onion, finely diced - 1 green bell pepper, diced - 2 medium celery stalks, diced - 4 cloves garlic, minced - 1 pound andouille sausage, sliced into rounds - 1 pound shrimp, peeled and deveined - 6 cups chicken broth - 2 cups okra, sliced (fresh or frozen) - 1 can (14.5 oz) diced tomatoes, with liquid - 2 tablespoons Cajun seasoning - 2 bay leaves - Salt and freshly ground black pepper to taste - 4 green onions, chopped (for garnish) - 1/4 cup fresh parsley, chopped (for garnish) - Cooked rice, for serving These ingredients form the heart of your gumbo. Each adds depth and tradition to the dish. You can enhance your gumbo with these optional ingredients. They add unique flavors and make the dish even better: - Bell pepper, any color - Fresh thyme or bay leaves - Hot sauce for extra heat - Lemon juice for brightness - Other seafood like crab or fish Feel free to mix and match. Cooking is all about personal taste. Not every ingredient is set in stone. You can swap some based on your preference. Here are a few tips: - Use olive oil instead of vegetable oil for a different flavor. - If you cannot find andouille sausage, try any smoked sausage. - For a lighter option, replace shrimp with chicken or tofu. - If okra is not available, use diced zucchini or green beans. These substitutions can help you create a gumbo that fits your needs. Just keep the spirit of the dish alive! For the complete recipe, check out the Full Recipe. Start by heating 1/2 cup of vegetable oil in a large pot over medium heat. Wait until the oil is hot. Next, whisk in 1/2 cup of all-purpose flour. Stir it constantly for 15-20 minutes. You want a deep brown color, known as a roux. This step is key for flavor, so be patient. Do not let it burn; keep stirring. Once your roux is ready, add 1 large diced onion, 1 diced green bell pepper, and 2 diced celery stalks. These three veggies are called the holy trinity in Cajun cooking. Sauté them for 5-7 minutes until they soften. The mix should smell great. After that, add 4 minced garlic cloves for a tasty boost. Now it’s time to add the fun stuff! Stir in 1 pound of sliced andouille sausage. Cook it for another 2-3 minutes. Then, pour in 6 cups of chicken broth while whisking to mix well. Add 2 cups of sliced okra and 1 can of diced tomatoes. Toss in 2 tablespoons of Cajun seasoning and 2 bay leaves. Season with salt and black pepper to taste. Bring this to a boil, then lower the heat. Let it simmer uncovered for 30-45 minutes. Stir it occasionally so nothing sticks. About 5-7 minutes before serving, fold in 1 pound of peeled and deveined shrimp. Cook until the shrimp turns opaque. Don’t forget to remove the bay leaves before serving. Ladle the gumbo over cooked rice and garnish with green onions and parsley. This makes for a beautiful dish! For the full recipe, check back to the ingredients section. To make a great roux, use equal parts oil and flour. I like to start with 1/2 cup of each. Heat the oil in a heavy pot over medium heat. Once hot, whisk in the flour. Stir constantly for 15-20 minutes. Look for a deep brown color, like chocolate. This step takes time, but it's key for flavor. If it burns, you must start over. Taste as you cook. Start with 2 tablespoons of Cajun seasoning. You can always add more later. If you want less heat, use less seasoning. Remember, the flavors will deepen as it simmers. For a fresh kick, add a pinch of cayenne pepper, but do it slowly. Adjust salt and pepper at the end for the best taste. One big mistake is rushing the roux. Don't skip this step; it adds depth. Another common error is not tasting the gumbo. Always check the flavors before serving. If it seems bland, it probably needs more seasoning. Lastly, avoid overcooking the shrimp. They only need a few minutes to cook through. For the best results, follow the [Full Recipe]. {{image_4}} You can make a tasty vegetarian gumbo. Replace the sausage and shrimp with veggies. Use mushrooms, zucchini, or eggplant for texture. Add beans for protein. Vegetable broth gives it depth. You can still use the holy trinity of onions, bell peppers, and celery. Season with Cajun spices for a kick. This version stays true to the gumbo spirit while being meat-free. If you want to try different proteins, there are many options. Chicken works well and adds a nice flavor. You can also use fish, like catfish or tilapia. Crab adds luxury to your gumbo, while clams bring a briny taste. Feel free to mix and match these proteins. Each adds its unique twist to the dish. Gumbo varies across Louisiana. In New Orleans, you might find seafood gumbo with shrimp and crab. In the bayou, you may see duck or game meats. Some regions use gumbo filé, a spice made from sassafras leaves, for flavor. Each area has its own twist, reflecting local culture and ingredients. It’s fun to explore these differences when cooking gumbo. For the full recipe, check out the Savory Shrimp & Sausage Gumbo. After enjoying your gumbo, store any leftovers in an airtight container. Make sure to cool the gumbo to room temperature first. This helps keep the flavors intact. Place it in the fridge if you plan to eat it within a few days. It will be good for up to three days. When you're ready to enjoy leftover gumbo, heat it gently. You can use a pot on the stove or a microwave. If using a pot, heat over low to medium heat. Stir often to avoid sticking. In the microwave, heat in short bursts, stopping to stir in between. This helps it heat evenly. Freezing gumbo is a great way to save it for later. To freeze, let it cool completely. Then, transfer it to a freezer-safe container or bag. Make sure to leave some space at the top. The gumbo will expand as it freezes. It can last for up to three months in the freezer. When you’re ready to eat, thaw it in the fridge overnight. Then, reheat it as mentioned above. If you want to keep it fresh, check out the Full Recipe for more tips! You can serve gumbo with several tasty sides. Cooked rice is a must. It soaks up the rich broth. You can also add crusty French bread for dipping. A simple green salad adds freshness. For a Cajun twist, try fried plantains or cornbread. These sides enhance the meal and balance the flavors. Homemade gumbo can last about three to four days in the fridge. Store it in an airtight container. Make sure it cools down before you place it in the fridge. This keeps it fresh and safe to eat. If you want it to last longer, freeze the gumbo. It can stay good for up to six months in the freezer. Yes, you can make gumbo without okra. Some people don’t like the texture. You can use other thickening agents if you want. Try adding filé powder or corn starch instead. This helps achieve a similar texture. You can also use more vegetables to add body to the dish. Gumbo and jambalaya are both Cajun dishes, but they differ in key ways. Gumbo is a soup with a rich broth. It often has a roux base and includes meats, seafood, and vegetables. Jambalaya is a one-pot dish that cooks rice with the other ingredients. It is thicker and less soupy than gumbo. Each dish has a unique charm and flavor. Try both to enjoy the best of Cajun cooking. Gumbo is a rich dish with deep flavors. We covered key ingredients and how to make them shine. You learned to prepare a perfect roux and the holy trinity of veggies. I shared tips to boost flavor and avoid common mistakes. We also explored tasty variations and how to store leftovers. You now have the tools to make gumbo your own. Enjoy crafting your perfect bowl, and share this dish with loved ones.](https://lazychefmagic.com/wp-content/uploads/2025/06/d6f35e0a-61a1-4611-99d7-a5f68e180fb9.webp)
Welcome to a culinary adventure with my Louisiana Gumbo featuring sausage and shrimp! This rich, hearty dish pairs bold flavors,
