Skip to content
DisclaimerTerms Of UseGDPR PolicyCookie Policy

lazychefmagic

  • Home
  • Drinks
  • Appetizers
  • Dinner
  • Dessert
  • About
  • Contact
  • Privacy Policy
DisclaimerTerms Of UseGDPR PolicyCookie Policy

NO-ING-IMG

To make a tasty blueberry swirl cheesecake, gather these key ingredients: - 1 ½ cups graham cracker crumbs - ½ cup unsalted butter, melted - 1 cup granulated sugar, divided - 4 packages (8 oz each) cream cheese, softened to room temperature - 1 teaspoon pure vanilla extract - 4 large eggs, at room temperature - 1 cup sour cream - 1 ½ cups fresh blueberries - 2 tablespoons cornstarch - 1 tablespoon fresh lemon juice These ingredients create a rich and creamy cheesecake with a sweet blueberry swirl. You can play with the flavor and texture by adding these optional ingredients: - A pinch of salt enhances the sweetness. - Lemon zest adds a bright, fresh note. - A splash of almond extract gives a nutty flavor. Feel free to mix and match these additions to suit your taste. If you have dietary needs, consider these substitutions: - Use gluten-free graham crackers for a gluten-free option. - Swap cream cheese for vegan cream cheese if needed. - For a lower sugar option, use a sugar substitute that measures like sugar. These swaps allow everyone to enjoy this delicious dessert! For the full recipe, check out the complete instructions. To start, preheat your oven to 325°F (160°C). This step is key for a perfect cheesecake. Next, grab a medium bowl. Combine 1 ½ cups of graham cracker crumbs, ½ cup of melted unsalted butter, and ¼ cup of granulated sugar. Mix until it looks like wet sand. Press this mixture firmly into a 9-inch springform pan. This creates a solid base. Bake it for 8-10 minutes. Look for a lightly golden color. Once done, take it out and let it cool. Now, let’s make the filling. In a large bowl, use an electric mixer. Beat 4 packages of softened cream cheese for 2-3 minutes. You want it smooth and creamy. Slowly add ¾ cup of granulated sugar while mixing. This helps to blend everything well. Mix in 1 teaspoon of pure vanilla extract. Then, add 4 large eggs, one at a time. Keep the mixer on low speed to avoid overmixing. Finally, fold in 1 cup of sour cream. This gives the filling a lovely, silky texture. For the blueberry swirl, take 1 ½ cups of fresh blueberries. In a separate bowl, mix them with 2 tablespoons of cornstarch and 1 tablespoon of fresh lemon juice. Toss gently to coat the blueberries. This step helps them stay suspended in the cheesecake. Pour half of the cream cheese mixture into the cooled crust. Spread it evenly. Then, scatter half of the blueberries on top. Pour the remaining cream cheese mixture over that. To create the swirl, gently use a knife or spatula to mix in the last blueberries. Now, it’s time to bake! Place the cheesecake in the oven for 55-60 minutes. The edges should be firm, but the center should still jiggle slightly. When it’s done, turn off the oven. Crack the door open and let the cheesecake cool for an hour inside. This helps prevent cracks. After an hour, move the cheesecake to a cooling rack. Let it reach room temperature. Cover it and refrigerate for at least 4 hours, or preferably overnight. When ready to serve, run a knife around the edge of the springform pan. Carefully release the sides to reveal your beautiful cheesecake. Enjoy! For the complete process with details, check the Full Recipe. To get a great swirl, use a knife or spatula. Gently draw lines in the cheesecake. Do not mix too much. You want to see the blueberry and cream cheese layers. This gives a nice look and taste. Overmixing can lead to cracks. Mix just until smooth. Also, avoid baking too long. Check the center; it should jiggle. If the edges are firm, it is ready. Let it cool slowly in the oven. This helps prevent cracks. Ovens can vary. Keep an eye on your cheesecake. Start checking at 50 minutes. If it needs more time, add five minutes. Each oven is different, so trust your instincts. For the best results, use the jiggle test. {{image_4}} You can add chocolate to your blueberry swirl cheesecake. Start by melting 4 ounces of dark chocolate. Mix this chocolate into half of the cream cheese batter. This gives a rich taste that pairs well with the blueberries. When you swirl in the blueberry mixture, it creates a stunning visual and flavor contrast. For a vegan option, swap the cream cheese with cashew cream. Soak 2 cups of raw cashews for a few hours. Blend them with ½ cup of coconut cream, 1/3 cup of maple syrup, and 1 teaspoon of lemon juice. Follow the same steps for creating the crust and blueberry swirl. This version is just as creamy and delicious! You can also mix in other fruits. Strawberries, raspberries, or blackberries work great. Just mash the fruit and stir in some sugar. You can use this fruit mixture instead of or alongside blueberries. This adds a fun twist and keeps your cheesecake exciting. For the full recipe, check out the Blueberry Swirl Cheesecake section above. To store leftover cheesecake, first let it cool completely. Cover it tightly with plastic wrap or foil. You can also use an airtight container. This keeps it fresh and safe from odors in the fridge. Leftover cheesecake will last up to five days in the fridge. If you want to keep cheesecake longer, freezing is a great option. Wrap the cheesecake tightly in plastic wrap. Then, place it in a freezer-safe container. This helps to avoid freezer burn. Your cheesecake can last up to three months in the freezer. When you're ready to eat it, move it to the fridge for a night to thaw. If you prefer warm cheesecake, reheat it gently. Place a slice on a microwave-safe plate. Microwave on low power for about 15 to 20 seconds. Check if it's warm enough to your liking. Avoid overheating, as this can cause the cheesecake to dry out. For a fresh taste, serve it with whipped cream and more blueberries. Enjoy the flavors! You can use Greek yogurt for cream cheese. It adds creaminess but is lower in fat. Another option is mascarpone cheese, which is rich and creamy. For a vegan version, try cashew cream blended with a bit of lemon juice. Each substitute gives a different taste, so choose what you like! The cheesecake is done when the edges look firm. The center should have a slight jiggle but not be liquid. A toothpick inserted should come out mostly clean. Remember, it will firm up as it cools. This way, you avoid overbaking and getting a dry cheesecake. Yes, you can! Making it a day ahead helps the flavors blend well. It will also set nicely in the fridge. Just cover it well to keep it fresh. When it’s time to serve, it will taste just as great! Serve the cheesecake cold for the best taste. You can add a dollop of whipped cream on top. Fresh blueberries make a nice garnish. For extra flair, drizzle honey or a berry sauce around the plate. This makes the dessert look even more tempting! For the full recipe, check out the detailed section above. Blueberry swirl cheesecake is a delightful treat. We covered the needed ingredients, from crust to filling. You learned how to achieve the perfect swirl and avoid common baking mistakes. We also explored fun variations, like chocolate and vegan options. Storage tips ensure your cheesecake stays fresh. With these insights, you can create the perfect dessert fit for any occasion. Enjoy your cheesecake adventure and share it with friends and family!

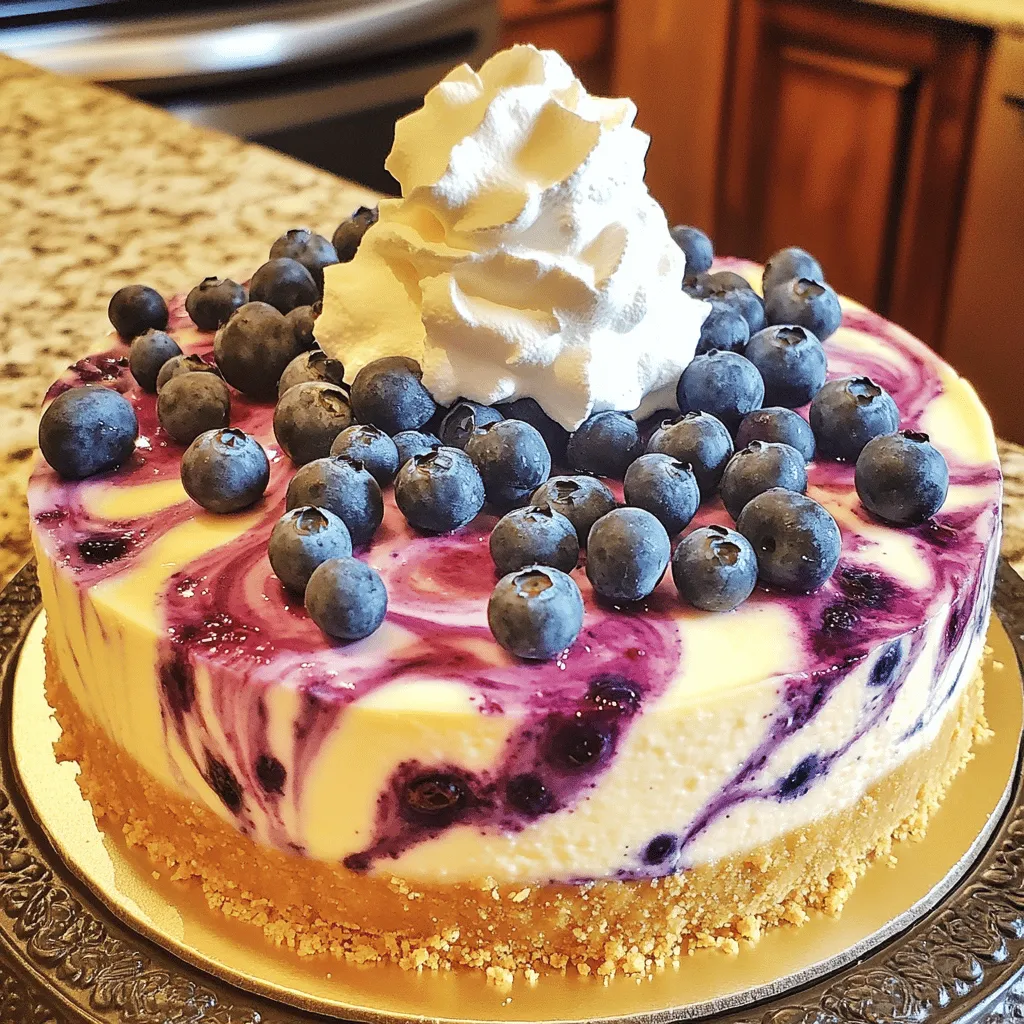
Blueberry Swirl Cheesecake Delightful and Simple Recipe

Craving a dessert that bursts with flavor but is simple to make? Meet my Blueberry Swirl Cheesecake! This delightful treat

- Shrimp and scallops Use 1 pound of large shrimp and 1 pound of sea scallops. Fresh seafood makes the dish shine. - Pasta selection and type Choose 8 ounces of linguine or spaghetti. These shapes hold the sauce well. - Garlic and lemon components Use 4 cloves of minced garlic and the zest and juice of 1 lemon. This adds a bright flavor. - Fresh parsley and Parmesan cheese Add 1/4 cup of chopped parsley for color and flavor. Grated Parmesan cheese adds creaminess if you like. - Red pepper flakes for heat Use 1 teaspoon of red pepper flakes for a kick. Adjust it based on your spice preference. - Olive oil and seasonings You will need 4 tablespoons of olive oil. Season with salt and black pepper to enhance the flavors. Start by boiling a large pot of salted water. This adds flavor to the pasta. Once the water boils, add 8 ounces of linguine or spaghetti. Cook it until it's al dente, following the package directions. When it’s done, drain the pasta in a colander. Remember to save about 1/2 cup of pasta water. This helps to create a nice sauce later. Keep the pasta in the strainer while you work on the other parts of the dish. Next, grab a large skillet and heat 2 tablespoons of olive oil over medium-high heat. While the oil heats, season 1 pound of cleaned scallops with salt and pepper. When the oil shimmers, add the scallops to the skillet. Cook them for about 2-3 minutes on each side until they turn a lovely golden brown. This gives them a nice crust. Once done, take them out and set them aside on a plate. Now, in the same skillet, add the other 2 tablespoons of olive oil. Toss in 1 pound of large shrimp, peeled and deveined. Cook them for about 2-3 minutes. You’ll know they are ready when they turn bright pink. Season with salt, pepper, and red pepper flakes. Stir everything to mix the flavors well. After that, add 4 cloves of minced garlic. Stir for 30 seconds until you smell that delicious garlic aroma. Lower the heat to low and return the golden scallops to the skillet. Gently add the cooked pasta along with the lemon juice and zest. Toss everything together carefully. If the pasta seems dry, add the reserved pasta water, one tablespoon at a time. This helps to make a light and creamy sauce that clings to the pasta. Finally, fold in 1/4 cup of chopped parsley. Taste your dish and adjust with extra salt and pepper if needed. For plating, consider using shallow bowls. This showcases the bright colors of the shrimp and scallops. You can also add extra lemon zest on top for a fresh touch. If you like, sprinkle some grated Parmesan cheese for added flavor. Enjoy this Lemon Garlic Shrimp & Scallop Pasta Delightful Meal with friends or family! For a complete guide, check the Full Recipe. To cook shrimp and scallops just right, follow some simple steps. For shrimp, cook them for about 2-3 minutes. They should turn a bright pink when done. For scallops, aim for 2-3 minutes on each side. Look for a golden crust. This gives them a nice flavor. Overcooking can ruin the texture. Shrimp can become rubbery, and scallops can turn tough. Keep an eye on them as they cook. Use a timer if you need to. Timing is key for perfect seafood. To boost the flavor of your dish, consider adding spices. Fresh herbs like basil or thyme can add a new twist. A pinch of smoked paprika can give it depth too. Just remember to start with small amounts. You can always add more. You can also play with acidity. If you want more zing, add extra lemon juice. A splash of white vinegar can also work well. Taste as you go to find the right balance. When it comes to plating, think about colors and textures. Serve the pasta in shallow bowls. This helps showcase the shrimp and scallops. You can also add some lemon wedges on the side. They look nice and offer extra flavor. For garnishes, try fresh parsley or extra lemon zest. A sprinkle of grated Parmesan cheese can add elegance. The visual appeal makes the meal feel special. Take your time to make each plate look beautiful. For the full recipe, check out the details in the earlier section. {{image_4}} You can swap seafood for a variety of options. Try using crab or lobster for a fancy twist. If you want a budget-friendly choice, use shrimp alone. Both options taste great! For those needing gluten-free options, choose gluten-free pasta made from rice or quinoa. These pastas work well in this dish and still taste delicious. To make this dish dairy-free, simply skip the Parmesan cheese. Use nutritional yeast instead. It adds a savory flavor that works well with lemon and garlic. Adjusting spice levels is easy. If you prefer less heat, reduce or leave out the red pepper flakes. For a spicier meal, add more to suit your taste. You can add seasonal vegetables for extra flavor and nutrition. In summer, consider adding fresh zucchini or cherry tomatoes. In winter, try spinach or broccoli for a heartier dish. Adapting for seasonal ingredients helps keep this meal fresh and exciting. Use what's in season for the best taste and to support local farms. To store leftover Lemon Garlic Shrimp & Scallop Pasta, place it in an airtight container. This keeps it fresh and avoids strong odors. The dish stays good in the fridge for up to three days. Make sure to cool it down to room temperature before sealing to prevent steam buildup. You can freeze this pasta dish for later enjoyment. First, let it cool completely. Then, transfer it to a freezer-safe container. This method keeps the flavors intact. It can last in the freezer for about three months. When you are ready to eat, thaw it overnight in the fridge for best results. To reheat, I recommend using a stovetop method. This helps maintain the texture and flavor. Add a splash of water or olive oil to prevent sticking. Heat over medium-low, stirring gently. If you use a microwave, place it in a microwave-safe dish. Cover it with a damp paper towel to keep moisture. Heat it in short intervals, stirring in between for even warming. Enjoy your meal just as good as the first time! To cook shrimp and scallops perfectly, watch for their color and texture. Shrimp should turn a bright pink. Scallops need a golden crust on both sides. For shrimp, it takes about 2-3 minutes per side. Scallops take the same time. Both should feel firm but not tough when done. Yes, you can prepare Lemon Garlic Shrimp & Scallop Pasta ahead of time. Cook the shrimp and scallops, but do not mix with pasta until serving. Store each part in separate containers. When ready to eat, reheat gently, then combine. This helps keep the textures just right. A crisp white wine works best with this dish. Look for a Sauvignon Blanc or Pinot Grigio. These wines balance the lemon and garlic flavors. They enhance the seafood taste without overpowering it. A light sparkling wine also adds a nice touch. Yes, you can simplify the cooking process. Start by cooking the pasta in a large pot. Once al dente, drain and set aside. In the same pot, sauté the scallops and shrimp. Add garlic next, then toss in the pasta. This cuts down on cleanup. To make this dish more kid-friendly, reduce the garlic and spice. You can serve the shrimp and scallops plain if needed. Consider adding a bit of cream for a richer sauce. Kids often enjoy creamy textures. Adjust flavors to suit their taste buds. For the full recipe, check out the complete guide. This blog post covered key ingredients and their roles in the dish. We discussed cooking steps to ensure perfect pasta, shrimp, and scallops. I shared tips for flavor and presentation, plus storage and reheating advice. With these insights, you can create a delicious Lemon Garlic Shrimp & Scallop Pasta at home. Enjoy experimenting with flavors and variations to make this dish your own!

Lemon Garlic Shrimp & Scallop Pasta Delightful Meal

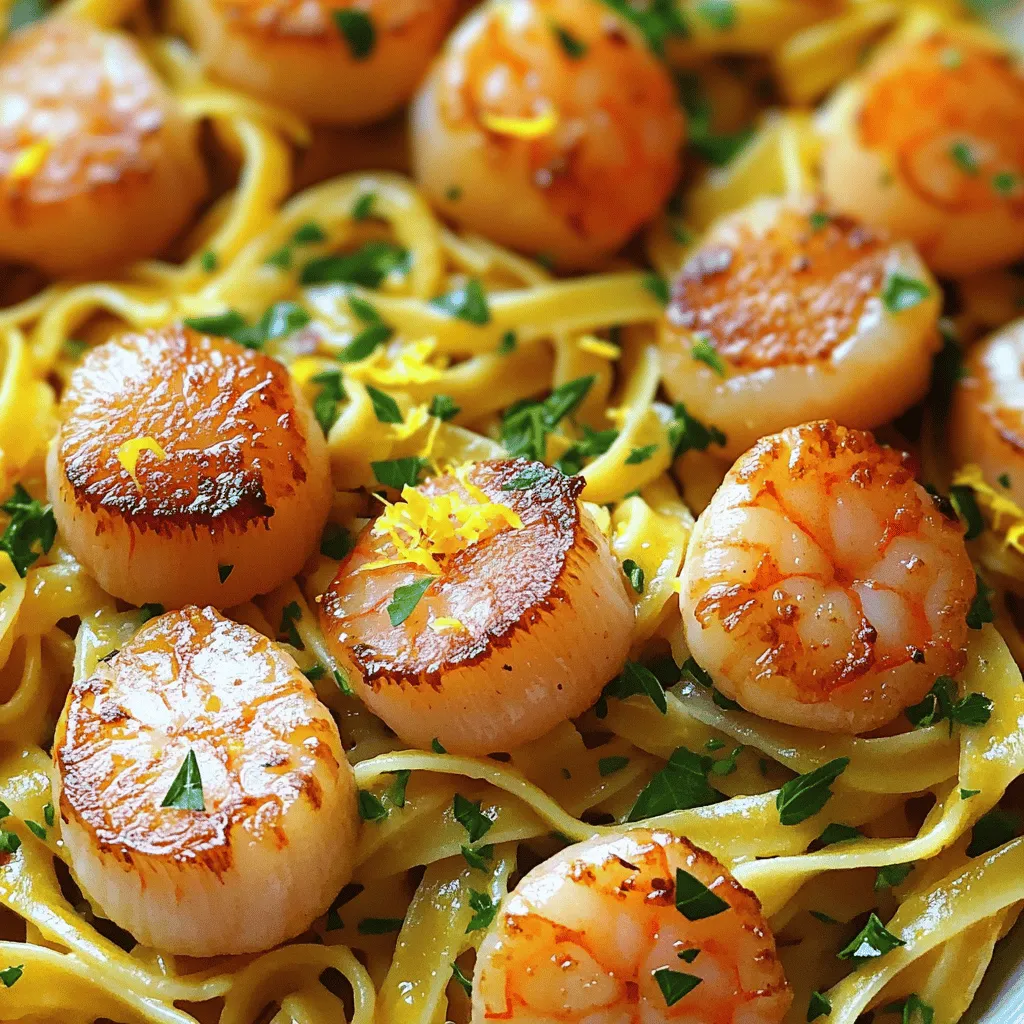
Welcome to a culinary adventure with my Lemon Garlic Shrimp & Scallop Pasta! If you love seafood, vibrant flavors, and

To make a delicious slow cooker pearl barley risotto, you'll need a few key ingredients. Here’s the complete list: - 1 cup pearl barley - 4 cups vegetable broth - 1 medium onion, finely chopped - 2 cloves garlic, minced - 1 cup mushrooms, sliced (cremini or button mushrooms work well) - 1 cup fresh spinach, chopped - 1/2 cup grated Parmesan cheese (or use nutritional yeast for a vegan option) - 2 tablespoons olive oil - 1 teaspoon dried thyme - 1 teaspoon dried oregano - Salt and pepper to taste - Fresh parsley, chopped (for garnish) Each ingredient plays an important role in the dish. Pearl barley gives the risotto its unique texture. The vegetable broth adds rich flavor, while onion and garlic provide a savory base. Mushrooms add depth, and spinach brings a fresh touch. Parmesan cheese adds creaminess, and herbs enhance the taste. Olive oil boosts richness, and salt and pepper round out the flavors. Feel free to adjust the herbs or add your favorite veggies. Cooking is all about making it your own! For the full recipe, check out the details above. Start by gathering your ingredients. You need: - 1 cup pearl barley - 4 cups vegetable broth - 1 medium onion, finely chopped - 2 cloves garlic, minced - 1 cup mushrooms, sliced - 1 cup fresh spinach, chopped - 1/2 cup grated Parmesan cheese - 2 tablespoons olive oil - 1 teaspoon dried thyme - 1 teaspoon dried oregano - Salt and pepper to taste - Fresh parsley, chopped Chop the onion and garlic first. This helps release their flavors. Slice the mushrooms next. You can use cremini or button mushrooms. Measure out the pearl barley and broth. Having everything prepped makes cooking easy. Now, it’s time to set up the slow cooker. Begin by adding the pearl barley, vegetable broth, chopped onion, minced garlic, and sliced mushrooms. Sprinkle in the thyme and oregano. Stir well so all the flavors mix. Next, drizzle the olive oil over the top. Season with salt and pepper. Stir gently to coat everything. Cover the slow cooker with its lid. Set it to low for 6-7 hours or high for 3-4 hours. The barley should be tender and creamy when done. About 30 minutes before the risotto finishes, stir in the chopped spinach and grated Parmesan cheese. Mix it well to combine. Cover the cooker again to let the spinach wilt. Once the risotto is ready, taste it and adjust the seasonings. Add more salt or pepper if needed. Serve hot, garnished with fresh parsley. For a special touch, serve it in deep bowls with a sprinkle of extra Parmesan. Enjoy your creamy risotto! For the full recipe, check out the details above. Achieving Creamy Consistency To get that creamy risotto, you must use enough liquid. Pearl barley absorbs a lot of broth, so use four cups as stated in the recipe. Stirring helps too, but not too much. The slow cooker does the work for you. Stirring Techniques While stirring is key, you do not need to stir often. Give it a gentle stir at the start and again 30 minutes before finishing. This way, you let the barley absorb flavors without breaking it down too much. Fresh vs. Dried Ingredients Fresh ingredients add brightness to your risotto. Use fresh spinach and mushrooms for the best taste. Dried herbs work well too, but fresh herbs can boost flavor significantly. Organic Options Opting for organic can make a big difference. Organic vegetables often have more flavor and fewer chemicals. Consider organic broth as well. It enhances the dish while keeping it clean and healthy. Altering for Higher Altitude If you live at a high altitude, your cooking time may need to change. You may need to add extra broth and increase the cooking time. Always check the barley for tenderness. Using Different Slow Cookers Not all slow cookers cook the same. Some run hot, while others run cooler. If your risotto is not cooking as expected, adjust the time. Keep an eye on the texture to find what works best for your model. For the full recipe, check the details above. Enjoy your cooking journey! {{image_4}} You can boost your risotto with proteins like chicken or tofu. For chicken, cut it into small pieces. Add the pieces in step one with the other ingredients. This will cook the chicken fully while the barley softens. If you prefer tofu, use firm tofu. Cut it into cubes and add it in the same step. Tofu will soak up all the flavors, adding a nice texture. Seafood is another tasty option. Shrimp or scallops work well. If using shrimp, add them during the last 30 minutes of cooking. This keeps them tender. For scallops, add them at the same time as the spinach. This way, they cook just right. Changing up your herbs can give the risotto a fresh taste. Try using fresh basil or rosemary instead of thyme and oregano. These herbs add a whole new layer of flavor. You can also mix different dried herbs. Just make sure not to overpower the dish. Broth variations can make a big difference, too. While vegetable broth is great, you can try chicken or beef broth for a heartier flavor. Each broth adds a unique taste to the risotto, making it richer and more satisfying. For vegetarians, cheese is a must for creaminess. If you want a vegan option, swap Parmesan with nutritional yeast. This gives a similar cheesy flavor without dairy. Adding more vegetables can increase nutrition. Think about bell peppers, peas, or zucchini. These veggies will add color and vitamins to your meal. Just chop them up and toss them in at the start. They will cook well and blend nicely into the risotto. For the complete recipe, check out the Full Recipe link. To store leftover risotto, let it cool to room temperature first. Place it in an airtight container. Refrigerate the risotto within two hours of cooking. It will last for about 3 to 4 days in the fridge. If you want to keep it longer, freezing is a great option. You can reheat the risotto in two ways: the microwave or the stovetop. For the microwave, place it in a bowl and cover it loosely. Heat in short bursts, stirring in between. For the stovetop, add a splash of broth to a pan and warm on low heat. Stir often to avoid burning. To restore creaminess, add a little more broth or a touch of olive oil as you reheat. To freeze risotto, use a freezer-safe container. Leave some space at the top for expansion. Risotto can last up to 3 months in the freezer. When you are ready to eat it, thaw it in the fridge overnight. Reheat using the stovetop method for best results. Always make sure it is heated all the way through before serving. - Quick Steps Recap Making Slow Cooker Pearl Barley Risotto is simple. Here’s how you do it: 1. Add 1 cup pearl barley, 4 cups vegetable broth, 1 medium onion (finely chopped), 2 cloves garlic (minced), and 1 cup mushrooms (sliced) into your slow cooker. 2. Sprinkle in 1 teaspoon dried thyme and 1 teaspoon dried oregano. Stir well. 3. Top with 2 tablespoons olive oil, then season with salt and pepper. Stir again. 4. Cover and cook on low for 6-7 hours or high for 3-4 hours until the barley is tender. 5. About 30 minutes before it’s done, add 1 cup fresh spinach (chopped) and 1/2 cup grated Parmesan cheese. Mix well. 6. Taste and adjust seasoning if needed. Serve hot with fresh parsley on top. - Comparison of Methods Yes, you can make risotto in a regular pot. The main difference is the cooking method. In a pot, you need to stir often. This helps release the starch in the barley for creaminess. In a slow cooker, you set it and forget it. You don’t stir as much. This method is easier and requires less attention. The flavors still develop well. Both methods will yield tasty risotto, but the slow cooker offers a hands-off approach. - Differences in Cooking and Flavor You can substitute pearl barley for rice, but they cook differently. Pearl barley takes longer to cook than most rice. It can take about 30-40 minutes in a pot and 6-7 hours in a slow cooker. Flavor-wise, pearl barley has a nutty taste and chewy texture. Rice is softer and milder. If you want a heartier dish, pearl barley is great. If you prefer lighter risotto, use rice. Each brings its unique charm to your plate. This blog post covered how to make Slow Cooker Pearl Barley Risotto. We explored each ingredient, from pearl barley to flavorful herbs. You learned step-by-step instructions for preparation and cooking. Tips for perfecting creamy risotto helped you understand ingredient quality. Variations showed how to add proteins and create unique flavors. I also provided storage tips for leftovers. In the end, making this risotto can be easy and fun. Try it and enjoy the delicious results!

Savory Slow Cooker Pearl Barley Risotto Recipe

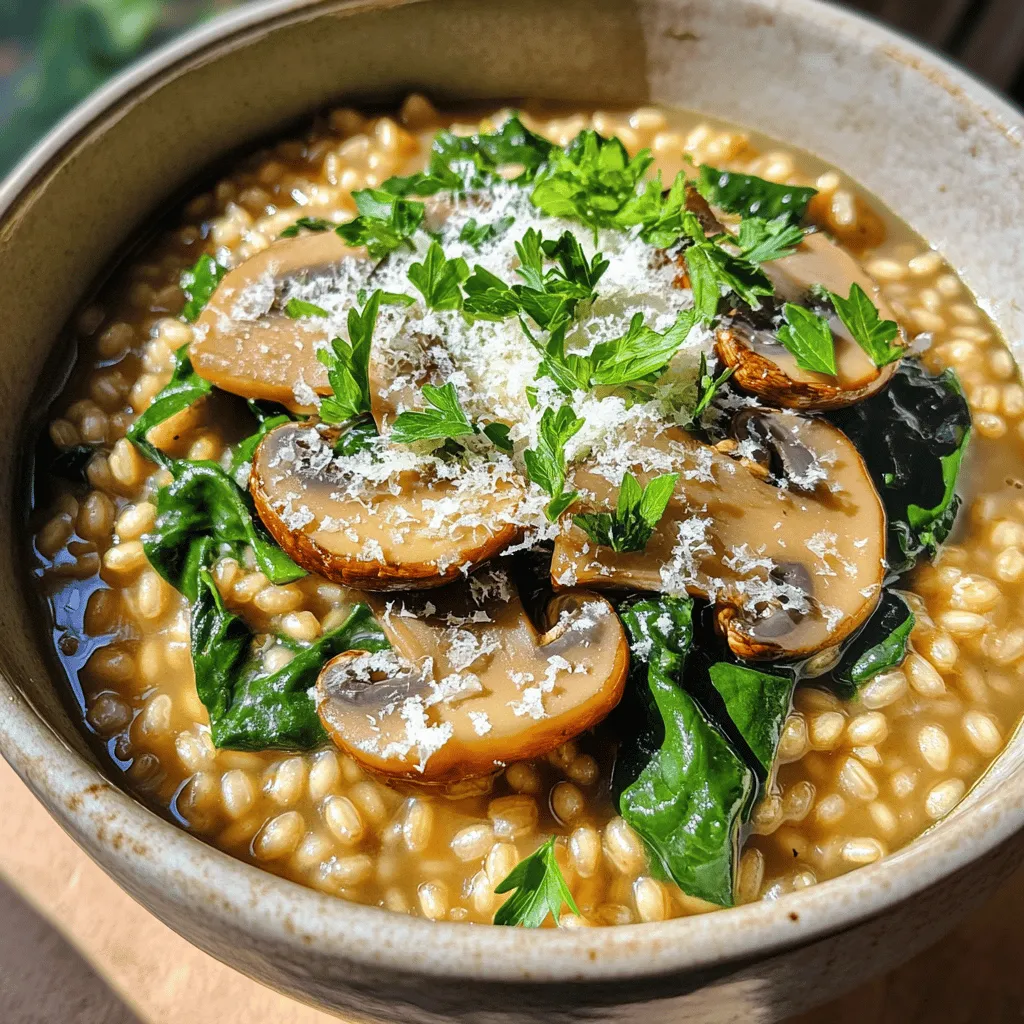
Are you ready to elevate your dinner game? This Savory Slow Cooker Pearl Barley Risotto recipe combines rich flavors with

- 1 medium cauliflower, cut into bite-sized florets - 1 cup all-purpose flour - ½ cup cornflour (cornstarch) - 1 teaspoon ginger-garlic paste - 1 teaspoon red chili powder (adjust to taste) - ½ teaspoon turmeric powder - Salt, to taste - Water, as needed for batter consistency - Oil, for deep frying - 1 tablespoon vegetable oil (for sautéing the vegetables) - 1 medium onion, finely chopped - 1 bell pepper (any color), diced - 2-3 green chilies, slit lengthwise - 3 tablespoons soy sauce - 1 tablespoon tomato ketchup - 1 tablespoon vinegar (white or apple cider) - 1 teaspoon sugar (to balance flavors) - 2 green onions, finely chopped (for garnish) - 1 teaspoon sesame seeds (optional, for garnish) You can easily swap out certain ingredients for better options. If you want a gluten-free meal, use rice flour instead of all-purpose flour. For a low-calorie version, you can bake the cauliflower instead of frying it. If you prefer a vegan option, make sure your soy sauce is vegan-friendly and use a plant-based oil for frying. Using fresh cauliflower makes a big difference. Fresh cauliflower has a better taste and texture. It stays crispier when cooked. Frozen cauliflower can work in a pinch, but it may turn mushy when cooked. If you choose frozen, thaw it first and pat it dry to remove excess water. This will help keep your Gobi Manchurian crispy. To make the perfect batter, start with a large mixing bowl. Add 1 cup of all-purpose flour and ½ cup of cornflour. Then, mix in 1 teaspoon of ginger-garlic paste, 1 teaspoon of red chili powder, and ½ teaspoon of turmeric powder. Don't forget to add salt to taste! Gradually pour in water, stirring as you go. You want your batter to be thick yet smooth. It should coat the cauliflower well but not drip off too much. Heat oil in a deep frying pan over medium heat. Aim for about 350°F (175°C). Dip each cauliflower floret into your batter, letting any excess drip off. Place the florets carefully into the hot oil. Fry them in batches to avoid crowding. Cook for about 4-5 minutes until they turn golden brown and crispy. Once fried, transfer them to a plate lined with paper towels to soak up extra oil. Grab another pan and heat 1 tablespoon of vegetable oil over medium heat. Add finely chopped onions and diced bell peppers. Sauté them for about 3-4 minutes. You want them tender and slightly caramelized but not mushy. Add slit green chilies and cook for another minute. This step adds a nice kick to your dish without overpowering the flavor. Now, you’re ready to combine everything in the next step! To keep your Gobi Manchurian crispy, follow these tips: - Use cold water for your batter. This helps create a light texture. - Avoid overcrowding the pan while frying. Cook in small batches. - Drain fried florets on paper towels to absorb extra oil. - Serve immediately for the best crunch. You can adjust the flavor to fit your taste: - Add more red chili powder for heat. Start with small amounts. - Mix in garlic or ginger for extra depth. Fresh ingredients work best. - Use different sauces, like chili sauce, for a twist. - Taste as you go, and balance with sugar or vinegar. Watch out for these common problems: - Don’t skip the soaking step for cauliflower. It helps remove dirt. - Make sure the oil is hot enough. The right temperature is key. - Avoid using too much batter. A light coat is best. - Don't rush the cooking. Let the flavors blend well in the pan. For a complete guide, check out the Full Recipe! {{image_4}} Gobi Manchurian is a great dish to play with flavors. You can explore variations like chili garlic or sweet and sour. For a chili garlic twist, add more garlic and chili paste to the sauce. This makes it spicy and bold. If you prefer sweet and sour, mix soy sauce and vinegar with sugar and ketchup. This will give a fun, tangy kick to the dish. Pairing Gobi Manchurian with rice makes it a hearty meal. You can serve it with fried rice or noodles. Fried rice adds texture and flavor. Toss in some peas and carrots for extra crunch. Noodles are another good choice. They soak up the sauce well and taste great with the crispy cauliflower. You will enjoy the combination! Making Gobi Manchurian vegan is easy. Replace the soy sauce with tamari for a gluten-free option. For a vegetarian version, use vegetable oil instead of any animal-based fats. If you want a creamier sauce, add coconut milk or cashew cream. This adds richness and flavor without losing the fun of Gobi Manchurian. For the full recipe, check out Gobi Manchurian Delight above! To keep your Gobi Manchurian fresh, store leftovers in an airtight container. This helps prevent moisture loss and keeps the flavors intact. Always let it cool before sealing. It will last about 2-3 days in the fridge. When you’re ready to eat, check for any signs of spoilage. If it smells off, it's best to toss it. Reheating Gobi Manchurian can be tricky. You want to keep that crispy texture. The best way is to use an oven. Preheat your oven to 350°F (175°C). Spread the Gobi Manchurian on a baking sheet. Heat for about 10-15 minutes, turning halfway. This method revives the crunchiness. If you're short on time, a microwave works, but it won't be as crispy. Just heat for 1-2 minutes. Freezing Gobi Manchurian is easy and great for meal prep. First, let it cool completely. Then, place it in an airtight freezer bag. Remove as much air as possible before sealing. It can stay frozen for up to 3 months. To defrost, move it to the fridge overnight. For best results, reheat in the oven after thawing. This keeps it tasty and crispy. Enjoy your delightful treat later! Gobi Manchurian is made from simple yet tasty ingredients. Here’s a breakdown of what you need: - 1 medium cauliflower, cut into bite-sized florets - 1 cup all-purpose flour - ½ cup cornflour (cornstarch) - 1 teaspoon ginger-garlic paste - 1 teaspoon red chili powder (adjust to taste) - ½ teaspoon turmeric powder - Salt, to taste - Water, as needed for batter consistency - Oil, for deep frying - 1 tablespoon vegetable oil (for sautéing) - 1 medium onion, finely chopped - 1 bell pepper (any color), diced - 2-3 green chilies, slit lengthwise - 3 tablespoons soy sauce - 1 tablespoon tomato ketchup - 1 tablespoon vinegar (white or apple cider) - 1 teaspoon sugar (to balance flavors) - 2 green onions, finely chopped (for garnish) - 1 teaspoon sesame seeds (optional, for garnish) These ingredients blend together to create a crispy, flavorful dish. Gobi Manchurian can last in the fridge for about 3 to 4 days. To store it safely, place it in an airtight container. Make sure it cools down completely before sealing the container. This helps keep it fresh and tasty. Yes, you can make Gobi Manchurian spicy! Here are a few tips: - Add more red chili powder to your batter. - Include chopped green chilies when sautéing vegetables. - Use spicy soy sauce or hot chili sauce in the sauce mix. These tweaks will bring the heat you crave while keeping the dish delicious. For the full recipe, check out [Full Recipe]. In this blog post, we explored Gobi Manchurian, covering ingredients, preparation, and serving ideas. I shared tips for achieving a crispy texture and enhancing flavor. Remember, you can customize the recipe to fit your diet and preferences. Storing leftovers properly will keep them fresh for later. Whether you prefer a spicy kick or an Indo-Chinese twist, Gobi Manchurian is versatile and delicious. Now, go and enjoy this tasty dish with friends and family!

Gobi Manchurian Crispy Cauliflower Delight Recipe

If you crave something crispy, rich, and bursting with flavor, Gobi Manchurian is your answer! This delightful dish combines fried

- 1 pound pizza dough (store-bought or homemade) - 1/2 pound ribeye steak, thinly sliced against the grain - 1 medium onion, thinly sliced - 1 green bell pepper, thinly sliced - 2 cups provolone cheese, shredded - 2 tablespoons olive oil, divided - 2 cloves garlic, minced - 1 teaspoon Worcestershire sauce - Salt and freshly ground black pepper, to taste - 1 egg, beaten (for egg wash) - 1 tablespoon Italian seasoning (optional) For a great Philly cheesesteak stromboli, you need fresh, quality ingredients. The right pizza dough gives you that perfect crust. I often use store-bought for ease, but homemade is great too. Ribeye steak is the star here. It offers rich flavor and tenderness. Slice it thin against the grain for the best bite. Next, the vegetables! Onions and bell peppers add sweetness and crunch. Don't forget garlic—it brings depth to your filling. Provolone cheese melts beautifully and adds that gooey texture we love. Seasonings like Worcestershire sauce and salt bring everything together. They enhance the natural flavors of the meat and veggies. - Italian seasoning, marinara sauce for serving While the main ingredients shine, optional ones can elevate your dish. I like to sprinkle Italian seasoning on top for extra flavor. A side of marinara sauce makes for a tasty dip. These little touches can make your stromboli even better! For the full recipe, check the link. - Preheat your oven to 400°F (200°C). - Line a baking sheet with parchment paper to avoid sticking. - In a large skillet, heat 1 tablespoon of olive oil over medium-high heat. - Add the thinly sliced ribeye steak. - Season it with salt, pepper, and Worcestershire sauce. - Sauté for about 2-3 minutes until it is browned but still slightly rare. - Remove the steak from the skillet and set it aside on a plate. - Without cleaning the skillet, add the remaining tablespoon of olive oil. - Once hot, add the sliced onions and green bell peppers. - Add the minced garlic at this time too. - Sauté the mixture for 5-7 minutes, stirring occasionally. - Cook until the vegetables are tender and slightly caramelized. - Return the steak to the skillet with the sautéed vegetables. - Stir to combine everything well. - Allow it to cook together for another 2 minutes. - Take the skillet off the heat. - Add the shredded provolone cheese to the steak-vegetable mix. - Stir until the cheese is melted and everything is evenly mixed. - On a lightly floured surface, roll out the pizza dough into a rectangle. - Aim for about 14x10 inches in size. - Spoon the steak and cheese mixture down the center of the dough. - Leave about an inch of space on either side. - Carefully fold the sides of the dough over the filling. - Roll up the dough tightly like a burrito. - Pinch the ends of the dough to seal it securely. - Place the stromboli seam-side down on the prepared baking sheet. - Brush the top with the beaten egg for a golden finish. - If you like, sprinkle some Italian seasoning on top. - Bake for 25-30 minutes until golden brown and fully cooked. - Once baked, let it cool for a few minutes. - Slice it into generous portions and serve warm. For the full recipe, don't forget to check the ingredients and instructions for a delicious experience! For a tasty Philly cheesesteak, use great seasonings. Always season the steak well. Add salt and black pepper to the meat while cooking. Worcestershire sauce adds depth. You can also sprinkle in some Italian seasoning for extra flavor. For the veggies, a pinch of salt will help bring out their sweetness. This mix will create a rich taste in every bite. Rolling and sealing your dough is key to a great Stromboli. Start by lightly flouring your surface. This keeps the dough from sticking. Roll your pizza dough into a big rectangle, about 14x10 inches. Next, place your filling down the center. Leave about an inch of space on each side. When you fold the sides over, do it gently. Then, roll the dough tightly like a burrito. Pinch the ends well to keep the filling inside. A beautiful Stromboli makes it even more fun to eat! After baking, let it cool for a few minutes. This helps set the filling. Slice it into big pieces to showcase that cheesy goodness. For a finishing touch, brush a little olive oil on top before baking. You can also sprinkle some Italian seasoning for color and flavor. Serve it with warm marinara sauce for dipping. It not only looks good but tastes amazing too. {{image_4}} You can change the meat and cheese for your Stromboli. Try chicken, pork, or turkey instead of ribeye. Each meat gives a different taste. For cheese, swap provolone for mozzarella or cheddar. Mixing cheeses can add more flavor. Don't forget to add spices to match your choice of meat! To make a veggie Stromboli, skip the meat. Use mushrooms, zucchini, and spinach for a hearty mix. Add plenty of cheese for creaminess. You can also use plant-based cheese for a dairy-free option. Season well with salt, pepper, and Italian herbs for a tasty twist. Different places have their own styles of Stromboli. In some areas, you might find Stromboli filled with pepperoni and mozzarella. Others may use ricotta and spinach. Each region brings unique flavors and ingredients. Explore these styles to find your favorite combination. To store leftover Stromboli, wrap it tightly in plastic wrap or foil. This keeps it fresh. Place it in an airtight container to avoid moisture loss. You can store it in the fridge for up to 3 days. When you're ready to eat, just take it out and reheat. If you want to freeze Stromboli, let it cool completely first. Wrap it in plastic wrap, then foil. This helps prevent freezer burn. You can freeze it for up to 3 months. When you want to enjoy it again, just thaw it in the fridge overnight before reheating. To reheat Stromboli for the best texture and taste, preheat your oven to 350°F (175°C). Place the Stromboli on a baking sheet and cover it loosely with foil. Heat for about 15-20 minutes. This keeps it moist and warm without drying out. For a crispier crust, remove the foil for the last 5 minutes of heating. Enjoy your delicious leftovers! To make pizza dough, you need a few simple ingredients. Start with: - 2 cups all-purpose flour - 1 packet (2 ¼ teaspoons) instant yeast - 1 teaspoon salt - ¾ cup warm water - 1 tablespoon olive oil 1. Mix the dry ingredients in a bowl. 2. Add the warm water and olive oil. 3. Stir until a dough forms. 4. Knead the dough on a floured surface for about 5 minutes. 5. Let it rise for 30 minutes in a warm place, covered with a cloth. This dough is easy and quick to make. You can use it right away or store it for later. Yes, you can use other cuts of steak. If you can't find ribeye, here are some options: - Sirloin - Flank steak - Chuck roast Each cut has its unique flavor and texture. Sirloin is leaner, while flank steak can add a nice chew. Just slice them thinly against the grain for the best result. Dipping sauces can enhance your Stromboli experience. Here are a few great options: - Marinara sauce - Garlic butter - Ranch dressing - Cheese sauce These sauces add flavor and richness. You can try different sauces based on your taste preferences. Stromboli can last in the fridge for about 3 to 4 days. To keep it fresh: - Wrap it tightly in plastic wrap or foil. - Store it in an airtight container. This helps maintain its taste and texture. If you want to keep it longer, consider freezing it for up to 3 months. This blog post covers making a delicious stromboli with ribeye steak, peppers, and cheese. You learned how to prepare the ingredients, cook them, and form the stromboli before baking it. I shared tips for flavor, dough handling, and making your dish look great. You also saw variations to try and how to store leftovers. Now, all that's left is to gather your ingredients and enjoy this tasty dish. Happy cooking!

Perfect Philly Cheesesteak Stromboli Easy Recipe Guide

If you crave a tasty twist on the classic Philly cheesesteak, you’re in for a treat! In this easy recipe

- 1 pound beef steak (ribeye or sirloin), thinly sliced - 1 medium onion, thinly sliced - 1 green bell pepper, thinly sliced - 2 cups shredded provolone cheese - 1 package egg roll wrappers - 2 tablespoons olive oil - Salt and pepper to taste - 1 teaspoon garlic powder - 1 teaspoon Italian seasoning - Oil for frying (vegetable or canola) These ingredients create the perfect blend of flavors. The beef gives a meaty base. The onion and bell pepper add sweetness and crunch. Provolone cheese melts into a creamy, dreamy filling. To make these egg rolls, you need a few key tools: - Large skillet for cooking - Slotted spoon for frying - Deep skillet or frying pan for frying - Clean, dry surface for wrapping - Paper towels for draining excess oil Having the right equipment makes cooking easier. It helps you achieve the best results. Seasoning is key to great flavor. Here are some tips: - Use salt and pepper to enhance the taste. - Garlic powder adds a nice depth. - Italian seasoning brings in herbs like oregano and basil. Feel free to adjust the spices to your liking. Experimenting with flavors can lead to delicious surprises. You can even try adding a pinch of cayenne for some heat. For the full recipe, check out the link above! Start by heating 2 tablespoons of olive oil in a large skillet over medium heat. Once the oil is hot, add the thinly sliced onion and green bell pepper. Cook them for about 5-7 minutes, stirring often. You want the veggies to soften and turn a nice golden color. This step adds great flavor to your filling. Next, add 1 pound of thinly sliced beef steak to the skillet. Season it with salt, pepper, 1 teaspoon of garlic powder, and 1 teaspoon of Italian seasoning. Stir the mixture frequently for about 3-4 minutes. Make sure the beef turns brown and no pink is left. Once done, take the skillet off the heat and fold in 2 cups of shredded provolone cheese. Stir until the cheese melts and mixes well with the beef and veggies. Now it's time to put everything together. Lay an egg roll wrapper on a clean surface, with one corner facing you. Spoon 2-3 tablespoons of the cheesy beef filling into the center. Fold the bottom corner over the filling, then tuck in the two side corners. Roll it tightly from the bottom to the top. Seal the edge with a drop of water. Repeat this until all wrappers are filled. For frying, heat oil in a deep skillet or frying pan to about 2 inches deep. Keep it on medium-high heat. When the oil is hot, carefully add the egg rolls in batches. Don't overcrowd the pan! Fry them for 3-4 minutes on each side. Look for a nice golden brown color. Use a slotted spoon to take them out and place them on paper towels to soak up extra oil. This will keep them crispy. Refer to the Full Recipe for specific measurements and additional tips. To get that perfect crunch, the oil must be hot. Heat the oil to 350°F. If you don’t have a thermometer, drop a small piece of wrapper in. It should sizzle right away. Fry in small batches, so the temperature stays high. This helps the egg rolls crisp up nicely. Once golden brown, place them on paper towels to absorb extra oil. This step keeps them crunchy. Melting cheese is key to a great filling. Use shredded provolone for easy melting. Mix it into the warm beef and vegetables. Turn off the heat first, and stir well. This helps the cheese melt evenly and bind all the flavors together. For extra creaminess, you can also blend in a bit of cream cheese. It makes a rich, gooey filling that you’ll love. Serve these egg rolls hot for the best taste. They pair well with a variety of dips. Try marinara, ranch, or spicy aioli for a flavor boost. You can also add a side salad or some fresh veggies for crunch. These egg rolls make a great snack or a fun meal. Check out the Full Recipe for more details! {{image_4}} You can switch up the meat in these egg rolls. Chicken or pork works great. Use thinly sliced chicken breast or pork tenderloin for tasty options. If you prefer a veggie choice, try mushrooms, zucchini, or tofu. These ingredients can give you a hearty filling with less meat. Just sauté them the same way as beef. Enjoy the same cheesy goodness! While provolone is classic, you can explore other cheeses too. Creamy mozzarella adds a nice stretch. Cheddar gives a sharp taste. Pepper jack adds spice for a kick. Mix and match these cheeses. This way, you can create a unique flavor each time you make these egg rolls. Don’t be shy to experiment! Dipping sauces can take your egg rolls to the next level. Marinara is a classic choice. It complements the cheese and meat well. For something creamy, ranch dressing is a hit. Try spicy aioli for a zesty flavor. You could also mix soy sauce with a touch of honey for a sweet and salty twist. The right sauce makes each bite even more enjoyable. For the full recipe, check out the complete details above! To store leftover egg rolls, let them cool completely. Place them in an airtight container. You can keep them in the fridge for up to three days. If you want to store them longer, consider freezing. For the best taste, reheat your egg rolls in the oven. Preheat your oven to 375°F (190°C). Place the egg rolls on a baking sheet and heat for about 10-12 minutes. This method keeps them crispy. You can also use an air fryer for great results. Set it to 350°F (175°C) and heat for 5-7 minutes. If you want to freeze them, wrap each egg roll tightly in plastic wrap. Then, place them in a freezer bag. They will stay fresh for about two months. When you are ready to eat, there’s no need to thaw. Just fry them straight from the freezer for a quick snack. For the full recipe, check the earlier section! Yes, you can prepare the filling in advance. Cook the beef and veggies, then mix in the cheese. Let it cool, then store it in an airtight container. You can keep it in the fridge for up to two days. When ready, assemble and fry the egg rolls. This helps save time on busy days. I love serving these egg rolls with a variety of sauces. Here are some great choices: - Marinara sauce for a classic touch - Creamy ranch for a cool dip - Zesty spicy aioli for some heat Feel free to get creative! You can try BBQ sauce or even a sweet chili sauce. Leftover egg rolls can last about three to four days in the fridge. Store them in an airtight container. When you're ready to eat, reheat them in the oven for a crispy texture. Avoid microwaving as it can make them soggy. For best results, fry them again for a few minutes. For the full recipe, check out the details above! You learned how to make tasty Cheesy Philly Cheesesteak Egg Rolls. We covered key ingredients, spices, and the best equipment for success. You followed simple steps for preparing the filling, cooking beef, and assembling the rolls. Now, remember the tips for a crunchy bite and melted cheese. You can also explore fun variations with different proteins, cheeses, and dipping sauces. With proper storage and reheating tips, enjoy these rolls anytime. Dive in, have fun, and impress your friends with this delicious snack!

Cheesy Philly Cheesesteak Egg Rolls Crunchy Delight

If you love cheesy goodness and crunchy bites, you’ll adore my Cheesy Philly Cheesesteak Egg Rolls. Imagine crispy, golden wraps

- 8 oz rotini pasta - 1 cup cooked lump crab meat - 1/2 cup cherry tomatoes, halved - 1/2 cup cucumber, diced - 1/4 cup red onion, finely chopped - 1/4 cup bell pepper, diced (preferably red or yellow) - 1/4 cup fresh parsley, chopped The main ingredients for this crab pasta salad create a bright and tasty dish. Rotini pasta holds the dressing well and adds fun texture. The crab meat brings a sweet flavor. Fresh veggies like cherry tomatoes and cucumbers add crunch and color. Red onion and bell pepper add a bit of zest. Fresh parsley gives a nice finish. - 1/4 cup mayonnaise - 2 tablespoons Greek yogurt - 1 tablespoon Dijon mustard - 1 tablespoon fresh lemon juice - Salt and pepper to taste The dressing is simple but full of flavor. Mayonnaise adds creaminess, while Greek yogurt makes it lighter. Dijon mustard gives a little kick. Fresh lemon juice brightens everything up. Don’t forget to season with salt and pepper to balance the flavors. - 1/2 teaspoon Old Bay seasoning - Additional garnishes like lemon wedges or extra parsley Old Bay seasoning is a classic touch for crab dishes. It adds a warm, spicy flavor that pairs well with seafood. You can also use extra garnishes to make the dish look pretty and fresh. Try adding lemon wedges or extra parsley on top for a bright look. For the full recipe, check out the detailed steps to make this delicious crab pasta salad. To start, bring a large pot of salted water to a boil. Add 8 ounces of rotini pasta once the water is bubbling. Cook the pasta until it is al dente, which usually takes about 8 to 10 minutes. After cooking, drain the pasta in a colander. Rinse it under cold water to stop the cooking process and cool it down. This step helps prevent the pasta from sticking together. While the pasta cools, you can prepare the dressing. In a small bowl, mix together 1/4 cup of mayonnaise, 2 tablespoons of Greek yogurt, and 1 tablespoon of Dijon mustard. Add 1 tablespoon of fresh lemon juice for a zesty kick. If you like, sprinkle in some Old Bay seasoning. Whisk everything together until smooth. Season with salt and pepper to taste. In a large bowl, combine the cooled rotini pasta, 1 cup of cooked lump crab meat, 1/2 cup of halved cherry tomatoes, 1/2 cup of diced cucumber, 1/4 cup of finely chopped red onion, and 1/4 cup of diced bell pepper. I prefer red or yellow bell pepper for color. Toss these ingredients gently to mix them well. The salad should look bright and inviting. Now it's time to dress the salad. Pour your prepared dressing over the pasta and vegetables. Use a spatula to gently toss everything together. Aim to coat all the ingredients evenly with the creamy dressing. Cover the salad with plastic wrap or a lid. Place it in the fridge for at least 30 minutes. This chilling time is crucial. It helps the flavors blend and taste even better. You can serve the salad chilled or at room temperature, depending on what you like. For the full recipe, check the complete list of steps and ingredients. To avoid mushy pasta, start with boiling water. Add salt to the water for flavor. Cook the rotini according to the package time, usually 8-10 minutes. Test it a minute early. You want the pasta to be al dente, meaning it should have a slight bite. After cooking, drain the pasta and cool it quickly. Rinse it under cold water to stop the cooking process. This keeps your pasta firm and ready for mixing. To boost flavor, taste your dressing before using it. You can add more lemon juice for brightness. A pinch of salt or pepper can enhance the taste as well. If you like spice, consider adding Old Bay seasoning. It gives a nice kick. Mix the dressing thoroughly to ensure even flavor. Adjust it to suit your taste buds. For a beautiful display, use a clear glass bowl. It shows off the bright colors of the salad. Garnish with fresh parsley and lemon wedges. This adds a nice touch and makes it look fancy. Serve chilled for a refreshing dish or at room temperature. Your guests will enjoy the visual appeal as much as the taste. {{image_4}} You can change the proteins and veggies in this salad. If crab isn't available, try shrimp or canned tuna. Both options add great flavor. For a veggie twist, swap in diced avocado or cooked corn. These ingredients keep the salad fresh and colorful. You can mix up the dressing to fit your taste. Add a splash of hot sauce for heat or swap mayonnaise for a vinaigrette. A simple olive oil and vinegar mix works well too. Experiment with herbs like dill or basil for a new flavor. If you need to make this salad gluten-free, use gluten-free pasta. Many options are available now. For a dairy-free version, skip the yogurt and use more lemon juice. This keeps the salad creamy and bright. These simple swaps make it easy to enjoy crab pasta salad for everyone. To keep your crab pasta salad fresh, place it in an airtight container. Ensure the lid seals tightly. Store the salad in the fridge right after serving. This helps maintain its crispness and flavor. If you have a lot of salad, divide it into smaller containers. This way, you can grab just what you need. I do not recommend freezing crab pasta salad. The texture of the pasta and crab can change. If you must freeze it, use a freezer-safe container. Thaw it in the fridge overnight before serving. The salad may lose some freshness, but it can still taste good. In the fridge, crab pasta salad lasts about 3 to 4 days. After that, the ingredients may spoil. Always check for any off smells or changes in texture. If it looks or smells strange, it’s best to toss it. Keeping track of when you made it can help you enjoy it at its best. For the full recipe, check out the detailed instructions above. Yes, you can use canned crab meat. However, it may not taste as fresh. Fresh crab meat has a sweeter, cleaner flavor. Canned crab often has added salt and can be softer in texture. If you choose canned crab, look for a high-quality brand. Rinse it well to reduce excess salt. This step helps balance the flavors in your Crab Pasta Salad. Crab Pasta Salad can last about 3 days in the fridge. Store it in an airtight container to keep it fresh. Always check for signs of spoilage before eating. If you see any discoloration or an off smell, it is best to throw it away. Enjoy your salad within the first couple of days for the best taste and quality. Crab Pasta Salad pairs great with many sides. You can serve it with crusty bread for a filling meal. A light green salad also complements it nicely. For a simple touch, add lemon wedges to brighten the flavors. You might even like to pair it with a chilled white wine. These options enhance the overall dining experience. Yes, Crab Pasta Salad is perfect for meal prep. It holds up well in the fridge for a few days. You can make it ahead and enjoy it for lunch or dinner. Just be sure to keep the dressing separate if you want it extra fresh. Mixing it right before eating helps keep the pasta and veggies crisp. This salad is a great choice for busy days. Enjoy making it ahead! Crab Pasta Salad blends rotini, fresh crab, and vibrant veggies in a tasty dish. With a simple dressing made from mayo, yogurt, and lemon juice, you can create flavor in every bite. Remember to chill the salad for the best taste. Feel free to explore variations and make it your own. By following these steps, you'll enjoy a refreshing meal that's easy to share. This dish not only satisfies cravings but also impresses friends and family. Keep your leftovers fresh and tasty for days to come!

Crab Pasta Salad Fresh and Flavorful Delight

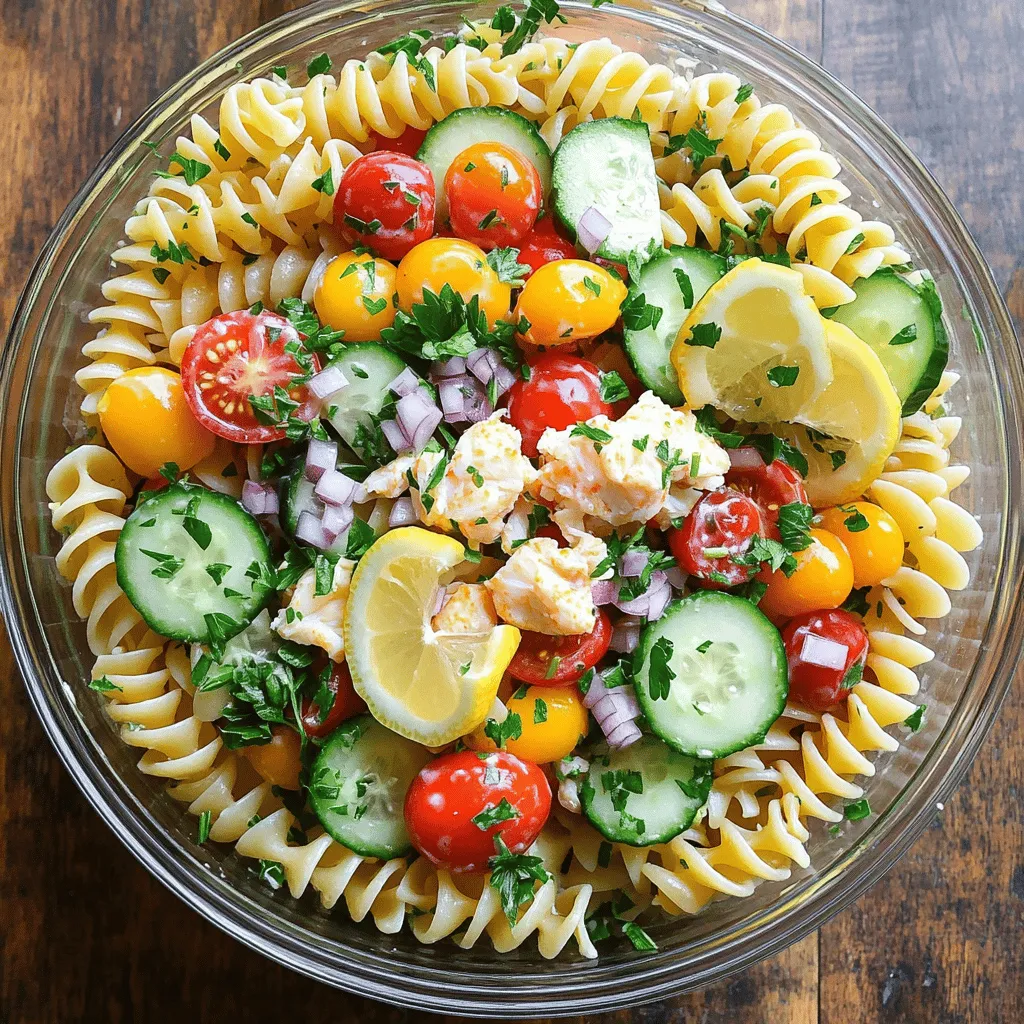
Looking for a fresh and flavorful dish that impresses with every bite? My Crab Pasta Salad is just what you

- 12 oz frozen pierogi (filled with potato and cheese) - 8 oz turkey sausage, sliced into rounds - 1 medium onion, finely chopped - 2 cloves garlic, minced - 1 cup heavy cream - 1 cup vegetable broth - 1 tablespoon mustard (Dijon or yellow) - 1 teaspoon smoked paprika - Salt and black pepper to taste - 2 tablespoons olive oil - 1 cup fresh spinach, washed and roughly chopped - Fresh parsley, chopped for garnish When I make this creamy pierogi and turkey sausage skillet, I always start with the main ingredients. Frozen pierogi are a lifesaver. They save time and still taste great. I love using turkey sausage for its lighter flavor. The onion adds sweetness, making everything even better. Next, I add garlic. Fresh garlic brings a strong taste that everyone loves. Heavy cream makes the sauce rich and smooth. I use vegetable broth to lighten it up, adding depth without being too heavy. For spices, mustard gives a nice tang. Smoked paprika adds warmth and depth. Salt and black pepper are key to make the flavors pop. Finally, olive oil is a must for cooking. The fresh spinach adds color and nutrition. I always finish with chopped parsley for a fresh touch. This mix of ingredients creates a dish that is both comforting and exciting. You can find the full recipe in the earlier section. - Heat olive oil in a large skillet. - Add turkey sausage and sauté until browned. - Set aside cooked sausage on a plate. First, grab a big skillet and warm the olive oil over medium heat. Once hot, toss in the sliced turkey sausage. Cook it for about 5 to 7 minutes. You want it to be nicely browned, which adds flavor. After that, take the sausage out and place it on a plate. - Add onion to the skillet and cook until translucent. - Incorporate minced garlic and sauté until fragrant. Next, in the same skillet, add the finely chopped onion. Cook it for about 4 to 5 minutes until it turns soft and translucent. This step makes the onion sweet. After that, add the minced garlic. Stir it for about a minute until it smells nice, but be careful not to burn it. - Pour in heavy cream and vegetable broth. - Stir in mustard and smoked paprika, adjust heat to simmer. Now it’s time to make the sauce. Pour in the heavy cream and vegetable broth, stirring to mix well. Turn the heat up a bit and bring it to a gentle simmer. Then, add in the mustard and smoked paprika. Let it simmer for about 3 to 4 minutes. This thickens the sauce and makes it very creamy. - Submerge frozen pierogi in the sauce. - Cover skillet and cook until heated through. Now, gently add the frozen pierogi into the sauce. Make sure they are well submerged. Cover the skillet and cook for about 8 to 10 minutes. Stir occasionally. You want the pierogi to be heated through and tender. - Add spinach and turkey sausage back to skillet. - Stir until spinach is wilted and evenly mixed. After the pierogi are ready, it’s time for the final touch. Add the fresh spinach and the cooked turkey sausage back into the skillet. Stir gently until the spinach wilts and mixes well with the other ingredients. - Taste and adjust seasoning. - Garnish with chopped parsley before serving. Finally, taste the dish and add salt or pepper if needed. Serve it hot, and don’t forget to sprinkle some chopped parsley on top to make it look nice. You can find the full recipe in the article for more details! - Ensure even cooking of pierogi by stirring occasionally. This keeps them from sticking. - Use high-quality ingredients for best flavor. Fresh produce and high-grade meats make a difference. - Experiment with different types of sausage for varied taste. Chicken or pork sausage can change the flavor profile. - Add grated cheese for extra creaminess and flavor. Cheddar or mozzarella blends well with the dish. - Serve in bowls with a drizzle of cream sauce. It enhances the look and makes it more appealing. - Add a sprinkle of crushed red pepper flakes for color. This gives a nice visual contrast and a hint of spice. For the full recipe, check the details provided earlier. {{image_4}} You can easily make this dish vegetarian. Simply swap the turkey sausage with a plant-based alternative. Options like tofu sausage or lentils work well. These substitutes still give you a hearty meal. To boost flavor, add fresh herbs. Dill and thyme can brighten the dish. You can also toss in vegetables for more texture. Bell peppers and mushrooms are great choices. They add color and taste to the skillet. You can change the sauce for a lighter touch. Swap heavy cream with Greek yogurt. This option still keeps the creaminess. You can also experiment with different mustards. Try spicy or honey mustard for new flavors. Each option brings a unique twist to the dish. Store any leftovers in an airtight container in the refrigerator. This keeps the dish fresh. I recommend eating leftovers within three days for the best taste. You can freeze this dish for later use. Make sure the sauce is slightly undercooked before freezing. This helps it hold its creamy texture when you reheat it. When you’re ready to enjoy your meal again, reheat it on the stovetop over low heat. This way, you keep the creaminess intact. If the sauce seems thick, add a splash of broth or cream to bring it back to life. This small trick can make a big difference! Cook for 8-10 minutes until heated through and tender. This time ensures they warm up nicely without getting mushy. Stir occasionally to keep them coated in the creamy sauce. Yes, you can prepare it a day ahead and reheat before serving. Just cook the pierogi and sauce, then store them separately. When ready to enjoy, simply reheat on the stove until warm. Chicken sausage, pork sausage, or a meat alternative work well. Each option brings a unique flavor. Choose what suits your taste or dietary needs best. Check packaging as traditional pierogi are often made with wheat flour. Some brands offer gluten-free options, so read the label to find a suitable choice. This blog post provided a tasty recipe for a skillet dish featuring pierogi, turkey sausage, and fresh spinach. You learned about the key ingredients and their roles in the dish. The step-by-step instructions guide you through cooking and garnishing, ensuring a delicious meal. Remember, you can customize the recipe with different sausages or a vegetarian twist. With the tips shared, you can store and reheat leftovers easily. Enjoy experimenting with flavors, and make this comforting dish your own!

Creamy Pierogi and Turkey Sausage Skillet Delight

Looking for a cozy, delicious meal that’s quick to make? In this Creamy Pierogi and Turkey Sausage Skillet Delight, I

To start, you need fresh watermelon rind. Choose a ripe, juicy watermelon. The rind should be firm and bright. Cut the rind into 1-inch cubes. Make sure to remove any red flesh. Next, gather granulated sugar. This ingredient sweetens the rind and makes it sticky. You'll need two cups for this recipe. The sugar helps create a syrup that coats the rind evenly. You also need water to make the syrup. Use one cup of water for this step. Flavorings add a unique taste. You'll need one teaspoon of pure vanilla extract. Ground cinnamon and ginger are great choices too. Use half a teaspoon of cinnamon and a quarter teaspoon of ginger, if you like. Lastly, add a quarter teaspoon of fine sea salt to enhance the flavors. You can find the full recipe with specific instructions to guide you through the process of making this delightful treat. Enjoy the sweet journey of making candied watermelon rind! Start with a ripe watermelon. Cut away the green skin with a sharp knife. You want only the white part. Make sure to cut it into 1-inch cubes. Discard any red flesh that may cling to the rind. In a large pot, boil 4 cups of water. Add the cubed rind and let it boil for about 10 minutes. This softens the rind a bit. Once it is tender, drain it and set it aside to cool. In the same pot, mix 1 cup of water with 2 cups of granulated sugar. Heat this over medium heat. Stir until the sugar dissolves completely. This creates a sweet syrup. Return the boiled rind to the pot. Lower the heat and let it simmer for 45 minutes to an hour. Stir occasionally. This process makes the rind translucent and thickens the syrup. Once the rind looks candied, take the pot off the heat. Let it sit for an hour to soak up the syrup. Afterward, use a slotted spoon to lift the rind out and let excess syrup drip off. Place the pieces on a wire rack. Allow them to dry for a few hours or overnight. If desired, dust with powdered sugar for extra sweetness. You can check the [Full Recipe] for more details. Pick a ripe watermelon for the best taste. Look for one that feels heavy for its size. The skin should be smooth and shiny, with a yellow spot where it rested on the ground. This spot shows it ripened well. Avoid watermelons with soft spots or blemishes, as these often mean over-ripeness or spoilage. To achieve the right texture, boil the rind just enough. You want it tender but not mushy. After boiling, let it cool in the syrup. This allows the rind to soak up the sweet flavors. Drying it on a rack helps firm up the pieces, making them less sticky and easier to handle. You can add fun flavors to your candied watermelon rind. Try using different spices like nutmeg or allspice for a warm kick. A splash of citrus juice can brighten the taste too. For a twist, dip the cooled rind in melted chocolate. This adds a rich layer of flavor that pairs well with the sweetness. {{image_4}} You can add spice to your candied watermelon rind. To make spiced rind, add more cinnamon. Use 1 teaspoon of cinnamon instead of 1/2 teaspoon. You can also add a pinch of nutmeg. This will give it a warm flavor. The spices will mix well with the sweet syrup. If you love chocolate, try this fun twist. After drying the candied rind, dip it in melted chocolate. You can use dark, milk, or white chocolate. Let the chocolate harden on a wire rack. This treat will be both crunchy and sweet. For a fresh taste, try adding citrus. Use lemon or orange zest in the syrup. This will brighten the flavor of the rind. You can also squeeze a little juice into the syrup. The citrus will make your sweet treat even more delicious. Feel free to get creative with these options. You can mix and match flavors. Don’t forget to check out the Full Recipe for more details! To keep your candied watermelon rind fresh, store it in an airtight container. Use a glass jar or a plastic container with a tight lid. Make sure the rind is completely dry before storing. This step helps to prevent moisture build-up, which can lead to spoilage. Candied watermelon rind can last up to two weeks at room temperature. If you want to keep it longer, you can freeze it. To freeze, spread the pieces on a baking sheet first. This method prevents them from sticking together. Once frozen, transfer them to a freezer-safe bag. They can last up to six months in the freezer. Check for any signs of spoilage before eating. If you see mold or an off smell, it's best to throw it away. The texture should remain slightly tacky, not hard or overly dry. If it feels very soft or mushy, it may no longer be good. Always trust your senses when it comes to food safety. Making candied watermelon rind takes about one and a half hours. This includes prep, boiling, and candying. You’ll spend ten minutes getting everything ready. Boiling the rind takes another ten minutes. Then, simmer the rind in syrup for about 45 minutes to an hour. The wait is worth it! Yes, you can eat candied watermelon rind as a snack! It has a sweet flavor and chewy texture. You can enjoy it straight from the bowl or use it in trail mix. It also makes a fun addition to cheese boards. Candied watermelon rind is not a health food, but it has some redeeming qualities. It offers hydration since watermelon is mostly water. However, it is high in sugar due to the candying process. Moderation is key when enjoying this sweet treat. You can find candied watermelon rind at specialty stores or online. Some local farmers' markets may also sell it. If you can’t find it, you can easily make it at home using the Full Recipe. Candied watermelon rind has many uses! You can chop it up to top desserts or mix it into salads. It also works well in cocktails for a sweet twist. You can even incorporate it into baked goods like muffins or cakes. For a detailed method on how to make this treat, check out the Full Recipe. It offers step-by-step instructions and tips for perfect results. Enjoy making this delightful candy! To wrap up, we covered how to make candied watermelon rind. You learned about the key ingredients, useful tips, and different flavors to try. We explored how to store the candy and answered common questions, too. Making this treat is simple and fun. Experimenting can lead to great snacks. Enjoy your candied watermelon rind and share it with friends! It’s a tasty way to avoid waste and treat yourself.

Candied Watermelon Rind Irresistible Sweet Treat

Love sweet treats but tired of the same old options? Let me introduce you to candied watermelon rind—a unique and

To make the apple coffee cake with cream cheese filling, you need: - 2 cups all-purpose flour - 1 ½ teaspoons baking powder - ½ teaspoon baking soda - 1 teaspoon ground cinnamon - ½ teaspoon salt - ½ cup unsalted butter, softened - 1 cup granulated sugar - 2 large eggs - 1 teaspoon vanilla extract - 1 cup buttermilk - 2 medium apples, peeled, cored, and diced - 8 ounces cream cheese, softened - ¼ cup powdered sugar - 1 teaspoon vanilla extract (for filling) - ½ cup chopped nuts (optional) - Cinnamon sugar for dusting You can add some fun twists to this cake: - ½ cup raisins for a chewy texture - 1 teaspoon nutmeg for extra warmth - 1 cup blueberries for a fruity mix - Different nuts like pecans or walnuts for crunch If you need to swap out some ingredients, here are some ideas: - Use whole wheat flour instead of all-purpose for a nuttier taste. - Substitute Greek yogurt for buttermilk for a lighter option. - Use maple syrup in place of granulated sugar for a unique flavor. - Replace cream cheese with a dairy-free option for a vegan version. For the full recipe, check out the section above on preparing your delicious apple coffee cake! Start by heating your oven to 350°F (175°C). This step is key to getting the cake just right. Next, grab a 9x13-inch baking pan. Lightly grease it or use parchment paper. This will help the cake come out easily after baking. In a medium bowl, whisk together the dry ingredients. Combine 2 cups of all-purpose flour, 1 ½ teaspoons of baking powder, ½ teaspoon of baking soda, 1 teaspoon of ground cinnamon, and ½ teaspoon of salt. Mixing these ingredients well ensures the cake rises evenly. In a large bowl, cream together ½ cup of softened butter and 1 cup of granulated sugar. Use an electric mixer for about 3 to 4 minutes. This makes the mixture light and fluffy. Add in 2 large eggs, one at a time, mixing well after each addition. Then add 1 teaspoon of vanilla extract. In another bowl, mix 8 ounces of softened cream cheese with ¼ cup of powdered sugar and 1 teaspoon of vanilla extract. Whisk or use a mixer until the filling is smooth. This creamy center will make your cake extra special. Pour half of the batter into your prepared pan. Spread it evenly. Next, spoon the cream cheese filling over the batter. Leave a little space at the edges. Then, pour the rest of the batter over the cream cheese layer. Smooth the top gently. Place your pan in the oven and bake for 40-45 minutes. Check if it’s done by inserting a toothpick in the center. It should come out clean. Once baked, let the cake cool in the pan for about 15 minutes. Then, transfer it to a wire rack to cool completely. Enjoy the wonderful blend of flavors in every slice. For the full recipe, refer to the complete details above. Baking requires attention to detail. Start by measuring each ingredient carefully. Use the spoon-and-level method for flour to avoid too much in your mix. Preheat your oven to 350°F (175°C) for even cooking. Always grease your baking pan or line it with parchment paper. This helps your cake release easily. The key to a moist cake is using buttermilk. It adds richness and keeps the cake soft. Make sure your apples are diced small to distribute moisture well throughout the batter. Avoid over-mixing the batter when combining wet and dry ingredients. This helps keep air in the mix, which gives your cake a light texture. To make the cream cheese filling smooth, ensure it is at room temperature. Mix the cream cheese, powdered sugar, and vanilla extract until creamy. Avoid lumps by whisking well. When layering the cake, spread the filling gently. This way, it stays in place and doesn’t mix too much with the batter. For extra flavor, consider adding a dash of cinnamon to the filling. Using these tips will help you create a perfect apple coffee cake with a delicious cream cheese filling. For the full recipe, check out the details above! {{image_4}} You can switch up the apples for other fruits. Pears add a sweet, juicy twist. Fresh peaches bring a lovely flavor too. You can even use berries for a burst of color and taste. Just make sure the fruit is ripe for the best results. Adjust the sugar based on the fruit’s sweetness. If you want a nut-free cake, just skip the nuts. For a gluten-free version, swap the all-purpose flour with a gluten-free blend. Make sure to check that your baking powder is gluten-free. This way, everyone can enjoy your cake without worry. You can enhance the flavor in many ways. Adding a pinch of nutmeg brings warmth to the cake. A splash of almond extract gives a nice twist too. If you love spice, try adding ginger or cardamom. These small changes make a big difference! For a richer flavor, mix in a bit of orange zest. Each addition opens up a world of taste. For the full recipe, check out the instructions above! To keep your apple coffee cake fresh, wrap it tightly in plastic wrap. You can also use an airtight container. This method helps to lock in moisture and flavor. Store it at room temperature for up to three days. If you live in a warm area, place it in the fridge to keep it fresh longer. If you want to save some cake for later, freezing is a great option. First, let the cake cool completely. Then, slice it into pieces for easy thawing. Wrap each piece in plastic wrap, and place them in a freezer bag, squeezing out the air. You can freeze it for up to three months. When you're ready to enjoy it, just thaw in the fridge overnight. To reheat your apple coffee cake, you have a few choices. For a warm slice, place it in the microwave for about 15-20 seconds. This warms it without drying it out. If you prefer a crispy top, use the oven. Preheat it to 350°F (175°C) and place the cake on a baking sheet for about 10 minutes. This gives you a nice warm slice with a crunchy top. You can find the full recipe for this delicious cake above. You can tell the cake is done when a toothpick comes out clean from the center. The edges should be a nice golden brown. If the top springs back when you gently press it, that’s a good sign too. Trust your senses; the smell will be amazing as it bakes! Yes, you can use other apples like Fuji or Gala. These apples add a sweet flavor. Just make sure to avoid apples that are too soft. You want apples that hold their shape when baked. To make the cake healthier, you can use whole wheat flour instead of all-purpose flour. You can also reduce the sugar by a small amount. Using unsweetened applesauce can replace some butter. This keeps it moist while cutting calories. Apple coffee cake pairs well with coffee or tea. You can also serve it with a scoop of vanilla ice cream or whipped cream. Fresh fruit on the side adds a nice touch. Try adding a drizzle of caramel sauce for extra sweetness! You can keep the cake at room temperature for about three days. If you want to keep it longer, store it in the fridge for up to a week. For even better storage, wrap slices in plastic and freeze them. They can last up to three months! For the full recipe, check out the instructions above. This blog post covers how to make a delicious Apple Coffee Cake. We discussed the key ingredients and their variations. I shared step-by-step instructions for baking, mixing, and layering the cake. You learned tips for keeping it moist and ways to customize it. Finally, I provided storage info and answered common questions about the cake. Start baking today! Enjoy each slice as a tasty treat. You can impress your friends and family with this simple recipe. Happy baking!

Irresistible Apple Coffee Cake with Cream Cheese Filling

Welcome to your next baking adventure! If you love sweet treats, this Apple Coffee Cake with Cream Cheese Filling is

Older posts
Newer posts
← Previous Page1 … Page56 Page57 Page58 … Page86 Next →

dsad

© 2026 lazychefmagic • Built with GeneratePress

Our Policies

  • Copyright Policy
  • Cookie Policy
  • GDPR Policy
  • Privacy Policy
  • Disclaimer
  • Terms Of Use

More Information

  • Home
  • About
  • Contact
  • Appetizers
  • Dessert
  • Dinner
  • Drinks
©2026, lazychefmagic About Back To Top