Skip to content
DisclaimerTerms Of UseGDPR PolicyCookie Policy

lazychefmagic

  • Home
  • Drinks
  • Appetizers
  • Dinner
  • Dessert
  • About
  • Contact
  • Privacy Policy
DisclaimerTerms Of UseGDPR PolicyCookie Policy

NO-ING-IMG

- 1 pound of large shrimp - 3 tablespoons of extra virgin olive oil - 4 cloves of garlic - 1 teaspoon of smoked paprika - 1/2 teaspoon of cayenne pepper - Juice of 1 lime - 8 small corn tortillas - 1 cup of shredded red cabbage - 1 ripe avocado - Fresh cilantro leaves - Lime wedges for serving When I make spicy garlic shrimp tacos, I always choose fresh ingredients. The shrimp should be large, firm, and bright. This dish shines with the right spices. I use smoked paprika for a deep flavor and cayenne for heat. Adjust the cayenne based on your taste. Fresh garlic adds a strong kick. For the best taste, I squeeze fresh lime juice over the shrimp. It brightens all the flavors. I also love using small corn tortillas. They hold the shrimp well and add texture. Shredded red cabbage gives a nice crunch. Sliced avocado adds creaminess. Fresh cilantro ties everything together, adding a burst of flavor. You can find the complete recipe in the Full Recipe section. Start by marinating the shrimp. In a large bowl, mix the shrimp with olive oil, minced garlic, smoked paprika, cayenne pepper, lime juice, salt, and pepper. Make sure the shrimp is well-coated. This spicy mix gives the shrimp great flavor. Let it sit for 15 to 20 minutes. This time allows the shrimp to soak up the spices. Next, preheat your skillet over medium-high heat. When the skillet is hot, add the marinated shrimp in a single layer. Don't crowd the pan; cook them in batches if needed. Cook the shrimp for about 2 to 3 minutes on one side. They should turn a bright pink. Flip the shrimp and cook for another 2 to 3 minutes until they are opaque. Remove them from heat once cooked. To warm corn tortillas, use a separate skillet. Heat them for about 30 seconds on each side until they are soft. This step makes them easier to fold. To build your tacos, place shredded red cabbage on each warm tortilla. Then, add the spicy garlic shrimp on top. Finish with slices of avocado and a sprinkle of cilantro. This layering brings out the best flavors. Serve your tacos with lime wedges for a zesty touch. Try the full recipe for more details on each step! To make your tacos truly pop, adjust the heat with cayenne pepper. Start with a small amount. You can always add more later. For the best taste, let the shrimp marinate for 15 to 20 minutes. This time helps the flavors mix well and soak into the shrimp. When sautéing shrimp, use a hot skillet. This helps get a nice sear. Avoid overcrowding the pan. Cook the shrimp in a single layer. This way, they cook evenly and don't steam. Watch your shrimp closely; they only need about 3 to 4 minutes total. Overcooked shrimp can turn rubbery, so keep an eye on them. To make your tacos look great, arrange them on a large platter. Place the shrimp on top of the shredded cabbage for a colorful look. Add avocado slices and a sprinkle of fresh cilantro for a finishing touch. Serve lime wedges on the side. This adds a bright burst of flavor. For more ideas, check the Full Recipe for extra garnishing suggestions. {{image_4}} You can swap shrimp for different proteins. Fish, chicken, or tofu work great. Each choice brings its own flavor. Try white fish for a lighter taste. Chicken adds a hearty bite, while tofu makes it plant-based. For spices, you can mix it up too. Use cumin for warmth or oregano for a fresh twist. A pinch of chili powder can bring more heat. Experimenting with spices lets you find your perfect flavor. If you need gluten-free options, use corn tortillas. They taste great and keep the dish light. Many brands offer good gluten-free tortillas. Just check the label to be sure. For vegan adaptations, swap shrimp for firm tofu or jackfruit. Use a vegan oil for cooking. You can also add extra veggies for more texture and taste. Adding sauces or salsas can boost the flavor. Try a mango salsa for a sweet touch. A spicy chipotle sauce adds heat and depth. You can also mix yogurt with herbs for a creamy drizzle. For side dishes, consider serving rice or beans. They add heartiness and balance the meal. A fresh salad can add crunch and color. These additions make your taco night even better. For the full recipe, check out the complete guide on making spicy garlic shrimp tacos! To keep your shrimp tacos fresh, place leftovers in an airtight container. This method prevents them from drying out or picking up other odors. You can store cooked shrimp in the refrigerator for up to three days. Make sure not to leave them out for more than two hours at room temperature. For best taste, eat them within that time frame. When you’re ready to enjoy your tacos again, use gentle heat to rewarm them. The best method is to use a skillet. Heat it over medium heat and add the shrimp, cooking for about 2-3 minutes until warm. For the tortillas, warm them in a separate pan for about 30 seconds on each side. This helps keep them from getting rubbery. Always keep an eye on the shrimp to avoid overcooking. Overcooked shrimp can become tough and chewy. Enjoy your flavorful meal again! To make shrimp tacos, you need a few simple ingredients. Here’s what you require: - 1 pound of large shrimp, meticulously peeled and deveined - 3 tablespoons of extra virgin olive oil - 4 cloves of garlic, finely minced - 1 teaspoon of smoked paprika - 1/2 teaspoon of cayenne pepper - Fresh juice from 1 lime - Salt and black pepper to taste - 8 small corn tortillas - 1 cup of finely shredded red cabbage - 1 ripe avocado, sliced - A handful of fresh cilantro leaves - Lime wedges for serving Start by mixing the shrimp with olive oil, garlic, smoked paprika, cayenne, lime juice, salt, and pepper. Let it marinate for 15-20 minutes. Cook the shrimp in a hot skillet until pink and opaque. Warm the tortillas, then layer cabbage, shrimp, avocado, and cilantro to build your tacos. You can find the full recipe [here](#). Shrimp tacos pair well with many sides and drinks. Here are some tasty options: - Fresh salsa or pico de gallo - Creamy guacamole - Crispy tortilla chips - Mexican street corn - A cool, refreshing salad - Cold drinks like limeade or a light beer These sides enhance the taco experience and add more flavor. Yes, you can prepare shrimp in advance! Just marinate the shrimp and store it in the fridge. Here are some tips: - Marinate shrimp for up to 2 hours for best flavor. - Store marinated shrimp in an airtight container. - Cook shrimp within one day for freshness. This makes meal prep easy and quick! Shrimp tacos can be spicy! The heat comes from cayenne pepper. Adjust the spice level by changing the amount you use. Here’s how: - Use less cayenne for a milder taste. - Add more cayenne for a stronger kick. - Try adding jalapeños for an extra layer of heat. These adjustments help you get the perfect spice level for your taste. Warming corn tortillas is simple and enhances their flavor. Here are my favorite methods: - Heat a skillet over medium heat and warm tortillas for 30 seconds on each side. - Wrap them in foil and place them in a warm oven for about 10 minutes. - Use a microwave: place a damp paper towel over tortillas and heat for 20-30 seconds. These methods keep tortillas soft and fresh for your tacos! In this article, we explored making delicious shrimp tacos, from ingredients to storage. The key is marinating shrimp well and balancing flavors with toppings. You can enjoy this dish with various proteins and dietary options too. Remember, the right cooking techniques ensure tasty shrimp that won’t overcook. Follow these steps for a fun meal. Enjoy sharing your shrimp tacos with family and friends, and don't forget to customize them to your taste!

Spicy Garlic Shrimp Tacos Flavorful and Easy Recipe

Get ready to spice up your dinner with my easy and delicious Spicy Garlic Shrimp Tacos! With just a handful

- 8 oz (230g) egg noodles - 1 lb (450g) flank steak, thinly sliced against the grain - 4 tablespoons unsalted butter, divided - 4 cloves garlic, minced - 2 tablespoons soy sauce - 1 tablespoon oyster sauce - 1 tablespoon honey - 1 teaspoon crushed red pepper flakes (adjust to taste) - 2 green onions, sliced diagonally - Salt and pepper, to taste - Fresh cilantro, for garnish (optional) If you can't find flank steak, you can use sirloin or ribeye instead. These cuts work well and stay tender. For the noodles, you can swap egg noodles with rice noodles or even spaghetti if needed. If you want to skip oyster sauce, use more soy sauce or a mix of soy and hoisin sauce. For a lighter meal, replace butter with olive oil. - 1 tablespoon = 3 teaspoons - 1 cup = 8 ounces - 1 lb = 16 ounces - 1 ounce = 28.35 grams This garlic butter steak noodles recipe is a quick and tasty meal that you can whip up anytime. It’s packed with flavor and easy to make. For the full recipe, check out the detailed instructions later in the article! To start, boil a pot of salted water. This helps season the noodles. Add 8 oz of egg noodles to the pot. Cook them according to the package instructions until they are al dente. This usually takes about 6-8 minutes. Drain the noodles, but save about ¼ cup of the pasta water. Set the noodles aside for later. While your noodles cook, take 1 lb of flank steak. Cut it into thin slices against the grain. Season the steak with salt, pepper, and 1 teaspoon of crushed red pepper flakes. Let it marinate for about 10 minutes. This will help the flavors soak in. In a large skillet, heat 2 tablespoons of unsalted butter over medium-high heat. Once it’s hot, add the steak slices. Sear them for 2-3 minutes on each side. You want a nice brown crust. When done, remove the steak from the skillet. Leave the juices in the pan; they add great flavor. In the same skillet, lower the heat to medium. Add the remaining 2 tablespoons of butter. Let it melt, then add 4 cloves of minced garlic. Sauté the garlic for about 30 seconds. Stir it constantly so it doesn’t burn. When it smells good, you’re ready for the next step. Now, add 2 tablespoons of soy sauce, 1 tablespoon of oyster sauce, and 1 tablespoon of honey to the skillet. Stir everything to mix well. Let it simmer for a minute. It should smell amazing! Toss in the cooked noodles next. Mix them well so they are coated in the sauce. If they seem dry, add a splash of the reserved pasta water. Finally, return the seared steak to the skillet. Use tongs to toss everything together gently. Make sure the steak and noodles are well mixed and heated through. Taste it! Adjust the seasoning with more salt, pepper, or crushed red pepper flakes if you like it spicier. Serve the garlic butter steak noodles hot. Garnish with sliced green onions and fresh cilantro for color and flavor. Enjoy your meal! For the full recipe, check out the recipe section. To get the best steak, start with good quality flank steak. Thin slices help the meat cook evenly. Season the meat well with salt and pepper. Let it sit for about 10 minutes. This step adds flavor and helps keep the juices inside. When you cook, use a hot skillet. This gives a nice brown crust. Sear for 2-3 minutes on each side. Aim for medium-rare for that juicy texture. Garlic butter makes this dish shine. Use fresh garlic for a strong taste. Don’t rush the garlic in the skillet; it only needs about 30 seconds. This keeps it fragrant and tasty. Add soy sauce and oyster sauce for a savory kick. Honey balances out the saltiness. If you like heat, adjust the crushed red pepper flakes to suit your taste. Toss the noodles well to coat them in the sauce. A large skillet is key for this recipe. It gives enough space for the steak to sear without crowding. A good pair of tongs helps flip the steak easily. Use a pot for boiling the noodles. This setup ensures you cook everything at the right time. A spatula is handy for mixing the noodles and steak, making it easier to serve. Check out the Full Recipe for more insights! {{image_4}} You can swap flank steak for chicken or shrimp. Chicken breast or thighs work well. Simply slice them thin and follow the same steps. For shrimp, use large, peeled ones. Sear them for about 2-3 minutes until they turn pink. The garlic butter sauce will still shine with these proteins. Adding veggies boosts flavor and nutrition. Snap peas, bell peppers, or broccoli are great choices. You can toss them in during the noodle cooking phase or sauté them with the steak. This way, you get a colorful dish that tastes amazing and is good for you. If you need a gluten-free dish, choose gluten-free noodles. Rice noodles or zucchini noodles are excellent choices. Adjust the sauces too. Use tamari instead of soy sauce. This keeps the flavors intact while making it safe for gluten-free diets. For the full recipe, check out Garlic Butter Steak Noodles. Enjoy these tasty variations! To keep your garlic butter steak noodles fresh, place them in an airtight container. Make sure to cool them down to room temperature before sealing. Store the container in the fridge. They will last for up to three days this way. When you're ready to enjoy your leftovers, reheat them gently. You can use a pan on low heat. Add a splash of water or broth to keep the noodles moist. Stir often until heated through. You can also use a microwave. Heat in short bursts, stirring in between, until warm. If you want to save some for later, freezing is a great option. Place the cooled noodles and steak in freezer bags. Squeeze out as much air as possible, then seal. They can stay in the freezer for up to three months. When you're ready to eat, thaw them in the fridge overnight before reheating. For the best texture, try to avoid freezing the dish for too long. You can use sirloin steak, ribeye, or even chicken. Each option offers a unique taste. If you want a lighter meal, try chicken breast. For a richer flavor, go for ribeye. Just remember to adjust cooking times based on the meat you choose. Yes, you can prepare the garlic butter steak noodles ahead of time. Cook the noodles and steak, then store them separately in the fridge. When ready to eat, reheat them in a skillet with a bit of butter. This keeps everything fresh and tasty. To change the spice level, simply add or reduce crushed red pepper flakes. If you want it milder, skip the flakes. Want more heat? Add a bit of chili oil or a dash of hot sauce to the sauce. Absolutely! You can swap in rice noodles, udon noodles, or even spaghetti. Just make sure to cook the noodles according to their package instructions. Each type will bring a different texture to the dish. For sides, try a simple salad or steamed veggies. The freshness will balance the rich flavors. You can also serve with garlic bread or a light soup for a complete meal. This blog post covered all the steps to make a great garlic butter steak noodle dish. We discussed key ingredients, helpful substitutions, and how to cook noodles and steak perfectly. You now have tips for flavor and storage. Remember, you can easily mix in other proteins or veggies to make this meal your own. Enjoy the cooking process and the tasty results! Cook well and share it with friends and family.

Garlic Butter Steak Noodles Quick and Tasty Meal

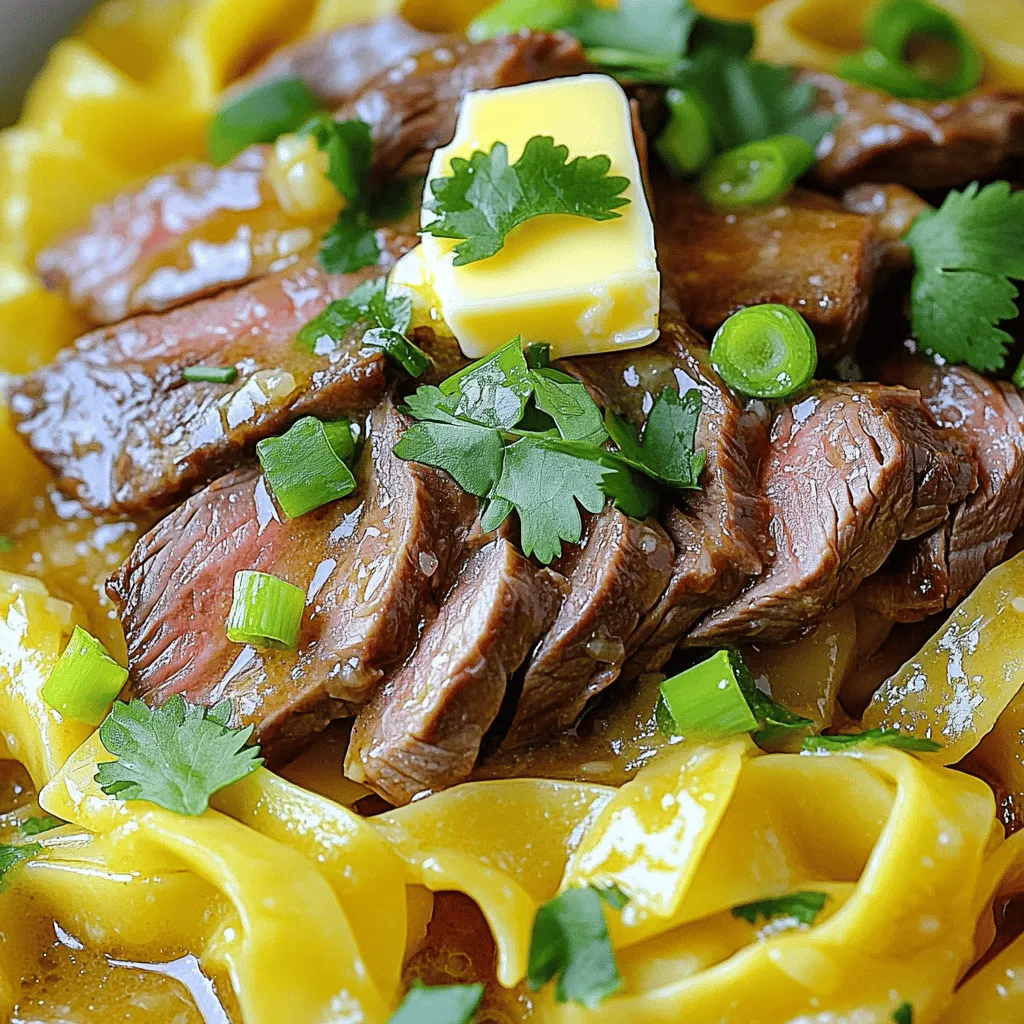
Looking for a quick and tasty meal? Garlic Butter Steak Noodles are your answer! This dish packs bold flavors and

- 2 cups cooked chicken breast, shredded or diced - 1/2 cup pecans, toasted and roughly chopped - 1/2 cup green grapes, halved - 1/4 cup celery, finely diced - 1/4 cup red onion, finely diced - 1/2 cup Greek yogurt (or substitute with mayonnaise) - 1 tablespoon apple cider vinegar - 1 tablespoon honey - Salt and freshly ground black pepper, to taste - Fresh parsley, finely chopped, for garnish (optional) The chicken provides a solid base. It adds protein to keep you full. I suggest using cooked chicken breast for the best flavor. Pecans add crunch and a nutty taste. They are also rich in healthy fats. Green grapes add sweetness and a burst of juice. Celery gives a nice crunch, while red onion adds a bit of bite. Greek yogurt makes the dressing creamy and tangy. You can swap it for mayonnaise if you prefer a richer flavor. Apple cider vinegar adds brightness, and honey gives a touch of sweetness. Salt and pepper enhance all the flavors in the dish. You can change the chicken for turkey if you like. For a vegetarian option, use chickpeas. Swap grapes with diced apples or dried cranberries for a different taste. Instead of pecans, try walnuts or almonds. If you want a lighter dressing, use low-fat yogurt. You can also add herbs like dill or chives for a fresh twist. The Full Recipe lets you explore these ideas and create your own version! To start, gather your ingredients. You will need cooked chicken breast, pecans, grapes, celery, and red onion. I like to use cooked chicken that is shredded or diced. It makes mixing easier. Use about two cups of chicken. Next, take half a cup of pecans. Toast them until they are golden brown. This step adds a nice crunch. Then, halve half a cup of green grapes. Chop a quarter cup of celery and red onion finely. For the dressing, you will need Greek yogurt or mayonnaise. I prefer Greek yogurt for a healthier touch. Take half a cup of yogurt and place it in a small bowl. Add a tablespoon of apple cider vinegar and honey. This mix gives the dressing a sweet and tangy taste. Don’t forget to add salt and pepper. Whisk everything together until smooth. Now, it’s time to combine everything. In a large bowl, add your chicken, pecans, grapes, celery, and onion. Then, pour the dressing over this mix. Use a spatula to fold everything gently. You want all the ingredients coated well. After mixing, taste the salad. If it needs more salt or pepper, now is the time to add it. Cover the bowl with plastic wrap and chill it in the fridge for at least 30 minutes. This step helps the flavors blend together. When ready to serve, stir gently. You can add fresh parsley for a nice touch. Enjoy your Pecan Chicken Salad! For the complete recipe, check [Full Recipe]. To shred chicken well, start with cooked chicken breast. You can use two forks or your hands. Pull apart the chicken into bite-sized pieces. This method makes it easy to mix into your salad. If the chicken is cold, warm it slightly first. It shreds better when warm, and it keeps the salad tasty. To toast pecans, use a dry skillet over medium heat. Add the pecans and stir them often. This helps them toast evenly. Watch them closely so they don’t burn. It takes about 5 to 7 minutes for them to turn golden. Toasted pecans add a nice crunch and deeper flavor to your salad. Seasonings can transform your chicken salad. Start with salt and pepper for the basic taste. You can also add garlic powder or onion powder for extra flavor. Try adding fresh herbs like parsley or dill to brighten the dish. A squeeze of lemon juice can add zing, too. Remember, taste as you go to find your perfect mix. For the full recipe, check out the Crunchy Pecan Chicken Salad 🥗🥜. {{image_4}} You can change the flavor of your salad with different dressings. Greek yogurt gives a creamy base, but you can try other options. For a tangy twist, use ranch dressing. If you want something zesty, try a lemon vinaigrette. Mix things up with a honey mustard dressing for sweetness. Each dressing brings a new taste to your pecan chicken salad. Fruits and veggies can make your salad exciting. Green grapes add sweetness, but you can mix in apples for crunch. Diced pears work well, too. For veggies, consider adding diced bell peppers or shredded carrots. These add color and nutrients. You can also include avocado for creaminess. The more you add, the more texture and flavor you get. If you want to change the protein, there are tasty options. Cooked turkey or rotisserie chicken works well. For a vegetarian option, use chickpeas or tofu. These choices keep the salad filling while meeting different diets. You can also use shredded beef for a hearty twist. This way, everyone can enjoy a delicious and healthy meal. Remember to check the [Full Recipe] for more details on making this delightful dish! When you have leftover salad, place it in an airtight container. This helps keep the salad fresh. You can use plastic wrap or a lid. Store it in the fridge for up to three days. Make sure to avoid adding any dressing to the leftovers. This keeps the salad crisp and tasty. I do not recommend freezing chicken salad. Freezing can change the texture and taste. The yogurt or mayonnaise may separate when thawed. If you must freeze it, use a freezer-safe container. Remember to leave some space for expansion. Thaw it in the fridge overnight before eating. Pecan chicken salad stays fresh for about three days in the fridge. After that, it may lose flavor and crunch. Always check for any signs of spoilage, like off smells or changes in color. If it seems off, it’s best to throw it away. Enjoy your salad while it's fresh for the best taste! Yes, you can make Pecan Chicken Salad ahead of time. This salad tastes great after it sits for a while. The flavors mix well and become even better. You can prepare the salad up to a day in advance. Just store it in the fridge in a sealed container. This will help keep it fresh. Before serving, give it a quick stir to mix everything again. Pecan Chicken Salad pairs well with many sides. Here are a few tasty options: - Mixed greens for a fresh crunch. - Whole grain bread for a filling sandwich. - Crackers to add a nice crunch. - A light soup for a warm meal. - Fresh fruit for a sweet touch. These sides add variety and balance to your meal. You can mix and match to find your favorite combo! Yes, Pecan Chicken Salad is a healthy choice. It packs protein from chicken and healthy fats from pecans. Greek yogurt adds creaminess while keeping calories lower than mayo. Fresh fruits and veggies add vitamins and minerals. It’s a great option for lunch or dinner. Enjoy this salad without guilt! We covered all you need for a great pecan chicken salad. You learned about key ingredients, how to make the dressing, and the best ways to mix and chill everything. Tips on shredding chicken and toasting pecans will boost your skills. Variations let you play with flavors and ingredients. Plus, easy storage tips keep leftovers fresh. This recipe is not just tasty; it can fit anyone's needs. Enjoy making your own delicious pecan chicken salad!

Pecan Chicken Salad Delightful and Healthy Recipe

Looking for a fresh twist on classic chicken salad? Let me introduce you to my Pecan Chicken Salad. This delightful

- 1 cup natural peanut butter (unsweetened) - 1/2 cup granulated erythritol (or your preferred keto-friendly sweetener) - 1 large egg - 1 teaspoon vanilla extract - 1/2 teaspoon baking soda - 1/4 teaspoon salt I choose natural peanut butter because it has no added sugars or oils. This keeps the cookies keto-friendly and rich in flavor. Erythritol works well as a sweetener since it has no carbs and does not spike blood sugar. The egg adds moisture and helps bind the dough together. Vanilla extract boosts the cookie's flavor, while baking soda helps them rise slightly. Salt balances the sweetness and enhances all the flavors. You can add 1/4 cup of sugar-free chocolate chips or chopped nuts like pecans or walnuts for extra texture. These additions bring a new flavor and make the cookies even more enjoyable. If you're feeling adventurous, try adding a pinch of cinnamon or a splash of almond extract for different tastes. {{ingredient_image_2}} First, set your oven to 350°F (175°C) to preheat. While the oven warms up, line a baking sheet with parchment paper. This step helps your cookies not stick and makes cleanup easy. Always use parchment paper for best results. In a big mixing bowl, add your natural peanut butter, erythritol, egg, vanilla extract, baking soda, and salt. Grab a spatula or a whisk to mix everything well. Blend until it forms a smooth dough. If your dough feels too thick, add a little more peanut butter. If it’s too sticky, a sprinkle of erythritol can help. Now it’s time to shape your cookies. Take about a tablespoon of dough and roll it into a ball. Place the balls on the baking sheet with space between each one. They will spread a little while baking. To get the classic crisscross look, press down on each cookie with a fork. This flattens them and gives them charm. To make the best keto peanut butter cookies, follow these simple steps: - Use natural peanut butter. This type has no added sugar or oils. - Measure your ingredients carefully. This ensures a consistent dough. - Preheat your oven. Always heat it to 350°F (175°C) before baking. - Chill the dough. If the dough is too soft, chill it for 30 minutes. - Space the cookies. Leave room on the baking sheet. They will spread. Here are some common pitfalls when making these cookies: - Using sweeteners incorrectly. Different sweeteners have different sweetness levels. - Not mixing well. Ensure all ingredients blend until smooth. - Overbaking. Watch the edges for a golden brown color. Take them out early if needed. - Skipping the salt. It enhances the flavor of the peanut butter. - Ignoring cooling time. Let them cool before moving. They will firm up. You can swap sweeteners in this recipe. Here’s how: - Granulated erythritol. This is the best choice for keto. Use it at a 1:1 ratio. - Stevia. Use about half the amount, as it is sweeter. - Monk fruit. This can be used 1:1, similar to erythritol. - Allulose. This is another great option, also used at a 1:1 ratio. - Liquid sweeteners. Reduce other liquids in the recipe to maintain dough consistency. These tips and tricks will help you create the best keto peanut butter cookies. Enjoy the process and savor each bite! Pro Tips Use Room Temperature Ingredients: Allow your peanut butter and egg to come to room temperature before mixing. This helps the ingredients blend more easily and create a smoother dough. Experiment with Sweeteners: If you're not a fan of erythritol, try other keto-friendly sweeteners like monk fruit or stevia to find your preferred level of sweetness. Don't Overbake: Keep an eye on the cookies as they bake. They should be slightly soft in the center when you take them out; they will continue to firm up as they cool. Cool Properly: Allow the cookies to cool on the baking sheet for a few minutes before transferring them to a wire rack. This prevents them from breaking apart while they're still warm. {{image_4}} No-bake cookies are quick and simple. You only need a few steps. Start with 1 cup of peanut butter. Then mix it with 1/2 cup of erythritol, 1 tablespoon of coconut oil, and 1 teaspoon of vanilla. Stir until it forms a smooth mixture. Next, scoop the mix onto parchment paper. Chill them in the fridge for about 30 minutes. This will help them firm up. They are ready to enjoy without any baking! Flourless cookies are a great option for a keto diet. They use peanut butter as the main base. Just mix 1 cup of natural peanut butter with 1/2 cup of erythritol and 1 egg. This makes a tasty dough. You can bake them just like the regular peanut butter cookies. They will be soft and chewy, perfect for a quick snack. You can kick up the flavor of your cookies easily. Add spices like cinnamon or nutmeg to the dough. Just 1/2 teaspoon will do the trick. You can also use extracts to change the taste. A few drops of almond or coconut extract can make a big difference. Feel free to get creative! Adding these touches will make each batch special. To keep your cookies fresh, store them in an airtight container. This stops them from drying out. Place a piece of parchment paper between layers to avoid sticking. They last for about a week on the counter. If you want them to last longer, consider freezing. Freezing is a great option for these cookies. First, let them cool completely. Then, place them in a single layer on a baking sheet. Freeze for about an hour. Once frozen, transfer them to a freezer bag. This way, they stay fresh for up to three months. When you want one, just take it out and let it thaw. Always keep cookies in a cool, dry place. Avoid direct sunlight, as this can change their texture. If they start to get soft, you can re-crisp them in the oven. Bake at 300°F (150°C) for about 5 minutes. This helps them regain their crunch. Enjoy your cookies any time with these simple storage tips! No, you cannot use regular sugar. Regular sugar adds carbs. Erythritol is low in carbs and keto-friendly. It also does not spike blood sugar levels. If you want a sweet taste without carbs, erythritol is your best choice. Yes, these cookies are great for meal prep. You can make a batch and store them. They last well in an airtight container. Enjoy them as a quick snack or a treat during the week. Each cookie has about 2 grams of net carbs. This makes them perfect for a keto diet. If you stick to one or two cookies, you stay within your carb limit. Yes, you can use other nut butters. Almond butter or cashew butter work well, too. Just ensure they are unsweetened and keto-friendly. This way, you can enjoy different flavors while keeping it low-carb. You've learned about essential ingredients, baking steps, and tips for great cookies. We explored variations and storage tips. Use these insights to make tasty keto peanut butter cookies that fit your diet. Remember, practice makes perfect, so try different flavors and tweaks. Keep your cookies fresh, and enjoy them whenever you like! Happy baking!

Keto Peanut Butter Cookies Easy Recipe to Savor

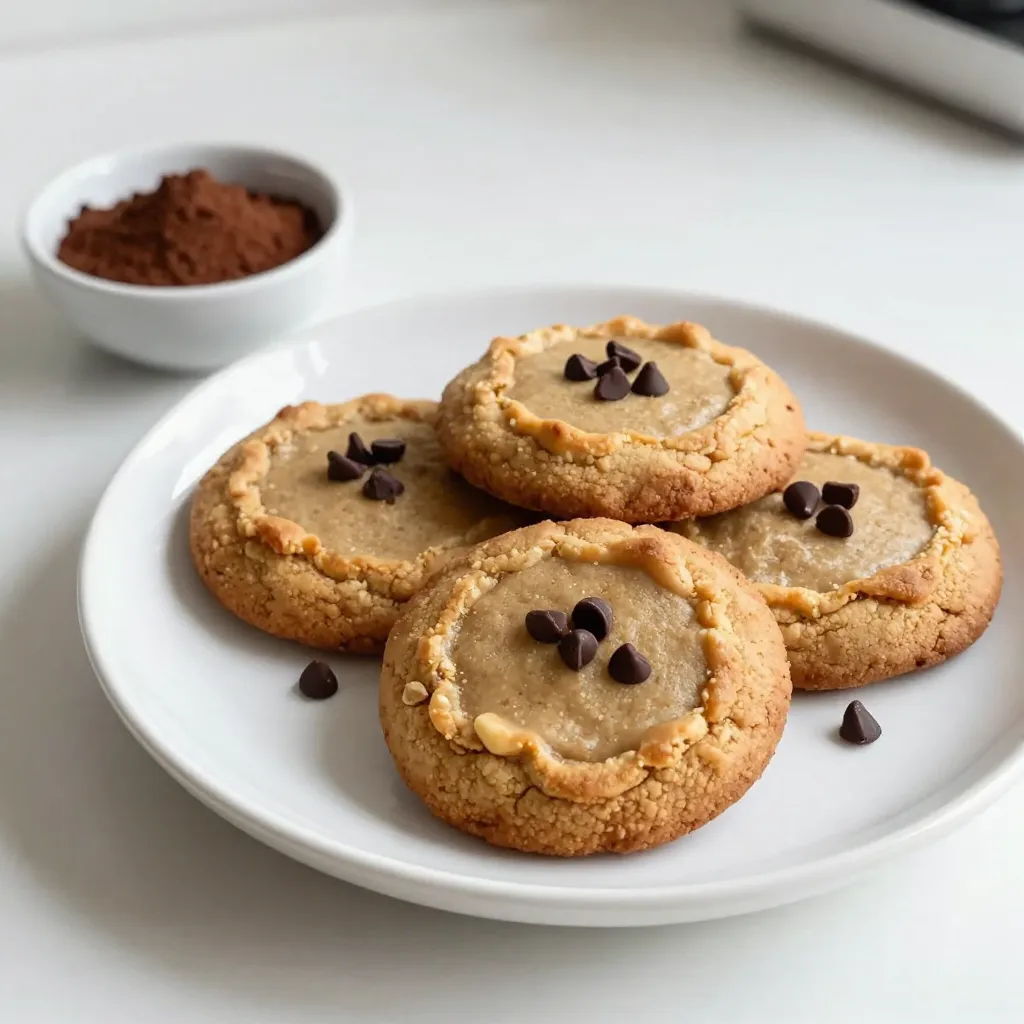
Are you craving a sweet treat that won’t kick you out of ketosis? Look no further! My Keto Peanut Butter

To make the Buffalo Cauliflower Bites, you will need a few simple ingredients. Here is the list: - 1 medium head of cauliflower, cut into bite-sized florets - 1 cup all-purpose flour - 1 cup almond milk (or your preferred plant-based milk) - 1 teaspoon garlic powder - 1 teaspoon onion powder - 1 teaspoon smoked paprika - 1/2 teaspoon salt - 1/2 teaspoon black pepper - 1 cup buffalo sauce (adjust to your heat preference) - 2 tablespoons melted vegan butter (optional for added richness) - Fresh parsley, finely chopped (for garnish) These ingredients create a delicious snack that is both spicy and satisfying. The cauliflower becomes crunchy and flavorful when baked. Using almond milk as a base keeps the recipe plant-based. You can change the buffalo sauce amount to fit your taste. If you want more heat, add extra sauce. The melted vegan butter adds richness, but it’s not a must. Don’t forget to garnish with parsley; it adds a nice color and flavor. This combination of ingredients makes for a great snack or party dish. For the complete recipe, check the section above. - Preheat your oven to 450°F (230°C). - Line a baking sheet with parchment paper to prevent sticking. - In a large bowl, mix together: - 1 cup all-purpose flour - 1 teaspoon garlic powder - 1 teaspoon onion powder - 1 teaspoon smoked paprika - 1/2 teaspoon salt - 1/2 teaspoon black pepper - Gradually add 1 cup of almond milk while whisking. This makes a smooth batter. - Take each cauliflower floret, dip it in the batter, and coat it well. Place coated florets on the baking sheet in a single layer. - Bake the cauliflower in the preheated oven for 20 minutes. Look for a golden brown color and crispy texture. - While the cauliflower bakes, mix 1 cup of buffalo sauce with 2 tablespoons of melted vegan butter in a separate bowl until smooth. - After baking, remove the cauliflower and toss it in the buffalo sauce mixture. Make sure each piece is coated well. - Return the coated cauliflower to the baking sheet. Bake again for 10-15 minutes, until the sauce is bubbling and caramelized. This is how you create delicious buffalo cauliflower bites! Want to see the full recipe? Check out the [Full Recipe]. To get crispy buffalo cauliflower bites, you can try different cooking methods. Baking is great, but you can also air fry for extra crunch. If you want a softer bite, steam the cauliflower first. Adjust the spice levels to suit your taste. For milder bites, use less buffalo sauce. If you love heat, add more sauce or try a spicier brand. Even coating is key. Make sure each floret is fully covered in the batter. This helps every bite get that tasty, crispy texture. Pair these bites with your favorite dips. Ranch and blue cheese are classic choices. You can also try a creamy avocado dip for a twist. Serve with side dishes that balance the heat. A fresh salad or veggie sticks work well. They add crunch and coolness to your meal. Presentation matters! Arrange the buffalo cauliflower bites on a bright platter. Garnish with fresh parsley for color. This adds a nice touch and makes your dish look inviting. Enjoy with friends and family! {{image_4}} If you need gluten-free options, swap all-purpose flour for almond flour or chickpea flour. Both work well, giving a nice texture and taste. For dairy-free sauces, you can use a vegan ranch or a yogurt made from nuts. These options keep your dish creamy without any dairy. To make your Buffalo Cauliflower Bites even better, try adding spices like cayenne pepper or smoked paprika. These spices boost the flavor and give a nice kick. If you want a kid-friendly version, reduce the hot sauce or mix it with a bit of honey. This makes it sweet and spicy, perfect for young taste buds. Feel free to explore the [Full Recipe] and tweak it to make it your own! To keep your Buffalo Cauliflower Bites fresh, use an airtight container. Glass or plastic containers work well. Store the bites in the refrigerator for up to three days. For longer storage, freeze them. They can last up to three months in the freezer. Make sure to label your container with the date for easy tracking. When you want to enjoy your leftover bites, there are a few good methods. The oven works best. Preheat it to 350°F (175°C) and place the bites on a baking sheet. Heat for about 10-15 minutes. This method keeps them crisp. If you're in a hurry, a microwave will also work. Heat in short bursts of 30 seconds. However, this method may make them a bit softer. To maintain that great texture, the oven is the way to go. For an extra kick, toss them in more buffalo sauce before reheating! Can I make Buffalo Cauliflower Bites ahead of time? Yes, you can prepare these bites ahead of time. Bake them as instructed, then let them cool. Store them in an airtight container in the fridge for up to three days. When ready to serve, reheat in the oven for best texture. How do I make this recipe spicier? To add more heat, use a hotter buffalo sauce. You can also mix in cayenne pepper or crushed red pepper flakes into the batter. Another option is to marinate the cauliflower in hot sauce before coating it. What other sauces can I use besides buffalo sauce? You can try BBQ sauce for a sweet twist. Sriracha sauce adds heat, while teriyaki sauce gives a sweet and savory flavor. Experiment with your favorite sauces to find what you enjoy most! What is the calorie count per serving? Each serving of Buffalo Cauliflower Bites has around 150 calories. This can vary based on the sauce and any added toppings. Always check the labels for accurate counts. Are there any allergens in this recipe? This recipe contains flour and almond milk, which may affect those with gluten or nut allergies. Always ensure you use safe alternatives for your needs. Check all ingredients if you have food sensitivities. This blog post covered how to make Buffalo Cauliflower Bites. We discussed the key ingredients, step-by-step preparation, and baking instructions. I shared tips for perfecting your dish and suggested tasty dip pairings. You learned about ingredient variations, storage tips, and answers to common questions. These bites are easy to make and full of flavor. Now you can enjoy this fun dish while tailoring it to your taste. Try different spices and dips for endless possibilities. Happy cooking!

Buffalo Cauliflower Bites Flavorful Snack Recipe

Looking for a tasty snack that’s both healthy and satisfying? Try my Buffalo Cauliflower Bites! They pack bold flavors and

To make a tasty peach crisp, gather these ingredients: - 4 large ripe peaches, peeled and sliced into thin wedges - 1 cup rolled oats - 1/2 cup all-purpose flour - 1/2 cup brown sugar, packed - 1/2 teaspoon ground cinnamon - 1/4 teaspoon ground nutmeg - 1/4 teaspoon salt - 1/3 cup unsalted butter, melted - 1 tablespoon freshly squeezed lemon juice - 1/2 cup chopped walnuts (optional for added texture) - Vanilla ice cream or whipped cream, for serving (optional for a delightful finish) When picking peaches, look for these signs of ripeness: - Choose peaches that feel slightly soft when you press them gently. - Look for a rich yellow or golden color. Avoid green peaches. - Check for a sweet aroma. A strong peach smell means good flavor. - If you can, buy peaches in season. They taste best during summer months. You may need to change some ingredients. Here are a few options: - For gluten-free, swap all-purpose flour with a gluten-free flour blend. - If you want a vegan version, use coconut oil instead of butter. - For a nut-free option, skip the walnuts or replace them with seeds like sunflower seeds. - If you cannot use sugar, consider using a sugar substitute, like Stevia, for sweetness. Using these tips, you'll create a peach crisp that suits your needs while keeping it delicious. You can find the Full Recipe to follow these steps easily. First, wash the peaches well. Use four large, ripe peaches for the best flavor. Peel them and slice them into thin wedges. Place the peach slices in a bowl. Add one tablespoon of freshly squeezed lemon juice. Gently toss the peaches to coat them evenly. This step keeps them fresh and bright. Then, transfer the sliced peaches into a greased 9-inch baking dish. Spread them out evenly. This will be the delicious base of your crisp. In a separate bowl, combine the dry ingredients. Use one cup of rolled oats, half a cup of all-purpose flour, and half a cup of packed brown sugar. Add half a teaspoon of ground cinnamon, a quarter teaspoon of ground nutmeg, and a quarter teaspoon of salt. Mix these well to blend the flavors. Next, pour in one-third cup of melted unsalted butter. Stir until the mixture looks like coarse crumbs. If you want some crunch, fold in half a cup of chopped walnuts. They add great texture. Now, it’s time to assemble your crisp. Evenly sprinkle the oat topping over the peach layer. Make sure it covers all the fruit. This will create that delightful crisp texture you crave. Preheat your oven to 350°F (175°C). Once preheated, carefully place the baking dish in the oven. Bake for 30-35 minutes. Look for a golden brown topping and bubbling peaches around the edges. Once baked, take it out and let it cool for a few minutes. You can serve it warm with a scoop of vanilla ice cream or a dollop of whipped cream on top for extra delight. Enjoy your homemade peach crisp! For the complete recipe, check out the Full Recipe. To get the best crisp, use old-fashioned rolled oats. They add a hearty texture. Mix the oats with flour, brown sugar, and spices. This will create a lovely topping. Make sure the butter is melted. It helps bind the topping together. Spread the topping evenly over the peaches. This ensures every bite is crunchy and sweet. To boost the flavor, add a pinch of salt to the topping. This enhances the sweetness of the peaches. You can also toss in chopped walnuts for extra crunch. If you like spices, add some ginger or allspice. For a twist, mix in berries or apples with the peaches. They add color and flavor to your crisp. Serve your peach crisp warm for the best taste. A scoop of vanilla ice cream on top is heavenly. Whipped cream also adds a nice touch. For a pretty presentation, use dessert bowls. Garnish with mint leaves or a sprinkle of cinnamon. This makes your dish look even more inviting. Enjoy every bite of this peachy delight! {{image_4}} You can easily make peach crisp gluten-free. Instead of all-purpose flour, use a gluten-free flour blend. Many brands work well. Make sure to check the labels to avoid hidden gluten. This swap keeps your crisp tasty without sacrificing texture. While peaches shine in this recipe, you can mix it up. Try using nectarines, plums, or blueberries. Each fruit adds a unique flavor. For a fun twist, blend peaches with raspberries for a sweet and tart combo. The key is to match the sweetness of your fruit with the right amount of sugar. Oat toppings are classic, but you can get creative. Consider using crushed nuts or granola for crunch. Almonds or pecans add a lovely nutty flavor. You could also use coconut flakes for a tropical touch. If you prefer a sweeter topping, try adding brown sugar or honey to your mix. These variations will give your peach crisp a fresh twist. For the full recipe, check out Peachy Delight Crisp. To keep your peach crisp fresh, let it cool completely. Cover the dish with plastic wrap or foil. Store it in the fridge for up to three days. If you want to keep it longer, consider freezing it. When you’re ready to enjoy your leftovers, preheat the oven to 350°F (175°C). Remove the cover from your dish, and place it in the oven. Heat for about 15-20 minutes. This will help the topping stay crispy. If you're in a hurry, you can use the microwave. Heat it in short bursts of 30 seconds until warm. If you want to freeze your peach crisp, first cool it completely. Cut it into portions for easier thawing. Wrap each piece tightly with plastic wrap and place them in a freezer bag. It can last up to three months in the freezer. When you're ready to eat it, thaw it overnight in the fridge. Then, reheat it in the oven as mentioned above. Enjoy your peach crisp anytime with these storage tips! To make this peach crisp vegan, swap the butter for coconut oil or vegan margarine. Use a plant-based milk in place of the butter if needed. For the topping, check that your brown sugar is vegan. This simple swap keeps all the flavors you love while being dairy-free. Yes, you can use frozen peaches. Just thaw them first and drain any extra liquid. This step helps keep your crisp from becoming too soggy. Frozen peaches can be a great option when fresh ones aren't in season. Serve your peach crisp warm for the best taste. A scoop of vanilla ice cream or a dollop of whipped cream on top adds a special touch. You can also sprinkle some cinnamon or add a sprig of mint for a pretty finish. For a delightful experience, enjoy it straight from the oven! If you'd like the full recipe, check out the complete instructions above. You learned how to make a delicious peach crisp. We covered picking fresh peaches, making a tasty oat topping, and baking it perfectly. I shared tips for texture and flavor, along with serving ideas. You can also explore gluten-free options and different fruit mixes. Storing and reheating peach crisp keeps it fresh longer. Enjoy this sweet, warm dessert with loved ones. It’s a simple treat you can make your own. Now it’s time to gather your ingredients and start baking!

Peach Crisp with Oat Topping Easy and Delicious Recipe

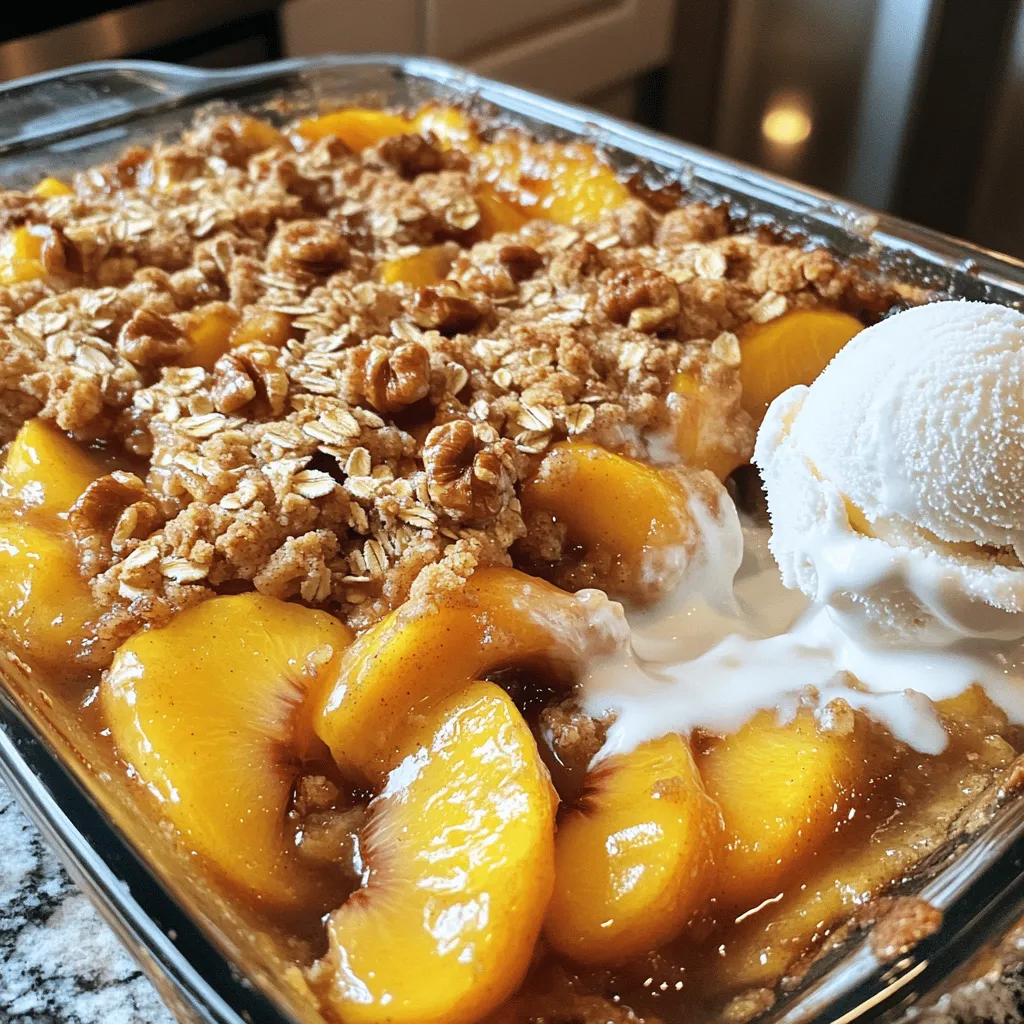
Are you ready to enjoy a warm, sweet treat? This Peach Crisp with Oat Topping is both easy and delicious.

- 1 medium head of cauliflower, cut into bite-sized florets - 2 tablespoons extra-virgin olive oil - 1 teaspoon ground cumin - 1 teaspoon smoked paprika - 1/2 teaspoon chili powder - 1/2 teaspoon garlic powder - Salt and freshly ground black pepper to taste - 8 small corn or flour tortillas - 1 cup fresh cilantro, finely chopped - 1 ripe avocado, sliced into thin wedges - 1 cup red cabbage, finely shredded - 1 lime, cut into wedges To make great vegan cauliflower tacos, start with fresh cauliflower florets. They give the best texture and flavor. I love using olive oil to help the spices stick. The spices add warmth and depth. Ground cumin and smoked paprika are my favorites. They bring a nice earthiness to the dish. Don't forget about the tortillas! I prefer small corn tortillas. They hold the filling well and add a nice taste. For toppings, cilantro, avocado, and red cabbage are perfect. They add freshness and crunch to each bite. - Additional vegetables or protein alternatives - Homemade salsa or sauces If you want to spice things up, consider adding more veggies. Bell peppers or zucchini work well. You can also try protein alternatives like black beans or lentils. For extra zest, make a homemade salsa. A simple tomato or mango salsa can brighten the dish. For a creamy touch, you can whip up a vegan sauce. A cashew cream or tahini dressing adds richness. You can find the full recipe for these tasty tacos in the link provided. Enjoy creating your own unique taco experience! 1. Preheat your oven to 425°F (220°C). This helps the cauliflower roast well. 2. In a large bowl, mix the cauliflower florets with olive oil and spices. - Use: - 1 medium head of cauliflower, cut into bite-sized florets - 2 tablespoons extra-virgin olive oil - 1 teaspoon ground cumin - 1 teaspoon smoked paprika - 1/2 teaspoon chili powder - 1/2 teaspoon garlic powder - Salt and freshly ground black pepper to taste 3. Toss the cauliflower until it gets coated with the oil and spices. 1. Spread the seasoned florets on a baking sheet lined with parchment paper. 2. Roast in the oven for 25-30 minutes. Flip the florets halfway through. This step helps them get crispy and golden. 3. Keep an eye on them; you want them tender but not burnt. 1. While the cauliflower roasts, warm the tortillas in a dry skillet. Heat each side for about 30 seconds until they are soft and slightly toasted. 2. Once the cauliflower is ready, take it out of the oven. Let it cool a little. 3. To build your taco, place a good amount of roasted cauliflower in the center of a tortilla. 4. Add toppings like: - Handful of shredded red cabbage - A few slices of creamy avocado - A sprinkle of fresh cilantro 5. Squeeze a lime wedge over each taco. This adds a fresh pop of flavor. For the full recipe, check the details above! To make the best vegan cauliflower tacos, spices matter. Here are my favorite ones: - Ground Cumin: It adds warmth and depth. - Smoked Paprika: This gives a nice smoky flavor. - Chili Powder: It brings a gentle heat. - Garlic Powder: It adds extra savory notes. Mix these spices with olive oil before you coat your cauliflower. This helps the flavors stick. You want to let the cauliflower marinate for at least 15 minutes. This gives time for the spices to soak in. When it comes to cooking cauliflower, roasting is my favorite method. Roasting brings out the natural sweetness and gives a crispy texture. - Roasting: Preheat your oven to 425°F (220°C). Spread the florets on a baking sheet. Roast them for 25-30 minutes. Flip them halfway for even cooking. - Sautéing: This is quicker but may not give the same crispy effect. You can sauté in a pan with a bit of oil for about 10 minutes. For a creamy touch, use vegan substitutes like cashew cream or coconut yogurt. These options add a smooth texture and rich taste. You can also try mashed avocado as a topping for a creamy bite. For the full recipe, check out the Vegan Cauliflower Tacos 🥦 section. {{image_4}} You can change up your tacos with different vegetables. Try bell peppers, onions, or zucchini. These add color and crunch. You can also swap proteins. Use black beans, lentils, or chickpeas for a hearty bite. Toppings can vary too. Add corn, radishes, or a dollop of vegan sour cream for extra flavor. If you want gluten-free options, use corn tortillas. They hold the filling well. For a low-carb meal, try using lettuce wraps instead of tortillas. This keeps it light and fresh. No matter your choice, these variations keep your tacos tasty and exciting. Remember to check the [Full Recipe] for the base ingredients and cooking steps! To keep your vegan cauliflower tacos fresh, store leftovers properly. First, let the tacos cool down. Place them in an airtight container. This helps avoid moisture loss. You can keep them in the fridge for up to three days. If you have extra roasted cauliflower, store it in a separate container. It will last about five days in the fridge. For longer storage, you can freeze the cauliflower. Use a freezer-safe bag or container. The roasted cauliflower can stay good for up to three months in the freezer. Just ensure the air is removed to prevent freezer burn. When you want to enjoy your leftovers, reheating is key. To keep the texture nice, use an oven or a skillet. Preheat the oven to 350°F (175°C). Spread the cauliflower on a baking sheet. Heat for about 10 to 15 minutes until hot. This keeps it crispy. If using a skillet, heat it over medium. Add a splash of water and cover it. This method helps steam it while also heating. Avoid using a microwave if you can. Microwaving can make the cauliflower soggy and less tasty. Enjoy your tacos as if they were fresh! How do you make cauliflower tacos crispy? To make cauliflower tacos crispy, roast the florets in a hot oven. Use enough olive oil and spices for flavor. Spread the cauliflower in a single layer on a baking sheet. Flip the florets halfway through roasting to ensure even cooking. This method gives a nice golden color and a crunchy texture. Can I use frozen cauliflower for this recipe? Yes, you can use frozen cauliflower. Just thaw it first and pat it dry. This step helps remove excess moisture. However, fresh cauliflower gives a better texture and taste. Frozen cauliflower may not get as crispy, but it still works well. What are some good sides to serve with these tacos? Great sides for cauliflower tacos include: - Black beans - Corn salad - Mango salsa - Quinoa - Rice These options add color and nutrition to your meal. They also enhance the taco experience. Benefits of using cauliflower in tacos Cauliflower is low in calories and high in fiber. It is a great source of vitamins C and K. This veggie is also rich in antioxidants. Using cauliflower in tacos adds nutrition without extra calories. It helps you feel full longer, making it a smart choice. Caloric count per serving and healthy swaps Each serving of these tacos has about 250 calories. To lower the calories, use less oil or skip the avocado. You can also swap regular tortillas for low-carb or gluten-free options. These simple changes keep the meal light yet satisfying. Vegan cauliflower tacos offer taste and health all in one meal. We covered key ingredients, like cauliflower and spices, along with delicious toppings. You now have simple steps for roasting and assembling them right. Remember to explore flavor variations and tips for storing leftovers. With these tacos, you can impress your friends and family while sticking to a healthy diet. Enjoy cooking and creating your own tasty spins on this dish!

Vegan Cauliflower Tacos Flavorful and Easy Recipe

Are you ready to spice up your taco night? I’ve got a tasty recipe for Vegan Cauliflower Tacos that’s both

- 1 lb boneless chicken breast - 2 tablespoons olive oil - Zest and juice of 2 fresh lemons - 1 tablespoon Dijon mustard - 1 clove garlic - 1 teaspoon natural honey - 1 cup fresh basil leaves - Sea salt and black pepper I often use wooden or metal skewers. If you choose wooden skewers, soak them in water for 30 minutes. This step helps prevent burning on the grill. Metal skewers do not require soaking, but they can get very hot. Always handle them with care. Preparing the skewers is simple. Cut the chicken into 1-inch cubes. This size helps the chicken cook evenly. The marinade, made from olive oil, lemon, honey, Dijon mustard, garlic, and fresh basil, will enhance the chicken's flavor. After marinating, thread the chicken pieces onto the skewers. Leave a little space between each piece. This space allows heat to circulate, ensuring even cooking. For the full recipe, you can check the detailed instructions. To make the marinade, start by mixing key ingredients. In a large bowl, whisk together these items: - 2 tablespoons high-quality olive oil - Zest and juice of 2 fresh lemons - 1 teaspoon natural honey - 1 tablespoon smooth Dijon mustard - 1 clove garlic, finely minced - 1 cup fresh basil leaves, chopped coarsely Whisking thoroughly is important. It helps blend the flavors together. This step ensures every bite packs a punch of flavor. After mixing the marinade, add your chicken cubes. Make sure each piece is fully coated. This way, the chicken absorbs the yummy flavors. Season it with sea salt and black pepper. Cover the bowl and refrigerate it. For the best taste, marinate the chicken for at least 30 minutes. However, letting it sit for 1 to 2 hours is even better. This allows the flavors to soak in deeply. Next, preheat your grill or grill pan to medium-high heat. A hot grill makes a big difference. It helps to get those beautiful grill marks on the chicken. While the grill heats up, carefully thread the marinated chicken onto your skewers. Leave a tiny space between each piece. This helps the heat circulate and cooks the chicken evenly. Once the grill is ready, place the skewers on it. Cook for about 10 to 12 minutes. Turn the skewers occasionally to ensure even cooking. The chicken should reach an internal temperature of 165°F (75°C) for safety. After grilling, let the skewers rest for a few minutes. This keeps the chicken juicy and tasty. For the full recipe, check out the complete instructions. To make your Lemon Basil Chicken Skewers shine, use fresh ingredients. Fresh basil, lemons, and chicken bring bright flavors. When you use fresh herbs, you get a burst of taste that dried herbs can’t match. For the best results, let the chicken rest after grilling. This step seals in the juices and keeps the meat tender. Serve your skewers on a colorful platter for a great look. You can garnish with extra basil leaves and lemon wedges. This adds a vibrant touch. Pair these skewers with a summer salad or creamy tzatziki. These sides balance the flavors and add texture. Avoid over-marinating the chicken. Too long in the marinade can make the meat mushy. Stick to 1-2 hours for the best result. Also, ensure even spacing when threading the chicken on skewers. This helps the chicken cook evenly and gives you those nice grill marks. {{image_4}} You can change the main protein in this dish. Shrimp makes a quick, tasty swap. Tofu also works well for a vegetarian option. Both options absorb the marinade flavor nicely. If you don’t have fresh lemons, try lime juice instead. You can also use lemon zest from a bottle in a pinch. For basil, fresh herbs are best, but dried basil can work too. Just use less, as dried herbs are stronger. You don’t always need a grill for these skewers. An air fryer is a great choice too. Preheat your air fryer to 400°F (200°C). Thread the marinated chicken onto skewers and place them inside. Cook for about 10-12 minutes, turning halfway through. For an oven-baked option, preheat to 400°F (200°C). Place skewers on a baking sheet lined with foil. Bake for around 15-20 minutes, or until the chicken is fully cooked. To give your skewers a little extra kick, consider adding spices. A pinch of cayenne pepper or smoked paprika can add a nice heat. You can also mix in some cumin or coriander for a different taste. When it comes to herbs, feel free to experiment. Try cilantro, mint, or even rosemary. Each herb brings its own unique flavor, making every skewered meal special. After cooking, let the skewers cool. Place them in an airtight container. This keeps the chicken fresh. Store them in the fridge. They will last up to three days. When reheating, use a skillet or oven. Heat at low to medium heat. This helps keep the chicken juicy. Avoid using a microwave. It can dry out the meat. To freeze marinated chicken, first prepare it as usual. Place the marinated chicken in a freezer bag. Remove as much air as possible. This prevents freezer burn. Label the bag with the date. You can freeze it for up to three months. When ready to use, move the bag to the fridge. Let it thaw overnight. For the best texture, cook it right after thawing. In the fridge, leftover skewers stay fresh for about three days. If they smell off or look discolored, do not eat them. Check for slimy textures or unusual colors. These signs mean the chicken has spoiled. Always trust your senses. If in doubt, throw it out. Lemon Basil Chicken Skewers are grilled chicken pieces marinated in a fresh lemon and basil mix. They burst with bright flavors and are perfect for summer. The marinade combines olive oil, garlic, honey, and Dijon mustard, giving the chicken a unique taste. These skewers make a great dish for parties or casual meals. For the best flavor, marinate the chicken for at least 30 minutes. If you have time, aim for 1 to 2 hours. This allows the chicken to soak up the lemon and basil flavors. Avoid marinating for too long, as the acid from the lemon can change the chicken’s texture. Yes, you can use many different marinades. Try a yogurt-based marinade for a creamy texture. A soy sauce blend can add a nice umami punch. You can also experiment with herbs like cilantro or parsley for a different taste. These skewers pair well with light and fresh sides. Consider serving them with a summer salad or grilled vegetables. Rice or couscous also works nicely. A creamy tzatziki sauce can add a refreshing dip that complements the flavors. You can prepare the skewers in advance. Marinate the chicken and thread it onto skewers. Store them in the fridge for up to 24 hours before grilling. This way, you save time on the day of your gathering. Just remember to let them come to room temperature before grilling for even cooking. Lemon basil chicken skewers offer a tasty meal packed with fresh flavors. We discussed key ingredients, from boneless chicken to fresh herbs, and provided steps for marinating and grilling. I also shared tips for perfect flavors, serving ideas, and common mistakes to avoid. Don’t forget you can tweak this dish with alternate proteins or herbs. Enjoy experimenting with this recipe and make it your own. Keep the basics in mind, and you’ll impress everyone at your next meal!

Lemon Basil Chicken Skewers Flavorful Grilled Delight

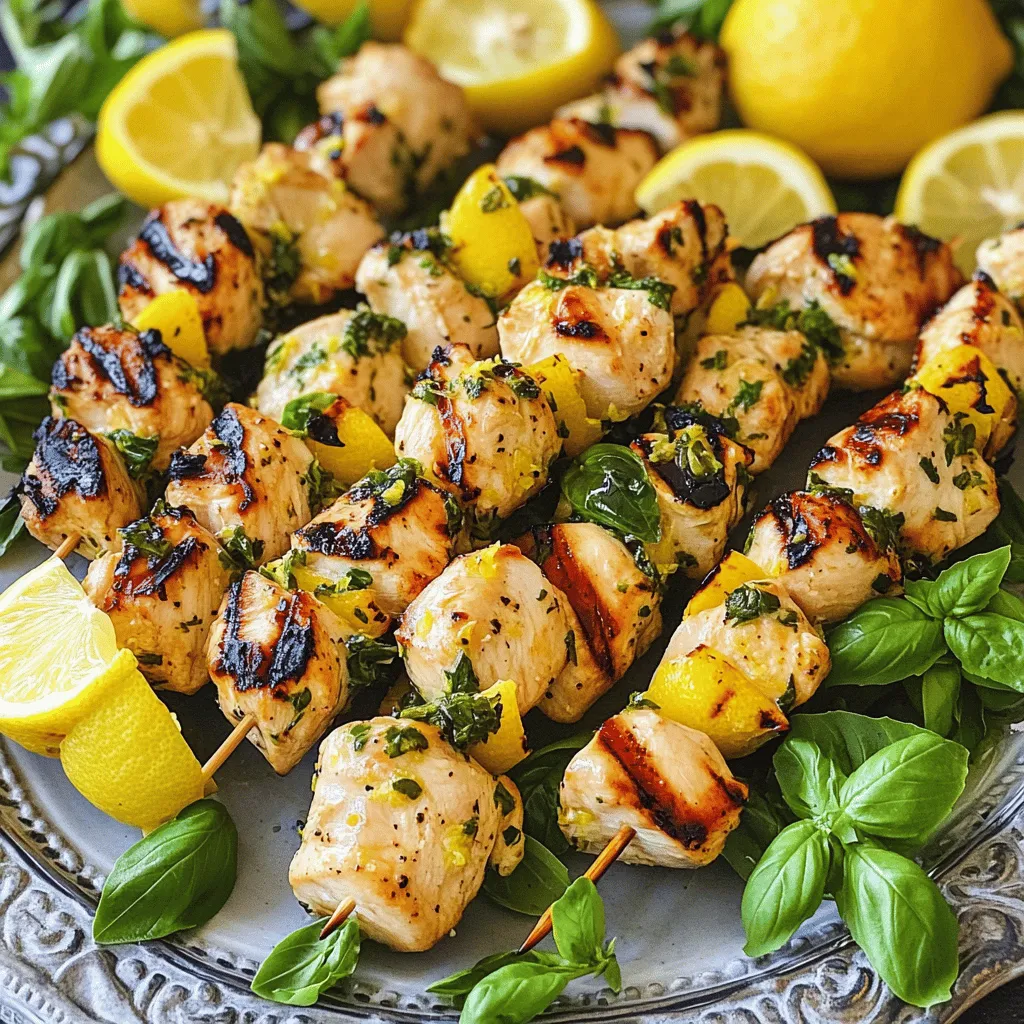
Summer is here, and what better way to celebrate than grilling up some delicious Lemon Basil Chicken Skewers? This tasty

- 4 large bell peppers (assorted colors) - 1 cup cooked quinoa - 1 can (15 oz) black beans - 1 cup corn kernels - 1 small red onion - 2 cloves garlic - Spices (ground cumin, smoked paprika, chili powder) - 1 cup diced tomatoes - 1 cup shredded cheese - Salt and pepper - Fresh cilantro or parsley Stuffed bell peppers with quinoa are fun to make and eat. You can mix and match colors of the bell peppers to make your dish pop. I love using red, yellow, and green peppers for a vibrant look. Quinoa is a great base for this recipe. It is a healthy grain packed with protein. The black beans add more protein and fiber. You can use canned beans for ease. Just rinse them before adding to your mix. Corn gives a sweet crunch to the filling. I often use frozen corn since it is quick and easy. Fresh or canned corn works fine too. Onions and garlic add depth to the flavor. Sauté them in a little oil until they soften. This step makes a big difference. Don’t forget the spices! Ground cumin, smoked paprika, and chili powder create a warm, rich flavor profile. Adjust them to your taste. Tomatoes keep the filling moist and add freshness. You can use fresh or canned tomatoes, depending on what you have. Cheese is the final touch. I like to use a mix of cheddar or a Mexican blend. It melts beautifully and adds creaminess. Finally, add salt and pepper to enhance all the flavors. You can find the Full Recipe for step-by-step guidance on creating this delicious dish. Enjoy your cooking! - Preheat the oven to 375°F (190°C). - Prepare the bell peppers by slicing off the tops and removing the seeds. - In a skillet, sauté the red onion and garlic until soft. - Add cooked quinoa, black beans, corn, diced tomatoes, and spices. - Fold in half a cup of cheese into the filling. - Stuff the mixture into the bell peppers until full. - Place the stuffed peppers in a greased baking dish. - Cover the dish and bake for 25 minutes. - Uncover and bake for an additional 10-15 minutes, until tender. For the detailed ingredient list and instructions, check the Full Recipe. To make your stuffed bell peppers taste great, start with sautéing. Heat a small amount of olive oil in a skillet. Add diced red onion and minced garlic. Sauté them until the onion softens and smells sweet. This step brings out the flavors. Choosing the right cheese matters too. I recommend using cheddar or a Mexican blend. These cheeses melt well and add a rich taste. Sprinkle some on top before baking for a delightful crust. For a fun and vibrant display, serve the stuffed peppers on a large platter. Arrange them in a circle to create a feast for the eyes. Add a sprinkle of fresh cilantro or parsley on top to brighten up the dish. This small touch makes the meal look even more inviting. You can also place lime wedges around the platter. This adds a pop of color and gives your guests a chance to enhance the flavor. Pairing bright colors with fresh herbs makes for a stunning presentation! {{image_4}} You can easily switch up the grains in your stuffed bell peppers. Instead of quinoa, try using rice or couscous. Both options will provide a different texture and flavor. Protein is another area for creativity. You can use chicken, turkey, or even tofu. Each protein adds its own taste. This allows you to tailor the dish to your liking. Customizing spices can change up the entire dish. Add more cumin for a warm flavor or extra chili powder for heat. You can also use Italian herbs for a different twist. Don’t forget about vegetables! Adding mushrooms, zucchini, or spinach can enhance the dish. These veggies bring more nutrients and color to your stuffed peppers. To store your stuffed bell peppers, let them cool first. Place them in an airtight container. This keeps the flavors fresh and the peppers safe. They will last in the fridge for about 3 to 5 days. If you want to enjoy them later, follow these steps. You can freeze stuffed peppers for longer storage. First, let them cool completely. Wrap each pepper tightly in plastic wrap. Then, place them in a freezer-safe bag. They will stay good for about 3 months in the freezer. To thaw, move them to the fridge overnight. For reheating, place them in a preheated oven at 350°F (175°C). Heat them for about 20 to 30 minutes until hot. You can also use a microwave for faster reheating. Just remember to add a splash of water to keep them moist. Following these tips will help you enjoy your quinoa-stuffed peppers later. If you want to see all the steps for making these delicious meals, check out the Full Recipe. To ensure tender bell peppers, start by baking them at the right temperature. Preheat your oven to 375°F (190°C). Cutting the tops off helps them cook evenly. You can also cover them with foil for the first part of baking. This keeps moisture in and softens the peppers well. After 25 minutes, remove the foil for a golden finish. If you want softer peppers, bake them longer. Yes, you can prepare stuffed peppers ahead of time. Start by cooking the filling and stuffing the peppers. Place them in a baking dish and cover with foil. Store them in the fridge for up to 24 hours. When ready to bake, add a few extra minutes to the cooking time. This gives them time to warm through. You can also freeze uncooked stuffed peppers. Just thaw them in the fridge before baking. Stuffed bell peppers pair well with many sides. A fresh salad adds great crunch and color. You might enjoy rice or quinoa on the side for extra texture. Some people like to serve them with bread rolls or garlic bread for dipping. A dollop of sour cream or guacamole on top adds creaminess. These options enhance the meal and make it more filling. You can find the full recipe for these delicious stuffed bell peppers [here](#). This will guide you through each step with detailed instructions. Enjoy cooking! Stuffed bell peppers are a fun and healthy meal. We covered the best ingredients, step-by-step cooking, and tips for a great finish. Remember to add your favorite spices and herbs for extra flavor. With the right prep and storage, these peppers can shine on your table. Feel free to try out variations, and don’t forget to enjoy leftovers. You now have all the tools for a tasty dish that family and friends will love. Happy cooking!

Stuffed Bell Peppers with Quinoa Flavorful Meal Idea

Looking for a tasty, healthy meal that’s fun to make? Stuffed bell peppers with quinoa pack a punch of flavor

To make these tasty pancakes, you need some key items: - 1 cup all-purpose flour - 2 tablespoons granulated sugar - 1 teaspoon baking powder - 1/2 teaspoon baking soda - 1/2 teaspoon salt These ingredients form the base of your pancake batter. The flour gives structure, while the sugar adds sweetness. Baking powder and baking soda help them rise, and salt enhances the flavors. Next, you need some dairy and eggs: - 1 cup buttermilk (or homemade with 1 cup milk + 1 tablespoon vinegar) - 1 large egg - 2 tablespoons unsalted butter, melted The buttermilk makes the pancakes soft and fluffy. If you don’t have buttermilk, use the homemade version. The egg binds everything together, and melted butter adds richness. Finally, let’s not forget the special flavors: - 2 tablespoons ground cinnamon - 1/4 cup brown sugar, packed - 1/4 cup cream cheese, softened to room temperature - 1/2 cup powdered sugar - 1 tablespoon milk (for icing) - 1 teaspoon vanilla extract The cinnamon and brown sugar create a delightful swirl in your pancakes. The cream cheese icing adds a sweet and creamy touch, making each bite irresistible. For the full recipe, check out the details provided earlier. Mixing the dry ingredients Start by grabbing a large bowl. Add 1 cup of all-purpose flour, 2 tablespoons of granulated sugar, 1 teaspoon of baking powder, 1/2 teaspoon of baking soda, and 1/2 teaspoon of salt. Use a whisk to mix until everything is well combined. This step is key for fluffy pancakes. Combining the wet ingredients In another bowl, mix together 1 cup of buttermilk, 1 large egg, and 2 tablespoons of melted unsalted butter. Whisk until smooth. Make sure the butter is not too hot, or it might cook the egg. Measuring and pouring the batter Now that you have both mixtures ready, gently pour the wet ingredients into the dry ones. Use a spatula to combine them. Don't worry if the batter is a bit lumpy; this keeps the pancakes fluffy! Heat your non-stick skillet over medium heat. Lightly grease it with butter or oil. Pour about 1/4 cup of batter onto the skillet. Adding cinnamon-sugar filling before flipping Before the batter sets, sprinkle about a teaspoon of the cinnamon-sugar mixture on top. This adds that delightful swirl we all love in cinnamon rolls. When you see bubbles forming on the top, it's time to flip the pancake. Cook for another 1-2 minutes until golden brown. Preparing the cream cheese icing While the pancakes cook, make the icing. In a small bowl, combine 1/4 cup of softened cream cheese, 1/2 cup of powdered sugar, 1 tablespoon of milk, and 1 teaspoon of vanilla extract. Mix until smooth and creamy. Serving suggestions Stack the warm pancakes on a plate. Drizzle the cream cheese icing generously on top. For a special touch, sprinkle a bit of cinnamon or add some pecans. Enjoy your delicious cinnamon roll pancakes! For the full recipe, refer to the earlier section. To make the best cinnamon roll pancakes, focus on two main things: mixing and cooking. - Importance of not overmixing: When you mix the batter, do it gently. You want some lumps to stay. Overmixing makes pancakes tough. Fluffy pancakes come from a light touch. - Cooking the pancakes at the right temperature: Heat your skillet to medium. If it’s too hot, the outside burns while the inside stays raw. A nice, even heat will give you golden pancakes. The way you serve your pancakes makes them even more special. - Drizzling and garnishing options: Use the cream cheese icing as a drizzle on top. A sprinkle of cinnamon adds great color and flavor. You can also add chopped nuts or fresh fruit for a fun look. - Serving alongside complementary dishes: Pair your pancakes with crispy bacon or fresh fruit. This balance makes your meal feel complete and satisfying. Using the right tools makes cooking easier and more fun. - Best non-stick skillet or griddle: A good non-stick skillet helps pancakes slide right off. Look for one with a flat surface and even heating. - Essential mixing utensils: Use a whisk for the batter and a spatula to flip. A sturdy bowl for mixing helps keep everything contained. Having these tools makes the process smooth. Follow these tips for a delicious breakfast that will impress everyone! If you want the full recipe, check out the [Full Recipe]. {{image_4}} You can adjust the recipe for different needs. For gluten-free pancakes, use a gluten-free flour blend. This can create a similar texture and taste, making it a great swap. You can also try almond flour or coconut flour for a nutty flavor. For those who follow a vegan diet, you can replace the egg with a flaxseed egg. Mix 1 tablespoon of ground flaxseed with 2.5 tablespoons of water. Let it sit for a few minutes until it thickens. Use plant-based milk instead of buttermilk. Almond or soy milk works well. You can also swap the butter for coconut oil or a vegan butter alternative. Spices can make a big difference. Try adding a pinch of nutmeg or cardamom to the batter for extra warmth. You can also use extracts like almond or maple to enhance the flavor. Just a drop can elevate your pancakes. Fruits and nuts add texture and taste. Chopped apples or bananas can be mixed into the batter. They add sweetness and moisture. For a crunch, consider adding walnuts or pecans. Just sprinkle them in before cooking. Toppings can change your pancake game. Traditional maple syrup is classic, but try drizzling with caramel or chocolate sauce for a treat. Fresh fruit or whipped cream also makes a lovely addition. For a fun twist, stack your pancakes like a cake. Layer them with icing or fruit between each pancake. You can also serve them in a bowl with toppings on the side. This way, everyone can customize their meal. For the full recipe, check out my detailed guide! Store leftover cinnamon roll pancakes in the fridge. Place them in an airtight container. Use parchment paper between layers to prevent sticking. They will stay fresh for up to four days. For longer storage, freeze the pancakes. Let them cool completely. Then, stack them with parchment paper in between. Wrap the stack tightly in plastic wrap and place it in a freezer bag. Properly stored, they can last up to three months. To reheat pancakes, use a microwave or an oven. For the microwave, place pancakes on a plate. Heat for about 20 to 30 seconds until warm. For the oven, preheat it to 350°F (175°C). Place pancakes on a baking sheet. Cover them with foil to keep them moist. Heat for about 10 minutes until they are warm throughout. Cinnamon roll pancakes last about four days in the fridge. Check for signs of spoilage, such as an off smell or visible mold. If they look or smell bad, it's best to discard them. To make homemade buttermilk, mix 1 cup of milk with 1 tablespoon of vinegar. Stir it well and let it sit for about 5 to 10 minutes. This quick method works great in a pinch. The milk will curdle slightly, creating a tangy flavor similar to buttermilk. You can then use this homemade buttermilk in your cinnamon roll pancakes. It adds richness and makes the pancakes fluffy. Yes, you can make the batter in advance. To store the prepared batter, place it in an airtight container. Keep it in the fridge for up to 24 hours. When you are ready to cook, give the batter a gentle stir. If it seems thick, add a splash of milk to reach your desired consistency. This way, you can enjoy fresh pancakes without much fuss in the morning. If you want a different option for the icing, consider using Greek yogurt or mascarpone cheese. Both alternatives add creaminess. You can also use a simple glaze made from powdered sugar and milk. Just mix until smooth. These options work well while keeping the flavor delightful. Cinnamon roll pancakes are a tasty twist on a breakfast classic. We covered the key ingredients, from flour to creamy icing. You learned how to mix, cook, and serve these delicious pancakes, plus tips for fluffy results. We also explored fun variations and how to store leftovers. Make these pancakes your own by adding flavors or toppings. Enjoy each bite, and share them with loved ones. Happy cooking!

Cinnamon Roll Pancakes Irresistible Breakfast Delight

Are you ready to elevate your breakfast game? Cinnamon Roll Pancakes are a delicious twist on a classic favorite. Imagine

Older posts
Newer posts
← Previous Page1 … Page59 Page60 Page61 … Page86 Next →

dsad

© 2026 lazychefmagic • Built with GeneratePress

Our Policies

  • Copyright Policy
  • Cookie Policy
  • GDPR Policy
  • Privacy Policy
  • Disclaimer
  • Terms Of Use

More Information

  • Home
  • About
  • Contact
  • Appetizers
  • Dessert
  • Dinner
  • Drinks
©2026, lazychefmagic About Back To Top