Skip to content
DisclaimerTerms Of UseGDPR PolicyCookie Policy

lazychefmagic

  • Home
  • Drinks
  • Appetizers
  • Dinner
  • Dessert
  • About
  • Contact
  • Privacy Policy
DisclaimerTerms Of UseGDPR PolicyCookie Policy

NO-ING-IMG

To make the Rainbow Veggie Quinoa Salad, gather these fresh ingredients: - 1 cup quinoa, thoroughly rinsed and drained - 2 cups vegetable broth (or water) for extra flavor - 1 cup cherry tomatoes, halved - 1 cup cucumber, diced into bite-sized pieces - 1 bell pepper (choose your favorite color), diced - 1 cup shredded carrots, vibrant and sweet - 1/2 cup red cabbage, thinly sliced for crunch - 1/4 cup fresh parsley, finely chopped for freshness - 1/4 cup feta cheese, crumbled (optional for a vegan-friendly dish) - 1/4 cup extra virgin olive oil - 3 tablespoons freshly squeezed lemon juice - 1 teaspoon garlic powder for a depth of flavor - Salt and pepper to taste Each ingredient adds its own health boost to this salad. Quinoa is high in protein and fiber. It keeps you full and energized. The colorful veggies provide vitamins and minerals. Cherry tomatoes are rich in antioxidants. Cucumbers keep you hydrated and refresh your palate. Carrots give you beta-carotene, good for your eyes. Red cabbage offers fiber and supports digestion. Olive oil provides healthy fats, while lemon juice adds vitamin C. Feta cheese, if used, gives calcium. Overall, this salad is a powerhouse of nutrition. When selecting veggies, focus on color and freshness. Look for bright colors, which often mean better flavor. Choose firm cucumbers and plump cherry tomatoes. Avoid any that are soft or bruised. For bell peppers, check for shiny skin and no blemishes. Shredded carrots should be bright orange and crisp. Red cabbage should feel heavy for its size. Always smell the parsley; it should smell fresh and green. Buying seasonal produce often ensures the best quality. To start, grab a medium saucepan. Pour in 2 cups of vegetable broth or water. Heat it on medium-high until it boils. When it bubbles, add 1 cup of rinsed quinoa. Lower the heat and cover the pot. Let it simmer for 15 to 20 minutes. The quinoa will absorb the liquid and become fluffy. Once done, take it off the heat and let it cool for about 5 minutes. This will give you the perfect base for your salad. While the quinoa cooks, you can prep the veggies. In a large mixing bowl, combine 1 cup of halved cherry tomatoes, 1 cup of diced cucumber, and 1 diced bell pepper. Add in 1 cup of shredded carrots and 1/2 cup of thinly sliced red cabbage. Lastly, toss in 1/4 cup of finely chopped parsley. Stir gently to mix everything well. Once the quinoa cools, add it to the veggie mix. This colorful mix looks and tastes amazing! Now, let’s make the dressing. In a small bowl, whisk together 1/4 cup of extra virgin olive oil and 3 tablespoons of freshly squeezed lemon juice. Add in 1 teaspoon of garlic powder, plus a pinch of salt and pepper. This dressing adds a zesty kick to your salad. Drizzle it over the quinoa and veggie mix. Toss gently to coat all ingredients well. Adjust the seasoning as needed. If you like, fold in 1/4 cup of crumbled feta cheese for a creamy touch. For the best flavor, cover the salad and chill for about 30 minutes. You can also serve it right away if you can’t wait! For the full recipe, check out the [Full Recipe]. When making your rainbow veggie quinoa salad, avoid these common mistakes: - Overcooking quinoa. It should be fluffy, not mushy. - Not rinsing quinoa. This removes a bitter coating called saponin. - Skipping the dressing. It adds flavor and ties all ingredients together. - Using stale vegetables. Fresh veggies keep the salad vibrant and tasty. To take your salad up a notch, try these tips: - Add herbs. Fresh herbs like basil or mint can brighten flavors. - Use lemon zest. Grating lemon peel adds a fresh zing. - Incorporate spices. A pinch of cumin or smoked paprika can add depth. - Experiment with nuts. Toasted nuts add crunch and healthy fats. Make your salad look as good as it tastes: - Use a large, colorful bowl. It showcases the vibrant ingredients. - Layer ingredients. Create a rainbow effect by layering veggies. - Garnish wisely. Top with parsley sprigs or lemon slices for flair. - Serve chilled. Chilling enhances the flavors and freshness. For the Full Recipe, check the earlier sections. {{image_4}} You can change up the Rainbow Veggie Quinoa Salad with your favorite veggies. Try adding broccoli florets or sweet corn for extra sweetness. Zucchini works well too; just chop it into bite-sized pieces. You can also swap in radishes for a peppery kick. The goal is to keep it colorful and fun! To make your salad heartier, consider adding proteins. Chickpeas are a great choice and add a nice crunch. You can also add black beans or grilled chicken. If you want a seafood twist, shrimp or tuna are tasty options. Just combine them into the salad before serving. This salad is naturally vegan and gluten-free, but you can make it even more so. If you want more flavor, use a vegan cheese instead of feta. Quinoa is already gluten-free, so you are set there! You can also add nuts, like almonds or walnuts, for added texture and protein. Just make sure to check that any added ingredients are gluten-free. For the full recipe, check out the main article! To keep your Rainbow Veggie Quinoa Salad fresh, store it in an airtight container. This helps prevent any odors from your fridge from mingling with your salad. Make sure to cool the salad to room temperature before sealing it up. This avoids extra moisture build-up and keeps your veggies crisp. Enjoy your salad within three days for the best taste and texture. Place your salad in the fridge at a temperature below 40°F (4°C). This keeps bacteria at bay and maintains freshness. If you have added feta cheese, eat the salad sooner. Cheese can spoil faster. Remember, the longer it sits, the more flavors can change. Freezing this salad is not ideal. The texture of the veggies changes when thawed. If you must freeze, try only freezing the quinoa. Cooked quinoa freezes well. Use a freezer-safe container, and it can last for up to three months. When ready to eat, thaw in the fridge overnight, then mix it back with fresh veggies. For a burst of color and flavor, always add fresh veggies to thawed quinoa before serving. For the full recipe, check out the detailed instructions above. The salad lasts for about 3 to 5 days in the fridge. Store it in an airtight container to keep it fresh. The veggies stay crisp, and the quinoa holds its texture well. Just remember that the longer it sits, the softer the veggies become. Yes, you can meal prep this salad! Make it one to three days ahead. Keep the dressing separate until you're ready to eat. This keeps the salad fresh and crunchy. When you are ready, just mix it all together and enjoy a quick, healthy meal. If you want to change up the dressing, try these options: - Balsamic vinaigrette for a sweet tang - Tahini dressing for a creamy texture - Avocado dressing for a healthy twist - Yogurt-based dressing for a cool flavor Feel free to experiment with different flavors to find your favorite! For the full recipe, check out the detailed steps above. In this blog post, we explored essential ingredients for a healthy salad, along with cooking tips. You learned how to cook quinoa and mix all salad elements perfectly. We also covered common mistakes and expert tips to enhance flavor. Variations let you customize with proteins or different vegetables. Finally, we discussed storage methods for leftovers and answered your key questions. Embrace these techniques, and you will make salads that taste great and nourish your body. Enjoy your healthy journey!

Rainbow Veggie Quinoa Salad Fresh and Colorful Meal

Looking for a fresh and colorful meal that’s as good for your taste buds as it is for your health?

- 1 cup semi-sweet chocolate chips - 1 cup mini marshmallows - 1 tablespoon unsalted butter - 1/2 teaspoon vanilla extract - 1/4 cup crushed graham cracker crumbs - Graham crackers - Pretzels - Sliced fruits (strawberries, bananas) When making S'mores dip, I always start with the main ingredients. Semi-sweet chocolate chips give that rich, sweet flavor. Mini marshmallows add the gooey texture. I use unsalted butter for a creamy base. A touch of vanilla extract brings warmth to the mix. Finally, crushed graham cracker crumbs give a crunchy finish. For dipping, I love using graham crackers. They match perfectly with the dip. Pretzels add a fun salty crunch. Sliced fruits, like strawberries and bananas, offer a fresh touch. You can choose what you like best. There’s no wrong way to enjoy this dip! To see how I bring these ingredients together, check out the Full Recipe. 1. First, preheat your oven to 350°F (175°C). This step is key for the dip. 2. Next, in a medium oven-safe skillet, add the unsalted butter. Melt it over medium heat. Do not let it burn. 3. After the butter melts, take the pan off the heat. Stir in the semi-sweet chocolate chips. Mix until smooth and creamy. 1. Now, add the vanilla extract to your melted chocolate. Stir it in well. 2. Spread mini marshmallows evenly over the chocolate mix. Make sure every bite gets that gooey goodness! 3. Sprinkle crushed graham cracker crumbs on top of the marshmallows. This adds crunch and flavor. 1. Place your skillet in the preheated oven. Bake for about 10-12 minutes. Watch for the marshmallows to puff up and turn golden brown. 2. Once baked, take it out and let it cool for one minute. This prevents burns when serving. For the full recipe, check out the details above. Enjoy your tasty S'mores dip! To make a great s'mores dip, melt the chocolate evenly. I always use a medium heat. Stir the chocolate until smooth. This helps avoid any lumps. For the marshmallows, keep an eye on their browning. You want them golden, not burnt. This adds that perfect toasty flavor. Get creative with how you serve your dip. Try using different dippers. I love using graham crackers and pretzels. Fresh fruits like strawberries and bananas work great too. Each dipper brings a new taste to the mix. It makes sharing fun and interactive. Make your s'mores dip look inviting. Serve it hot in a skillet for a rustic touch. You can also use a decorative bowl. Arrange your dippers around it for a festive look. This adds to the experience and makes it more enjoyable. Use the Full Recipe to guide you through these steps. {{image_4}} You can switch things up with dark chocolate. This adds a richer taste that many love. Try using different flavored marshmallows, too. Options like strawberry or caramel can make the dip even more fun. If you follow a vegan diet, you can still enjoy this treat. Use vegan chocolate chips and marshmallows. For gluten-free options, choose gluten-free graham crackers. These small swaps keep your dip delicious and inclusive for everyone. Enjoy the Full Recipe for more ideas! To store your leftover s'mores dip, let it cool first. Then, place it in an airtight container. This helps keep the dip fresh. You can refrigerate it for up to three days. When ready to eat, you can reheat it. For reheating, use an oven or microwave. If using an oven, preheat it to 350°F (175°C). Place the dip in an oven-safe dish and heat for about 10 minutes. Stir it halfway through to warm it evenly. If using a microwave, heat it in short bursts. Start with 30 seconds and check until hot. When stored properly, s'mores dip lasts about three days in the fridge. After that, the taste and texture may change. You should look for signs of spoilage. If you see any mold or off smells, it’s best to throw it away. Also, if the dip feels dry or hard, it may not be enjoyable. Always check your leftovers before digging in. Keeping it fresh ensures you can enjoy this tasty treat later! You can make S'mores Dip in a few different ways. If you don't have an oven, try using a microwave. To do this, melt the butter in a microwave-safe bowl. Then add the chocolate chips and heat in short bursts, stirring in between. Once smooth, add the marshmallows on top. Heat until the marshmallows puff up. You can also use a stovetop. Just melt the butter in a pan, add the chocolate, and mix until smooth. Then, top with marshmallows and cover until they melt. Yes, you can prepare parts of the dip ahead of time. You can melt the butter and chocolate and mix them. Just store this mixture in the fridge until you’re ready to bake. When you are ready, add the marshmallows and graham cracker crumbs before baking. This saves time and makes serving easy. If you don't have graham crackers, don’t worry! You can use pretzels for a salty twist. Sliced fruits like strawberries and bananas also work well. They add a fresh taste to the dip. You can even try cookies like vanilla wafers or chocolate chip cookies for a fun change. Enjoy the dip with whatever you like! This blog post covered how to make a delicious s'mores dip. We discussed key ingredients, like chocolate chips and marshmallows. Then, we outlined simple steps for preparation and baking. I shared tips for perfecting the dip and creative serving ideas. You can even try fun variations or store leftovers safely. S'mores dip is easy and fun to make. Your friends and family will love it. Enjoy making this sweet treat anytime!

S’mores Dip with Chocolate and Marshmallows Delight

If you love classic s’mores but want a fun twist, you’re in for a treat! S’mores Dip with Chocolate and

- 4 large bell peppers (choose a mix of colors for visual appeal) - 1 cup quinoa, thoroughly rinsed - 1 can (15 oz) black beans, drained and rinsed - 1 cup corn kernels (can be fresh, frozen, or canned) - 1 teaspoon ground cumin - 1 teaspoon smoked paprika - 1 teaspoon chili powder - Salt and freshly ground black pepper to taste - ½ cup shredded cheese (for a cheesy topping) - 1 tablespoon olive oil (plus a bit more for brushing) - Fresh cilantro, chopped (for garnish) In this recipe, I focus on using fresh, colorful bell peppers. They are the stars of this dish. Quinoa serves as a great base. It is packed with protein and adds a nice texture. Black beans and corn bring in more flavor and nutrients. The spices enhance the taste. Ground cumin adds warmth. Smoked paprika gives a hint of smokiness. Chili powder adds a bit of heat. You can adjust these to your liking. Adding cheese on top makes a creamy finish. Fresh cilantro brings brightness and freshness. These ingredients work together to create a delicious meal. You can find the full recipe in the article. Enjoy cooking these stuffed bell peppers! - Preheat the oven to 375°F (190°C). - Rinse and cook the quinoa. In a medium pot, combine 1 cup of rinsed quinoa with 2 cups of vegetable broth. Bring this to a boil, then reduce the heat and cover. Let it simmer for 15 minutes. After that, fluff the quinoa with a fork and set it aside. - Slice off the tops of the bell peppers. Keep the tops for later use if you want to garnish. - Remove seeds and membranes. This step is key to making sure your peppers are ready to be filled. - Sauté onion and garlic in a large skillet with olive oil. Cook until the onion turns soft and clear, about 3-4 minutes. - Combine filling ingredients and stuff the peppers. Add the cooked quinoa, black beans, corn, halved cherry tomatoes, cumin, smoked paprika, chili powder, salt, and pepper to the skillet. Mix well and heat for about 5 minutes. - Generously fill each bell pepper with the quinoa mixture. Press down gently to pack it tight. If you like cheese, sprinkle some on top. - Bake the stuffed peppers. Place the stuffed peppers in a baking dish and cover with aluminum foil. Bake for 25 minutes. Remove the foil and bake for another 10-15 minutes until the peppers are soft and tops are golden. For the full recipe, check the details above! - How to properly cook quinoa: Rinse one cup of quinoa under cold water before cooking. This step removes the bitter coating called saponin. Combine it with two cups of vegetable broth in a pot. Bring it to a boil, then cover and simmer for about 15 minutes. Fluff it with a fork afterward for the best texture. - Best way to stuff the peppers: After cooking your quinoa, mix it with black beans, corn, and spices in a bowl. Use a spoon to fill each bell pepper with this mixture. Pack it in gently but firmly, so the filling holds well. - Ensure even cooking while baking: Arrange the stuffed peppers upright in a baking dish. Cover the dish with aluminum foil for the first part of baking. This keeps the moisture in, helping the peppers cook evenly. Remove the foil later for a nice golden top. - Serving suggestions: Place each stuffed pepper on a plate. You can put the reserved tops next to them for color. This adds a nice touch and makes the dish look inviting. - Garnishing ideas: Sprinkle fresh cilantro on top right before serving. A drizzle of balsamic glaze also adds flavor and makes the dish pop visually. - Suggested herbs and spices: Adding fresh herbs like basil or parsley can brighten the flavor. A pinch of oregano can also deepen the taste of your filling. Experiment to find what you like best. - Adding toppings like cheese or avocado: Consider sprinkling shredded cheese on top of the stuffed peppers before baking. It melts beautifully and adds richness. You can also add sliced avocado on top when serving for a creamy contrast. These tips will help you create stuffed bell peppers that are not only tasty but also visually appealing. For the complete recipe, check out the Full Recipe section! {{image_4}} You can change the protein in your stuffed peppers. For a heartier dish, use ground turkey or beef. They add great flavor and texture. If you prefer a meatless option, try lentils or chickpeas. They pair well with quinoa and boost the protein content. You can easily adjust the spiciness of your stuffed peppers. Add more chili powder for heat or reduce it for a milder taste. Try mixing in different vegetables too. Bell peppers work great, but zucchini, spinach, or mushrooms can add new flavors. Feel free to experiment with what you have on hand. To make your stuffed peppers vegan, skip the cheese and use plant-based alternatives. Nutritional yeast can give a cheesy flavor without dairy. Consider adding tofu or tempeh for extra protein. They blend well with the quinoa and keep the dish filling and satisfying. Check out the Full Recipe for more details on how to make these delicious changes. To keep your stuffed bell peppers fresh, store leftovers in the fridge. Place them in an airtight container. This helps prevent them from drying out or absorbing other odors. They will stay good for about 3 to 5 days. If you want to enjoy the flavors longer, consider freezing them. You can freeze stuffed peppers for later use. To do this, allow them to cool completely. Wrap each pepper tightly in plastic wrap or aluminum foil. Place them in a freezer-safe bag. They can stay frozen for up to 3 months. When you're ready to eat, thaw them overnight in the fridge. For reheating, bake them in the oven at 350°F (175°C) until hot. Alternatively, you can microwave them, but the oven gives better texture. Preparing stuffed peppers ahead of time can save you effort later. You can stuff the peppers a day in advance and store them in the fridge. Just cover them with plastic wrap. When it's time to cook, simply pop them in the oven. Reheating is easy; just follow the baking instructions. This dish is perfect for a quick weeknight dinner or meal prep. Enjoy your flavorful delight anytime! You can use rice as a great substitute. Long-grain white or brown rice works well. Other grains like farro or bulgur are tasty too. Just cook them according to their package instructions before mixing. These grains add their own unique flavor and texture to the dish. Yes, you can prepare stuffed peppers ahead of time. Cook and stuff the peppers, then cover and store them in the fridge. They can last for up to two days before baking. You can also freeze them. Just wrap each pepper tightly. When ready, bake straight from the freezer, adding a bit more time to the oven. Check for tenderness in the peppers. They should be soft but not mushy. The filling needs to be hot throughout. If you see bubbling around the edges, that’s a good sign too. Another tip is to look for a golden top if you added cheese. Stuffed bell peppers are simple, tasty, and full of flavor. You learned about the best ingredients, spices, and steps to make them. Tips on cooking and presentation can help make your dish shine. I shared ideas for variations and storage, ensuring you can enjoy them later. Incorporating these tips can make your cooking easier and delicious. Try different fillings and make it your own! Enjoy creating your perfect stuffed peppers.

Stuffed Bell Peppers with Quinoa Flavorful Delight

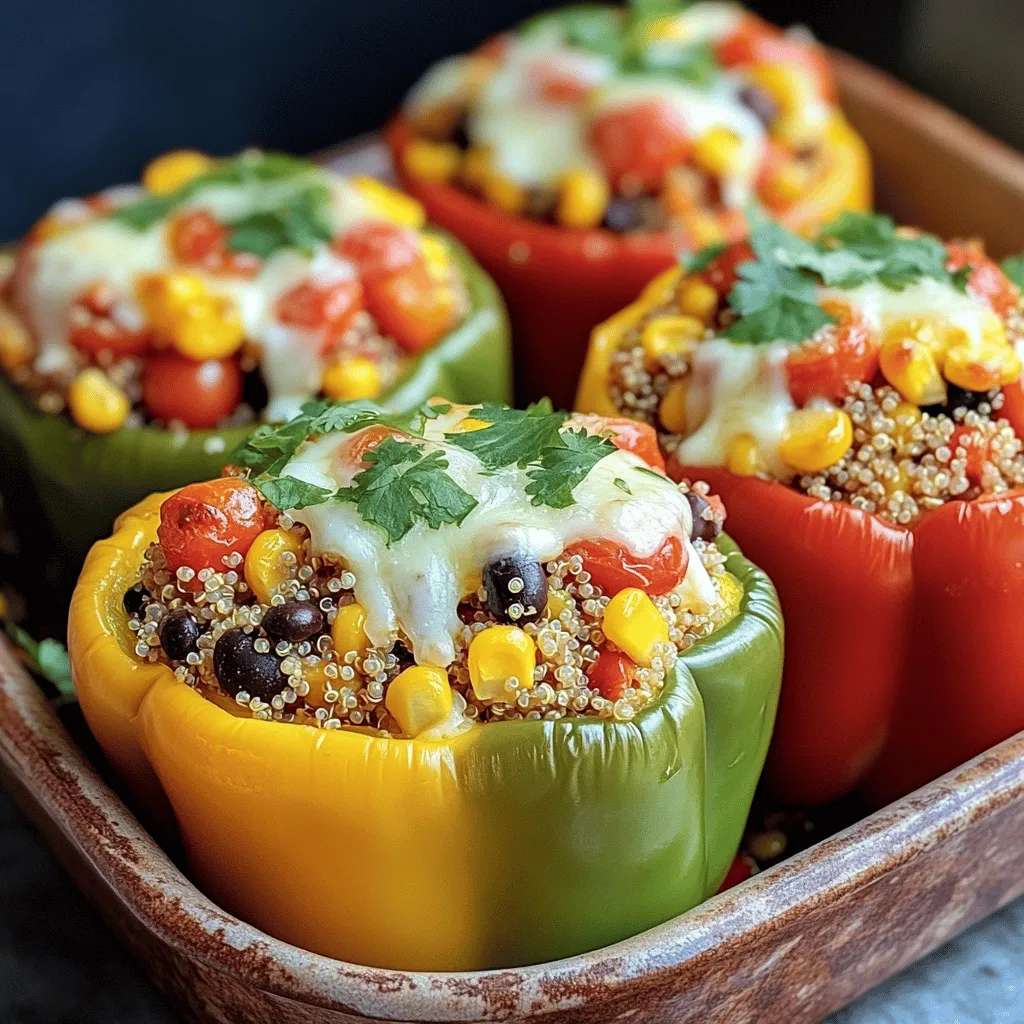
If you’re looking for a colorful dish that’s easy to make and full of flavor, you’ve found it! Stuffed bell

- 2 ripe avocados, halved and pitted - 1/4 cup unsweetened cocoa powder - 1/4 cup pure maple syrup or honey - 1/4 cup almond milk or milk of your choice - 1 teaspoon vanilla extract - A pinch of sea salt - Optional toppings: shaved dark chocolate, fresh berries, or chopped nuts You can adjust the sweetness of your pudding. If you want it sweeter, add more maple syrup or honey. You can also use different sweeteners, like agave syrup. For a dairy-free option, stick with almond milk. Other plant-based milks work well, too! Coconut milk or oat milk are great choices. Avocados bring many health benefits. They are full of healthy fats, which help your heart. They also have fiber, vitamins, and minerals. Cocoa powder is rich in antioxidants. It can boost your mood and help with heart health. Plus, it adds a rich chocolate flavor! Combining these two makes for a tasty and healthy dessert. - Slicing and pitting: Start by taking your ripe avocados. Use a knife to slice them in half. Be careful not to cut too deep. Once halved, twist the two halves to separate them. Use a spoon to gently remove the pit. - Scooping out the flesh: Grab a spoon and scoop the creamy flesh from each half. Make sure to get all of it. Place the avocado flesh into your food processor. This will be the base of your pudding. - Combining in the food processor: Now, add your other ingredients to the food processor. Include the cocoa powder, maple syrup or honey, almond milk, vanilla extract, and sea salt. - Achieving a smooth texture: Blend all the ingredients on high speed. Watch as they come together. You want a silky, smooth texture. If you see any bits stuck to the sides, stop the blender. Use a spatula to scrape them down, then blend again. - Tasting and tweaking sweetness: Once blended, taste your pudding. Is it sweet enough for you? If not, add a little more maple syrup or honey. Blend again for a few seconds. - Importance of incorporating adjustments: Getting the flavor just right is key. Don’t rush this step. Adjusting the sweetness ensures that every bite is delicious. Enjoy the process of making it just how you like it! To get the best texture for your chocolate avocado pudding, pay attention to the blending time. Blend the mixture until it's silky and smooth. This usually takes about one to two minutes. Don’t forget to use a spatula to scrape down the sides of your blender. This helps mix everything evenly and ensures no avocado chunks remain. You can make your pudding more exciting by adding extra flavors. A splash of espresso gives it a rich depth. You can also try a tiny pinch of chili powder for a fun kick. Always use high-quality cocoa powder. It makes a big difference in taste and makes your pudding taste decadent. Serving your pudding nicely makes it even more enjoyable. Use small bowls or glasses to show off the creamy texture. Chill the pudding for at least 30 minutes before serving. This makes it taste even better. For a pop of color, garnish with shaved dark chocolate, fresh berries, or chopped nuts. These add texture and visual appeal, making your dessert look like a treat from a fancy restaurant. {{image_4}} You can make this pudding your own with some fun changes. Try using different sweeteners. Agave syrup or stevia can add a unique twist. Each sweetener brings its own flavor. You can also mix in extra flavorings. Hazelnut spread adds a nutty taste, while a drop of mint extract gives a fresh kick. These small tweaks can change the whole vibe of your dessert. Want to make it vegan? Just swap the honey for maple syrup. This keeps the pudding creamy and delicious. It’s also easy to make gluten-free. All the ingredients are naturally gluten-free. You can enjoy this treat without worry, no matter your diet. Let’s talk toppings! Fresh fruit makes a great choice. You can use strawberries, raspberries, or bananas. They add color and flavor. Crunchy toppings can also be fun. Try adding granola or chopped nuts for a great texture. These toppings not only look pretty but also add a tasty crunch. Remember, the full recipe has more tips for serving! To keep your chocolate avocado pudding fresh, use airtight containers. Glass jars or plastic containers work well. Store the pudding in the fridge for up to 3 days. This keeps it creamy and tasty. You can freeze the pudding if you have leftovers. Put it in a freezer-safe container. Make sure to leave some space at the top since it will expand. To enjoy it later, thaw the pudding in the fridge overnight. This helps maintain the flavor and smooth texture. Check for any changes in color or smell to see if the pudding is bad. If it turns brown or smells sour, it’s time to toss it. To extend shelf life, always use clean utensils and avoid double-dipping. This keeps the pudding fresh and safe to eat. For the full recipe, check out the earlier sections. Yes, you can prepare chocolate avocado pudding ahead of time. This allows for easy meal prep. Just store it in airtight containers. Keep it chilled in the fridge until you are ready to serve. This pudding tastes even better after sitting for a bit. The flavors blend well, creating a richer taste. Yes, chocolate avocado pudding is vegan and dairy-free. The main ingredients are ripe avocados, cocoa powder, and maple syrup. Almond milk or any plant-based milk works well too. This recipe contains no animal products. This makes it a great dessert for everyone, including those with dietary restrictions. Chocolate avocado pudding stays fresh in the fridge for about 3 to 5 days. Store it in an airtight container to keep it from drying out. If you see any brown spots, just stir it well. The creamy texture should remain intact, making it a delightful treat, even on day five. In this blog post, I covered how to make a delicious chocolate avocado pudding. We went through the key ingredients, their health benefits, and easy steps to blend them smoothly. I also shared tips on enhancing flavor and serving ideas that look great. Remember, you can adjust sweetness and play with toppings to match your taste. This creamy dessert is not just tasty; it’s also a healthy treat you can feel good about. Enjoy making this indulgent yet nutritious pudding!

Chocolate Avocado Pudding Creamy and Healthy Delight

Looking for a healthy yet indulgent treat? You’re in the right place! Chocolate avocado pudding is creamy, rich, and packed

To make honey butter biscuits, you will need: - 2 cups all-purpose flour - 1 tablespoon baking powder - 1/2 teaspoon baking soda - 1/2 teaspoon salt - 1/4 cup unsalted butter, cold and cubed - 3/4 cup buttermilk - 1/4 cup honey (for the biscuits) - 1/2 cup unsalted butter, softened (for the honey butter) - 1/4 cup honey (for the honey butter) - Optional: Flaky sea salt for topping When measuring your ingredients, be precise. Use a dry measuring cup for flour. Spoon the flour into the cup and level it off with a knife. If you don’t have buttermilk, you can use regular milk. Just add 1 tablespoon of vinegar to 3/4 cup of regular milk. Let it sit for five minutes. This will give you a good substitute. For the honey butter, you will mix two simple ingredients: - 1/2 cup unsalted butter, softened - 1/4 cup honey This mix will add a sweet touch to your biscuits. It’s rich and creamy, perfect for spreading. If you want a twist, try adding a pinch of cinnamon or a dash of vanilla to the honey butter. This can enhance the flavor even more. Now, you're ready to bake some fluffy, warm honey butter biscuits! Check out the full recipe for detailed steps. Start by preheating your oven to 425°F (220°C). This step is key for making sure your biscuits rise well. Line a baking sheet with parchment paper. This keeps the biscuits from sticking. In a large bowl, mix the dry ingredients. Combine 2 cups of all-purpose flour, 1 tablespoon of baking powder, 1/2 teaspoon of baking soda, and 1/2 teaspoon of salt. Whisk these ingredients together until they blend well. This ensures that your biscuits rise evenly. Add the cold, cubed butter to the dry mix. I use a pastry cutter or my fingers to mix until it looks like coarse crumbs. Next, pour in 3/4 cup of buttermilk and 1/4 cup of honey. Stir gently, but don’t overmix. You want a sticky dough with some lumps. Turn the dough onto a floured surface. Pat it into a rectangle about 1-inch thick. Fold the dough over itself a few times. This creates layers and helps make your biscuits flaky. If you like, use a rolling pin to shape the dough without kneading it too much. Use a floured biscuit cutter or glass to cut out biscuits. Place them on the baking sheet, leaving space in between. Bake for 12 to 15 minutes. The biscuits should turn golden brown and rise nicely. While they bake, mix 1/2 cup of softened butter with another 1/4 cup of honey for the honey butter. Once the biscuits are done, brush them with this mixture. If you want, sprinkle flaky sea salt on top for extra flavor. Enjoy your warm biscuits! For the full recipe, check out the detailed instructions provided. To make your honey butter biscuits soft and flaky, start with cold ingredients. Use cold butter straight from the fridge. Cut the butter into small cubes before mixing it into the flour. This step helps create pockets of butter that puff up when baking. - Don’t overmix your dough. - You want lumps to remain for that flaky texture. - Pat the dough gently to avoid activating gluten too much. For smooth honey butter, ensure your butter is softened but not melted. Mix the softened butter and honey in a bowl until they blend well. If it’s too thick, add a bit more honey. For a fun twist, sprinkle in some flaky sea salt to enhance the flavor. - Use a hand mixer for a creamier texture. - Adjust honey to taste for sweetness. Serve your honey butter biscuits warm for the best flavor. They pair well with breakfast items like eggs and bacon. You can also enjoy them as a snack with extra honey butter on the side. - Try them with jam or fresh fruit. - Drizzle additional honey on top for a sweet touch. For the full recipe, check out the Heavenly Honey Butter Biscuits section! {{image_4}} You can add cheddar cheese to your honey butter biscuits. Just mix in 1 cup of shredded cheddar with the dry ingredients. This gives a nice, cheesy flavor that pairs well with the sweet honey. The cheese adds richness and great texture. I love how the melted cheese creates a gooey center in every bite. For a fresh twist, try adding herbs. Mix in 1 to 2 tablespoons of finely chopped herbs, like rosemary or thyme, to the dough. The herbs add a savory note that balances the honey's sweetness. It makes these biscuits perfect for brunch or a dinner side. I often serve these with roasted meats or soups. Need a gluten-free option? Use a gluten-free flour blend in place of all-purpose flour. Make sure it has a binding agent, like xanthan gum, for the best texture. This version tastes just as good as the original. Plus, it opens up the recipe to more people. Everyone can enjoy these delicious biscuits! For the full recipe, check out the Heavenly Honey Butter Biscuits section above. To keep your leftover honey butter biscuits fresh, place them in an airtight container. This will help maintain their softness. If you don’t have a container, wrap them tightly in plastic wrap. Store them at room temperature for up to 2 days. For longer storage, consider refrigeration. Just remember, the cold can dry them out a bit. When you're ready to enjoy your biscuits again, reheating is key. Preheat your oven to 350°F (175°C). Place the biscuits on a baking sheet. Cover them lightly with aluminum foil to keep them moist. Heat for about 10 minutes or until warm. This method keeps them soft and flaky. You can also use a microwave, but this may make them a little chewy. Heat them in 10-second bursts until warm. Freezing honey butter biscuits is a great way to save some for later. Allow the biscuits to cool completely first. Then, wrap each biscuit in plastic wrap. Place them in a freezer bag or airtight container. They can last in the freezer for up to 3 months. To enjoy, simply thaw them in the fridge overnight and reheat as described above. This way, you can have a warm biscuit whenever you want! Yes, you can use regular butter. However, unsalted butter gives you more control over the salt in the recipe. This helps you balance the sweetness of the honey. If you choose salted butter, you might want to cut back on added salt in the dough. Your biscuits are done when they turn golden brown on top. They should also feel light and fluffy when you touch them. You can also check by inserting a toothpick in the center. If it comes out clean, they are ready to enjoy. Honey butter biscuits pair well with many foods. You can serve them with fried chicken or warm soups. They also go great with jam, fresh fruit, or a simple pat of honey butter on top. Yes, you can use plant-based milk instead of buttermilk. Almond milk or oat milk works well. For the butter, choose a dairy-free butter substitute. This way, you still enjoy the soft and flaky texture without dairy. Honey butter biscuits stay fresh for about two days at room temperature. To keep them longer, store them in an airtight container. They can last up to a week in the fridge. For longer storage, freeze them for up to three months. Just reheat before serving for the best taste. In this post, we covered how to make honey butter biscuits. You learned about the key ingredients, step-by-step instructions, and helpful tips. We also explored variations to suit your taste. Remember, these biscuits pair well with many dishes and are easy to store. Enjoy baking and sharing these treats. You will impress your family and friends! Keep experimenting with flavors and enjoy the joy they bring. Happy baking!

Honey Butter Biscuits Soft and Flaky Delight Recipe

Get ready to treat yourself to soft and flaky honey butter biscuits, the perfect comfort food! In this recipe, I’ll

- 1 cup rolled oats - 1 cup almond milk (or any milk of your choice) - 1 medium apple, diced - 1/2 teaspoon ground cinnamon - 1 tablespoon maple syrup (or honey) - A pinch of salt - 1/4 cup Greek yogurt (or a plant-based alternative) - 1 tablespoon chia seeds - Optional toppings: sliced almonds, extra diced apples, or almond butter When making apple cinnamon overnight oats, you need simple, fresh ingredients. Start with rolled oats. They soak well and give a creamy texture. Next, choose your milk. Almond milk works great, but feel free to use any milk you love. You’ll want a medium apple, diced small. Granny Smith apples add a nice tartness. For flavor, ground cinnamon is a must. It gives warmth and spice. Maple syrup or honey sweetens the oats nicely. A pinch of salt balances the sweetness. If you want to make your oats even creamier, add Greek yogurt. It also boosts protein. Chia seeds help thicken the mix and add nutrients. You can top your oats with sliced almonds, more apples, or almond butter for extra crunch and richness. This blend of ingredients creates a wholesome breakfast. It’s easy to prepare and delicious to eat. Check out the Full Recipe for a complete guide on how to make this nutritious treat. - Combine oats, almond milk, maple syrup, chia seeds, and salt in a bowl. - Stir until the oats are fully soaked. - Fold in diced apple and ground cinnamon. Ensure even mixing for great flavor. - Transfer the mixture into mason jars or airtight containers. - Fill each jar about three-quarters full for best results. - Layer Greek yogurt on top of the oatmeal mixture for added creaminess. - Seal jars tightly and refrigerate overnight or for at least 4 hours. - This lets the oats soak and soften perfectly. - In the morning, stir the mixture well. Taste it and adjust sweetness if needed. - You can add more maple syrup for a sweeter touch. Check out the Full Recipe for a detailed guide on making Apple Cinnamon Overnight Oats! Choose your apple wisely. I love using a Granny Smith apple. Its tartness makes the oats pop. If you prefer a sweeter taste, try a Fuji or Honeycrisp. Adjust the maple syrup too. You can add more or less based on your taste. This way, you make it just right for you. Layering is key for perfect texture. Start with oats and milk, then top with yogurt. This keeps everything creamy. Let your oats soak overnight. This is the best way to ensure they soften and absorb all the flavors. A minimum of four hours works as well. Make it pretty! Top your oats with sliced almonds or more diced apples. A drizzle of almond butter adds flair. For special occasions, serve in clear jars. This shows off the layers and colors. You can even add a sprig of mint on top for a fresh touch. Check out the Full Recipe for more ideas. {{image_4}} You can easily make this dish fit your diet. If you want vegan options, swap Greek yogurt for coconut yogurt. Use agave syrup or a fruit puree instead of maple syrup. For gluten-free oats, choose certified gluten-free rolled oats. This ensures you avoid any gluten contamination. Feel free to play with flavors! Adding nuts or seeds gives your oats a nice crunch. Try walnuts, pecans, or pumpkin seeds for extra texture. You can also mix in other fruits. Bananas and berries work great. Just chop them up and stir them in! Making a big batch is smart for busy mornings. You can double or triple the recipe. Store your oats in jars or containers. This way, breakfast is ready to grab and go. Just take one out of the fridge and enjoy! To keep your apple cinnamon overnight oats fresh, use airtight containers. These containers prevent air from getting in and help maintain the oats' texture. Mason jars work great. They are easy to seal and look nice. You can also use plastic containers with tight lids. Just ensure they are clean and dry before you add your oats. You can store these overnight oats in the fridge for up to five days. If you see any signs of mold or a strange smell, it’s time to toss them. Freshness is key for taste and safety. Always check your oats before eating, especially if they have been in the fridge for a while. Yes, you can freeze overnight oats! This is a great way to prepare meals ahead of time. Just put them in freezer-safe containers. When you are ready to eat, move them to the fridge to thaw overnight. For best results, eat them within a month. When serving, stir well to mix any separated ingredients. You can also add a splash of milk to bring back the creamy texture. How do you make apple cinnamon overnight oats? To make apple cinnamon overnight oats, start with rolled oats. Combine one cup of oats with one cup of almond milk. Add in diced apples, cinnamon, chia seeds, and a pinch of salt. Mix well. Layer Greek yogurt on top. Seal the container and refrigerate overnight. In the morning, stir and add toppings if you like. Can I use quick oats instead of rolled oats? Yes, you can use quick oats. They will soak up the liquid quicker. This change may make the oats creamier. Keep in mind, the texture will be a bit different. Rolled oats offer more chew, while quick oats are softer. What are the health benefits of oats and apples? Oats are high in fiber, which helps digestion. They also keep you full longer. Apples are rich in vitamins and antioxidants. They can boost your immune system. Together, they make a healthy breakfast choice. Are overnight oats filling, and how many servings should I eat? Overnight oats are very filling. They combine carbs, protein, and healthy fats. This mix helps you feel satisfied. One serving is usually about half a cup of oats. You can adjust based on your hunger. Can I make this recipe without dairy? Yes, you can easily make it dairy-free. Use almond milk or coconut milk instead. You can also choose any plant-based milk you like. This keeps the recipe creamy and tasty. What can I substitute for maple syrup in the recipe? If you want a substitute for maple syrup, try honey or agave nectar. You can also use mashed bananas for sweetness. Each option will change the flavor a bit but will still taste great. This blog post guided you through making delicious apple cinnamon overnight oats. We covered the key ingredients and tips for flavor and creaminess. You learned how to prepare, store, and customize your oats. Remember, these oats are not just easy; they are also healthy and flexible. You can mix in your favorite fruits or change the sweeteners. Now, get creative and enjoy your tasty, make-ahead breakfast!

Apple Cinnamon Overnight Oats Healthy Breakfast Choice

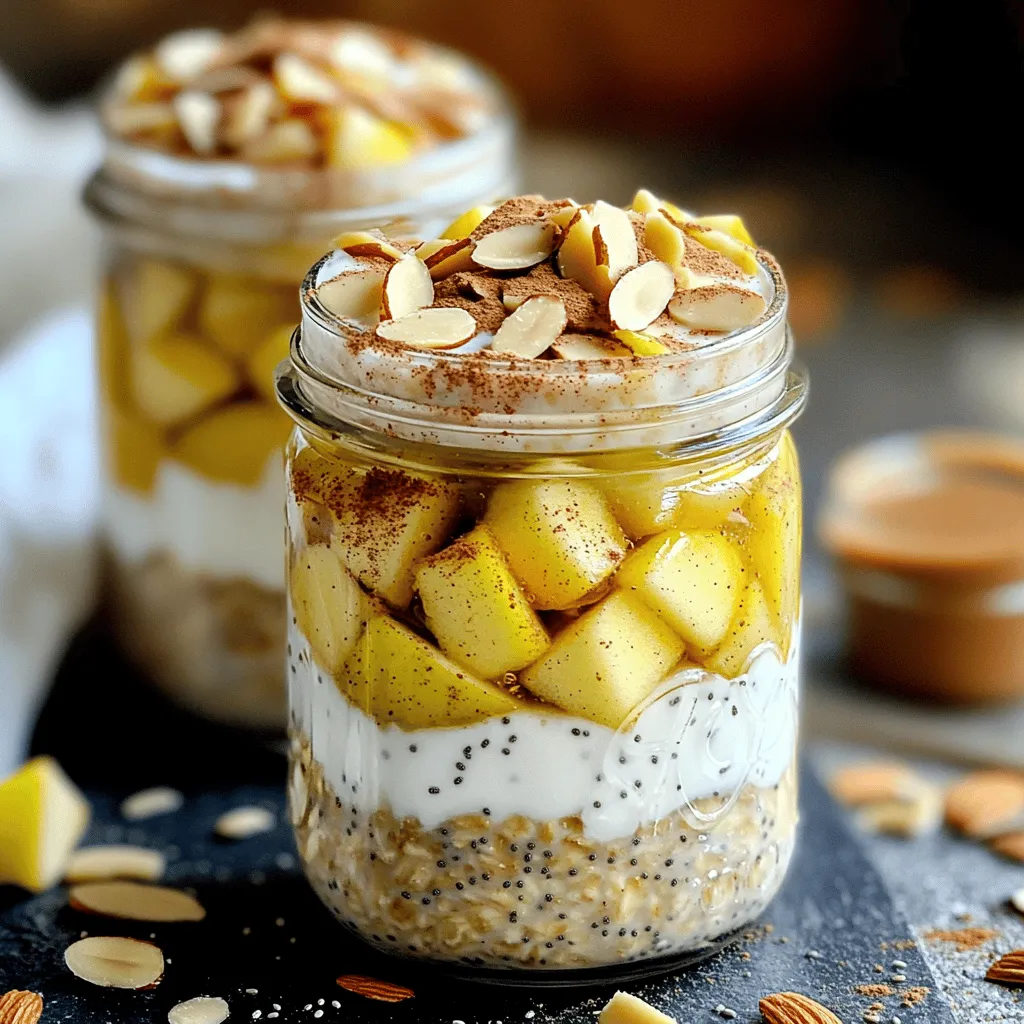
Looking for a quick, healthy breakfast that tastes amazing? Apple Cinnamon Overnight Oats are your answer! This easy recipe blends

- 1 cup all-purpose flour - 2 tablespoons granulated sugar - 1 tablespoon baking powder - 1/2 teaspoon salt - 1 cup milk - 1 large egg - 2 tablespoons melted butter (plus extra for cooking) - 1/2 cup Nutella - Powdered sugar (for dusting) - Fresh strawberries or banana slices (optional, for topping) If you need a substitute for all-purpose flour, you can use whole wheat flour or almond flour. These options work well, but they may change the texture slightly. For a dairy-free option, almond milk or oat milk are great choices. These milks will keep your pancakes tasty and fluffy without dairy. Nutella is delicious, but you can also use other chocolate spreads. Brands like Justin’s or a homemade chocolate hazelnut spread can work well if you want something different. To start, gather your dry ingredients. In a large bowl, mix together: - 1 cup all-purpose flour - 2 tablespoons granulated sugar - 1 tablespoon baking powder - 1/2 teaspoon salt Whisk these until they blend well. Next, in another bowl, mix your wet ingredients. Combine: - 1 cup milk - 1 large egg - 2 tablespoons melted butter Stir until the mixture is smooth. Gently pour this wet mixture into the dry ingredients. Use a spatula to fold them together, but don't overmix. A few lumps are fine! Now, it's time to cook. Preheat your non-stick skillet over medium heat. Add a bit of butter to grease the surface. Pour about 1/4 cup of batter into the skillet. Cook this for about 2 minutes. Watch for bubbles forming on the surface. Once you see bubbles, drop 1 tablespoon of Nutella right in the center. Use another tablespoon of batter to cover the Nutella. This seals it inside. Flip the pancake when the edges look set and golden brown. Cook the other side for 1-2 minutes until it turns golden too. Your pancakes are ready! Serve them warm. Dust with powdered sugar for a sweet touch. You can also add some fresh strawberries or banana slices on top. Stack them neatly on a plate. This gives a beautiful look. Enjoy your Nutella stuffed pancakes! For the full recipe, check the details above. To make the best Nutella stuffed pancakes, avoid overmixing the batter. When you mix the dry and wet ingredients, stir gently. Lumps are just fine! Overmixing can make your pancakes tough. The ideal cooking temperature is medium heat. If the skillet is too hot, the outside burns before the inside cooks. Keep an eye on the pancakes as they cook. Look for bubbles on the surface; that’s your cue to flip! If you need a quick breakfast, try these prep tips. You can mix the dry ingredients ahead of time and store them. Just add wet ingredients when you’re ready to cook. Using pancake mix is another time saver. Just add water or milk, then follow the same steps. You can still add Nutella for that yummy filling. Want to kick up the flavor? Add a pinch of cinnamon or vanilla extract to the batter. It gives your pancakes a warm, sweet taste. To make your pancakes fluffier, separate the egg. Whisk the egg white until it’s stiff, then fold it into the batter. This adds air and gives you light, fluffy pancakes. For the full recipe of Nutella stuffed pancakes, check out the details above. {{image_4}} To make crepes, thin the pancake batter. Add more milk until it flows easily. Use a non-stick pan and pour a small amount of batter. Swirl it around to cover the bottom. Cook for about 1-2 minutes until the edges lift. Flip the crepe, then add Nutella in the center. Fold the crepe over the filling. Serve warm with fresh fruit or whipped cream. For flavor variations, try adding peanut butter or fruit spreads. You can mix in spices like cinnamon for extra warmth. Cream cheese can also make a rich, creamy filling. For gluten-free pancakes, use oat flour or almond flour. Both options provide a great texture. You may need to add more liquid to the batter. Start with a bit more milk to get the right consistency. Adjust cooking technique by lowering the heat slightly. Gluten-free batters often need more time to cook through. Watch closely to avoid burning. Flip when golden brown and firm on the edges. To make a savory twist, consider adding crispy bacon. Cook bacon pieces and sprinkle them on top of the Nutella. You can also add chopped nuts for crunch. Try unexpected toppings like cheese or avocado. A drizzle of balsamic glaze can balance sweetness. These flavors create a fun mix of savory and sweet. Experiment to find your favorite combination. You can find the Full Recipe above to start making these delicious treats! To keep your Nutella stuffed pancakes fresh, store them properly. First, let the pancakes cool to room temperature. Then, stack them with layers of parchment paper in between to prevent sticking. Place them in an airtight container. They will last in the fridge for up to three days. If you want to store them for longer, freezing is a great option. Wrap each pancake individually in plastic wrap. Then, place the wrapped pancakes in a freezer bag. They can last up to two months in the freezer. When it comes to reheating, you have two main options: the microwave or the stovetop. The microwave is quick and easy. Simply place the pancake on a microwave-safe plate and heat for about 20-30 seconds. If you use the stovetop, heat a skillet over low heat. Place the pancake in the skillet for about one minute on each side. To keep your pancakes moist, add a small pat of butter while reheating on the stovetop. This will enhance flavor and texture. Enjoy your warm, gooey Nutella stuffed pancakes anytime! Yes, you can make Nutella stuffed pancakes ahead of time. Here’s how: - Cook the pancakes: Follow the full recipe and cook the pancakes. - Cool them down: Let the pancakes cool on a wire rack. - Store properly: Place them in a single layer in an airtight container. - Refrigerate: Keep them in the fridge for up to three days. When you're ready to eat, reheat them in a skillet or microwave. To prevent Nutella from leaking, seal the filling well. Here are my tips: - Use enough batter: When you drop Nutella, cover it with extra batter. - Press gently: Lightly press the batter over the Nutella to seal it. - Cook on medium heat: This helps the edges set before flipping. These steps will keep the Nutella inside and make for a perfect bite. Finding Nutella stuffed pancakes is easy! Check out these places: - Local diners: Many diners serve fun pancake options. - Brunch spots: Cafes that focus on brunch often have unique pancakes. - Food trucks: Look for food trucks that specialize in sweets or breakfast. You can also search online for reviews and recommendations in your area. Nutella stuffed pancakes are great for kids! Here are a few things to consider: - Nutritional value: They are rich in carbs and sugar, so serve them in moderation. - Add fruit: Top with fresh fruit like bananas or strawberries for extra nutrients. - Make it fun: Let kids help make their own pancakes. They’ll love the process! These tips make the meal fun and a little healthier for everyone. You now know how to create delicious Nutella pancakes. We covered the ingredients, cooking steps, and tips for perfecting your dish. Remember, you can swap ingredients to suit your needs. Enjoy trying different toppings and variations for a unique twist. Whether you opt for sweetness or a savory touch, your pancakes can be a hit. Store them well for another tasty breakfast. I hope you feel confident to make these for yourself and your loved ones. Enjoy your cooking!

Nutella Stuffed Pancakes Irresistible Breakfast Treat

Welcome to the sweet world of Nutella Stuffed Pancakes! If you’re ready to impress your friends or family with an

To make a rich and creamy spinach artichoke dip, you'll need a few key ingredients. Here’s what you’ll need: - 1 cup fresh spinach, finely chopped - 1 cup canned artichoke hearts, thoroughly drained and coarsely chopped - 1 cup cream cheese, softened to room temperature - 1/2 cup sour cream - 1/2 cup mayonnaise - 1 cup shredded mozzarella cheese, divided - 1/4 cup grated Parmesan cheese - 2 cloves garlic, minced - 1 teaspoon onion powder - Salt and freshly ground black pepper, to taste - Optional: sliced baguette or crispy tortilla chips for serving These ingredients combine to create a dip that’s smooth and full of flavor. You can adjust the amounts based on your taste. For example, you can add more garlic if you love its flavor or use extra cheese for a cheesier dip. This recipe focuses on fresh and rich flavors to make every bite satisfying. For the full recipe, check out the instructions above. - Preheat the oven to 350°F (175°C). - Soften cream cheese to room temperature. - Combine cream cheese, sour cream, and mayonnaise until smooth. - Stir in mozzarella and Parmesan cheese. - Fold in spinach, artichoke hearts, garlic, and onion powder. - Season to taste with salt and pepper. - Transfer mixture to a greased baking dish. - Bake for 25-30 minutes until bubbly and golden. This simple process will lead you to a warm, creamy dip. For the full recipe, check the details above. Enjoy the rich flavors and creamy texture! To get the best texture for your dip, start with the cream cheese. Make sure it is fully softened. This makes mixing easier and smoother. If the cream cheese is too cold, your dip will be lumpy. Mix just enough to blend the ingredients. Avoid overmixing to keep the dip a bit chunky. A few bits of artichoke or spinach add great texture. You can prepare this dip in advance. Just mix all the ingredients and place them in a dish. Cover and refrigerate until you are ready to bake. If you bake it cold, add a few extra minutes to the cooking time. This helps ensure it heats all the way through. I love serving this dip warm. It pairs perfectly with sliced baguette or crispy tortilla chips. You can also use fresh veggie sticks for a lighter option. For a more appealing look, add some garnishes. Try a sprinkle of extra Parmesan or fresh herbs on top. These simple touches make your dish stand out! {{image_4}} You can easily swap some ingredients to change the dip. For a healthier twist, use Greek yogurt instead of sour cream. It gives a nice tang and keeps it creamy. You can also try different cheeses. Cheddar adds a sharp flavor, while feta gives a salty kick. Both make the dip even tastier! Want to spice things up? Add a pinch of red pepper flakes. This small change will give your dip a nice kick. You can also mix in herbs like thyme or basil. These herbs add freshness and enhance the overall flavor. Don’t be afraid to experiment! If you need a gluten-free option, choose the right dippers. Use fresh veggies or gluten-free crackers. They pair perfectly with the creamy dip. For vegan friends, use plant-based cream cheese instead of regular cream cheese. This small change keeps the dip delicious and inclusive. You can find options in many stores now. For the full recipe, check out the detailed instructions above. Store any leftover dip in an airtight container in the fridge. This helps keep it fresh. For the best taste, eat it within 3-4 days. If it sits too long, the flavors can fade. To reheat the dip, use the oven or microwave. Warm it until it’s hot again. For extra creaminess, add more cheese before you heat it. This simple step makes the dip even richer and more delicious! Yes, you can prepare it a day before and bake when needed. This dip keeps well in the fridge. Just cover it tightly. When you're ready to serve, pop it in the oven. This saves time for your party or gathering. Yes, when served with gluten-free dippers, the dip itself is gluten-free. Just check labels on your chips or bread. Many brands offer tasty gluten-free options. This makes it safe for those with gluten allergies. Serve with sliced baguette, tortilla chips, or fresh veggie sticks. Each option brings a different crunch and flavor. Bread adds a soft touch, while chips give extra crunch. Veggie sticks offer a fresh bite. Mix and match for a fun platter! Add diced jalapeños or adjust the amount of red pepper flakes. Start small, then taste as you go. You can always add more heat. This dip is all about your taste. Adjusting the spice makes your dip unique! In summary, this blog post guides you through making creamy spinach artichoke dip. You learned the needed ingredients, easy steps, and helpful tips. Baking this dip brings out its rich flavors, perfect for gatherings. Remember, you can personalize it with different herbs, cheeses, or dippers. Make it ahead for quick serving. Whether you stick to the classic recipe or get creative, enjoy sharing this tasty treat with others. Your friends and family will love it!

Creamy Spinach Artichoke Dip Tasty and Easy Recipe

If you’re craving a warm, cheesy delight that’s quick and easy to make, you’re in the right place! My Creamy

- 4 chicken thighs, bone-in and skin-on - 1 cup long-grain white rice - 2 cups low-sodium chicken broth - Zest and juice of 1 fresh lemon - 4 cloves garlic, minced - 1 medium onion, finely chopped - 1 teaspoon dried oregano - 1 teaspoon dried thyme - 1 teaspoon smoked paprika - ½ teaspoon sea salt - ¼ teaspoon freshly cracked black pepper - 2 tablespoons extra virgin olive oil - Fresh parsley and lemon slices for garnish To create the best One-Pan Lemon Herb Chicken and Rice, gather these fresh and flavorful ingredients. The chicken thighs are key for a juicy dish. Long-grain white rice soaks up all the tasty broth. Low-sodium chicken broth adds depth without too much salt. The lemon zest and juice bring bright flavor. Garlic and onion give a savory base. The dried herbs, like oregano and thyme, add warmth, while smoked paprika gives a nice hint of smokiness. Don't forget to finish with fresh parsley and lemon slices. They make the dish look fresh and inviting. For the full recipe, check the details above. - Heat olive oil in a large skillet over medium-high heat. - Season chicken thighs with salt, pepper, smoked paprika, oregano, and thyme. To start, I heat the olive oil in a large skillet. I look for a good shimmer to know it’s ready. While the oil warms, I season my chicken thighs. I use salt, pepper, smoked paprika, oregano, and thyme. This blend gives the chicken great flavor. It’s important to cover both sides well. - Sear chicken thighs skin-side down for 4-5 minutes until golden brown. - Flip and sear for an additional 3-4 minutes. - Remove chicken and sauté onion and garlic. Next, I place the chicken thighs skin-side down in the hot oil. I let them sear for about 4-5 minutes until they are golden brown. The aroma fills my kitchen! After that, I carefully flip the chicken over and sear for another 3-4 minutes. Once nicely browned, I remove the chicken and set it aside. I don’t wash the pan; I want those tasty bits. I add chopped onion and minced garlic to the hot pan. I sauté them for 2-3 minutes until the onions are clear and the garlic smells amazing. - Toast rice with onion and garlic for 1 minute. - Add chicken broth, lemon zest, and lemon juice. - Nestle chicken thighs back into the pan and simmer. Now, I stir in the rice with the onion and garlic. I toast the rice for about 1 minute to soak up those flavors. Then, I carefully pour in chicken broth. I also add lemon zest and lemon juice for that bright flavor. It’s important to mix everything well. After that, I gently place the seared chicken thighs back into the pan. I make sure they sit skin-side up in the broth and rice. I bring the mixture to a gentle simmer. Then, I cover the pan and turn the heat down low. I let it cook for 25-30 minutes until the rice is tender. Following the [Full Recipe] ensures I get the best results with this dish. To achieve crispy chicken skin, start with high heat when searing. Place the chicken skin-side down and let it cook without moving it. This helps form a golden crust. You can also pat the skin dry with a paper towel before seasoning. Less moisture means crispier skin. Letting the dish rest is key. After cooking, keep the pan covered for about five minutes. This resting time allows the flavors to blend and the chicken to stay juicy. The rice will also finish cooking during this time. For side dishes, consider serving steamed greens like broccoli or green beans. Their freshness complements the rich flavors of the chicken and rice. A light salad with lemon vinaigrette also pairs well. Adjusting herbs and spices can change your flavor profile. If you want more zest, add extra lemon juice or zest. For a bit of heat, try a pinch of red pepper flakes. Fresh herbs like basil or rosemary can also add a lovely touch. Serving directly from the pan creates a rustic look. It shows off the bright colors of the dish. If you prefer a more formal touch, plate each serving individually. Be sure to include some lemon slices and a sprinkle of parsley for a fresh finish. For garnishing ideas, consider adding a few lemon wedges around the dish. You can also sprinkle some extra parsley on top. This adds a pop of color and makes the meal more inviting. Enjoy the beauty of your One-Pan Lemon Herb Chicken and Rice! For the full recipe, check out the details above. {{image_4}} You can switch up the protein in this dish. Chicken thighs work great, but chicken breasts or even tofu make good choices too. If you want a lighter option, use skinless chicken. For those who prefer plant-based meals, tofu absorbs the flavors well and gives a nice texture. For rice, use gluten-free options like quinoa or brown rice. Just remember, these may change cooking times. Quinoa cooks faster than brown rice, so keep an eye on it to avoid mushiness. Adding veggies is an easy way to boost your meal. Try peas, bell peppers, or even spinach. They add color and nutrition. You can toss them in the pan during the last few minutes of cooking. This keeps them bright and fresh. You can also play with herbs. Rosemary and basil add a different twist to the flavor. Feel free to mix and match! Fresh herbs work well too. Just add them at the end for the best taste. If you want to save time, use an Instant Pot or slow cooker. For the Instant Pot, cook on high pressure for 10 minutes. Then let it naturally release for 5 minutes. This method makes the chicken super tender. For a hands-off approach, oven-baking is a great option. Preheat your oven to 375°F. In a large baking dish, combine the rice, broth, lemon, and seasonings. Nestle the chicken on top. Cover with foil and bake for about 30-35 minutes. Remove the foil and bake for another 10 minutes. This will give you crispy chicken skin without much fuss. For the full recipe, check the main article. To keep your One-Pan Lemon Herb Chicken and Rice fresh, store leftovers in an airtight container. This prevents moisture loss and keeps flavors intact. Make sure to refrigerate within two hours of cooking. You can also freeze this dish for later. Just cool it completely before placing it in freezer-safe bags. This way, the chicken and rice stay tasty for up to three months. When reheating, use the stovetop or microwave. If using the stovetop, add a splash of chicken broth to the pan. Heat over low until warm. This helps keep the rice moist and flavorful. In the microwave, cover the dish with a damp paper towel. This traps steam and prevents drying. Heat in short bursts, stirring in between, until hot. In the fridge, your dish lasts about three to four days. Check for signs of spoilage. If the chicken smells sour or has a strange color, it’s best to discard it. The rice may also harden or become dry, which means it’s time to toss it. Always trust your senses when it comes to food safety. How to make One-Pan Lemon Herb Chicken and Rice? To make this dish, you need to follow a few simple steps. First, heat olive oil in a large skillet. Season the chicken thighs with salt, pepper, smoked paprika, oregano, and thyme. Sear the chicken skin-side down until golden brown. Remove the chicken and sauté onion and garlic in the same pan. Add rice, then pour in chicken broth, lemon zest, and lemon juice. Nestle the chicken back in and simmer until the rice is tender. You can find the Full Recipe above for more details. Can you use different types of rice for this recipe? Yes, you can use different types of rice. Long-grain rice works best, but you can try jasmine or basmati rice. Each type gives the dish a unique flavor and texture. Just remember to adjust the liquid ratio and cooking time as needed. What are the calories per serving? This dish has about 400 calories per serving. This count includes the chicken, rice, and broth. The lemon and herbs add flavor without many extra calories. You can adjust the serving size to fit your dietary needs. Is this dish suitable for meal prep? Yes, this dish is great for meal prep! It holds up well in the fridge. You can make a big batch and store it in airtight containers. It tastes even better the next day as the flavors meld. What to do if the rice is undercooked? If the rice is undercooked, add a little more broth or water. Cover the pan and let it cook for a few more minutes. Check often to avoid overcooking. The goal is fluffy rice that absorbs all the flavors. How to ensure the chicken is fully cooked? To ensure the chicken is fully cooked, use a meat thermometer. The internal temperature should reach 165°F (75°C). If you don’t have a thermometer, cut into the thickest part of the thigh. The juices should run clear, not pink. This blog covers how to make One-Pan Lemon Herb Chicken and Rice. You learned about key ingredients like chicken thighs, rice, and chicken broth. I shared steps for cooking and tips for perfecting your dish. You also found variations and storage info to keep leftovers fresh. Remember, cooking should be fun and tasty. Try new herbs and flavors to make this dish your own. Enjoy every bite!

One-Pan Lemon Herb Chicken and Rice Delight

Are you ready to impress at dinner with a simple yet mouthwatering One-Pan Lemon Herb Chicken and Rice? This dish

- 8 oz cream cheese, softened to room temperature - 1/4 cup unsalted butter, softened - 4 cups powdered sugar, sifted - 1 tablespoon fresh orange zest - 2 tablespoons freshly squeezed orange juice - 1/2 teaspoon pure vanilla extract - 1/2 teaspoon fine sea salt - Yellow and orange food coloring (optional, for visual appeal) - Granulated sugar, for coating To make Orange Cream Cheese Mints, start with some basic ingredients. Cream cheese and unsalted butter create a rich base. The cream cheese should be soft, which helps blend it well. You will also need powdered sugar to sweeten the mix. Sifting it first keeps the mints smooth. Next, add fresh orange zest and juice for a bright, citrus flavor. These ingredients give the mints their unique taste. Don’t forget the pure vanilla extract! It adds depth to the flavors. The fine sea salt balances the sweetness. If you want to make the mints look fun, consider using yellow and orange food coloring. It’s optional but can make your treats pop. Lastly, granulated sugar is used to coat the mints, adding a nice crunch. These ingredients come together to create a simple yet delightful treat. Enjoy the process of mixing and creating these sweet mints! {{ingredient_image_2}} - Start by mixing the cream cheese and butter. In a large bowl, beat them on medium speed for 2-3 minutes. This makes the mixture smooth. - Next, add the powdered sugar. Do this slowly to avoid a sugar cloud. Mix on low speed until it's fully blended. - Now, stir in the orange zest, orange juice, vanilla extract, and sea salt. Keep mixing until it’s smooth and well combined. - If you want color, add a few drops of yellow and orange food coloring. Blend until you reach your desired shade. - Cover the bowl with plastic wrap. Chill the mixture in the fridge for 30 minutes. This helps it firm up. - Once chilled, scoop out small portions using a teaspoon. Roll each piece into a ball with your hands. - Roll each ball in granulated sugar until they are fully coated. Place them on a baking sheet lined with parchment paper. - Use a fork or your fingers to gently press down each mint. This flattens them into a nice shape. - Put the flattened mints back in the fridge. Chill them for at least 1 hour before serving. This step helps them set well. - Room temperature ingredients: Start with cream cheese and butter at room temp. This helps them mix well and become creamy. Cold ingredients can make your mints lumpy. - Avoiding powdered sugar mess: When adding powdered sugar, mix on low speed. This will keep the sugar from puffing up and making a mess. - Adjusting sweetness and zest: Taste the mixture as you mix. If you want more flavor, add more orange zest or juice. You can also reduce the sugar if it’s too sweet. - Achieving the right consistency: The mixture should be soft but not sticky. If it’s too runny, add a bit more powdered sugar until you get the right texture. - Creative serving suggestions: Serve the mints in a pretty candy dish or on a colorful platter. This makes them look festive and fun. - Garnishing for visual appeal: Add a sprinkle of fresh orange zest or a few mint leaves on top. This gives a nice pop of color and makes your mints even more inviting. Pro Tips Chill for Better Handling: Allowing the mixture to chill for 30 minutes not only firms it up but also makes it easier to roll into perfect balls without sticking to your hands. Customize Your Color: Feel free to adjust the amount of food coloring to match your occasion. A vibrant hue can make your mints more visually appealing! Perfect Sugar Coating: For an even sugar coating, consider rolling the mints in sugar multiple times or using superfine sugar for a smoother finish. Creative Shapes: Instead of forming traditional balls, use cookie cutters to create fun shapes for special occasions, adding a personal touch to your treats! {{image_4}} You can change the flavor of your Orange Cream Cheese Mints in fun ways. Try using lemon or lime zest instead of orange. These citrus swaps bring a bright taste to your mints. You can also mix flavors. A blend of orange and lemon zest creates a unique twist. For a different scent, add mint or almond extract. These extracts can give your mints a fresh vibe. A drop or two is all you need for a boost. For those on a vegan diet, you can make these mints using plant-based cream cheese. This swap keeps the taste while fitting your needs. Look for a brand that works well in desserts. You can also make them gluten-free. Use cornstarch instead of powdered sugar to help your mints hold together. This change keeps the texture right while making the treat safe for everyone. Enjoy your mints knowing they fit your diet! To keep your Orange Cream Cheese Mints fresh, chill them well. After making the mints, place them in the fridge for at least an hour. This helps them firm up nicely. Once they are set, store them in an airtight container. I recommend using a container that seals tightly. This keeps moisture out and preserves the mints' flavor. You can store the mints in the fridge for up to two weeks. After that, they may start to lose their taste and texture. Signs of spoilage include an off smell, discoloration, or a change in texture. If you notice any of these, it’s best to discard them. Always trust your senses when checking food freshness! Can I freeze Orange Cream Cheese Mints? Yes, you can freeze these mints. Place them in an airtight container. They will stay fresh for up to three months. Just let them thaw in the fridge before you eat them. What can I use instead of cream cheese? You can use a plant-based cream cheese if you want a dairy-free option. Neufchâtel cheese works well too. It has a similar taste and texture to cream cheese. How do I make them less sweet? To make the mints less sweet, reduce the powdered sugar. Start by cutting it down to three cups. You can also add more orange zest or juice for a bolder flavor. Are there store-bought options available? Yes, some stores sell similar cream cheese mints. Check your local candy aisle or specialty shops. They may not taste as fresh, but they are convenient. How can I customize the flavor? You can add different extracts, like mint or lemon. Try mixing in other citrus zest for a twist. Experimenting makes it fun and unique! In this blog post, we explored how to make tasty Orange Cream Cheese Mints. We covered what ingredients you need, like cream cheese, butter, and flavorings. You learned a simple step-by-step method to mix, shape, and chill your mints. We shared tips for improving taste and ideas for serving. Plus, we looked at flavor variations and storage tips to keep them fresh. With these insights, you can create mints that impress everyone. Enjoy making your sweet treats!

Orange Cream Cheese Mints Sweet and Simple Treat

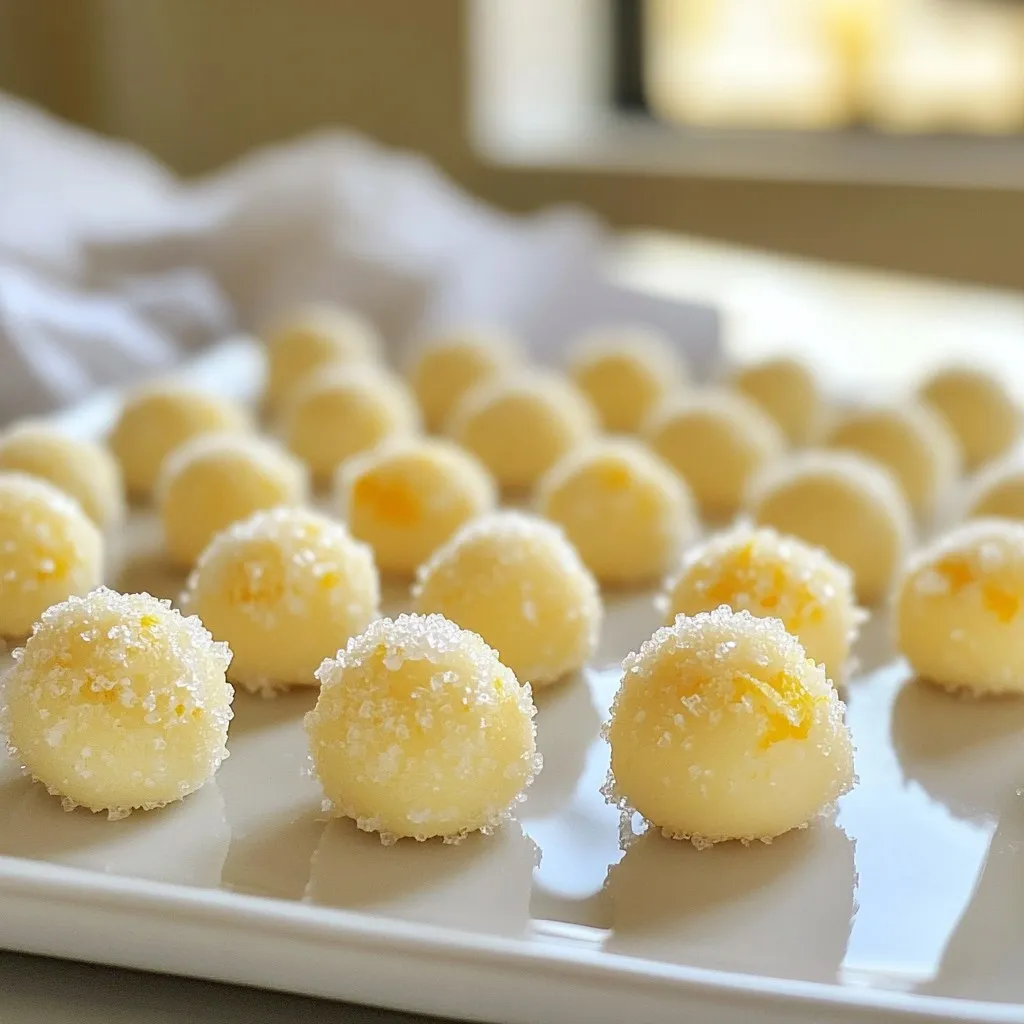
If you’re looking for a fun and tasty treat, you’ll love these Orange Cream Cheese Mints! They are sweet, zesty,

Older posts
Newer posts
← Previous Page1 … Page60 Page61 Page62 … Page86 Next →

dsad

© 2026 lazychefmagic • Built with GeneratePress

Our Policies

  • Copyright Policy
  • Cookie Policy
  • GDPR Policy
  • Privacy Policy
  • Disclaimer
  • Terms Of Use

More Information

  • Home
  • About
  • Contact
  • Appetizers
  • Dessert
  • Dinner
  • Drinks
©2026, lazychefmagic About Back To Top