![Here are the key ingredients for making no-bake chocolate oatmeal cookies. Each one plays an important role in flavor and texture. - Rolled Oats: Use 1 cup of rolled oats. They give the cookies a chewy texture. - Unsweetened Cocoa Powder: Use 1/2 cup. This adds rich chocolate flavor without extra sugar. - Natural Peanut Butter: Use 1/2 cup. It adds creaminess and binds the cookies together. - Honey or Maple Syrup: Use 1/2 cup. This acts as a sweetener and keeps cookies moist. - Almond Milk (or preferred milk): Use 1/4 cup. This helps to combine the ingredients smoothly. - Unsweetened Shredded Coconut: Use 1/4 cup. It adds a fun texture and coconut flavor. - Pure Vanilla Extract: Use 1/2 teaspoon. This enhances the overall taste of the cookies. - Sea Salt: Just a pinch is enough. It balances the sweetness and brings out flavors. - Optional Toppings: You can add crushed nuts, chocolate chips, or sea salt flakes for extra fun. These ingredients come together to create a delightful treat. For the full recipe, check out the details above. 1. Start by grabbing a medium saucepan. Place it on low heat. 2. Add the natural peanut butter, honey or maple syrup, cocoa powder, almond milk, vanilla extract, and a pinch of sea salt. 3. Stir the mix well for about 3-5 minutes. Heat until it becomes smooth. 4. Make sure there are no lumps left. This will keep your cookies creamy. 1. Once smooth, remove the saucepan from heat. 2. Carefully fold in the rolled oats and shredded coconut. 3. Mix until every piece is covered in the chocolate. This gives each bite great flavor. 1. Let the mix cool a bit so it’s easy to handle. 2. Use a tablespoon to scoop the mixture. Drop it onto a parchment-lined baking sheet. 3. Shape each scoop into a round cookie. Press gently to form nice shapes. 4. If you like, add toppings like crushed nuts, chocolate chips, or sea salt. 5. Put the baking sheet in the fridge for at least 30 minutes. This helps the cookies set. For the full recipe, check the [Full Recipe]. Ensuring Proper Texture and Consistency To get a great texture, you must blend your ingredients well. Heat the peanut butter, honey, and cocoa slowly. This helps them mix nicely. Stir until smooth with no lumps. When adding oats and coconut, fold gently. This keeps the cookies soft and chewy. Cooling Tips Let your mixture cool a bit before shaping. If it's too hot, it can spread too much. After shaping, chill the cookies on a baking sheet for about 30 minutes. This helps them set well and hold their shape. Creative Serving Ideas For a fun look, place your cookies on a bright plate. Dust some shredded coconut around them for a nice touch. You can stack the cookies for height or arrange them in a circle. Pairing Suggestions These cookies taste great with a cold glass of almond milk. You can also try them with a cup of coffee or tea. Their rich chocolate flavor pairs well with many drinks. Overheating Ingredients Be careful not to overheat your mixture. Too much heat can change the texture. It may become too thick or lose its flavor. Always stir on low heat. Not Allowing Cookies to Set Do not skip the chilling step. If you do, your cookies might fall apart. They need time to firm up in the fridge. Make sure to leave them for at least 30 minutes. This will help you enjoy perfect no-bake cookies every time. For the complete recipe, check out the [Full Recipe]. {{image_4}} You can make your no-bake cookies even better with a few simple tweaks. Adding spices like cinnamon or nutmeg can give your cookies a warm, cozy flavor. Just a pinch can transform your treats. You can also incorporate nut butters. Try almond or cashew butter for a tasty twist. Each nut butter adds its unique taste, making every batch special. If you want a vegan option, use maple syrup instead of honey. It works just as well and keeps the cookies sweet. Also, for gluten-free cookies, check that your oats are certified gluten-free. This way, everyone can enjoy these treats, no matter their diet. Don’t stop with the basic recipe! You can add dried fruits like raisins or cranberries for natural sweetness. Seeds like chia or flax seeds can boost nutrition and add a nice crunch. You can also mix different nuts and chocolate types, like dark or white chocolate chips. These small changes make your cookies unique and fun to eat. For the full recipe, check out the detailed guide on making Choco Oat Delight Cookies. To keep your no-bake chocolate oatmeal cookies fresh, use an airtight container. This helps keep them from drying out. Place the cookies in the fridge. They will last there for up to one week. Make sure they are not in direct contact with moisture. If you want to save some for later, freezing works great. Place the cookies in a single layer on a baking sheet. Freeze them until they are solid. Then, transfer them to a freezer bag or container. Remove as much air as possible to prevent freezer burn. To thaw, simply take out the cookies and let them sit at room temperature. They will be ready to eat in about 15 to 30 minutes. These cookies can last for about one week in the fridge. In the freezer, they can stay good for up to three months. Just remember, the longer they sit, the more they may lose flavor and texture. Enjoy them fresh for the best taste! You can tell when no-bake cookies are set by their texture. They should feel firm to the touch and hold their shape. A good test is to gently press a cookie. If it holds its form, it is ready. If it feels mushy or falls apart, give it more time in the fridge. The cooling helps them firm up nicely. Skipping the chilling step is not ideal. Without chilling, your cookies may be too soft. They won’t hold their shape well. The chilling time allows the cookies to set properly, giving them a nice chewy texture. If you rush this step, you might end up with a gooey mess instead of a treat. Yes, there are many alternatives for peanut butter. You can use almond butter, sunflower seed butter, or cashew butter. Each option adds a different flavor. If you have nut allergies, sunflower seed butter is a great choice. Just make sure to pick a nut or seed butter that you enjoy! Absolutely! These cookies can be made in advance. Store them in an airtight container in the fridge. They will stay fresh for up to a week. You can also freeze them for longer storage. If you freeze them, let them thaw in the fridge before enjoying. This way, you always have a sweet treat ready to go. You now know how to make delicious no-bake cookies. We covered the key ingredients, from rolled oats to cocoa powder. I shared step-by-step instructions for mixing, shaping, and chilling. You also learned tips to avoid common mistakes and creative ways to vary your cookies. Remember, you can store these treats for later enjoyment. With these insights, you can create tasty and fun cookies anytime. Enjoy your baking journey!](https://lazychefmagic.com/wp-content/uploads/2025/05/73a6ff15-540e-448d-8766-4f832a5d8417.webp)
No-Bake Chocolate Oatmeal Cookies Simple and Quick
Are you craving a sweet treat but short on time? I’ve got you covered! These No-Bake Chocolate Oatmeal Cookies are
Are you craving a sweet treat but short on time? I’ve got you covered! These No-Bake Chocolate Oatmeal Cookies are
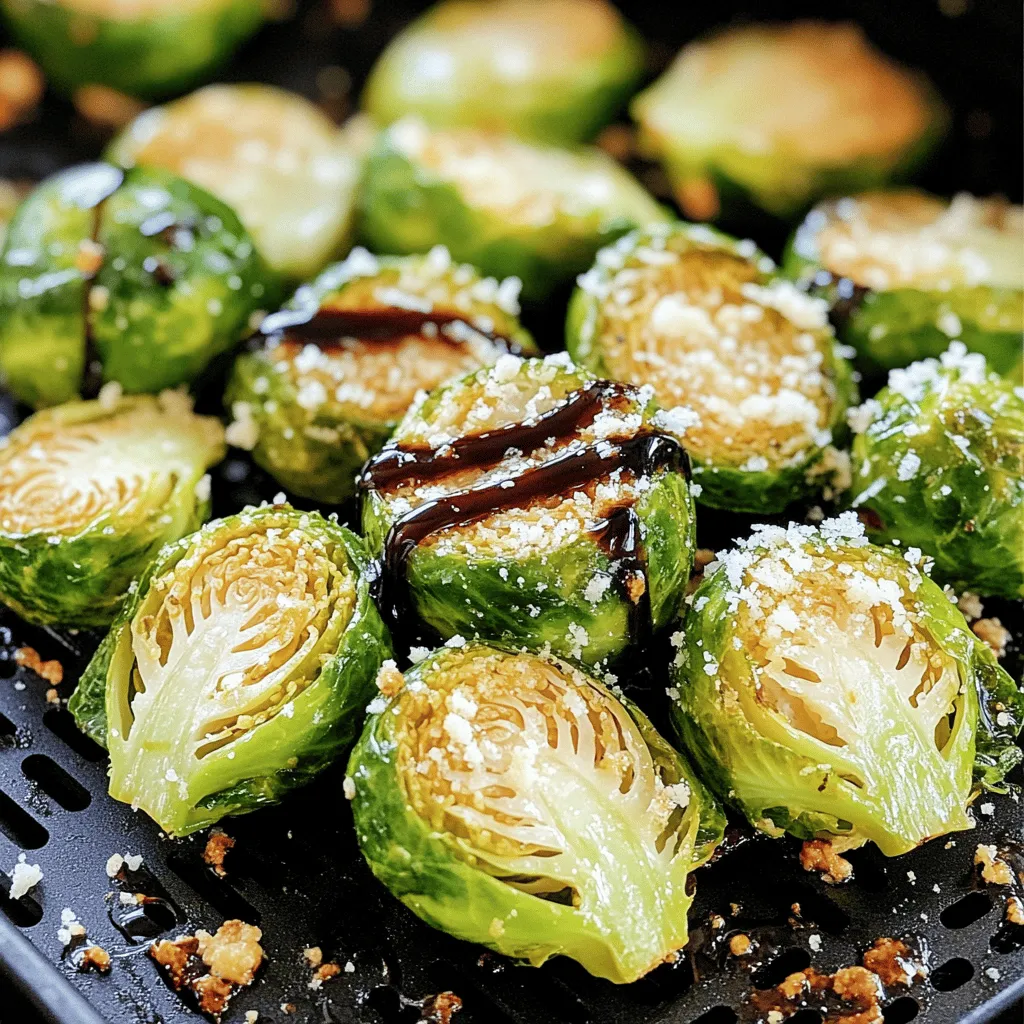
Looking for a tasty side dish that’s easy to make? Crispy Air Fryer Brussels Sprouts are your answer! With just

S’mores Dip is the ultimate sweet treat that everyone loves! This easy recipe combines gooey chocolate, fluffy marshmallows, and crunchy
![- Cherry tomatoes - Mozzarella balls (bocconcini) - Fresh basil leaves For a great Caprese salad skewer, fresh ingredients are key. Cherry tomatoes bring sweetness and crunch. I love using ripe, juicy tomatoes for the best taste. Next, mozzarella balls, or bocconcini, add a creamy touch. They melt in your mouth and balance the tomatoes. Finally, fresh basil leaves give a burst of flavor. Their aroma enhances every bite. - Balsamic glaze - Extra virgin olive oil - Sea salt and black pepper Pantry ingredients elevate your skewers. Balsamic glaze adds a sweet tang that ties it all together. Just a drizzle brings depth to the dish. Extra virgin olive oil adds richness. It coats the skewers and brings out the flavors. A sprinkle of sea salt and black pepper enhances each bite. These simple staples transform your Caprese salad skewers into a gourmet treat. - Wooden or metal skewers - Mixing bowl - Serving platter or mason jar To make these skewers, you need some basic tools. Wooden or metal skewers help hold everything together. A mixing bowl is perfect for your olive oil and spices. Finally, a serving platter or mason jar makes for a pretty display. Arrange the skewers upright in a jar for a fun look. For the complete recipe, check the [Full Recipe]. Gather your ingredients first. You will need cherry tomatoes, mozzarella balls, and fresh basil leaves. Rinse the cherry tomatoes under cold water. Cut the tomatoes in half carefully. If your mozzarella balls are in water, drain them well. This step is key to keeping your skewers from getting soggy. Now it’s time to assemble. Take a skewer and slide a cherry tomato onto it. Next, add a fresh basil leaf. The basil should be small enough to fit well. Then, add a mozzarella ball. Repeat this layering process until your skewer is full. Aim for three to four sets of tomato, basil, and mozzarella. Leave some space at the ends for easy handling. To add flavor, prepare a simple drizzle. In a bowl, mix extra virgin olive oil with a pinch of sea salt and black pepper. Stir this mixture gently and set it aside. Once your skewers look colorful and delicious, place them on a serving platter. Drizzle the olive oil mixture over the skewers. For a sweet touch, add balsamic glaze on top. This creates beautiful patterns. Finally, sprinkle a little more sea salt and black pepper for extra taste. For the full recipe, check the details above! For a tasty Caprese skewer, start with the cherry tomato. It adds freshness first. Next, add a basil leaf. Choose a leaf that fits nicely. Finally, finish with a mozzarella ball. Repeat this order to build a colorful tower. Make sure to leave some space at the ends. This space helps you handle the skewers easily. You want to grab them without losing a single ingredient. To boost flavor, think about adding a sprinkle of garlic powder. It adds a nice kick. You can also use fresh cracked pepper for a little heat. As for drizzles, balsamic glaze works great. But you can try pesto for a twist. A splash of lemon juice can brighten the flavors too. Each option adds a unique touch to your skewers. Serve your skewers in style. One fun idea is to place them upright in a mason jar. It makes a lovely centerpiece. If you prefer a platter, lay them out in a circle. Add extra basil leaves around them for color. For a festive look, use colorful plates or napkins. The goal is to make your dish as pretty as it is tasty. Check out the full recipe for more tips! {{image_4}} You can change the cheese in your skewers. Feta adds a salty bite. Goat cheese gives a creamy texture. Both options work well with tomatoes and basil. If you want a fresh twist, try arugula or mint instead of basil. These herbs add a new flavor. Want to make your skewers heartier? Add in some diced bell peppers or cucumber slices. They bring extra crunch and freshness. You can also include sliced grilled chicken or shrimp for protein. For dressings, try a lemon vinaigrette or a garlic aioli. These flavors can really enhance your dish. You can adapt this recipe for special events. In the fall, add roasted pumpkin or butternut squash. For summer barbecues, use fresh corn or zucchini. You can even make a festive version with red and green cherry tomatoes for Christmas. Using seasonal ingredients keeps your dish fresh and exciting. These variations help you customize your Caprese salad skewers. You can find the full recipe to get started. To keep your assembled skewers fresh, wrap them tightly in plastic wrap. This helps prevent air exposure. Store them in the fridge for up to two days. If you have leftover ingredients, keep them sealed in separate containers. This way, the ingredients stay fresh and maintain their flavors. If you want to save these skewers for later, freezing is an option. However, it's best to freeze the ingredients separately. The tomatoes and mozzarella can lose texture when thawed. Store them in airtight bags. When ready to eat, thaw them in the fridge overnight. Reheat gently in the oven to keep flavors intact. Got leftovers? You can slice the skewers and toss them into a salad. They also work great on sandwiches. Mix leftover mozzarella and basil into pasta for a quick meal. You can use the balsamic glaze as a salad dressing, adding a burst of flavor to your dishes. Caprese salad skewers are a fun twist on the classic dish. They combine fresh cherry tomatoes, mozzarella balls, and basil leaves. These ingredients are threaded onto skewers, creating a colorful and easy-to-eat appetizer. The dish celebrates the flavors of Italy, bringing together sweet, creamy, and herbaceous notes in every bite. The balsamic glaze and olive oil add a delightful finishing touch, enhancing the overall taste. To make Caprese salad skewers vegan, you can replace the mozzarella with plant-based cheese. Look for vegan mozzarella or use marinated tofu for a creamy texture. Ensure that other ingredients, like the balsamic glaze, are vegan-friendly. You can also add some avocado for extra creaminess while keeping it plant-based. Yes, you can prepare these skewers ahead of time. Assemble them and store them in the fridge. Just be sure to drizzle the balsamic glaze and olive oil right before serving to keep the flavors fresh. This way, you can save time and enjoy your gathering without stress. To keep your skewers intact, focus on the order of assembly. Start with a cherry tomato, then add a basil leaf, followed by a mozzarella ball. Make sure to press them gently together while threading. Leaving a small space at both ends of the skewer makes it easier to hold. Using sturdy skewers, whether wooden or metal, also helps maintain structure. This blog post explored how to create delicious Caprese salad skewers. We covered fresh ingredients like cherry tomatoes and mozzarella, along with pantry essentials. You learned step-by-step assembly and tips for the best flavors. We discussed variations and storage to keep your skewers fresh. In conclusion, these skewers are easy and fun to make. Enjoy them at any event or just for a snack. Experiment with flavors and ingredients to make them your own. Happy skewering!](https://lazychefmagic.com/wp-content/uploads/2025/05/5113c06c-0bd9-4238-b81d-a506c4468687.webp)
Looking for a fresh and tasty appetizer? Easy Caprese Salad Skewers are the perfect choice! With juicy cherry tomatoes, creamy

Are you ready to take your taco game to the next level? Tacos Al Pastor are a festive treat bursting
![- 1 can (15 oz) chickpeas, thoroughly drained and rinsed - 1/4 cup vegan mayonnaise - 1 tablespoon Dijon mustard - 1 tablespoon fresh lemon juice - 2 celery stalks, finely chopped - 1/4 cup red onion, finely diced - 1/4 cup dill pickles, chopped - 1/4 teaspoon garlic powder - Salt and pepper, to taste - Whole grain bread or wraps - Fresh greens (spinach or romaine lettuce) - Optional: Sliced tomatoes or creamy avocado The main star of this dish is the chickpeas. They are rich in protein and fiber. This makes them a great base for our salad. You can find canned chickpeas at most grocery stores. Make sure to drain and rinse them well. This step helps remove excess salt and improves the taste. Next, we add vegan mayonnaise. It gives our salad a creamy texture. If you want a lighter option, you can use less mayonnaise. Dijon mustard brings a nice tang to the dish. You can adjust the amount based on your taste. Lemon juice adds brightness. It balances the creamy and savory flavors. Celery adds crunch, while red onion gives a pop of color. Dill pickles bring a zesty kick that makes each bite exciting. Garlic powder adds depth. You can also use fresh garlic if you prefer. Now, let’s not forget salt and pepper. They enhance all the flavors. Whole grain bread or wraps serve as the foundation for our sandwich. Fresh greens like spinach or romaine lettuce add nutrients and freshness. If you like, you can add sliced tomatoes or avocado for extra flavor and creaminess. For the complete recipe, check out the Full Recipe for all the tasty details! - Mash the chickpeas in a mixing bowl. - Mix in vegan mayonnaise, Dijon mustard, and lemon juice. - Fold in celery, red onion, pickles, and seasonings. Start by taking a can of chickpeas. Drain and rinse them well. Use a fork or potato masher to mash the chickpeas. You want a mix of smooth and chunky textures. This gives the salad a nice bite. Once you're happy with the mash, add in vegan mayonnaise, Dijon mustard, and fresh lemon juice. These ingredients add creaminess and a zesty kick. Next, fold in finely chopped celery and red onion. The celery adds crunch, and the onion gives flavor. Then, stir in some chopped dill pickles and a sprinkle of garlic powder. Season with salt and pepper. Taste it! You can adjust the flavors to your liking. If you want the best taste, chill the mixture for 15-20 minutes. This lets the flavors blend. - Layer chickpea salad on bread or wrap. - Add fresh greens and optional toppings. - Cut and serve immediately. Now it's time to make your sandwich! Take a slice of whole grain bread or a wrap. Spread a generous scoop of the chickpea salad on it. Make sure to cover the bread well for a tasty bite. Add a layer of fresh greens, like spinach or romaine lettuce. You can also add sliced tomatoes or creamy avocado if you like. These toppings add extra flavor and nutrition. Close the sandwich with another slice of bread or wrap. If you want, cut it in half for easy eating. Serve it right away or wrap it up for lunch later. - Chill mixture for 15-20 minutes before serving. - Adjust seasonings to taste for personalization. To get the best results, chilling the mixture is key. This step helps the flavors deepen. Also, feel free to tweak the seasonings. If you love garlic, add more garlic powder. If you like it tangy, a bit more lemon juice works great. Each time, you can make the sandwich your own! For the full recipe, check out the Chickpea Delight Salad Sandwich. For a great chickpea salad, keep the texture chunky. You want to feel the chickpeas in each bite. Use a fork or potato masher to mash them lightly. If you prefer, a food processor works well, but pulse it for a few seconds. This way, the chickpeas stay partly whole. To kick up the flavor, try adding spices like paprika or cumin. A pinch of cayenne gives a nice kick if you like heat. You can also use flavored vegan mayonnaise, like garlic or chipotle. This adds a fun twist to your sandwich. Make your sandwich look nice by adding fresh greens between the chickpea salad and the bread. Sliced tomatoes add color and taste, too. Serve with a side of carrot sticks or crunchy veggie chips. This makes your meal feel complete and fun. {{image_4}} You can swap chickpeas for other ingredients. Lentils make a great choice. They are soft and packed with protein. Tofu is another option. It adds a creamy texture when mashed. You can also try different types of bread or wraps. Sourdough adds a tart flavor, while pita pockets offer a fun twist. Adding spices can give your sandwich an international flair. For a Mediterranean touch, add cumin and parsley. A bit of curry powder gives it an Indian vibe. You can also use local ingredients. Fresh herbs from your garden can add unique flavors. Try adding roasted red peppers or avocado for a local twist. Seasonal vegetables can boost your salad's freshness. In spring, toss in some radishes for crunch. During summer, sliced cucumbers add a refreshing taste. In fall, consider adding shredded carrots or apples. They bring sweetness that balances the savory flavors. Adjust your recipe based on what’s fresh and available. This way, your sandwich stays exciting and tasty. For the complete recipe, check out the Full Recipe. To keep your chickpea salad fresh, store it in an airtight container. Make sure to cover it well. This method helps keep flavors vibrant and prevents drying out. The salad stays fresh in the fridge for about 3 to 5 days. Before you eat, give it a good stir to mix the flavors again. If you want to save some for later, you can freeze the chickpea salad mixture. Use a freezer-safe container or bag for best results. Remove as much air as possible to prevent freezer burn. The salad can stay good in the freezer for up to 2 months. When you're ready to eat, thaw it in the fridge overnight. You can also place the sealed bag in cold water for a quicker thaw. After thawing, mix it well before serving. To reheat your chickpea salad, use a microwave or a skillet on low heat. If using a microwave, heat for 30 seconds at a time until warm. Be careful not to overheat; you want to keep the texture nice. Serve the reheated salad on fresh bread or wraps. You can also add some fresh greens or sliced tomatoes for extra flavor and crunch. For the full recipe, check out the [Full Recipe]. Yes, you can! Look for gluten-free bread or wraps. Many brands offer tasty options. You can use lettuce leaves as wraps too. This gives a fresh crunch and keeps it light. Just make sure to check labels for hidden gluten. Enjoy your meal without worry! To make the sandwich more filling, add more protein. Consider adding chickpeas, lentils, or tofu. You can also use whole grain bread for complex carbs. Quinoa is another great option. These additions will keep you satisfied longer. Mix and match to find your favorite! You have several choices if you avoid vegan mayonnaise. Use mashed avocado for creaminess. Greek yogurt can work if you eat dairy. Hummus adds flavor and moisture too. Each option gives a unique taste to your sandwich. Feel free to experiment and find what you love! This blog post shared a simple vegan chickpea salad sandwich recipe. We looked at ingredients, preparation steps, and how to assemble it. Tips for texture, flavor, and variations helped catch your taste. I also covered storage and answered common questions. Try these ideas for lunch or a light dinner. You can mix things to keep it fresh. Enjoy creating your own twist on this tasty dish!](https://lazychefmagic.com/wp-content/uploads/2025/05/50c90071-9876-474c-924d-290d81f967b6.webp)
Looking for a quick, healthy meal? Try my Vegan Chickpea Salad Sandwich! It’s packed with flavor and nutrition, making it
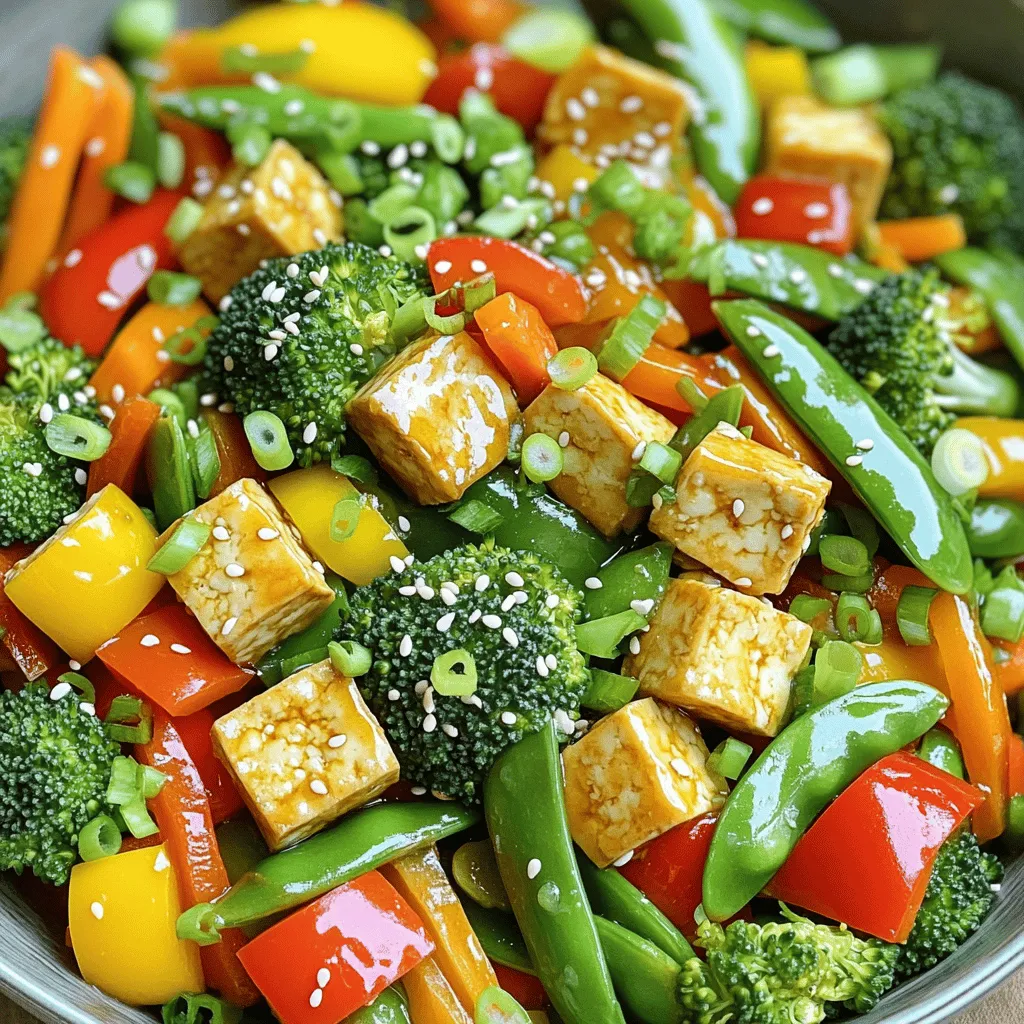
Looking for a quick, tasty dinner? This Vegetable Stir-Fry with Tofu is perfect for you! Packed with colorful veggies and
![- 1 cup quinoa, well rinsed - 1 cup cherry tomatoes, halved - 1 cucumber, diced into bite-sized pieces - 1 red bell pepper, diced - 1 cup canned chickpeas, drained and rinsed - 1/2 red onion, finely chopped - 1/2 cup Kalamata olives, pitted and sliced in half The main ingredients in the Mediterranean quinoa bowl create a colorful and healthy meal. Quinoa is a great base. It is high in protein and fiber. The mix of cherry tomatoes, cucumber, and red bell pepper adds freshness. Canned chickpeas provide extra protein and heartiness. Kalamata olives give a briny flavor that ties it all together. - 3 tablespoons extra virgin olive oil - 2 tablespoons freshly squeezed lemon juice - 1 teaspoon dried oregano - Salt and pepper to taste A simple dressing enhances the flavor. Extra virgin olive oil adds richness. Fresh lemon juice brings brightness. Dried oregano gives a taste of the Mediterranean. Using salt and pepper is key to balance these flavors. - 1/4 cup feta cheese, crumbled - 1/4 cup fresh parsley, chopped roughly For those who want to add more flavor, feta cheese is a perfect choice. It adds creaminess and saltiness. Fresh parsley provides a burst of color and freshness. You can mix these toppings in or sprinkle them on top for a fun look. You can find the full recipe with instructions to make this delicious bowl. To start, rinse your quinoa well. Use a fine mesh strainer for this. Rinsing helps remove the bitter outer layer called saponin. After rinsing, combine 1 cup of quinoa with 2 cups of vegetable broth in a medium saucepan. Next, place the pot over high heat. Bring the mixture to a rolling boil. Once it boils, reduce the heat to low. Cover the pot and let it simmer for about 15 minutes. The quinoa is done when all the liquid is absorbed. Remove it from heat and fluff the quinoa with a fork. Let it cool to room temperature. This makes it easier to mix with the vegetables later. While the quinoa cooks, you can chop your vegetables. Start with the cherry tomatoes. Cut them in half. Next, take the cucumber and dice it into small, bite-sized pieces. For the red bell pepper, make small cubes. Finely chop the red onion. Lastly, slice the Kalamata olives in half. Aim for uniform sizes so all the pieces blend well. Once chopped, gather all your fresh ingredients. Set them aside for mixing with the quinoa. Now, let’s make the dressing. In a small bowl, combine 3 tablespoons of extra virgin olive oil with 2 tablespoons of freshly squeezed lemon juice. Add 1 teaspoon of dried oregano. Whisk the mixture together until it’s well blended. Taste it, and adjust as needed. You can add more lemon juice for tang or a pinch of salt for flavor. Feel free to customize your dressing. You can add minced garlic or a dash of honey for sweetness. Finally, drizzle the dressing over your quinoa and vegetable mixture. Toss gently until everything is well coated. Your Mediterranean Quinoa Bowl is now ready to shine! For the full recipe, check out the details above. To fluff quinoa for lightness, wait until it cools. Use a fork to gently separate the grains. This step is key for a light and airy base. When you serve it, add layers of colorful vegetables. This makes the bowl look fresh and inviting. A bright presentation can make your meal even more enjoyable. Prepping ingredients in advance saves time. You can wash and chop your veggies a day before. Store them in separate containers to keep them fresh. Cooked quinoa can also stay in the fridge for up to five days. This makes it easy to grab and assemble your bowl when needed. The best way to serve the Mediterranean Quinoa Bowl is in a large, colorful dish. This allows everyone to see all the vibrant ingredients. You can also pair it with grilled chicken or shrimp for extra protein. For a lighter meal, enjoy it with a side of leafy greens or a refreshing salad. These options make your meal more varied and satisfying. If you want the full recipe, check it out [Full Recipe]. {{image_4}} You can change the protein in your Mediterranean Quinoa Bowl. Adding grilled chicken or shrimp gives it a nice touch. Both options add flavor and make the meal more filling. For a plant-based option, use tofu. Tofu soaks up flavors well, making it a great choice for vegans. You can swap in seasonal veggies. Try asparagus in spring or roasted zucchini in summer. These changes keep your bowl fresh and exciting. Creative additions like spinach or artichokes also enhance the dish. Feel free to mix and match your favorite vegetables. Experiment with different herbs and spices in the dressing. Fresh basil or cilantro can add a new twist. You can also try a creamy dressing, like tahini or yogurt. This adds richness and pairs well with the other flavors. Explore these options to find your perfect blend! To keep your Mediterranean Quinoa Bowl fresh, store leftovers in an airtight container. Make sure the bowl cools to room temperature before sealing. Place it in the fridge within two hours of making it. This helps maintain its flavor and texture. Use the bowl within three to four days for the best taste. Yes, you can freeze the Mediterranean Quinoa Bowl! Place it in a freezer-safe container. Leave some space at the top for expansion. It will stay good for about three months. When you want to enjoy it again, thaw it in the fridge overnight. Reheat it gently in the microwave or on the stove. Add a splash of olive oil or lemon juice for extra flavor. In the fridge, the Mediterranean Quinoa Bowl lasts about three to four days. Look for signs of spoilage, such as off smells or changes in color. If the veggies get mushy or the quinoa smells sour, it’s time to toss it. Always trust your senses. If it doesn’t look or smell right, don’t eat it. The Mediterranean Quinoa Bowl is packed with nutrients. It contains protein, fiber, and healthy fats. Here’s a quick breakdown: - Calories: About 350 per serving - Protein: 11 grams - Carbohydrates: 45 grams - Fiber: 9 grams - Fat: 15 grams Quinoa is a great source of complete protein. It has all nine essential amino acids. The vegetables give you vitamins and minerals. Chickpeas add extra protein and fiber. Feta cheese adds flavor and calcium. This bowl is not just tasty; it is also very healthy. Yes, you can easily make this dish gluten-free. Quinoa is naturally gluten-free. Just make sure to check all other ingredients. Here are some tips: - Use certified gluten-free vegetable broth. - Ensure that canned chickpeas are labeled gluten-free. - Avoid any added ingredients that may contain gluten, such as certain sauces or dressings. With these changes, you can enjoy a gluten-free Mediterranean Quinoa Bowl. Making this dish vegetarian or vegan is simple. The base of the bowl is already vegetarian. To make it vegan, you can swap out the feta cheese. Here are a few options: - Leave out the feta or use a vegan cheese alternative. - Add extra chickpeas or nuts for protein. - Consider adding avocado for creaminess. These swaps will keep your Mediterranean Quinoa Bowl flavorful and satisfying while meeting your dietary needs. For the full recipe, check out the Mediterranean Quinoa Bowl. A Mediterranean Quinoa Bowl is packed with healthy ingredients like quinoa, vegetables, and chickpeas. We discussed how to cook the quinoa, prepare the veggies, and make a zesty dressing. You can customize this dish with protein options, tasty toppings, and various dressings. Remember to store leftovers properly for the best taste. This bowl is not just nutritious; it’s versatile and easy to make. Enjoy creating your version of this dish, and share it with loved ones. Fresh flavors and colorful ingredients await you in each bite!](https://lazychefmagic.com/wp-content/uploads/2025/05/99e1da65-47bc-4a51-93e6-7437feb6aced.webp)
Looking for a colorful, healthy meal that’s easy to make? The Mediterranean Quinoa Bowl checks all the boxes! Packed with
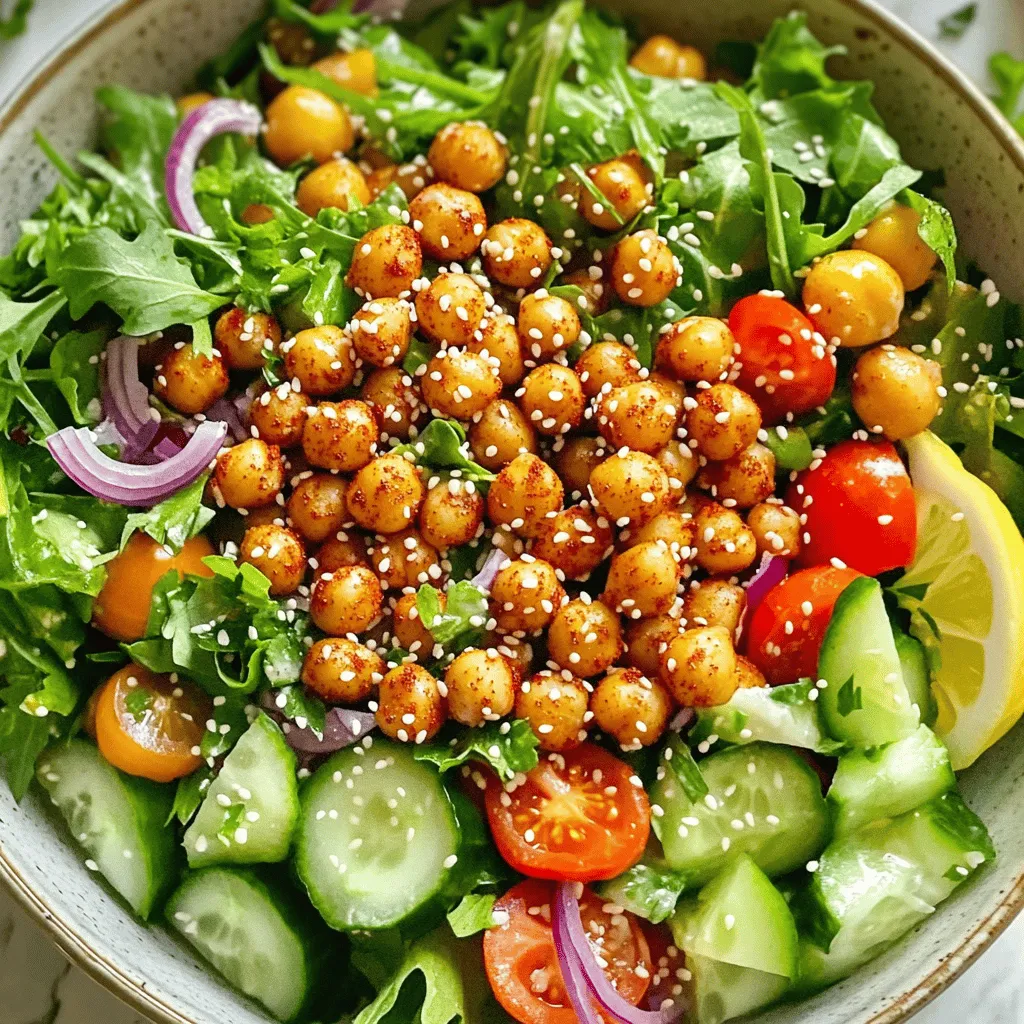
Looking for a fresh and tasty dish? My Crispy Chickpea Salad is just what you need! Packed with crunch and
![- 4 medium sweet potatoes - 1 can (15 oz) black beans, rinsed and drained - 1 cup corn kernels (fresh or frozen) - 1 red bell pepper, diced - 1 teaspoon ground cumin - 1 teaspoon chili powder - 1/2 teaspoon smoked paprika - Salt and pepper to taste These main ingredients create a hearty filling. The sweet potatoes serve as a great base. Black beans add protein and fiber. Corn brings a sweet crunch. The red pepper gives freshness and color. Spices like cumin and chili powder boost flavor. - 1/4 cup feta cheese, crumbled (optional) - 1 avocado, diced - 2 tablespoons fresh cilantro, chopped - Greek yogurt or sour cream for serving Adding these extras enhances the dish. Feta cheese adds a creamy tang. Avocado gives a rich texture. Cilantro adds freshness. A dollop of Greek yogurt or sour cream brings creaminess. - Baking sheet - Medium skillet - Utensil essentials (knife, cutting board, spoon) You will need a baking sheet to roast the sweet potatoes. A medium skillet is great for cooking the filling. Make sure to have basic utensils ready. This equipment makes the cooking process smooth. For the complete recipe, check the Full Recipe link. First, you need to preheat your oven to 400°F (200°C). Rinse the sweet potatoes under cold water. Scrub them gently to remove dirt. Use a fork to poke several holes in each potato. This step helps steam escape while baking. After that, arrange the sweet potatoes on a baking sheet lined with parchment paper. This will catch any drips and make cleanup easier. While the sweet potatoes bake, it’s time to make the filling. In a medium skillet, heat a drizzle of olive oil over medium heat. Add the diced red bell pepper. Sauté it for about 4-5 minutes until tender and slightly golden. Next, stir in the rinsed black beans and corn kernels. Sprinkle in ground cumin, chili powder, smoked paprika, salt, and pepper. Mix everything well and let it cook for another 5 minutes. This helps the flavors blend together nicely. Once the sweet potatoes are tender, carefully take them out of the oven. Allow them to cool for a few minutes. Slice each potato open lengthwise, creating a pocket for the filling. Use a fork to fluff the insides gently. This makes them light and airy. Now, generously spoon the savory filling into each potato. Let it overflow a bit for a hearty look. If you like, sprinkle crumbled feta cheese on top. Add diced avocado and fresh chopped cilantro for extra flavor. Drizzle a bit of olive oil over everything to add richness. Serve each stuffed sweet potato with a side of Greek yogurt or sour cream for a tasty contrast. For the full version of this recipe, you can refer to the [Full Recipe]. To get the best sweet potatoes, look for firm, smooth skin. Avoid any with cuts or soft spots. Medium sweet potatoes work well for stuffing. They should bake evenly and hold the filling. Cooking time can change based on size. For medium sweet potatoes, plan for 45-60 minutes at 400°F. Larger potatoes may need a bit longer, while smaller ones cook faster. Always check for doneness with a fork. It should slide in easily when they're ready. To add extra flavor, try different spices and herbs. Garlic powder, onion powder, or oregano can brighten the filling. You can also add fresh herbs like parsley or basil for a fresh taste. Combining textures makes the dish exciting. Add creamy toppings like Greek yogurt or sour cream. Then, add crunchy elements like toasted nuts or seeds. This contrast will keep each bite interesting and delightful. Pair your stuffed sweet potatoes with fresh salads or roasted veggies. A simple green salad with lemon dressing works great. You can also serve them alongside a tangy coleslaw for a crunch. For a beautiful presentation, arrange the stuffed sweet potatoes on a colorful platter. Garnish with fresh cilantro and lime slices. This adds a pop of color and invites everyone to enjoy the meal. {{image_4}} You can change the filling for your savory stuffed sweet potatoes. For a vegetarian option, use lentils or chickpeas. They add protein and fiber. You could also use quinoa for a nutty flavor. Mix in diced zucchini or spinach for extra greens. Spices bring life to your filling. Try adding garlic powder for a punch. Smoked paprika adds a warm note. You can also use Italian herbs like basil and oregano. For vegan diets, skip the feta cheese. Use avocado instead for creaminess. You can also swap Greek yogurt for a vegan yogurt alternative. If you need gluten-free options, this recipe is perfect as is. Just ensure your seasonings are also gluten-free. For low-calorie choices, reduce the olive oil and cheese. This keeps the dish tasty while lightening the calories. Sweet potatoes are great, but you can try other root veggies. Butternut squash or carrots work well too. They both have a sweet flavor that pairs nicely with savory fillings. When using different veggies, consider their texture. For example, carrots may need more cooking. You can also adjust spices to match the new flavor profiles. For instance, carrots shine with ginger and nutmeg. To keep your stuffed sweet potatoes fresh, let them cool first. Place them in an airtight container. You can stack them or place them side by side. Store them in the fridge for up to four days. If you want to keep them longer, freezing is a great option. When reheating, avoid sogginess by using the oven. Preheat it to 350°F (175°C). Place the stuffed sweet potatoes on a baking tray. Cover them loosely with foil to keep them moist but not soggy. Heat for about 15 to 20 minutes. You can also use a microwave, but the oven gives a better texture. To freeze stuffed sweet potatoes, wrap each one tightly in plastic wrap. Then place them in a freezer-safe bag or container. They can last for about three months in the freezer. When ready to eat, thaw them in the fridge overnight. Reheat them in the oven, following the steps above. Enjoy your delicious meal anytime! Stuffed sweet potatoes can last about 3 to 5 days in the fridge. To keep them fresh, store them in an airtight container. This helps prevent moisture and odors from seeping in. Always let them cool before placing them in the fridge. If you notice any changes in color or smell, it’s best to throw them out. Yes, you can make stuffed sweet potatoes ahead of time. Cook the sweet potatoes and prepare the filling. Store the filling and sweet potatoes separately in the fridge. When you are ready to eat, reheat the sweet potatoes in the oven or microwave. This keeps everything fresh and tasty. There are many fun toppings to try! Here are some ideas: - Sliced green onions for a fresh crunch - A dollop of Greek yogurt for creaminess - Chopped jalapeños for a spicy kick - Roasted nuts for added texture - Salsa for a zesty flavor boost Mix and match these toppings to create your perfect stuffed sweet potato. For the full recipe and detailed cooking instructions, check out the Savory Stuffed Sweet Potatoes recipe. Enjoy making this delightful and healthy meal! Savory stuffed sweet potatoes are a simple and healthy meal. We covered the main ingredients, which include sweet potatoes, black beans, and corn. I shared step-by-step preparation and assembly tips to make your cooking easy. You learned ways to enhance flavor and texture with toppings and seasonings. With a few variations and storage tips, you can customize this dish. Enjoy experimenting with different fillings and toppings. These stuffed potatoes can be creative and fun to make, and they taste amazing. Keep the recipe handy for quick meals!](https://lazychefmagic.com/wp-content/uploads/2025/05/e0a98e89-b218-44cb-9f9d-4675314ecea7.webp)
Looking for a flavorful meal that is both delicious and healthy? Savory stuffed sweet potatoes are the answer! With their
