Skip to content
DisclaimerTerms Of UseGDPR PolicyCookie Policy

lazychefmagic

  • Home
  • Drinks
  • Appetizers
  • Dinner
  • Dessert
  • About
  • Contact
  • Privacy Policy
DisclaimerTerms Of UseGDPR PolicyCookie Policy

NO-ING-IMG

To make the best sheet pan fajitas, gather these fresh and tasty ingredients. The right mix will bring out bold flavors in every bite. - Chicken Breast and Vegetables - 1 lb chicken breast, thinly sliced - 1 red bell pepper, sliced into strips - 1 yellow bell pepper, sliced into strips - 1 green bell pepper, sliced into strips - 1 red onion, sliced into thin wedges - Spices and Seasonings - 3 tablespoons olive oil - 2 teaspoons chili powder - 1 teaspoon ground cumin - 1 teaspoon garlic powder - 1 teaspoon onion powder - 1 teaspoon smoked paprika - Salt and freshly ground black pepper, to taste - Tortillas and Garnishes - Fresh cilantro, finely chopped (for garnish) - Tortillas (small, corn or flour, for serving) These ingredients form the base of your fajitas. Fresh veggies and juicy chicken blend perfectly with spices. This combination ensures each bite bursts with flavor. You can find the detailed cooking steps in the Full Recipe. Enjoy cooking! - Preheat the Oven Start by preheating your oven to 425°F (220°C). This step is key for cooking the fajitas evenly. - Prepare the Chicken and Vegetables In a big bowl, add the thinly sliced chicken. Then, toss in the red, yellow, and green bell peppers. Add the red onion next. Mix all the ingredients well. This ensures every bite is flavorful. - Mix the Seasoning In a small bowl, whisk together olive oil, chili powder, ground cumin, garlic powder, onion powder, and smoked paprika. Don’t forget to add salt and pepper. This blend will make your fajitas pop with taste. - Coat and Arrange on Sheet Pan Pour the seasoning mix over the chicken and veggies. Use your hands or a spatula to coat everything well. Spread the mixture on a large sheet pan. Make sure it’s in a single layer to cook evenly. - Bake and Stir Place the sheet pan in the oven. Bake for 20-25 minutes. Halfway through, take it out and stir gently. This step helps the chicken cook through and the veggies caramelize. - Final Touches Before Serving Once done, take the pan out of the oven. Let it cool for a couple of minutes. Warm your tortillas in a skillet or microwave. Spoon the fajita mix into the tortillas and top with fresh cilantro. Enjoy your sizzling sheet pan fajitas! For more details, check the Full Recipe. - Ensuring Even Cooking To achieve even cooking, cut your chicken and veggies into uniform pieces. This way, they all cook at the same rate. Spread them out on the sheet pan in a single layer. Don't overcrowd the pan; this helps everything roast nicely. - Flavor Enhancements To boost flavor, marinate the chicken for at least 30 minutes before cooking. This extra time allows the spices to penetrate the meat. You can also add lime juice or diced jalapeños for a zesty kick. Fresh herbs, like cilantro, add brightness when serving. - Best Tortilla Options Use small corn or flour tortillas, depending on your taste. Corn tortillas offer a more traditional flavor, while flour tortillas are softer. Warm them up before serving to make them more pliable. - Presentation Ideas Serve the fajitas on a large platter. Arrange the tortillas nearby for easy access. Add lime wedges and extra cilantro for color and flavor. Encourage guests to build their own fajitas. This makes for a fun and interactive meal. For the complete recipe, check out the [Full Recipe]. {{image_4}} You can swap the chicken for other proteins. Try beef, shrimp, or tofu. Each option brings a unique taste. For beef, use flank steak, sliced thin. For shrimp, choose large, deveined pieces. Tofu works well, too; just press and cube it before cooking. Feel free to mix up the veggies. Zucchini, mushrooms, or corn are great choices. You can also use sweet potatoes for a hearty touch. Each veggie adds its own flavor and texture, making your fajitas fun and fresh. Want more heat? Add sliced jalapeños or a pinch of cayenne pepper. If you prefer milder fajitas, skip the spicy elements. You can also use a taco seasoning mix for a different flavor punch. Try different marinades for new flavors. A lime juice and honey mix adds sweetness. You can also use soy sauce and ginger for an Asian twist. Each marinade creates a unique taste, making every meal exciting. For the full recipe, check out Sizzling Sheet Pan Fajitas. Refrigeration Guidelines After enjoying your sheet pan fajitas, store leftovers in an airtight container. Keep them in the fridge for up to three days. Make sure to let the fajitas cool first. This prevents extra moisture inside the container. Freezing Instructions To freeze, place the cooled fajitas in a freezer-safe bag. Remove as much air as possible before sealing. They can last up to three months in the freezer. When you're ready, thaw them overnight in the fridge before reheating. Best Methods for Freshness For best results, reheat your fajitas in the oven. Preheat it to 350°F (175°C). Spread the fajitas on a baking sheet and warm for about 10-15 minutes. This keeps the chicken juicy and the veggies crisp. You can also use the microwave. Place the fajitas on a microwave-safe plate; cover with a damp paper towel. Heat in 30-second bursts until warm. This method is quick but may not keep the same texture as the oven. Remember, enjoy your fajitas fresh for the best taste! For the full recipe, check out the details above. How to make Sheet Pan Fajitas? To make Sheet Pan Fajitas, start by preheating your oven to 425°F (220°C). Slice 1 lb of chicken breast and your favorite bell peppers and onion. Mix olive oil and spices in a bowl, then toss everything together. Spread it on a sheet pan and bake for 20-25 minutes. Can I make these fajitas vegetarian? Yes, you can easily make these fajitas vegetarian. Just replace the chicken with sliced mushrooms or zucchini. Use the same spices and bake as usual. You will still get great flavor and texture. What sides pair well with Fajitas? Fajitas taste great with sides like rice, beans, or guacamole. You can also serve them with a fresh salad or corn on the cob. These add color and taste to your meal. Can I use frozen chicken? Using frozen chicken is not the best choice. It may not cook evenly. If you must use frozen chicken, ensure it fully thaws before cooking. This helps it cook properly and stay juicy. How long do leftovers last? Leftovers can last 3-4 days in the fridge. Store them in an airtight container. When you want to eat them again, just reheat in the oven or microwave. They will still taste delicious! This blog post covers sheet pan fajitas, from ingredients to serving tips. You learned about chicken, vegetables, and spices. I shared step-by-step instructions for prep and cooking. Tips included ensuring even cooking and best tortilla options. We also discussed variations for flavors and ingredients. As you dive into making these fajitas, remember to store leftovers properly for freshness. Now you have all the tools to enjoy delicious fajitas at home. Get cooking, and savor every bite!

Sheet Pan Fajitas Quick and Flavorful Dinner Idea

Looking for a quick and delicious dinner? Sheet Pan Fajitas are your answer! This all-in-one meal brings juicy chicken and

- 1 pound large shrimp, peeled and deveined - 4 tablespoons unsalted butter - 2 tablespoons honey - 4 cloves garlic, minced - 2 tablespoons low sodium soy sauce - 1 tablespoon freshly squeezed lemon juice - 1 teaspoon red pepper flakes (optional) - Salt and freshly ground black pepper to taste - Fresh parsley, finely chopped, for garnishing These ingredients create a simple yet tasty dish. The shrimp brings a sweet flavor, while the garlic adds a bit of depth. The butter makes everything rich and creamy. Honey balances the garlic's sharpness with a hint of sweetness. I love using fresh ingredients. Fresh garlic gives a bright taste. You can adjust the red pepper flakes based on your spice level. Do you want a kick? Add more! For a pop of color and taste, fresh parsley adds life to the plate. Once you gather these items, you're ready to create a dish that impresses. For the complete recipe, check out the Full Recipe. - Heat a large skillet over medium heat. - Add 4 tablespoons of unsalted butter. - Let the butter melt, stirring until it bubbles. - Once bubbly, add 4 cloves of minced garlic. - Sauté the garlic for 1-2 minutes. Stir to keep it from browning. - The garlic should smell great and turn lightly golden. - In a bowl, combine 2 tablespoons of honey. - Add 2 tablespoons of low sodium soy sauce. - Pour in 1 tablespoon of freshly squeezed lemon juice. - Stir this mix well until it becomes smooth and glossy. - Add 1 pound of peeled and deveined shrimp to the skillet. - Toss the shrimp gently to coat them in the sauce. - Let them cook undisturbed for 2-3 minutes. - Flip each shrimp over and cook for another 2-3 minutes. - They should turn pink and opaque when done. - Season with salt and black pepper to taste. - If you like spice, add 1 teaspoon of red pepper flakes. You can find the complete instructions in the Full Recipe. Enjoy this easy dish! - Always use fresh garlic for the best taste. - You can add ginger or lime zest for a zing. The right garlic boosts the dish. Fresh garlic gives a strong, rich flavor that dried ones can’t match. You might want to try adding ginger for a warm kick. Lime zest can also brighten the dish, making it more vibrant and fresh. - Cook the shrimp undisturbed for even cooking. - Shrimp are done when they turn pink and opaque. Cooking shrimp needs your focus. When you place them in the pan, let them be for a few minutes. It helps them cook evenly and get that lovely sear. To check if they are done, look for that bright pink color. They should also be opaque. If they are still translucent, keep cooking. - Garnish with parsley for color and taste. - Serve over rice or with steamed veggies. Garnishing adds the final touch. Chopped parsley looks pretty and adds freshness. To make your meal complete, serve the shrimp over fluffy jasmine rice. You can also pair it with steamed veggies. Drizzle any sauce left in the pan over everything for extra flavor. Enjoy your beautiful plate! {{image_4}} To make this dish spicy, add more red pepper flakes or sriracha. Start with the original amount of red pepper flakes. Then, taste the sauce. If you want more heat, add more. For sriracha, stir in one teaspoon at a time until you like the flavor. This adds a fun kick to the dish. For a tangy twist, adjust the lemon juice. Start with one tablespoon as in the recipe. After mixing it in, taste the sauce. If you want it zestier, squeeze in more lemon juice. This brightens the flavors and adds freshness that pairs well with shrimp. To balance sweetness and saltiness, modify the soy sauce and honey. Use low sodium soy sauce to control salt. You can start with one tablespoon of honey, then taste. If you want it sweeter, add more honey. This creates a rich, savory sauce that enhances the shrimp's natural taste. Feel free to explore these fun variations for your Honey Garlic Butter Shrimp recipe! For the full recipe, check out the details above. To keep your honey garlic butter shrimp fresh, store it in the refrigerator. Place the shrimp in an airtight container to lock in moisture and flavor. This method helps maintain the dish's taste and texture. You can also use glass or plastic containers with tight-fitting lids. They prevent spills and make it easy to see what’s inside. When reheating, avoid overcooking the shrimp. The best way is to use a skillet. Heat it over medium-low heat. Add a splash of water or broth to keep the shrimp moist. Stir gently for about 3-5 minutes until warmed through. You can also use the microwave, but cover the dish with a damp paper towel. Heat for 1 minute, then check. Add more time as needed, but don’t let it cook too long. Enjoy your delicious leftovers! Shrimp cook fast. For large shrimp, it takes about 4 to 6 minutes. You want them to turn pink and opaque. If they are small, they may cook in 2 to 4 minutes. Watch closely. Overcooked shrimp become tough. Yes, you can use frozen shrimp. Just make sure to thaw them first. To thaw, place them in the fridge overnight or run them under cold water for about 10 minutes. Frozen shrimp may have extra water, so pat them dry before cooking. This helps the shrimp cook evenly and keeps the sauce thick. This dish pairs well with many sides. Here are some ideas: - Serve it over jasmine rice to soak up the sauce. - Pair it with steamed broccoli or green beans for a healthy touch. - A simple salad with mixed greens adds freshness. - Garlic bread makes a nice addition to mop up the sauce too. For the full recipe, check out the detailed cooking steps. This blog post showed you how to make Honey Garlic Butter Shrimp. We covered the main and additional ingredients, provided step-by-step instructions, and shared tips for flavor and presentation. We also explored variations you can try. Finally, we discussed storage and reheating to keep your shrimp tasty. Dive into this recipe, and enjoy your delicious meal! You now have all the tools to make it great.

Honey Garlic Butter Shrimp Flavorful and Simple Dish

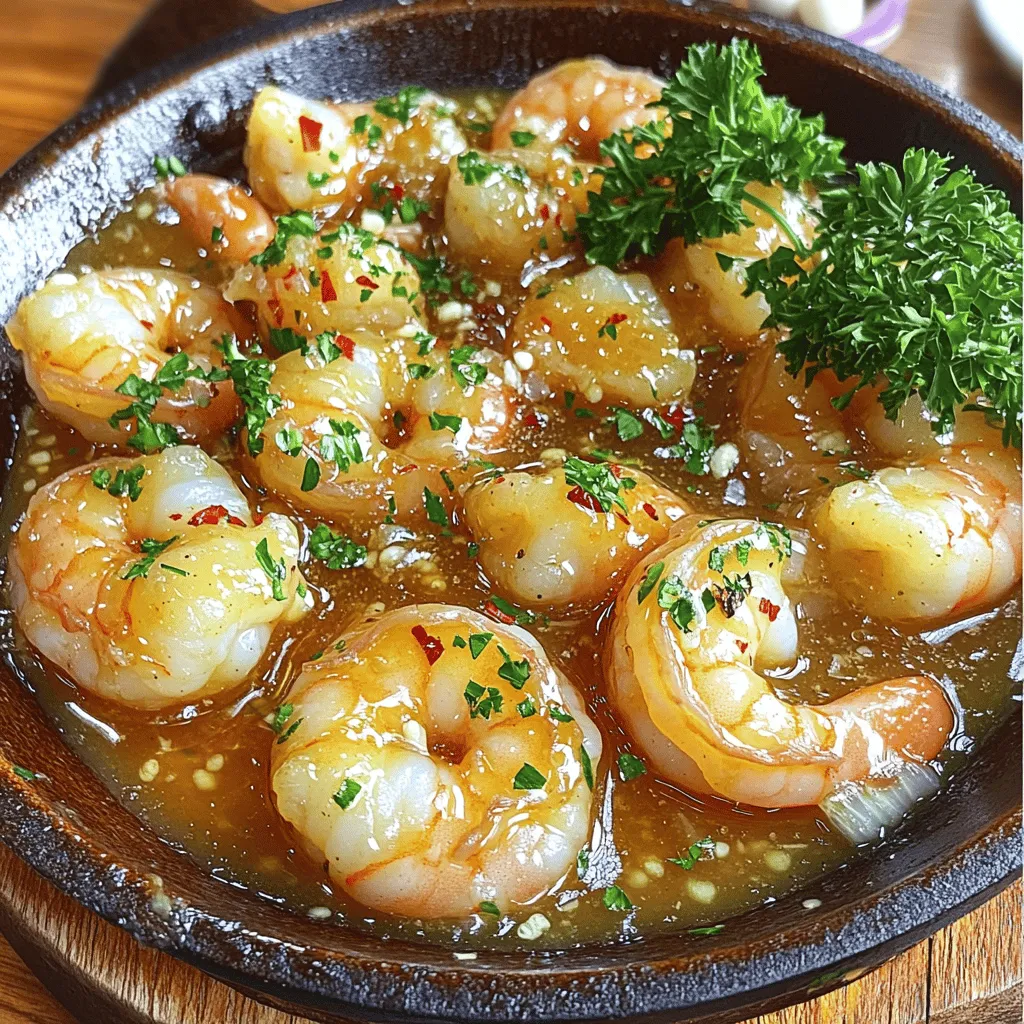
If you’re craving a tasty dish that’s quick and easy, try my Honey Garlic Butter Shrimp. This dish packs big

- 4 large bell peppers (various colors) - 1 cup quinoa - 2 cups vegetable broth - 1 can black beans - 1 cup corn kernels The main ingredients are simple yet packed with nutrition. I use bell peppers in different colors to make the dish look bright and fun. Quinoa acts as a great base; it’s high in protein and gluten-free. Black beans and corn add fiber and flavor, making every bite satisfying. - 1 small red onion - 2 cloves garlic - Ground cumin, smoked paprika, chili powder - Salt and black pepper Aromatics like red onion and garlic bring warmth to the dish. Ground cumin adds earthiness, while smoked paprika gives it a hint of smokiness. Chili powder brings a bit of heat, making each bite exciting. Don’t forget salt and pepper to enhance all the flavors. - 1 cup crushed tomatoes - 1 avocado - Fresh cilantro Crushed tomatoes bind everything together, adding moisture. Avocado gives a creamy texture, balancing the flavors well. Fresh cilantro adds brightness and freshness, making the dish feel complete. For the full recipe, check out the vibrant Vegan Stuffed Bell Peppers. - Preheat the oven to 375°F (190°C). - Slice the tops off the bell peppers and remove seeds. To prepare the bell peppers, start by preheating your oven. This helps the peppers cook evenly. Next, slice the tops off and scoop out the seeds. Be gentle so you don’t tear the peppers. Arrange them cut-side up in a baking dish. This keeps them stable while baking. - Bring vegetable broth to a boil. - Add rinsed quinoa, cover, and simmer. For the quinoa, bring your vegetable broth to a boil in a medium saucepan. Once boiling, add the rinsed quinoa. Turn the heat down low. Cover the pot and let it simmer for about 15 minutes. This step makes the quinoa fluffy and delicious. - Sauté red onion and garlic. - Mix in black beans, corn, and seasonings. - Combine with quinoa and crushed tomatoes. While the quinoa cooks, heat a large skillet over medium heat. Add a splash of water or olive oil to the pan. Sauté the diced red onion until soft. This takes about five minutes. Add minced garlic and cook for another minute. Then, stir in black beans, corn, and spices. Mix it all well and let it cook for a few minutes. Finally, add the cooked quinoa and crushed tomatoes to the mix. Stir until everything is combined. - Fill each pepper with the quinoa mixture. - Pack it gently for better structure. Now, it’s time to stuff the peppers! Take the quinoa mixture and fill each bell pepper. Press it down gently to pack it in. This helps keep the filling inside while they bake. - Cover with foil and bake for 25 minutes. - Remove foil and bake for an additional 10-15 minutes. Cover the baking dish with foil. This keeps the moisture in while they cook. Bake the peppers for 25 minutes. After that, carefully remove the foil. Bake for an extra 10 to 15 minutes. The peppers should be tender and slightly wrinkled. - Cool slightly before serving. - Top with diced avocado and cilantro. Once done, take out the dish and let the peppers cool for a few minutes. Before serving, add diced avocado on top. Sprinkle with fresh cilantro for a burst of flavor. This adds a nice touch to your vibrant vegan stuffed bell peppers. Enjoy this flavorful and healthy meal! For the full recipe, check the details above. When you pick bell peppers, look for ones that are ripe and firm. They should feel heavy for their size. A shiny skin indicates freshness. You can explore different colors like red, yellow, and green. Each color has a unique taste, with red being the sweetest. To boost flavor, consider adding spices like oregano or thyme. Fresh herbs can also brighten the dish. Sautéing the onions and garlic first brings out their sweetness. This step makes a big difference in taste. For more texture, add chopped nuts or seeds to your filling. These stuffed peppers pair well with a fresh salad or rice. You can also serve them with a side of avocado slices. For a fun presentation, use a colorful platter. Garnish with extra cilantro and lime wedges for a zesty touch. This adds color and makes the dish pop. Feel free to check out the Full Recipe for more details! {{image_4}} You can easily swap out quinoa for rice or millet. Both options work well and add their own taste. If you want a different protein, try lentils or chickpeas instead of black beans. They offer great texture and flavor. Feel free to add more veggies to your stuffing mix. Zucchini, spinach, or diced carrots can add color and nutrients. Adding a variety of veggies boosts the dish's fiber and makes it even healthier. Plus, it keeps every bite exciting and unique. To ensure your stuffed peppers are gluten-free, check all your ingredients. Look for gluten-free labels on broth and canned goods. If you bake, use gluten-free breadcrumbs as a topping if desired. This way, everyone can enjoy this tasty meal! To keep your vegan stuffed bell peppers fresh, store leftovers in the fridge. Place the stuffed peppers in an airtight container. They will stay good for about 3 to 5 days. If you want to save them for later, freezing is a great option. Wrap each pepper in plastic wrap, then place them in a freezer-safe bag. This way, you can enjoy them later. When it's time to eat your leftovers, you can reheat them in the oven or microwave. For the oven, preheat to 350°F (175°C). Place the peppers on a baking sheet, cover with foil, and heat for about 15-20 minutes. This helps keep the peppers moist. If using a microwave, heat one pepper at a time for about 2-3 minutes. Check to make sure they are warm throughout. To keep flavor and texture, avoid overcooking. In the fridge, your stuffed peppers can last about 3 to 5 days. Watch for signs of spoilage, like a sour smell or mushy texture. If you see any mold, it's best to toss them out. Keeping an eye on these signs can help you enjoy your meal safely. Yes, you can prepare the stuffed peppers in advance. Simply make the filling and stuff the peppers a day before. Store them in the fridge. When you’re ready to eat, just bake them. This saves time on busy days. If you need a quinoa substitute, try rice or millet. Both work well and add a different texture. You can also use couscous or farro if gluten is not a concern. These grains will still give your peppers a hearty filling. To add spice, consider using jalapeños or serrano peppers in your filling. You can also add red pepper flakes or hot sauce. For extra heat, try using a spicier chili powder. Adjust the amount based on your heat preference. Yes, these stuffed peppers freeze well. Prepare the peppers and let them cool completely. Then, wrap them tightly in plastic wrap and place them in a freezer-safe bag. To reheat, thaw in the fridge overnight and bake as usual. Vegan stuffed bell peppers are a delicious and healthy dish. We covered the main ingredients, such as bell peppers, quinoa, and beans. I shared simple steps for prepping, cooking, and baking. Tips included picking the best peppers and adding extra spices. You can easily customize this meal to fit your taste and dietary needs. Enjoy your stuffed peppers fresh or as leftovers. With these tips, you can make meal prep easy and tasty. Now, get cooking, and delight in every bite!

Vegan Stuffed Bell Peppers Flavorful and Healthy Meal

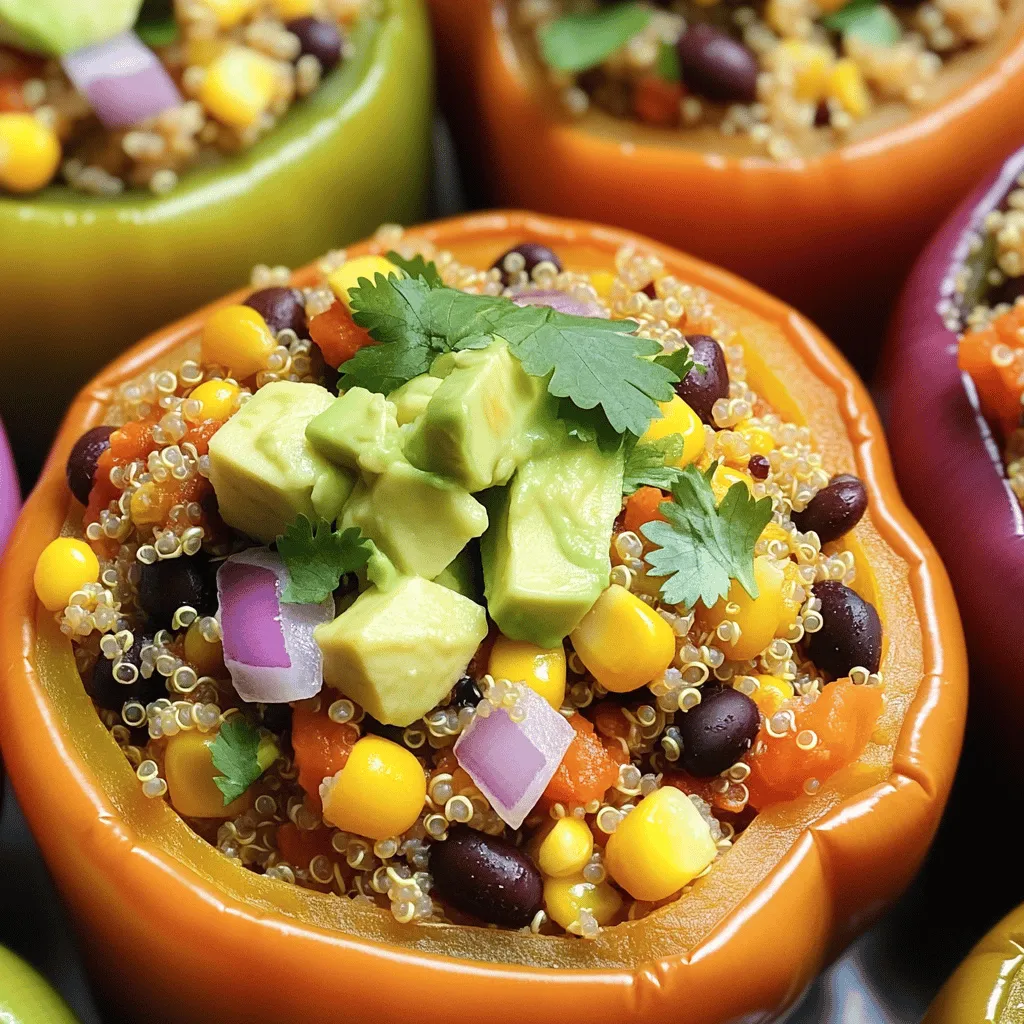
Looking for a healthy meal that’s both tasty and fun? Let me introduce you to vegan stuffed bell peppers! These

- Chicken and Marinade Components - 2 boneless, skinless chicken breasts - 2 tablespoons extra virgin olive oil - Juice of 1 fresh lime - Salt and freshly cracked black pepper to taste - 1 teaspoon garlic powder - 1 teaspoon ground cumin - Salsa Ingredients - 1 ripe mango, diced into small cubes - 1 red bell pepper, finely chopped - 1/2 medium red onion, finely chopped - 1 jalapeño, deseeded and minced (adjust for spice preference) - 2 tablespoons fresh cilantro, chopped - Seasoning and Flavor Enhancers - Salt to taste - Freshly cracked black pepper to taste This bright mango salsa chicken is a feast for the eyes and the taste buds. The chicken gets its flavor from a simple marinade, while the salsa bursts with fresh ingredients. You can adjust the spice level to your liking. Use this list to gather everything you need for your delicious meal. For the complete preparation details, check the Full Recipe. Preparing the Marinade To make the marinade, mix olive oil, lime juice, garlic powder, and ground cumin in a small bowl. Add salt and pepper to taste. This simple mix brings out great flavors in the chicken. Coating the Chicken Take the chicken breasts and place them in a shallow dish. Pour the marinade over them. Use your hands to coat each piece well. Make sure every part is covered. Recommended Marination Time Cover the dish with plastic wrap and place it in the fridge. Let the chicken marinate for at least 30 minutes. For more flavor, aim for 2 hours if you can. Combining Salsa Ingredients While the chicken marinates, grab a medium bowl. Add diced mango, chopped red bell pepper, red onion, minced jalapeño, and chopped cilantro. This mix creates a bright and tasty salsa. Balancing Flavors Gently toss the salsa ingredients together. Add a pinch of salt to enhance the flavors. Taste and adjust as needed. Let the salsa sit to let the flavors blend well. Preheating the Grill Heat your grill or grill pan to medium heat. A hot grill helps create nice grill marks and adds flavor. Cooking Time and Temperature Remove the chicken from the marinade, letting excess drip off. Place the chicken on the grill. Cook for about 6-7 minutes on each side. Make sure it reaches an internal temperature of 165°F (75°C). Checking for Doneness Avoid flipping the chicken too often. This gives you nice grill marks. Use a meat thermometer to check the chicken's doneness. Importance of Resting Time Once cooked, take the chicken off the grill and let it rest for 3-5 minutes. Resting helps the juices spread, making the chicken juicy. Final Assembly with Mango Salsa Before serving, top each grilled chicken breast with the mango salsa. This adds a fresh and colorful touch to your dish. Enjoy your meal! Marinating Tips For the best flavor, use a simple marinade. Mix olive oil, lime juice, garlic powder, and cumin. Add salt and pepper to taste. Let the chicken sit in this mix. Cover the dish and refrigerate. Marinate for at least 30 minutes, but 2 hours is better. This time helps the chicken soak up all the tasty flavors. Ensuring Juiciness To keep your chicken juicy, avoid overcooking it. Grill the chicken for 6-7 minutes on each side. Check for a temperature of 165°F (75°C) for doneness. Once cooked, let it rest for 3-5 minutes. This resting time helps the juices stay inside the meat. Fresh Ingredients to Use Use ripe mangoes for sweetness. Red bell peppers add crunch and color. A red onion gives a nice bite, while cilantro adds freshness. Don’t forget the jalapeño for heat. Adjust the amount based on your spice preference. Fresh ingredients make the salsa bright and flavorful. Adjusting Spiciness If you like it mild, remove the seeds from the jalapeño. For more heat, leave some seeds in. You can also add a pinch of cayenne pepper for an extra kick. Always taste before serving to ensure the salsa matches your heat level. Plating Suggestions Serve the chicken on a bed of fluffy rice or quinoa. This adds a nice base and keeps it filling. Place the mango salsa on top to showcase its vibrant colors. Make sure the chicken is the star of the dish. Garnishes for Visual Appeal Add fresh cilantro sprigs on top for a pop of green. Lime wedges not only look great but add a citrusy zest. A sprinkle of lime zest can make the dish even more inviting. These small touches make your meal look fancy and inviting. For the full recipe [Full Recipe], check out the details! {{image_4}} Gluten-Free Options This Mango Salsa Chicken is naturally gluten-free. Make sure to check all labels on ingredients. Always use fresh spices and oils that do not contain gluten. Paleo and Keto Adaptations For a Paleo meal, skip the sugar and process the salsa fresh. You can enjoy this dish on a keto diet too. Just ensure the chicken and salsa ingredients are low in carbs. Adding Different Fruits You can switch up the salsa by adding fruits. Try peaches, pineapples, or avocados. Each fruit brings a unique taste and texture. Incorporating Spices Want to kick up the flavor? Add spices like chili powder or smoked paprika. These spices can add depth and warmth to the dish. Baking vs. Grilling You can bake the chicken if you prefer. Preheat your oven to 400°F (200°C) and bake for 20-25 minutes. Grill gives a nice char, while baking keeps it juicy. Cooking on a Stovetop Using a stovetop works well too. Just heat some oil in a pan over medium heat. Cook the chicken for about 6-7 minutes on each side until it’s done. This method is fast and easy. For a complete guide, check out the [Full Recipe]. To keep your mango salsa chicken fresh, store it in the fridge. Use an airtight container. This helps keep the chicken moist and the salsa vibrant. The best practice is to separate the salsa and chicken. This prevents the salsa from making the chicken soggy. For freezing, place the chicken and salsa in freezer-safe bags. Remove as much air as possible before sealing. This helps prevent freezer burn. You can store it for up to three months. Label the bags with dates for easy tracking. When reheating, avoid drying out the chicken. The microwave works but may not keep the texture. Instead, try using an oven or skillet. Preheat the oven to 350°F (175°C). Place the chicken in a baking dish with a splash of water. Cover with foil to keep moisture in. Heat for about 15 minutes or until warm. If using a skillet, add a little olive oil. Heat on medium-low, turning the chicken often. This helps maintain flavor and texture. Reheat the salsa separately, if needed. Just a quick warm-up will do. Properly stored, leftover mango salsa chicken lasts about three to four days in the fridge. Always check for any signs of spoilage. Look for changes in smell, color, or texture before eating. For frozen chicken, you can keep it for three months. After that, the quality may decline. Yes, you can use frozen chicken. Just make sure to thaw it first. - Tips on Thawing and Cooking: - Place the frozen chicken in the fridge overnight for safe thawing. - You can also use the cold water method. Seal the chicken in a bag and submerge it in cold water for a few hours. - Once thawed, follow the recipe as usual. Marinating is still important for flavor. Mango Salsa Chicken pairs well with many side dishes. - Side Dishes and Accompaniments: - Serve it with rice or quinoa for a filling meal. - A fresh green salad adds crunch and color. - Grilled veggies or corn on the cob are great options too. - For a twist, try serving it with tortilla chips for a fun crunch. You can prepare the salsa a few hours in advance. - Optimal Storage and Freshness Tips: - Store the salsa in an airtight container in the fridge. - It tastes best within 24 hours. The flavors will meld together nicely. - If you make it too early, the mango may get mushy. Just make it fresh if you plan to keep it longer. Marinating the chicken is highly recommended. - Impact on Flavor and Texture: - The marinade adds depth and richness to the chicken. - It helps keep the chicken juicy while cooking. - If you're short on time, even a quick 30-minute soak will help. You can mix it up with other fruits too. - Creative Substitutions for Homemade Salsa: - Try pineapple for a sweet and tangy twist. - Peaches or nectarines also add a nice flavor. - For a unique touch, use kiwi or strawberries. Each fruit brings its own charm! For the full recipe, refer to the earlier section on Mango Salsa Chicken. In this blog post, we explored making Mango Salsa Chicken. We reviewed the key ingredients, from the chicken marinade to the salsa mix. I shared step-by-step instructions for marinating, grilling, and serving. The tips helped you ensure juicy chicken and enhance the salsa. We also discussed variations for different diets and cooking methods. With these insights, you can confidently create a tasty, fresh dish. Enjoy your culinary adventure with Mango Salsa Chicken!

Mango Salsa Chicken Flavorful and Simple Recipe

Craving a dish that’s bursting with flavor yet simple to prepare? You’re in the right place! This Mango Salsa Chicken

To make zucchini noodles with pesto, gather these main ingredients: - 4 medium zucchinis, spiralized into noodles - 2 cups fresh basil leaves, packed - 1/2 cup pine nuts, lightly toasted - 1/2 cup grated Parmesan cheese (or substitute with nutritional yeast for a vegan option) - 2 cloves garlic, peeled - 1/2 cup extra-virgin olive oil - Salt and freshly ground black pepper, to taste These ingredients create a fresh, tasty meal. The zucchini provides a nice crunch. The basil adds a fragrant touch. Pine nuts give the pesto a creamy texture, while Parmesan adds depth. You can jazz up your dish with these optional garnishes and add-ins: - 1 cup cherry tomatoes, halved (for garnish) - Extra fresh basil leaves, for garnish These add color and extra flavor to the dish. You can also mix in grilled chicken or shrimp for protein. Try adding a squeeze of lemon juice for a zesty kick. This dish is light yet filling. Each serving contains: - Calories: Approximately 250 - Protein: 8 grams - Fat: 20 grams - Carbohydrates: 10 grams - Fiber: 3 grams Zucchini noodles with pesto fits well into a healthy diet. They are low in calories but high in flavor. This makes them a great choice for lunch or dinner. For the full recipe, check the section above. To start, grab your spiralizer. Use it to turn each zucchini into long, noodle-like strands. After spiralizing, place the noodles in a colander and sprinkle them with salt. Let them sit for about 10 minutes. This step removes excess moisture. If you skip this, your dish may end up watery. Now, let’s make the pesto. In your food processor, combine the fresh basil leaves, toasted pine nuts, grated Parmesan cheese, and peeled garlic cloves. Pulse these ingredients together until they are finely chopped. This helps mix the flavors well. Next, with the processor running, slowly pour in the extra-virgin olive oil. Blend until the mixture is smooth and creamy. If it feels too thick, add a splash of water. Finally, season with salt and black pepper to taste. Heat a large skillet over medium heat. Once it’s hot, add the drained zucchini noodles. Sauté them for 2-3 minutes. You want them slightly soft but still crunchy. After cooking, remove the skillet from heat. Immediately add the pesto to the warm zucchini noodles. Toss them together until every noodle is coated. For a fun finish, transfer the pesto-coated noodles to serving plates. Top each plate with halved cherry tomatoes and extra basil leaves for a colorful look. This dish is fresh and flavorful, showcasing the beauty of simple ingredients. Enjoy your cooking adventure with this full recipe! To make great zucchini noodles, you need a good spiralizer. Start with firm, fresh zucchinis. Cut off both ends before spiralizing. This helps the zucchini stay steady. Once you spiralize, let the noodles rest in a colander. Sprinkle them with salt to draw out some moisture. This step keeps your dish vibrant and prevents sogginess. If you have extra pesto, store it in the fridge. Use an airtight container to keep it fresh. Pour a thin layer of olive oil on top. This oil helps seal in flavor and prevents browning. Your pesto will stay good for about a week, so enjoy it in other dishes too! Zucchini noodles are versatile! Serve them as a light main dish or side. Add grilled chicken or shrimp for protein. Cherry tomatoes add a pop of color and flavor. You can also sprinkle red pepper flakes for a little heat. For a unique touch, try adding nuts or seeds on top. They give a nice crunch and extra nutrients. For the full recipe, check out the Zesty Zucchini Noodles with Fresh Basil Pesto. {{image_4}} If you want a vegan version of zucchini noodles with pesto, it’s easy! Replace Parmesan cheese with nutritional yeast. This swap gives you a cheesy flavor without dairy. You can also use sunflower seeds instead of pine nuts. They add a nice crunch and are often cheaper. Want to boost your dish? You can add extra veggies! Try bell peppers or spinach for more color and nutrients. Adding chickpeas can give you some protein. They work well with the pesto and make your meal heartier. Pesto isn’t just for basil. You can mix things up! Use arugula or kale for different tastes. For a spicy kick, add crushed red pepper. If you love garlic, toss in an extra clove. Experimenting with flavors makes cooking fun! Check out the Full Recipe for more ideas on how to customize your dish. To store your zucchini noodles, place them in an airtight container. Keep them in the fridge. They stay fresh for up to three days. If you want to keep them longer, you can freeze them. Just make sure to pat them dry to remove excess moisture. Pesto sauce is best stored in a glass jar. Pour a thin layer of olive oil on top to keep it fresh. Seal the jar tightly and store it in the fridge. Pesto can last about a week this way. For longer storage, freeze the pesto in ice cube trays. Once frozen, transfer the cubes to a zip-top bag. When reheating zucchini noodles, use a skillet over medium heat. Add a splash of water to prevent sticking. Stir gently for about two minutes until heated through. For pesto, simply warm it in the microwave or on the stove. Mix it with the noodles right before serving. This keeps the flavors bright and fresh. You can check out the full recipe for zucchini noodles with pesto for more tips! Zucchini noodles cook quickly. You want them to be tender but still slightly firm. Cook them for about 2-3 minutes in a hot skillet. Stir them gently to avoid overcooking. If they bend easily but still hold shape, they are done! Yes, you can use store-bought pesto. It saves time and still tastes great. Just make sure to choose a high-quality brand. Look for a pesto with fresh ingredients like basil, garlic, and olive oil. It can make your meal prep easier. To prevent soggy noodles, salt them first. After spiralizing, sprinkle salt on the noodles and let them rest in a colander for 10 minutes. This step helps draw out excess moisture. Avoid cooking them for too long, and you’ll keep that nice crunch. Zucchini noodles with pesto are easy, tasty, and healthy. We explored main ingredients, optional add-ins, and nutritional facts. I shared steps to make zoodles, create pesto, and combine them. We covered tips for spiralizing, storing, and serving. I also gave you variations for vegan diets and more flavor. You can store zoodles and pesto with ease. Try these ideas for a fun meal tonight. Enjoy experimenting with different flavors and ingredients. Cooking should be fun and tasty!

Zucchini Noodles with Pesto Fresh and Flavorful Dish

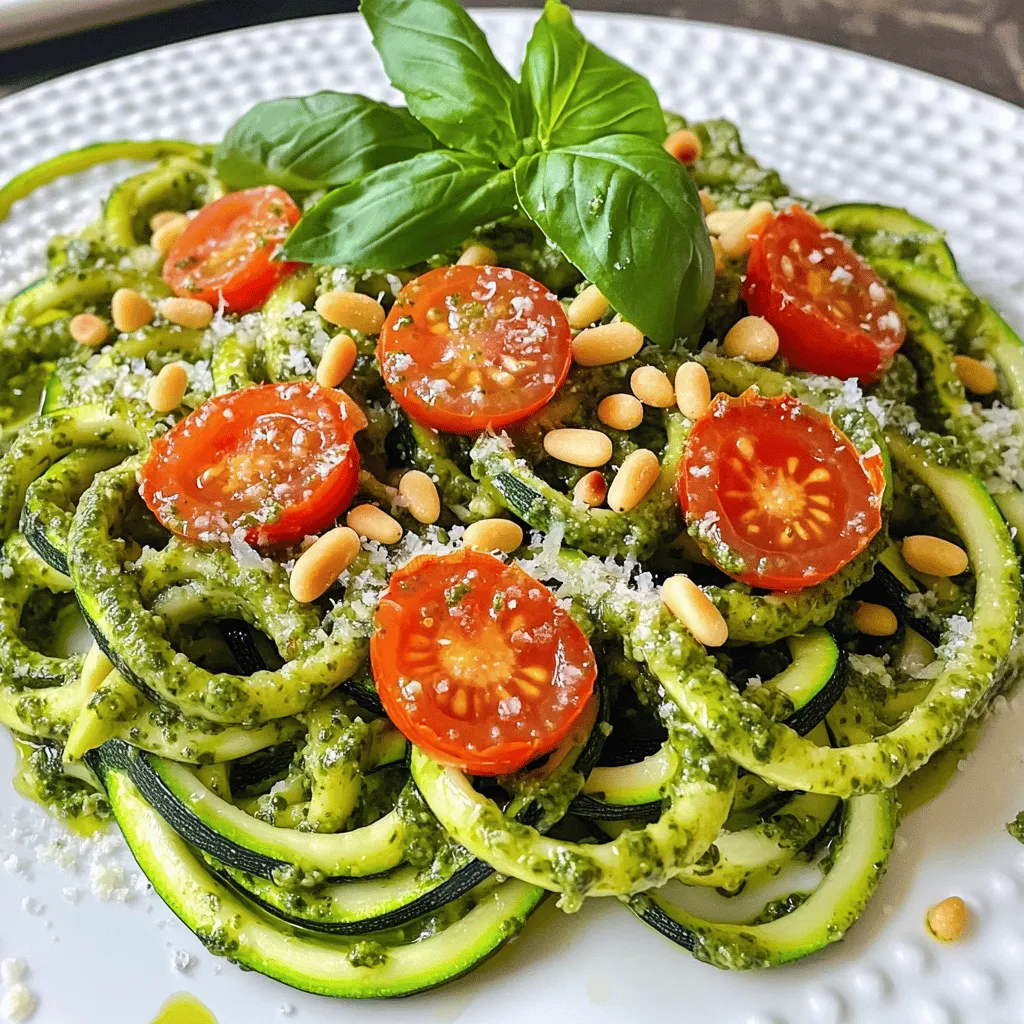
Are you ready to elevate your meals with a fresh and easy dish? Zucchini noodles with pesto are a healthy

When making Mediterranean Chickpea Salad, choose fresh and vibrant ingredients for the best flavor. Here’s what you’ll need: - 1 can (15 oz) chickpeas, drained and thoroughly rinsed under cold water - 1 cup cherry tomatoes, halved for a burst of sweetness - 1 medium cucumber, diced into bite-sized pieces - 1 bell pepper (red or yellow), diced into colorful chunks - 1/4 of a red onion, finely chopped for a hint of sharpness - 1/2 cup kalamata olives, pitted and sliced for a briny kick - 1/4 cup fresh parsley, finely chopped for a fresh aroma - 1/4 cup feta cheese, crumbled (optional, for a creamy touch) - 3 tablespoons extra virgin olive oil for richness - 2 tablespoons freshly squeezed lemon juice for brightness - 1 teaspoon dried oregano to enhance the Mediterranean flavor - Sea salt and freshly ground black pepper to taste This salad shines with its mix of textures and flavors. The chickpeas give a nice base, while the veggies add crunch and color. Using fresh herbs like parsley makes the dish smell great. If you love cheese, feta brings a creamy touch that many enjoy. For a complete guide on how to prepare this salad, check the Full Recipe. - Rinse and drain chickpeas: Start by rinsing one can of chickpeas under cold water. Drain them well. This keeps your salad fresh and clean. - Dice and chop vegetables: Next, chop your vegetables. Cut one cup of cherry tomatoes in half. Dice one medium cucumber into bite-sized pieces. Chop one bell pepper into colorful chunks. Finally, finely chop a quarter of a red onion. - Combine ingredients in a large bowl: In a large mixing bowl, add the rinsed chickpeas, halved tomatoes, diced cucumber, colorful bell pepper, and red onion. Toss these ingredients gently to mix them well. - Prepare and add dressing: In a small bowl, whisk together three tablespoons of extra virgin olive oil, two tablespoons of lemon juice, and one teaspoon of dried oregano. Add a pinch of sea salt and black pepper. Pour this dressing over your salad mixture and toss everything together. - Adjust seasoning and incorporate feta: Taste your salad. If needed, add more salt, pepper, or lemon juice. If you want to include feta, sprinkle a quarter cup of crumbled feta cheese on top. Gently mix to combine. - Allow resting time for flavor enhancement: Let the salad sit for about 10 to 15 minutes at room temperature. This resting time allows the flavors to blend, making your Mediterranean Chickpea Salad even more tasty. To make your Mediterranean Chickpea Salad shine, serve it in a large, shallow bowl. This lets the vibrant colors show. You can also use individual dishes for a fun touch. For a garnish, add parsley sprigs or a sprinkle of feta cheese on top. This salad pairs well with warm pita bread or grilled meats. The flavors blend perfectly. You can prepare this salad in advance. Mix all the ingredients and store them in the fridge. The flavors will blend together as it sits. Just hold off on adding the feta until serving. This keeps it fresh and creamy. Aim to make it a few hours before serving for the best taste. Want to boost the flavor? Try adding fresh herbs like basil or mint. They bring a nice, refreshing taste. You can also sprinkle in some red pepper flakes for a spicy kick. If you like a tangy twist, consider adding capers or a splash of balsamic vinegar. Each addition can make your salad unique and exciting. For the full recipe, refer to the Full Recipe section above. {{image_4}} You can switch out chickpeas for other beans, like black beans or white beans. They add a nice texture and flavor. If you don’t like olives, try sun-dried tomatoes or capers. Both bring a briny kick to the salad. You can also skip the cheese. Instead, use avocado for creaminess. When choosing vegetables, think about what is in season. In the summer, add zucchini or radishes. In the fall, try roasted butternut squash. Seasonal veggies make the dish fresh and vibrant. The dressing can change the whole vibe of the salad. Instead of olive oil and lemon juice, use balsamic vinegar for a tangy twist. You can mix in some Dijon mustard for a bit of spice. You can also adjust the flavors based on what you like. If you want more heat, add a pinch of red pepper flakes. For a sweet touch, drizzle in some honey. The dressing should reflect your taste, so feel free to experiment. Check out the Full Recipe for more ideas! To keep your Mediterranean Chickpea Salad fresh, store it in an airtight container. Place it in the fridge right after serving. This will help maintain its flavor and crunch. Make sure to eat the salad within a few days for the best taste. If you notice any sogginess, give it a quick stir before serving again. When stored properly, Mediterranean Chickpea Salad stays fresh for about 3 to 5 days in the fridge. After that, the veggies may start to lose their crispness. If you see any signs of spoilage, it's best to toss it out. Always use your senses to check for freshness—look for changes in color or smell. I don't recommend freezing chickpea salad. Freezing can change the texture of the vegetables. However, if you really want to freeze it, do so without the dressing. This way, you can add fresh dressing when you thaw it. Thaw in the fridge overnight before serving. Yes, you can use dried chickpeas. First, soak them overnight in water. This helps them soften. After soaking, drain and rinse them. Then, cook the chickpeas in boiling water for about 1 to 1.5 hours until tender. This way, you have fresh chickpeas for your salad. Yes, Mediterranean Chickpea Salad can be vegan-friendly. Just skip the feta cheese. You can add extra olives or nuts for creaminess. Always check labels for hidden dairy in dressings. This keeps your salad fully plant-based. You can add several protein sources. Try diced grilled chicken or shrimp for a meat option. If you want plant-based proteins, use quinoa or hemp seeds. Adding nuts like almonds or walnuts gives a nice crunch too. This salad pairs well with many dishes. Serve it with warm pita bread for a tasty meal. Grilled chicken or fish also work great. You can enjoy it alongside a soup for a balanced meal. This keeps every bite fresh and exciting. For the full recipe, check out Mediterranean Chickpea Salad Extravaganza. Mediterranean Chickpea Salad is a vibrant dish full of fresh ingredients. You learned to prepare this salad step-by-step, from rinsing chickpeas to mixing in flavorful herbs. I shared serving tips and ways to make it ahead for busy days. You can customize every part, from ingredients to dressings. Don’t forget about proper storage to keep leftovers fresh. With this guide, you’ll enjoy delicious, healthy meals anytime. Dive into the fresh flavors, and make this salad your own!

Mediterranean Chickpea Salad Fresh and Flavorful Dish

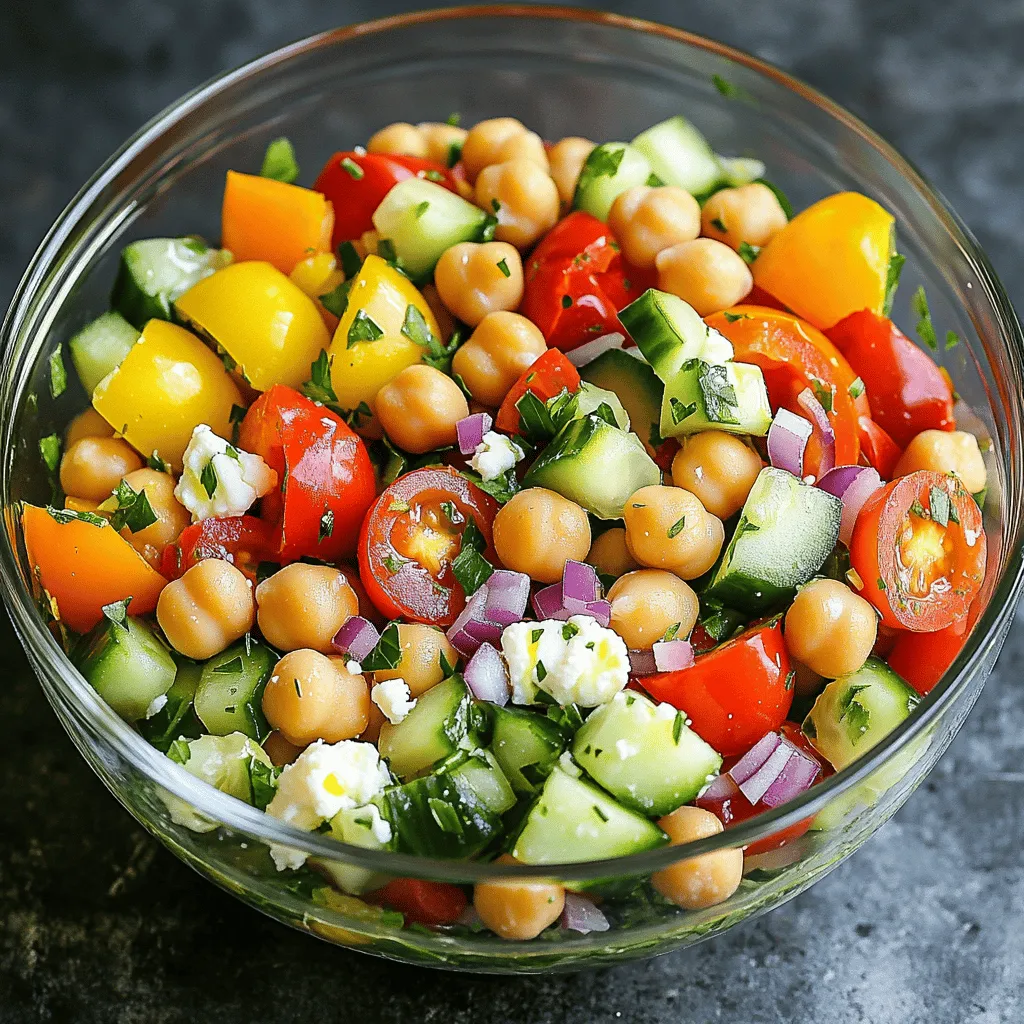
Ready to spice up your meals? This Mediterranean Chickpea Salad is fresh, colorful, and full of flavor. It’s packed with

When making savory herb cornbread muffins, it's key to gather fresh, quality ingredients. Here’s what you need for a tasty batch: - 1 cup cornmeal - 1 cup all-purpose flour - 1 tablespoon baking powder - 1 teaspoon salt - 1 teaspoon sugar - ½ teaspoon freshly ground black pepper - 1 teaspoon dried thyme - 1 teaspoon dried rosemary - 1 cup buttermilk (or substitute with milk mixed with a squeeze of lemon juice) - 1 large egg - ¼ cup melted butter (or use olive oil for a lighter option) - ½ cup shredded sharp cheddar cheese - ¼ cup finely chopped fresh chives (or green onions if desired) These ingredients come together to create a rich, savory flavor. Cornmeal gives a lovely texture while the herbs add depth. The cheese and chives provide a nice burst of flavor. Using buttermilk makes the muffins moist and fluffy. For the full recipe, check out the [Full Recipe]. 1. Preheat the Oven: First, heat your oven to 400°F (200°C). This step is key for a nice rise in your muffins. Prepare a muffin tin by lining it with paper liners or greasing it lightly with cooking spray. 2. Mix Dry Ingredients: In a large bowl, combine the cornmeal, all-purpose flour, baking powder, salt, sugar, black pepper, thyme, and rosemary. Use a whisk to blend everything well. This ensures that the flavors mix evenly. 3. Incorporate Wet Ingredients: In another bowl, whisk together the buttermilk, egg, and melted butter. Mix until everything is smooth and combined. This mixture brings moisture to the muffins. 4. Combine Wet and Dry Mixtures: Pour the wet mixture into the dry ingredients. Using a spatula, gently fold these together. Be careful not to overmix; a few lumps are okay. This keeps the muffins light and fluffy. 5. Add Flavor Boosters: Now, fold in the shredded cheddar cheese and chopped chives. This step adds a burst of flavor to your muffins. Make sure the cheese and chives are spread evenly throughout the batter. 6. Fill the Muffin Cups: Using a spoon or ladle, divide the batter among the muffin cups. Fill each cup about two-thirds full. This allows enough space for rising. 7. Bake: Place the muffin tin in your preheated oven. Bake for 15-20 minutes. The muffins are done when a toothpick inserted in the center comes out clean. 8. Cool and Serve: Once baked, take the muffins out of the oven and cool them in the pan for about 5 minutes. After that, transfer them to a wire rack to cool completely. Serve warm for the best flavor! For the complete recipe, check out the Full Recipe section above. Enjoy your baking! - Avoid Overmixing: When you mix the wet and dry ingredients, do it gently. Overmixing makes muffins tough. Stir until just combined. A few lumps are fine! - Choosing the Right Cheddar: Use sharp cheddar for a bold flavor. It adds a nice kick to the muffins. If you prefer milder cheese, feel free to use medium cheddar. - Adjusting Consistency with Milk Alternatives: Buttermilk is best for moisture and tang. If you don't have it, mix regular milk with a squeeze of lemon juice. This mimics buttermilk's tangy taste. - Serving Warm with Butter: Serve your muffins warm for the best taste. Spread a bit of butter on top. It melts and enhances the flavor. - Garnishing Options: For a pop of color, sprinkle extra chopped chives on top. You can also add a dash of paprika for a lovely look and a hint of spice. These tips will help you create the perfect savory herb cornbread muffins. For the full recipe, check out the detailed instructions above! {{image_4}} Using Different Herbs You can switch up the herbs in this recipe. Instead of thyme and rosemary, try using fresh basil or parsley. Each herb gives a unique taste. Mix and match to find your favorite blend. Adding Vegetables or Meats Want to make these muffins heartier? Add cooked vegetables like corn, bell peppers, or zucchini. Chopped cooked bacon or sausage also works great. These additions bring extra flavor and texture. Gluten-Free Adaptation If you need a gluten-free option, use gluten-free all-purpose flour. This swap keeps the muffins fluffy and delicious. Just make sure your cornmeal is also gluten-free. Spices for Extra Kick To give your muffins a spicy twist, add a pinch of cayenne pepper or chili powder. This will wake up your taste buds and add warmth. You can also use smoked paprika for a deeper flavor. Sweet Variations for Dessert For a sweet treat, mix in some honey or maple syrup. You can also fold in chocolate chips or dried fruit like cranberries. This turns the savory muffins into a delightful dessert. Feel free to explore these variations. Each will make your savory herb cornbread muffins unique and fun. Try out the full recipe and enjoy the journey of flavors! To keep your savory herb cornbread muffins fresh, use airtight containers. This helps to lock in moisture and flavor. You can store them at room temperature for up to three days. If you want them to last longer, move them to the fridge. They can stay fresh there for about a week. Just make sure they are in a sealed container to avoid drying out. When it’s time to enjoy your muffins again, reheating is key. The best method for freshness is the oven. Preheat your oven to 350°F (175°C). Place the muffins on a baking sheet and heat for about 10 minutes. This warms them evenly and keeps them soft. If you're in a hurry, you can use the microwave. Heat each muffin for about 15 to 20 seconds. Just be careful not to overheat, or they may turn rubbery. Either way, reheating brings back the flavors and makes them taste freshly baked again. Can I freeze savory herb cornbread muffins? Yes, you can freeze these muffins. Let them cool completely first. Then, wrap each muffin in plastic wrap. Place them in a freezer bag. They last up to three months. How do I make these muffins dairy-free? To make dairy-free muffins, use plant-based milk instead of buttermilk. Mix regular milk with lemon juice or vinegar. This creates a similar effect. You can also replace butter with coconut oil or a dairy-free spread. What should I serve with cornbread muffins? These muffins pair well with soups, stews, or chili. They also work great with salads or as a side for grilled meats. Try them with honey or butter for a sweet twist. What is the best way to tell when they're done? Insert a toothpick into the center of a muffin. If it comes out clean, they are done. You can also check for a golden color on top. The muffins should spring back when lightly pressed. How can I increase the herb flavor in my muffins? To boost the herb flavor, add more fresh herbs like chives or parsley. You can also use fresh thyme and rosemary instead of dried. Experiment with different herbs to find your favorite mix. You learned how to make savory herb cornbread muffins from scratch. The recipe blends cornmeal and flour with herbs for great taste. I shared tips to ensure perfect muffins and ways to adapt them for your needs. Remember to store them well to keep them fresh. You can also try new flavors by swapping ingredients. Enjoy baking and sharing these delicious muffins with friends and family!

Savory Herb Cornbread Muffins Easy and Flavorful Recipe

Are you ready to elevate your cornbread game? These Savory Herb Cornbread Muffins are easy to whip up and packed

- 4 boneless, skinless chicken breasts - 1 ripe mango, diced into small cubes - 1/2 red onion, finely chopped - 1 red bell pepper, diced into small pieces - 1 jalapeño, seeded and minced - 1/4 cup fresh cilantro, finely chopped - Juice of 2 fresh limes - 1 tablespoon extra virgin olive oil - Salt and freshly ground black pepper to taste - 1 teaspoon ground cumin - 1 avocado, sliced (optional) To make mango salsa chicken, you need fresh and bright ingredients. The chicken is the star of the dish. Boneless, skinless chicken breasts work great. They grill nicely and stay juicy. Next, the mango adds sweetness. Choose a ripe one for the best flavor. Dice it into small cubes so it mixes well with other salsa ingredients. The red onion brings a nice crunch. Finely chop it and mix it in. For a pop of color and flavor, add a red bell pepper. Diced into small pieces, it pairs well with the mango. If you like spice, include a jalapeño. Just seed and mince it before mixing. Don’t forget the fresh cilantro. It adds a bright taste and makes the dish look great. You’ll need the juice of two fresh limes for acidity. This will balance the sweetness of the mango. Use extra virgin olive oil to help the spices stick to the chicken. Add salt and freshly ground black pepper to taste. Ground cumin adds a warm, earthy flavor. Finally, if you want a creamy touch, slice an avocado for serving. This dish is a feast for the eyes and the taste buds. For the full recipe, check the details shared earlier. Enjoy cooking! First, preheat your grill or grill pan to medium-high heat. This step is key to getting that nice char on the chicken. Next, take four boneless, skinless chicken breasts. Season them well with a spice blend. I use salt, black pepper, and ground cumin for a tasty kick. Rub the spices evenly over both sides of the chicken. This helps to lock in flavor while grilling. While the grill heats up, let's make the mango salsa. Grab a medium bowl and combine the diced mango, finely chopped red onion, diced red bell pepper, minced jalapeño, and fresh cilantro. This mix gives your salsa a vibrant look and taste. Squeeze the juice of two fresh limes over the mixture and stir it gently. Let the salsa sit for a few minutes. This allows the flavors to blend and become even better. Now it’s time to grill the chicken. First, brush the grill grates with a little olive oil. This step prevents the chicken from sticking. Place the seasoned chicken breasts on the grill. Cook them for 6-7 minutes on each side. Make sure to check the internal temperature. It should reach 165°F (75°C) to be safe to eat. Once the chicken is cooked, let it rest for a few minutes. This helps keep the juices in. Then, top each grilled chicken breast with the fresh mango salsa. For a creamy texture, add slices of avocado beside the chicken. This adds a nice touch and makes the dish look great. Enjoy every bite of this flavorful meal! For the full recipe, click here. Using a meat thermometer helps you cook your chicken right. Always check if the chicken hits 165°F (75°C). This ensures it's safe to eat and juicy. After grilling, let the chicken rest for about five minutes. This step keeps the juices inside and makes each bite tender. You can adjust the spice level in your mango salsa. If you want it spicier, add more jalapeño. For a milder taste, use less. Letting the salsa sit for a few minutes helps the flavors mix well. This waiting time makes your salsa even tastier. When serving, think about how to make your dish pop! Garnish with fresh cilantro and lime wedges. This adds color and a fresh touch. Choose a bright plate to showcase your vibrant salsa and chicken. A colorful display makes your meal more inviting and fun to enjoy. {{image_4}} You can switch up the fruit in your salsa. Pineapple adds a sweet tang. Peach gives a juicy twist. Both options work great with chicken. If you prefer a different protein, try pork or shrimp. Both cook well and soak up flavors. They also pair nicely with mango salsa. Grilling is fun, but there are other ways to cook this dish. You can bake or sauté the chicken. Both methods keep the chicken juicy. A slow cooker is another great choice. It makes the chicken tender and flavorful. An air fryer cooks quickly, giving a nice crisp finish. Making this dish gluten-free is easy. Just check your spice blends. Most should be gluten-free. For a low-carb version, skip the avocado and use less fruit. You can serve it over a bed of greens instead. This keeps it light and fresh while still full of flavor. For the full recipe, check out the [Full Recipe]. To store leftover mango salsa chicken, first let it cool down. Place the chicken and salsa in airtight containers. Keep the chicken and salsa separate to maintain freshness. Store in the fridge at 40°F (4°C) or lower. The chicken stays good for 3 to 4 days. The salsa can last up to 2 days, but it tastes best fresh. You can reheat mango salsa chicken in the microwave or the oven. For the microwave, place the chicken on a microwave-safe plate. Heat on medium power for 1 to 2 minutes. Check the chicken's temperature; it should be hot all the way through. In the oven, preheat to 350°F (175°C). Place the chicken in a baking dish and cover it with foil. Heat for about 10 to 15 minutes. This keeps the chicken moist. Avoid overheating to prevent dryness. Enjoy your delicious meal again! Mango salsa chicken can last about three to four days in the fridge. Make sure to store it in an airtight container. If you notice any off smells or changes in texture, it is best to toss it. Always check for signs of spoilage before eating leftovers. Yes, you can make the salsa a day ahead. Simply combine all the salsa ingredients and store them in the fridge. The flavors will blend well overnight. Just remember to give it a gentle stir before serving. This way, you save time and enhance the taste of your dish. Mango salsa chicken pairs well with many sides. Here are some great ideas: - Rice or quinoa for a filling base - Grilled vegetables for added color and flavor - Fresh salad to add a crisp texture - Corn on the cob for a sweet touch For the complete recipe, check out the Full Recipe link. Enjoy the burst of flavors with your meal! This blog post covered a delicious mango salsa chicken dish. We started with the key ingredients, from chicken to fresh mango. Then, I shared step-by-step instructions for prepping, grilling, and topping with salsa. We also discussed tips for perfect chicken and how to change up flavors. Finally, I provided storage info and answered common questions about the dish. Try this recipe to impress family or friends. With vibrant flavors and simple steps, it’s sure to become a favorite. Enjoy the process and the tasty results!

Mango Salsa Chicken Flavorful and Easy Grilled Dish

Looking for a dish that bursts with flavor and is easy to make? Mango Salsa Chicken is your answer! This

- 1 cup unsalted butter - 3/4 cup packed brown sugar - 1/2 cup granulated sugar - 2 large eggs - 2 teaspoons pure vanilla extract - 2 1/4 cups all-purpose flour - 1 teaspoon baking soda - 1/2 teaspoon fine sea salt - 1 1/2 cups semi-sweet chocolate chips - 1/2 cup chopped walnuts (optional) - Extra sea salt for topping To make the best Chocolate Chip Cookie Skillet, you need quality ingredients. Fresh butter gives a rich taste. I love using unsalted butter to control the salt. Brown sugar adds depth, while granulated sugar makes it sweet. The eggs need to be large. They help bind everything together. Pure vanilla extract brings a warm aroma. Always choose real vanilla for the best flavor. All-purpose flour is key. It gives structure to your cookie. Baking soda helps the cookie rise and get that soft texture. Sea salt enhances the sweet taste. Chocolate chips are a must! Semi-sweet chips melt beautifully and add richness. You can add walnuts for crunch, but that’s up to you. After mixing, sprinkle extra sea salt on top. It adds a perfect salty bite to the sweet cookie. This is the list you need for the Chocolate Chip Cookie Skillet. For the full recipe, check the provided details and start baking! - Set oven temperature to 350°F (175°C). - Prepare cast-iron skillet with cooking spray or butter. - Mix butter with brown sugar and granulated sugar. - Beat until smooth and fluffy. - Incorporate eggs one by one. - Mix in vanilla extract until well combined. - Whisk together flour, baking soda, and sea salt. - Gradually add to wet mixture. - Gently incorporate chocolate chips and walnuts. - Be cautious not to overmix. - Spoon dough into skillet and spread evenly. - Bake for 25-30 minutes, let cool before slicing. This process creates a warm and gooey cookie that everyone loves. For the full recipe, be sure to check the ingredients listed above. Creaming butter and sugars is key. This step makes your cookie soft and fluffy. Mix them until they are light and airy. This can take around 2-3 minutes. Watch out for overmixing the dough. Once you add flour, stir just until combined. Overmixing can make your cookies tough. Top your cookie skillet with fun extras. Ice cream is a classic choice. Whipped cream adds a light touch. Drizzle on some chocolate sauce for even more flavor. Serve it warm in the skillet for a cozy vibe. Use a big spoon to cut it into wedges. This looks rustic and inviting. A mint sprig on top can add color and freshness. Sometimes, you may overbake your cookie. If this happens, add a scoop of ice cream on top. The cold ice cream will help balance the dry cookie. To ensure even cooking, spread the dough evenly in the skillet. This helps it bake uniformly. Check it closely in the oven. Look for golden brown edges and a soft center. This means it’s just right! {{image_4}} You can make your chocolate chip cookie skillet even more fun! Try using different types of chocolate chips. Dark chocolate chips add a rich taste. Milk chocolate chips make it sweet and creamy. You might also like using white chocolate chips for a different twist. If you enjoy a crunch, add nuts. Chopped walnuts or pecans work great. They add flavor and texture. Dried fruit, like cranberries or cherries, brings a sweet and tart flavor. This makes your dessert unique! Want to make this recipe gluten-free? You can swap all-purpose flour for a gluten-free flour blend. Just make sure it has a good mix of flours. This will keep the cookie soft and chewy. For dairy-free options, use plant-based butter and dairy-free chocolate chips. These simple swaps let everyone enjoy this treat without worry! If you want smaller portions, grab mini skillets. Use about half the dough for each skillet. This makes perfect little desserts for sharing. Bake them for about 15-20 minutes. Keep an eye on them, as they cook faster. You will love these cute, individual-sized treats! To keep your chocolate chip cookie skillet fresh, follow these simple steps: - Allow the skillet to cool completely. - Cover it tightly with plastic wrap or foil. - Store it in the fridge. Leftovers stay good for about 3 to 5 days. Enjoy the sweet taste even after a few days! When you're ready to enjoy your cookie skillet again, here’s how to reheat it: - Preheat your oven to 350°F (175°C). - Place the skillet in the oven for about 10 to 15 minutes. - You can also microwave individual slices for about 20-30 seconds. To keep the texture nice and soft, avoid overheating. You want that gooey center! If you want to save some for later, freezing is a great choice: - Let the skillet cool completely. - Cover it tightly with plastic wrap, then foil. - Place it in the freezer. It can last up to 3 months in the freezer. When you’re ready to eat, thaw it in the fridge overnight. Then, reheat as mentioned above. You’ll have a warm, tasty treat ready to go! Yes, you can prepare the cookie dough ahead of time. Mix the dough and store it in the fridge. This keeps it fresh for up to three days. You can also freeze the dough. Just wrap it tightly in plastic wrap. When you're ready to bake, let it thaw in the fridge overnight. This way, you can enjoy fresh cookies anytime! A cast-iron skillet works best for this recipe. Cast iron heats evenly and gives the cookie a nice crust. You can also use a non-stick skillet. Just make sure it’s oven-safe. Avoid glass skillets, as they can break in high heat. A sturdy skillet makes a big difference in baking your cookie. Yes, you can use different types of sugars. Brown sugar gives a rich flavor and chewy texture. Granulated sugar makes the cookie sweet and light. You can try coconut sugar for a different taste. Each sugar will change the flavor and texture a bit. So, feel free to experiment! Look for golden brown edges and a soft center. The center may seem underbaked, but it will firm up as it cools. You can also insert a toothpick. If it comes out with a few moist crumbs, it's ready. Timing is key, so keep an eye on it while baking. Enjoy your delicious treat! This blog post covered how to make a delicious skillet cookie. You learned the ingredients, from butter to chocolate chips. The step-by-step guide made baking easy, ensuring perfect results. Remember to cream your butter and sugars for the best texture. You can customize your cookie with flavors or dietary options. Store leftovers properly for future enjoyment. Overall, this recipe is simple and fun. You can impress your friends and family with your baking skills. Enjoy creating and sharing this tasty treat!

Chocolate Chip Cookie Skillet Decadent Dessert Treat

Chocolate chip cookie skillet is the perfect dessert for anyone who loves warm, gooey cookies. This one-pan treat combines the

- 1 pound large shrimp, peeled and deveined - 4 tablespoons unsalted butter - 4 cloves garlic, finely minced - 1 teaspoon paprika - 1 teaspoon ground cumin - 1 tablespoon freshly squeezed lime juice - Salt and freshly ground black pepper, to taste - 8 small corn or flour tortillas - 1 cup finely shredded cabbage - 1 ripe avocado, sliced into thin wedges - Fresh cilantro sprigs, for garnish - Lime wedges, for serving - Choosing fresh shrimp: Look for shrimp that have a mild scent. They should be firm and slightly shiny. Avoid any with a strong smell or a slimy texture. Fresh shrimp can make your tacos taste amazing. - Best butter options for flavor: Use unsalted butter for more control over the salt level. It allows the garlic flavor to shine through. If you want a richer taste, try using a high-quality European butter. - Substituting garlic with garlic powder: If you don’t have fresh garlic, garlic powder works too. Use half the amount since it is stronger. Keep in mind that fresh garlic gives a better flavor, which is key in this dish. For the full recipe, check out the details above. - Total time: 20 minutes - Prep time: 10 minutes - Cook time: 10 minutes How to make the garlic butter To start, grab a large skillet. Place it on medium heat and add 4 tablespoons of unsalted butter. Watch as the butter melts. When it is fully melted, add the 4 cloves of finely minced garlic. Stir it for about 1 minute. You want it to smell great but not burn. Cooking shrimp to the perfect doneness Next, it’s time for the shrimp. Take 1 pound of large shrimp, peeled and deveined. Sprinkle in 1 teaspoon of paprika, 1 teaspoon of ground cumin, salt, and black pepper. Mix well so that the shrimp get coated in the spices. Now, gently add the shrimp to the skillet. Cook them for 2-3 minutes. They should turn vibrant pink and opaque. This means they are perfectly cooked. Layering ingredients appropriately Once the shrimp are ready, you will want to warm the tortillas. Use a dry skillet or a low flame for this. Warm each tortilla for a few seconds until they are soft. Now, take each tortilla and lay down a handful of finely shredded cabbage. This gives a nice crunch. Presentation recommendations Top the cabbage with the garlic butter shrimp mixture. Next, add slices of avocado on top. Finally, sprinkle fresh cilantro over everything for a burst of flavor. Serve the tacos with lime wedges on the side. They add a fresh squeeze of zest that brings everything together. For the full recipe, check the detailed instructions above. - To avoid overcooked shrimp, cook them for just 2-3 minutes. - Look for vibrant pink color and opaque texture to know they are done. - For the perfect garlic flavor, sauté minced garlic until fragrant, about 1 minute. - Be careful not to burn the garlic; it should be slightly golden. - Pair your tacos with a fresh corn salad or a side of black beans. - Add lime wedges for a zesty kick and cilantro for color and taste. - Consider a creamy avocado sauce or spicy salsa for extra flavor depth. - Pre-cook shrimp in advance and store them in the fridge for quick meals. - Keep tortillas in an airtight bag to maintain freshness throughout the week. - Chop toppings like cabbage and avocado ahead of time for easy assembly. For the full recipe, refer to the detailed instructions above. Enjoy your cooking! {{image_4}} You can easily change up the protein in these tacos. Try chicken, fish, or even tofu for a fun twist. Each option gives the dish a new flavor. If you go vegetarian, swap shrimp with grilled veggies or black beans. Both options work great in tacos and keep it filling. Want some heat? Add jalapeños or chili flakes to the garlic butter. This spice will wake up your taste buds! You can also get creative with toppings. Mango salsa adds sweetness, while pickled onions bring a tangy crunch. Both options will take your tacos to the next level. If you need gluten-free options, use corn tortillas. They taste amazing and fit into most diets. For a low-carb meal, use lettuce wraps instead of tortillas. This keeps the flavor while lowering carbs. You can enjoy these tacos no matter your dietary needs. To store cooked shrimp, first cool them down. Place shrimp in an airtight container. You can keep them in the fridge for up to two days. Make sure to check them before using. If you want to save shrimp for longer, freezing is a good option. Place the shrimp in a freezer-safe bag. Squeeze out any air and seal it tightly. Frozen shrimp will stay good for up to three months. When ready to use, thaw them in the fridge overnight. Storing tacos can be tricky. To keep taco fillings fresh, store them separately. Use small containers for each ingredient. This way, the flavors stay fresh. For tortillas, wrap them in a damp paper towel. Place them in a plastic bag to keep them soft. You can also use a tortilla warmer if you have one. This helps maintain their moisture. When reheating shrimp, use a skillet over low heat. Add a splash of water or broth to keep them moist. Heat for just a few minutes until warmed through. Be careful not to overcook them. For tortillas, warm them quickly in the skillet as well. This ensures they remain soft. You can also microwave them for about 10 seconds. Just be sure to cover them with a damp paper towel to prevent them from drying out. How do you know when shrimp are cooked? You can tell shrimp are cooked when they turn pink and curl slightly. They should look opaque, not translucent. The cooking time is usually 2-3 minutes over medium heat. If shrimp feel firm to the touch, they're done. Keep an eye on them to avoid overcooking, which can make them tough. Can I use frozen shrimp for this recipe? Yes, you can use frozen shrimp. Just make sure to thaw them first. You can do this by placing them in cold water for about 15-20 minutes. Once thawed, peel and devein as needed. Then, follow the recipe as usual. Frozen shrimp work well and save time! What can I substitute for lime juice? If you don’t have lime juice, you can use lemon juice instead. It has a similar tangy flavor. Another option is vinegar. Apple cider vinegar can add a nice twist. Remember that these substitutes may change the taste slightly but will still be delicious. Can I make these tacos in advance? Yes, you can prepare the shrimp ahead of time. Cook them and store them in the fridge for up to two days. Warm them up before serving. However, it's best to assemble the tacos just before eating. This keeps the tortillas soft and the toppings fresh. What are the estimated calories per taco? Each taco has about 200-250 calories. This can vary based on the size of your tortillas and how much shrimp you add. If you use more toppings, the calorie count will change too. It’s a tasty way to enjoy a meal without going overboard on calories. Tips for making the recipe healthier To make these tacos even healthier, use whole wheat tortillas instead of regular ones. You can also add more veggies, like diced tomatoes or bell peppers. This adds fiber and nutrients. Reducing the butter or using a lighter spread can cut calories too, while still keeping flavor. In this blog post, we covered how to make shrimp tacos from scratch. You learned about the key ingredients, cooking steps, and helpful tips for perfect flavor. We also discussed meal prep ideas and ingredient variations to fit your tastes. Remember, cooking shrimp just right is crucial for great tacos. Take time to layer your ingredients for the best presentation. Try different proteins or toppings for fun flavors. Enjoy your shrimp tacos and impress your friends with your cooking skills!

Garlic Butter Shrimp Tacos Flavorful and Easy Recipe

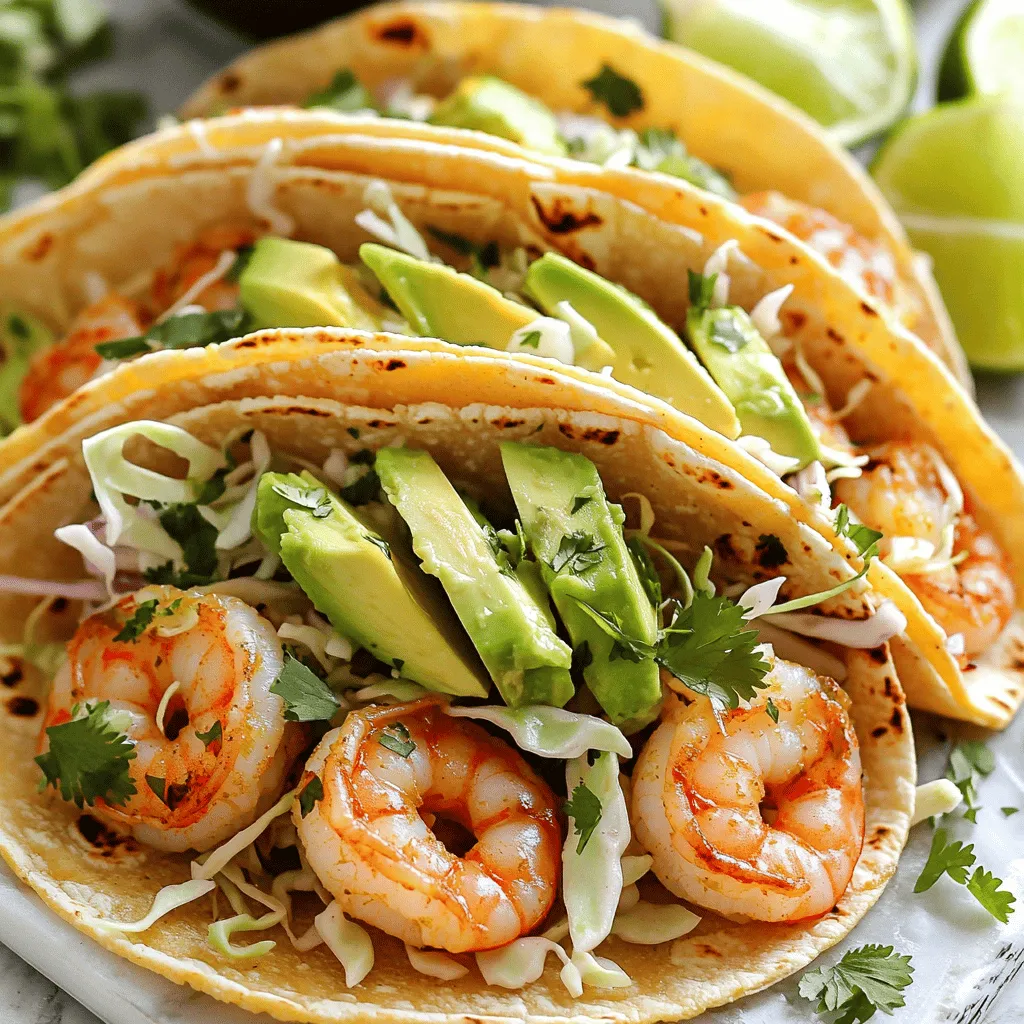
Get ready to savor a tasty twist on Taco Night with my Garlic Butter Shrimp Tacos! With just a few

Older posts
Newer posts
← Previous Page1 … Page62 Page63 Page64 … Page86 Next →

dsad

© 2026 lazychefmagic • Built with GeneratePress

Our Policies

  • Copyright Policy
  • Cookie Policy
  • GDPR Policy
  • Privacy Policy
  • Disclaimer
  • Terms Of Use

More Information

  • Home
  • About
  • Contact
  • Appetizers
  • Dessert
  • Dinner
  • Drinks
©2026, lazychefmagic About Back To Top